A Beginner’s Guide to Applying Eyeliner: Tips and Techniques for a Flawless Look

A Beginner's Guide to Applying Eyeliner: Tips and Techniques for a Flawless Look

Eyeliner is an essential tool in every woman’s makeup kit. It has the power to transform your look instantly, making your eyes appear bigger, brighter, and more defined. However, for many beginners, applying eyeliner can be a daunting task. With so many types, formulas, and techniques to choose from, it can be overwhelming to know where to start.

In this beginner’s guide, we will go over the basics of applying eyeliner and give you tips and techniques to help you achieve a flawless look.

Types of Eyeliner

There are several types of eyeliners available in the market, and each one comes with its own set of pros and cons. Here are some of the most popular types of eyeliner:

Pencil Eyeliner – This is the most common type of eyeliner and is perfect for beginners. Pencil eyeliners come in a range of colors, textures, and finishes. They are easy to apply, smudge-able, and can create a soft or intense look.

Liquid Eyeliner – Liquid eyeliner is more challenging to apply than pencil eyeliner, but it offers a more precise and defined look. Liquid eyeliners are available in a range of formulas, including matte, glossy, and glittery.

Gel Eyeliner – Gel eyeliner is a hybrid between liquid and pencil eyeliner. It has a creamy texture that glides smoothly on the eyelids, providing a long-lasting, smudge-proof finish.

Eyeshadow as Eyeliner – You can also use eyeshadow as eyeliner by wetting a brush and applying it along the lash line. This technique provides a soft, smoky look that is perfect for a daytime look.

Choosing the Right Eyeliner for You

When choosing an eyeliner, consider your skill level, eye shape, and desired look. If you are a beginner, start with a pencil eyeliner, which is easy to apply and forgiving. If you have smaller eyes, avoid using thick lines and opt for a thin, natural look. If you have round eyes, elongate them by creating a winged or cat-eye look.
A Beginner's Guide to Applying Eyeliner: Tips and Techniques for a Flawless Look

Tips and Techniques for Applying Eyeliner

Here are some tips and techniques to help you apply eyeliner like a pro:

Start with a clean, moisturized eye area. This will help the eyeliner glide on smoothly and prevent smudging.

Use a primer or eyeshadow base to ensure that the eyeliner stays in place.

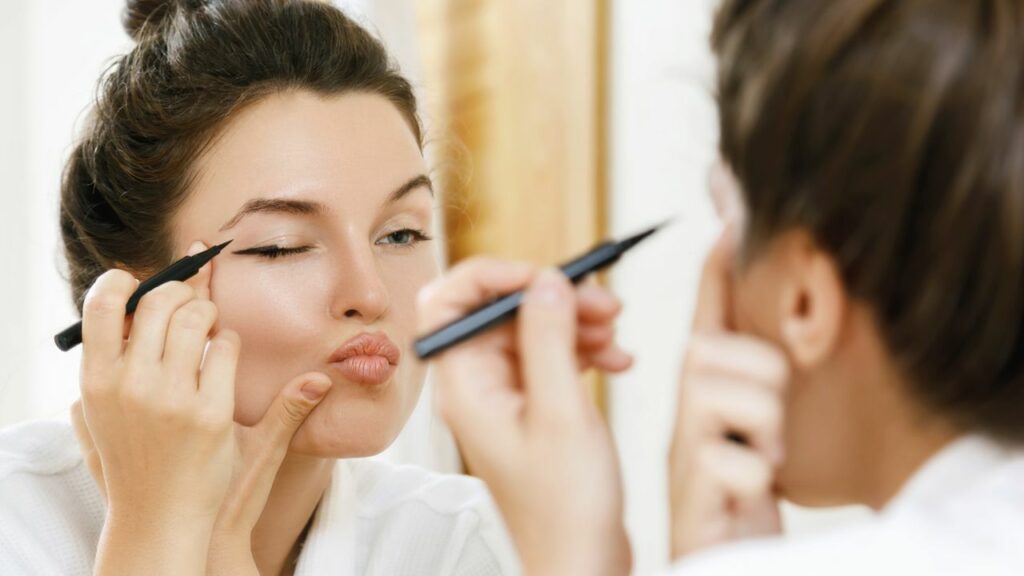
Rest your elbow on a flat surface to keep your hand steady while applying eyeliner.

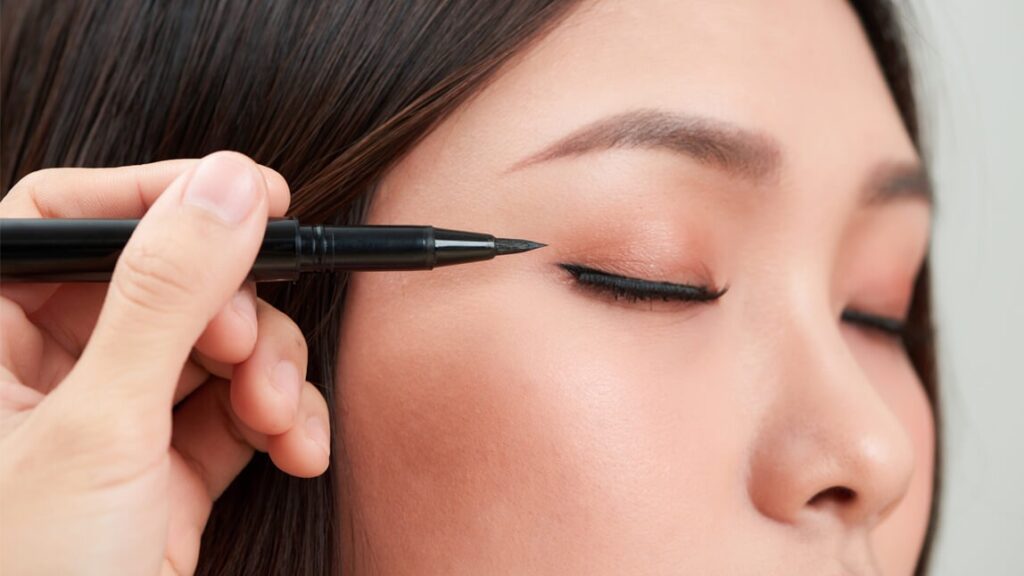
Hold the eyeliner like a pen and start by drawing a thin line along the lash line. Use short strokes and connect them to create a smooth, continuous line.


For a natural look, smudge the eyeliner with a brush or your finger. For a dramatic look, create a winged or cat-eye look by extending the line outwards and upwards.

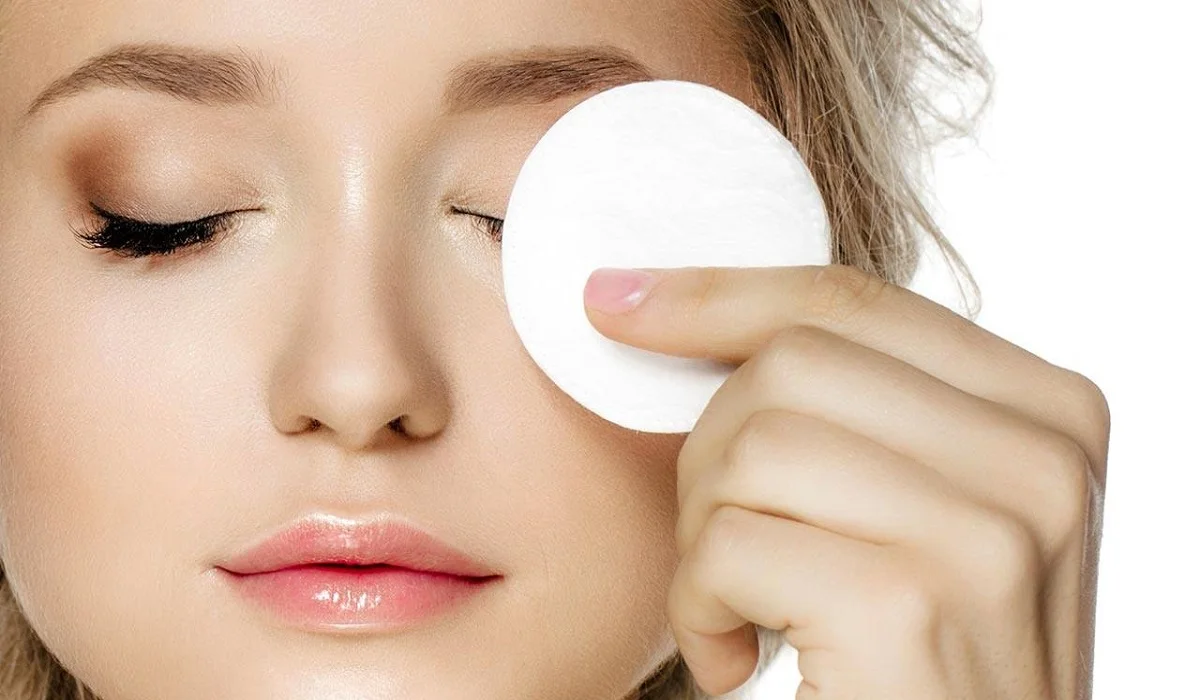
If you make a mistake, don’t worry. Use a cotton swab dipped in makeup remover to correct any errors.

To avoid smudging, set the eyeliner with a matching eyeshadow or a translucent powder.

Finally, apply mascara to enhance the eyeliner and complete the look.

Eyeliner is a versatile makeup tool that can enhance your natural beauty and transform your look. By choosing the right eyeliner for you and mastering the application techniques, you can achieve a flawless and polished look that is perfect for any occasion.

When applying eyeliner to the lower lash line, use a lighter hand and apply the eyeliner as close to the lash line as possible. This will create a natural look and prevent the eyeliner from smudging.

Experiment with different eyeliner styles and techniques to find the ones that work best for you. You can try creating a winged eyeliner, a smoky eye look, or a double-winged eyeliner for a bold and edgy look.

If you have hooded eyes, avoid applying eyeliner to the entire upper lash line. Instead, apply eyeliner to the outer corner of the eye and create a winged look. This will help to lift the eye and make it appear more open.

To make your eyes appear bigger and brighter, apply a white or nude eyeliner to the waterline. This will create the illusion of larger eyes and make your eye color pop.

When choosing an eyeliner color, consider your eye color and skin tone. Black and brown eyeliners are universal and work well for most eye colors and skin tones. If you have green or blue eyes, try using a purple or navy eyeliner to make your eyes stand out.


Don’t forget to remove your eyeliner before going to bed. Use a gentle makeup remover or micellar water to remove all traces of eyeliner from your eyes. This will help to prevent irritation and keep your eyes healthy.

In conclusion, applying eyeliner can be a fun and rewarding experience once you know the basics. By choosing the right eyeliner, mastering the application techniques, and experimenting with different styles and colors, you can create a flawless and polished look that is perfect for any occasion. With a little practice and patience, you can become an eyeliner pro in no time!

What You Need To Know About Putting Lotion On Yourface
What You Need to Know About Putting Lotion on Your Face

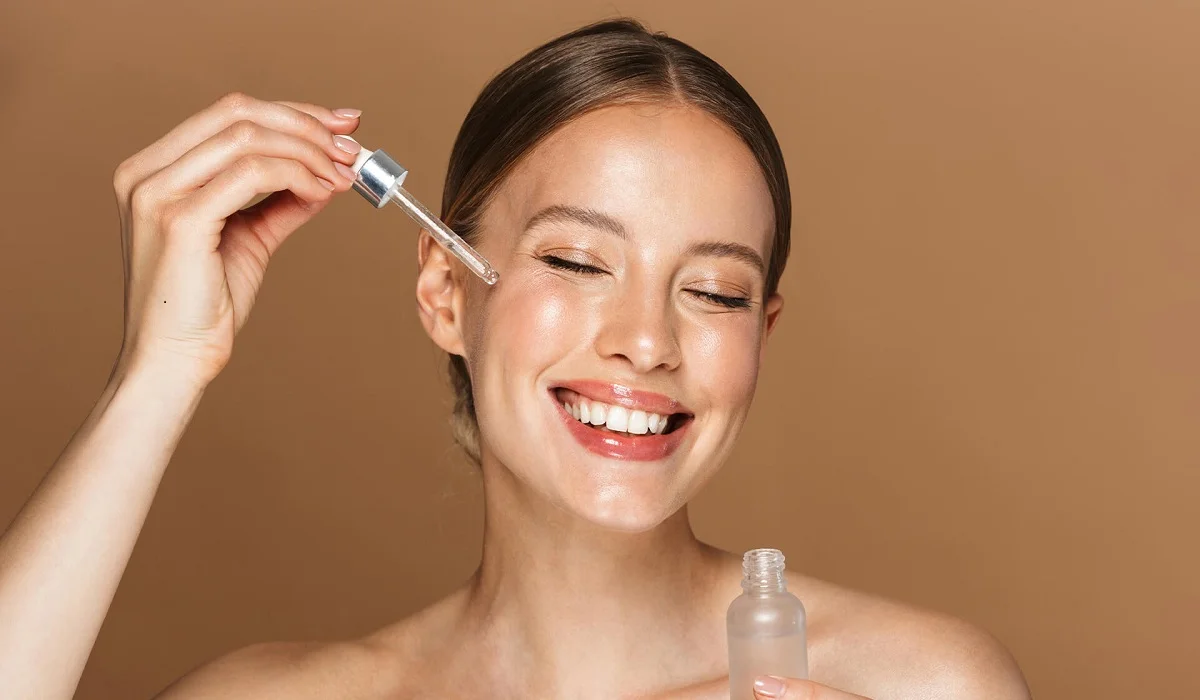
In the quest for radiant, healthy skin, moisturizing plays a pivotal role, especially when it comes to facial care. With the vast array of lotions available, understanding how to choose and apply them effectively is crucial. This guide will navigate you through everything you need to know about putting lotion on your face, blending scientific insights with practical tips. Understanding the importance of facial moisturization is the first step towards achieving a glowing complexion. The skin on our faces is more exposed to environmental factors and tends to be more sensitive, making targeted care essential. Moisturizing helps maintain the skin’s barrier, preventing dehydration and protecting against irritants. Choosing the Right Facial Lotion Identifying Your Skin Type Knowing whether your skin is oily, dry, combination, or sensitive is crucial in selecting a lotion that complements your skin’s needs without causing adverse reactions. Ingredients to Look for and Avoid Opt for lotions with hyaluronic acid, glycerin, and ceramides for hydration. Steer clear of harsh ingredients like alcohol and fragrances if you have sensitive skin. SPF-Infused Lotions for Daytime Use A lotion with SPF protection is essential for daytime use to shield your skin from harmful UV rays, preventing premature aging and skin cancer. The Correct Way to Apply Facial Lotion Step-by-Step Guide Applying lotion correctly enhances its effectiveness. Start with a cleansed face, apply a pea-sized amount, and gently massage it in an upward, circular motion. Common Application Mistakes to Avoid Over-application and neglecting the neck and décolletage are common mistakes that can lead to clogged pores and missed areas of care. The Role of Lotion in Your Skincare Routine Morning vs. Night: Tailoring Your Approach Your morning lotion should be lightweight and contain SPF, while your nighttime lotion can be richer, focusing on repair and hydration. Synergy with Other Skincare Products Understanding how to layer products correctly ensures that your skin receives the full benefits of each. Special Considerations for Sensitive Skin Hypoallergenic and Fragrance-Free Options For sensitive skin, hypoallergenic and fragrance-free lotions minimize the risk of irritation. Patch Testing for Safety Always perform a patch test with a new lotion to ensure it doesn’t provoke a reaction on your sensitive skin. The Impact of Seasons on Facial Moisturization Adjusting Your Lotion for Winter and Summer Your skin’s needs change with the seasons; opt for a heavier moisturizer in winter and a lighter one in summer. Tips for Maintaining Skin Hydration Staying hydrated, using humidifiers, and avoiding overly hot showers can help maintain your skin’s moisture balance. Understanding Facial Lotions and Acne Non-Comedogenic Formulas Choose non-comedogenic lotions to prevent pore blockages and acne flare-ups. Balancing Moisture without Exacerbating Acne Even oily and acne-prone skin needs moisturization to balance oil production and maintain skin health. Anti-Aging and Facial Lotions Ingredients That Fight Signs of Aging Look for lotions with retinol, peptides, and antioxidants that help reduce the appearance of fine lines and wrinkles. Incorporating Retinoids and Antioxidants Using lotions with these ingredients at night can significantly improve skin texture and tone over time. The Evolution of Facial Lotions From Traditional Creams to Modern Serums…

The Ultimate Guide To Selecting The Perfect Bronzer Brush
The Ultimate Guide to Selecting the Perfect Bronzer Brush

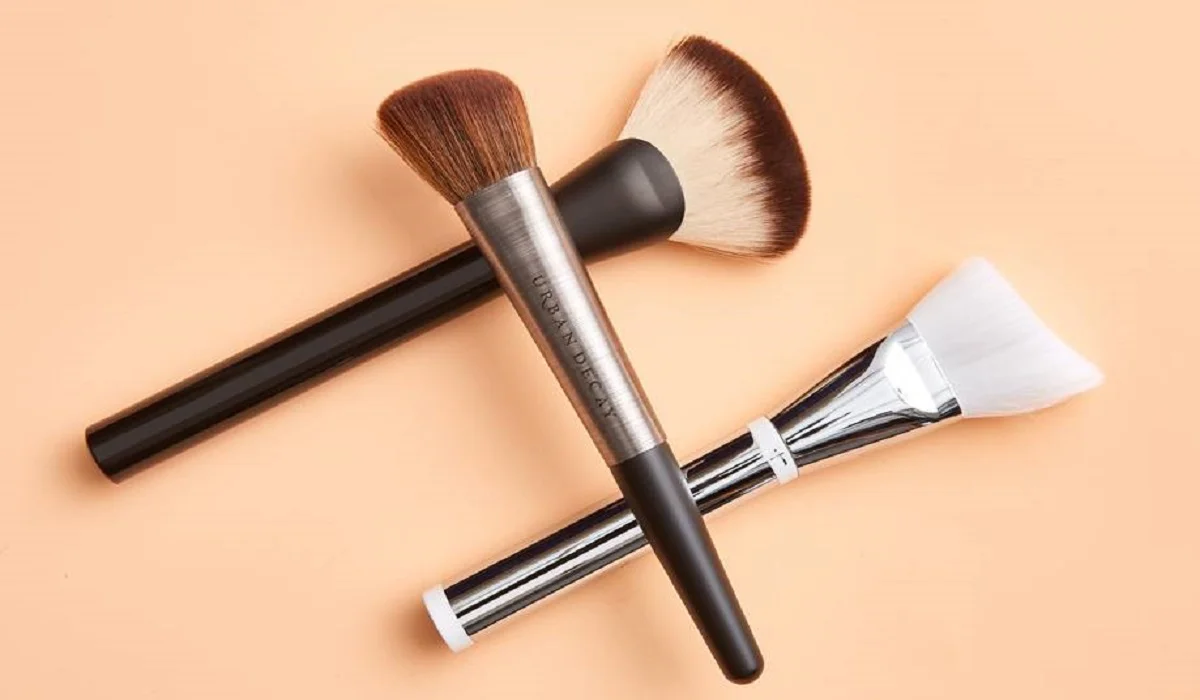
Bronzer application is an art form, reminiscent of painting, where the choice of brush plays a crucial role in the final effect. Selecting an appropriate bronzer brush not only elevates the application process but guarantees that the bronzer melds impeccably with your skin, yielding a natural, luminous finish. Bronzer: Purpose and Essence Bronzer, a beauty staple, aims to bestow your skin with a warm, sun-kissed radiance, enriching your complexion. Beyond its primary purpose, it’s instrumental in contouring, allowing for the meticulous sculpting and highlighting of facial contours. The secret to mastering bronzer application lies in the symbiosis between the product and the applicator. Diverse Spectrum of Bronzer Brushes The realm of bronzer brushes is diverse, with each variant designed to fulfill a distinct aspect of bronzer application. From angled, fluffy, dense, to stippling brushes, each type is tailored to meet specific application desires, guiding you towards achieving your envisioned makeup look. Natural vs. Synthetic Bristle Debate The selection between natural and synthetic bristle brushes remains a topic of debate. Natural bristles excel in their ability to pick up and distribute powder products seamlessly, while synthetic bristles stand out for their versatility, ease of maintenance, and ethical stance. Your choice should align with your personal ethics and the specific effects you wish to achieve. Impact of Shape and Size on Application The geometry and dimensions of a brush significantly dictate its application efficacy. Broad, fluffy brushes are ideal for an overall radiant effect, whereas compact, dense brushes allow for meticulous contouring. Angled brushes are adept at chiseling cheekbones, and stippling brushes offer a refined, airbrushed finish. Angled Brushes: Masters of Contouring Angled brushes, characterized by their tapered bristles, facilitate focused application, rendering them perfect for contouring endeavors with bronzer. They are the tools of choice for sculpting cheekbones, jawlines, and temple areas with precision. Fluffy Brushes: Architects of a Natural Glow For a subtle, natural glow, fluffy brushes are unparalleled. Their plush, expansive bristles ensure even distribution of bronzer, achieving a delicate, radiant sheen. Dense Brushes: Precision in Sculpting Dense brushes, known for their compact bristles, provide unparalleled control, making them indispensable for detailed face sculpting. Employing a gentle approach allows for the gradual intensification of the bronzer, ensuring a sculpted yet natural appearance. Stippling Brushes: Pioneers of a Flawless Finish Stippling brushes, with their unique dual-fiber bristles, are celebrated for achieving an impeccable, airbrushed complexion. They excel in seamlessly blending bronzer into the skin, eliminating any potential for unevenness or streaks. Influence of Brush Handle on Application The design and balance of a brush handle can significantly enhance application control, offering a comfortable and precise makeup experience. Bronzer Brush Maintenance Maintaining your bronzer brush through regular cleaning is crucial for its performance and longevity, ensuring a clean and hygienic application process. Bronzer Application Mastery To sidestep common pitfalls, such as excessive application or misplaced product, heed expert advice. Employing a gentle hand, thorough blending, and selecting a bronzer shade that complements your skin tone are essential techniques. Evaluating Budget vs. Premium Brushes The decision between investing in a premium brush or opting…

Mastering The Art Of Hair Straightening Tips And Tricks 22
Mastering the Art of Hair Straightening – Tips and Tricks

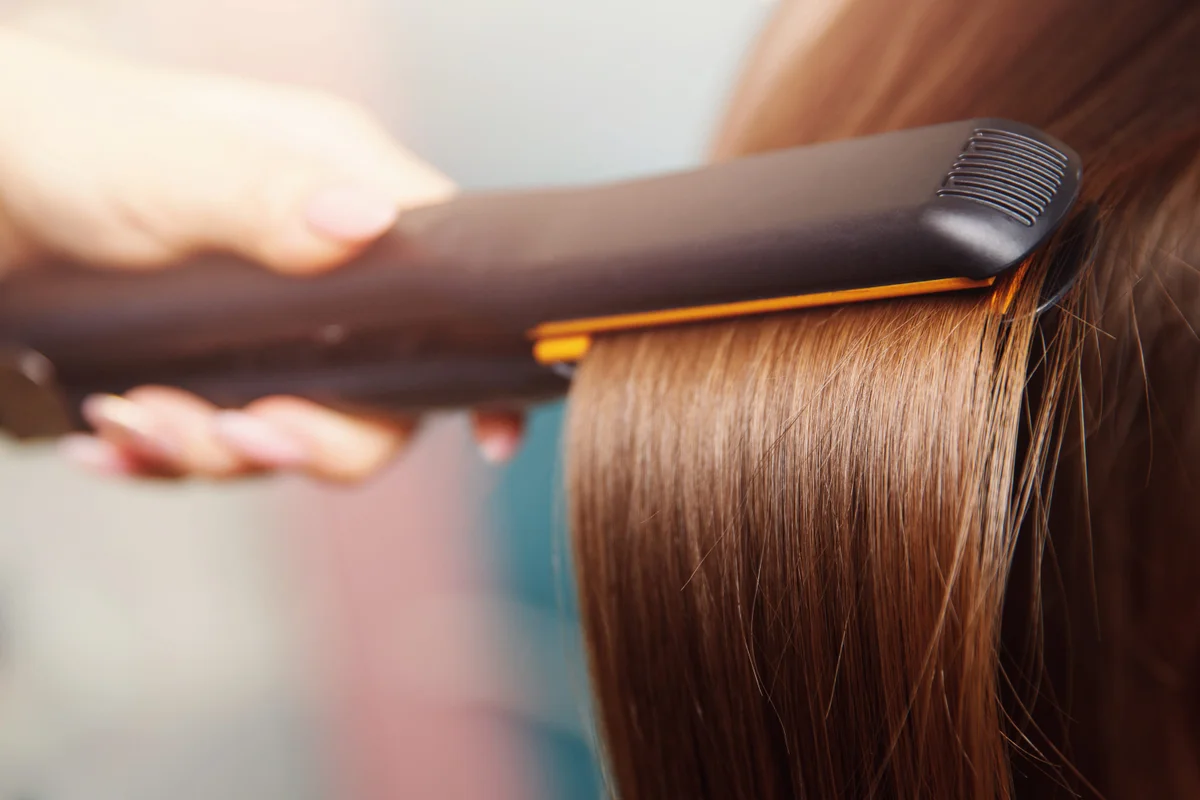
Hair straighteners (also referred to as flat irons) are indispensable tools in hairstyling. No matter if your natural curls, waves or frizziness is curlier, wavier or frizzier than others; using one correctly requires some skill and knowledge – we offer this comprehensive guide on using one safely for salon-worthy results – whether that be beginner or veteran level experience! This comprehensive guide offers expert tips and insights so that anyone using one will discover its full potential and unlock its true power! Chapter 1 : Selecting an Appropriate Hair Straightener Before engaging in hair straightening techniques, selecting an effective straightener that meets both your hair type and styling requirements is of vital importance. In Chapter 1, we will explore different kinds of straighteners available including ceramic, tourmaline and titanium models as you learn about plate size considerations, temperature settings and features to make an informed decision that suits your hair. Chapter 2: Styling Your Hair Proper preparation is key to attaining salon-quality straight hair. Chapter 2 covers how essential it is to start off with clean, dry locks before applying a heat protectant spray for added heat protection and detangling and sectioning your locks for even straightening. Chapter 3: Establish the Appropriate Temperature Setting the Right Temperature Chapter 3 explores the significance of setting the appropriate temperature on a hair straightener, explaining how you can tailor its heat output according to your hair type (lower temperatures for fine or damaged strands, higher for thick or coarse ones) as well as exploring advantages associated with using an adjustable straightener with digital temperature controls. Chapter 4: Proper Straightening Technique Chapter 4 delves deep into straightening technique. Here you’ll learn to hold and glide a straightener correctly along your hair’s shaft to maintain an even pace – without creating creases or burns! Additionally, different straightening methods such as the chase method or flick method will be discussed to enable different styles. Chapter 5 : Sectioning for Success Sub-dividing hair sections is key to creating perfectly straight locks. Chapter 5 offers step-by-step instructions on how to divide up your locks into manageable sections and straighten each section systematically for superior control and results. Working with smaller sections ensures superior control and results! Chapter 6: Finishing Touches Chapter 6 explores finishing touches and styling options to achieve an ideal result, so as to achieve the ideal end product. Here, you’ll learn how to add volume, curl your straightened locks or add shine using straighteners; hair serums, shine sprays or hair spritz can further amplify your style! Chapter 7: Maintenance and Care Plan Proper hair straightener care and maintenance are crucial in order to extend its longevity and effectiveness. In Chapter 7, we offer tips for cleaning and storing your straightener, as well as troubleshooting issues like sticky plates or uneven heating. Chapter 8 : Preserving Your Hair from Harm Maintaining the health of your hair when straightening is of utmost importance, which is why Chapter 8 explores ways to minimize heat damage using products and techniques available, while we share tips for scheduling heat-free days in your…

Keratin 1
What is keratin care?

Keratin is an essential protein component that serves as the building block for our hair, nails and the outermost layer of our skin. When it comes to maintaining healthy locks and maintaining their beauty, understanding keratin’s benefits for haircare are paramount in order to maintaining them at peak condition. Let’s dive deep into its world and uncover its contribution towards overall hair wellbeing! Keratin: An Overview of Its Function and Composition: Keratin is a fibrous structural protein found at the core of hair strands and composed mostly of amino acids derived from cysteine that provides strength, structure, and resilience for healthy hair follicles. Keratin’s unique composition also makes it a key element of various hair care treatments and products available today. Keratin for Hair Benefits: Here Are Three Advantages Strength and Resilience Keratin plays an integral part in strengthening hair shafts, imparting strength, and increasing overall resilience. By binding with existing structures within hair strands, it helps prevent breakage while strengthening each individual strand for external stressors such as weather changes. Keratin therapy may even restore vitality to damaged or weakened tresses by helping restore vitality while decreasing the chance of split ends. Smoothness and ManageabilityKeratin stands out among its many advantages as an exceptional solution for smoothness and manageability, working to eliminate frizz for an easier styling experience. Keratin can particularly beneficial to individuals suffering from unruly or frizzy locks by creating an even surface and making styling simpler each day. Keratin should become part of everyone’s daily styling regimen for optimal results! Keratin contributes to hair’s elasticity, an integral factor for its flexibility. Elastic locks stretch without snapping back when stretched without breakage allowing various styling options without jeopardizing its health; this advantage can especially come in handy for people who engage in heat styling or other forms of hairstyling regularly. Repair for Damage Repair Keratin’s reparative properties make it an invaluable ally in combatting these damages to hair from heat styling tools, chemical treatments and environmental elements. By filling gaps in hair cuticle gaps it repairs damage by filling any missing portions and restore the overall integrity of hair shaft; ultimately resulting in hair that looks and feels healthier! Reduce Porosity:High porosity can result in excessive moisture absorption or loss, leaving hair more susceptible to dryness or breakage. Keratin helps combat this issue by filling gaps and creating a smoother surface – not only will this benefit overall texture of hair but it will also create more balanced moisture levels throughout. Professional Keratin Treatments Are Renowned For Their Long-Lasting Smoothing Effects:Keratin treatments are well known for providing lasting smoothing effects. By creating a protective shield around each hair strand, these treatments create long-term smoothness – making keratin treatments an appealing semi-permanent solution to manage frizzy or unruly locks. Overall, keratin’s benefits to hair extend well beyond its surface layers; from structural issues and overall hair health benefits to smoother, stronger and more manageable locks due to professional treatments or products infused with this transformative protein. Keratin stands as an indispensable ingredient when it comes to haircare products and professional…

What Is The Difference Between Compact Powder And Foundation 2
What is the Difference Between Compact Powder and Foundation?

At its heart, makeup is all about creating the ideal complexion. Two key players in this endeavor are compact powder and foundation; both serve as essential base products that contribute to this goal, with different purposes, applications, formulations, formulations, formulations and purposes for makeup applications. We will present this comprehensive guide highlighting these differences so you can make informed choices tailored specifically for you beauty needs. Chapter 1 : Foundation The Role of Foundation Foundation is unquestionably one of the keystones of makeup artistry. It serves as the canvas upon which your beauty masterpiece takes form – think of it as its foundation! Foundation is designed to conceal imperfections, even out your skin tone, and create a uniform surface for other makeup products to adhere to. Available in liquid, cream and powder formulations each offering specific coverage levels and finishes, foundation is an indispensable beauty staple that comes in multiple flavors to meet these goals. Whatever look is your goal – natural and no makeup to full coverage glamour – foundation is essential in reaching it. By selecting an appropriate foundation suited for your skin type and tone, the perfect base can be created for your makeup journey. Chapter 2 : Understanding Compact Powder Compact powder (commonly referred to as setting or pressed powder) is an indispensable product in everyday makeup routines and serves an integral purpose in beauty regimes. Compact powder differs from foundation in that its primary goal is setting your makeup, controlling excessive shine and creating a matte finish. Available both translucent and tinted varieties to provide coverage across a range of skin tones. Compact powder is your go-to product for creating an impeccable and long-term makeup look. It prevents oiliness from migrating onto oilier areas of the face while giving skin a velvety surface texture with smooth results. Compact powder can also provide touch-ups throughout the day to keep your makeup fresh and flawless, helping create an instant matte complexion and maintaining its longevity. A must have item in any makeup bag! Chapter 3: Coverage Levels and Insurability Ratings One of the key differences between compact powder and foundation lies in their coverage levels, so in Chapter 3, we’ll dive deep into that topic. Foundation offers different levels of coverage depending on its formulation and application methods; compact powder offers minimal to light coverage without covering major imperfections – we will assist in selecting an ideal product depending on what level of coverage is desired by you. Chapter 4: Application Techniques Foundation and compact powder require different application techniques in order to achieve their respective purposes. When applying foundation, there are various techniques you can employ such as brushes, makeup sponges or even your fingertips – depending on which is suitable. These tools enable you to evenly apply foundation, reaching the coverage level and finish you want. Brushes provide precise application while sponges create an airbrushed effect for seamless coverage. Compact powder should usually be applied using either a puff or powder brush for easier application. Puffs included with compact powder are great tools for setting your makeup…

Makeup Styles That Reveal Your Unique Beauty, According To Your Zodiac Sign
Makeup Styles That Reveal Your Unique Beauty, According to Your Zodiac Sign

As far as beauty goes, your zodiac sign can reveal much about both you and your makeup preferences. Each zodiacal sign possesses distinct traits which tend to influence what kinds of styles people gravitate towards when applying makeup based on zodiac signs. We will explore makeup tips tailored specifically for every zodiac sign here as we gain more insight into this realm of expression and beauty through makeup artist inspiration for crafting signature looks using zodiac sign makeup styles! Let’s dive deep into these fascinating universe of makeup styles inspired by these cosmic bodies! Aries (March 21 – April 19): Make A Bold Statement With Your Words! Aries individuals, representing the zodiac’s first sign, are famous for their enthusiasm, courage and limitless energy. With little patience for waiting around or being left behind when making plans come into fruition, Aries individuals excel at creating powerful presence with minimum effort – something best symbolized by bold red lipstick which always seem to find their way into their handbags! A true reflection of Aries energy! Red, symbolising fire, is an ideal color choice for Aries. Makeup that stays put all day, such as long-wear smudge-proof foundations or waterproof mascara is suitable to their active lifestyles. Taurus (April 20 – May 20): Bring Timeless Elegance Into your Lifestyle Taureans, led by Venus – the goddess of beauty and affection – find immense satisfaction from sensuous scents, exquisite flavors, quality textures, aesthetic visuals, and soothing sounds that bring them pleasure. Taureans value timeless elegance over passing fads when it comes to cosmetics – hence they tend to seek harmonious relationships as much as romantic partners. Taureans who seek to emphasize both their femininity and eyes with eye makeup will love YSL Lash Clash Mascara. Though some may view Taureans’ unwavering energy as stubbornness, don’t try forcing fashion on them; rather they set their own rules which they are adept at abiding by. Thin and weightless textures that feel barely there provide all-day comfort on lips for these energetic individuals. Gemini (May 21-June 20): Find Ways To Express Your Vivid Energy Ruled by Mercury, our planet’s fastest planet, Geminis are among the brightest members of mutable zodiac signs. Their strong communication skills, sharp intellect, and quick adaptability set them apart. Their keen sense for new experiences enables them to quickly explore makeup trends which reflect ever-evolving perspectives into their style; Geminis can express themselves creatively when testing different products! Cancer (June 21-July 22): To Highlight Natural Tones Cancerians, under the sign of Cancerius the Moon’s influence, are noted for their strong intuition as well as their homely and faithful qualities. Cancer people prefer soft feminine makeup looks inspired by water’s element. Through memories they easily incorporate nostalgic styles into their look. Leo (July 23 – August 22): Expand Your Radiance As Leos are associated with the Sun, they tend to attract notice in social gatherings due to their leadership, self-confidence, and warmth – qualities which stand them out immediately upon entering a room. Leos enjoy grandeur and shimmer; when starting makeup routines they should opt for primer…

How To Apply Matte Foundation If You Have Dry Skin: Tips And Tricks
How to Apply Matte Foundation if You Have Dry Skin: Tips and Tricks

Matte foundation is a popular makeup product that can help create a flawless, shine-free complexion. However, if you have dry skin, applying matte foundation can be challenging. The wrong application technique can make your skin look flaky, cakey, and accentuate dry patches. In this article, we will discuss how to apply matte foundation if you have dry skin, including tips and tricks to help you achieve a beautiful, long-lasting matte finish. Start with a Good MoisturizerBefore applying any makeup, it’s essential to prepare your skin by moisturizing it. When you have dry skin, it’s crucial to choose a rich, hydrating moisturizer that will help plump up your skin and create a smooth canvas for your foundation. Look for moisturizers that contain ingredients like hyaluronic acid, glycerin, and ceramides that can help retain moisture and prevent water loss. Apply the moisturizer to your face and neck and wait a few minutes for it to fully absorb into your skin before applying foundation. Prime Your SkinAfter moisturizing, apply a primer to your face. Primers can help smooth out your skin, blur imperfections, and create a barrier between your skin and the foundation. When you have dry skin, look for a hydrating primer that contains ingredients like glycerin or dimethicone that can help lock in moisture. Avoid primers that contain alcohol or fragrances that can further dry out your skin. Apply the primer evenly to your face, focusing on areas where you have dry patches. Choose the Right FoundationWhen you have dry skin, it’s essential to choose a matte foundation that is specifically designed for dry skin types. Look for foundations that are labeled as “demi-matte” or “natural matte” that have a satin-like finish rather than a completely flat, matte finish. These types of foundations can help control shine while still providing a natural-looking finish that won’t accentuate dry patches. Avoid foundations that are labeled as “matte” or “powder” as these can be too drying for dry skin. Apply Foundation with a Damp SpongeOne of the best ways to apply matte foundation if you have dry skin is with a damp makeup sponge. Dampening the sponge can help prevent the foundation from clinging to dry patches and provide a more natural-looking finish. Start by dabbing a small amount of foundation onto the sponge, then apply it to your face using a bouncing motion. This technique can help blend the foundation seamlessly into your skin and prevent it from settling into fine lines or wrinkles. Build Up the CoverageWhen applying matte foundation to dry skin, it’s better to build up the coverage gradually than applying too much product at once. Start with a thin layer of foundation and gradually build up the coverage until you achieve your desired level of coverage. This technique can help prevent the foundation from looking too heavy or cakey, which can be a common problem when applying matte foundation to dry skin. Set with PowderAfter applying your matte foundation, it’s essential to set it with a translucent powder. Setting the foundation can help prevent it from transferring and increase its longevity….

Expert Tips For Hassle Free Makeup Removal And Skin Brightening
Expert Tips for Hassle-Free Makeup Removal and Skin Brightening

Removing makeup is an essential step in any skincare routine, crucial for maintaining healthy, clear skin. Proper makeup removal prevents clogged pores, breakouts, and skin irritation, ensuring your skin can breathe and rejuvenate overnight. This guide provides a detailed, step-by-step approach to effectively remove makeup, highlighting best practices, recommended products, and aftercare tips for optimal skin health. Understanding the Importance of Makeup Removal The journey to flawless skin begins with understanding why thorough makeup removal is non-negotiable. This section delves into the adverse effects of sleeping with makeup on, including accelerated aging and increased susceptibility to environmental damage. Learn about the significance of removing makeup to maintain the integrity of your skin barrier and prevent common skin concerns. Step 1: Choosing the Right Makeup Remover The first step in your makeup removal routine is selecting a product that suits your skin type and the kind of makeup you use. From micellar water and cleansing oils to makeup removal wipes and balms, this part explores the various options available, offering guidance on choosing the most effective and gentle formula for your needs. Step 2: Removing Eye Makeup Gently Eye makeup, especially waterproof products, requires special attention due to the delicate nature of the skin around the eyes. This section provides tips for safely and gently removing mascara, eyeliner, and eyeshadow, reducing the risk of irritation and ensuring no residue is left behind. Step 3: Cleansing Your Face Thoroughly After addressing the eye area, the next step focuses on removing foundation, concealer, and other face makeup. Discover techniques for using your chosen cleanser to dissolve and lift away makeup, dirt, and oil, ensuring a deep clean that leaves your skin fresh and clear. Tips for double cleansing are also included for those wearing heavy or long-wear makeup. Step 4: Toning and Moisturizing Post-cleansing care is crucial for restoring your skin’s natural balance. This section emphasizes the importance of using a gentle toner to remove any lingering traces of makeup and balance the skin’s pH, followed by a hydrating moisturizer to nourish and protect the skin barrier. Special Considerations for Sensitive Skin Individuals with sensitive skin may require special considerations during the makeup removal process. This part provides recommendations for hypoallergenic, fragrance-free products and techniques that minimize irritation, ensuring a soothing and effective makeup removal experience for all skin types. The Role of Exfoliation Incorporating exfoliation into your skincare routine can enhance the effectiveness of makeup removal and improve overall skin health. Learn about the benefits of exfoliation for removing dead skin cells and promoting cell renewal, along with advice on how to exfoliate safely without over-stripping the skin. Aftercare: Nurturing Your Skin Post-Makeup After makeup removal, taking additional steps to care for your skin can make a significant difference in its appearance and health. This section covers aftercare practices such as applying targeted treatments, serums, and overnight masks to address specific skin concerns and support skin recovery and rejuvenation. Common Mistakes to Avoid Even with the best intentions, common mistakes during the makeup removal process can compromise skin health. This segment highlights pitfalls to…