The Ultimate Guide to Makeup Brushes: What They Are and What They’re Used For

The Ultimate Guide to Makeup Brushes: What They Are and What They're Used For

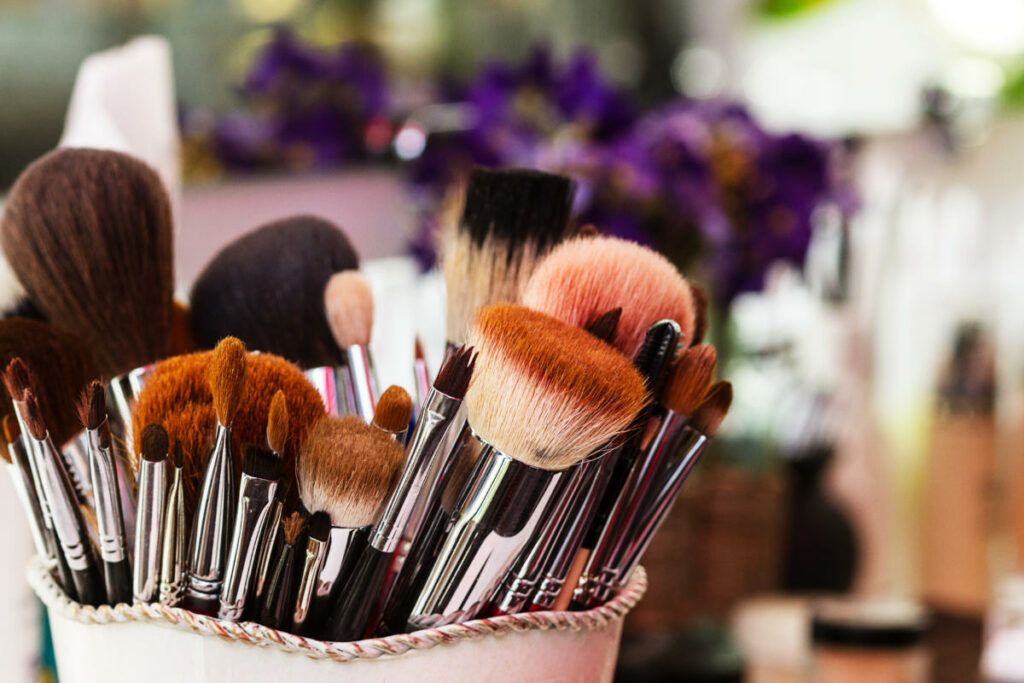
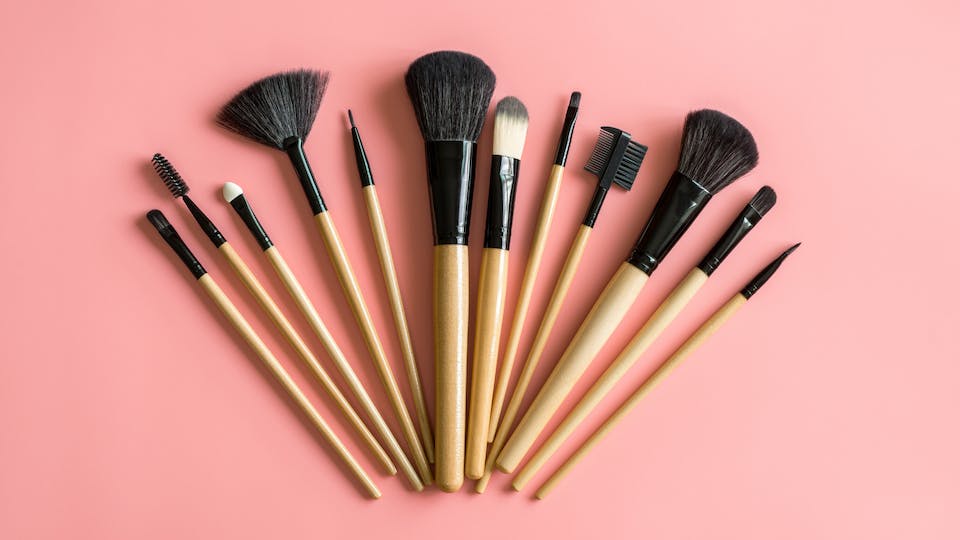
Makeup brushes are an essential tool for any makeup lover. With so many different types of brushes available, it can be overwhelming to know which ones to use for what purpose. In this beginner’s guide, we’ll break down the most common makeup brushes and what they’re used for.

Foundation Brush
A foundation brush is typically flat and has densely packed bristles. It’s used to apply liquid or cream foundation evenly to the face. To use, apply a small amount of foundation to the back of your hand or directly onto the brush. Starting at the center of your face, blend the foundation outward using circular motions.

Beauty Blender
A beauty blender is a makeup sponge that’s used to apply foundation, concealer, or other liquid products. To use, dampen the sponge and squeeze out any excess water. Apply a small amount of product to the sponge and bounce it onto your skin, blending as you go.

Powder Brush
A powder brush is typically large and fluffy, with loosely packed bristles. It’s used to apply powder products, such as setting powder or bronzer, to the face. To use, dip the brush into the powder and tap off any excess. Apply the powder to your face using sweeping motions.

Blush Brush
A blush brush is typically smaller and more tapered than a powder brush. It’s used to apply blush to the cheeks. To use, dip the brush into the blush and tap off any excess. Smile to locate the apples of your cheeks, and apply the blush using circular motions.

Contour Brush
A contour brush is typically angled and has densely packed bristles. It’s used to apply contour products, such as powder or cream contour, to the hollows of the cheeks, temples, and jawline. To use, dip the brush into the product and tap off any excess. Apply the contour using sweeping motions, blending as you go.

Highlighter Brush
A highlighter brush is typically smaller and more tapered than a powder brush. It’s used to apply highlighter to the high points of the face, such as the tops of the cheekbones, brow bone, and cupid’s bow. To use, dip the brush into the highlighter and tap off any excess. Apply the highlighter using sweeping motions.
The Ultimate Guide to Makeup Brushes: What They Are and What They're Used For

Eyeshadow Brush
An eyeshadow brush is typically small and flat or slightly fluffy. It’s used to apply eyeshadow to the eyelids. To use, dip the brush into the eyeshadow and tap off any excess. Apply the eyeshadow to your lid using sweeping or patting motions.

Crease Brush
A crease brush is typically small and tapered. It’s used to apply eyeshadow to the crease of the eye, to create depth and dimension. To use, dip the brush into the eyeshadow and tap off any excess. Apply the eyeshadow to the crease using back-and-forth motions, blending as you go.

Blending Brush
A blending brush is typically fluffy and dome-shaped. It’s used to blend out harsh lines and create a seamless transition between eyeshadow shades. To use, dip the brush into the eyeshadow and tap off any excess. Use circular or windshield-wiper motions to blend out any harsh lines.

Angled Brush
An angled brush is typically flat and angled. It’s used to apply eyeliner or eyebrow products. To use, dip the brush into the product and tap off any excess. Apply the product using short, precise strokes.

Lip Brush
A lip brush is typically small and tapered. It’s used to apply lipstick or lip gloss with precision. To use, dip the brush into the product and tap off any excess. Starting at the center of your lips, apply the product outward using short, precise strokes.

Fan Brush
A fan brush is typically thin and flat with sparse bristles. It’s used to apply highlighter or to sweep away excess product. To use, dip the brush into the highlighter and tap off any excess. Apply the highlighter to the high points of your face using sweeping motions. Alternatively, use the fan brush to sweep away any excess powder or fallout from your makeup application.

Kabuki Brush
A kabuki brush is typically large and dense with flat, rounded bristles. It’s used to apply powder products, such as bronzer or setting powder, to the face. To use, dip the brush into the powder and tap off any excess. Apply the powder to your face using circular motions.

Flat Concealer Brush
A flat concealer brush is typically small and flat with tightly packed bristles. It’s used to apply concealer to specific areas of the face, such as under the eyes or on blemishes. To use, dip the brush into the concealer and apply to the desired areas using tapping or patting motions. Blend out any harsh lines with a beauty blender or finger.

Angled Brow Brush
An angled brow brush is typically small and angled with dense bristles. It’s used to apply eyebrow products, such as pomade or powder, to fill in and define the eyebrows. To use, dip the brush into the product and tap off any excess. Use short, hair-like strokes to fill in any sparse areas and define the shape of your eyebrows.


In conclusion, makeup brushes are an essential tool for achieving flawless makeup application. With the variety of brushes available, it’s important to understand what each brush is used for and how to use it. Whether you’re a beginner or an experienced makeup enthusiast, having the right brushes in your collection can make a significant difference in the outcome of your makeup look.

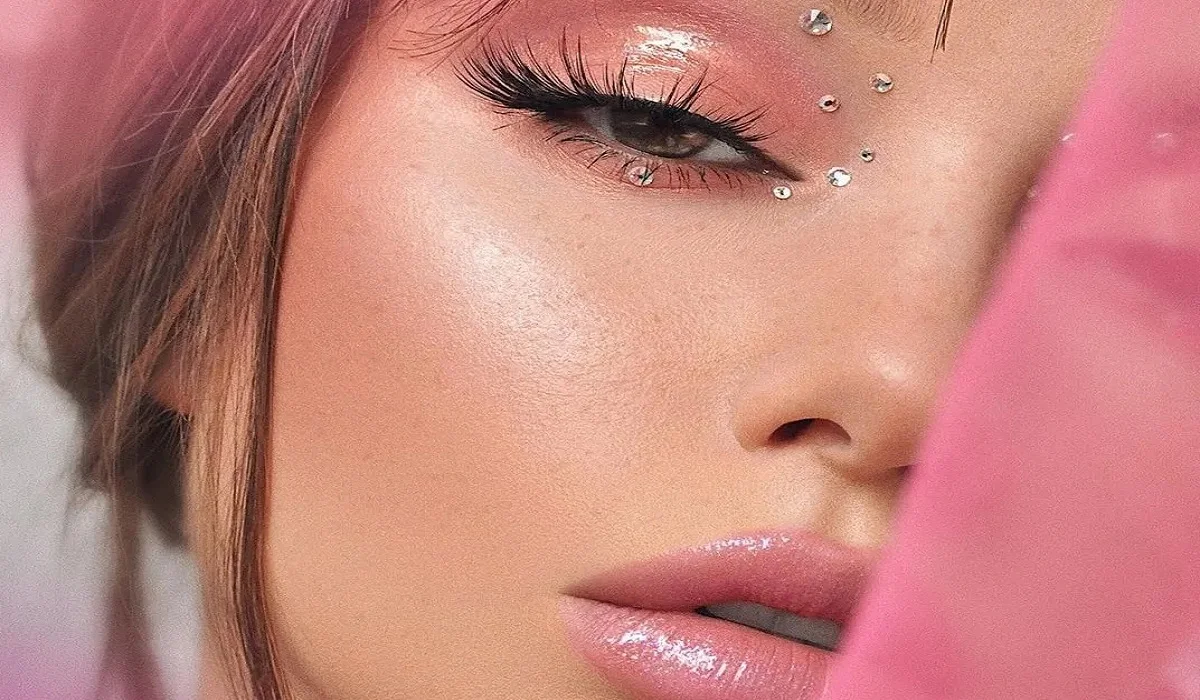
A Radiant Glow: Mastering Blush Application For Round Face Shapes
A Radiant Glow: Mastering Blush Application for Round Face Shapes

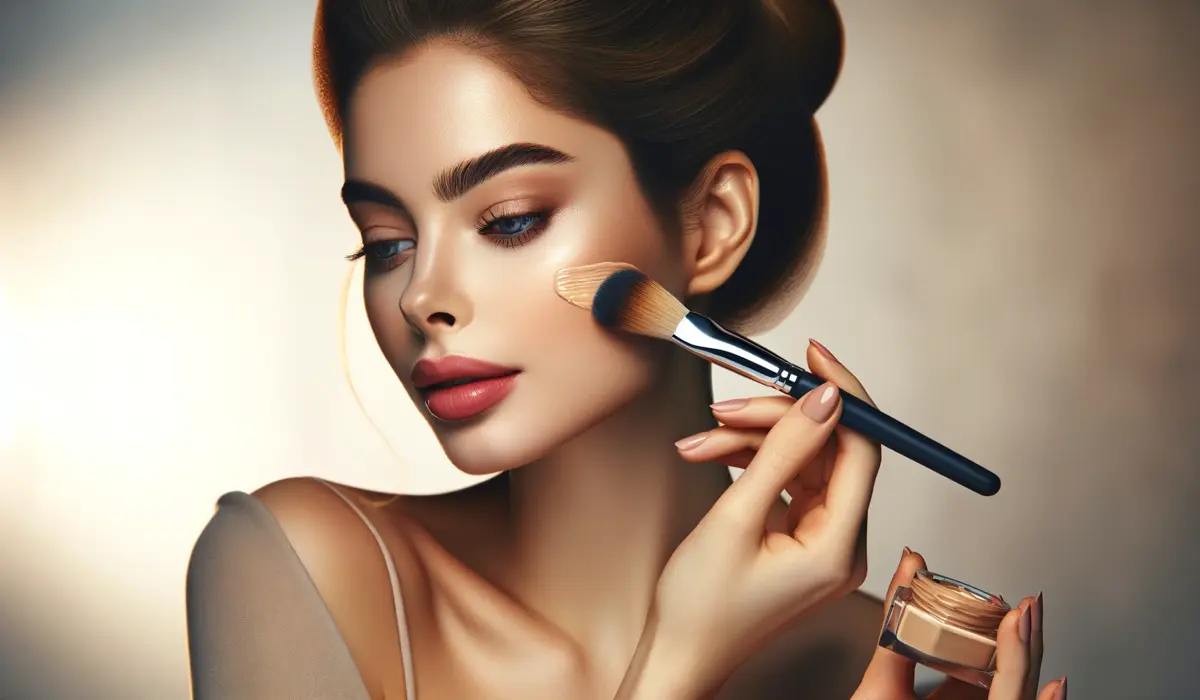
Blush is a makeup essential that can transform your look from dull to radiant, adding a healthy flush to your cheeks and enhancing your facial features. When it comes to applying blush, one size does not fit all, as different face shapes require specific techniques to achieve the most flattering results. If you have a round face shape, this guide is tailored to help you unlock the secrets of applying blush to accentuate your natural beauty. In this comprehensive guide, we’ll explore step-by-step instructions and valuable tips to ensure that your blush application complements your round face shape impeccably. Understanding the Round Face Shape Before delving into the tips for blush application, it’s crucial to understand the characteristics of a round face shape. A round face typically has soft, curved lines with a width and height that are approximately equal. The goal when applying blush to a round face is to create the illusion of more definition and angles, enhancing the natural bone structure. Choosing the Right Blush Shade Selecting the right blush shade is the first step towards achieving a flawless look. For a round face shape, opt for shades that offer a warm, natural glow. Peach, coral, and rosy tones work wonderfully as they provide a subtle radiance while imparting a hint of color. Avoid shades that are too dark or overly intense, as they can make your face appear even rounder. Prep and Prime Before you start applying blush, ensure that your skin is well-prepped and primed. Cleanse your face, apply a moisturizer suitable for your skin type, and follow up with a primer to create a smooth canvas for makeup application. This ensures that your blush adheres evenly and lasts longer throughout the day. Blush Application Steps Choose the Right Brush: Opt for a fluffy, angled blush brush for the best application. The angled shape helps you apply the blush precisely to the apples of your cheeks while blending seamlessly. Smile and Locate the Apples: Smile to identify the apples of your cheeks – the round, slightly raised areas that pop up when you smile. This is where you’ll focus your blush application. Light Hand for Building Color: Start with a small amount of blush on your brush. It’s easier to build up the color gradually rather than trying to tone it down if you apply too much at once. Apply in a Diagonal Line: Begin applying the blush in a diagonal line from the apples of your cheeks towards your temples. This technique adds a gentle lift to your face, creating the illusion of higher cheekbones. Blend, Blend, Blend: Blending is key to achieving a natural, seamless look. Use gentle, upward strokes to blend the blush into your skin. Make sure there are no visible lines, and the color diffuses evenly. Focus on the High Points: Concentrate the majority of the blush color on the apples of your cheeks, and then lightly sweep the remaining product along your cheekbones towards your hairline. Less is More for Round Faces: Remember, less is more when applying blush to a…

Which Curling Tool Is Best Forme
Which Curling Tool Is Best for Me?

In the intricate world of hair styling tools, the quest to unearth the ideal curling instrument can seem daunting. Aspiring for anything from casual beach waves to tight spirals or full-bodied curls, the key lies in selecting the correct device. This guide serves as a beacon, illuminating the path through the curling tool labyrinth, guaranteeing a match that resonates with your hair’s unique characteristics, aesthetic aspirations, and proficiency level. Deciphering Hair Characteristics Texture and Length of Your Hair The journey to selecting a curling tool begins with an understanding of your hair’s texture and length. Delicate, fine hair demands an adjustable-temperature tool to avert potential harm, while robust, thick locks may necessitate intense heat to ensure curls hold. For shorter hair, a diminutive barrel circumvents ungainly angles, creating perfect curls, whereas a more extensive barrel suits longer hair, crafting flowing waves or grand curls. The Impact of Hair Type on Tool Selection A basic principle emerges: fine, short hair necessitates meticulous heat and barrel size considerations, while thick, long hair affords more flexibility but requires increased heat and a broader curling surface for effective styling. Diverse Curling Instruments The Quintessential Curling Iron Characteristics and Optimal Usage The traditional curling iron, armed with its clamp, is synonymous with precision and ease, ideal for novices or those aiming for meticulously defined curls. Varied barrel dimensions accommodate different hair lengths and curl sizes. The Versatile Curling Wand Benefits and Usage Techniques Clamp-free curling wands champion the creation of natural-looking waves, ranging from loose to tightly coiled, depending on application technique, thereby offering versatile curl solutions. The Revolutionary Automatic Curler Features and Operational Guidance Automatic curlers represent the vanguard of curling technology, simplifying the curling process. They are a boon for individuals challenged by conventional curling techniques yet desiring uniform, exquisite curls. The Convenient Hot Rollers Advantages and Usage Manual Hot rollers, suited for those who value a more passive styling approach or need to multitask, excel in delivering volume and gentle curls, particularly for medium to long hair. Selecting Your Ideal Curling Device Critical Considerations In choosing a curling tool, it’s essential to weigh factors such as hair type, desired curl effect, skill level, and tool specifications. Contemplate the heat settings, barrel size, and construction material (be it ceramic, titanium, or tourmaline) as these elements influence both hair health and styling results. Comparative Analysis: Irons, Wands, and Rollers Each styling tool presents distinct advantages: curling irons offer versatility and precision; wands yield a more natural appearance; rollers are superior for volumizing and convenience. Align your selection with your styling preferences and lifestyle requisites. Safety Precautions Employ a heat protectant spray and abstain from curling damp hair to mitigate damage. Adhere to the manufacturer’s guidelines to guarantee both safety and desired outcomes. Maintenance of Curling Instruments Ensuring your curling tool’s cleanliness and proper storage prolongs its lifespan and sustains performance quality. Insider Strategies for Impeccable Curls Hair Preparation for Curling Commence with clean, dry hair, applying a heat protectant and, if desired, a styling product for enhanced hold. Segment your hair to simplify the styling process….

Pump Up The Volume In Your Hair: Here's How To Achieve Bouncy And Voluminous Locks
Pump Up the Volume in Your Hair: Here’s How to Achieve Bouncy and Voluminous Locks

Having luscious, voluminous hair can transform your entire look, boosting your confidence and leaving you feeling fabulous. However, not everyone is naturally blessed with thick, voluminous hair. If you find yourself struggling to achieve the desired volume, don’t worry—there are various techniques and tricks you can employ to pump up the volume in your hair and create stunning, bouncy locks. In this guide, we’ll explore a range of methods, from styling techniques to product recommendations, that can help you achieve the voluminous hair of your dreams. Section 1: Preparing Your Hair for Volume Before diving into styling techniques, it’s essential to prepare your hair properly for volume-enhancing methods. Here are a few steps you can take to set the foundation for voluminous hair: Choosing the Right Haircut: Opt for layered cuts or styles that add texture and movement to your hair. Layers can create the illusion of fuller hair by removing weight and adding dimension. Proper Shampooing and Conditioning: Use volumizing shampoos and conditioners specifically designed to add fullness to your hair. Avoid heavy, oil-based products that can weigh down your strands. Blow-Drying Techniques: Blow-drying your hair in an upward motion using a round brush can provide a lift at the roots and create a voluminous base for styling. Section 2: Styling Techniques for Volume Now that your hair is prepped, it’s time to explore different styling techniques that can help you achieve volume: Teasing or Backcombing: Using a fine-toothed comb, gently tease the roots of your hair to create instant lift and volume. Remember to be gentle to avoid damaging your hair. Velcro Rollers: Before blow-drying, set sections of your hair in velcro rollers. This technique allows your hair to cool and set in a voluminous shape, creating long-lasting volume. Root-Lifting Products: Applying root-lifting sprays or mousses directly to your roots can add height and volume. Massage the product into your roots for extra lift. Heat Styling Tools: Curling irons or straighteners can be used strategically to add volume. By curling sections of your hair away from your face or creating loose waves, you can achieve a fuller appearance. Dry Shampoo: Not only does dry shampoo refresh your hair between washes, but it can also add texture and volume. Spritz dry shampoo onto your roots and massage it in to absorb excess oil and create lift. Section 3: Product Recommendations for Volume In addition to styling techniques, certain hair products can work wonders in creating volume. Here are a few recommendations: Volumizing Shampoos and Conditioners: Look for products that are specifically formulated to add volume and thickness to your hair. These products usually contain ingredients that plump up the hair shaft and create fullness. Texturizing Sprays: These sprays are designed to give your hair grip and create a tousled, voluminous look. Spray onto your roots and mid-lengths to add texture and body. Hairsprays: Opt for lightweight hairsprays that provide a flexible hold. They will help maintain your volume throughout the day without weighing down your hair. Mousse: Apply a golf ball-sized amount of mousse to your roots before blow-drying. It adds…

5 Essential Tips To Enhance Your Eye Shadowskills
5 Essential Tips to Enhance Your Eye Shadow Skills

Eye shadow can dramatically transform your look, adding depth, dimension, and a pop of color to your eyes. Whether you’re aiming for a subtle enhancement or a bold statement, mastering the art of eye shadow application is key. In this comprehensive guide, we’ll delve into five pivotal tips that will elevate your eye shadow game, ensuring your makeup not only looks stunning but also lasts longer. Prime Your Eyes Before diving into colors and techniques, it’s crucial to start with a clean canvas. Priming your eyelids is the first step towards ensuring your eye shadow adheres better and stays put for hours. A good eye primer prevents creasing and fading, making it indispensable for both daily wear and special occasions. You can opt for a dedicated eye primer or a versatile option that suits both your face and eyelids. The key is to apply a thin, even layer across your eyelid to create the perfect base for your eye shadow. Understand Your Eye Shape Eye shadow isn’t a one-size-fits-all affair; your application technique should be tailored to your unique eye shape. Whether you have almond, round, hooded, or monolid eyes, each shape has specific strategies to enhance and define its natural beauty. By recognizing your eye shape, you can apply eye shadow in a way that accentuates your best features, from lifting droopy lids to making small eyes appear larger. This personalization ensures your eye makeup complements your overall look. Select the Right Eye Shadow Type The type of eye shadow you choose plays a significant role in the final look. Cream eye shadows work wonders as a base color, offering a smooth application. However, for versatility and ease of blending, pressed powder eye shadows are generally preferred. They come in a wide range of finishes, from matte to shimmer, allowing you to create depth and dimension on your eyelids. When selecting eye shadows, consider the occasion, your skin type, and the look you’re aiming for. Invest in Quality Brushes The right tools can make all the difference in eye shadow application. A comprehensive set of brushes allows for precise application and seamless blending. Essentials include a large, fluffy brush for applying a base color, a smaller, denser brush for adding depth to the crease, and a blending brush to ensure there are no harsh lines. Additionally, a pencil brush is great for detailed work, like defining the lower lash line or inner corners. Quality brushes offer better control and can help you achieve a more professional finish. Choose Eye Shadow Colors That Complement Your Eye Color The colors you choose should enhance your natural eye color, making your eyes the focal point of your face. Here’s a quick guide: By incorporating these tips into your makeup routine, you’ll notice a significant improvement in your eye shadow application. Remember, practice makes perfect, and experimenting with different colors and techniques is part of the fun. Embrace your creativity, and let your eyes shine! Mastering eye shadow application is an art that enhances your natural beauty and allows for creative expression. By following these…

What Is A Fan Brush
What is a Fan Brush?

A fan brush, often a staple in both art and beauty kits, is characterized by its unique fan-shaped bristles, designed to spread out wide while still allowing for delicate work. Originating from the need for artists to blend paint and create textures with finesse, the fan brush has a rich history in the arts. It has evolved over time, with variations developed for specific mediums and techniques. Today, it is available in several types, including soft and stiff bristles, each serving a distinct purpose. Uses of Fan Brushes in Art Fan brushes are invaluable for artists looking to achieve a range of effects in their work. They are particularly adept at blending colors on the canvas, creating smooth transitions between hues without harsh lines. This blending capability makes them ideal for skies, water, and other natural elements that require a soft touch. Additionally, fan brushes can be used to create interesting textures and patterns, such as the impression of leaves, grass, or hair, adding a layer of realism and depth to paintings. For techniques like glazing and layering, the fan brush applies thin, even coats of paint, allowing for the gradual build-up of color and luminosity. Uses of Fan Brushes in Makeup In the beauty world, fan brushes have a different set of uses but are equally cherished for their precision and versatility. Their light, feathery bristles are perfect for applying powdered makeup products like highlighters, bronzers, and blushes, offering a soft, natural finish. The unique shape of the fan brush allows for targeted application, enabling makeup artists to accentuate features like cheekbones and the bridge of the nose with ease. Additionally, fan brushes are excellent for gently sweeping away any excess or fallen product, ensuring a clean, flawless makeup application. Choosing the Right Fan Brush The key to harnessing the full potential of a fan brush lies in selecting the right one for your needs. Bristle material plays a significant role, with synthetic fibers offering durability and ease of cleaning, while natural bristles provide a softer touch ideal for sensitive skin and fine art. The size and shape of the brush will dictate its suitability for specific tasks, with larger brushes covering more area and smaller brushes offering precision. Proper care and maintenance, including regular cleaning and storage, will ensure the longevity of your fan brush. Creative Projects with Fan Brushes Beyond their traditional uses, fan brushes can inspire a variety of creative projects. Artists can experiment with different painting techniques, such as stippling and scumbling, to achieve unique effects on the canvas. DIY enthusiasts might find fan brushes handy for home decor projects, like creating textured finishes on walls or furniture. In mixed media art, the fan brush can be used to apply adhesives or create dynamic layers, adding dimension and interest to the artwork. Professional Tips for Using Fan Brushes To get the most out of your fan brush, consider the following tips from professionals: always select the right size and type of brush for your project, use a light touch to avoid overapplication of product, and experiment with…

Mastering The Eyelash Curler
Mastering the Eyelash Curler

Transforming your lashes from straight to stunningly curled can be effortlessly achieved with the proper use of an eyelash curler, turning it into an indispensable tool in your beauty arsenal. However, mishandling it could result in discomfort, lash damage, or uneven curls. This detailed manual will guide you through mastering the eyelash curler, incorporating upkeep advice and solutions to frequent problems, enabling you to safely and effectively obtain those desirable, fluttering lashes. Selecting the Ideal Eyelash Curler Eyelash Curler Varieties The market offers eyelash curlers in metal, plastic, and heated models. Metal curlers stand out for their sturdiness and precision in curling, while plastic variants are perfect for on-the-go use due to their lightness. For those with hard-to-curl lashes, heated eyelash curlers can achieve a more defined and enduring curl. Choosing a Curler for Your Eye Shape Eyelash curlers are not one-size-fits-all; their efficiency varies with different eye shapes. It’s crucial to choose a curler that complements the curvature of your eye to ensure a uniform curl and avoid discomfort. Some manufacturers provide curlers tailored to specific eye shapes such as almond, round, or deep-set. Lash Preparation Ensure Lashes are Clean and Dry Commence with lashes that are devoid of any makeup or residue, as leftover products can lead to lashes sticking to the curler, risking damage. Post face-washing, ensure your lashes are thoroughly dried before proceeding with the curling process. Warming the Curler (Optional) To enhance the curl, consider gently warming your metal eyelash curler with a hairdryer for a brief period. Always test the curler’s temperature on your hand to confirm it’s warm, not hot, preventing any harm to your eye’s delicate surrounding skin or the lashes themselves. Curling Your Lashes Proper Curler Placement With the curler open, position your lashes between the pads, getting as close as possible to the lash base without touching the eyelid. Confirm that all lashes are captured by the curler’s opening. Executing the Curl Press the curler’s handles together gently for approximately 5 to 10 seconds. For a more natural curl, you may lightly pump the curler. Refrain from pulling or yanking the curler to avoid lash damage. Sectional Curling For a more pronounced curl, adopt a sectional approach: begin at the base, then mid-lash, and finally near the tips. This technique fosters a seamless, natural curl rather than an abrupt crimp. Post-Curling Mascara Application Follow up the curling with your preferred mascara to set the curl. Opt for a waterproof or curl-enhancing mascara for optimal results. Applying mascara post-curling prevents the lashes from sticking to the curler and potential damage. Curler Maintenance and Cleanliness Eyelash Curler Cleansing To ensure optimal performance, regularly clean your curler to eliminate any mascara residue or debris. Utilize a gentle makeup remover or isopropyl alcohol for cleaning, allowing the curler to dry thoroughly before its next use. Pad Replacement Change the curler’s rubber pads every few months or at signs of wear to maintain curl efficiency and lash safety. Neglecting to replace worn pads can compromise lash health and curl quality. Addressing Common Concerns Avoiding Eyelid Pinching Pinching…

Foilyage: The Perfect Fusion Of Foil Highlights And Balayage
Foilyage: The Perfect Fusion of Foil Highlights and Balayage

When it comes to hair color trends, there’s always something new and exciting on the horizon. One such trend that has taken the hair industry by storm is “foilyage.” Foilyage is a hair coloring technique that combines the best of both worlds: the precise placement of foil highlights and the seamless, natural look of balayage. This technique has gained immense popularity among hairstylists and clients alike, offering a stunning and low-maintenance hair color option. In this article, we will delve into the details of foilyage, exploring what it is, how it differs from other coloring techniques, its benefits, and why it has become a go-to choice for many individuals seeking a sun-kissed, dimensional look. What is Foilyage? Foilyage is a term coined by hairstylists to describe a hair coloring technique that combines the foil highlighting method with balayage. Foil highlights involve separating sections of hair and applying color or lightener to the selected strands, which are then covered with foil to process the color more efficiently. On the other hand, balayage is a freehand technique where the colorist paints the color or lightener directly onto the hair, creating a soft, graduated effect. Foilyage bridges the gap between these two techniques by incorporating the precise placement of foil highlights with the natural blending and softness of balayage. How is Foilyage Different from Traditional Highlights and Balayage? Traditional highlights involve placing foils throughout the hair to create contrast and dimension. While this technique can produce beautiful results, the final look can sometimes appear too structured and uniform. Balayage, on the other hand, offers a more natural and effortless look by painting color directly onto the hair. However, without the aid of foils, it can be challenging to achieve maximum lift and create a more dramatic contrast. Foilyage strikes the perfect balance between these two techniques. By using foils strategically, colorists can achieve more lift and control while still maintaining a soft and blended appearance. The foils help to incubate the color, resulting in a more vibrant and dimensional effect compared to traditional balayage. Additionally, foilyage allows for precise placement of color, making it an excellent choice for those looking for specific highlights or lightening in certain areas of the hair. Benefits of Foilyage: Natural and Gradual: Foilyage creates a seamless, sun-kissed effect that mimics the natural way hair lightens under the sun. The color transition is soft and gradual, giving the hair a dimensional and lived-in appearance. Low Maintenance: One of the key advantages of foilyage is its low maintenance nature. Since the color is applied in a way that blends seamlessly with the hair, regrowth is less noticeable, reducing the frequency of touch-up appointments. This makes foilyage an ideal choice for those who prefer a more effortless hair color that grows out gracefully. Customizable: Foilyage offers endless possibilities for customization. Colorists can tailor the placement and intensity of the highlights to complement a client’s skin tone, hair type, and personal style. Whether you desire a subtle change or a bold transformation, foilyage can be adapted to suit your preferences. Versatile for All Hair…

Choosing Between Deodorant And Antiperspirant
Choosing Between Deodorant and Antiperspirant

Navigating the choice between deodorant and antiperspirant presents a common quandary for individuals worldwide. While both claim to address body odor, their mechanisms and benefits vary significantly. This piece offers an in-depth examination of deodorants and antiperspirants, guiding you towards a choice that resonates with your unique needs and preferences. Deciphering Deodorants Deodorants combat body odor by neutralizing or concealing it, without impacting the body’s natural perspiration process. They primarily target the skin’s bacteria responsible for odor during sweat breakdown. Defining Deodorants Deodorants, applied mainly to the underarms, aim to diminish or disguise the smell resulting from sweat’s bacterial decomposition. Ingredients such as alcohol and antimicrobial agents are included to curtail bacterial proliferation, alongside fragrances to cover up any odors. Mechanism of Deodorants Deodorants focus on eradicating body odor by attacking surface bacteria on the skin. Components like ethanol and triclosan create an environment unfavorable to bacterial growth, thus mitigating odor. Advantages of Deodorant Use Deodorants are ideal for those who wish to preserve their body’s natural ability to sweat. They are particularly beneficial for individuals with sensitive skin, offering formulations that reduce the risk of irritation. Investigating Antiperspirants Contrastingly, antiperspirants aim to curb sweating by temporarily obstructing the sweat glands, aiding in odor control and maintaining dryness. Understanding Antiperspirants Antiperspirants contain active ingredients, such as aluminum compounds, to temporarily close off sweat ducts, minimizing sweat presence on the skin’s surface. Functionality of Antiperspirants Aluminum salts in antiperspirants react with the moisture on the skin, forming a gel barrier that blocks sweat glands, thus lowering sweat output and its associated smell. Antiperspirant Benefits Antiperspirants suit those prone to excessive sweating, seeking to lessen both moisture and odor. They prove especially valuable in scenarios of heightened stress or in warmer climates, where sweating increases. Deodorant versus Antiperspirant: Distinct Approaches The primary distinction between deodorants and antiperspirants is their method of addressing body odor. Deodorants target the bacteria causing the odor, whereas antiperspirants focus on reducing sweat production itself. Composition and Mechanism Deodorants consist mainly of antimicrobials and scents, while antiperspirants use aluminum-based compounds to obstruct sweat glands. Skin Type Compatibility The choice between deodorant and antiperspirant often hinges on one’s skin type and personal preference. Individuals with sensitive skin might favor alcohol-free deodorants, whereas those who perspire more heavily may opt for antiperspirants. Health Implications Potential for Skin Reactions Both products can trigger skin reactions in certain individuals, making it crucial to test a new product on a small skin area before widespread use. Aluminum Safety Debate Concerns have been raised regarding aluminum in antiperspirants. Nonetheless, organizations like the American Cancer Society and the Alzheimer’s Association have clarified that existing studies do not definitively associate aluminum exposure from antiperspirants with cancer or Alzheimer’s disease. Selecting an Appropriate Product Considering Activity Level and Lifestyle Your selection may be influenced by your daily activities and lifestyle. Those leading an active life or residing in hotter climates might find antiperspirants more advantageous. Preferences and Sensitivities When choosing a product, factor in your scent preferences, application method (spray, stick, roll-on), and any skin sensitivities. Optimal Application Techniques…