The Ultimate Guide to Cleaning Your Makeup Brushes: Tips, Tricks, and Techniques

The Ultimate Guide to Cleaning Your Makeup Brushes: Tips, Tricks, and Techniques

Makeup brushes are an essential tool in any beauty routine. They help us achieve flawless and effortless makeup looks, whether we’re going for a natural or dramatic look. However, it’s important to note that these brushes need to be cleaned regularly to maintain their performance and longevity. Dirty brushes can harbor bacteria, oil, dirt, and dead skin cells that can cause breakouts and other skin problems.

Cleaning your makeup brushes may seem like a daunting task, but it’s actually quite simple and easy to do. With the right tools and techniques, you can keep your brushes clean and in good condition for years to come. In this article, we’ll walk you through the step-by-step process of cleaning your makeup brushes, as well as some tips and tricks to make the process even easier.

Step 1: Gather Your Supplies

Before you start cleaning your makeup brushes, you’ll need to gather some supplies. Here are the things you’ll need:

Gentle liquid soap or brush cleaner: You can use any gentle liquid soap or brush cleaner to clean your brushes. Avoid using harsh soaps or detergents as they can damage the bristles.

Bowl or sink: You’ll need a bowl or sink to clean your brushes in. Make sure it’s clean and free from any dirt or debris.

Towel: You’ll need a clean towel to dry your brushes on.

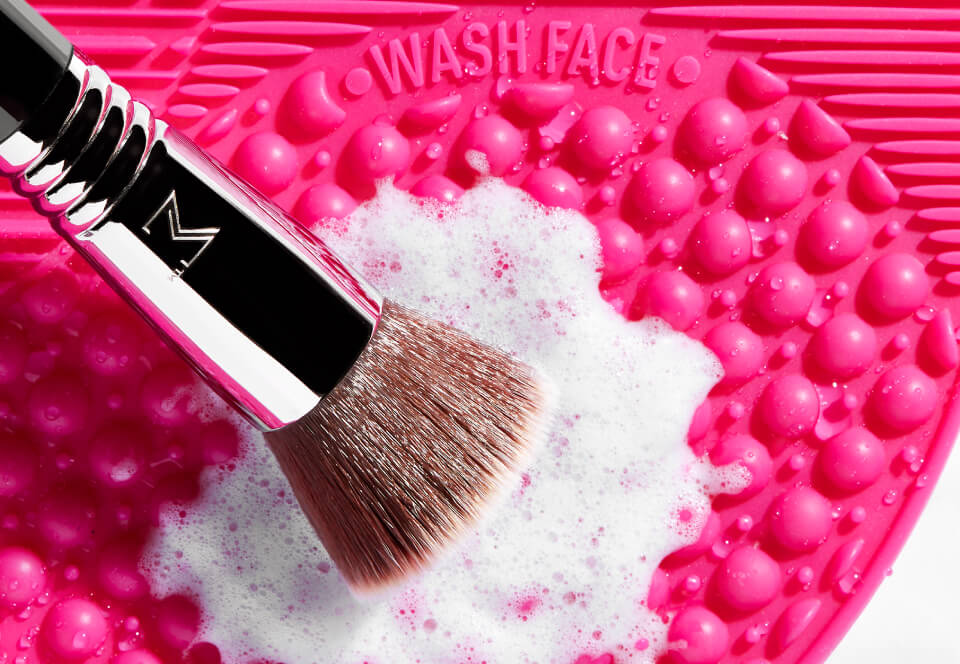
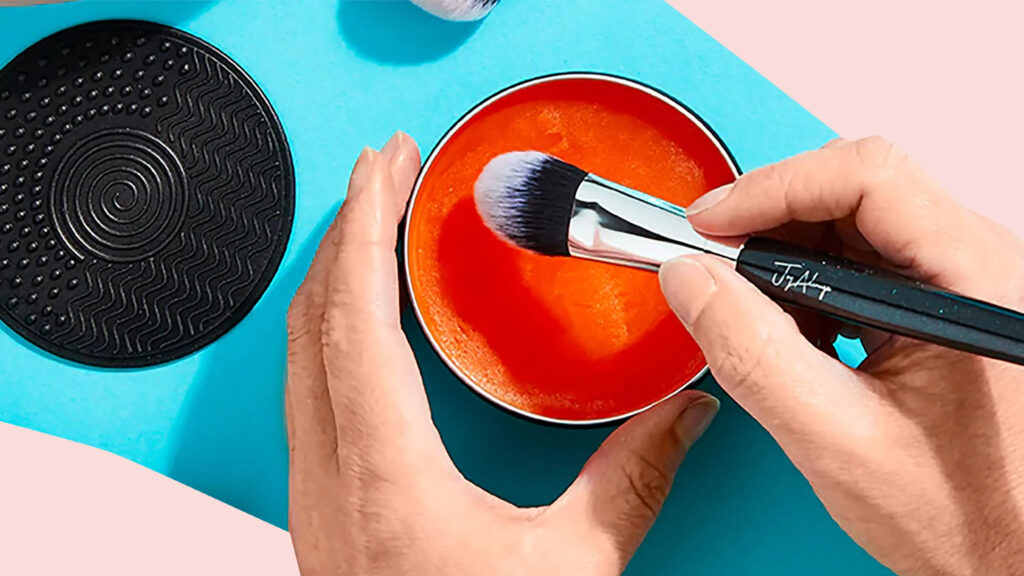
Brush cleaning mat or glove (optional): A brush cleaning mat or glove can help you get a deeper clean on your brushes by helping to remove dirt and makeup residue.

Step 2: Wet Your Brushes

To start cleaning your makeup brushes, wet the bristles under running water. Make sure the water is lukewarm and not too hot or too cold. Hold the brush under the water with the bristles facing down, and avoid getting water on the metal part of the brush as it can loosen the glue that holds the bristles in place.

Step 3: Clean Your Brushes

Once your brushes are wet, it’s time to clean them. You can use a gentle liquid soap or brush cleaner for this step. Put a small amount of soap or cleaner into your palm or onto a brush cleaning mat or glove. Swirl the brush into the soap or cleaner, making sure to cover all the bristles.

Gently massage the bristles with your fingers, working the soap or cleaner into the brush. If you’re using a brush cleaning mat or glove, use the textured surface to help remove any dirt or makeup residue.

Step 4: Rinse Your Brushes

After you’ve cleaned your brushes, rinse them thoroughly under running water. Make sure all the soap or cleaner is rinsed out of the bristles. Keep rinsing the brushes until the water runs clear.

Step 5: Dry Your Brushes

Once you’ve rinsed your brushes, it’s time to dry them. Gently squeeze the excess water out of the bristles, then reshape the bristles with your fingers. Lay the brushes flat on a clean towel and let them air dry. Avoid drying your brushes upright as the water can seep down into the metal part of the brush and loosen the glue.


The Ultimate Guide to Cleaning Your Makeup Brushes: Tips, Tricks, and Techniques

If you need to use your brushes right away, you can use a hair dryer on the lowest setting to speed up the drying process. Make sure the bristles are completely dry before using them.

Tips and Tricks:

Clean your brushes at least once a week to keep them in good condition.

Use a gentle liquid soap or brush cleaner to clean your brushes.

Avoid using hot water to clean your brushes as it can damage the bristles.

Never soak your brushes in water as it can loosen the glue that holds the bristles in place.

Be gentle when cleaning your brushes, especially if they’re made of natural hair. Harsh scrubbing can damage the bristles.

If you don’t have a brush cleaning mat or glove, you can use the palm of your hand to clean your brushes.

Don’t dry your brushes upright as the water can seep down into the metal part of the brush and loosen the glue. Instead, lay them flat on a clean towel.


Don’t use a hair dryer on high heat to dry your brushes as it can damage the bristles.

If your brushes are really dirty, you may need to clean them multiple times to get them completely clean.

Store your brushes in a clean and dry place to prevent bacteria growth.

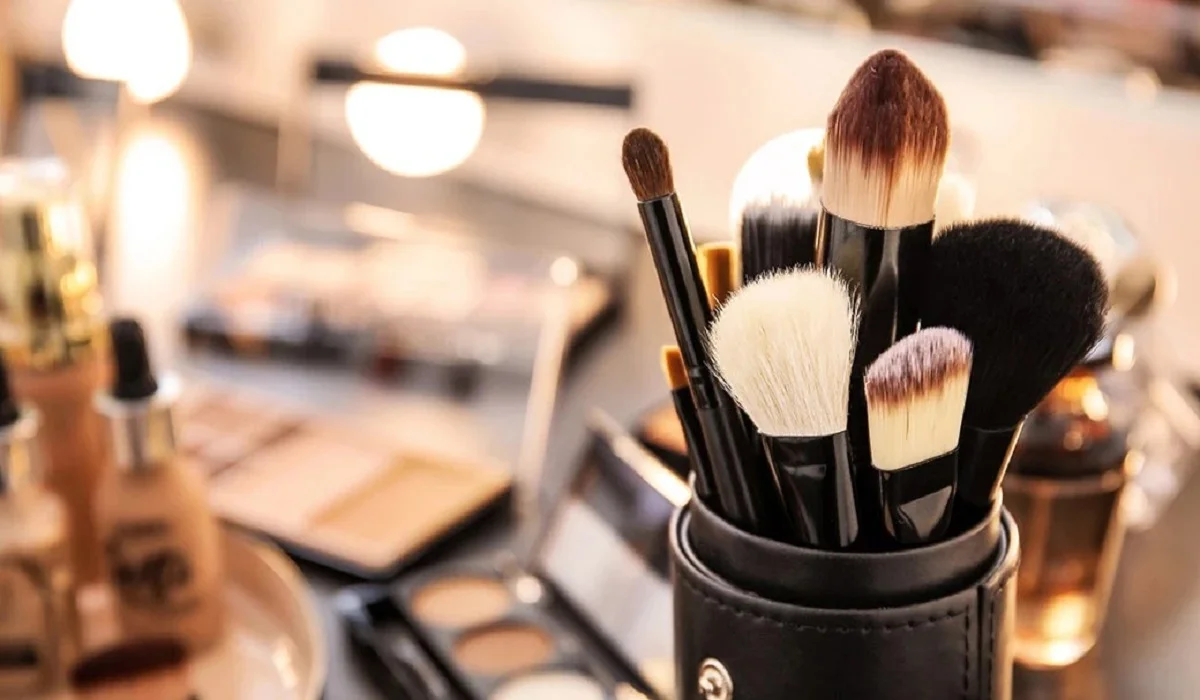
Consider investing in a brush holder to keep your brushes organized and easily accessible.

If you’re short on time, you can use a quick-drying brush cleaner spray to clean your brushes between uses.

In conclusion, cleaning your makeup brushes is an important step in your beauty routine that should not be overlooked. Regular cleaning will not only help maintain the performance and longevity of your brushes, but it will also prevent bacteria growth and skin problems. By following the tips and techniques outlined in this article, you can keep your brushes clean and in good condition for years to come.


Mastering The Art Of Pristine Complexion Your Definitive Guide To Makeup Dissolution
Mastering the Art of Pristine Complexion: Your Definitive Guide to Makeup Dissolution

The act of makeup removal transcends mere skin cleansing, positioning itself as a pivotal element in any skincare regimen. Its purpose extends beyond surface cleaning, aiming to safeguard the skin’s health, vitality, and radiance. Advanced makeup dissolution entails more than basic cleaning; it encompasses a suite of techniques and products crafted to fortify and enrich the skin, averting complications such as pore blockages, acne outbreaks, and early signs of aging. This exhaustive tutorial delivers all requisite insights for proficient makeup elimination, guaranteeing the preservation of your skin’s vigor and health. Decoding Makeup Dissolution Viewing makeup removal as a critical art form integral to your daily skincare ritual is essential. This process is not solely about removing the visible makeup layers; it’s fundamentally about enabling the skin to rejuvenate, breathe, and optimally absorb skincare products. It necessitates a comprehension of the makeup varieties applied, the skin’s specific requirements, and identifying the most suitable products and methods for removal. Key Instruments for Efficient Makeup Dissolution The selection of appropriate instruments and concoctions is crucial for effective makeup dissolution. The market is abundant with options catering to diverse skin types and makeup formulations, from mild eye makeup dissolvers to oil-infused solutions aimed at resilient foundation and lipstick forms. Products like micellar water, cleansing oils, balms, and wipes each serve distinct purposes, with the choice depending on individual skin sensitivity, makeup resilience, and personal inclinations. Sequential Guide for Makeup Dissolution Advanced Cleansing and Skincare Post-Makeup Dissolution Post-dissolution, deep cleansing ensures the elimination of all residual makeup, leaving the skin impeccably clean. This can be achieved through exfoliation, recommended 2-3 times weekly, followed by the application of a rich moisturizer to aid skin recovery throughout the night. Components such as hyaluronic acid, ceramides, and niacinamide are invaluable in moisturizers for post-dissolution care. Micellar Water’s Role in Makeup Dissolution Micellar water stands out as a mild yet effective choice, suitable for all skin varieties. Its micelles adeptly attract makeup, oil, and dirt, facilitating their removal without necessitating vigorous scrubbing. It is particularly beneficial for those with sensitive skin or for swift makeup changes. The Oil Cleansing Technique for Resilient Makeup For dissolving stubborn, waterproof makeup and deep skin cleansing, the oil cleansing method proves highly effective. It involves massaging a tailored oil blend into the skin to liquefy makeup, followed by using a warm washcloth to open pores and wipe away the oil, alongside any impurities and makeup. Circumventing Common Skin Irritations To prevent irritation, gentle removal techniques are paramount. This entails opting for hypoallergenic solutions, eschewing abrasive scrubbing, and treating the delicate eye area with care. Always conduct a patch test with new products to ascertain their compatibility with your skin. Natural and Home-Made Makeup Dissolvers For aficionados of natural skincare, ingredients like coconut oil, jojoba oil, and witch hazel present viable makeup removal alternatives. Crafting homemade solutions can be both cost-effective and kind to the skin. Significance of Regular Makeup Brush Cleansing Maintaining clean makeup brushes is essential to prevent skin irritation and acne. Brushes ought to be washed routinely with a gentle cleanser or brush…

Harms Of Sleeping With Make Up: Why You Should Never Skip The Cleansing Ritual
Harms of Sleeping with Make-up: Why You Should Never Skip the Cleansing Ritual

The allure of a perfectly made-up face is undeniable, and makeup has become a powerful tool for enhancing beauty and boosting confidence. However, as the day turns into night, the temptation to skip the makeup removal process and fall into bed can be strong. It’s a common scenario; you’re tired, and removing makeup feels like an unnecessary chore. But what happens when you choose to sleep with makeup on? In this comprehensive guide, we will explore the perils of sleeping with makeup, the profound effects it can have on your skin, and why you should never neglect the vital nightly ritual of makeup removal. The Consequences of Sleeping with Makeup Before we delve into the specifics, let’s understand the potential consequences of sleeping with makeup: The Role of Makeup in Clogged Pores One of the most significant consequences of sleeping with makeup on is clogged pores. Your skin naturally produces sebum (oil) throughout the day to keep itself moisturized and protected. Makeup can mix with this oil, along with sweat and environmental pollutants, forming a potent cocktail that seeps into your pores. When these pores become clogged, several issues can arise: The Impact on Collagen and Elastin Collagen and elastin are two essential proteins that give your skin its firmness, elasticity, and youthful appearance. They work together to maintain the skin’s structure and prevent sagging. Sleeping with makeup on can have a detrimental impact on these proteins. Makeup residue, along with environmental pollutants, can generate free radicals. These free radicals are unstable molecules that can damage collagen and elastin fibers, causing them to break down more rapidly. As a result, you may notice the development of fine lines, wrinkles, and sagging skin, even at a younger age than expected. Skin Cell Turnover and Dullness Your skin goes through a natural process of shedding dead skin cells and replacing them with new, healthy ones. This process, known as skin cell turnover, contributes to a fresh and radiant complexion. However, sleeping with makeup can disrupt this essential cycle. Makeup residue can form a barrier on your skin’s surface, trapping dead skin cells and preventing them from shedding properly. This leads to a buildup of old, dead cells that contribute to a dull and lackluster complexion. Additionally, when skin cell turnover is compromised, you’re more likely to experience clogged pores and acne breakouts. Eye Irritation and Infections The delicate skin around your eyes is particularly vulnerable to the adverse effects of sleeping with makeup. Leaving mascara, eyeliner, or eyeshadow on overnight can result in various eye-related issues: Preventing the Damage: The Importance of Makeup Removal To protect your skin from the perils of sleeping with makeup, the importance of a thorough makeup removal routine cannot be overstated. Here’s how to do it effectively: Step 1: Begin with the Eyes Start by focusing on the eye makeup, as it’s often the most stubborn to remove: Step 2: Cleanse Your Face Now, it’s time to remove the makeup from the rest of your face: Step 3: Double Cleanse To ensure all makeup, sunscreen, and impurities are thoroughly…

Henna Vs. Regular Tattoos: An In Depth Comparison Of Body Art Forms
Henna vs. Regular Tattoos: An In-Depth Comparison of Body Art Forms

Choosing between henna and regular tattoos can be a challenging decision for anyone looking to get body art done on their skin. Both options have their unique characteristics, advantages, and considerations that can influence the final choice. In this comprehensive article, we will compare henna tattoos and regular tattoos, providing all the necessary information to help individuals make an informed decision. From the creation process to the duration, pain factor, design possibilities, and potential risks, we will explore each aspect of these body art forms. Section 1: Understanding Henna and Regular Tattoos 1.1 Henna Tattoos: Henna tattoos are temporary body art made using natural henna plant powder. The powder is mixed with water to form a paste, which is applied to the skin using a piping bag. The dye from the henna plant stains the skin temporarily, creating intricate and mesmerizing patterns. Henna tattoos are a popular choice for those seeking a temporary design without the permanence of regular tattoos. 1.2 Regular Tattoos: Regular tattoos, also known as permanent tattoos, involve using a tattoo machine gun, tattoo needles, and tattoo ink. The tattoo gun pushes the ink into the dermis layer of the skin, resulting in long-lasting body art. Regular tattoos offer a vast array of design possibilities and can be highly detailed and intricate. Section 2: Comparing Henna and Regular Tattoos 2.1 The Process of Creating: Henna tattoos rely on a henna paste that is skillfully applied to the skin’s surface. The patterns are created by the artist pushing the paste out of the piping bag. On the other hand, regular tattoos involve the use of a tattoo machine gun and needles to insert ink into the dermis, creating a permanent design. Both techniques require skilled professionals, but the application methods are vastly different. 2.2 Duration of the Tattoos: Henna tattoos are temporary and typically last between 4 and 7 days, with the possibility of lasting up to 12 days with high-quality henna paste. After this period, the dye fades away, leaving the skin clear again. Regular tattoos, however, are designed to be permanent and can last a lifetime if desired. Tattoo removal options, such as laser tattoo removal, are available for those who want to remove a regular tattoo. 2.3 The Pain Issue: Henna tattoos are pain-free as the henna paste is placed on the skin’s surface. Conversely, getting a regular tattoo involves piercing the skin with needles, causing pain and discomfort during the process. However, the pain level can vary depending on the tattoo’s location, size, and the skill of the artist. The healing process of a regular tattoo can also cause some discomfort, but proper aftercare can minimize any issues. 2.4 Design Possibilities: Henna tattoos are limited in design possibilities compared to regular tattoos. Henna’s application technique is suited for pattern work, while regular tattoos offer limitless design options with intricate details, shading, and various colors. Regular tattoos’ versatility allows for almost lifelike creations, providing a wide range of design choices. 2.5 Skin Impact and Risks: Henna tattoos, when done with natural henna plant powder, have minimal impact…

7 Makeup Mistakes That Might Be Making You Look Older
7 Makeup Mistakes That Might Be Making You Look Older: How to Avoid Them

Makeup is a powerful tool that can enhance your natural beauty and boost your confidence. However, certain makeup habits might be doing more harm than good, especially as they can inadvertently age your appearance. Identifying and correcting these mistakes can make a significant difference in looking effortlessly youthful. This guide will explore seven common makeup mistakes and provide practical advice for avoiding them. Mistake #1: Overdoing Foundation Choosing the Wrong Formula A heavy foundation or the wrong formula can settle into fine lines and wrinkles, accentuating them. Opt for lightweight, hydrating foundations that offer buildable coverage. Application Techniques to Avoid Avoid applying foundation too heavily. Use a damp beauty sponge or a stippling brush for a more natural, skin-like finish. Remember, less is more. Mistake #2: Neglecting Skincare Before Makeup The Importance of a Hydrated Base Skincare plays a crucial role in how makeup sits on your skin. Dehydrated skin can cause makeup to cling to dry patches, making you look older. Recommended Pre-Makeup Skincare Routine Always start with a clean face, followed by a hydrating serum or moisturizer, and don’t forget to apply a primer to smooth out the skin’s texture. Mistake #3: Using Too Much Powder The Effect of Powder on Mature Skin Setting powder, especially when overused, can highlight fine lines and dry out your skin. Use translucent powders sparingly and only in areas that need it. Alternative Setting Methods Consider setting sprays or lightly dusting powder only in the T-zone to maintain a dewy finish on the rest of the face. Mistake #4: Ignoring Eyebrow Care Filling Eyebrows Too Harshly Over-filled eyebrows can harden your features, making you appear older. Aim for a more natural look by using feathery strokes and choosing a shade that matches your hair color closely. The Role of Eyebrows in Facial Structure Well-groomed eyebrows can lift the face and frame the eyes, contributing to a more youthful appearance. Consider consulting a professional for the best shape. Mistake #5: Over-Contouring and Highlighting Finding the Balance Too much contouring or highlighting can look unnatural and aging. Use these products sparingly and blend thoroughly to enhance your natural bone structure subtly. Techniques for a Natural Contour Opt for cream products that can be blended out easily for a more natural-looking shadow and glow, rather than harsh lines. Mistake #6: Choosing the Wrong Lip Products The Impact of Matte and Dark Shades Matte and darker lip colors can make lips appear thinner and more aged. They can also emphasize lip lines. Hydrating Lip Color Options Choose lip colors that are closer to your natural lip color and opt for formulas that offer hydration and a slight sheen to give the appearance of fuller, younger lips. Mistake #7: Skipping Eyelid Primer Preventing Creased Eyeshadow Eyelid primer prevents eyeshadow from settling into creases, which can age the eyes. It creates a smooth canvas for eyeshadow, enhancing its color and longevity. Enhancing Eyeshadow Longevity A good primer can also intensify the pigment of your eyeshadow, making your eye makeup look more vibrant and youthful throughout the day. In conclusion, avoiding…

Healing
A Father’s Stand: Love, Desperation and the Power of Healing

Doctors at a hospital in Texas informed George Pickering that his son was in a state of brain death. They explained that his son showed “no brain activity” and the decision had been made to remove life support. George Pickering became distraught when he learned of his son’s apparent brain death. Pickering was unconvinced of their assessment and… GO TO THE NEXT PAGE TO CONTINUE…

The Importance Of Using A Base Coat During Your At Home Manicure Session
The Importance of Using a Base Coat During Your At-Home Manicure Session

The allure of a professional-looking manicure from the comfort of home has never been stronger. With the advent of high-quality nail care products available for consumer purchase, the dream of achieving a salon-worthy finish without stepping out the door is now a reality. Essential to this DIY manicure kit is the often-overlooked yet crucial base coat, a foundational element that sets the stage for a flawless finish. What is a Base Coat? Definition and Purpose: A base coat is a clear or slightly tinted polish applied before the color coat. Its primary role is to prepare the nail surface for color application, ensuring a smooth, even, and long-lasting finish. Types of Base Coats and Their Benefits: From strengthening formulas to ridge fillers, each type of base coat serves a specific purpose, addressing various nail concerns while providing a solid foundation for nail color. The Importance of a Base Coat Protection Against Staining: One of the key benefits of applying a base coat is its ability to protect nails from staining, especially when using dark or highly pigmented colors. Enhancing Nail Strength: For those with brittle or weak nails, a base coat can add an extra layer of strength, reducing the likelihood of breakage and peeling. Smoothing the Nail Surface: A quality base coat can fill ridges and imperfections, creating a perfectly smooth canvas for color application. Improving Polish Adhesion: By forming a sticky layer, a base coat enhances the adhesion of the nail polish, extending the life of your manicure. Choosing the Right Base Coat Factors to Consider: Selecting the right base coat involves considering your nail type, concerns, and the finish you desire. Recommended Products for Different Nail Types: Recommendations will include products tailored to strengthen, hydrate, or smooth nails, ensuring there’s an ideal base coat for everyone. Step-by-Step Guide to Applying Base Coat Preparing Your Nails: Proper nail preparation is essential for a successful application. This section will guide readers through cleaning, filing, and buffing their nails for optimal results. Application Tips for an Even Coat: Achieving an even base coat is key to a flawless manicure. This guide will offer tips and techniques to master the application process. The Role of Base Coat in Nail Health Preventing Yellowing and Damage: Regular use of a base coat can prevent the yellowing and damage often caused by frequent nail polish application. Nutrient-Infused Base Coats for Nail Care: Highlighting base coats infused with vitamins and nutrients that promote nail health and growth. Comparing Base Coats with Top Coats and Nail Hardeners Differences and Purposes: This section will clarify the distinct roles of base coats, top coats, and nail hardeners, ensuring readers understand when and how to use each product. DIY Manicure Tips and Tricks Achieving Long-lasting Results: Tips for extending the life of your manicure, from application techniques to maintenance advice. Creative Ways to Enhance Your Manicure: Inspiration for readers to get creative with their at-home manicure sessions, incorporating art, accents, and more. Troubleshooting Common Manicure Issues Peeling and Chipping: Solutions and preventive measures for common manicure pitfalls, ensuring your hard work…

Illuminating Radiance: Top Tips On Choosing The Perfect Primer For Dull Skin
Illuminating Radiance: Top Tips on Choosing the Perfect Primer for Dull Skin

If you have dull skin that lacks radiance and appears lackluster, using a primer specifically designed to address this concern can be a game-changer in your makeup routine. Primers are the secret to achieving a flawless and long-lasting makeup look, and selecting the right one for dull skin can brighten, hydrate, and create a luminous glow. In this comprehensive guide, we will explore the top tips on choosing a primer suited to dull skin, helping you achieve a radiant complexion that lasts all day. Understanding Dull Skin and its Causes Dull skin is characterized by a lack of radiance, appearing flat and lifeless. Several factors contribute to dullness, including: Dead Skin Cells: Accumulation of dead skin cells on the skin’s surface can create a barrier that reflects light poorly, resulting in a dull appearance. Dehydration: Lack of proper hydration can cause the skin to lose its plumpness and glow, leading to a lackluster complexion. Uneven Texture: Uneven skin texture can cast shadows and reduce the skin’s ability to reflect light, making the skin look dull. Environmental Factors: Exposure to pollutants, harsh weather, and UV radiation can damage the skin and contribute to dullness. Age: As we age, the skin’s natural renewal process slows down, leading to a buildup of dead skin cells and a loss of luminosity. Top Tips on Choosing a Primer for Dull Skin When it comes to choosing a primer for dull skin, the key is to opt for products that address the specific concerns associated with dullness. Consider the following tips to find the perfect primer for your needs: Look for Hydrating FormulasHydration is essential for combatting dullness, so opt for a primer that offers intense moisture. Look for ingredients such as hyaluronic acid, glycerin, and aloe vera, which help lock in moisture and keep your skin looking plump and radiant. Choose Illuminating PrimersIlluminating primers are specifically designed to add a luminous glow to the skin. These primers often contain light-reflecting particles that bounce light off the skin, instantly brightening the complexion and reducing the appearance of dullness. Consider Color-Correcting PrimersColor-correcting primers are formulated to target specific skin concerns, including dullness. Look for primers with peach, pink, or lavender undertones, which can help counteract sallowness and revive a lackluster complexion. Check for Antioxidant-Rich IngredientsAntioxidant-rich primers can help protect the skin from environmental damage, which is a common cause of dullness. Look for ingredients like vitamins C and E, green tea extract, and niacinamide, which have powerful antioxidant properties. Find Primers with Exfoliating PropertiesExfoliating primers can help remove dead skin cells, promoting a smoother and more radiant complexion. Ingredients like alpha hydroxy acids (AHAs) or beta hydroxy acids (BHAs) in the primer can gently exfoliate the skin, revealing a brighter and fresher appearance. Avoid Heavy, Matte FormulationsSteer clear of heavy, matte primers, as they can further emphasize dullness and make the skin look flat. Instead, opt for lightweight and dewy formulations that offer a natural and radiant finish. Consider Your Skin TypeTake your skin type into account when choosing a primer. If you have dry skin, opt for a…

From Play Doh To Sunscreenthe Dangers Of Skincare For Kids Explained
From Play-Doh to Sunscreen: The Dangers of Skincare for Kids Explained

Children are facing an increasing amount of pressure to maintain a skincare routine, and dermatologists are growing anxious about the potential risks and health ramifications. This article offers a comprehensive rundown of the trend, as well as an overview of the reasons experts are growing more concerned about its implications for children. The Changing Face of the Beauty Industry The beauty industry has transitioned to target a younger audience, and there is an influx of products being marketed to children. As a result, more and more children are becoming users of skincare products, and dermatologists are raising concerns about the dangers of early adoption. However, it’s vital that these dangers are fully understood, as a child’s skin is fundamentally different and more sensitive than an adult’s. The Market for Children’s Skincare In recent years, the market for skincare products for children has expanded dramatically, with numerous brands offering ranges dedicated to a younger audience. This boom is largely the result of a turn in focus towards skin health, as well as aggressive marketing aimed at both parents and youngsters. Why Children’s Skin is Different Children’s skin is different from adults’ skin: It’s more delicate, more susceptible to irritation, and takes longer to form its own protective barrier. That’s because children’s skin has a different composition, is thinner, and performs its barrier function differently than adult skin, causing it to be more susceptible to moisture loss and external damage from harsh skincare ingredients. The Dangers of Early Skincare Adoption Using skincare in kids could pose a number of risks to skin condition, allergy development, and overall health. A number of ingredients can disrupt skin development, create allergies, or cause long-term health issues, making caution and knowledge two powerful skincare choices for children. Common Harmful Ingredients in Children’s Skincare Beware of the alarming chemicals housed in many skincare products for kids, including synthetic fragrance, parabens, and sulfates, because they can be harsh on young skin. Expert Dermatologists’ Warnings What do dermatologists think of the increasing phenomenon of kids using skincare products?Read their take on protecting sensitive, youthful skin. Alternatives to Traditional Skincare for Children Skip the chemicals and opt for the naturals in children’s skincare. Ingredients to look for, contain, and avoid as well as the brand leading the way in gentle, non-toxic children skincare. How Parents and Guardians Can Help Ultimately, parents and guardians are responsible for overseeing and guiding their children’s skincare routines. Here are some considerations that can help ensure that the products used on kids are safe, appropriate, and beneficial to their skin health. Choosing Safe Skincare Products for Kids Selecting safe kids skincare products is no easy task. This portion of the article gives an overview of how parents can approach product selections, including latching onto ingredient lists, looking for particular certifications, and seeking out dermatologist-recommended options. The Psychological Impact of Early Beauty Standards Introducing kids to skincare and beauty standards at a young age can lead to some significant psychological outcomes. This section examines what steering youth into beauty routines can do to their self-esteem and body image…