All You Need to Know About Eyebrow Threading: The Ultimate Guide

All You Need to Know About Eyebrow Threading: The Ultimate Guide

Eyebrow threading is a popular method of hair removal that originated in South Asia and has become increasingly popular in the Western world. It is a precise and relatively painless way to shape and groom eyebrows. In this guide, we will cover everything you need to know about eyebrow threading, including what it is, how it works, the benefits, and what to expect during and after the procedure.

What is Eyebrow Threading?
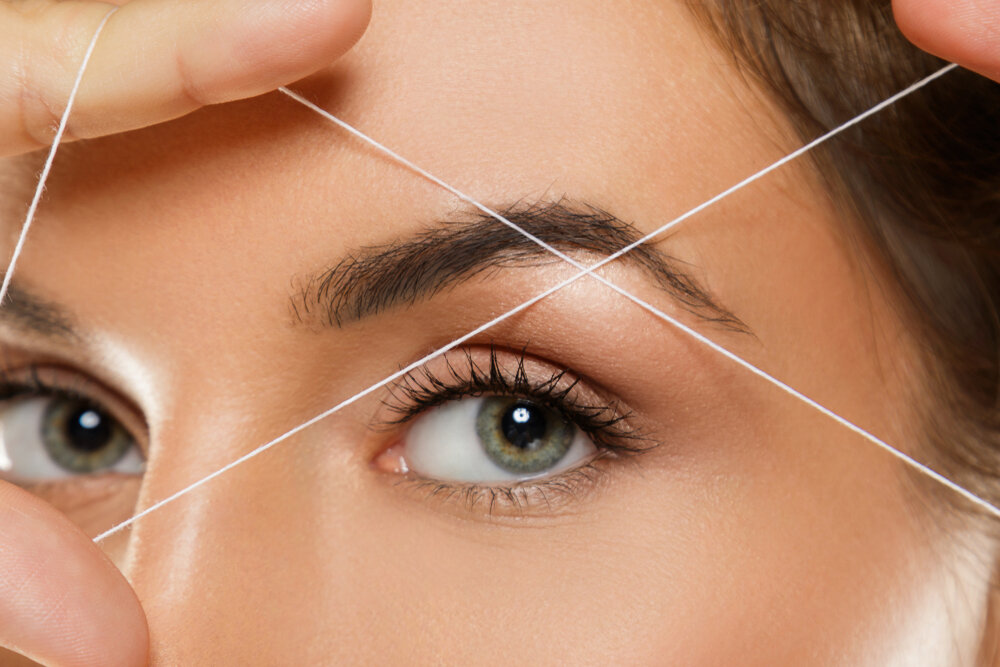
Eyebrow threading is a hair removal technique that involves twisting and pulling a thread along the skin, which removes the hair from the follicle. The thread is typically made of cotton or polyester and is doubled over, creating a loop at one end and two loose ends at the other. The practitioner holds one end of the thread in their mouth and uses the other hand to manipulate the loop, allowing them to precisely remove individual hairs from the eyebrow area.

How does Eyebrow Threading Work?
Eyebrow threading works by pulling out hair from the root. The practitioner will use the looped end of the thread to trap and twist individual hairs, pulling them out from the follicle. Because threading only removes hair from the root, the results can last up to 4-6 weeks before the hair grows back. Additionally, threading is a relatively gentle technique, as it does not require any chemicals or heat, making it suitable for those with sensitive skin.

Benefits of Eyebrow Threading:
There are several benefits to eyebrow threading. First, it is a precise technique, allowing for a more defined and tailored eyebrow shape. Second, it is less painful than other hair removal methods, such as waxing, as it does not pull on the skin. Third, threading is a quick and easy procedure that can be done in a matter of minutes. Finally, because threading only removes hair from the root, the results can last up to 4-6 weeks, making it a low-maintenance option.

What to Expect During an Eyebrow Threading Procedure:
If you have never had your eyebrows threaded before, you may be wondering what to expect during the procedure. First, the practitioner will ask you about the shape and style you are looking for. They will then use a white eyeliner pencil to draw on the shape of your new eyebrows. Once you have approved the shape, the practitioner will begin the threading process, using the looped end of the thread to remove hairs from the eyebrow area. You may experience some mild discomfort during the procedure, but it should not be painful. Once the threading is complete, the practitioner will apply a soothing cream or gel to the area to reduce any redness or irritation.
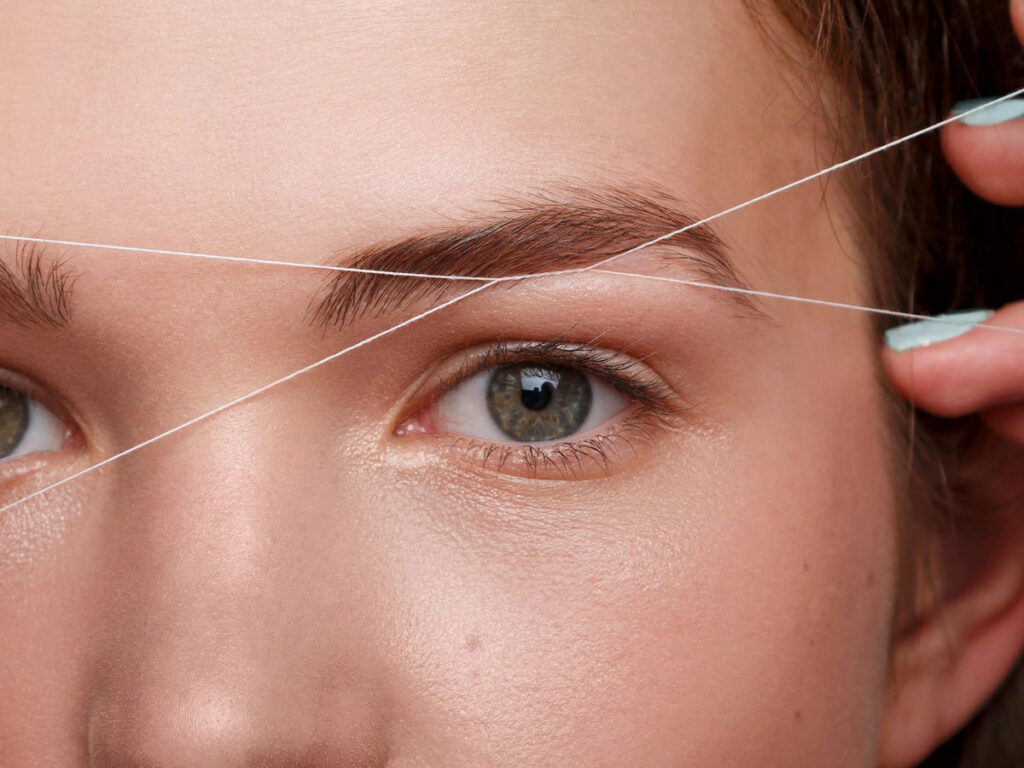
All You Need to Know About Eyebrow Threading: The Ultimate Guide

Aftercare for Eyebrow Threading:
Aftercare for eyebrow threading is relatively simple. You should avoid touching or rubbing the eyebrow area for at least 24 hours after the procedure to allow the skin to heal. You may also experience some redness or mild swelling, which should subside within a few hours. You can apply a cool compress to the area to reduce any discomfort. Finally, it is important to keep the eyebrow area clean and avoid applying any makeup or skincare products for at least 24 hours after the threading.

Eyebrow threading is a precise, gentle, and low-maintenance way to groom and shape your eyebrows. It is a popular technique that has been used for centuries and has gained popularity in the Western world in recent years. If you are looking for a quick and easy way to shape your eyebrows, eyebrow threading may be the perfect solution for you.

Tips for Choosing a Practitioner:
When it comes to eyebrow threading, it’s important to choose a practitioner who is experienced and skilled in the technique. Look for a practitioner who has a reputation for quality work and who uses high-quality threads and tools. Additionally, make sure the practitioner is licensed and trained to perform eyebrow threading.

Cost of Eyebrow Threading:
The cost of eyebrow threading varies depending on your location and the practitioner you choose. In general, you can expect to pay anywhere from $10 to $40 for an eyebrow threading session. While this may be more expensive than some other hair removal techniques, such as shaving or plucking, the results can last much longer, making it a cost-effective option in the long run.

How Often Should You Get Eyebrow Threading?
The frequency of eyebrow threading depends on your individual hair growth and preferences. However, in general, most people get their eyebrows threaded every 4-6 weeks. This allows enough time for the hair to regrow and for the skin to recover from the previous threading session.

Risks and Side Effects of Eyebrow Threading:
While eyebrow threading is generally considered safe, there are some risks and side effects to be aware of. These may include redness, swelling, and irritation of the skin. Additionally, if the practitioner is not skilled or experienced, they may accidentally remove too much hair or cause injury to the skin. To minimize these risks, it’s important to choose a skilled practitioner who uses high-quality tools and threads.

Alternative Hair Removal Techniques:
While eyebrow threading is a popular hair removal technique, it may not be the best option for everyone. Alternative hair removal techniques include waxing, plucking, and shaving. Each technique has its own pros and cons, and it’s important to choose the method that works best for your individual needs and preferences.

In conclusion, eyebrow threading is a popular and effective hair removal technique that can help you achieve perfectly shaped and groomed eyebrows. With the right practitioner and aftercare, you can enjoy the benefits of eyebrow threading for weeks at a time. Whether you are new to eyebrow threading or a seasoned pro, this guide can help you get the most out of this ancient and effective technique.


How To Achieve The Tiktok Vanilla Girl Makeupaesthetic
How to Achieve the TikTok Vanilla Girl Makeup Aesthetic

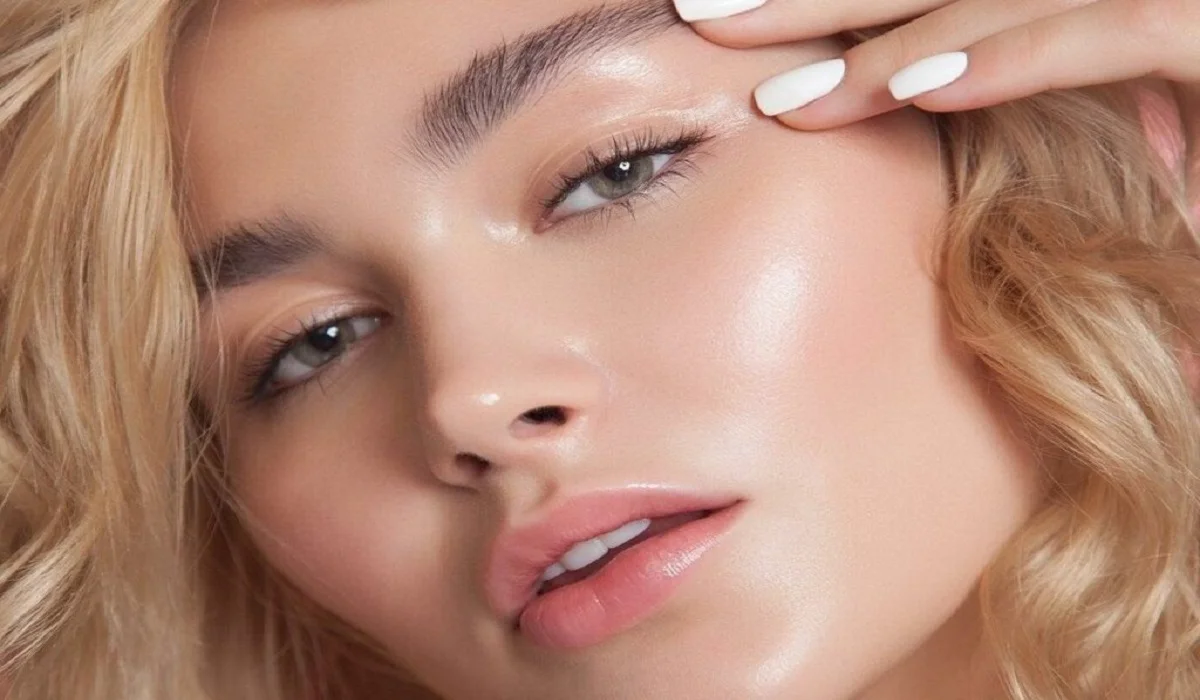
In an era where TikTok dictates the pulse of beauty and fashion trends, the Vanilla Girl makeup aesthetic has emerged as a coveted look. It’s a celebration of simplicity and natural beauty, steering away from the bold and dramatic to embrace the understated elegance of minimal makeup. This aesthetic is all about enhancing your natural features in the most subtle way. Whether you’re a seasoned makeup enthusiast or new to the beauty scene, achieving the Vanilla Girl look can be simple with the right approach. This comprehensive guide will walk you through the essential steps to mastering this effortlessly chic look, turning you into a TikTok sensation in no time. Start with a Flawless Base Achieving the Vanilla Girl makeup look begins with perfecting your canvas. Cleanse and moisturize your face to ensure a smooth and hydrated base. Opt for a tinted moisturizer or a lightweight foundation that seamlessly matches your skin tone for that barely-there effect. Application is key; use a damp beauty sponge or a foundation brush for an even and natural finish. A good base not only enhances the makeup but also cares for your skin underneath. Embrace Neutral Shades The essence of the Vanilla Girl aesthetic lies in the palette of neutral tones that complement your natural skin tone. Earthy hues of brown, beige, and nude in matte finishes are your best friends for eyeshadows and blushes. For the lips, a hint of gloss over a nude lipstick or a swipe of tinted lip balm adds the perfect touch of understated glamour. Selecting the right shades is crucial for maintaining the authenticity of the aesthetic while playing up your best features. Illuminate Your Natural Features Highlighting is a game-changer in the Vanilla Girl makeup routine. Use a highlighter that’s just a shade lighter than your skin tone and possesses a subtle shimmer, not glitter. The key areas to focus on are the tops of your cheekbones, the bridge of the nose, and the cupid’s bow. A gentle application will lend you a soft, ethereal glow that defines the Vanilla Girl look. Subtly Defined Eyes For eyes that speak volumes without saying a word, stick to neutral eyeshadows to define the crease and the outer corners. A swipe of brown or black mascara adds definition to your lashes, making your eyes appear wider and more awake. Those seeking a bit more depth can lightly line the waterline with a brown or black pencil. Remember, the goal is to enhance, not overshadow, your natural beauty. Natural Brows Are Key Brows frame the face and play a pivotal role in the Vanilla Girl aesthetic. The focus here is on full, well-groomed brows that look as natural as possible. Fill in sparse areas with a brow pencil or gel, mimicking the natural hair direction. The shade chosen should closely match your hair color to avoid a harsh contrast, keeping the overall look soft and coherent. Seal with a Dewy Finish Lock in your makeup while adding a burst of hydration with a dewy setting spray. A fine mist enriched with glycerin or…

Explore Five Natural Strategies For Soothing Dry Hands
Explore Five Natural Strategies for Soothing Dry Hands

Dry hands are a frequent issue for many, often worsened by factors such as environmental conditions, regular hand washing, and the use of harsh chemicals, leading to discomfort, cracks, and potential infections. Yet, through proper care and natural remedies, it’s feasible to replenish moisture and restore your skin’s health. This piece delves into five natural remedies that alleviate dry hands, combining age-old wisdom with contemporary dermatological insights. Five Natural Strategies for Soothing Dry HandsThe Significance of HydrationHydrating the skin is essential to preserve its barrier function, prevent moisture loss, and shield against irritants. Consistently hydrating can markedly enhance the skin’s suppleness and hydration, diminishing the likelihood of dryness and fissures. Natural Remedy 1: Coconut Oil RegimenCoconut oil, a natural emollient, is laden with fatty acids that restore skin moisture. Nightly application of virgin coconut oil to the hands, followed by wearing cotton gloves, can boost absorption, rendering the hands supple and smooth. Natural Remedy 2: Oatmeal Honey ExfoliantA scrub made from oatmeal and honey not only exfoliates dead skin but deeply moisturizes. Combine ground oatmeal with honey and a small amount of water to create a paste. Gently rub this mixture on your hands and rinse after 10 minutes to rejuvenate the skin. Natural Remedy 3: Aloe Vera TreatmentRenowned for its calming and healing effects, aloe vera gel applied to the hands can moisturize, mend cracks, and alleviate irritation. Its anti-inflammatory qualities also lessen redness and discomfort. Natural Remedy 4: Shea Butter RemedyExtracted from shea tree nuts, shea butter is a superb moisturizer for parched hands. Its rich vitamin and fatty acid content is perfect for skin nourishment and repair. For optimal results, generously apply shea butter to your hands at nighttime. Natural Remedy 5: Glycerin-Rosewater CombinationGlycerin, a humectant, draws moisture to the skin. A hydrating concoction of glycerin and rosewater applied daily can prevent dryness and maintain soft skin. Preventing Dry HandsPrevent dry hands by wearing gloves in cold conditions and during household tasks. Opt for mild, unscented cleansers over harsh soaps. Prevention is equally critical as treatment. Diet and Hydration for Skin WellnessA diet rich in vitamins and omega-3 fatty acids, coupled with sufficient hydration, promotes skin health from within. Incorporate nutrient-dense foods like nuts, seeds, and green vegetables into your diet and drink ample water daily. Humidifiers’ Role in Dry Hand ManagementEmploying a humidifier in dry settings and colder months can increase air moisture, aiding in skin dryness prevention. Choose a suitable humidifier for your area and maintain it well for maximum effectiveness. Consulting a DermatologistShould home remedies fail to ameliorate dry hands, or if you observe severe cracking, bleeding, or infection signs, seeking a dermatologist’s counsel is prudent. They can offer specialized treatments and recommendations. Exploring Natural Oils for Skin CareInvestigating various natural oils can yield customized dry skin solutions. Each oil, from almond to jojoba, provides unique benefits like anti-inflammatory effects and vital nutrients for skin restoration. DIY Moisturizing Hand MasksCrafting your moisturizing hand masks with ingredients like avocado, banana, and yogurt is a delightful and efficacious method for treating dry hands. These natural components are rich…

Skin Serums: An Essential Addition To Your Skincare Routine
Skin Serums: An Essential Addition to Your Skincare Routine

Healthy, glowing skin is a top priority for many people, but with the plethora of skincare products available in the market, it can be difficult to determine which ones are necessary for your skin. One product that has gained popularity in recent years is skin serums. Skin serums are highly concentrated formulas that contain active ingredients designed to penetrate the skin deeply and target specific skin concerns. In this article, we will explore what skin serums are, why they are beneficial for the skin, and how to incorporate them into your skincare routine. What are Skin Serums?Skin serums are lightweight and highly concentrated formulas that contain a high percentage of active ingredients such as vitamins, antioxidants, and peptides. The main difference between skin serums and other skincare products is their ability to penetrate the skin more deeply due to their smaller molecular size. This allows the active ingredients in skin serums to deliver targeted benefits to the skin at a cellular level, making them highly effective in treating specific skin concerns such as fine lines, wrinkles, hyperpigmentation, and acne. Why Should We Use Skin Serums?There are many benefits of using skin serums as part of your daily skincare routine. Here are some of the reasons why you should consider incorporating a skin serum into your routine: Targeted Benefits: Skin serums are highly concentrated and contain active ingredients that are specifically designed to target specific skin concerns. For example, a vitamin C serum can help brighten the skin and reduce the appearance of dark spots and hyperpigmentation, while a hyaluronic acid serum can help hydrate the skin and reduce the appearance of fine lines and wrinkles. Deep Penetration: The small molecular size of skin serums allows them to penetrate the skin deeply, delivering active ingredients to the deeper layers of the skin where they can be most effective. Lightweight Formulas: Skin serums have lightweight formulas that are easily absorbed into the skin, making them ideal for use under moisturizers and makeup. High Concentration of Active Ingredients: Skin serums contain a higher concentration of active ingredients than other skincare products, making them more effective in treating specific skin concerns. Versatility: Skin serums are available in a wide range of formulations, making them suitable for all skin types and skin concerns. How to Choose the Right Skin Serum?With so many skin serums available in the market, it can be overwhelming to choose the right one for your skin. Here are some factors to consider when choosing a skin serum: Skin Type: Consider your skin type when choosing a skin serum. If you have oily or acne-prone skin, look for a serum that contains salicylic acid or benzoyl peroxide. If you have dry or sensitive skin, look for a serum that contains hyaluronic acid or ceramides. Skin Concerns: Choose a serum that is specifically designed to target your skin concerns. For example, if you have hyperpigmentation, look for a serum that contains vitamin C or kojic acid. Ingredients: Read the label carefully and look for ingredients that are backed by research and have been proven to…

The Art Of Blow Drying: History, Science, And Tips For Perfecting Your Technique
The Art of Blow Drying: History, Science, and Tips for Perfecting Your Technique

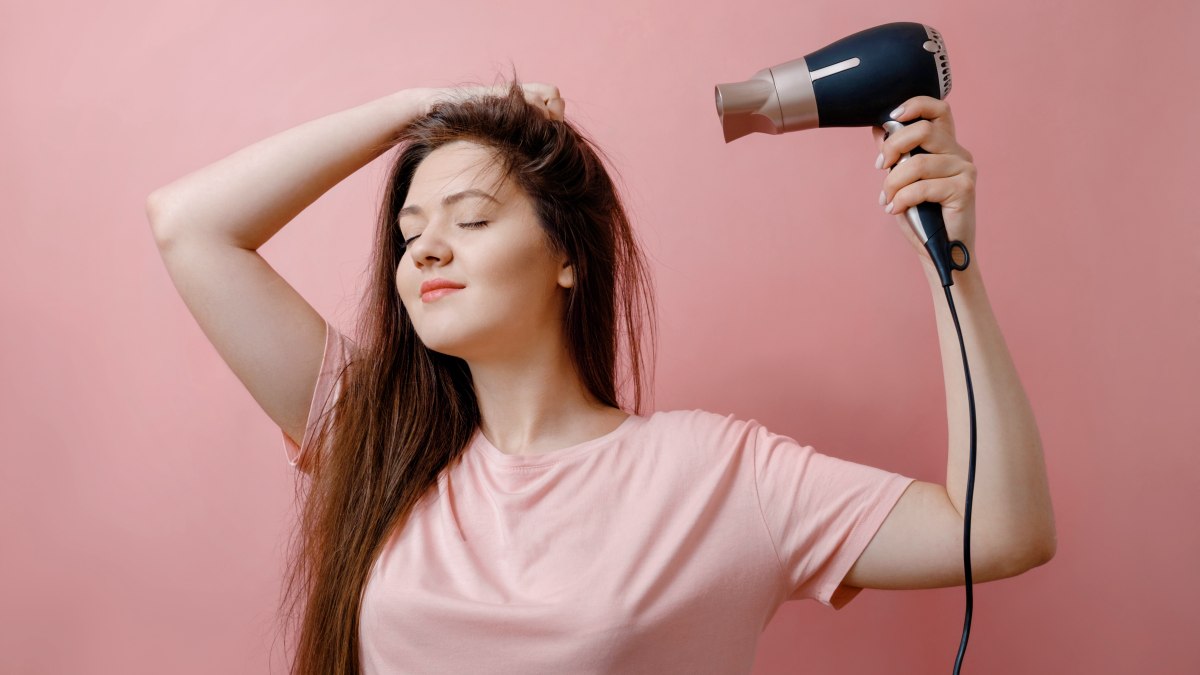
Blow drying is a staple in hair styling, and for good reason. It’s a quick and effective way to dry and style your hair at the same time, giving you the power to create a wide range of looks from sleek and straight to voluminous and curly. But have you ever wondered how blow dryers work or how they’ve evolved over time? In this article, we’ll explore the history and science of blow drying, as well as offer tips for using this versatile tool to achieve your desired style. How Blow Dryers Work At their core, blow dryers use a combination of heat and airflow to dry and style hair. The heating element inside the dryer heats up the air as it passes through, and the resulting hot air blows out of the nozzle and onto the hair. The speed and temperature of the airflow can be adjusted using the settings on the dryer. Most dryers have at least two speed settings (high and low) and two temperature settings (hot and cold). The high speed and hot temperature setting is typically used for drying wet hair quickly, while the low speed and cool temperature setting is used for setting a style or cooling down hair that’s been heated. In addition to the heating element and motor, blow dryers also have a filter to prevent dust and debris from getting sucked into the motor, and a nozzle to direct the airflow. Some dryers also come with attachments like diffusers or concentrators, which can be used to create different styles or enhance the natural texture of your hair. Tips for Using a Blow Dryer Blow drying your hair may seem straightforward, but there are a few tips and tricks that can help you get the best results. Here are some things to keep in mind: Prep Your HairBefore you start blow drying, it’s important to prep your hair properly. Start by washing your hair with a gentle shampoo and conditioner, then towel dry to remove excess water. If you have thick or curly hair, you may want to apply a leave-in conditioner or hair oil to help detangle and protect your strands from heat damage. Use the Right ToolsTo get the most out of your blow dryer, it’s important to use the right tools. This includes a quality dryer with adjustable settings, as well as any attachments (like a diffuser or concentrator) that you may need for your hair type and desired style. You’ll also want to have a round brush or a paddle brush on hand to help smooth and shape your hair as you dry. Divide and ConquerTo make blow drying easier and more effective, divide your hair into sections using clips or hair ties. Start at the back of your head and work your way forward, drying each section one at a time. This will help ensure that each section gets evenly dried and styled, and will also prevent you from getting tangled up in your own hair! Use the Right TechniqueTo get the best results with your blow dryer, it’s…

Women Work Together For Years Then Discover They’re Biological Sisters
Women work together for years then discover they’re biological sisters

Children who are adopted often hope to be reunited with their biological family so they can have some idea of where they are from. This story is about two women who were adopted from another country and somehow fate helped them find their way to one another. 31-year-old Julia Tinetti, and 32-year-old Cassandra Madison met in 2013 when both of them were working at the Russian Lady Bar in New Haven. Julia noticed a tattoo of the Dominican Republic’s flag on Cassandra’s arm and commented on how she is Dominican as well but was adopted from there. Julia stopped in her tracks to reveal that she had a similar story, she was Dominican but adopted by an American family as a baby. We would go out for drinks, for dinner. The two women would often get told by their other co-workers that they looked so much alike that they could be sisters. The women entertained the idea and looked at their adoption documents but they did not match up. But based on the similarities in their adoption timelines and resemblance, both women did feel they had some sort of connection with one another. Tinetti was born in 1989 and was adopted shortly after her birth while Madison was born a year earlier in 1988 and adopted shortly after as well. The women were confident that they would be related to one another but a look at their adoption papers which did not match made them second guess their instincts and conclude that they might not be related after all. In 2015, Madison moved from Connecticut to Virginia Beach, Virginia however still kept in touch with Tinetti. In 2018, her adoptive mother gave her a 23andMe DNA testing kit for Christmas so she could know more about her background. What she found out was shocking… “I did not know that you can find a relative, so that was very much a shock,” Madison said, she was matched to several distant relatives. Madison’s childhood friend Molly Sapadin helped piece the puzzle together. Sapadin was adopted shortly after her birth in 1990 from the Dominican Republic as well. Her adoptive mother was friends with Madison’s adoptive mother and the girls grew up together in New Haven, Connecticut. Sapadin compared her adoption paperwork with Madison’s and they realized they might be half-sisters as they had the same last name and the same person listed as their birth mother. Sapadin and Tinetti were adopted on the same day and in close proximity to one another and hence think their paperwork must have been mixed up by whoever had been filling it out. Madison was able to match with a first cousin due to her DNA results. The cousin helped connect her to her biological father Adriano Luna Collado. Her birth father still resides in the Dominican Republic. As for her biological mother, Yulianna Collado passed away in 2015 after suffering from a heart attack. In 2018, Madison made a trip to the Dominican Republic to meet her biological father and her siblings. When she met her family,…

About Heart Health Risks
7 Vital Insights: Why Women Are Still Uninformed About Heart Health Risks

Heart health remains a paramount concern globally, yet a significant gap persists in the dissemination of crucial health information to women. This discrepancy not only undermines women’s ability to make informed health decisions but also poses a considerable risk to their overall well-being. Through an exploration of current trends, barriers to information, and potential solutions, this article aims to shed light on why women are still not getting the crucial information they need about their heart health and how society can bridge this critical gap. Women’s Heart Health: An Unmet NeedHeart disease stands as a leading cause of mortality among women, yet its threat is often underestimated due to pervasive myths and misinformation. The narrative that heart disease is primarily a male concern has led to a dangerous oversight of women’s heart health needs. This section delves into the importance of heart health for women, backed by statistics and research that highlight the urgency of addressing this issue. Dismantling MisconceptionsThe battle against heart disease in women is often hindered by widespread misconceptions. Many believe the symptoms of heart disease in women mirror those in men, ignoring gender-specific signs that could aid early detection. Here, we debunk myths and provide clarity on how heart disease manifests differently in women. Navigating BarriersAccess to heart health information for women is fraught with barriers, from systemic biases within healthcare to socioeconomic factors that limit educational opportunities. This exploration into the hurdles faced by women in accessing heart health information lays the groundwork for understanding the complexity of the issue. Essential Heart Health InformationPreventative measures, symptom recognition, and the importance of lifestyle choices such as diet and exercise constitute the critical information women need. This comprehensive guide aims to arm women with the knowledge to combat heart disease effectively. Lifestyle’s Influence on Heart HealthLifestyle choices play a significant role in heart health. This section examines the impact of smoking, alcohol consumption, and physical activity on women’s heart health, offering evidence-based advice for making healthier choices. Healthcare’s Role in Women’s Heart HealthThe healthcare system’s role is pivotal in advancing women’s heart health. Improving communication between healthcare providers and patients, alongside promoting gender-specific research and treatment options, could dramatically improve outcomes for women. Technological Advancements in Heart HealthTechnological innovations, including wearable tech and advanced diagnostics, are transforming the landscape of heart health. This section explores how these advances are aiding in the monitoring and management of heart health, offering hope for the future. Heart Health Across the LifespanWomen’s heart health needs vary by age. From the challenges faced by young women to the unique risks during middle age and beyond, this segment addresses the importance of age-specific strategies in managing heart health. Success Stories in Heart HealthReal-life success stories of women overcoming heart disease serve as powerful testimonials to the importance of awareness and proactive health management. These narratives inspire and motivate change, emphasizing the potential for positive outcomes. Advocating for Heart HealthEmpowering women to advocate for their heart health is crucial. This section provides practical advice on how to engage with healthcare providers, seek supportive communities, and make…

10 Tips For Concealing Under Eye Bags Like A Pro
10 Tips for Concealing Under-Eye Bags Like a Pro

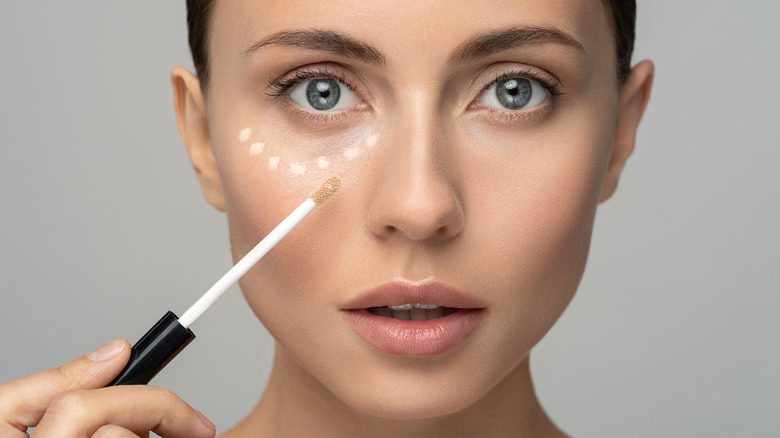
Under-eye bags are a common problem for many people, whether it’s due to genetics, lack of sleep, or aging. These bags can make you look tired and older than you actually are. Luckily, there are many ways to conceal under-eye bags and make your eyes look brighter and more youthful. In this article, we will share 10 tips for concealing under-eye bags like a pro. Use a Color CorrectorIf you have dark circles under your eyes, a color corrector can help neutralize the discoloration. Look for a peach or orange color corrector, depending on your skin tone. Apply it gently to the under-eye area using your ring finger. Be careful not to tug or pull on the delicate skin around your eyes. Use a Concealer with a Yellow or Peach UndertoneAfter applying a color corrector, use a concealer that has a yellow or peach undertone. This will help brighten your under-eye area and make you look more awake. Use a small, fluffy brush to apply the concealer in a triangle shape under your eyes, then blend it in with a damp beauty sponge. Use a Hydrating Eye CreamDry skin can make under-eye bags look worse. Make sure to use a hydrating eye cream before applying any makeup. Look for an eye cream that contains hyaluronic acid, which helps to plump and hydrate the skin. Apply a Cooling Eye GelIf you’re dealing with puffiness under your eyes, try applying a cooling eye gel. Keep the eye gel in the fridge for a few minutes before applying it to your under-eye area. The coolness will help reduce inflammation and puffiness. Use a Light-Reflecting PowderAfter applying your concealer, use a light-reflecting powder to set it. This will help brighten your under-eye area even more and prevent creasing. Use a fluffy brush to apply the powder lightly under your eyes. Use a Matte BronzerIf you have under-eye bags that are more prominent, you can use a matte bronzer to create a shadow effect. Apply the bronzer lightly in the hollows under your cheekbones and around your temples. This will help to create the illusion of depth and make your under-eye bags less noticeable. Apply Mascara and EyelinerApplying mascara and eyeliner can help draw attention away from your under-eye bags. Curl your lashes and apply mascara to open up your eyes. Use a thin line of eyeliner along your lash line to define your eyes further. Use a Bright LipstickIf you’re still feeling self-conscious about your under-eye bags, try wearing a bright lipstick. A bold lip color will draw attention away from your under-eye area and make you feel more confident. Use a Makeup Setting SprayTo make sure your makeup stays in place all day, use a makeup setting spray. This will also help prevent your under-eye area from getting oily and causing your makeup to smudge. Get Plenty of Sleep and Drink WaterWhile these tips can help conceal under-eye bags, the best way to get rid of them is to get plenty of sleep and drink water. Aim for at least 7-8 hours of sleep each…

How To Create A Flawless Makeup Look Without Foundation
How to Create a Flawless Makeup Look Without Foundation

Creating a flawless makeup look without relying on foundation is an art that celebrates natural beauty while skillfully concealing imperfections. This approach not only allows your skin to breathe but also highlights your features in the most natural and effortless way. Whether you’re aiming to simplify your makeup routine or seeking a lighter option for daily wear, mastering the art of no-foundation makeup can transform your beauty regimen. The Basics of No-Foundation Makeup The journey to a flawless look without foundation starts with understanding the essentials. Prepping your skin and choosing the right products are foundational steps that determine the success of your makeup application. This section will guide you through essential skin preparation, selecting products that enhance rather than cover, and techniques that offer coverage and radiance without the weight of foundation. Skin Preparation A flawless makeup application begins with well-prepared skin. Cleansing, exfoliating, and hydrating are key steps to create a smooth canvas. Additionally, priming your skin helps to refine pores and ensure a longer-lasting makeup application. This segment will delve into the best practices for skin preparation, focusing on products and methods that boost your skin’s natural glow. Concealing Without Foundation Concealing blemishes and under-eye circles without the blanket coverage of foundation requires targeted techniques and the right concealer. This part will explore how to choose a concealer that matches your skin tone and texture and detailed application methods to cover imperfections effectively. Enhancing the Skin with Tinted Moisturizers Tinted moisturizers offer a light, breathable alternative to foundation, providing hydration and a hint of color. This section will cover how to select the perfect tinted moisturizer for your skin type and the best application tips for a natural, dewy finish. The Role of Powder Setting your makeup and reducing shine without foundation can be achieved with the right powder. We’ll discuss the different types of powders available, from translucent to mineral, and how to apply them for a natural, matte finish. Achieving a Natural Glow with Highlighters Highlighters can bring dimension and a healthy glow to the skin without the need for foundation. This part will guide you through selecting the right highlighter for your skin tone and mastering subtle highlighting techniques. Adding Color Without Heaviness Blush and bronzer can add warmth and color to your face without the heaviness of foundation. Learn about the selection of blush and bronzer that complements your skin tone and how to apply them for a natural-looking flush and contour. Eye Makeup Techniques Eye makeup plays a crucial role in enhancing your no-foundation look. From choosing the right eyeshadow colors to applying mascara and eyeliner for maximum impact, this section provides tips for making your eyes stand out. Defining Brows Well-defined brows frame your face and enhance your features, especially when foregoing foundation. Discover how to find the right shape and color for your brows and techniques for filling and shaping them for a polished look. Lip Makeup Lip color can tie your makeup look together. This part will discuss how to choose lip colors that complement your natural look and application tips…