Radiofrequency (RF) Skin Tightening: A Non-Surgical Solution for Firmer, Smoother Skin

Radiofrequency (RF) Skin Tightening: A Non-Surgical Solution for Firmer, Smoother Skin

As we age, our skin loses elasticity and becomes looser, resulting in wrinkles and sagging. While there are surgical options such as facelifts, not everyone wants to undergo such invasive procedures. Radiofrequency (RF) skin tightening is a non-surgical alternative that can help tighten and firm the skin without the need for incisions or downtime. In this article, we will explore what radiofrequency skin tightening is, how it works, and its benefits and risks.

What is Radiofrequency (RF) Skin Tightening?
Radiofrequency skin tightening is a non-invasive treatment that uses energy waves to heat the skin’s deeper layers, stimulating collagen production and tightening the skin. The treatment involves the use of a handheld device that emits radiofrequency waves, which penetrate the skin and heat the underlying tissue. This causes the tissue to contract, which in turn stimulates collagen production. Collagen is a protein that gives our skin its elasticity and firmness, and as we age, our body produces less of it, leading to sagging and wrinkles.

How does Radiofrequency (RF) Skin Tightening work?
During a radiofrequency skin tightening treatment, a handheld device is used to apply the radiofrequency waves to the skin. The waves penetrate the skin’s deeper layers, heating the tissue and stimulating collagen production. The heat causes the collagen fibers to contract, resulting in tighter, firmer skin. The heat also triggers the body’s natural healing response, which increases blood flow and promotes cell turnover. This can lead to a reduction in the appearance of wrinkles, fine lines, and sagging skin.

Benefits of Radiofrequency (RF) Skin Tightening:

Non-Invasive: Radiofrequency skin tightening is a non-invasive treatment, which means that it does not require incisions or downtime. This makes it an attractive option for people who want to improve the appearance of their skin without undergoing surgery.

Stimulates Collagen Production: Radiofrequency waves stimulate collagen production, which can help improve the skin’s elasticity and firmness. Collagen is a protein that gives our skin its structure, and as we age, our body produces less of it. Radiofrequency skin tightening can help reverse this process, leading to tighter, firmer skin.

Improves Skin Texture: Radiofrequency skin tightening can improve the texture of the skin by promoting cell turnover. This can lead to a reduction in the appearance of wrinkles, fine lines, and other signs of aging.

Quick and Easy: Radiofrequency skin tightening treatments are quick and easy, often taking less than an hour to complete. There is also no downtime required, which means that patients can return to their normal activities immediately after the treatment.

Versatile: Radiofrequency skin tightening can be used on various areas of the body, including the face, neck, arms, abdomen, and thighs. This makes it a versatile treatment that can address multiple areas of concern.
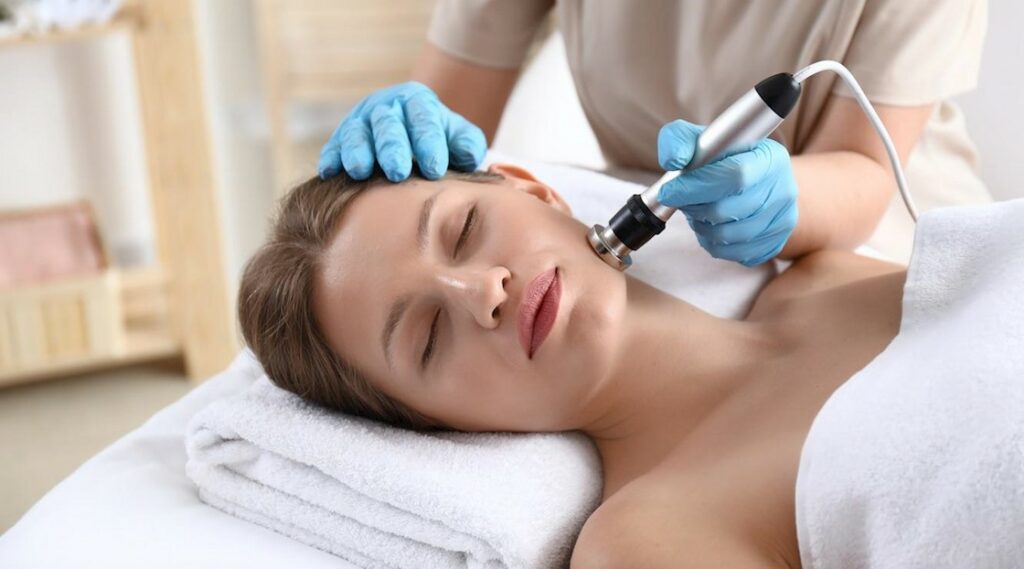
Radiofrequency (RF) Skin Tightening: A Non-Surgical Solution for Firmer, Smoother Skin

Risks of Radiofrequency (RF) Skin Tightening:
While radiofrequency skin tightening is generally considered safe, there are some risks associated with the treatment. These include:

Burns: The heat generated by the radiofrequency waves can cause burns if the skin is not properly protected. This risk can be minimized by ensuring that the skin is properly prepped and the device is used correctly.

Redness and Swelling: Some patients may experience redness and swelling after the treatment, which is a normal response to the heat generated by the radiofrequency waves. This typically resolves within a few hours to a few days.

Discomfort: Some patients may experience discomfort during the treatment, particularly if the device is used on sensitive areas. However, this is usually mild and can be managed with the use of topical numbing cream or adjusting the device settings.

Skin Damage: In rare cases, radiofrequency skin tightening can cause damage to the skin, particularly if the device is used incorrectly or on a patient with certain skin conditions. It is important to consult with a qualified practitioner and disclose any relevant medical history before undergoing the treatment.
Overall, the risks of radiofrequency skin tightening are relatively low compared to surgical options, but it is important to be aware of them and take steps to minimize the risk of complications.

Who is a good candidate for Radiofrequency (RF) Skin Tightening?
Radiofrequency skin tightening is generally safe for most people, but there are some factors that may make someone a better candidate for the treatment. These include:

Mild to moderate skin laxity: Radiofrequency skin tightening works best on patients with mild to moderate skin laxity. Patients with more severe sagging may require more invasive treatments such as surgery.


Healthy skin: Patients with healthy skin are more likely to have a positive response to the treatment. Patients with certain skin conditions, such as eczema or psoriasis, may not be good candidates for the treatment.

Realistic expectations: Radiofrequency skin tightening can produce noticeable improvements in skin laxity and texture, but it is not a miracle cure. Patients should have realistic expectations about the results and understand that multiple treatments may be necessary to achieve their desired outcome.

Radiofrequency (RF) skin tightening is a non-surgical option for patients who want to improve the appearance of sagging or loose skin. The treatment works by stimulating collagen production and promoting cell turnover, leading to tighter, firmer skin. While there are some risks associated with the treatment, they are generally low compared to surgical options, and most patients experience little to no downtime. It is important to consult with a qualified practitioner to determine if radiofrequency skin tightening is a good option for your individual needs and concerns.

Face Mits 1
A Comprehensive Guide to Facial Mists

As beauty enthusiasts strive for radiant and rejuvenated skin, beauty enthusiasts continually search out innovative solutions they can incorporate into their skincare regimens. An exciting discovery has been face mists; an ingenious product which has quickly become an indispensable staple. This comprehensive guide explores everything about face mists: their history and key ingredients as well as benefits and applications, giving an insider’s view into this versatile product that holds power within delicate droplets of mist spray. Face Mist Origins:Facial mists have their origins in ancient skincare practices such as those practiced by Egyptians and Romans who valued such rituals by using water infused with botanical extracts for refreshment and hydration of their skin. Over time, however, their creation was refined further to include advanced formulations and delivery systems to become what are known today as face mists. Ingredients of Facial Mists: At the core of facial mists’ magic lies their carefully chosen ingredients – each selected for its specific properties that benefit skin health. Formulations may differ, yet common components found within face mists include: Benefits of Face Mists:Facial mists have become an invaluable addition to skincare regimes for their ability to provide numerous advantages for the skin. Notable advantages are: How to Use Face Mists:Facial mists have numerous applications. Here is our guide on how best to take advantage of them for rejuvenating purposes: Face Mists for Different Skin Types: Facial mists offer effective solutions for various skin concerns and types, with specific formulations tailored specifically for you and your concerns. When selecting one to meet these criteria: DIY Face Mists: For those who enjoy taking control of their skincare, crafting their own face mist is an engaging DIY activity, offering plenty of opportunities for customization and experimentation with various ingredients. A basic recipe might include: Ingredients include purified water, aloe vera gel, rosewater and lavender essential oil. Instructions: Conclusion: Elevating Skincare With Luxury: Facial mists have quickly become an indispensable addition to skincare regimes, embodying hydration, rejuvenation and self-care in one refreshing mist spray. From ancient roots to contemporary formulations, face mists have transformed from an occasional product used just to wake you up during the day to serving various needs and preferences alike – be it as an early wakeup call during your workday; setting spray for makeup application or aromatherapy ritual – their transformative power cannot be denied; so embrace its luxury today and let this luxurious facial spray do just what its name promises – unleash it now and experience its transformative power today! So embrace its elegance today; indulge its transformative power is undeniable! So indulge the elegance of facial spray and experience all its transformative power for yourself today and let go.

Enhancing Makeup Perfection: Exploring The Power Of Setting Spray And Primer
Enhancing Makeup Perfection: Exploring the Power of Setting Spray and Primer

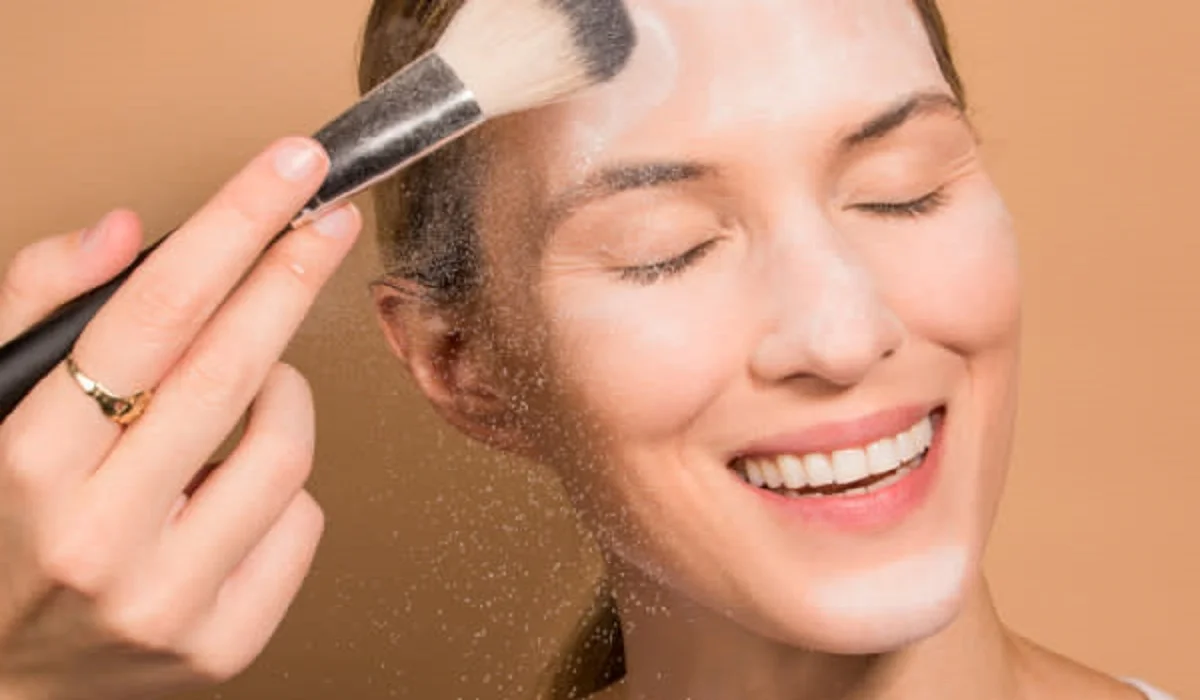
In the world of cosmetics, setting spray and primer have become essential tools for makeup enthusiasts and professionals alike. These products play a crucial role in achieving a flawless and long-lasting makeup look. In this article, we will explore the purpose and benefits of makeup setting spray, as well as provide guidance on the proper use of primer. By understanding the role of these products and learning effective application techniques, you can take your makeup game to the next level. Part 1: Unveiling the Magic of Makeup Setting Spray Defining Makeup Setting Spray: Makeup setting spray, also known as finishing spray or fixing spray, is a product designed to prolong the wear of makeup and help it stay in place.It typically comes in a spray bottle and contains ingredients that provide a light mist over the face, setting the makeup and creating a protective layer. The Benefits of Makeup Setting Spray: Prolongs Makeup Wear: Setting spray helps to extend the longevity of your makeup, preventing it from smudging or fading throughout the day.Enhances Makeup Appearance: Setting spray can give your makeup a more seamless, airbrushed finish, making it look more natural and blended.Increases Makeup Durability: By creating a protective barrier, setting spray helps to shield your makeup from external factors such as humidity, sweat, and oiliness.Hydrates the Skin: Some setting sprays contain hydrating ingredients that can provide an added boost of moisture to your skin, giving it a fresh and dewy appearance. How to Use Makeup Setting Spray: After completing your makeup application, hold the setting spray bottle about 8-10 inches away from your face.Close your eyes and mist the spray in a circular motion, ensuring that your entire face is covered.Allow the spray to dry naturally without touching or blending it in.If you prefer a more intense hold, you can repeat the process by layering the setting spray.Part 2: Unleashing the Potential of Primer Understanding Primer: Primer is a preparatory product applied before makeup to create a smooth and even canvas for foundation and other cosmetics.It typically comes in a gel, cream, or lotion form and is available in various types such as silicone-based, water-based, color-correcting, or illuminating.The Benefits of Using Primer: Smoothes the Skin: Primer helps to fill in fine lines, wrinkles, and pores, creating a smoother surface for makeup application.Improves Makeup Longevity: By providing a base for makeup to adhere to, primer helps to extend the wear time of your cosmetics.Enhances Makeup Pigmentation: Primer can intensify the color and vibrancy of your makeup, making it appear more vibrant and true to shade.Addresses Specific Skin Concerns: Different types of primers cater to specific skin concerns, such as oil control, hydration, or color correction. How to Apply Primer: Start with a clean and moisturized face.Dispense a small amount of primer onto your fingertips or a makeup brush.Apply the primer onto specific areas of concern, such as the T-zone or areas with visible pores or texture.Gently blend the primer into your skin using upward strokes, ensuring an even and seamless application.Allow the primer to settle for a few minutes before proceeding with…

Eyebrow Tinting Essential Guidelines Forimpeccable Brows
Eyebrow Tinting: Essential Guidelines for Impeccable Brows

The art of eyebrow tinting has become a sought-after trend in the realm of beauty, offering an alternative to the daily application of makeup by enhancing the facial aesthetics semi-permanently. This technique, aimed at defining, shaping, and enriching the brow color, presents a fuller and more defined appearance, accentuating the facial structure exquisitely. Nevertheless, adhering to specific guidelines is paramount to achieve optimal results. Our detailed manual will navigate you through the nuances of perfecting your eyebrow tinting, covering preparatory steps, maintenance advice, and solutions for typical challenges encountered. Understanding Eyebrow Tinting Understanding Eyebrow Tinting At its core, eyebrow tinting entails the use of semi-permanent dye to fortify, sculpt, and intensify your eyebrows’ appearance. It stands as an excellent choice for individuals desiring to darken lighter brows, infuse life into fading or sparse brows, or simplify their daily eyebrow grooming routine. Eyebrow Tinting Advantages Eyebrow tinting brings numerous benefits, from yielding a more natural brow enhancement to cutting down on makeup time. It’s resistant to water and smudging, with the potential to remain vibrant for weeks, offering a practical, maintenance-free beauty solution. Preparing for Eyebrow Tinting Selecting an Appropriate Color The success of eyebrow tinting significantly depends on choosing a tint that harmonizes with your hair color and skin tone, aiming to amplify your natural beauty without overwhelming it. Allergy Tests A Precautionary Step A patch test prior to the tinting process is critical to rule out allergic reactions to the dye, safeguarding against adverse effects and ensuring a safe tinting experience. Professional Service vs. DIY Approach The decision between professional tinting services and DIY kits hinges on balancing expertise and personalized care against the convenience and cost-effectiveness of at-home options. We delve into the merits and drawbacks of both to assist in making a well-informed choice. The Do’s of Eyebrow Tinting Choosing the Suitable Tint Formula Identifying the optimal tint formula is essential for attaining the desired effect. This segment will explore the variety of eyebrow tints available and guide you in selecting the most fitting option. Adherence to Instructions Precise compliance with the provided instructions or professional guidance is fundamental, whether tinting at home or opting for a salon service, to avert errors and secure the best possible results. Aftercare Recommendations Maintaining the longevity of your tinted brows involves specific aftercare practices. We will unveil strategies to prolong your tint’s durability, advising on products and activities to avoid. The Don’ts of Eyebrow Tinting Evading Common Pitfalls This part addresses typical errors to steer clear of, such as incorrect color selection or overlooking patch tests, to smooth your eyebrow tinting journey. The Drawbacks of Excessive Tinting Over-tinting can result in overly dark, stark brows. We advocate for moderation to maintain a balanced, authentic appearance. The Dangers of Unauthorized Dyes Employing dyes not sanctioned for eyebrow tinting poses significant health risks. Highlighting the criticality of using only eyebrow-specific tinting products. Eyebrow Tinting: A Step-by-Step Tutorial Preparation: Cleansing and Mapping From cleansing and shaping your brows for tint application to ensuring even coverage and effective aftercare, we furnish a comprehensive guide to executing…

Why Sleeping With Braided Hair Is The Better Alternative To A Bun Or Ponytail
Braided Beauty: Why Sleeping with Braided Hair is a Better Alternative to a Bun or Ponytail

When it comes to nighttime hair care, finding the right hairstyle can make a significant difference in the health and appearance of your hair. Many people opt for buns or ponytails as a convenient way to keep their hair off their face while they sleep. However, sleeping with braided hair offers several benefits that make it a superior alternative. In this article, we will explore why sleeping with braided hair is a better option for overnight hair care, from minimizing breakage and tangles to promoting healthy hair growth and maintaining effortless waves. Minimizes Breakage:One of the primary advantages of sleeping with braided hair is the reduced risk of breakage. Buns and ponytails can create tension and stress on the hair shaft, leading to breakage and split ends. Braids, on the other hand, distribute the tension more evenly along the length of the hair, reducing the risk of damage. Prevents Tangling:Braiding your hair before bed can help prevent tangles and knots that can occur when hair is left loose or tied up in a bun or ponytail. The structured nature of a braid keeps the hair strands in place and minimizes friction, reducing the chances of waking up with tangled and unruly hair. Promotes Healthy Hair Growth:Sleeping with braided hair can contribute to healthier hair growth. By keeping your hair in a braid overnight, you minimize the risk of hair breakage, which can impede hair growth progress. Additionally, braids help protect the hair from external elements, such as friction against pillows or blankets, allowing the hair to grow longer and stronger. Maintains Effortless Waves:If you desire soft, natural waves, sleeping with braided hair is an excellent option. Braids create gentle, natural-looking waves when undone in the morning. This low-maintenance hairstyle saves time and effort in styling, as you wake up with beautiful, textured waves that can last throughout the day. Reduces Frizz and Flyaways:Braiding your hair at night can help control frizz and minimize flyaways. The contained structure of the braid keeps the hair strands in place, reducing the chances of friction-induced frizz. This is particularly beneficial for those with naturally curly or textured hair that tends to be prone to frizz and flyaways. Protects Hair from Environmental Factors:Sleeping with braided hair provides a protective barrier against external factors that can damage your hair. By keeping your hair contained in a braid, you minimize exposure to friction against pillows, blankets, or rough surfaces. This protection helps maintain the integrity of the hair cuticle and reduces the risk of damage caused by environmental stressors. Versatility for Next-Day Hairstyling:Another advantage of sleeping with braided hair is the versatility it offers for next-day hairstyling. Once you undo your braids in the morning, you can experiment with different hairstyles, such as a loose updo, a half-up half-down style, or leave your hair down with natural-looking waves. The textured foundation provided by the braids can add volume and hold to your hairstyles, making it easier to achieve a variety of looks. Comfortable and Relaxing:Braiding your hair before bed can provide a comfortable and relaxing experience. The gentle tension…

The Allure Of Sea Salthairspray
The Allure of Sea Salt Hairspray

Within the expansive realm of haircare solutions, Sea Salt Hairspray stands out as a cherished selection, rivaling the essential dry shampoo in popularity. Its acclaim is well-deserved; this miraculous concoction bestows upon your hair an enviable vitality and volume, solidifying its position as a staple in daily hairstyling routines. However, the magic of Sea Salt Hairspray extends beyond mere volume enhancement. This guide aims to enlighten you on its comprehensive benefits, optimal usage techniques, and the simplicity of crafting your personalized version at home. Unraveling the Mystique of Sea Salt Hairspray Esteemed among hairstyling aficionados and homegrown experts, Sea Salt Hairspray is celebrated for its ability to texture hair, closely replicating the effect saltwater has on our tresses. Contrary to what its name might suggest, it forgoes a potent fragrance, presenting itself as an inclusive solution for anyone eager to amplify their hair’s natural charm. Regardless of whether your hair is curly and seeks definition, or straight and yearns for added volume, this spray stands as your quintessential ally in sculpting the ideal hairstyle. Maximizing the Efficacy of Sea Salt Hairspray To achieve unparalleled results, initiate the process on clean, slightly moist hair. Prior to application, ensure your hair is devoid of tangles and remnants of other styling products, then proceed to evenly distribute the spray from the mid-lengths to the tips. Employing a subtle scrunch or twist will further define waves or curls. Embrace the essence of a naturally windswept, beachy appearance by allowing your hair to air dry, steering clear of towel drying to avert frizz and potential damage. Sea Salt Spray’s Adaptability Across Hair Varieties Sea Salt Hairspray exhibits no prejudice, offering a spectrum of advantages to all hair types: Crafting Your Own Sea Salt Hairspray: Formulas Catered to Specific Hair Needs For Curly Hair: A concoction blending sea salt and heated water until dissolved, enriched with melted coconut oil and a hint of leave-in conditioner for a moisturizing effect. For Dry Hair: A mix of sea salt and warm water, enhanced with Epsom salt and macadamia oil to hydrate while texturizing. For Thin Hair: A solution of sea salt in warm water, amalgamated with avocado oil and a selection of essential oils for fragrance and additional moisture. Poised for a Textural Revolution? Armed with this knowledge and the tools for creation, you stand ready to leverage the transformative power of Sea Salt Hairspray. Whether you’re experimenting with crafting your blend or honing your application technique, the allure of voluminous, textured hair is now within your grasp. Which homemade recipe will you venture to explore first?: Sea Salt Hairspray transcends the ordinary, positioning itself as more than just a styling aid; it is a portal to achieving the coveted, effortless beachy waves. With its universal appeal across hair types and the feasibility of DIY variations, it becomes an indispensable component in the hair care repertoire of those in pursuit of a natural, textured look. Yield to the allure of sea salt and witness your hair flourish with unprecedented volume and dynamism. Can I use sea salt spray on colored…

Microshading: The Art Of Effortlessly Defined Brows
Microshading: The Art of Effortlessly Defined Brows

Eyebrows play a crucial role in framing the face and enhancing our overall appearance. Over the years, various techniques have emerged to help individuals achieve their desired brow look, including microshading. Microshading is a semi-permanent cosmetic procedure that aims to create natural-looking, defined eyebrows. In this article, we will explore the art of microshading, understanding what it is, how it works, and the benefits it offers for those seeking flawlessly shaped and filled brows. Understanding Microshading:Microshading, also known as powder brows or ombre brows, is a cosmetic tattooing technique that involves depositing pigment into the superficial layers of the skin to create a soft, powdered effect on the eyebrows. Unlike microblading, which uses fine incisions to mimic individual eyebrow hairs, microshading utilizes a stippling technique to achieve a more filled-in appearance. This technique is particularly beneficial for individuals with sparse or thin eyebrows, as it creates a denser and more defined brow look. The Process of Microshading:Microshading typically begins with a consultation to discuss the desired eyebrow shape, color, and overall outcome. Before the procedure, a numbing cream is applied to the brow area to minimize any discomfort. The technician then uses a handheld device or a manual tool with a cluster of small needles to gently tap and deposit pigment into the skin. The technician carefully layers the pigment, creating a gradient effect that mimics the natural growth and shading of eyebrow hair. The procedure may take around 1-2 hours, depending on the individual’s desired result. Achieving Natural-Looking Results:One of the significant advantages of microshading is its ability to create natural-looking results. By utilizing a stippling technique, the technician can mimic the appearance of soft, powdered eyebrows, closely resembling the natural texture and shading of brow hair. This technique allows for more flexibility in creating varying levels of density and achieving a result that complements the client’s facial features and desired aesthetic. Customization for Every Client:Microshading offers a high level of customization to meet each client’s unique preferences. The technician takes into account factors such as the client’s face shape, existing brow shape, and color to create a personalized treatment plan. The color of the pigment can be tailored to match the client’s natural hair color or desired shade, ensuring that the brows look natural and well-blended with the client’s overall appearance. The shape and density of the brows can also be adjusted to enhance the client’s facial features and achieve their desired brow style. Long-Lasting Results:Microshading is a semi-permanent procedure, meaning that the results can last for an extended period before requiring touch-ups. On average, microshaded eyebrows can retain their color and shape for 1-3 years, depending on factors such as individual skin type, lifestyle, and aftercare. Touch-up sessions can be scheduled as needed to maintain the desired brow appearance and ensure longevity. Minimally Invasive and Safe:Microshading is a minimally invasive procedure that carries a relatively low risk when performed by a skilled and experienced technician in a sterile environment. Proper sanitation practices and the use of high-quality pigments minimize the risk of complications. However, as with any cosmetic procedure,…

Understanding The Different Types Of Mascara Brushes A Comprehensive Guide 222
Understanding the Different Types of Mascara Brushes: A Comprehensive Guide

Mascara is an essential makeup item that can enhance the look of your eyelashes by making them appear longer, thicker, and more voluminous. But, have you ever wondered why there are so many types of mascara brushes available in the market? Each brush has its unique shape, size, and bristle type, which can affect the application, formula, and overall results of your mascara. In this comprehensive guide, we’ll dive into the different types of mascara brushes, their features, and how they can impact your lash game. Whether you’re a makeup newbie or a seasoned pro, this article will help you understand the differences between mascara brushes and choose the one that suits your needs. Classic Straight BrushThe classic straight brush is the most common type of mascara brush that you’ll find in almost every mascara tube. It features a cylindrical shape with evenly spaced bristles that are straight and uniform in length. This brush is ideal for separating and defining your lashes, as it can reach even the tiniest hairs in your lash line. However, the classic straight brush may not be the best option if you’re looking for volume or curl. Its shape is relatively basic, and it may not be able to lift your lashes or create a dramatic effect. Also, if you have short lashes, a straight brush may not be the best option as it won’t be able to reach the roots. Curved BrushThe curved brush has a crescent moon shape that follows the natural curve of your eye. It’s designed to lift and curl your lashes from the roots, creating a more dramatic effect. The curved brush is ideal for those with straight or downward-facing lashes, as it can help create an upward lift. The bristles on a curved brush may be slightly longer on the outer edge and shorter on the inner edge. This design allows for better control and precision when applying mascara to the inner and outer lashes. However, a curved brush may not be the best option for those with short lashes, as it may not be able to reach all the hairs. Tapered BrushThe tapered brush has a pointed shape that resembles a cone. It’s wider at the base and tapers to a point at the tip, which allows for better control and precision. A tapered brush is ideal for creating a more natural look, as it can reach the inner and outer corners of your eyes and coat each lash individually. The pointed tip of a tapered brush can also be used to apply mascara to your lower lashes without smudging. This brush is ideal for those with short or sparse lashes, as it can add length and volume without clumping or flaking. Ball Tip BrushThe ball tip brush has a rounded shape at the tip, which resembles a small ball. This brush is ideal for adding volume and curl to your lashes, as it can coat each hair evenly and separate them for a more dramatic effect. The ball tip brush is also perfect for applying mascara to your lower…

Hair Extensions And Washing 1
5 Essential Tips for Washing Hair Extensions: Extend Their Life and Beauty

Hair extensions offer a fantastic way to add length, volume, and versatility to your hairstyle. However, maintaining them properly, especially when it comes to washing, is crucial to preserving their beauty and prolonging their life. This comprehensive guide delves into the nuances of hair extensions and washing, ensuring your extensions stay as gorgeous as the day you got them. Understanding Hair Extensions Hair extensions come in various forms, including clip-ins, tape-ins, weaves, and fusion extensions, each requiring specific care techniques. The benefits of using hair extensions are manifold; they can instantly transform your look, add volume to thinning hair, and allow you to experiment with colors and styles without committing to permanent changes. When choosing hair extensions, consider factors like your lifestyle, hair type, and maintenance commitment to find the perfect match. Pre-Wash Care for Hair Extensions Before diving into washing your extensions, pre-wash care is vital. Detangling your extensions with a soft brush or a wide-tooth comb can prevent matting and reduce breakage during the washing process. Applying a light, nourishing oil or a pre-wash treatment can also protect the hair fibers and ensure they remain smooth and manageable. Washing Hair Extensions: Step-by-Step Guide Washing your hair extensions doesn’t have to be daunting. Begin by gently brushing them to remove tangles, then wet the hair gradually to prevent tangling under water. Use a sulfate-free shampoo to cleanse the extensions, focusing on the roots where buildup is most common. Rinse thoroughly and apply a moisturizing conditioner, avoiding the bonds or clips. Finally, rinse with cold water to seal the hair cuticles, enhancing shine and smoothness. Maintaining Hair Extensions Post-Wash After washing, gently pat your extensions dry with a soft towel and apply a leave-in conditioner or hair oil to keep them hydrated. Avoid using high heat when drying or styling your extensions, and consider air-drying them when possible to minimize damage. Regularly scheduled maintenance appointments with a professional can also ensure your extensions remain in top condition. Common Mistakes to Avoid with Hair Extensions Many extension wearers unknowingly shorten the lifespan of their hair additions by washing them too frequently, using harsh chemicals, or neglecting daily care. To avoid these pitfalls, wash your extensions only when necessary, opt for gentle hair care products, and implement a nightly routine to prevent tangling and matting. Professional Tips for Hair Extension Care Salon professionals often recommend specific washing techniques and products tailored to your type of extensions. They can also provide invaluable advice on maintaining your extensions, from the best brushes to the ideal frequency of washes. DIY Hair Extension Washing Solutions For those who prefer natural hair care, there are plenty of homemade solutions and natural products that can safely clean and condition your hair extensions. Ingredients like apple cider vinegar, coconut oil, and aloe vera gel can offer gentle, effective alternatives to store-bought products. Understanding the Impact of Water Quality on Hair Extensions The quality of the water you use to wash your extensions can significantly affect their condition. Hard water, rich in minerals, can leave deposits on your extensions, leading to dullness…