Understanding the Different Types of Mascara Brushes: A Comprehensive Guide

Understanding the Different Types of Mascara Brushes: A Comprehensive Guide

Mascara is an essential makeup item that can enhance the look of your eyelashes by making them appear longer, thicker, and more voluminous. But, have you ever wondered why there are so many types of mascara brushes available in the market? Each brush has its unique shape, size, and bristle type, which can affect the application, formula, and overall results of your mascara.

In this comprehensive guide, we’ll dive into the different types of mascara brushes, their features, and how they can impact your lash game. Whether you’re a makeup newbie or a seasoned pro, this article will help you understand the differences between mascara brushes and choose the one that suits your needs.

Classic Straight Brush
The classic straight brush is the most common type of mascara brush that you’ll find in almost every mascara tube. It features a cylindrical shape with evenly spaced bristles that are straight and uniform in length. This brush is ideal for separating and defining your lashes, as it can reach even the tiniest hairs in your lash line.

However, the classic straight brush may not be the best option if you’re looking for volume or curl. Its shape is relatively basic, and it may not be able to lift your lashes or create a dramatic effect. Also, if you have short lashes, a straight brush may not be the best option as it won’t be able to reach the roots.

Curved Brush
The curved brush has a crescent moon shape that follows the natural curve of your eye. It’s designed to lift and curl your lashes from the roots, creating a more dramatic effect. The curved brush is ideal for those with straight or downward-facing lashes, as it can help create an upward lift.

The bristles on a curved brush may be slightly longer on the outer edge and shorter on the inner edge. This design allows for better control and precision when applying mascara to the inner and outer lashes. However, a curved brush may not be the best option for those with short lashes, as it may not be able to reach all the hairs.

Tapered Brush
The tapered brush has a pointed shape that resembles a cone. It’s wider at the base and tapers to a point at the tip, which allows for better control and precision. A tapered brush is ideal for creating a more natural look, as it can reach the inner and outer corners of your eyes and coat each lash individually.

The pointed tip of a tapered brush can also be used to apply mascara to your lower lashes without smudging. This brush is ideal for those with short or sparse lashes, as it can add length and volume without clumping or flaking.

Ball Tip Brush
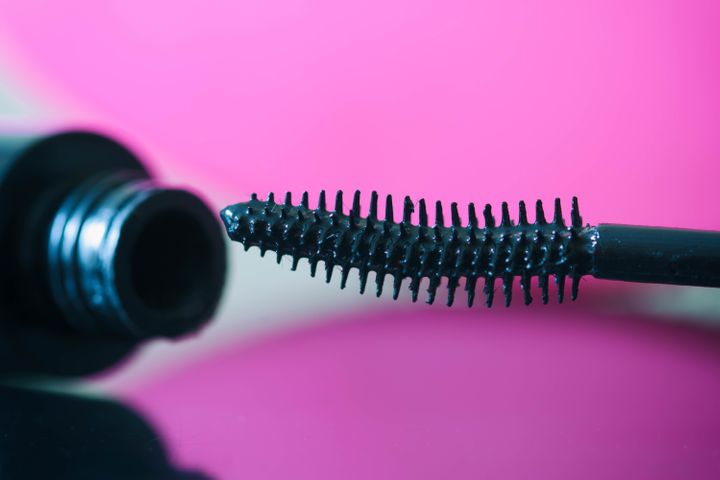
The ball tip brush has a rounded shape at the tip, which resembles a small ball. This brush is ideal for adding volume and curl to your lashes, as it can coat each hair evenly and separate them for a more dramatic effect. The ball tip brush is also perfect for applying mascara to your lower lashes, as it can reach even the tiniest hairs.

However, the ball tip brush may not be the best option for those with short or sparse lashes, as it can make them look clumpy and unnatural. Also, it may take longer to apply mascara with a ball tip brush as the rounded tip can’t reach all the hairs at once.
Understanding the Different Types of Mascara Brushes- A Comprehensive Guide-222

Hourglass Brush
The hourglass brush has a unique shape that resembles an hourglass figure. It’s wider in the middle and tapers at both ends, which allows for better control and precision. The hourglass brush is ideal for creating volume and length, as it can lift your lashes and coat them evenly.

The bristles on an hourglass brush may be different lengths and densities, which allows for better coverage and separation. The wider center of the brush is perfect for adding volume and length to your lashes, while the tapered ends can reach the inner and outer corners of your eyes.

The hourglass brush is ideal for those with medium to long lashes, as it can create a more dramatic effect without clumping or flaking. However, it may not be the best option for those with short lashes, as the wider center may not be able to reach all the hairs.

Comb Brush
The comb brush features tiny teeth or bristles that resemble a comb. This brush is ideal for separating and defining your lashes, as it can remove clumps and tangles. The comb brush is also perfect for those with thick or long lashes, as it can prevent them from sticking together.

The comb brush can also be used to apply mascara to your eyebrows, as it can help shape and define them. However, the comb brush may not be the best option for those with short or sparse lashes, as it may not be able to add volume or length.

Micro Brush
The micro brush features tiny bristles that are densely packed together. This brush is ideal for adding length and volume to your lashes, as it can coat each hair individually. The micro brush is also perfect for those with short or sparse lashes, as it can reach even the tiniest hairs.


The densely packed bristles on a micro brush can also prevent clumping and flaking, as they can distribute the mascara evenly. However, the micro brush may take longer to apply mascara as it can’t cover all the hairs at once.

Double-Sided Brush
The double-sided brush features two different brush heads on either end of the wand. This brush is ideal for those who want more versatility and control when applying mascara. One end may have a classic straight brush, while the other end may have a curved or tapered brush.

The double-sided brush can also be used to apply mascara to your lower lashes, as one end may have a smaller brush head. However, the double-sided brush may be more expensive than a single-headed brush, and it may be harder to store.

In conclusion, choosing the right mascara brush can make a significant difference in how your lashes look. The shape, size, and bristle type can impact the application, formula, and overall results of your mascara. Understanding the different types of mascara brushes and their features can help you choose the one that suits your needs and preferences.

Whether you want to add length, volume, curl, or definition to your lashes, there’s a mascara brush out there for you. From the classic straight brush to the double-sided brush, each brush has its unique advantages and disadvantages. Experimenting with different types of mascara brushes can help you find the perfect one for your lash game.

Top 25 Hair Trends In February A Comprehensive Guide
Top 25 Hair Trends in February: A Comprehensive Guide

February brings not just a change in seasons but also fresh inspiration for hair enthusiasts and stylists around the globe. This month, we’re seeing a blend of nostalgic revivals, innovative techniques, and a strong emphasis on individuality and self-expression. Whether you’re looking to update your look or just curious about the latest trends, this guide will dive deep into the top 25 hair trends capturing attention this February. The Rise of Natural TexturesGone are the days when straight hair dominated the beauty scene. This February, embracing your natural texture is not just a trend; it’s a movement. Curls and coils are celebrated with products and techniques designed to enhance rather than tame. From lightweight leave-in conditioners to defining creams, the market is flooded with options catering to every type of curl. Bold Color Choices are making a statement this month, with vibrant reds and cool blues leading the charge. The art of color application is evolving, with techniques like balayage and ombre allowing for more personalized expressions of style. Retro RevivalThe past is a treasure trove of inspiration, and this February, the shag cut and bangs are making a powerful comeback. These styles offer a nostalgic yet fresh look, adaptable to various hair types and lengths. Sustainable Hair Care PracticesSustainability is more than a buzzword in the beauty industry; it’s a practice being embraced with open arms. This trend extends to hair care, with an increasing number of brands offering eco-friendly products and consumers turning to DIY natural hair masks for a more sustainable routine. Men’s Hair TrendsMen’s hair trends this February are all about versatility, from the sleek simplicity of the buzz cut to the laid-back vibe of long hair and man buns. There’s a noticeable shift towards more carefree, low-maintenance styles. Braids and TwistsBraids and twists remain a staple in hair styling, known for their versatility and protective qualities. This month, box braids and faux locs are particularly popular, with new braiding techniques offering a fresh twist on traditional styles. The Bob Cut: A Timeless TrendThe bob cut proves its timelessness, adapting to modern tastes with variations like the textured bob and the asymmetrical bob. This February, it’s all about finding the bob variation that best suits your personal style and face shape. Innovative Hair AccessoriesAccessories can transform any hairstyle, and this February, it’s all about making a statement. Clips, headbands, and even scarves are being used in creative ways to add a touch of personality to every look. The Wet LookThe sleek, wet hair effect is a trend that bridges the gap between sophistication and edge. Achieving this look requires the right products and techniques, with many turning to gel and pomades for that perfect glossy finish. Celebrity Hair InspirationsCelebrities often set the pace for hair trends, and this February is no exception. From the red carpet to Instagram, stars are showcasing a range of looks that are inspiring people to experiment with their own hair. DIY Hair Color at HomeWith the ongoing interest in personalization, many are opting to dye their hair at home. This trend is supported…

Tips To Make The Wedding Of Your Dream Makeup
Tips to Make the Wedding of Your Dream Makeup

At every wedding celebration of love and union is an emotional day filled with meticulous planning of every last detail and the spotlight shining bright on the bride-to-be. Of the numerous decisions to be made for this grand occasion, wedding makeup should take top priority; hiring professional artists may help with this aspect or undertaking it on your own may prove useful; either way achieving wedding makeup of your dreams takes careful planning, preparation and personal flair for maximum effect – here is our complete guide of tips and tricks designed to ensure beauty and confidence on this milestone day! 1. Starting With SkincareAchie a flawless makeup look begins with skincare. In the months prior to your wedding day, establish an effective regimen designed to address acne, dry skin and uneven tone with regular cleansing, exfoliation and moisturization for radiant and flawless complexions. Tip: Plan in advance to take care of any specific skincare requirements by scheduling professional facials or dermatological treatments with qualified providers. 2. Trial Runs Are NecessaryIt is crucial that both brides and grooms make time for trial runs ahead of the big day to try different looks and find one that complements both your features and vision for how your day should unfold. By conducting multiple runs before, this ensures your final selection satisfies both of these objectives. Tip: Wear something similar to your wedding dress color during your trial makeup appointment in order to judge how the makeup will match up against it. 3. Consider Your Wedding Style Makeup should complement the overall aesthetic and atmosphere of your event, from romantic garden ceremonies and city receptions, to beachside affairs and celebrations. Adapt it according to what works for each of these occasions! Tip: Select makeup colors that complement the hues in your wedding color palette for a polished and cohesive appearance. 4. Enhance Your Natural Features: Wedding makeup should emphasize, rather than hide your natural beauty. Focus on emphasizing the highlights in terms of eyes, lips or cheekbones in particular and subtly contour to add dimension while not looking over-dramatic. Tip: Choose natural-looking false eyelashes to increase definition, while still remaining comfortable for every day use. 5. Long-Lasting Formulas Are KeyWedding days can be filled with joyous memories. Makeup that stays put all day or night such as foundation, mascara and eyeliner will ensure a fresh appearance for photos taken all night long! Tip: Use translucent powder to set your makeup and reduce shine and keep everything in its proper place. 6. Coordinate With Your HairstyleYour hair and makeup should match effortlessly and harmonize. Discussing plans with a makeup artist to make sure the overall effect is harmonious is key for creating an aesthetically pleasing overall look. Tip: For an updo look, emphasize your eyes and lips for maximum impact. With loose flowing locks, go for more neutral yet romantic makeup to complete the look. 7. Photography-Friendly MakeupWedding photographs capture special memories for eternity, so your makeup should be camera-ready. Avoid products with SPF as these may cause flashback when photographed; choose matte finish foundation to minimize…

Stop The Tears: Tips For Preventing Watery Eyes While Applying Makeup
Stop the Tears: Tips for Preventing Watery Eyes While Applying Makeup

Applying makeup can be a fun and creative process, but it can also be frustrating when your eyes start to water and ruin your hard work. Watery eyes can be caused by a variety of factors, including allergies, dryness, and even emotional reactions. Whatever the cause may be, there are several tips and tricks you can use to prevent your eyes from watering while applying makeup. Start with Clean, Moisturized SkinBefore you even begin applying makeup, make sure your skin is clean and moisturized. Dry skin can cause irritation and lead to watery eyes, so it’s important to hydrate your skin with a moisturizer that is suitable for your skin type. Avoid moisturizers that contain fragrances or other irritants that could trigger your eyes to water. Use Allergy-Tested ProductsIf you have sensitive skin or allergies, it’s important to use makeup and skincare products that are labeled as allergy-tested. These products have been formulated to be less irritating and are less likely to cause an allergic reaction. Additionally, avoid using any products that you know you are allergic to or have caused irritation in the past. Avoid Applying Makeup Too Close to Your EyesOne of the main causes of watery eyes while applying makeup is getting product too close to your eyes. Avoid applying eyeliner, mascara, and eyeshadow too close to your lash line or inner corner of your eyes. Instead, keep the products on the outer part of your eyelid and use a smaller brush to apply product closer to your lash line if necessary. Choose Non-Irritating ProductsWhen choosing makeup products, opt for those that are labeled as hypoallergenic or non-irritating. These products are formulated with ingredients that are less likely to cause irritation and are generally safer for sensitive eyes. Look for products that are free of fragrances, sulfates, and parabens. Use Eye DropsIf your eyes tend to get dry or itchy while applying makeup, use eye drops to lubricate and refresh your eyes. Choose drops that are specifically formulated for dry eyes and avoid those that contain redness reducers or other additives that could further irritate your eyes. Avoid Waterproof ProductsWhile waterproof makeup can be great for special occasions or long days, it can also be more difficult to remove and can cause irritation to your eyes. Avoid using waterproof products on a daily basis and opt for regular formulas that are easier to remove and less likely to cause irritation. Take BreaksIf you feel your eyes starting to water while applying makeup, take a break and let your eyes rest for a few minutes. You can close your eyes or look away from the mirror for a bit to give your eyes a break from the products. This can also help to reduce eye strain and prevent further irritation. Use a Light HandWhen applying makeup, use a light hand and avoid pressing or pulling on your eyelids. This can irritate your eyes and cause them to water. Instead, gently apply product and use a soft touch to prevent irritation. Clean Your Brushes and ToolsDirty brushes and tools can harbor…

Which Makeup Tool Is Right For You The Ultimate Guide To Makeuptools
Which Makeup Tool is Right for You? The Ultimate Guide to Makeup Tools

The artistry of makeup significantly benefits from the choice of tools, akin to how an artist’s masterpiece is influenced by their selected instruments. For novices embarking on their makeup voyage or professionals seeking to polish their skills, comprehending the vast array of makeup tools is paramount. Our objective is to clarify the makeup tool landscape, enabling you to choose wisely for your distinct beauty practices. Key Makeup Instruments A Comparison of Brushes and Sponges The decision between utilizing brushes or sponges for foundation is a prevalent quandary. Brushes are lauded for their precise application, excelling in the blending of both liquid and powder forms, whereas sponges are celebrated for delivering a flawless, airbrushed look, particularly with liquid foundations. Foundation Application Instruments A Spectrum from Brushes to Fingers A deep dive into foundation application tools unveils a plethora of choices, each with unique advantages. From the natural warmth of fingers facilitating blending, the precision afforded by foundation brushes, to the dewy sheen offered by sponges, every method brings something distinct to the table. Specialty Makeup Implements Eyeshadow and Eyeliner Tools The transformation of eyeshadow application lies in the appropriate selection of brushes. Ranging from soft, fluffy brushes for blending to precise pencil brushes, each is designed for crafting diverse eyelid looks. Eyeliner tools also vary, with pencils creating a smudged effect, and liquid liners providing a crisp, defined edge, each tool offering a path to achieve your envisioned eye makeup style. Innovative Makeup Implements From Silicone Sponges to Beauty Blenders Silicone sponges have emerged as a sanitary, easy-to-maintain choice for foundation application, minimizing product wastage while ensuring a smooth coverage. Beauty blenders, on the other hand, have transformed the application of foundation and concealer, ensuring an even, blended coverage. Their unique design facilitates precise application in challenging spots. Makeup Tools for Enhancing the Eyes Mascara Wands and Eyelash Curlers The design of a mascara wand is pivotal in achieving the desired lash effect, whether it’s for volume or length. Recognizing the various wand shapes is essential in picking the mascara that aligns with your goals. Eyelash curlers are indispensable for creating an uplifted, open-eyed appearance, with the trick lying in finding a curler that comfortably conforms to your eye shape. Facial Makeup Tools Contouring and Highlighting Brushes Contouring brushes, with their angled bristles, are engineered to replicate the face’s natural shadows, accentuating features like cheekbones and the jawline. Highlighting brushes aim to deposit shimmer on the face’s high points, such as cheekbones and brow bones, enhancing your glow. Lip Makeup Tools Brushes and Liners for Precision A lip brush is vital for exact lipstick or gloss application, offering edge control and the option to intensify color. Lip liners outline the lips and prevent color bleed, facilitating a precise lip edge or a blended look. Maintaining and Storing Makeup Tools Maintaining the cleanliness of your makeup tools is crucial for avoiding skin irritation and breakouts. This guide will discuss optimal practices for tool maintenance. Additionally, proper storage not only organizes your tools but also prolongs their lifespan, with innovative solutions ensuring cleanliness and accessibility….

Benefits Of Yoga For Skin And Hair 111
Benefits Of Yoga For Skin And Hair

Yoga has emerged as an invaluable practice to promote holistic well-being. Beyond physical fitness and mental clarity, its effects also extend into skin and hair health and vitality – benefits we discover here as we examine its profound connection between yoga and external beauty – we will investigate. Learn about what ancient practice contributes towards glowing skin and luscious locks with this exploration! Mind-Body ConnectionYoga’s core mission lies in uniting mind, body and spirit into an harmonious experience for practitioners. Yoga promotes this state of being both internally as well as externally with its holistic nature helping our mental and physical states work in unison, leading to positive impacts that show in skin conditions and hair care needs as a direct reflection. Affect on Mental and Emotional Well-BeingMind-body practices like yoga and mindfulness meditation have long been revered for their stress-reducer properties, including relaxation techniques like yoga and mindfulness meditation. By relaxing the mind, these practices encourage relaxation within the body resulting in decreased levels of stress hormones. The Essence of Yoga Yoga (from Sanskrit: “yuj,” meaning union) is an ancient and profound ancient Indian spiritual discipline which goes far beyond physical exercise. Drawing its source in Indian philosophy and spirituality, this holistic discipline seeks to align body, mind, and spirit – not simply physical postures! At its core, yoga offers individuals an opportunity for personal exploration that promotes greater self-awareness while cultivating inner peace as they achieve harmony amongst themselves and with all aspects of existence. Yoga encompasses a multifaceted approach to wellness that draws upon various interwoven components for maximum impact and profound effects. Some key aspects are as follows. The Pillars of Yoga Physical Postures(Asanas)Yoga often begins with asanas – physical postures designed to build strength, flexibility, and equilibrium – designed not only to increase physical fitness but also cultivate mindfulness and presence. From gentle stretches to more challenging poses, asanas provide physical benefits while cultivating mindfulness. Breath Control(Pranayama)To control breathing effectively. Pranayama, or breath control, is at the core of yoga practice and should be seen as an artform that facilitates deep breathing techniques to bridge between your physical body and mental mind. Deep and alternate nostril breathing practices serve as ways of relieving stress while increasing overall well-being. MeditationMeditating is at the core of yoga practice, inviting practitioners to turn inward and foster an elevated state of awareness through focused attention, mindfulness or guided visualization techniques. Meditation serves as an invaluable means of quietening one’s mind while creating mental clarity and strengthening their connections to themselves and other members. Philosophy and Ethics of YogaYoga’s philosophical foundation extends far beyond physical postures to encompass principles for ethical living and gaining greater insight into existence. Nonviolence (ahimsa), truthfulness (satya), and self-discipline (tapas) all play key roles on its path of enlightenment. Dhyana (Contemplation)Contemplation, also referred to as Dhyana in yoga terminology, allows practitioners to explore profound aspects of life and themselves with greater depth than they would during regular meditation practices. Contemplation has proven valuable in contributing to personal development, self-exploration and understanding one’s purpose more thoroughly than its…

Mastering Nail Stamps Your Ultimate Guide To Exquisite Nail Art
Mastering Nail Stamps: Your Ultimate Guide to Exquisite Nail Art

Nail stamping is not just a beauty trend; it’s an art form that allows for personalized, intricate nail designs that were once only achievable by seasoned nail artists. Whether you’re a seasoned nail artist or a beginner, this guide will walk you through the essentials of nail stamping, ensuring your next manicure stands out. Understanding Nail Stamps Nail stamps are innovative tools designed to transfer designs from etched plates to your nails, creating detailed and precise nail art. The key components include the stamping plate, stamper, scraper, and stamping polish. Stamping plates are made from metal or plastic and feature engraved designs. Stampers, typically made from silicone, pick up the polish from these designs. The scraper removes excess polish from the plate, ensuring a clean transfer. Types of Nail Stamps Preparation for Nail Stamping Preparing your nails is crucial for a flawless finish. Start with clean, shaped nails, and apply a base coat to protect your natural nails and enhance polish adherence. Choose a smooth, flat surface for your work area, and lay out all your tools within easy reach. Selecting Your Design When selecting a design, consider the size of your nails and the complexity of the design. Beginners may find simpler designs easier to work with, while more experienced users can explore intricate patterns and layered looks. Choosing the Right Nail Polish for Stamping The success of nail stamping heavily relies on the polish used. Stamping polishes are specifically formulated to be thick and highly pigmented, ensuring a crisp, opaque design. While not all regular polishes work for stamping, metallic and cream polishes often yield good results due to their pigmentation and consistency. Tips for Color Selection Step-by-Step Guide to Nail Stamping Advanced Techniques As you become more comfortable with the basics of nail stamping, explore advanced techniques to elevate your nail art. Troubleshooting Common Issues Aftercare and Maintenance Extend the longevity of your stamped nails by applying a clear top coat to seal in the design. For maintenance, clean your stamping plate and tools with nail polish remover after each use. Avoid using acetone on silicone stampers, as it can cause them to deteriorate. How long do nail stamped designs last? With proper application and aftercare, including a quality top coat, nail stamped designs can last as long as a traditional manicure, typically around one to two weeks. Can nail stamps be used on artificial nails? Absolutely! Nail stamps can be used on both natural and artificial nails. Just ensure the artificial nails are properly prepped and the surface is smooth for stamping. How can I remove nail stamping polish? Nail stamping polish can be removed with regular nail polish remover. However, for long-lasting designs sealed with a gel top coat, you might need a gel polish remover or acetone. Nail stamping opens up a world of creativity and personal expression right at your fingertips. With practice, you can achieve salon-quality designs from the comfort of your home. Embrace the learning curve, and don’t be afraid to experiment with different techniques and styles. Happy stamping!

Concealer Or Foundation Understanding
Concealer or Foundation: Understanding the Difference and Choosing the Right Product for Your Skin

Navigating the vast world of makeup can be overwhelming, especially when it comes to foundational products like concealer and foundation. These essentials lay the groundwork for a flawless makeup look, but their distinct purposes and application techniques can cause confusion. This guide demystifies concealer and foundation, highlighting their differences, benefits, and how to choose the right products for your skin type and concerns. Understanding Foundation The Purpose of Foundation Foundation serves as a base for your makeup, designed to even out skin tone and provide a smooth canvas. It can range from sheer to full coverage, depending on the desired finish and the product’s formulation. Types of Foundation: Liquid, Powder, Cream Foundations come in various forms, including liquid, powder, and cream. Liquid foundations are versatile and suitable for most skin types, powder foundations work best for oily skin, and cream foundations offer dense coverage for dry or mature skin. Matching Foundation to Your Skin Tone Selecting the right foundation shade is crucial for a natural look. Test shades along your jawline in natural light and consider your skin’s undertone to find the perfect match. Decoding Concealer The Role of Concealer in Makeup Concealer is used to cover imperfections such as blemishes, dark circles, and redness. It’s usually thicker than foundation and provides targeted coverage. Different Types of Concealers and Their Uses Concealers vary in consistency and coverage. Liquid concealers are great for under-eye areas, while stick or cream concealers are better for covering blemishes or scars. Choosing the Right Shade and Formula For under-eye concealer, choose a shade slightly lighter than your skin tone to brighten the area. For blemishes, match the concealer to your foundation shade. Consider your skin type when selecting a formula to ensure compatibility. Foundation vs. Concealer: Key Differences Coverage Level Foundation provides a uniform base, while concealer offers high coverage for specific areas. Texture and Finish Foundations can have various finishes, from matte to dewy. Concealers typically have a thicker texture to provide concentrated coverage. Application Techniques for Flawless Skin Applying Foundation for Even Coverage Start with a small amount and blend outward from the center of your face using a brush, sponge, or fingers. Build coverage as needed. Concealer Application Tips for a Seamless Look Apply concealer after foundation to avoid using more product than necessary. Dab gently over imperfections and blend edges for a smooth transition. Combining Foundation and Concealer Step-by-Step Guide for Layering Apply foundation first to create an even base. Then, use concealer on targeted areas for additional coverage. Set with powder if desired. Tips for a Natural-Looking Finish Blend well and choose formulas and shades that complement your skin type and color. Avoid over-application to maintain a natural appearance. Choosing Products for Specific Skin Concerns Best Foundations and Concealers for Dry Skin Opt for hydrating formulas that contain moisturizing ingredients to prevent flakiness and cakey appearance. Recommendations for Oily and Acne-Prone Skin Look for non-comedogenic and oil-free products that provide a matte finish and control shine throughout the day. Sensitive Skin Solutions Choose hypoallergenic and fragrance-free products to minimize the risk of…

Achieving A Flawless At Home Manicure: Tips And Tricks For Beautiful Nails
Achieving a Flawless At-Home Manicure: Tips and Tricks for Beautiful Nails

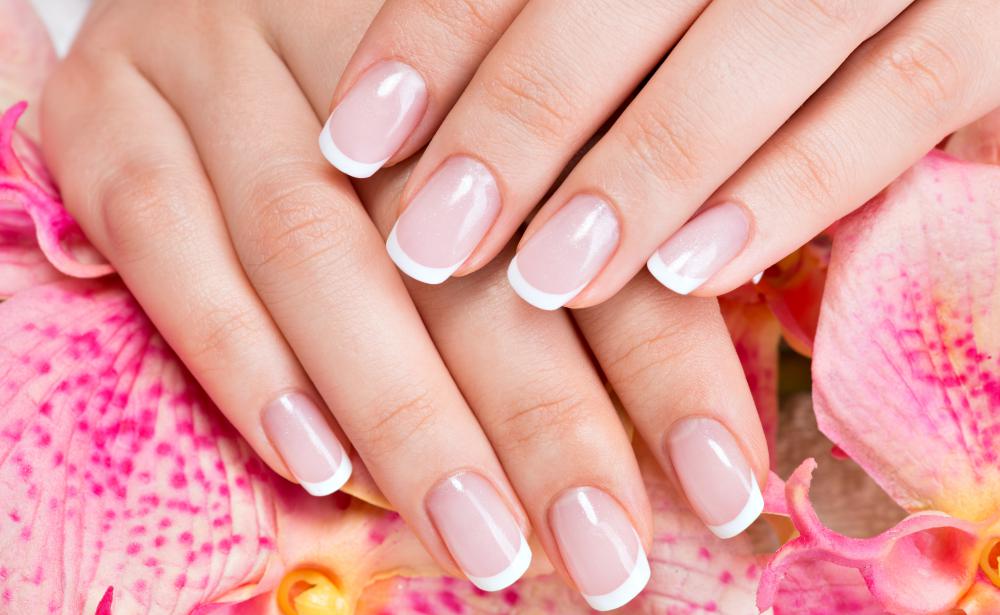
A well-manicured set of nails can enhance your overall appearance and boost your confidence. While visiting a salon for a professional manicure is a popular option, there are times when an at-home manicure is more convenient and cost-effective. With the right techniques and tools, you can achieve salon-quality results from the comfort of your own home. In this article, we will explore a variety of tips and tricks to help you achieve a flawless at-home manicure, ensuring beautiful and well-groomed nails. Prepping Your Nails:The key to a flawless manicure lies in the preparation of your nails. Start by removing any existing nail polish using an acetone-based remover. Trim your nails to the desired length and file them to shape. Gently push back your cuticles using a cuticle pusher or an orangewood stick, being careful not to damage or cut them. Soaking and Exfoliating:For an added pampering step, soak your nails in warm, soapy water for a few minutes. This softens the cuticles and makes them easier to push back or remove. After soaking, use a gentle exfoliating scrub or a soft toothbrush to gently scrub your hands and nails, removing any dead skin cells and leaving your skin feeling smooth and rejuvenated. Choosing the Right Nail Polish:Selecting the right nail polish is crucial for a flawless manicure. Look for polishes that have a smooth and even consistency, as this will make the application process easier. Opt for high-quality brands that offer a wide range of colors and finishes. If you’re new to doing your own manicures, consider starting with a classic shade that is forgiving and easier to apply evenly. Proper Application Techniques:When applying nail polish, use thin and even coats to achieve a smooth and streak-free finish. Begin with a base coat, which helps protect your nails and prevents staining. Apply two coats of your chosen nail polish color, allowing each coat to dry completely before applying the next. Finish off with a top coat to seal the color and add shine. Ensure that you cover the entire nail surface, including the tips, for maximum longevity and a polished look. Cleaning Up Mistakes:No matter how careful you are, it’s common to make small mistakes during the nail polish application process. To clean up any smudges or excess polish around the edges, dip a small brush or an angled eyeliner brush into nail polish remover and carefully clean up the mistakes. Alternatively, you can use a cotton swab dipped in nail polish remover to remove any stray polish. Drying Time:Patience is key when it comes to allowing your nails to dry. Wait for each coat of polish to dry completely before proceeding with the next layer or any activities that may risk smudging your nails. To speed up the drying process, you can use a quick-dry top coat or apply a nail polish drying spray. Hydrating and Nourishing:After your manicure is complete, it’s important to hydrate and nourish your nails and cuticles. Massage a cuticle oil or a moisturizing hand cream into your nails and cuticles to keep them healthy and prevent…