Papaya: The Superfood for Glowing Skin

Papaya: The Superfood for Glowing Skin

Papaya, also known as pawpaw, is a tropical fruit that is packed with essential nutrients and antioxidants that are beneficial for overall health. But did you know that papaya is also a superfood for skin? The enzymes and vitamins present in papaya make it an excellent ingredient for skincare products. In this article, we will explore the benefits of papaya for skin and how you can incorporate it into your skincare routine.

Papaya helps to exfoliate dead skin cells
The enzymes papain and chymopapain present in papaya are natural exfoliants that help to remove dead skin cells and unclog pores. Regular use of papaya-based skincare products can improve skin texture and make it smoother and softer.

Papaya promotes collagen production
Collagen is a protein that gives skin its structure and elasticity. As we age, our body’s collagen production decreases, leading to wrinkles and sagging skin. Papaya is rich in vitamin C, which is essential for collagen production. Regular use of papaya-based skincare products can help to boost collagen production, resulting in firmer and more youthful-looking skin.

Papaya reduces inflammation
Papaya contains an enzyme called papain, which has anti-inflammatory properties. This makes papaya an excellent ingredient for those with sensitive or acne-prone skin. Regular use of papaya-based skincare products can help to soothe inflammation and redness, leaving skin looking calm and even-toned.

Papaya brightens skin
Papaya is rich in vitamin A and alpha hydroxy acids (AHAs), which help to brighten and even out skin tone. AHAs are natural exfoliants that help to remove dead skin cells and reveal brighter, more radiant skin. Regular use of papaya-based skincare products can help to fade dark spots and hyperpigmentation, leaving skin looking brighter and more youthful.

Papaya hydrates skin
Papaya is a great source of water and nutrients, making it an excellent ingredient for hydrating the skin. Regular use of papaya-based skincare products can help to plump up the skin and reduce the appearance of fine lines and wrinkles. Additionally, the antioxidants present in papaya help to protect the skin from environmental damage, such as pollution and UV rays.

Papaya can help to treat acne
The antibacterial and anti-inflammatory properties of papaya make it an excellent ingredient for treating acne. Papaya-based skincare products can help to unclog pores, reduce inflammation, and kill acne-causing bacteria. Additionally, papaya contains vitamin C, which helps to fade acne scars and dark spots.

Papaya can soothe sunburned skin
Papaya contains enzymes that can help to soothe and heal sunburned skin. Applying papaya-based skincare products to sunburned skin can help to reduce inflammation, redness, and pain. Additionally, the hydrating properties of papaya can help to restore moisture to sun-damaged skin.

Papaya: The Superfood for Glowing Skin

Incorporating Papaya into your Skincare Routine

Now that you know the benefits of papaya for skin, it’s time to incorporate it into your skincare routine. Here are some ways you can use papaya for glowing, healthy-looking skin:

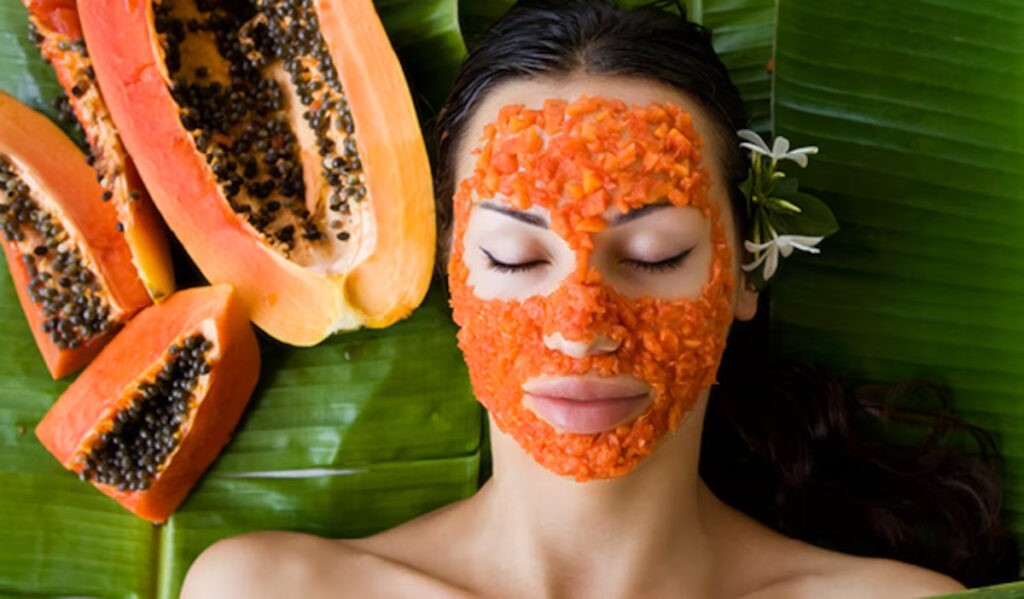
Papaya face mask
You can make a DIY papaya face mask by mashing up a ripe papaya and applying it to your face. Leave the mask on for 15-20 minutes, then rinse off with warm water. This mask will help to exfoliate dead skin cells, brighten skin, and reduce inflammation.

Papaya enzyme exfoliator
Papaya enzyme exfoliators are a popular skincare product that contains papain and chymopapain enzymes. These enzymes work to gently exfoliate dead skin cells and unclog pores, revealing smoother and brighter skin. To use a papaya enzyme exfoliator, apply a small amount to damp skin and massage in circular motions. Rinse off with warm water.

Papaya toner
Papaya toner is a gentle and refreshing way to incorporate papaya into your skincare routine. Papaya toners typically contain papaya extract, witch hazel, and other soothing ingredients. To use a papaya toner, apply it to a cotton pad and gently swipe it over your face after cleansing.

Papaya moisturizer
Papaya moisturizers are an excellent way to hydrate and nourish the skin while also benefiting from the skin-loving properties of papaya. Look for a papaya moisturizer that contains hyaluronic acid and other hydrating ingredients for maximum benefits.

Papaya sunscreen
Papaya sunscreen is a great way to protect your skin from the harmful effects of UV rays while also benefiting from the nourishing properties of papaya. Look for a broad-spectrum sunscreen that contains papaya extract and other antioxidants for maximum protection.

Papaya is a superfood for skin that is packed with essential nutrients and antioxidants. The enzymes and vitamins present in papaya make it an excellent ingredient for skincare products. Regular use of papaya-based skincare products can help to exfoliate dead skin cells, boost collagen production, reduce inflammation, brighten skin, hydrate skin, treat acne, and soothe sunburned skin. So, next time you’re looking to upgrade your skincare routine, consider incorporating papaya-based products for healthy, glowing skin.


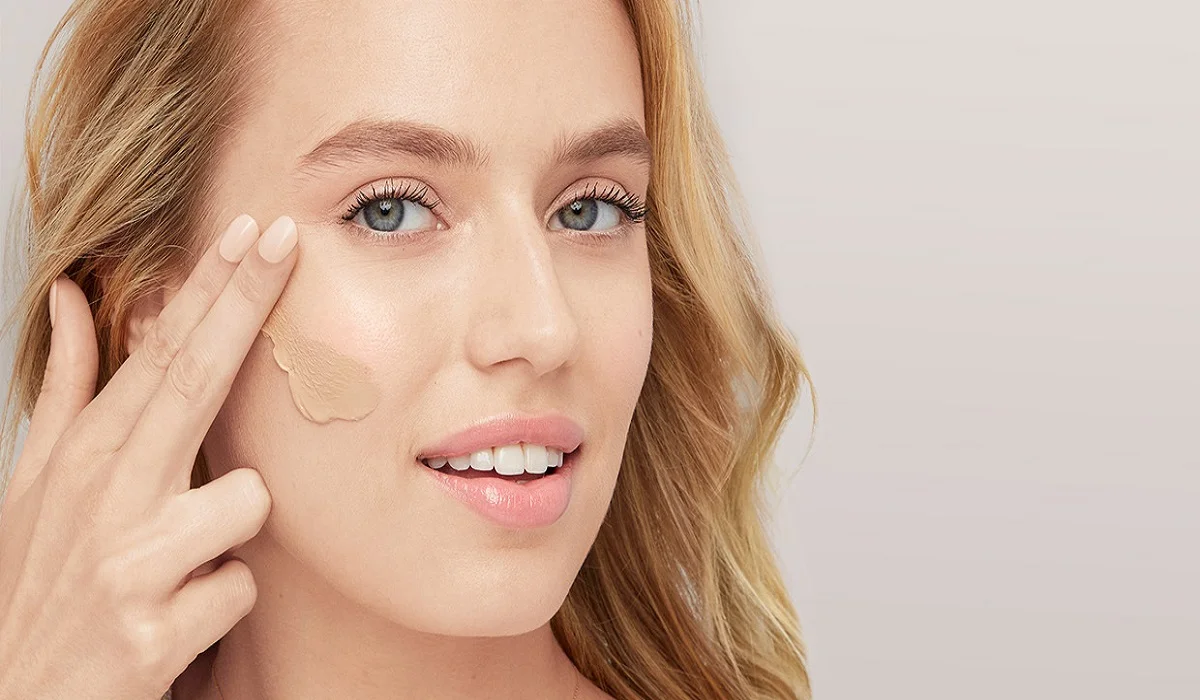
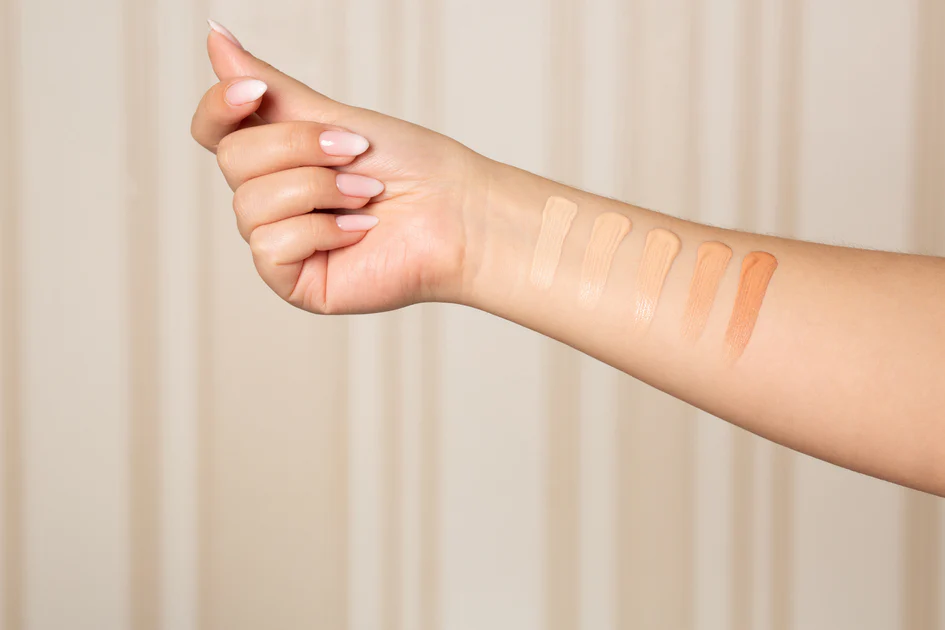
The Comprehensive Spectrum Of Concealers Navigating Through Choices For Impeccable Skin
The Comprehensive Spectrum of Concealers: Navigating Through Choices for Impeccable Skin

At the heart of any transformative makeup regimen lies the concealer, a pivotal element that meticulously camouflages imperfections such as under-eye shadows, blemishes, and skin tone disparities. The perfect concealer not only magnifies your inherent allure but also elevates your self-assurance by presenting a pristine base. This exposition ventures into the myriad forms of concealers, equipping you with the knowledge to discern the most compatible variant for your skin’s unique needs and preferences. Liquid Concealers Boasting unparalleled adaptability, liquid concealers cater to a broad spectrum of skin types, including those that are dry, mixed, and prone to acne. They provide a customizable coverage range from sheer to opaque, ideally complementing foundation. For a flawless integration, adopt a gentle patting technique using a beauty sponge or brush, ensuring an evenly distributed, authentic appearance. Cream Concealers For those seeking superior concealment, cream concealers emerge as the prime choice, particularly favoring dry and aging skin due to their hydrating formulation. They are adept at masking dark under-eye areas and harmonizing skin tone variations. Optimal application involves pre-warming the concealer on your skin and setting it with a fine powder to avert creasing. Stick Concealers Designed for precision and portability, stick concealers are the go-to for oily and combination skin, offering a dense formula conducive to targeted application. They excel in concealing specific spots and hyperpigmentation. For a smooth blend, use either a brush or fingertips. Color-Correcting Concealers Exploiting color theory, color-correcting concealers effectively neutralize distinct discolorations; green attenuates redness, while peach and orange are antidotes for blue or grey under-eye circles, and yellow revitalizes dull complexions. Apply judiciously prior to your standard concealer to prevent a heavy makeup look. Hydrating Concealers Infused with moisturizing agents like hyaluronic acid and vitamins, hydrating concealers are the salvation for dry skin or areas with fine lines, offering a radiant, moist finish that doesn’t crease. Seek out serum-esque formulas for optimal results. Matte Concealers Matte concealers are the sanctuary for oily complexions, delivering enduring coverage devoid of gloss. To circumvent a parched appearance, prime your skin with a moisturizing base and blend swiftly. Mineral Concealers For those with sensitive skin, mineral concealers present a minimalistic approach, devoid of oils, fragrances, and artificial colorants, minimizing irritation risks. Employ a fluffy brush for a light, authentic coverage. Serum Concealers Merging skincare with cosmetic elegance, serum concealers offer a featherlight, nurturing blend that progressively enhances skin quality. They are ideal for achieving a subtle, “barely-there” makeup look while pampering your skin with beneficial ingredients. Balm Concealers For relentless imperfections, balm concealers promise full coverage. They necessitate warming between the fingers for a fluid application and are best blended with a dense brush. Pot Concealers Pot concealers deliver concentrated pigment in a compact format, perfect for precise applications and under-eye concealment. Utilize a small brush for targeted application, blending the periphery for a natural effect. Brightening Concealers Formulated to illuminate and elevate the under-eye region and facial shadows, brightening concealers contain reflective particles that impart a luminous sheen. Layer over your regular concealer for an enhanced glow. Waterproof Concealers Indispensable for humid conditions…

What Is Microblading Transform Your Eyebrows From Sparse To Gorgeous (1)
What is microblading? Transform Your Eyebrows from Sparse to Gorgeous

Microblading is a transformative beauty procedure that meticulously enhances the appearance of your eyebrows, offering a semi-permanent solution for those seeking fuller, more defined brows. This technique involves the manual insertion of pigment into the upper layers of skin to create the appearance of natural eyebrow hairs. However, achieving the best possible results requires more than just booking an appointment; it involves thorough preparation, understanding the process, and proper aftercare. Choosing the Right Microblading Technician The first step in your Microblading journey is to choose a skilled and certified aesthetician. Researching your options is crucial. Look for a salon that showcases an extensive portfolio of before and after photos, demonstrating their ability to produce the kind of results that captivate you. It’s essential that your chosen technician not only possesses the necessary certification but also has a wealth of experience, reflected in their hours of education and practical application. Remember, the quality of your results depends heavily on the skill and precision of the technician. State Regulations and Technician Licensing Be aware that each state has its own set of rules and regulations governing microblading. Before proceeding, verify the licensing requirements in your area and ensure your technician meets these standards. This step is crucial for both your safety and the legality of the procedure. Preparing for Your Microblading Session Proper preparation can significantly enhance the outcome of your Microblading procedure. Here are some essential tips to ensure you’re fully prepared: Understanding the Microblading Procedure Microblading is typically completed in three key steps: Preparation Initially, your aesthetician will apply a topical numbing cream to your eyebrow area to minimize discomfort. This preparation is vital for both your comfort and the steadiness of the microblading process. The Procedure Experience Pain tolerance varies from person to person. Some may only feel a slight scratching sensation, while others might experience a bit more discomfort. However, most find the procedure to be bearable, with the numbing cream significantly reducing any pain. Post-Procedure Care Immediately after your session, it’s normal for your eyebrows to appear darker and more pronounced than expected. This intensity will fade as they heal, usually within a week, resulting in a more natural look. It’s advised to avoid water exposure, including long showers and baths, during the initial healing phase to prevent the pigment from washing out prematurely. Post-Microblading Care To ensure the best healing and color retention, follow these aftercare tips: Potential Risks and How to Mitigate Them While microblading is generally safe, being informed about potential risks is crucial: Allergic Reactions Though rare, it’s possible to have an allergic reaction to the pigment used. Discuss any known allergies with your technician beforehand. Infection Infections can occur if the procedure is done with non-sterile equipment. Ensure your salon follows strict hygiene practices. Semi-Permanence Microblading results are semi-permanent. If you’re unhappy with the results, corrections or removal can be more challenging. Give yourself time to consider if microblading is right for you and choose a technician who can offer a result you’re confident you’ll be happy with. Microblading can significantly enhance your facial…

Nurturing Sensitive Skin Essential Considerations For Allergy Prone Skin Care
Nurturing Sensitive Skin: Essential Considerations for Allergy-Prone Skin Care

For individuals with allergies, maintaining a skincare routine that caters to their specific needs is crucial. Allergic reactions can range from mild irritation to more severe symptoms, making it essential to be mindful of the products and ingredients used on the skin. In this article, we will explore the key considerations for people with allergies when it comes to skincare. From understanding common allergens to identifying hypoallergenic products and adopting a gentle skincare routine, we will provide valuable insights to help you nurture your sensitive skin and minimize the risk of adverse reactions. Know Your Allergens:The first step in managing allergies is to identify the substances that trigger your reactions. Common allergens in skincare products include fragrances, preservatives, dyes, certain plant extracts, and ingredients derived from nuts or gluten. Keep a record of the products that have caused reactions in the past, and consult with a dermatologist or allergist to determine specific allergens to avoid. Read Ingredient Labels:When selecting skincare products, it’s crucial to read and understand the ingredient labels. Look for products that clearly list their ingredients, and familiarize yourself with potential allergens. Avoid products that contain known allergens or substances that you have reacted to in the past. Opt for products labeled as hypoallergenic or suitable for sensitive skin, as they are formulated to minimize the risk of triggering allergic reactions. Patch Test New Products:Before incorporating a new skincare product into your routine, perform a patch test. Apply a small amount of the product to a small area of your skin, such as the inner forearm, and observe for any signs of irritation or allergic reactions over the next 24 to 48 hours. If redness, itching, or swelling occurs, refrain from using the product on your face or body. Choose Hypoallergenic Products:Hypoallergenic products are formulated to minimize the risk of causing allergic reactions. Look for products that are specifically labeled as hypoallergenic, as they are typically free from common allergens and undergo rigorous testing to ensure their safety. These products are designed to be gentle on sensitive skin and reduce the likelihood of triggering an allergic response. Avoid Fragrances and Irritants:Fragrances are a common allergen and can be found in many skincare products. Opt for fragrance-free or unscented products, as they are less likely to cause allergic reactions. Additionally, avoid skincare products that contain known irritants such as alcohol, sulfates, parabens, and harsh chemical ingredients. These substances can strip the skin of its natural moisture barrier and increase the risk of sensitivity and irritation. Moisturize Regularly:Keeping the skin well-hydrated is essential for individuals with allergies. Moisturizers help maintain the skin’s moisture barrier, preventing dryness and minimizing the risk of irritation. Choose gentle, fragrance-free moisturizers that are formulated for sensitive skin. Look for products that contain hydrating ingredients such as hyaluronic acid, ceramides, and natural oils to nourish and protect your skin. Adopt a Gentle Skincare Routine:Simplicity is key when it comes to skincare for allergy-prone skin. Avoid using multiple products with complex ingredient lists, as this increases the likelihood of encountering allergens. Opt for a gentle cleanser that is free…

Dermaplaning: The Popular Skincare Treatment Explained

Dermaplaning is a non-invasive, exfoliating skincare treatment that has gained popularity in recent years. It involves the use of a sharp, surgical-grade scalpel to remove the outermost layer of dead skin cells and vellus hair (also known as peach fuzz) from the face. The result is a smoother, brighter, and more radiant complexion. In this article, we’ll explore the benefits, risks, and considerations for dermaplaning. Benefits of Dermaplaning One of the primary benefits of dermaplaning is its ability to exfoliate the skin. The scalpel removes the outer layer of dead skin cells, which can help to reduce the appearance of fine lines, wrinkles, and acne scars. Additionally, by removing the dead skin cells, it allows for better absorption of skincare products, making them more effective. This can be especially beneficial for individuals who have hyperpigmentation or uneven skin tone, as the exfoliation can help to even out the complexion. Another benefit of dermaplaning is the removal of vellus hair. While many people are hesitant to remove peach fuzz, it can actually be beneficial for the skin. Vellus hair can trap dirt and oil, which can contribute to breakouts. By removing the hair, it can help to prevent breakouts and make the skin appear smoother and more refined. Dermaplaning is also a quick and painless procedure. It typically takes around 30 minutes to complete and is done in-office by a licensed esthetician or dermatologist. Unlike other exfoliating treatments, such as chemical peels, dermaplaning does not require any downtime. Patients can immediately return to their normal activities without any redness or irritation. Risks and Considerations While dermaplaning is generally considered safe, there are some risks and considerations to keep in mind. The use of a sharp scalpel on the face can be dangerous if not done correctly, so it’s important to only have the procedure done by a licensed professional. It’s also important to avoid any sun exposure for a few days after the procedure, as the skin will be more sensitive. Another consideration is that dermaplaning is not suitable for everyone. Individuals with active acne, eczema, or rosacea should avoid the procedure, as it can exacerbate these conditions. Additionally, those with a history of cold sores should take precautions, as the procedure can trigger an outbreak. It’s also important to note that dermaplaning is a temporary solution. While the results can last for a few weeks, the skin will eventually return to its natural state. For best results, it’s recommended to have the procedure done every 4-6 weeks. How to Prepare for Dermaplaning Before having a dermaplaning treatment, it’s important to properly prepare your skin. This includes avoiding any exfoliating treatments for at least a week prior to the procedure. It’s also important to avoid any sun exposure or tanning beds for at least a week before the procedure. On the day of the procedure, it’s important to arrive with a clean face, free of any makeup or skincare products. The esthetician or dermatologist will then apply a numbing cream to the face, which will help to minimize any discomfort during the procedure….

Diy Lip Balm Simple Ingredientsfor Beautiful Lips
DIY Lip Balm: Simple Ingredients for Beautiful Lips

The allure of lips transcends mere aesthetics, playing a pivotal role in our expressions and the vibrancy of our smiles, thereby influencing our self-esteem and how we are perceived. Our lips, devoid of oil-producing glands, are exposed to the merciless whims of the environment, be it the biting chill, arid conditions, or the relentless sun. This exposure necessitates a dedicated regimen for lip care, elevating it from a mere aspect of our beauty routines to a critical necessity. Advantages of Crafting Your Own Lip Balm Efficiency and Uncomplicated Nature: The allure of concocting your own lip balm lies in its straightforwardness and cost-effectiveness. A modest investment in simple ingredients yields a bountiful supply, sufficient for months. This approach is not only economical but also opens a playground for experimentation with flavors and ingredients, all without denting your wallet. Mastery Over Composition: The commercial lip balm aisle is a maze of complex formulations, some containing elements that might not sit well with everyone. Venturing into homemade lip balm creation bestows upon you the power to curate your ingredients, ensuring a concoction that is as natural as it is benign, especially for those with a penchant for sensitivities. Tailoring to Taste: The realm of DIY lip balm is rife with customization opportunities. From the fragrance and taste to the hue, you can tweak your creation to reflect your personal style and preferences. This bespoke approach not only personalizes your lip care but also transforms homemade lip balms into intimate, thoughtful presents for loved ones. Sustainability: Opting to craft your own lip balm is a nod to environmental consciousness. By favoring natural constituents and repurposable packaging, you contribute to the reduction of plastic waste and the dissemination of harmful chemicals into our planet. Curating Natural Components for Your Lip Balm Foundation Elements for Consistency and Hydration: The cornerstone of any exemplary lip balm lies in its base components – beeswax, shea butter, cocoa butter, and coconut oil. These ingredients are pivotal for achieving the desired consistency that solidifies at room temperature yet melts upon contact with the lips, providing moisture and shielding them from the elements. Oils for Enrichment and Moisturization: Incorporating oils like argan, jojoba, and sweet almond enriches the lip balm with moisturizing virtues. These oils, brimming with vitamins and fatty acids, are instrumental in the rejuvenation and healing of the lips’ delicate dermis. Essential Oils for Fragrance and Added Benefits: Essential oils infuse the lip balm with enticing aromas while endowing it with additional benefits. For instance, peppermint oil imparts a refreshing coolness, whereas lavender oil is celebrated for its soothing properties. It’s crucial to employ these potent oils judiciously to prevent irritation. Additional Components for Restoration and Defense: Ingredients such as honey, vitamin E oil, and aloe vera gel introduce extra layers of healing and protection. Honey acts as a natural humectant, attracting moisture to the skin. Vitamin E oil is a powerhouse of antioxidants that aid in cellular restoration, and aloe vera gel offers solace to irritated lips, alongside a cooling sensation. Recipes for Crafting Custom Lip Balm Concocting Your…

World's First All Girl Sextuplets
World’s First All-Girl Sextuplets

Meet the Walton sextuplets – Luci, Hannah, Sarah, Ruth, Kate and Jennie, the world’s first all-female surviving sextuplets. Born on 18th November 1983 in Liverpool, England, they changed the life of their parents Janet and Graham Walton forever. The couple had been trying to conceive for several years without any success. They went through 13 rounds of fertility treatment and were ready to adopt children after all the failed attempts. Imagine their excitement when they learnt that they were finally carrying a baby. But… GO TO THE NEXT PAGE TO CONTINUE…

How To Cover Up Tattoos Withmakeup
How to Cover up Tattoos With Makeup

Whether for a job interview, special event, or personal reasons, there are times when you might wish to conceal a tattoo temporarily. With the right makeup and technique, covering up tattoos is entirely possible, allowing for flexibility in how and when your tattoos are visible. This comprehensive guide provides everything you need to know about hiding tattoos with makeup, ensuring a flawless finish. Covering up a tattoo with makeup is a practical solution for temporarily concealing ink without the commitment of permanent removal. The key is understanding which products to use and how to apply them for a cover-up that looks natural and stays put. Understanding Tattoo Coverage Makeup Types of Makeup for Tattoo Coverage Heavy-duty concealers and color correctors are essential for tattoo coverage. Look for products specifically designed for covering tattoos or those used for stage makeup, as they offer the high pigmentation and coverage needed. Selecting the Right Shade and Formula Choose a concealer that matches your skin tone closely. If your tattoo contains vivid colors, you may need a palette of color correctors to neutralize these hues before applying concealer. Preparing Your Skin for Makeup Application Cleansing and Priming Start with clean, dry skin. Use a primer to create a smooth canvas, which helps the makeup adhere better and last longer. Importance of Hydration Moisturize the area around the tattoo, but wait until the moisturizer is fully absorbed before applying makeup. Hydrated skin ensures an even application. Step-by-Step Guide to Covering a Tattoo With Makeup Tips for a Natural and Long-Lasting Finish Removing Makeup and Caring for Your Skin Gentle Removal Techniques Use a gentle makeup remover or micellar water to avoid scrubbing, which can irritate the skin. Post-removal Skin Care After removing the makeup, cleanse the skin thoroughly and apply a nourishing moisturizer to keep the skin healthy. How to Cover up Tattoos With Makeup Recap of Key Points: Concealing tattoos with makeup is a viable option for those seeking temporary coverage. By selecting the right products and following proper application techniques, you can achieve a cover-up that looks natural and withstands the rigors of your day. Covering tattoos with makeup is an art that combines the right products with skillful application to achieve a natural-looking concealment. Whether for a special occasion or everyday need, the ability to temporarily hide your tattoos gives you control over your appearance. With practice and patience, anyone can master this technique, embracing the flexibility and confidence that comes with flawless tattoo coverage.

Mastering The Eyelash Curler
Mastering the Eyelash Curler

Transforming your lashes from straight to stunningly curled can be effortlessly achieved with the proper use of an eyelash curler, turning it into an indispensable tool in your beauty arsenal. However, mishandling it could result in discomfort, lash damage, or uneven curls. This detailed manual will guide you through mastering the eyelash curler, incorporating upkeep advice and solutions to frequent problems, enabling you to safely and effectively obtain those desirable, fluttering lashes. Selecting the Ideal Eyelash Curler Eyelash Curler Varieties The market offers eyelash curlers in metal, plastic, and heated models. Metal curlers stand out for their sturdiness and precision in curling, while plastic variants are perfect for on-the-go use due to their lightness. For those with hard-to-curl lashes, heated eyelash curlers can achieve a more defined and enduring curl. Choosing a Curler for Your Eye Shape Eyelash curlers are not one-size-fits-all; their efficiency varies with different eye shapes. It’s crucial to choose a curler that complements the curvature of your eye to ensure a uniform curl and avoid discomfort. Some manufacturers provide curlers tailored to specific eye shapes such as almond, round, or deep-set. Lash Preparation Ensure Lashes are Clean and Dry Commence with lashes that are devoid of any makeup or residue, as leftover products can lead to lashes sticking to the curler, risking damage. Post face-washing, ensure your lashes are thoroughly dried before proceeding with the curling process. Warming the Curler (Optional) To enhance the curl, consider gently warming your metal eyelash curler with a hairdryer for a brief period. Always test the curler’s temperature on your hand to confirm it’s warm, not hot, preventing any harm to your eye’s delicate surrounding skin or the lashes themselves. Curling Your Lashes Proper Curler Placement With the curler open, position your lashes between the pads, getting as close as possible to the lash base without touching the eyelid. Confirm that all lashes are captured by the curler’s opening. Executing the Curl Press the curler’s handles together gently for approximately 5 to 10 seconds. For a more natural curl, you may lightly pump the curler. Refrain from pulling or yanking the curler to avoid lash damage. Sectional Curling For a more pronounced curl, adopt a sectional approach: begin at the base, then mid-lash, and finally near the tips. This technique fosters a seamless, natural curl rather than an abrupt crimp. Post-Curling Mascara Application Follow up the curling with your preferred mascara to set the curl. Opt for a waterproof or curl-enhancing mascara for optimal results. Applying mascara post-curling prevents the lashes from sticking to the curler and potential damage. Curler Maintenance and Cleanliness Eyelash Curler Cleansing To ensure optimal performance, regularly clean your curler to eliminate any mascara residue or debris. Utilize a gentle makeup remover or isopropyl alcohol for cleaning, allowing the curler to dry thoroughly before its next use. Pad Replacement Change the curler’s rubber pads every few months or at signs of wear to maintain curl efficiency and lash safety. Neglecting to replace worn pads can compromise lash health and curl quality. Addressing Common Concerns Avoiding Eyelid Pinching Pinching…