Understanding Facial Warts: Causes, Symptoms, Treatment, and Prevention

Understanding Facial Warts: Causes, Symptoms, Treatment, and Prevention

Facial warts are a common skin condition that affects many people around the world. They are small, raised, rough, and often flesh-colored or brownish growths that appear on the face, neck, or other areas of the body. While they are usually harmless, they can be unsightly and can cause embarrassment, especially if they appear on prominent areas of the face. In this article, we will discuss everything you need to know about facial warts, including their causes, symptoms, treatment, and prevention.

Causes of Facial Warts:

Facial warts are caused by a type of virus called human papillomavirus (HPV). There are more than 100 different strains of HPV, and some of them can cause warts to develop on the skin. HPV is highly contagious and can be spread through direct skin-to-skin contact or by touching surfaces that have come into contact with the virus. People with weakened immune systems are more susceptible to developing warts, including facial warts.

Symptoms of Facial Warts:

Facial warts are usually small, raised, and rough to the touch. They may appear as a single wart or in clusters, and can range in size from a pinhead to a pea. Facial warts can appear on any part of the face, including the forehead, cheeks, nose, chin, and around the eyes. They may be flesh-colored or brownish in color, and can have a rough or smooth surface.

Facial warts may also cause other symptoms, such as itching, bleeding, or pain. If a facial wart becomes irritated, it may bleed or become infected, which can lead to further complications.

Treatment of Facial Warts:

Facial warts can be treated using a variety of methods, depending on their size, location, and severity. Some of the most common treatments for facial warts include:

Topical medications: Over-the-counter creams and ointments containing salicylic acid or other chemicals can be applied directly to the wart to help dissolve it. These medications may take several weeks or months to work, and may cause mild irritation or redness.
Understanding Facial Warts: Causes, Symptoms, Treatment, and Prevention

Cryotherapy: This involves freezing the wart with liquid nitrogen. This causes the wart to blister and eventually fall off. Cryotherapy is usually performed by a dermatologist and may require several treatments.

Laser treatment: This involves using a laser to destroy the wart tissue. Laser treatment is usually reserved for larger or more stubborn warts, and may require local anesthesia.

Surgery: In rare cases, surgery may be necessary to remove a facial wart. This is usually only recommended for large or painful warts that do not respond to other treatments.

Prevention of Facial Warts:

Preventing facial warts involves taking steps to reduce your risk of being exposed to the HPV virus. Some of the most effective ways to prevent facial warts include:

Practice good hygiene: Wash your hands regularly, especially after touching surfaces that may be contaminated with the virus.

Avoid touching your face: This can help reduce your risk of spreading the virus to your face.


Avoid sharing personal items: Do not share towels, razors, or other personal items that may be contaminated with the virus.

Wear shoes in public places: This can help reduce your risk of being exposed to the virus on the floor or other surfaces.

If you suspect you have a facial wart, it is important to see a dermatologist for an accurate diagnosis and appropriate treatment. Do not attempt to remove a facial wart yourself, as this can cause infection and scarring.

In addition to the treatments mentioned above, there are also some home remedies and natural treatments that may be effective for treating facial warts. These include applying duct tape, apple cider vinegar, tea tree oil, or garlic to the wart. However, it is important to talk to a healthcare professional before trying any home remedies to avoid complications or adverse effects.

Overall, the key to preventing facial warts is to practice good hygiene, avoid sharing personal items, and protect yourself from exposure to the virus. If you do develop a facial wart, seek medical attention for appropriate treatment and follow-up care. With the right care and precautions, facial warts can be managed effectively, allowing you to feel confident and comfortable in your own skin.


A Radiant Glow: Mastering Blush Application For Round Face Shapes
A Radiant Glow: Mastering Blush Application for Round Face Shapes

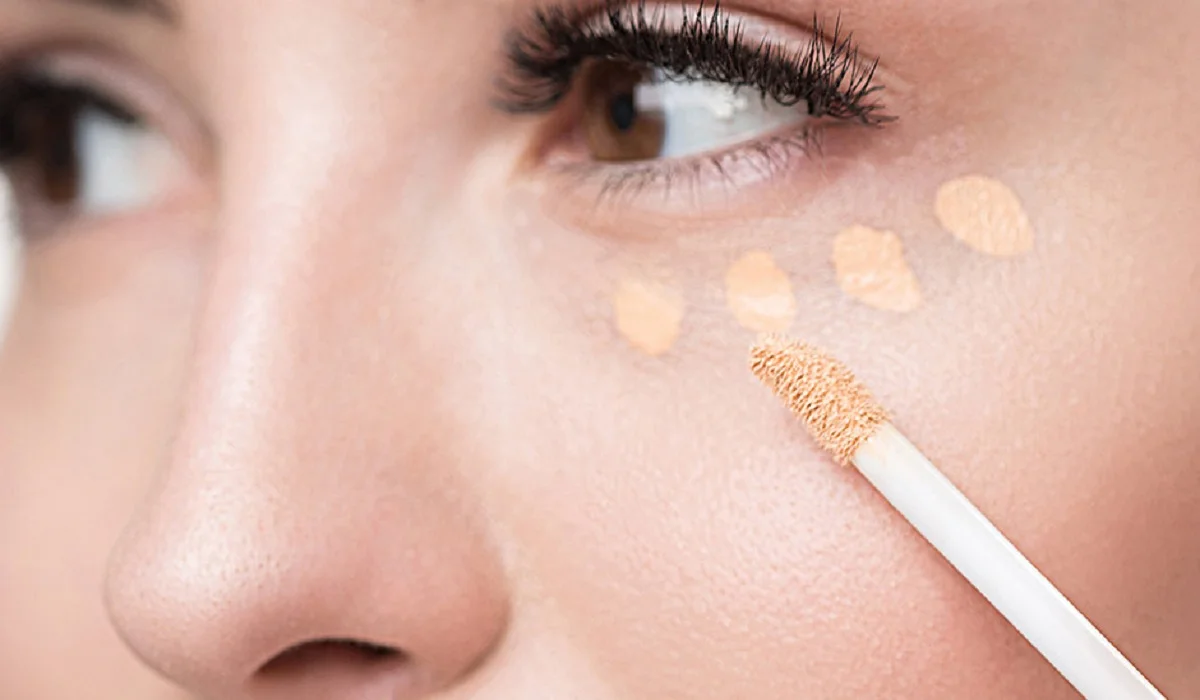
Blush is a makeup essential that can transform your look from dull to radiant, adding a healthy flush to your cheeks and enhancing your facial features. When it comes to applying blush, one size does not fit all, as different face shapes require specific techniques to achieve the most flattering results. If you have a round face shape, this guide is tailored to help you unlock the secrets of applying blush to accentuate your natural beauty. In this comprehensive guide, we’ll explore step-by-step instructions and valuable tips to ensure that your blush application complements your round face shape impeccably. Understanding the Round Face Shape Before delving into the tips for blush application, it’s crucial to understand the characteristics of a round face shape. A round face typically has soft, curved lines with a width and height that are approximately equal. The goal when applying blush to a round face is to create the illusion of more definition and angles, enhancing the natural bone structure. Choosing the Right Blush Shade Selecting the right blush shade is the first step towards achieving a flawless look. For a round face shape, opt for shades that offer a warm, natural glow. Peach, coral, and rosy tones work wonderfully as they provide a subtle radiance while imparting a hint of color. Avoid shades that are too dark or overly intense, as they can make your face appear even rounder. Prep and Prime Before you start applying blush, ensure that your skin is well-prepped and primed. Cleanse your face, apply a moisturizer suitable for your skin type, and follow up with a primer to create a smooth canvas for makeup application. This ensures that your blush adheres evenly and lasts longer throughout the day. Blush Application Steps Choose the Right Brush: Opt for a fluffy, angled blush brush for the best application. The angled shape helps you apply the blush precisely to the apples of your cheeks while blending seamlessly. Smile and Locate the Apples: Smile to identify the apples of your cheeks – the round, slightly raised areas that pop up when you smile. This is where you’ll focus your blush application. Light Hand for Building Color: Start with a small amount of blush on your brush. It’s easier to build up the color gradually rather than trying to tone it down if you apply too much at once. Apply in a Diagonal Line: Begin applying the blush in a diagonal line from the apples of your cheeks towards your temples. This technique adds a gentle lift to your face, creating the illusion of higher cheekbones. Blend, Blend, Blend: Blending is key to achieving a natural, seamless look. Use gentle, upward strokes to blend the blush into your skin. Make sure there are no visible lines, and the color diffuses evenly. Focus on the High Points: Concentrate the majority of the blush color on the apples of your cheeks, and then lightly sweep the remaining product along your cheekbones towards your hairline. Less is More for Round Faces: Remember, less is more when applying blush to a…

Dermaplaning: The Popular Skincare Treatment Explained

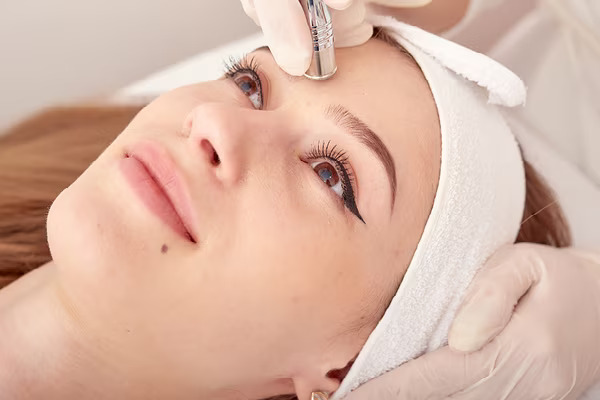
Dermaplaning is a non-invasive, exfoliating skincare treatment that has gained popularity in recent years. It involves the use of a sharp, surgical-grade scalpel to remove the outermost layer of dead skin cells and vellus hair (also known as peach fuzz) from the face. The result is a smoother, brighter, and more radiant complexion. In this article, we’ll explore the benefits, risks, and considerations for dermaplaning. Benefits of Dermaplaning One of the primary benefits of dermaplaning is its ability to exfoliate the skin. The scalpel removes the outer layer of dead skin cells, which can help to reduce the appearance of fine lines, wrinkles, and acne scars. Additionally, by removing the dead skin cells, it allows for better absorption of skincare products, making them more effective. This can be especially beneficial for individuals who have hyperpigmentation or uneven skin tone, as the exfoliation can help to even out the complexion. Another benefit of dermaplaning is the removal of vellus hair. While many people are hesitant to remove peach fuzz, it can actually be beneficial for the skin. Vellus hair can trap dirt and oil, which can contribute to breakouts. By removing the hair, it can help to prevent breakouts and make the skin appear smoother and more refined. Dermaplaning is also a quick and painless procedure. It typically takes around 30 minutes to complete and is done in-office by a licensed esthetician or dermatologist. Unlike other exfoliating treatments, such as chemical peels, dermaplaning does not require any downtime. Patients can immediately return to their normal activities without any redness or irritation. Risks and Considerations While dermaplaning is generally considered safe, there are some risks and considerations to keep in mind. The use of a sharp scalpel on the face can be dangerous if not done correctly, so it’s important to only have the procedure done by a licensed professional. It’s also important to avoid any sun exposure for a few days after the procedure, as the skin will be more sensitive. Another consideration is that dermaplaning is not suitable for everyone. Individuals with active acne, eczema, or rosacea should avoid the procedure, as it can exacerbate these conditions. Additionally, those with a history of cold sores should take precautions, as the procedure can trigger an outbreak. It’s also important to note that dermaplaning is a temporary solution. While the results can last for a few weeks, the skin will eventually return to its natural state. For best results, it’s recommended to have the procedure done every 4-6 weeks. How to Prepare for Dermaplaning Before having a dermaplaning treatment, it’s important to properly prepare your skin. This includes avoiding any exfoliating treatments for at least a week prior to the procedure. It’s also important to avoid any sun exposure or tanning beds for at least a week before the procedure. On the day of the procedure, it’s important to arrive with a clean face, free of any makeup or skincare products. The esthetician or dermatologist will then apply a numbing cream to the face, which will help to minimize any discomfort during the procedure….

Benefits Of Yoga For Skin And Hair 111
Benefits Of Yoga For Skin And Hair

Yoga has emerged as an invaluable practice to promote holistic well-being. Beyond physical fitness and mental clarity, its effects also extend into skin and hair health and vitality – benefits we discover here as we examine its profound connection between yoga and external beauty – we will investigate. Learn about what ancient practice contributes towards glowing skin and luscious locks with this exploration! Mind-Body ConnectionYoga’s core mission lies in uniting mind, body and spirit into an harmonious experience for practitioners. Yoga promotes this state of being both internally as well as externally with its holistic nature helping our mental and physical states work in unison, leading to positive impacts that show in skin conditions and hair care needs as a direct reflection. Affect on Mental and Emotional Well-BeingMind-body practices like yoga and mindfulness meditation have long been revered for their stress-reducer properties, including relaxation techniques like yoga and mindfulness meditation. By relaxing the mind, these practices encourage relaxation within the body resulting in decreased levels of stress hormones. The Essence of Yoga Yoga (from Sanskrit: “yuj,” meaning union) is an ancient and profound ancient Indian spiritual discipline which goes far beyond physical exercise. Drawing its source in Indian philosophy and spirituality, this holistic discipline seeks to align body, mind, and spirit – not simply physical postures! At its core, yoga offers individuals an opportunity for personal exploration that promotes greater self-awareness while cultivating inner peace as they achieve harmony amongst themselves and with all aspects of existence. Yoga encompasses a multifaceted approach to wellness that draws upon various interwoven components for maximum impact and profound effects. Some key aspects are as follows. The Pillars of Yoga Physical Postures(Asanas)Yoga often begins with asanas – physical postures designed to build strength, flexibility, and equilibrium – designed not only to increase physical fitness but also cultivate mindfulness and presence. From gentle stretches to more challenging poses, asanas provide physical benefits while cultivating mindfulness. Breath Control(Pranayama)To control breathing effectively. Pranayama, or breath control, is at the core of yoga practice and should be seen as an artform that facilitates deep breathing techniques to bridge between your physical body and mental mind. Deep and alternate nostril breathing practices serve as ways of relieving stress while increasing overall well-being. MeditationMeditating is at the core of yoga practice, inviting practitioners to turn inward and foster an elevated state of awareness through focused attention, mindfulness or guided visualization techniques. Meditation serves as an invaluable means of quietening one’s mind while creating mental clarity and strengthening their connections to themselves and other members. Philosophy and Ethics of YogaYoga’s philosophical foundation extends far beyond physical postures to encompass principles for ethical living and gaining greater insight into existence. Nonviolence (ahimsa), truthfulness (satya), and self-discipline (tapas) all play key roles on its path of enlightenment. Dhyana (Contemplation)Contemplation, also referred to as Dhyana in yoga terminology, allows practitioners to explore profound aspects of life and themselves with greater depth than they would during regular meditation practices. Contemplation has proven valuable in contributing to personal development, self-exploration and understanding one’s purpose more thoroughly than its…

The Perfect Brush: Choosing The Right Tool For Applying Bronzer
The Perfect Brush: Choosing the Right Tool for Applying Bronzer

Bronzer is a versatile makeup product that adds warmth, dimension, and a sun-kissed glow to the face. When it comes to applying bronzer, using the appropriate brush is crucial for achieving a seamless and natural-looking result. The right brush will help you blend the product evenly, control the intensity, and ensure a flawless application. In this article, we will explore different types of brushes suitable for applying bronzer, helping you find the perfect tool to enhance your complexion. Fluffy Powder Brush:A fluffy powder brush is a versatile option for applying bronzer. Look for a brush with soft, densely packed bristles that allow for precise and even distribution of the product. The large surface area of the brush helps to blend the bronzer seamlessly, creating a natural and diffused look. Use gentle sweeping motions to apply the bronzer to the desired areas of your face, such as the cheekbones, temples, and jawline. Angled Brush:An angled brush is an excellent choice for contouring with bronzer. This brush has a slanted shape that follows the natural angles of your face, making it easier to sculpt and define the cheekbones and other facial features. The angled bristles provide more control and precision, allowing you to create a more defined and chiseled look. Use the brush to apply the bronzer in the hollows of your cheeks, along the hairline, and under the jawline, blending it out for a seamless finish. Fan Brush:A fan brush is ideal for achieving a subtle and diffused bronzing effect. This brush features soft, thin bristles fanned out in a shape that allows for a light application of product. The fan brush is particularly useful for those who prefer a more natural-looking bronzer or have fair skin. Gently sweep the brush over the areas where the sun naturally hits your face, such as the forehead, bridge of the nose, and tops of the cheekbones, for a soft and radiant glow. Kabuki Brush:A kabuki brush is a dense and compact brush with a rounded top, often used for applying powder products. It works well for bronzer application, especially if you prefer a more intense and concentrated color payoff. The dense bristles pick up and deposit more product, allowing you to build up the bronzer gradually. Use small circular motions to blend the bronzer onto the areas you want to enhance, such as the cheeks and forehead, for a more dramatic effect. Tapered Brush:A tapered brush is a versatile option for bronzer application, especially if you want to add depth and dimension to specific areas of your face. This brush features soft bristles that come to a pointed tip, allowing for precise application and blending. It is especially useful for contouring the nose or creating a defined jawline. Use the tapered brush to apply bronzer to the sides of your nose, under the cheekbones, or along the jawline, blending it out for a seamless finish. Duo-Fiber Brush:A duo-fiber brush, also known as a stippling brush, is a unique tool with a combination of long and short bristles. This brush creates a soft and airbrushed effect,…

How Do I Remove Lipstick
How to Remove Stubborn Lipstick: A Comprehensive Guide

Lipstick, the crowning jewel of many makeup looks, can be both a blessing and a curse. While finding that perfect, long-lasting shade is a victory for beauty enthusiasts, removing it can pose a significant challenge. Stubborn, long-wearing lipsticks designed to last through meals and drinks often leave a lasting stain, necessitating effective removal techniques to protect and care for your lips. This guide offers detailed strategies for removing even the most tenacious lipstick, ensuring your lips remain healthy and stain-free. Before diving into removal methods, it’s essential to understand why some lipsticks are so hard to remove. Long-lasting and smudge-proof formulas contain ingredients designed to adhere firmly to the lips, resisting moisture and friction. While this makes them incredibly durable throughout the day, it also means they can stain the lips and require more than just a simple wipe to remove. Effective Removal Techniques 1. Vaseline Vaseline, a staple in skincare routines for generations, is not only a powerful moisturizer but also an effective lipstick remover. Its thick, emollient nature helps to break down the lipstick’s formula, making it easier to wipe away. 2. Lip Balm Lip balm can act as an on-the-go lipstick remover, offering a convenient solution when you need a quick color change. 3. Organic Oil Natural oils such as coconut and olive oil are not only excellent for skin care but also adept at removing stubborn makeup, including lipstick. 4. Micellar Cleansing Water Micellar water is a gentle yet effective makeup remover that can tackle stubborn lipstick without irritating the skin or lips. 5. Lip Scrub Creating a homemade lip scrub with honey and brown sugar not only removes stubborn lipstick but also exfoliates the lips, leaving them soft and smooth. Step-by-Step Removal Process Removing stubborn lipstick needn’t be a harsh or damaging process to your lips. With the right products and gentle techniques, you can effectively remove any trace of lipstick, leaving your lips clean, soft, and ready for your next color application or simply to rest and rejuvenate overnight. Refined Answers to Common Queries Is It Safe to Eliminate Tenacious Lipstick Without Damaging My Lips?Absolutely, provided that one adheres to gentle, moisture-rich techniques as detailed herein. Utilizing substances such as Vaseline, lip balm, organic oils, micellar water, and crafted lip scrubs can efficaciously dispel persistent lipstick while safeguarding your lips’ well-being. It is imperative to apply a quality lip balm post-removal to maintain optimal hydration. Can Baby Oil Serve as a Substitute for Olive or Coconut Oil in Lipstick Removal?Indeed, baby oil constitutes a viable and gentle alternative for eradicating stubborn lipstick, thanks to its formulation tailored for sensitive skin, thereby deeming it appropriate for the fragile area of the lips. Nonetheless, individuals with oily or acne-prone skin should exercise caution when applying near the lip perimeter to avert potential skin breakouts. Is Micellar Water Compatible with All Skin Varieties?Crafted for mildness, micellar water is generally compatible across all skin types, encompassing those with sensitive skin. Its micelles proficiently attract and encapsulate impurities, oils, and makeup without depriving the skin of its innate moisture, rendering it…

Forehead Wrinkles & Fine Lines: Top Causes And How To Fix Them
Forehead Wrinkles & Fine Lines: Top Causes and How to Fix Them

As we age, our skin goes through many changes, one of which is the development of wrinkles and fine lines. Forehead wrinkles and fine lines are some of the most noticeable signs of aging, and they can be a cause of concern for many people. However, there are many factors that contribute to the development of these wrinkles and fine lines, and there are also many ways to fix them. In this article, we will explore the top causes of forehead wrinkles and fine lines and discuss how to fix them. Causes of Forehead Wrinkles and Fine Lines Aging: As we age, our skin loses its elasticity and becomes thinner, making it more prone to wrinkles and fine lines. Sun damage: Exposure to the sun’s UV rays can damage the skin, causing it to lose elasticity and develop wrinkles and fine lines. Genetics: Some people are more prone to developing wrinkles and fine lines due to their genetics. Smoking: Smoking is known to accelerate the aging process and can lead to the development of wrinkles and fine lines. Repetitive facial expressions: Repeatedly making the same facial expressions can cause the skin to crease, leading to the development of wrinkles and fine lines. Dehydration: When the skin is dehydrated, it can become dry and more prone to wrinkles and fine lines. Poor diet: A poor diet that is low in nutrients and antioxidants can contribute to the development of wrinkles and fine lines. How to Fix Forehead Wrinkles and Fine Lines Sun protection: Protecting your skin from the sun’s UV rays is one of the best ways to prevent the development of wrinkles and fine lines. Always wear sunscreen when you are outside and try to stay in the shade during the hottest parts of the day. Moisturize: Keeping your skin moisturized can help to prevent wrinkles and fine lines from developing. Use a high-quality moisturizer that contains hyaluronic acid, which helps to hydrate the skin and reduce the appearance of wrinkles. Facial exercises: Performing facial exercises can help to strengthen the muscles in your face and prevent the development of wrinkles and fine lines. Quit smoking: Quitting smoking is one of the best things you can do for your skin. Smoking is known to accelerate the aging process and can lead to the development of wrinkles and fine lines. Hydration: Staying hydrated is essential for maintaining healthy skin. Make sure to drink plenty of water throughout the day to keep your skin hydrated and prevent the development of wrinkles and fine lines. Healthy diet: Eating a healthy diet that is rich in nutrients and antioxidants can help to prevent the development of wrinkles and fine lines. Foods that are high in vitamin C, such as citrus fruits, can help to boost collagen production, which can help to reduce the appearance of wrinkles. Cosmetic treatments: There are many cosmetic treatments available that can help to reduce the appearance of wrinkles and fine lines. Botox injections, dermal fillers, and chemical peels are just a few of the treatments that are available. Forehead wrinkles and…

The Importance Of Using A Base Coat During Your At Home Manicure Session
The Importance of Using a Base Coat During Your At-Home Manicure Session

The allure of a professional-looking manicure from the comfort of home has never been stronger. With the advent of high-quality nail care products available for consumer purchase, the dream of achieving a salon-worthy finish without stepping out the door is now a reality. Essential to this DIY manicure kit is the often-overlooked yet crucial base coat, a foundational element that sets the stage for a flawless finish. What is a Base Coat? Definition and Purpose: A base coat is a clear or slightly tinted polish applied before the color coat. Its primary role is to prepare the nail surface for color application, ensuring a smooth, even, and long-lasting finish. Types of Base Coats and Their Benefits: From strengthening formulas to ridge fillers, each type of base coat serves a specific purpose, addressing various nail concerns while providing a solid foundation for nail color. The Importance of a Base Coat Protection Against Staining: One of the key benefits of applying a base coat is its ability to protect nails from staining, especially when using dark or highly pigmented colors. Enhancing Nail Strength: For those with brittle or weak nails, a base coat can add an extra layer of strength, reducing the likelihood of breakage and peeling. Smoothing the Nail Surface: A quality base coat can fill ridges and imperfections, creating a perfectly smooth canvas for color application. Improving Polish Adhesion: By forming a sticky layer, a base coat enhances the adhesion of the nail polish, extending the life of your manicure. Choosing the Right Base Coat Factors to Consider: Selecting the right base coat involves considering your nail type, concerns, and the finish you desire. Recommended Products for Different Nail Types: Recommendations will include products tailored to strengthen, hydrate, or smooth nails, ensuring there’s an ideal base coat for everyone. Step-by-Step Guide to Applying Base Coat Preparing Your Nails: Proper nail preparation is essential for a successful application. This section will guide readers through cleaning, filing, and buffing their nails for optimal results. Application Tips for an Even Coat: Achieving an even base coat is key to a flawless manicure. This guide will offer tips and techniques to master the application process. The Role of Base Coat in Nail Health Preventing Yellowing and Damage: Regular use of a base coat can prevent the yellowing and damage often caused by frequent nail polish application. Nutrient-Infused Base Coats for Nail Care: Highlighting base coats infused with vitamins and nutrients that promote nail health and growth. Comparing Base Coats with Top Coats and Nail Hardeners Differences and Purposes: This section will clarify the distinct roles of base coats, top coats, and nail hardeners, ensuring readers understand when and how to use each product. DIY Manicure Tips and Tricks Achieving Long-lasting Results: Tips for extending the life of your manicure, from application techniques to maintenance advice. Creative Ways to Enhance Your Manicure: Inspiration for readers to get creative with their at-home manicure sessions, incorporating art, accents, and more. Troubleshooting Common Manicure Issues Peeling and Chipping: Solutions and preventive measures for common manicure pitfalls, ensuring your hard work…