Mastering Eyebrow Stabilizers and Primer for Flawless Makeup Application

Mastering Eyebrow Stabilizers and Primer for Flawless Makeup Application

Eyebrow stabilizers and primers are essential tools in the world of makeup, helping to create a polished and long-lasting look. Eyebrow stabilizers, also known as brow gels or pomades, are designed to keep your eyebrows in place, providing definition and structure. Primers, on the other hand, are products that create a smooth canvas for makeup application, enhancing its longevity and improving overall coverage. In this guide, we will delve into the world of eyebrow stabilizers and primers, exploring their benefits and providing step-by-step instructions on how to use them effectively.

Section 1: Understanding Eyebrow Stabilizers
Eyebrow stabilizers come in various forms, such as gels, waxes, and pomades, and are available in a range of shades to match different hair colors. These products offer several benefits, including:

Shape and Definition: Eyebrow stabilizers help tame unruly hairs and provide control to shape and define your brows. They offer a solution for those with sparse or overgrown eyebrows, allowing you to create a more precise and polished look.

Long-lasting Hold: By setting your eyebrows in place, stabilizers ensure that your desired shape stays intact throughout the day, resisting smudging or fading caused by natural oils or sweat.

Section 2: How to Use Eyebrow Stabilizers
Using an eyebrow stabilizer is a straightforward process that requires a few simple steps:

Prep and Cleanse: Start by cleansing your face and removing any residual makeup or oils from your eyebrows. This ensures better adherence and longevity of the product.

Choose the Right Shade: Select an eyebrow stabilizer that matches your hair color or is slightly lighter for a more natural effect.

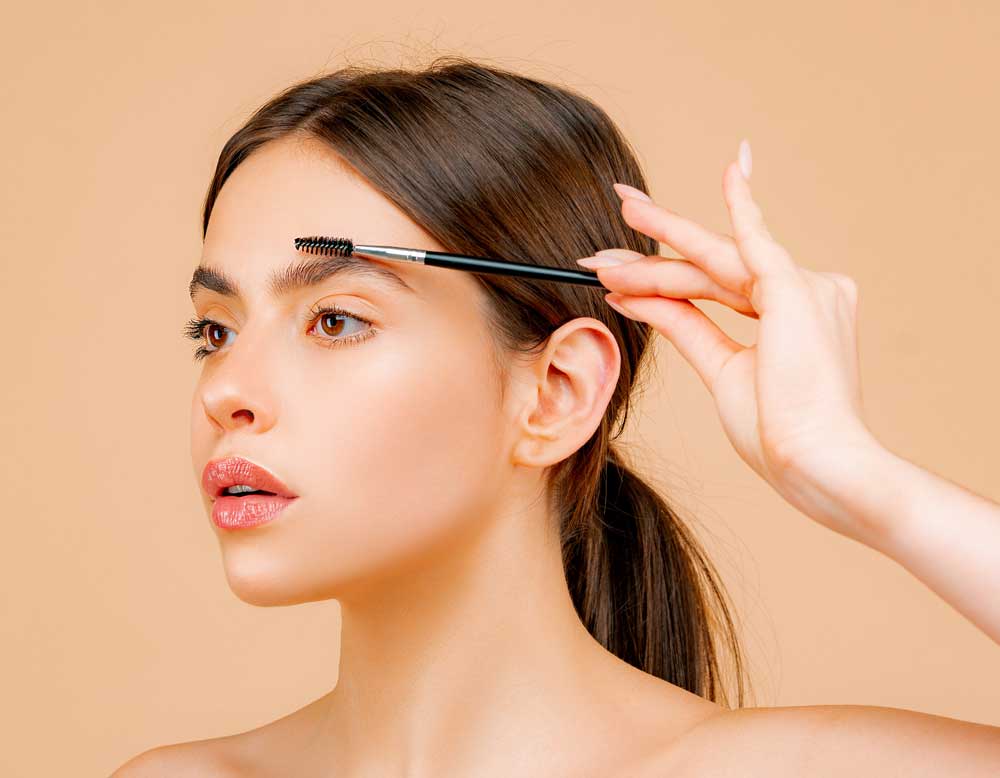
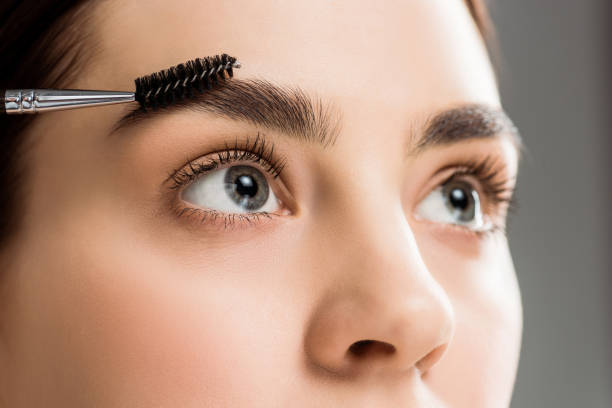
Application: Using a small, angled brush or a spoolie, lightly dip it into the product and remove any excess. Begin applying the stabilizer in short, feathery strokes following the natural shape of your brows. Fill in any sparse areas and gradually build up the intensity until you achieve your desired look.

Blending and Setting: After applying the stabilizer, use a clean spoolie or a brow brush to blend the product evenly through your eyebrows. This step helps create a seamless, natural finish. Finally, set your brows with a clear brow gel or a transparent mascara to ensure the longevity of the stabilizer throughout the day.

Section 3: Unveiling the Power of Primers
Primers act as a crucial step in your makeup routine, serving as a base to even out the skin’s texture and improve the longevity of your makeup. Their benefits include:

Smoothing and Pore Minimizing: Primers fill in fine lines, pores, and other imperfections, creating a smooth canvas for foundation application.

Enhanced Makeup Adherence: Primers help makeup products, such as foundation and concealer, adhere better to the skin, ensuring a flawless and long-lasting finish.
Mastering Eyebrow Stabilizers and Primer for Flawless Makeup Application

Section 4: How to Use Primers
Using a primer is an essential step for achieving a flawless makeup look. Here’s how to apply it effectively:

Cleanse and Moisturize: Begin by cleansing your face and applying a lightweight moisturizer suitable for your skin type. Allow the moisturizer to fully absorb before moving on to the primer.

Choose the Right Primer: Select a primer that suits your specific needs, such as pore-minimizing, mattifying, or illuminating, depending on your skin concerns and desired finish.

Application: Take a small amount of primer, roughly a pea-sized amount, and apply it to your face. Start by focusing on the areas that tend to be oilier or have more visible pores, such as the T-zone (forehead, nose, and chin). Use your fingertips or a makeup sponge to gently blend the primer into your skin using light, upward motions. Ensure an even application, paying attention to any areas with texture or unevenness.


Allow Absorption: Give the primer a few minutes to fully absorb into your skin before moving on to the next step. This allows it to create a smooth surface and maximize its effectiveness.

Proceed with Makeup Application: Once the primer has settled, you can proceed with applying your foundation, concealer, and other makeup products. The primer will provide a seamless base, helping your makeup go on more evenly and ensuring its longevity.

Section 5: Conclusion
Eyebrow stabilizers and primers are valuable assets in achieving a flawless and long-lasting makeup look. Eyebrow stabilizers help define and shape your brows while keeping them in place throughout the day. Primers create a smooth canvas for makeup application, improving its adherence and longevity. By incorporating these products into your routine and following the step-by-step instructions provided, you can elevate your makeup game to new heights. Experiment with different brands and formulations to find the eyebrow stabilizer and primer that suit your preferences and cater to your specific needs, resulting in a polished and flawless finish.

In conclusion, mastering the use of eyebrow stabilizers and primers can significantly enhance your makeup application. These products offer various benefits, such as shape definition, long-lasting hold, smoother skin texture, and improved makeup adherence. By following the proper techniques and incorporating these products into your routine, you can achieve a flawless and long-lasting makeup look. So, go ahead, experiment, and embrace the power of eyebrow stabilizers and primers to elevate your beauty game to the next level.

Henna Vs. Regular Tattoos: An In Depth Comparison Of Body Art Forms
Henna vs. Regular Tattoos: An In-Depth Comparison of Body Art Forms

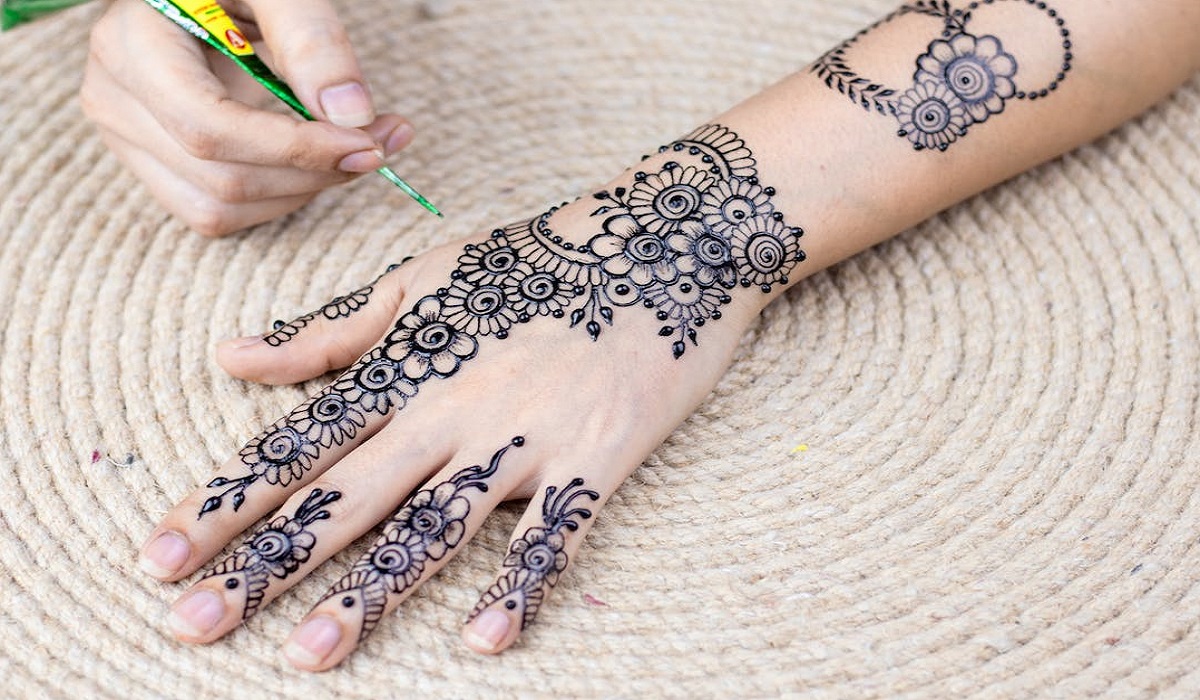
Choosing between henna and regular tattoos can be a challenging decision for anyone looking to get body art done on their skin. Both options have their unique characteristics, advantages, and considerations that can influence the final choice. In this comprehensive article, we will compare henna tattoos and regular tattoos, providing all the necessary information to help individuals make an informed decision. From the creation process to the duration, pain factor, design possibilities, and potential risks, we will explore each aspect of these body art forms. Section 1: Understanding Henna and Regular Tattoos 1.1 Henna Tattoos: Henna tattoos are temporary body art made using natural henna plant powder. The powder is mixed with water to form a paste, which is applied to the skin using a piping bag. The dye from the henna plant stains the skin temporarily, creating intricate and mesmerizing patterns. Henna tattoos are a popular choice for those seeking a temporary design without the permanence of regular tattoos. 1.2 Regular Tattoos: Regular tattoos, also known as permanent tattoos, involve using a tattoo machine gun, tattoo needles, and tattoo ink. The tattoo gun pushes the ink into the dermis layer of the skin, resulting in long-lasting body art. Regular tattoos offer a vast array of design possibilities and can be highly detailed and intricate. Section 2: Comparing Henna and Regular Tattoos 2.1 The Process of Creating: Henna tattoos rely on a henna paste that is skillfully applied to the skin’s surface. The patterns are created by the artist pushing the paste out of the piping bag. On the other hand, regular tattoos involve the use of a tattoo machine gun and needles to insert ink into the dermis, creating a permanent design. Both techniques require skilled professionals, but the application methods are vastly different. 2.2 Duration of the Tattoos: Henna tattoos are temporary and typically last between 4 and 7 days, with the possibility of lasting up to 12 days with high-quality henna paste. After this period, the dye fades away, leaving the skin clear again. Regular tattoos, however, are designed to be permanent and can last a lifetime if desired. Tattoo removal options, such as laser tattoo removal, are available for those who want to remove a regular tattoo. 2.3 The Pain Issue: Henna tattoos are pain-free as the henna paste is placed on the skin’s surface. Conversely, getting a regular tattoo involves piercing the skin with needles, causing pain and discomfort during the process. However, the pain level can vary depending on the tattoo’s location, size, and the skill of the artist. The healing process of a regular tattoo can also cause some discomfort, but proper aftercare can minimize any issues. 2.4 Design Possibilities: Henna tattoos are limited in design possibilities compared to regular tattoos. Henna’s application technique is suited for pattern work, while regular tattoos offer limitless design options with intricate details, shading, and various colors. Regular tattoos’ versatility allows for almost lifelike creations, providing a wide range of design choices. 2.5 Skin Impact and Risks: Henna tattoos, when done with natural henna plant powder, have minimal impact…

The Ultimate Guide To Cream Blush: How To Use, Choose And Apply
The Ultimate Guide to Cream Blush: How to Use, Choose and Apply

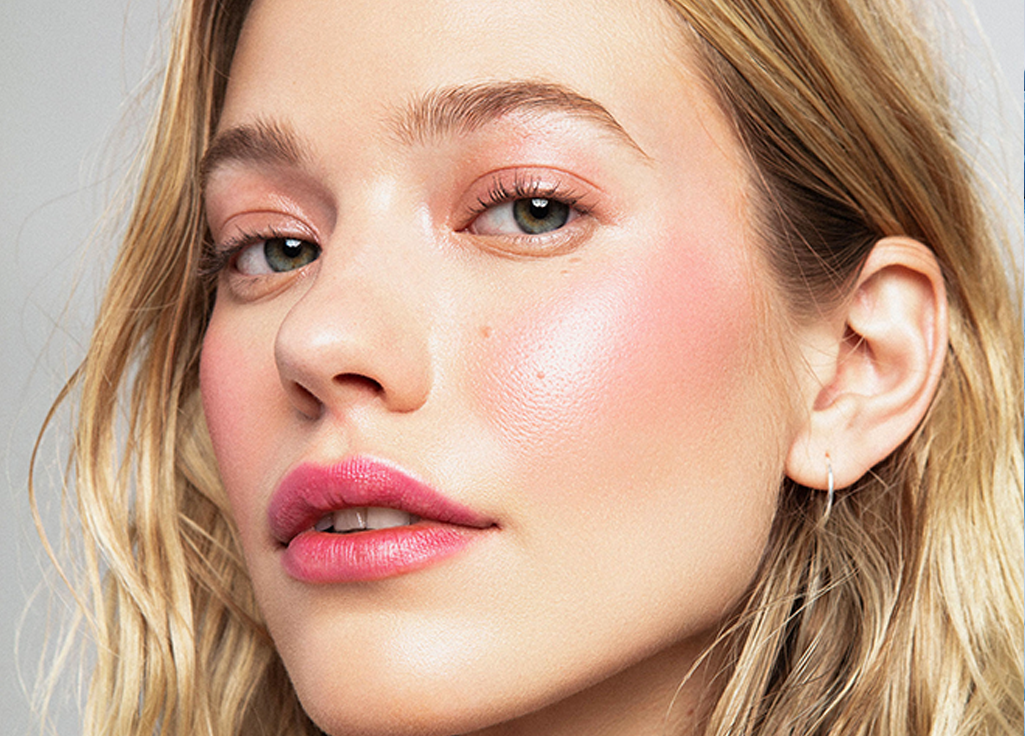
Cream blush has been gaining popularity in recent years, thanks to its ability to provide a natural, dewy glow to the cheeks. Unlike powder blushes, cream blushes have a creamy, emollient texture that blends effortlessly into the skin, giving a soft and seamless finish. In this guide, we’ll explore everything you need to know about cream blush, including how to choose the right shade for your skin tone, how to apply it, and some of the best cream blushes on the market. Why Choose Cream Blush? Cream blushes have many benefits over their powder counterparts. Here are just a few: Natural Finish: Cream blush gives a natural-looking flush to the cheeks, as it blends seamlessly into the skin. It’s perfect for those who want a subtle, understated look. Hydrating: Cream blushes contain moisturizing ingredients that keep the skin hydrated and glowing. This is especially beneficial for those with dry skin, as it can help to prevent flakiness and enhance the overall appearance of the skin. Versatile: Cream blush can be used not just on the cheeks, but also on the lips and eyes. This makes it a versatile product that can be used for a range of looks. How to Choose the Right Shade of Cream Blush? Choosing the right shade of cream blush is important to ensure that it looks natural and complements your skin tone. Here are some tips to help you choose the right shade: Skin Undertones: Determine your skin’s undertones, whether it’s warm, cool or neutral. Warm skin tones look best with peachy or golden shades, while cool tones look great with pink or berry shades. Neutral skin tones can pull off a wider range of shades. Depth of Shade: Consider the depth of the shade you’re choosing. If you have fair skin, lighter shades like baby pink or peach will look best. If you have medium skin, opt for shades that are more saturated and pigmented. For deeper skin tones, rich shades like brick or berry will look best. Consider Your Makeup Look: Think about the overall makeup look you’re going for. If you’re going for a natural, no-makeup look, a subtle pink or peachy shade would be perfect. If you’re going for a more dramatic look, a brighter or deeper shade would be more suitable. How to Apply Cream Blush? Applying cream blush is simple and easy. Here’s how to do it: Preparation: Start by prepping your skin with moisturizer and primer to create a smooth, even base. Application: Using your fingertips or a makeup sponge, apply a small amount of cream blush to the apples of your cheeks. Start with a small amount, and build up as needed. Blend: Use your fingers or a sponge to blend the blush into your skin, ensuring that there are no harsh lines or streaks. Set: Once you’re happy with the application, set the blush with a light dusting of powder to ensure it lasts all day. Final Thoughts Cream blush is a versatile and easy-to-use product that can give a natural, radiant glow to the cheeks. When choosing…

Care Oils You Can Use To Get Shinyhair
Care Oils You Can Use to Get Shiny Hair

Haircare oils provide essential treatment and care to restore health to our locks with their rich formulas and promote strong, shiny locks – just what our locks need when exposed to sun, wind, pollution or styling tools such as blow dryers. Long term exposure can result in damage, breakage and moisture loss leading to dull and lifeless locks – ideal candidates for inclusion into daily hair routine. Let’s discover some great hair care oils available so we can select an oil regimen tailored for each of you today. Intensely Moisturizing Hair Oils Aloe and Argan-Based Hair Oils An aloe/argan hair care oil helps combat frizz while soothing your scalp, moisturizing hair from roots to tips – leaving it soft and shiny! For optimal results, massage this treatment oil onto the scalp 5-15 minutes prior to shampooing then rinse out after 5-15 minutes for best results. Aromatherapy Hair Care OilsOur Aromatherapy Hair Care Oils is a blend of cold-pressed argan oil, cold-pressed jojoba oil, ylang-ylang essential oil and rosemary essential oil that provides strong vitamin E support to hair. Apply a small amount to palms then rub into entire length and ends focusing on length and ends for 10-15 minutes while wearing shower cap before rinsing out hair thoroughly. Radiance-Boosting Hair Oils Care oils formulated from six precious botanical oils (flaxseed, hazelnut, sweet almond, macadamia nut oil, argan nut oil, camellia oil and tsubaki oil) nourish, repair and soften facial and body skin with just one application – giving radiance-boosting hair oils their power! You only need to buy one product to feel fabulously gorgeous. Treatment Oils for Processed Hair Treatment Oils for Processed Hair Oils containing nettle oil help combat hair loss while supporting growth. Argan oil also deeply moisturizing, making them suitable for chemically treated, sun damaged and otherwise processed hair. Incorporating eco-friendly principles in production and design with all-natural ingredients. Hair Oils for Shiny Hair Hair oils that contain ingredients like eucalyptus, sunflower, sesame or almond oils can provide shine-boosting shine with just a few drops applied directly onto hair ends. Argan, Jojoba and Almond Oils for Frizz ControlOils that include argan, jojoba and almond extract help repair and revitalize hair instantaneously while controlling static and frizz issues effectively. Coconut Care OilPacked with coconut oil, this care oil nourishes and repairs very dry, wavy and curly locks without weighing them down – providing silky-soft locks free from frizz and static that feel protected and secure against further frizz or static build up. Simply massage this onto clean hair from roots through to tips before waiting one hour to see results before doing another application session. Let’s get to know hair care oils better: When using hair oils, it’s essential to consider your hair type and specific needs. You can apply these oils as pre-shampoo treatments, leave-in conditioners, or scalp massages, depending on your preference. Additionally, a patch test is recommended, especially if you have sensitive skin, to ensure you don’t have any adverse reactions.

Decoding Undertones: Understanding How Vein Color Can Indicate Your Skin Undertone

When it comes to finding the perfect makeup shades, hair colors, or clothing that flatter your complexion, understanding your skin’s undertone is key. While determining your undertone may seem like a daunting task, there is a simple method that can offer valuable insights: examining the color of your veins. The veins on your wrist can provide clues about your skin undertone, helping you make informed choices when it comes to beauty and fashion. In this article, we will delve into the correlation between vein color and undertone, explore the different undertone categories, and provide practical tips on how to determine and embrace your undertone to enhance your overall appearance. Understanding Undertones: Undertone refers to the underlying color that shines through your skin, regardless of its surface tone (fair, medium, or deep). It is categorized into three main types: cool, warm, and neutral. Cool Undertone:If you have a cool undertone, your skin may have hints of pink, red, or blue. People with cool undertones often have veins that appear bluish or purple on their wrists. Cool undertones are commonly associated with fair or light skin, but they can also be present in medium and deep skin tones. Warm Undertone:A warm undertone typically has undertones of yellow, peach, or golden hues. Veins on individuals with warm undertones may appear greenish or olive. Warm undertones are commonly found in people with golden or olive skin tones, but they can also be present in fair or deep skin tones. Neutral Undertone:A neutral undertone indicates a balance between cool and warm tones. Veins of individuals with neutral undertones may appear blue-green or a mix of blue and green. Neutral undertones are versatile and can suit a range of skin tones, from fair to deep. Determining Your Undertone Using Vein Color: To determine your undertone based on the color of your veins, follow these steps: Find natural light: Look for natural lighting or step outside to ensure accurate color perception. Examine your wrist: Observe the veins on the inside of your wrist or the underside of your forearm. Pay attention to their color and appearance. Cool Undertone: If your veins appear bluish or purple, you likely have a cool undertone. Warm Undertone: If your veins appear greenish or olive, you likely have a warm undertone. Neutral Undertone: If your veins appear blue-green or a mix of blue and green, you likely have a neutral undertone. Applying Your Undertone Knowledge: Understanding your undertone can guide your choices in various aspects of beauty and fashion: Foundation and Concealer:Knowing your undertone is crucial for selecting the right foundation and concealer shades that will blend seamlessly with your skin. Cool undertones are complemented by foundations with pink or neutral undertones, while warm undertones benefit from foundations with yellow or golden undertones. Neutral undertones can typically wear a range of shades from different undertone families. Lipstick and Blush:When choosing lipsticks and blushes, consider your undertone to find shades that enhance your natural beauty. Cool undertones tend to suit berry, pink, and blue-based red shades, while warm undertones can opt for coral, peach, and…

The Spf Threshold: Understanding Why You Should Never Use Sunscreen Below 30 Spf
The SPF Threshold: Understanding Why You Should Never Use Sunscreen Below 30 SPF

Sunscreen is a crucial component of any skincare routine, providing protection against the harmful effects of the sun’s ultraviolet (UV) rays. Sun Protection Factor (SPF) is a measure of a sunscreen’s ability to shield the skin from UVB radiation, which is primarily responsible for sunburns. While a variety of SPF options are available, there is a consensus among dermatologists that using a sunscreen with an SPF below 30 is inadequate for adequate sun protection. In this article, we will explore the reasons why you should never use sunscreen below 30 SPF and understand the significance of SPF in safeguarding your skin against sun damage. Understanding SPF:SPF indicates the level of protection a sunscreen offers against UVB rays. For instance, an SPF 30 sunscreen theoretically allows you to stay in the sun 30 times longer than if you were not wearing any sunscreen before burning. SPF primarily measures protection against UVB rays, while UVA rays can also cause long-term skin damage. Therefore, it is crucial to choose a broad-spectrum sunscreen that protects against both UVA and UVB rays. Insufficient Protection from Sunburns:Using a sunscreen with an SPF below 30 significantly diminishes its ability to protect your skin from sunburns. Sunburns are not only painful but also a sign of skin damage. Sunscreens with higher SPF values provide a greater level of protection against UVB radiation, reducing the risk of sunburns and subsequent skin damage. Opting for an SPF below 30 increases your vulnerability to sunburns, making it essential to choose a higher SPF to effectively shield your skin. Inadequate Protection against Skin Cancer:Prolonged exposure to UV radiation is a major risk factor for skin cancer. Using a sunscreen with an SPF below 30 offers limited protection against UVB rays, which can lead to an increased risk of skin cancer. Skin cancer, including melanoma, the deadliest form of skin cancer, is strongly linked to sun exposure. By opting for a higher SPF sunscreen, you provide your skin with an added layer of defense against harmful UV rays, reducing the risk of developing skin cancer. Lesser Shielding against Premature Aging:UV radiation is a significant contributor to premature aging, including wrinkles, fine lines, and age spots. Sunscreens with SPF below 30 provide inadequate protection against UVB rays, allowing them to penetrate the skin and accelerate the aging process. By using a higher SPF sunscreen, you can minimize the damage caused by UV radiation, helping to preserve your skin’s youthful appearance and preventing premature aging. Increased Vulnerability to Sun Damage:Sun damage goes beyond sunburns and premature aging. Exposure to UV radiation without adequate protection can result in other harmful effects, including hyperpigmentation, uneven skin tone, and the breakdown of collagen and elastin fibers. These factors can lead to a loss of skin elasticity, sagging, and a dull complexion. To maintain the health and integrity of your skin, it is crucial to choose a sunscreen with an SPF of 30 or higher to provide robust protection against sun damage. Underestimating Sun Exposure:It is important to note that many individuals underestimate their sun exposure and the duration they spend…

7 Best Tips For Choosing Your Next Hair Color
7 Best Tips for Choosing Your Next Hair Color

Selecting your next hair color transcends mere aesthetic preferences, incorporating an intricate analysis of skin undertones, personal style, and maintenance commitment into the decision-making process. This comprehensive guide is crafted to escort you through the selection journey, ensuring a gratifying outcome. Skin Tone Consideration The foundation of a captivating hair color lies in the harmony between the chosen hue and your skin’s undertones. Distinguishing whether your skin radiates warm, cool, or neutral undertones is pivotal. Harmonizing with Natural Hair Color Embracing your inherent hair color can yield more natural, flattering outcomes. Techniques like balayage or highlights can subtly enhance your original color. For a bolder statement, consider hues at the opposite end of your natural spectrum. Hair Color Trends for 2023/2024 Keep abreast of the latest trends to spark your hair color transformation. This season, we’re witnessing a renaissance of pastel shades, bold colors, and a nod to naturalistic hues. From the ethereal softness of lavender to the deep allure of cobalt blue, there’s a trendsetting shade awaiting your discovery. Maintenance of Color Vibrancy To preserve the luminosity and health of your colored hair, invest in products specifically formulated for color-treated hair and adhere to a schedule for touch-ups. Color Psychology A change in hair color can significantly alter perceptions and affect your mood. Grasping the psychological impact of different shades can assist in selecting a color that not only enhances your appearance but also elevates your confidence. Temporary vs. Permanent Dyes Your commitment level and willingness to experiment play crucial roles in deciding between temporary and permanent coloring options. Temporary dyes provide a risk-free avenue for exploration, whereas permanent dyes cater to those seeking enduring change. DIY vs. Professional Coloring While home dyeing kits offer a cost-effective alternative, professional salon services deliver expertise and consistently superior outcomes, especially for complex colors and techniques. Influence of Hair Texture and Type Your hair’s texture and type can affect color absorption and reflection. Coarser hair may necessitate stronger or more prolonged treatments, while finer hair might quickly become saturated with color. Selecting a Complementary Hair Color To identify a hair color that flatters, factor in your lifestyle, maintenance preferences, and seasonal changes, allowing your hair color to evolve alongside your dynamic lifestyle. Importance of Allergy and Strand Tests Conducting allergy and strand tests before dyeing is essential for ensuring safety and predicting the color outcome, preventing adverse reactions and unforeseen results. Hair Health Post-Coloring Although coloring can impact hair health, implementing deep conditioning treatments and protective styling can help maintain its vitality and vibrance. Enhancement Through Highlights and Lowlights Incorporating highlights or lowlights can introduce depth and movement, offering a spectrum of effects from subtle to dramatic. Correcting Color Mistakes While dye mishaps are rectifiable, a range of solutions from color removers to professional correction services exist to address nearly any issue. Personalizing Your Color Experimenting with shade mixing or avant-garde coloring techniques like ombré or color blocking can customize your look, imbuing it with uniqueness. Demystifying Hair Coloring Myths Addressing common misconceptions about hair coloring is crucial for setting realistic expectations and achieving…

Makeup Styles That Reveal Your Unique Beauty, According To Your Zodiac Sign
Makeup Styles That Reveal Your Unique Beauty, According to Your Zodiac Sign

As far as beauty goes, your zodiac sign can reveal much about both you and your makeup preferences. Each zodiacal sign possesses distinct traits which tend to influence what kinds of styles people gravitate towards when applying makeup based on zodiac signs. We will explore makeup tips tailored specifically for every zodiac sign here as we gain more insight into this realm of expression and beauty through makeup artist inspiration for crafting signature looks using zodiac sign makeup styles! Let’s dive deep into these fascinating universe of makeup styles inspired by these cosmic bodies! Aries (March 21 – April 19): Make A Bold Statement With Your Words! Aries individuals, representing the zodiac’s first sign, are famous for their enthusiasm, courage and limitless energy. With little patience for waiting around or being left behind when making plans come into fruition, Aries individuals excel at creating powerful presence with minimum effort – something best symbolized by bold red lipstick which always seem to find their way into their handbags! A true reflection of Aries energy! Red, symbolising fire, is an ideal color choice for Aries. Makeup that stays put all day, such as long-wear smudge-proof foundations or waterproof mascara is suitable to their active lifestyles. Taurus (April 20 – May 20): Bring Timeless Elegance Into your Lifestyle Taureans, led by Venus – the goddess of beauty and affection – find immense satisfaction from sensuous scents, exquisite flavors, quality textures, aesthetic visuals, and soothing sounds that bring them pleasure. Taureans value timeless elegance over passing fads when it comes to cosmetics – hence they tend to seek harmonious relationships as much as romantic partners. Taureans who seek to emphasize both their femininity and eyes with eye makeup will love YSL Lash Clash Mascara. Though some may view Taureans’ unwavering energy as stubbornness, don’t try forcing fashion on them; rather they set their own rules which they are adept at abiding by. Thin and weightless textures that feel barely there provide all-day comfort on lips for these energetic individuals. Gemini (May 21-June 20): Find Ways To Express Your Vivid Energy Ruled by Mercury, our planet’s fastest planet, Geminis are among the brightest members of mutable zodiac signs. Their strong communication skills, sharp intellect, and quick adaptability set them apart. Their keen sense for new experiences enables them to quickly explore makeup trends which reflect ever-evolving perspectives into their style; Geminis can express themselves creatively when testing different products! Cancer (June 21-July 22): To Highlight Natural Tones Cancerians, under the sign of Cancerius the Moon’s influence, are noted for their strong intuition as well as their homely and faithful qualities. Cancer people prefer soft feminine makeup looks inspired by water’s element. Through memories they easily incorporate nostalgic styles into their look. Leo (July 23 – August 22): Expand Your Radiance As Leos are associated with the Sun, they tend to attract notice in social gatherings due to their leadership, self-confidence, and warmth – qualities which stand them out immediately upon entering a room. Leos enjoy grandeur and shimmer; when starting makeup routines they should opt for primer…

What Is Microblading Transform Your Eyebrows From Sparse To Gorgeous (1)
What is microblading? Transform Your Eyebrows from Sparse to Gorgeous

Microblading is a transformative beauty procedure that meticulously enhances the appearance of your eyebrows, offering a semi-permanent solution for those seeking fuller, more defined brows. This technique involves the manual insertion of pigment into the upper layers of skin to create the appearance of natural eyebrow hairs. However, achieving the best possible results requires more than just booking an appointment; it involves thorough preparation, understanding the process, and proper aftercare. Choosing the Right Microblading Technician The first step in your Microblading journey is to choose a skilled and certified aesthetician. Researching your options is crucial. Look for a salon that showcases an extensive portfolio of before and after photos, demonstrating their ability to produce the kind of results that captivate you. It’s essential that your chosen technician not only possesses the necessary certification but also has a wealth of experience, reflected in their hours of education and practical application. Remember, the quality of your results depends heavily on the skill and precision of the technician. State Regulations and Technician Licensing Be aware that each state has its own set of rules and regulations governing microblading. Before proceeding, verify the licensing requirements in your area and ensure your technician meets these standards. This step is crucial for both your safety and the legality of the procedure. Preparing for Your Microblading Session Proper preparation can significantly enhance the outcome of your Microblading procedure. Here are some essential tips to ensure you’re fully prepared: Understanding the Microblading Procedure Microblading is typically completed in three key steps: Preparation Initially, your aesthetician will apply a topical numbing cream to your eyebrow area to minimize discomfort. This preparation is vital for both your comfort and the steadiness of the microblading process. The Procedure Experience Pain tolerance varies from person to person. Some may only feel a slight scratching sensation, while others might experience a bit more discomfort. However, most find the procedure to be bearable, with the numbing cream significantly reducing any pain. Post-Procedure Care Immediately after your session, it’s normal for your eyebrows to appear darker and more pronounced than expected. This intensity will fade as they heal, usually within a week, resulting in a more natural look. It’s advised to avoid water exposure, including long showers and baths, during the initial healing phase to prevent the pigment from washing out prematurely. Post-Microblading Care To ensure the best healing and color retention, follow these aftercare tips: Potential Risks and How to Mitigate Them While microblading is generally safe, being informed about potential risks is crucial: Allergic Reactions Though rare, it’s possible to have an allergic reaction to the pigment used. Discuss any known allergies with your technician beforehand. Infection Infections can occur if the procedure is done with non-sterile equipment. Ensure your salon follows strict hygiene practices. Semi-Permanence Microblading results are semi-permanent. If you’re unhappy with the results, corrections or removal can be more challenging. Give yourself time to consider if microblading is right for you and choose a technician who can offer a result you’re confident you’ll be happy with. Microblading can significantly enhance your facial…