The Ultimate Guide: How to Properly Apply Sunscreen Under Foundation

The Ultimate Guide: How to Properly Apply Sunscreen Under Foundation

Wearing sunscreen is crucial for maintaining healthy and youthful skin, protecting it from the harmful effects of the sun’s ultraviolet (UV) rays. However, many people struggle with incorporating sunscreen into their makeup routine, particularly when it comes to applying it under foundation. In this comprehensive guide, we will walk you through the steps to ensure that you can effectively wear sunscreen under foundation, allowing you to enjoy the benefits of both sun protection and flawless makeup.

Step 1: Choose the Right Sunscreen:
Before applying sunscreen, it is essential to select a product that suits your skin type and provides broad-spectrum protection against both UVA and UVB rays. Look for a lightweight formula that is specifically designed for the face and has a minimum SPF (Sun Protection Factor) of 30. Opt for non-comedogenic and oil-free options to prevent clogged pores and excessive shine.

Step 2: Cleanse and Moisturize:
Start with a clean canvas by washing your face with a gentle cleanser. Follow up with a lightweight moisturizer suitable for your skin type. Allow the moisturizer to absorb completely before proceeding to the next step. Hydrated skin ensures a smooth application of sunscreen and foundation.

Step 3: Apply Sunscreen:
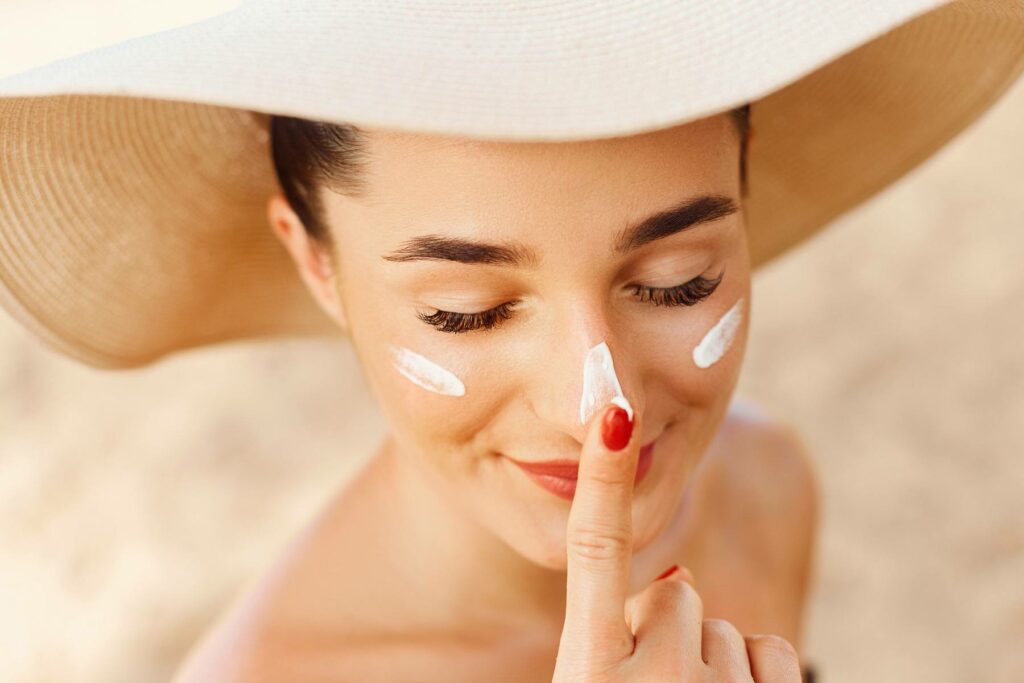
Take a dime-sized amount of sunscreen and dot it onto your forehead, cheeks, chin, and nose. Gently spread the sunscreen across your face, ensuring even coverage. Pay extra attention to areas prone to sun exposure, such as the bridge of the nose, cheekbones, and temples. Avoid rubbing vigorously, as it may cause the sunscreen to pill or ball up.

Step 4: Wait for Sunscreen to Set:
Allow the sunscreen to absorb into your skin for at least 10 to 15 minutes before applying foundation. This waiting period allows the sunscreen to form a protective barrier on your skin and ensures better adherence of the foundation.

Step 5: Choose a Foundation Formula:
To ensure compatibility between sunscreen and foundation, opt for a foundation with a lightweight and liquid consistency. Oil-free and water-based formulas tend to work best with sunscreen, as they minimize the risk of clogged pores and allow for smoother application.

Step 6: Mix Sunscreen with Foundation (Optional):
If you prefer a more streamlined application process, you can mix a small amount of sunscreen with your foundation. This method helps to ensure even distribution of sun protection and foundation, providing a combined layer of coverage. However, it is important to maintain the recommended amount of sunscreen for adequate sun protection.

Step 7: Apply Foundation:
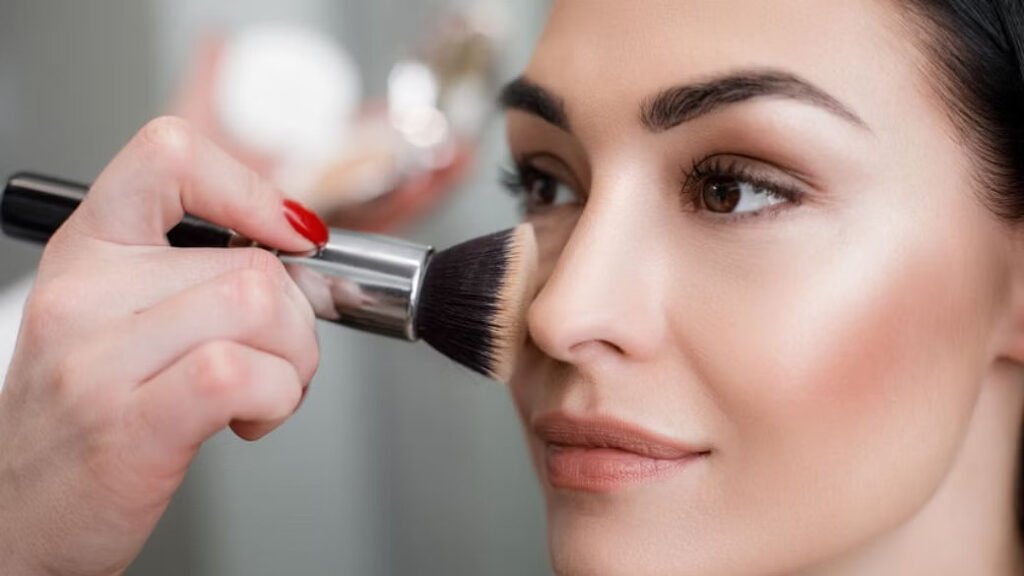
Using a clean makeup brush, sponge, or your fingertips, apply the foundation onto your face in gentle, downward strokes. Start from the center of your face and blend outward for a seamless finish. Avoid using excessive pressure, as it may disrupt the sunscreen layer beneath.

Step 8: Set with Powder (Optional):
If you prefer to set your foundation with powder, choose a translucent or mineral-based powder with sun-protective properties. Apply a light dusting to ensure your makeup stays in place while adding an extra layer of sun protection.

Step 9: Reapply Sunscreen Throughout the Day:
Remember that sunscreen needs to be reapplied every two hours, especially if you are exposed to direct sunlight for extended periods or if you perspire heavily. When reapplying sunscreen, gently blot away excess oil or sweat with a tissue before applying a new layer.
The Ultimate Guide: How to Properly Apply Sunscreen Under Foundation

By following these steps, you can confidently wear sunscreen under foundation, ensuring that your skin remains protected from the damaging effects of the sun’s rays while maintaining a flawless makeup look. Remember, consistent sun protection is key to healthy and radiant skin, so make wearing sunscreen a part of your daily routine.

SPF in Moisturizer: If you’re short on time or prefer a simplified routine, you can opt for a moisturizer that already contains SPF. Many moisturizers offer SPF protection, allowing you to combine hydration and sun protection in one step.

Touch-Up with Powder Sunscreen: Throughout the day, if you need to touch up your makeup or reapply sunscreen, consider using a powder sunscreen. These convenient products come in a compact form and can be applied over your foundation without disrupting your makeup. They provide an additional layer of sun protection while reducing shine.

Don’t Forget the Neck and Chest: When applying sunscreen and foundation, remember to extend it to your neck and chest as well. These areas are often exposed to the sun and can show signs of aging and sun damage. Extend your skincare and makeup routine to these areas to maintain an even complexion.

Choose a High-SPF Lip Balm: The delicate skin on your lips is also susceptible to sun damage. Protect your lips by using a lip balm that offers a high SPF. Look for lip products that contain ingredients like zinc oxide or titanium dioxide for effective sun protection.
Consider a Separate Sunscreen for Body: While this guide focuses on wearing sunscreen under foundation on the face, it’s important to protect your entire body from the sun’s rays. Use a separate sunscreen product specifically formulated for the body and apply it generously to exposed skin when spending time outdoors.

Wearing sunscreen under foundation is a crucial step in maintaining healthy, protected skin. By following the steps outlined in this guide, you can effectively incorporate sunscreen into your makeup routine without compromising your desired makeup look. Remember to choose the right sunscreen for your skin type, allow it to absorb before applying foundation, and reapply sunscreen throughout the day for optimal sun protection. With these practices in place, you can enjoy the benefits of both a flawless complexion and a shielded skin from the sun’s harmful rays.


Nourishing Solutions For Dry And Damaged Hair: A Comprehensive Guide To Effective Treatment And The Role Of Hair Primers
Nourishing Solutions for Dry and Damaged Hair: A Comprehensive Guide to Effective Treatment and the Role of Hair Primers

Dry and damaged hair can be a source of frustration and can significantly impact our self-confidence. However, with the right care and attention, it is possible to revive and restore the health and vitality of your hair. This comprehensive guide aims to provide you with valuable insights and practical tips to effectively treat dry and damaged hair. Additionally, we will explore the benefits and proper usage of hair primers, an essential tool in your hair care arsenal. Understanding Dry and Damaged HairBefore diving into treatment options, it is important to understand the underlying causes and characteristics of dry and damaged hair. Factors such as excessive heat styling, chemical treatments, environmental exposure, improper hair care routines, and nutritional deficiencies can all contribute to dryness and damage. Dry hair lacks moisture, appearing dull, brittle, and prone to frizz. Damaged hair, on the other hand, has structural impairments, such as split ends, breakage, and rough texture. Building a Hair Care RoutineDeveloping a consistent and tailored hair care routine is crucial for improving the condition of dry and damaged hair. This section will outline the essential steps to incorporate into your regimen, including cleansing, conditioning, and treatments. We will discuss the importance of using sulfate-free shampoos, moisturizing conditioners, and deep conditioning masks enriched with nourishing ingredients such as keratin, argan oil, shea butter, and vitamin E. Furthermore, we will explore the benefits of incorporating natural remedies like coconut oil and aloe vera into your routine. Nourishing Treatments for Dry and Damaged Hair In addition to a comprehensive hair care routine, targeted treatments can help restore moisture and repair damaged strands. We will discuss various treatments, such as protein treatments, hair masks, leave-in conditioners, and serums that can provide intensive hydration and repair. We will also touch upon the significance of regular trims to remove split ends and promote healthy hair growth. Introduction to Hair PrimersHair primers have gained popularity in recent years as a preparatory step in the hair care routine. This section will explain the purpose and benefits of using hair primers. Primers create a protective barrier between your hair and styling tools, minimizing heat damage and reducing the risk of breakage. They also provide a smooth base for styling products and help prolong the longevity of your desired hairstyle. Hair primers can come in various forms, including sprays, creams, and serums, each offering unique benefits. Utilizing Hair Primers for Optimal Results To maximize the effectiveness of hair primers, it is crucial to understand their proper usage. This section will provide a step-by-step guide on how to use hair primers correctly. We will discuss the ideal application techniques, the amount of product to use, and how to distribute it evenly throughout your hair. Additionally, we will explore the compatibility of hair primers with other styling products, such as heat protectants, volumizers, and smoothing serums. Choosing the Right Hair Primer for Your Needs Selecting the most suitable hair primer for your specific hair type and concerns is essential. This section will highlight key factors to consider when choosing a hair primer, including ingredients, formulation, and the…

What Is Filler Fatigue?
What is Filler Fatigue?

Over the past decade, dermal fillers have gained immense popularity as a non-surgical solution for facial rejuvenation and enhancement. While these injectable treatments offer impressive results, there is a growing concern known as “filler fatigue.” Filler fatigue refers to the diminishing satisfaction or perceived lack of effectiveness experienced by some individuals after repeated filler treatments. In this article, we will delve into the concept of filler fatigue, exploring its causes, symptoms, and potential strategies to address this phenomenon. What is Filler Fatigue?Filler fatigue can be described as a psychological state in which individuals become less satisfied with the outcomes of dermal filler treatments over time. It is characterized by a sense of diminishing returns or the feeling that the effects of fillers are not as noticeable or long-lasting as they once were. This phenomenon can lead to frustration, disappointment, and a desire for alternative treatment options. Causes of Filler Fatigue:Several factors contribute to the development of filler fatigue. Firstly, repeated exposure to the same aesthetic outcome can lead to habituation or a psychological adaptation to the visual changes brought about by fillers. The initial excitement and novelty may wane as individuals become accustomed to their enhanced appearance. Additionally, unrealistic expectations, influenced by social media and the “perfect” images portrayed, can contribute to filler fatigue when the achieved results do not align with these idealized standards. Impact of Individual Biology:Individual biological factors also play a role in filler fatigue. The body’s natural metabolism and breakdown of hyaluronic acid, the most common filler substance, can vary from person to person. Some individuals may experience a faster breakdown of the filler material, leading to a shorter duration of effectiveness. Additionally, the rate of collagen production, which contributes to the longevity of filler results, can differ among individuals, affecting the overall satisfaction with the outcomes. Overfilling and Unnatural Results:Another contributing factor to filler fatigue is overfilling or excessive use of dermal fillers. When practitioners inject an excessive amount of filler or place it incorrectly, it can result in an unnatural appearance or distortion of facial features. Over time, individuals may develop dissatisfaction as the overfilled areas settle and create an imbalance in facial proportions. This can contribute to the perception that fillers are no longer effective or desirable. Addressing Filler Fatigue:To address filler fatigue, open communication between the patient and the practitioner is crucial. Patients should express their concerns, expectations, and desired outcomes clearly, allowing the practitioner to tailor the treatment accordingly. Additionally, practitioners should provide realistic expectations and educate patients about the limitations and potential longevity of fillers. This helps manage expectations and minimize the risk of filler fatigue. Combination Approaches and Alternative Treatments:In cases of filler fatigue, alternative treatments or combination approaches can be considered. These may include neuromodulators such as Botox, which relax facial muscles and reduce the appearance of wrinkles, or collagen-stimulating treatments like Sculptra, which promote natural collagen production for long-lasting results. These alternatives can provide a refreshed look and offer a different approach to facial rejuvenation. Time Intervals and Maintenance:Proper spacing between filler treatments can also help mitigate filler fatigue….

Unveiling The Magic: Exploring Transparent Eyeliner
Unveiling the Magic: Exploring Transparent Eyeliner

When it comes to enhancing the eyes and creating captivating makeup looks, eyeliner plays a pivotal role. From classic black to vibrant colors, eyeliners come in various shades and formulas. However, a recent trend that has taken the beauty world by storm is transparent eyeliner. In this article, we will delve into the world of transparent eyeliner, understanding what it is, how it works, and the unique benefits it offers. Whether you’re a makeup enthusiast or curious about the latest beauty trends, join us as we unveil the magic of transparent eyeliner. Understanding Transparent Eyeliner:Transparent eyeliner, also known as clear eyeliner or invisible eyeliner, is a revolutionary cosmetic product designed to enhance the eyes without the traditional appearance of a visible line. Unlike traditional eyeliners that come in pigmented shades, transparent eyeliner appears colorless or translucent when applied. It provides a subtle, natural look that defines the eyes without overpowering other elements of the makeup. How Does Transparent Eyeliner Work?Transparent eyeliner typically comes in the form of a gel or liquid with a clear consistency. The formula usually includes polymers or film-forming agents that create a thin, invisible line along the lash line. These polymers adhere to the skin, creating a barrier that gives the illusion of a defined eye shape without the appearance of visible eyeliner. Transparent eyeliner works by enhancing the natural contours of the eye, making it look more awake and defined. Versatility in Eye Makeup:One of the key advantages of transparent eyeliner is its versatility in eye makeup looks. Unlike traditional eyeliners that can sometimes limit the range of styles, transparent eyeliner can be seamlessly incorporated into various makeup looks. Whether you prefer a natural “no-makeup” look, a soft and subtle enhancement, or a bold and dramatic eye, transparent eyeliner provides a versatile tool to achieve your desired effect. Smudge-Free and Long-Lasting:Transparent eyeliner often boasts smudge-free and long-lasting properties. Since it doesn’t contain pigments that can transfer or fade, it has a higher resistance to smudging, smearing, or running throughout the day. This makes it particularly suitable for those with oily eyelids or in humid climates where traditional eyeliners may struggle to maintain their integrity. With transparent eyeliner, you can enjoy a defined eye look that lasts from morning to night without the need for constant touch-ups. Accentuating Eye Shape:One of the primary goals of eyeliner is to accentuate and enhance the natural shape of the eyes. Transparent eyeliner excels in this area by defining the eyes without overpowering them. By tracing a clear line along the lash line, transparent eyeliner helps to create the illusion of fuller lashes and a more lifted eye appearance. It can also be used to subtly elongate or reshape the eye shape, allowing for endless possibilities in eye makeup experimentation. Complementing Diverse Makeup Styles:Transparent eyeliner seamlessly complements a wide range of makeup styles. It is particularly effective when paired with vibrant eyeshadows or intricate eye art, as it adds definition and structure without competing for attention. Additionally, transparent eyeliner works harmoniously with other eye-enhancing products like mascara and false lashes, allowing them…

Dermaplaning: The Popular Skincare Treatment Explained

Dermaplaning is a non-invasive, exfoliating skincare treatment that has gained popularity in recent years. It involves the use of a sharp, surgical-grade scalpel to remove the outermost layer of dead skin cells and vellus hair (also known as peach fuzz) from the face. The result is a smoother, brighter, and more radiant complexion. In this article, we’ll explore the benefits, risks, and considerations for dermaplaning. Benefits of Dermaplaning One of the primary benefits of dermaplaning is its ability to exfoliate the skin. The scalpel removes the outer layer of dead skin cells, which can help to reduce the appearance of fine lines, wrinkles, and acne scars. Additionally, by removing the dead skin cells, it allows for better absorption of skincare products, making them more effective. This can be especially beneficial for individuals who have hyperpigmentation or uneven skin tone, as the exfoliation can help to even out the complexion. Another benefit of dermaplaning is the removal of vellus hair. While many people are hesitant to remove peach fuzz, it can actually be beneficial for the skin. Vellus hair can trap dirt and oil, which can contribute to breakouts. By removing the hair, it can help to prevent breakouts and make the skin appear smoother and more refined. Dermaplaning is also a quick and painless procedure. It typically takes around 30 minutes to complete and is done in-office by a licensed esthetician or dermatologist. Unlike other exfoliating treatments, such as chemical peels, dermaplaning does not require any downtime. Patients can immediately return to their normal activities without any redness or irritation. Risks and Considerations While dermaplaning is generally considered safe, there are some risks and considerations to keep in mind. The use of a sharp scalpel on the face can be dangerous if not done correctly, so it’s important to only have the procedure done by a licensed professional. It’s also important to avoid any sun exposure for a few days after the procedure, as the skin will be more sensitive. Another consideration is that dermaplaning is not suitable for everyone. Individuals with active acne, eczema, or rosacea should avoid the procedure, as it can exacerbate these conditions. Additionally, those with a history of cold sores should take precautions, as the procedure can trigger an outbreak. It’s also important to note that dermaplaning is a temporary solution. While the results can last for a few weeks, the skin will eventually return to its natural state. For best results, it’s recommended to have the procedure done every 4-6 weeks. How to Prepare for Dermaplaning Before having a dermaplaning treatment, it’s important to properly prepare your skin. This includes avoiding any exfoliating treatments for at least a week prior to the procedure. It’s also important to avoid any sun exposure or tanning beds for at least a week before the procedure. On the day of the procedure, it’s important to arrive with a clean face, free of any makeup or skincare products. The esthetician or dermatologist will then apply a numbing cream to the face, which will help to minimize any discomfort during the procedure….

The Astonishing Reality Could Lip Balm Be Deteriorating Your Chapped Lips 2
The Astonishing Reality: Could Lip Balm Be Deteriorating Your Chapped Lips?

Turning to lip balm for immediate solace from chapped lips is a common practice, yet there’s growing curiosity about whether these comforting tubes may actually be perpetuating a cycle of lip dryness and dependence. This article investigates the composition of lip balms, their influence on lip health, and strategies for judiciously choosing and utilizing lip care products. Deciphering Lip Balm and Its ConstituentsActing as a moisture-locking barrier, lip balm shields lips from harsh external conditions like cold climates and dry environments. Key components typically encompass occlusives such as petroleum jelly, humectants including hyaluronic acid, and emollients like shea butter. Although these constituents are mainly beneficial, some lip balm formulas may incorporate potential irritants, for instance, fragrances or menthol, aggravating sensitivity and intensifying dryness. The Phenomenon of Lip Balm DependenceThe notion of becoming reliant on lip balm is not unfounded. Such dependence arises when lips start relying on artificial moisture, diminishing their innate hydrating capabilities. Indications of excessive use involve constant reapplication needs and experiencing a sense of tightness or aridity sans balm. Evaluating Ingredients’ Effects on Lip WellnessIngredients vary significantly in their impact on lip health. While substances like lanolin and beeswax offer profound moisturization and protection, certain essential oils and synthetic additives might irritate the lips, further exacerbating chapped conditions. Contrasting Balms, Salves, and OintmentsComprehending the distinctions among these products aids in making informed choices. Balms provide a balanced mix of occlusion and hydration, salves focus on healing with their denser consistencies, and ointments are ideal for extreme dryness, offering substantial protective layers. Hydration’s Role in Lip CareBoth internal and external hydration are pivotal for lip health. Adequate water intake fosters natural moisture, whereas applying products enriched with aloe vera and glycerin enhances the lips’ moisture retention. Debunking Lip Balm Myths and TruthsMisconceptions abound, such as the belief in lip balms causing addictive dryness or the superiority of all-natural ingredients. The essence lies in identifying products that are meticulously formulated to meet individual lip requirements. Dermatologists’ Insights on Lip Balm ApplicationExperts advocate for balms devoid of allergenic or irritating substances, recommending those with straightforward, hydrating ingredients. The preference between natural versus synthetic components often comes down to personal sensitivity and skin reactivity. Optimizing Personal Lip Care PracticesAn effective daily lip care regimen should encompass gentle exfoliation, adequate hydration, and protection against environmental elements. Tailoring care according to weather conditions, like applying SPF-infused balms in sunny settings, can mitigate damage. Assessing the Dilemma: Does Lip Balm Aggravate Chapped Lips?The response is nuanced. For the majority, a carefully selected lip balm delivers vital moisture and protection. Yet, for individuals with sensitive skin or allergies to certain substances, some balms might indeed worsen dryness. Tailoring Lip Care to Individual NeedsIdentifying personal lip types and issues is crucial for customized care. Those with a predisposition to dryness might find solace in more occlusive formulas, whereas individuals with sensitive lips might seek hypoallergenic and unscented options. The Mental Aspect of Lip Balm UseBeyond physical dependency, the habitual use of lip balm can encompass an emotional dimension, with some developing a psychological attachment to their lip care…

Embracing Radiance Exploring The Multifaceted Benefits Of Rose Water For Skin 1
Embracing Radiance: Exploring the Multifaceted Benefits of Rose Water for Skin

For centuries, rose water has been cherished for its enchanting fragrance and a wide array of benefits for the skin. Derived from the petals of the rose flower through a meticulous distillation process, rose water is a natural elixir that has found a cherished place in skincare routines around the world. Packed with vitamins, antioxidants, and gentle astringent properties, rose water offers an array of advantages that can transform your skincare regimen. In this comprehensive guide, we delve into the multifaceted benefits of rose water for the skin, unveiling the secrets to achieving a radiant and rejuvenated complexion. Understanding Rose Water Rose water, also known as rose hydrosol, is a distilled water infused with the aromatic and therapeutic essence of roses. It is renowned for its gentle nature, making it suitable for various skin types, including sensitive and delicate skin. As a versatile skincare ingredient, rose water boasts an impressive array of benefits that contribute to healthier, more vibrant skin. Hydration and Moisture One of the primary benefits of rose water is its exceptional ability to provide hydration and moisture to the skin. The water-binding properties of rose water help lock in moisture, preventing dehydration and maintaining a supple complexion. Regular use of rose water can result in plumper, more radiant skin that glows with vitality. Calming and Soothing Rose water is a natural tonic for irritated or sensitive skin. Its anti-inflammatory properties help soothe redness, inflammation, and irritation caused by various factors, such as sunburn, allergies, or skin conditions like eczema. Applying rose water can provide instant relief and a sense of calm to your skin. Balancing pH Levels Balanced pH levels are crucial for healthy skin. Rose water has a slightly acidic pH, which makes it an excellent natural remedy for maintaining the skin’s optimal pH balance. By using rose water as a toner, you can help regulate the skin’s acidity, which in turn supports a strong skin barrier and prevents issues like acne and excessive dryness. Anti-Aging Effects The antioxidants present in rose water, including vitamin C, help combat free radicals that accelerate the aging process. Regular use of rose water can diminish the appearance of fine lines and wrinkles, promoting a smoother and more youthful complexion. Additionally, the astringent properties of rose water tighten pores and give the skin a firmer appearance. Cleansing and Refreshing Rose water serves as a gentle yet effective cleanser for the skin. It helps remove dirt, oil, and impurities from the pores, leaving your skin feeling fresh and rejuvenated. You can use rose water as a makeup remover or as a refreshing mist throughout the day to revitalize your skin and uplift your senses. Natural Astringent The natural astringent properties of rose water make it an ideal solution for toning the skin. It helps tighten the skin, reduce the appearance of pores, and control excess oil production. Incorporating rose water into your skincare routine can lead to a smoother, more refined complexion. Reduction of Under-Eye Puffiness Rose water’s soothing and anti-inflammatory properties extend to the delicate skin around the eyes. Applying a cotton…

Microshading: The Art Of Effortlessly Defined Brows
Microshading: The Art of Effortlessly Defined Brows

Eyebrows play a crucial role in framing the face and enhancing our overall appearance. Over the years, various techniques have emerged to help individuals achieve their desired brow look, including microshading. Microshading is a semi-permanent cosmetic procedure that aims to create natural-looking, defined eyebrows. In this article, we will explore the art of microshading, understanding what it is, how it works, and the benefits it offers for those seeking flawlessly shaped and filled brows. Understanding Microshading:Microshading, also known as powder brows or ombre brows, is a cosmetic tattooing technique that involves depositing pigment into the superficial layers of the skin to create a soft, powdered effect on the eyebrows. Unlike microblading, which uses fine incisions to mimic individual eyebrow hairs, microshading utilizes a stippling technique to achieve a more filled-in appearance. This technique is particularly beneficial for individuals with sparse or thin eyebrows, as it creates a denser and more defined brow look. The Process of Microshading:Microshading typically begins with a consultation to discuss the desired eyebrow shape, color, and overall outcome. Before the procedure, a numbing cream is applied to the brow area to minimize any discomfort. The technician then uses a handheld device or a manual tool with a cluster of small needles to gently tap and deposit pigment into the skin. The technician carefully layers the pigment, creating a gradient effect that mimics the natural growth and shading of eyebrow hair. The procedure may take around 1-2 hours, depending on the individual’s desired result. Achieving Natural-Looking Results:One of the significant advantages of microshading is its ability to create natural-looking results. By utilizing a stippling technique, the technician can mimic the appearance of soft, powdered eyebrows, closely resembling the natural texture and shading of brow hair. This technique allows for more flexibility in creating varying levels of density and achieving a result that complements the client’s facial features and desired aesthetic. Customization for Every Client:Microshading offers a high level of customization to meet each client’s unique preferences. The technician takes into account factors such as the client’s face shape, existing brow shape, and color to create a personalized treatment plan. The color of the pigment can be tailored to match the client’s natural hair color or desired shade, ensuring that the brows look natural and well-blended with the client’s overall appearance. The shape and density of the brows can also be adjusted to enhance the client’s facial features and achieve their desired brow style. Long-Lasting Results:Microshading is a semi-permanent procedure, meaning that the results can last for an extended period before requiring touch-ups. On average, microshaded eyebrows can retain their color and shape for 1-3 years, depending on factors such as individual skin type, lifestyle, and aftercare. Touch-up sessions can be scheduled as needed to maintain the desired brow appearance and ensure longevity. Minimally Invasive and Safe:Microshading is a minimally invasive procedure that carries a relatively low risk when performed by a skilled and experienced technician in a sterile environment. Proper sanitation practices and the use of high-quality pigments minimize the risk of complications. However, as with any cosmetic procedure,…

Illuminating Radiance: Top Tips On Choosing The Perfect Primer For Dull Skin
Illuminating Radiance: Top Tips on Choosing the Perfect Primer for Dull Skin

If you have dull skin that lacks radiance and appears lackluster, using a primer specifically designed to address this concern can be a game-changer in your makeup routine. Primers are the secret to achieving a flawless and long-lasting makeup look, and selecting the right one for dull skin can brighten, hydrate, and create a luminous glow. In this comprehensive guide, we will explore the top tips on choosing a primer suited to dull skin, helping you achieve a radiant complexion that lasts all day. Understanding Dull Skin and its Causes Dull skin is characterized by a lack of radiance, appearing flat and lifeless. Several factors contribute to dullness, including: Dead Skin Cells: Accumulation of dead skin cells on the skin’s surface can create a barrier that reflects light poorly, resulting in a dull appearance. Dehydration: Lack of proper hydration can cause the skin to lose its plumpness and glow, leading to a lackluster complexion. Uneven Texture: Uneven skin texture can cast shadows and reduce the skin’s ability to reflect light, making the skin look dull. Environmental Factors: Exposure to pollutants, harsh weather, and UV radiation can damage the skin and contribute to dullness. Age: As we age, the skin’s natural renewal process slows down, leading to a buildup of dead skin cells and a loss of luminosity. Top Tips on Choosing a Primer for Dull Skin When it comes to choosing a primer for dull skin, the key is to opt for products that address the specific concerns associated with dullness. Consider the following tips to find the perfect primer for your needs: Look for Hydrating FormulasHydration is essential for combatting dullness, so opt for a primer that offers intense moisture. Look for ingredients such as hyaluronic acid, glycerin, and aloe vera, which help lock in moisture and keep your skin looking plump and radiant. Choose Illuminating PrimersIlluminating primers are specifically designed to add a luminous glow to the skin. These primers often contain light-reflecting particles that bounce light off the skin, instantly brightening the complexion and reducing the appearance of dullness. Consider Color-Correcting PrimersColor-correcting primers are formulated to target specific skin concerns, including dullness. Look for primers with peach, pink, or lavender undertones, which can help counteract sallowness and revive a lackluster complexion. Check for Antioxidant-Rich IngredientsAntioxidant-rich primers can help protect the skin from environmental damage, which is a common cause of dullness. Look for ingredients like vitamins C and E, green tea extract, and niacinamide, which have powerful antioxidant properties. Find Primers with Exfoliating PropertiesExfoliating primers can help remove dead skin cells, promoting a smoother and more radiant complexion. Ingredients like alpha hydroxy acids (AHAs) or beta hydroxy acids (BHAs) in the primer can gently exfoliate the skin, revealing a brighter and fresher appearance. Avoid Heavy, Matte FormulationsSteer clear of heavy, matte primers, as they can further emphasize dullness and make the skin look flat. Instead, opt for lightweight and dewy formulations that offer a natural and radiant finish. Consider Your Skin TypeTake your skin type into account when choosing a primer. If you have dry skin, opt for a…