Unveiling the Magic of Mascara Primers: Elevating Your Lash Game

Unveiling the Magic of Mascara Primers: Elevating Your Lash Game

In the realm of beauty and cosmetics, mascara is often regarded as the Holy Grail for achieving voluminous and defined lashes. However, in recent years, a new player has emerged to elevate lash perfection to unprecedented heights: mascara primer. This revolutionary product has garnered attention for its ability to enhance the effects of mascara, creating longer, fuller, and more dramatic lashes. In this article, we will explore the fascinating world of mascara primers, unravel their benefits, and provide insights into how they work their magic. So, get ready to discover the secret weapon for achieving luscious lashes!

Understanding Mascara Primer:

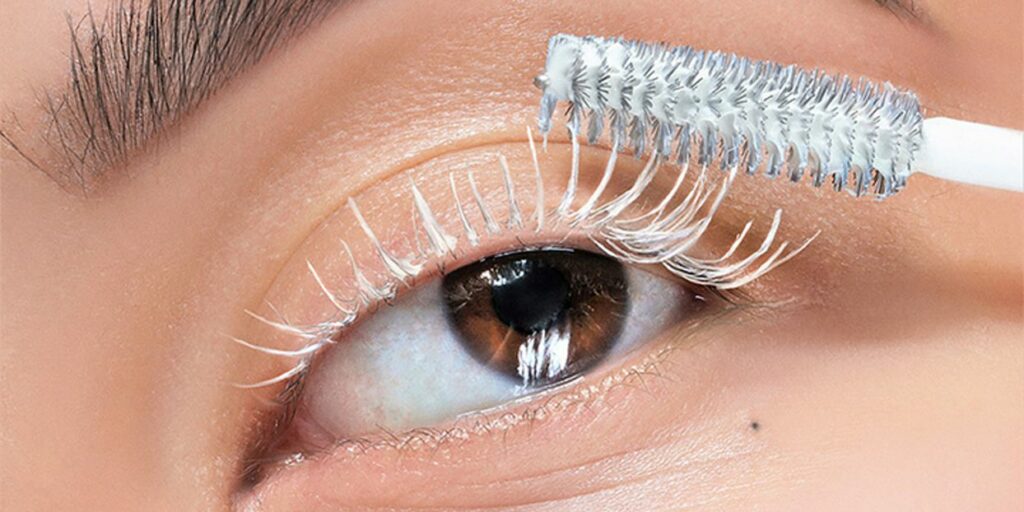
Mascara primer is a product designed to be applied to the lashes before mascara. It acts as a base coat, prepping the lashes for mascara application and maximizing its effects. Typically, mascara primers come in a creamy, often white or light-colored formula, enriched with nourishing ingredients and specialized polymers. These ingredients work in harmony to deliver a range of benefits that enhance the appearance of lashes.

Benefits of Mascara Primer:

Lash Lengthening and Thickening:
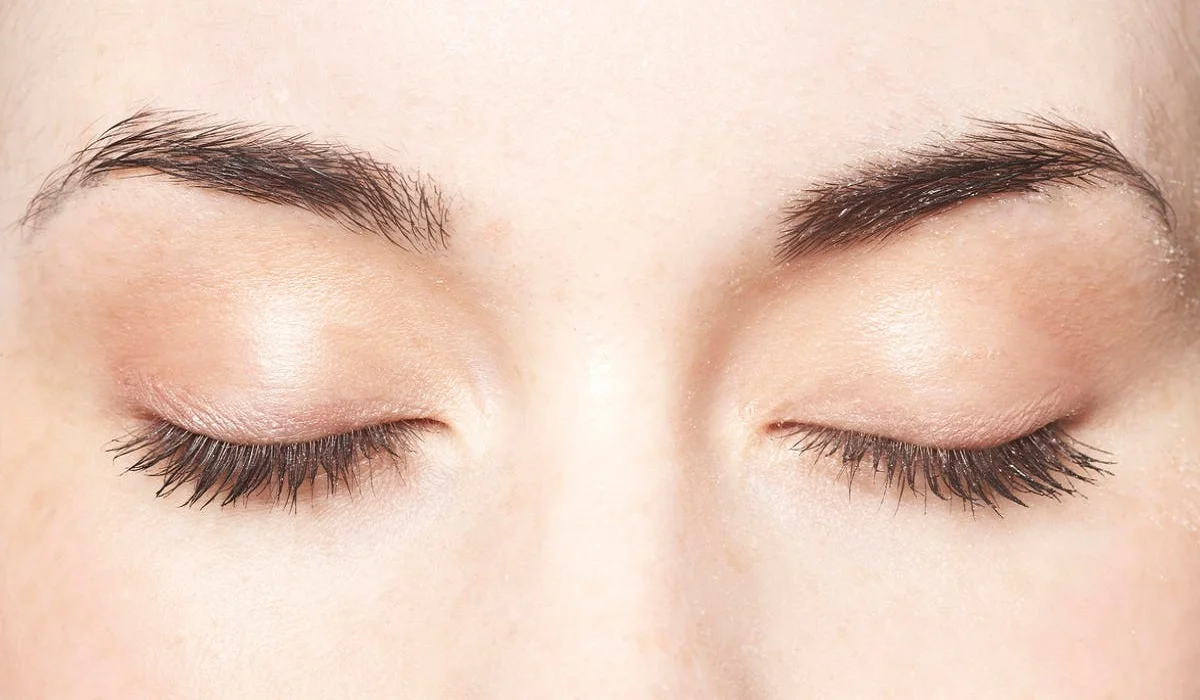
Mascara primers contain fibers or microfibers that adhere to the lashes, adding length and thickness. These tiny fibers act as extensions, effectively magnifying the impact of mascara by providing a fuller and more voluminous look. The combination of primer and mascara creates the illusion of longer, fluttery lashes that beautifully frame the eyes.

Improved Mascara Performance:
By applying a mascara primer, you create a smoother surface for mascara application. The primer coats and separates each lash, creating a solid foundation for the mascara to adhere to. As a result, mascara glides on effortlessly, ensuring clump-free and even distribution of the product. The primer also helps to prevent smudging and flaking throughout the day, enhancing the longevity of your mascara wear.

Enhanced Curl Retention:
If you’re looking to achieve a captivating curl that lasts, mascara primer is your secret weapon. The formula of many primers includes curl-enhancing properties that help lift and hold the lashes in place. By using a primer, you can preserve the curl created by an eyelash curler for a more extended period, giving your eyes an open and awakened appearance.

Nourishment and Conditioning:
Many mascara primers are enriched with nourishing ingredients, such as vitamins, peptides, and botanical extracts. These ingredients provide essential nutrients to the lashes, helping to strengthen and condition them over time. Regular use of a mascara primer can contribute to healthier lashes that are less prone to breakage and damage.

Versatility:
One of the remarkable aspects of mascara primers is their versatility. They can be used in combination with any mascara, allowing you to tailor your lash look according to your preferences. Whether you desire a natural, everyday look or a dramatic, high-impact effect, a mascara primer can help you achieve it by amplifying the results of your chosen mascara.
Unveiling the Magic of Mascara Primers: Elevating Your Lash Game

How to Apply Mascara Primer:

Applying mascara primer is a simple process that can make a significant difference in your lash game. Follow these steps to make the most of your mascara primer:

Step 1: Start with clean, dry lashes. Ensure that your lashes are free from any residual makeup or oils to allow the primer to adhere effectively.

Step 2: Open the mascara primer tube and gently remove the wand, wiping off any excess product on the rim of the tube.

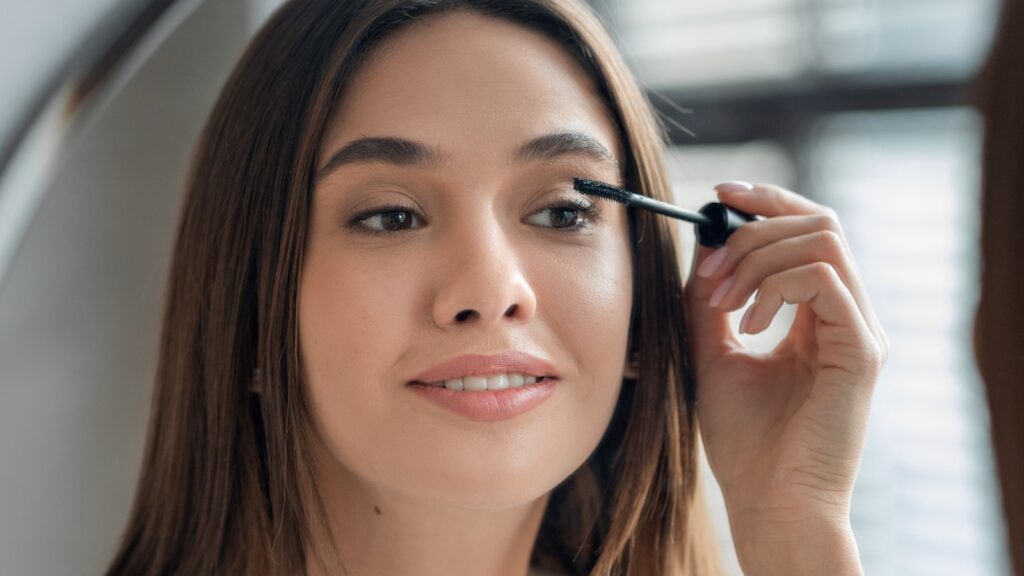
Step 3: Starting at the base of your lashes, apply the primer in upward strokes, moving towards the tips. Coat each lash thoroughly to ensure even coverage.

Step 4: Allow the primer to dry for a few seconds before applying your favorite mascara on top. You allow the primer to dry for a few seconds before applying your favorite mascara on top. You can also choose to apply multiple coats of primer for a more intense effect. Just remember to let each coat dry before proceeding to the next layer.


Step 5: After the primer has dried, apply your mascara as you normally would. Start at the base of the lashes and wiggle the wand back and forth as you move towards the tips. This technique helps to separate and coat each lash, ensuring a voluminous and clump-free look.

Step 6: For added drama, you can repeat the process of applying mascara primer followed by mascara. Layering the two products can create a more intense and eye-catching effect.

Tips for Using Mascara Primer:

Choose the Right Primer: Consider your desired outcome when selecting a mascara primer. If you’re aiming for length and thickness, opt for a primer with fibers. If you’re looking for added curl retention, choose a primer with curl-enhancing properties. There are various options available in the market, so finding one that suits your specific needs should not be a challenge.

Don’t Forget the Lower Lashes: While mascara primer is commonly used on the upper lashes, don’t overlook the lower lashes. Applying a thin coat of primer can add definition and volume to your lower lashes, complementing your overall lash look.

Seal the Deal: To ensure the longevity of your mascara and primer, consider using a lash sealer or a clear mascara as a final step. These products can help set the mascara and primer in place, preventing smudging or flaking throughout the day.

Removal: When it’s time to remove your eye makeup, use a gentle eye makeup remover or micellar water to dissolve the mascara and primer. Be sure to cleanse the lashes thoroughly to avoid any residue that could potentially weaken the lashes over time.

Mascara primer has revolutionized the way we approach lash enhancement, providing a multitude of benefits that take our lash game to new heights. By utilizing a mascara primer, you can achieve longer, fuller, and more defined lashes. With its ability to enhance mascara performance, provide nourishment, and prolong curl retention, mascara primer has become an indispensable tool in the makeup routine of lash enthusiasts.

Remember to select a mascara primer that suits your specific needs and follow the application tips for optimal results. So, the next time you’re seeking a stunning lash transformation, don’t forget to incorporate the magic of mascara primer into your beauty arsenal. Elevate your lash game and let your eyes captivate with their mesmerizing allure.


The Comprehensive Spectrum Of Concealers Navigating Through Choices For Impeccable Skin
The Comprehensive Spectrum of Concealers: Navigating Through Choices for Impeccable Skin

At the heart of any transformative makeup regimen lies the concealer, a pivotal element that meticulously camouflages imperfections such as under-eye shadows, blemishes, and skin tone disparities. The perfect concealer not only magnifies your inherent allure but also elevates your self-assurance by presenting a pristine base. This exposition ventures into the myriad forms of concealers, equipping you with the knowledge to discern the most compatible variant for your skin’s unique needs and preferences. Liquid Concealers Boasting unparalleled adaptability, liquid concealers cater to a broad spectrum of skin types, including those that are dry, mixed, and prone to acne. They provide a customizable coverage range from sheer to opaque, ideally complementing foundation. For a flawless integration, adopt a gentle patting technique using a beauty sponge or brush, ensuring an evenly distributed, authentic appearance. Cream Concealers For those seeking superior concealment, cream concealers emerge as the prime choice, particularly favoring dry and aging skin due to their hydrating formulation. They are adept at masking dark under-eye areas and harmonizing skin tone variations. Optimal application involves pre-warming the concealer on your skin and setting it with a fine powder to avert creasing. Stick Concealers Designed for precision and portability, stick concealers are the go-to for oily and combination skin, offering a dense formula conducive to targeted application. They excel in concealing specific spots and hyperpigmentation. For a smooth blend, use either a brush or fingertips. Color-Correcting Concealers Exploiting color theory, color-correcting concealers effectively neutralize distinct discolorations; green attenuates redness, while peach and orange are antidotes for blue or grey under-eye circles, and yellow revitalizes dull complexions. Apply judiciously prior to your standard concealer to prevent a heavy makeup look. Hydrating Concealers Infused with moisturizing agents like hyaluronic acid and vitamins, hydrating concealers are the salvation for dry skin or areas with fine lines, offering a radiant, moist finish that doesn’t crease. Seek out serum-esque formulas for optimal results. Matte Concealers Matte concealers are the sanctuary for oily complexions, delivering enduring coverage devoid of gloss. To circumvent a parched appearance, prime your skin with a moisturizing base and blend swiftly. Mineral Concealers For those with sensitive skin, mineral concealers present a minimalistic approach, devoid of oils, fragrances, and artificial colorants, minimizing irritation risks. Employ a fluffy brush for a light, authentic coverage. Serum Concealers Merging skincare with cosmetic elegance, serum concealers offer a featherlight, nurturing blend that progressively enhances skin quality. They are ideal for achieving a subtle, “barely-there” makeup look while pampering your skin with beneficial ingredients. Balm Concealers For relentless imperfections, balm concealers promise full coverage. They necessitate warming between the fingers for a fluid application and are best blended with a dense brush. Pot Concealers Pot concealers deliver concentrated pigment in a compact format, perfect for precise applications and under-eye concealment. Utilize a small brush for targeted application, blending the periphery for a natural effect. Brightening Concealers Formulated to illuminate and elevate the under-eye region and facial shadows, brightening concealers contain reflective particles that impart a luminous sheen. Layer over your regular concealer for an enhanced glow. Waterproof Concealers Indispensable for humid conditions…

Nourishing Solutions For Dry And Damaged Hair: A Comprehensive Guide To Effective Treatment And The Role Of Hair Primers
Nourishing Solutions for Dry and Damaged Hair: A Comprehensive Guide to Effective Treatment and the Role of Hair Primers

Dry and damaged hair can be a source of frustration and can significantly impact our self-confidence. However, with the right care and attention, it is possible to revive and restore the health and vitality of your hair. This comprehensive guide aims to provide you with valuable insights and practical tips to effectively treat dry and damaged hair. Additionally, we will explore the benefits and proper usage of hair primers, an essential tool in your hair care arsenal. Understanding Dry and Damaged HairBefore diving into treatment options, it is important to understand the underlying causes and characteristics of dry and damaged hair. Factors such as excessive heat styling, chemical treatments, environmental exposure, improper hair care routines, and nutritional deficiencies can all contribute to dryness and damage. Dry hair lacks moisture, appearing dull, brittle, and prone to frizz. Damaged hair, on the other hand, has structural impairments, such as split ends, breakage, and rough texture. Building a Hair Care RoutineDeveloping a consistent and tailored hair care routine is crucial for improving the condition of dry and damaged hair. This section will outline the essential steps to incorporate into your regimen, including cleansing, conditioning, and treatments. We will discuss the importance of using sulfate-free shampoos, moisturizing conditioners, and deep conditioning masks enriched with nourishing ingredients such as keratin, argan oil, shea butter, and vitamin E. Furthermore, we will explore the benefits of incorporating natural remedies like coconut oil and aloe vera into your routine. Nourishing Treatments for Dry and Damaged Hair In addition to a comprehensive hair care routine, targeted treatments can help restore moisture and repair damaged strands. We will discuss various treatments, such as protein treatments, hair masks, leave-in conditioners, and serums that can provide intensive hydration and repair. We will also touch upon the significance of regular trims to remove split ends and promote healthy hair growth. Introduction to Hair PrimersHair primers have gained popularity in recent years as a preparatory step in the hair care routine. This section will explain the purpose and benefits of using hair primers. Primers create a protective barrier between your hair and styling tools, minimizing heat damage and reducing the risk of breakage. They also provide a smooth base for styling products and help prolong the longevity of your desired hairstyle. Hair primers can come in various forms, including sprays, creams, and serums, each offering unique benefits. Utilizing Hair Primers for Optimal Results To maximize the effectiveness of hair primers, it is crucial to understand their proper usage. This section will provide a step-by-step guide on how to use hair primers correctly. We will discuss the ideal application techniques, the amount of product to use, and how to distribute it evenly throughout your hair. Additionally, we will explore the compatibility of hair primers with other styling products, such as heat protectants, volumizers, and smoothing serums. Choosing the Right Hair Primer for Your Needs Selecting the most suitable hair primer for your specific hair type and concerns is essential. This section will highlight key factors to consider when choosing a hair primer, including ingredients, formulation, and the…

How To Cover Dark Eye Circles In 5steps
How to cover dark eye circles in 5 steps?

On the other hand, the chronic dark under-eye circles can shadow even the best and brightest version of us. In this case, the shadows that genetics, lack of sleep, or lifestyle choices are attributed to make us look much older or more fatigued than we actually are. Most of the time, it’s actually within your reach. This is an in-depth article looking into the causes of under-eye circles and how to hide them with a multi-step approach, finally discussing other strategies that may be of benefit in ensuring your eyes reflect your inner vibrancy. The Genesis of Shadows: Unveiling the CausesEven before going through the process of how to hide the dark circles on a journey, it is paramount to understand where they come from. There are several reasons that bring this about, and all have to be given full, separate, covered-up attention.Genual Inheritance: A common culprit, especially when it comes to thin skin running in the family around the eyes, making the blood vessels more pronounced.The Sleep Factor: Poor sleep may lead to the dilation of the blood vessels located under the eyes, hence contributing to the dark circles. Step One: Prime Your Canvas Preparing the Under-Eye Area for ConcealmentA flawless makeup application begins with preparation. Here’s how to ensure the under-eye area is primed and ready: Choosing Your Concealer Finding Your Perfect MatchSelecting an ideal concealer is more art than science, involving consideration of shade, formula, and skin undertone: Shade Selection: If the discoloration that needs to be corrected is of a bluish or purplish tinge, then look for a concealer that is one or two shades lighter than your natural skin tone, concealing with peach or salmon undertones. Step 3: Masterful Application Techniques for Seamless ConcealmentApplication technique can make or break your concealing efforts. Achieve a natural, even coverage with these steps: Concealing Mastery Elevating Your Technique Enhance your concealing game with additional tips: Step 5: Final Touches Setting Your MasterpieceTo maintain your under-eye concealment throughout the day: Conclusion Surely, the steps provided could cover the dark circles under the eyes, given the right information and tools offered, knowing the causes in advance, precise preparation, selection, application, and setting of all steps scrupulously. Bring forth bright and youthful eyes with these tips followed; and with them, the natural beauty shall shine more confidently.

Unlocking Hair Growth The Correct Usage Of A Derma Roller For Optimal Results
Unlocking Hair Growth: The Correct Usage of a Derma Roller for Optimal Results

Derma rollers have gained popularity as a beauty tool for promoting hair growth. These handheld devices, equipped with tiny needles, work by creating micro-injuries on the scalp, stimulating blood circulation and triggering the body’s natural healing response. When used correctly, derma rollers can enhance hair growth and improve the absorption of hair care products. In this article, we will delve into the proper technique and tips for using a derma roller to maximize its benefits and promote healthy hair growth. Understanding the Derma Roller:A derma roller consists of a cylindrical barrel-shaped handle with a roller head attached. The roller head contains numerous fine needles, usually between 0.25 to 1.5 millimeters in length. It’s important to select a derma roller with needle length appropriate for hair growth stimulation, typically ranging from 0.5 to 1.0 millimeters. Cleanse and Prepare the Scalp:Before using a derma roller, ensure your scalp is clean and free from any oils, products, or debris. Wash your hair thoroughly with a gentle shampoo and allow your scalp to dry completely. Avoid using any styling products or oils that may interfere with the rolling process or cause buildup on the needles. Divide the Scalp into Sections:To ensure thorough coverage, divide your scalp into manageable sections. Part your hair in the center and then create additional sections from front to back and side to side. This division will help you focus on one area at a time, ensuring proper treatment and minimizing the risk of overlapping or missing areas. Start with Gentle Pressure:Hold the derma roller at a slight angle and apply gentle pressure to the scalp. Begin rolling in one direction, such as front to back, and then switch to the perpendicular direction for the next pass. Maintain consistent and gentle pressure throughout the process to avoid excessive discomfort or skin irritation. Roll in Different Directions:To stimulate hair growth effectively, it’s important to roll the derma roller in different directions. Roll vertically, horizontally, and diagonally across each section of your scalp. This multidirectional approach ensures maximum coverage and stimulates blood flow from various angles. Be Mindful of Needle Length:Choose a needle length that suits your comfort level and hair growth goals. For beginners, it’s advisable to start with shorter needles, such as 0.5 millimeters, and gradually work your way up as your scalp becomes more tolerant. Longer needles should be used with caution and under the guidance of a professional. Avoid Excessive Pressure:While it’s important to apply gentle pressure, avoid pressing too hard with the derma roller. Excessive pressure can cause unnecessary discomfort, irritation, or damage to the scalp. The goal is to create micro-injuries, not to induce pain or harm the skin. Let the needles do the work with light and controlled pressure. Adjust Frequency:The frequency of derma roller usage depends on individual preferences and tolerance. Initially, start with once a week and gradually increase to a maximum of two to three times per week if desired. Allow your scalp to rest and recover between sessions to avoid overstimulation and potential adverse reactions. Follow with Hair Care Products:After using the derma…

Flawless Fitness: Gym Makeup For A Workout
Flawless Fitness: Gym Makeup for a Workout

Going to the gym may be daunting for some people, particularly for those looking their best during workouts. Although makeup might not immediately spring to mind when considering gym work outs, many women find a bit of makeup can boost confidence and feel ready to tackle any exercise routines they face. In this article we’ll talk about The Stronghold look – ideal makeup style to achieve in this setting – plus tips and tricks that’ll help achieve and maintain it during each gym workout session. The Stronghold LookThis look embodies minimalism and longevity – designed to remain put no matter how much sweating takes place! The goal is for it to look natural yet have just enough glamor. Here are its core components. Begin with an oil-free and matte-finish primer designed specifically to keep makeup in place during physical activity, applying thin layers all over your face in areas where sweat tends to collect most often. Pay particular attention when applying these foundations if sweat becomes an issue for you. Foundation: When selecting foundation or tinted moisturizer that complements the tone of your skin, ensure it is lightweight enough. Any product too thick or cakey could clog pores during exercise and make you uncomfortable during physical activities such as sports. When applying foundation with brush or sponge application, blend well. Concealers: Concealer can help cover up blemishes or dark circles under your eyes; for optimal results use something lightweight and blendable. Furthermore, color correctors may help neutralize any redness or discolorations on your face and neutralize redness or discolorations on its own. Brows: Use either clear gel or tinted tinted gel to shape and add definition to your eyebrows, giving them shape that frames your face for an impeccable appearance. Doing this will add dimension and help give a polished feel. Mascara: When selecting waterproof mascara, choose one or two coats that won’t smudge or flake off during exercise. Concentrate application efforts at outer corners so your eyes appear wider open. Lip Balm or Gloss: For an added splash of color during workout sessions, complete your look by applying tinted lip balm or gloss to add some moisture back into your lips while giving them some needed nourishment. This can keep them hydrated throughout your fitness regime! Now that you understand how to achieve the Stronghold look, here are a few tricks and tips to maintain it throughout your workout: Apply a sweat-proof setting spray: For added peace of mind and to secure the integrity of your makeup application, invest in a spray designed specifically to resist sweat and humidity. Carry oil-blotting sheets: If your workout routine leaves you oily, take oil blotting sheets along. They can help absorb excess oils while simultaneously maintaining fresh-looking makeup. Avoid Touching Your Facial Structure: As much as possible during your workout, avoid touching your facial structure too often as this could cause your makeup to smudge and spread, while potentially spreading bacteria onto the surface of the skin. Bring along a towel: Always have a small towel handy so you can wipe sweat from your…

Tips To Prevent Eyes From Watering When Applying Makeup
Tips to Prevent Eyes from Watering When Applying Makeup

Applying makeup should be an enjoyable ritual, not a tearful struggle. Yet, many individuals experience watery eyes during makeup application, turning a beauty routine into a daunting task. Understanding eye sensitivity and the common irritants in makeup is crucial for a comfortable experience. This section delves into why our eyes react to certain products and how to mitigate this response. The Science Behind Watery Eyes Why do our eyes water when we apply makeup? The reasons can range from direct irritation to the subtle effects of certain ingredients. Exploring the causes of watery eyes and how makeup interacts with our eye area will illuminate ways to prevent this involuntary reaction. Choosing the Right Makeup Products Not all makeup is created equal, especially for those with sensitive eyes. This section guides you through selecting hypoallergenic and non-irritating makeup options. Learn about the ingredients to avoid and how to read labels to protect your eyes. Pre-Application Tips Preparing your skin and eye area before makeup application is just as important as the makeup you use. Discover cleansing and hydrating practices that can shield your eyes from irritation and enhance the durability of your makeup. Application Techniques to Minimize Irritation The way you apply makeup can significantly impact how your eyes react. This part offers insights into gentle application methods and the tools that can help reduce the risk of irritating your eyes. Eye Makeup Tips Specific tips for applying mascara, eyeliner, and eyeshadow can make a world of difference for sensitive eyes. Find out the best practices that promote a tear-free makeup application. Managing Contact Lenses and Makeup For contact lens wearers, applying makeup poses additional challenges. Learn the dos and don’ts to keep your eyes comfortable and your vision clear. Natural Remedies to Soothe Sensitive Eyes Sometimes, despite our best efforts, our eyes still feel irritated. This section explores home remedies and soothing eye drops that can calm sensitive eyes. Waterproof vs. Regular Makeup: Pros and Cons Choosing between waterproof and regular makeup involves weighing their benefits and potential irritants. Understand when to opt for waterproof products and what to consider before making your choice. Dealing with External Factors External factors like the environment and seasonal changes can exacerbate eye sensitivity. Learn how to adjust your makeup routine to these influences to keep your eyes protected. Makeup Removal: Best Practices Removing makeup gently and effectively is key to preventing irritation. This section covers the techniques and products recommended for sensitive eyes. Professional Advice from Makeup Artists Glean wisdom from makeup artists who share their expert tips, dos, and don’ts for individuals with sensitive eyes. Preventive Measures for Long-Term Eye Health Maintaining eye health goes beyond makeup. Explore how regular eye check-ups and dietary recommendations can support long-term eye health. Summarizing key points and final thoughts, this section reinforces the importance of understanding and implementing strategies to prevent watery eyes, ensuring a more enjoyable makeup experience. Embracing these tips can transform your makeup routine into a tear-free, enjoyable experience. Remember, the key to preventing watery eyes lies in understanding your sensitivities, choosing the right…

How To Spot And Treat Damage In Dry Hair: A Comprehensive Guide
How to Spot and Treat Damage in Dry Hair: A Comprehensive Guide

Dry hair is a common hair concern that can be caused by various factors, including environmental conditions, heat styling, chemical treatments, and inadequate hair care practices. When hair lacks moisture and essential nutrients, it becomes prone to damage, leading to frizz, split ends, and overall dullness. Spotting and treating damage in dry hair is essential to restore its health, shine, and manageability. In this comprehensive guide, we will explore the signs of damage in dry hair and provide effective treatment methods to revive and nourish your locks. Signs of Damage in Dry Hair: Split Ends: Split ends are one of the first signs of hair damage. When the protective outer layer of the hair cuticle is damaged, the inner cortex becomes exposed, causing the hair to split into two or more ends. Split ends give the hair a frayed appearance and can travel up the hair shaft if left untreated. Brittle Texture: Dry hair lacks elasticity and flexibility, making it brittle and prone to breakage. When hair is damaged, it loses its ability to withstand stress and can snap easily when combed or styled. Lack of Shine: Healthy hair reflects light, creating a natural shine. However, damaged dry hair appears dull and lacks luster due to the rough and damaged cuticle. Tangles and Knots: Damaged hair has a rough surface, leading to tangles and knots that are challenging to detangle without causing further damage. Frizz and Flyaways: The cuticle damage in dry hair allows moisture to escape, causing frizz and flyaways, especially in humid conditions. Overly Porous Hair: Damage in dry hair can lead to excessive porosity, where the hair absorbs and loses moisture rapidly. Overly porous hair struggles to hold onto moisture, making it prone to dryness and further damage. Treatment Methods for Damaged Dry Hair: Trim Regularly:To combat split ends and prevent further damage, regular trims are essential. Trimming the hair every 6-8 weeks removes split ends and promotes healthy hair growth. Deep Conditioning:Deep conditioning treatments nourish and hydrate the hair, restoring moisture and improving its texture. Look for deep conditioning masks or treatments with ingredients like shea butter, argan oil, or keratin to repair and strengthen the hair. Avoid Heat Styling:Reduce the use of heat styling tools such as flat irons and curling wands, as they can cause further damage to dry hair. If you must use heat, apply a heat protectant spray and use the lowest heat setting possible. Use Sulfate-Free Shampoos:Sulfates in shampoos can strip the hair of its natural oils, making dry hair even drier. Switch to sulfate-free shampoos that are gentle on the hair and scalp. Limit Chemical Treatments:Excessive chemical treatments, such as bleaching and coloring, can worsen dry hair. Limit the use of harsh chemicals and opt for nourishing hair treatments instead. Incorporate Oils into Your Routine:Natural oils like coconut oil, jojoba oil, and argan oil can provide deep hydration and repair damaged hair. Apply a small amount of oil to damp hair or use it as an overnight treatment for intense nourishment. Hydrate from Within:Proper hydration is essential for healthy hair. Drink plenty…

What Is Microblading Transform Your Eyebrows From Sparse To Gorgeous (1)
What is microblading? Transform Your Eyebrows from Sparse to Gorgeous

Microblading is a transformative beauty procedure that meticulously enhances the appearance of your eyebrows, offering a semi-permanent solution for those seeking fuller, more defined brows. This technique involves the manual insertion of pigment into the upper layers of skin to create the appearance of natural eyebrow hairs. However, achieving the best possible results requires more than just booking an appointment; it involves thorough preparation, understanding the process, and proper aftercare. Choosing the Right Microblading Technician The first step in your Microblading journey is to choose a skilled and certified aesthetician. Researching your options is crucial. Look for a salon that showcases an extensive portfolio of before and after photos, demonstrating their ability to produce the kind of results that captivate you. It’s essential that your chosen technician not only possesses the necessary certification but also has a wealth of experience, reflected in their hours of education and practical application. Remember, the quality of your results depends heavily on the skill and precision of the technician. State Regulations and Technician Licensing Be aware that each state has its own set of rules and regulations governing microblading. Before proceeding, verify the licensing requirements in your area and ensure your technician meets these standards. This step is crucial for both your safety and the legality of the procedure. Preparing for Your Microblading Session Proper preparation can significantly enhance the outcome of your Microblading procedure. Here are some essential tips to ensure you’re fully prepared: Understanding the Microblading Procedure Microblading is typically completed in three key steps: Preparation Initially, your aesthetician will apply a topical numbing cream to your eyebrow area to minimize discomfort. This preparation is vital for both your comfort and the steadiness of the microblading process. The Procedure Experience Pain tolerance varies from person to person. Some may only feel a slight scratching sensation, while others might experience a bit more discomfort. However, most find the procedure to be bearable, with the numbing cream significantly reducing any pain. Post-Procedure Care Immediately after your session, it’s normal for your eyebrows to appear darker and more pronounced than expected. This intensity will fade as they heal, usually within a week, resulting in a more natural look. It’s advised to avoid water exposure, including long showers and baths, during the initial healing phase to prevent the pigment from washing out prematurely. Post-Microblading Care To ensure the best healing and color retention, follow these aftercare tips: Potential Risks and How to Mitigate Them While microblading is generally safe, being informed about potential risks is crucial: Allergic Reactions Though rare, it’s possible to have an allergic reaction to the pigment used. Discuss any known allergies with your technician beforehand. Infection Infections can occur if the procedure is done with non-sterile equipment. Ensure your salon follows strict hygiene practices. Semi-Permanence Microblading results are semi-permanent. If you’re unhappy with the results, corrections or removal can be more challenging. Give yourself time to consider if microblading is right for you and choose a technician who can offer a result you’re confident you’ll be happy with. Microblading can significantly enhance your facial…