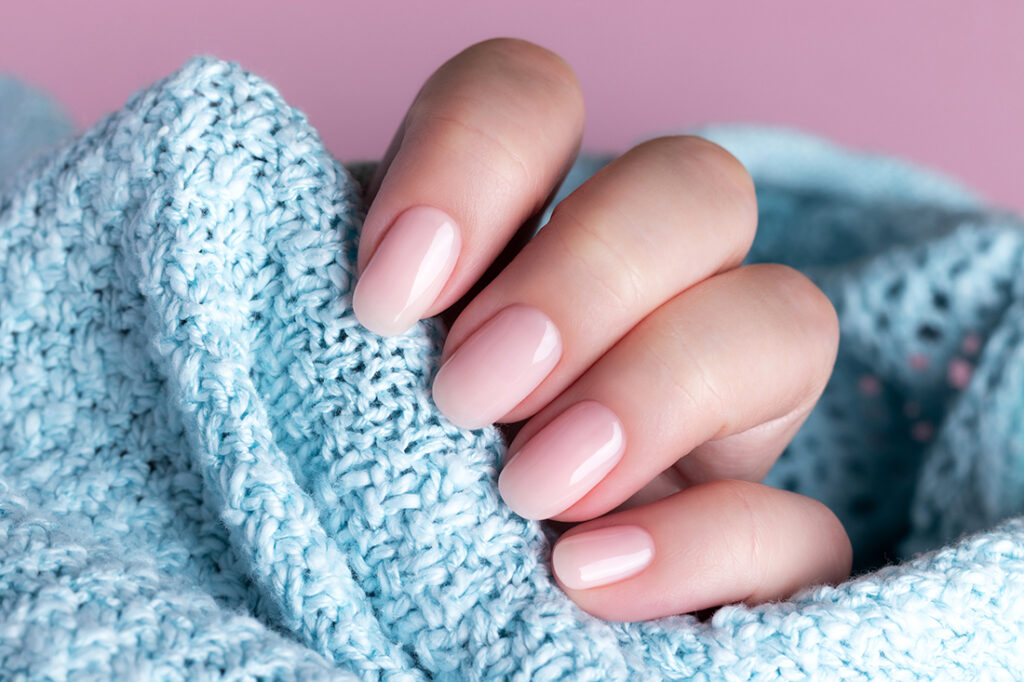
The Allure of Vanilla Latte Manicures: A Luxurious Trend in Nail Art

The Allure of Vanilla Latte Manicures: A Luxurious Trend in Nail Art

In the ever-evolving world of nail art, new trends constantly emerge, captivating beauty enthusiasts and professionals alike. One such trend that has been gaining popularity is the Vanilla Latte Manicure. Combining sophistication and indulgence, this luxurious nail art style is inspired by the rich tones and creamy swirls of a comforting vanilla latte. From its mesmerizing color palette to its versatility in design, the Vanilla Latte Manicure offers a delightful blend of elegance and creativity. In this article, we delve into the essence of this trend, exploring its origins, techniques, and the endless possibilities it presents for nail art enthusiasts.

Origin and Inspiration
The Vanilla Latte Manicure takes its inspiration from the beloved beverage that has become a symbol of warmth, comfort, and indulgence. The rich caramel hues, creamy off-white tones, and swirling patterns found in a classic vanilla latte are translated into exquisite nail art designs. The trend gained traction within the nail art community as artists sought to infuse a sense of sophistication into their creations while incorporating everyday luxuries.

Techniques and Design
The key to achieving a stunning Vanilla Latte Manicure lies in the skillful application of various techniques and attention to detail. Nail technicians carefully select a range of complementary colors, including soft beige, warm caramel, creamy ivory, and hints of chocolate, to emulate the hues found in a vanilla latte. These shades are applied in strategic layers, creating an ombre effect or marbling patterns that mimic the swirls in a freshly brewed latte.

For those seeking a more intricate design, artists may incorporate delicate coffee bean motifs, latte art-inspired patterns, or even tiny pearls and crystals to enhance the luxurious appeal. Additionally, nail stamping techniques and hand-painted accents can further elevate the Vanilla Latte Manicure, allowing for personalized and unique designs that reflect individual tastes and preferences.
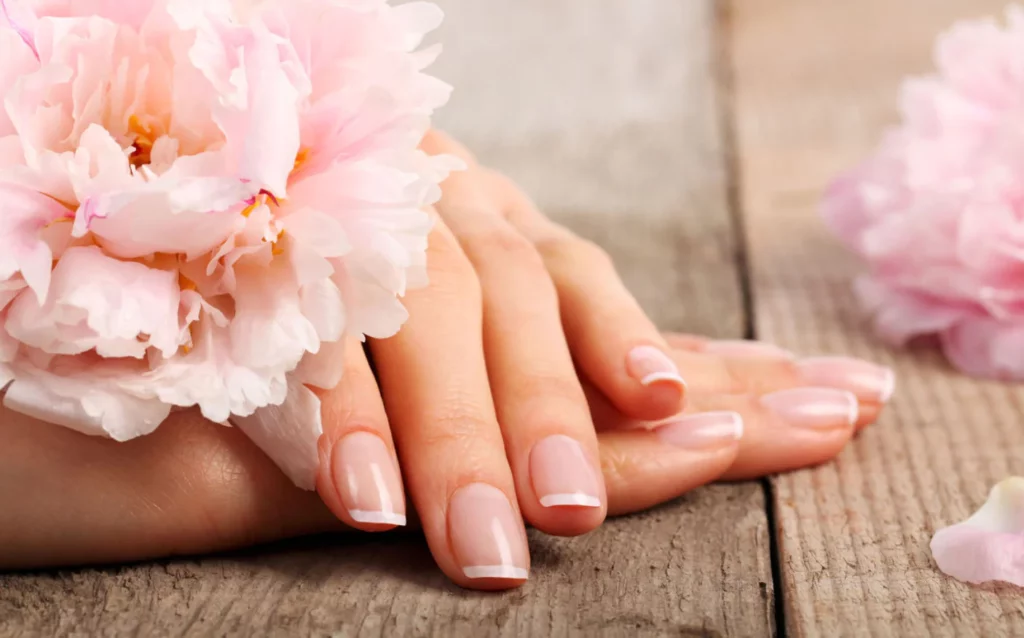
The Allure of Vanilla Latte Manicures: A Luxurious Trend in Nail Art

Versatility and Customization
One of the most enticing aspects of the Vanilla Latte Manicure is its versatility. Whether you prefer a subtle and understated look or a bold and eye-catching statement, this trend offers something for everyone. The color palette can be adjusted to suit different skin tones and preferences, allowing individuals to create a customized Vanilla Latte Manicure that perfectly complements their personal style.

Furthermore, the design possibilities are virtually limitless. From classic French tips with a vanilla latte twist to intricate nail art featuring latte-inspired motifs, the Vanilla Latte Manicure can be adapted to suit any occasion or mood. Whether you’re attending a formal event, enjoying a casual outing, or simply expressing your creativity, this trend provides a canvas for endless nail art possibilities.

Maintenance and Care
To ensure the longevity of a Vanilla Latte Manicure, proper care and maintenance are essential. Applying a high-quality base coat helps protect the natural nail and prevent staining. Regular touch-ups and clear topcoat applications can prolong the manicure’s lifespan, minimizing chipping and maintaining its lustrous finish. Additionally, it’s important to moisturize the cuticles and nails to keep them healthy and hydrated.

The Vanilla Latte Manicure is a captivating trend that combines elegance, creativity, and the comforting appeal of a warm beverage. Its rich color palette and versatile design options make it a sought-after choice for nail art enthusiasts seeking a luxurious and stylish manicure. Whether you opt for a subtle, minimalist approach or a more elaborate and intricate design, the Vanilla Latte Manicure offers a delightful and personalized experience. So, why not indulge in this trend and treat yourself to a touch of sophisticationand luxury?

Embrace the allure of the Vanilla Latte Manicure and elevate your nail game to new heights. Whether enjoyed in the cozy ambiance of a nail salon or recreated in the comfort of your own home, this trend invites you to indulge in a sensory experience that combines the pleasures of beauty and gastronomy. As you gaze at your meticulously designed nails, adorned with swirls of creamy hues reminiscent of a vanilla latte, you’ll feel a sense of satisfaction and confidence. The Vanilla Latte Manicure is more than just a nail art trend; it’s a symbol of self-care, sophistication, and the artistry that can be achieved at your fingertips. So treat yourself to this luxurious experience and savor the essence of a Vanilla Latte Manicure.


Beauty Sleep: Is It Real? Unveiling The Truth
Beauty sleep: Is it real? Unveiling the Truth

The concept of beauty has intrigued humanity for centuries, and throughout history, various methods and products have been employed in pursuit of it. But what if one of the most effective and natural beauty treatments has been right under our noses all along? Sleep, often underrated in the quest for beauty, plays a profound role in our overall appearance and well-being. In this in-depth exploration, we will delve into the fascinating science of how sleep impacts our beauty, including its effects on our skin, hair, eyes, and overall vitality. We will also uncover practical tips for optimizing your beauty sleep and debunk common misconceptions about this essential nightly ritual. The Beauty Sleep Connection: How Sleep Affects Your Appearance Your nightly slumber isn’t just about rest; it’s a crucial time when your body undergoes a myriad of processes that directly influence your physical appearance. Let’s explore how sleep affects different aspects of your beauty: 1. Skin Rejuvenation: During deep sleep stages, your body releases growth hormones, which stimulate cell repair and renewal. This process is vital for maintaining youthful and healthy-looking skin. Adequate sleep helps reduce the appearance of wrinkles, fine lines, and skin dullness. 2. Circulation and Glowing Skin: Improved blood circulation during sleep ensures that your skin receives essential nutrients and oxygen. This results in a natural radiance and even skin tone. Conversely, sleep deprivation can lead to a pale, sallow complexion. 3. Hydration: While you sleep, your body’s hydration balance is restored, helping to keep your skin moisturized. Sleep-deprived individuals are more prone to dryness and flakiness. 4. Acne and Breakouts: Lack of sleep can trigger an increase in stress hormones, leading to breakouts and worsening of skin conditions like acne and eczema. 5. Under-Eye Circles: Insufficient sleep can cause blood vessels under the eyes to dilate, resulting in dark circles and puffiness. Hair Health: Hair follicles receive nutrients and oxygen through blood circulation, which is optimized during sleep. A good night’s rest promotes hair growth and overall hair health. Bright Eyes: Rested eyes appear brighter and less bloodshot compared to tired, sleep-deprived eyes. Overall Vitality: Beauty isn’t just skin deep; it reflects your overall vitality. When you sleep well, you wake up feeling refreshed and rejuvenated, which translates to a more vibrant and attractive appearance. Optimizing Your Beauty Sleep: Tips for a Restorative Night Now that we’ve established the connection between sleep and beauty, here are some tips for ensuring you get the most out of your beauty sleep: 1. Consistent Sleep Schedule: Aim for a regular sleep schedule by going to bed and waking up at the same times each day, even on weekends. Consistency helps regulate your body’s internal clock. 2. Create a Relaxing Bedtime Routine: Engage in calming activities before bedtime, such as reading, taking a warm bath, or practicing relaxation exercises. This helps signal to your body that it’s time to wind down. 3. Comfortable Sleep Environment: Ensure your sleep environment is conducive to rest. Invest in a comfortable mattress and pillows, maintain a cool room temperature, and block out excess light and noise. 4….

Keratin 1
What is keratin care?

Keratin is an essential protein component that serves as the building block for our hair, nails and the outermost layer of our skin. When it comes to maintaining healthy locks and maintaining their beauty, understanding keratin’s benefits for haircare are paramount in order to maintaining them at peak condition. Let’s dive deep into its world and uncover its contribution towards overall hair wellbeing! Keratin: An Overview of Its Function and Composition: Keratin is a fibrous structural protein found at the core of hair strands and composed mostly of amino acids derived from cysteine that provides strength, structure, and resilience for healthy hair follicles. Keratin’s unique composition also makes it a key element of various hair care treatments and products available today. Keratin for Hair Benefits: Here Are Three Advantages Strength and Resilience Keratin plays an integral part in strengthening hair shafts, imparting strength, and increasing overall resilience. By binding with existing structures within hair strands, it helps prevent breakage while strengthening each individual strand for external stressors such as weather changes. Keratin therapy may even restore vitality to damaged or weakened tresses by helping restore vitality while decreasing the chance of split ends. Smoothness and ManageabilityKeratin stands out among its many advantages as an exceptional solution for smoothness and manageability, working to eliminate frizz for an easier styling experience. Keratin can particularly beneficial to individuals suffering from unruly or frizzy locks by creating an even surface and making styling simpler each day. Keratin should become part of everyone’s daily styling regimen for optimal results! Keratin contributes to hair’s elasticity, an integral factor for its flexibility. Elastic locks stretch without snapping back when stretched without breakage allowing various styling options without jeopardizing its health; this advantage can especially come in handy for people who engage in heat styling or other forms of hairstyling regularly. Repair for Damage Repair Keratin’s reparative properties make it an invaluable ally in combatting these damages to hair from heat styling tools, chemical treatments and environmental elements. By filling gaps in hair cuticle gaps it repairs damage by filling any missing portions and restore the overall integrity of hair shaft; ultimately resulting in hair that looks and feels healthier! Reduce Porosity:High porosity can result in excessive moisture absorption or loss, leaving hair more susceptible to dryness or breakage. Keratin helps combat this issue by filling gaps and creating a smoother surface – not only will this benefit overall texture of hair but it will also create more balanced moisture levels throughout. Professional Keratin Treatments Are Renowned For Their Long-Lasting Smoothing Effects:Keratin treatments are well known for providing lasting smoothing effects. By creating a protective shield around each hair strand, these treatments create long-term smoothness – making keratin treatments an appealing semi-permanent solution to manage frizzy or unruly locks. Overall, keratin’s benefits to hair extend well beyond its surface layers; from structural issues and overall hair health benefits to smoother, stronger and more manageable locks due to professional treatments or products infused with this transformative protein. Keratin stands as an indispensable ingredient when it comes to haircare products and professional…

The Benefits And Risks Of Using Salicylic Acid For Skincare Routine
The Benefits and Risks of Using Salicylic Acid for Skincare Routine

Salicylic acid is a type of beta-hydroxy acid that is commonly used in skincare products to treat various skin conditions, including acne, blackheads, and whiteheads. It works by penetrating deep into the pores to dissolve and exfoliate dead skin cells, oil, and other impurities, thereby preventing clogged pores and reducing inflammation. In this article, we will discuss the benefits and risks of using salicylic acid for skincare routine. Benefits of Salicylic Acid for Skincare Routine Acne TreatmentSalicylic acid is one of the most effective ingredients for treating acne. It helps to unclog pores by removing dead skin cells, excess oil, and other impurities, thereby reducing the occurrence of acne. Salicylic acid also has anti-inflammatory properties that help to reduce redness and swelling associated with acne. Blackhead and Whitehead TreatmentBlackheads and whiteheads are caused by clogged pores. Salicylic acid helps to penetrate deep into the pores and dissolve the impurities that cause these types of blemishes. Regular use of salicylic acid can help to prevent the formation of blackheads and whiteheads. ExfoliationSalicylic acid is a natural exfoliant that helps to remove dead skin cells, leaving the skin looking brighter and smoother. It also helps to stimulate cell renewal, which can improve the texture and tone of the skin. Anti-aging BenefitsSalicylic acid can help to reduce the appearance of fine lines and wrinkles. It works by stimulating collagen production, which helps to improve the elasticity and firmness of the skin. Reduces the Appearance of PoresSalicylic acid can help to reduce the appearance of pores by unclogging them and removing excess oil and impurities. This can help to make the skin look smoother and more even. Risks of Salicylic Acid for Skincare Routine Skin IrritationSalicylic acid can cause skin irritation, especially if used in high concentrations or if you have sensitive skin. Symptoms of skin irritation may include redness, itching, and burning. It is important to start with a low concentration and gradually increase as tolerated. Dryness and PeelingSalicylic acid can cause dryness and peeling, especially if used in high concentrations or if you have dry or sensitive skin. It is important to use a moisturizer after applying salicylic acid to prevent dryness and peeling. Sun SensitivitySalicylic acid can make the skin more sensitive to the sun. It is important to use a sunscreen with a high SPF when using salicylic acid. Pregnancy and BreastfeedingSalicylic acid should be avoided during pregnancy and breastfeeding. There is a risk of harm to the developing fetus or infant. How to Use Salicylic Acid for Skincare Routine Start with a low concentration: If you are new to salicylic acid, it is important to start with a low concentration and gradually increase as tolerated. A concentration of 0.5% to 2% is usually effective for most people. Use it once or twice a week: Salicylic acid should be used once or twice a week, depending on your skin type and the concentration of the product. Use it at night: Salicylic acid can make the skin more sensitive to the sun, so it is best to use it at night. This will…

10 Tips For Concealing Under Eye Bags Like A Pro
10 Tips for Concealing Under-Eye Bags Like a Pro

Under-eye bags are a common problem for many people, whether it’s due to genetics, lack of sleep, or aging. These bags can make you look tired and older than you actually are. Luckily, there are many ways to conceal under-eye bags and make your eyes look brighter and more youthful. In this article, we will share 10 tips for concealing under-eye bags like a pro. Use a Color CorrectorIf you have dark circles under your eyes, a color corrector can help neutralize the discoloration. Look for a peach or orange color corrector, depending on your skin tone. Apply it gently to the under-eye area using your ring finger. Be careful not to tug or pull on the delicate skin around your eyes. Use a Concealer with a Yellow or Peach UndertoneAfter applying a color corrector, use a concealer that has a yellow or peach undertone. This will help brighten your under-eye area and make you look more awake. Use a small, fluffy brush to apply the concealer in a triangle shape under your eyes, then blend it in with a damp beauty sponge. Use a Hydrating Eye CreamDry skin can make under-eye bags look worse. Make sure to use a hydrating eye cream before applying any makeup. Look for an eye cream that contains hyaluronic acid, which helps to plump and hydrate the skin. Apply a Cooling Eye GelIf you’re dealing with puffiness under your eyes, try applying a cooling eye gel. Keep the eye gel in the fridge for a few minutes before applying it to your under-eye area. The coolness will help reduce inflammation and puffiness. Use a Light-Reflecting PowderAfter applying your concealer, use a light-reflecting powder to set it. This will help brighten your under-eye area even more and prevent creasing. Use a fluffy brush to apply the powder lightly under your eyes. Use a Matte BronzerIf you have under-eye bags that are more prominent, you can use a matte bronzer to create a shadow effect. Apply the bronzer lightly in the hollows under your cheekbones and around your temples. This will help to create the illusion of depth and make your under-eye bags less noticeable. Apply Mascara and EyelinerApplying mascara and eyeliner can help draw attention away from your under-eye bags. Curl your lashes and apply mascara to open up your eyes. Use a thin line of eyeliner along your lash line to define your eyes further. Use a Bright LipstickIf you’re still feeling self-conscious about your under-eye bags, try wearing a bright lipstick. A bold lip color will draw attention away from your under-eye area and make you feel more confident. Use a Makeup Setting SprayTo make sure your makeup stays in place all day, use a makeup setting spray. This will also help prevent your under-eye area from getting oily and causing your makeup to smudge. Get Plenty of Sleep and Drink WaterWhile these tips can help conceal under-eye bags, the best way to get rid of them is to get plenty of sleep and drink water. Aim for at least 7-8 hours of sleep each…

12 Clever Makeup Storage Ideas That Will Revolutionize Yourvanity
12 Clever Makeup Storage Ideas That Will Revolutionize Your Vanity

When it comes to organizing our beauty products, finding the right makeup storage solutions can be as personal and creative as the makeup routines themselves. With a variety of products cluttering our vanities, bathrooms, and dressing tables, efficient and clever storage becomes essential. This article explores innovative and practical makeup storage ideas that not only optimize space but also add a touch of personal flair to your daily beauty ritual. Understanding Your Makeup Collection Assessing Your Collection Before diving into storage solutions, it’s crucial to understand the extent and variety of your makeup collection. This involves taking stock of what you own, identifying frequently used items versus occasional ones, and noting the size and shape of your products. Categories of Makeup Organizing your makeup by category is a foundational step toward efficiency. Grouping items into categories such as lip products, eye makeup, and face makeup can simplify the process of finding and storing them. Innovative Makeup Storage Solutions Magnetic Boards A creative and space-saving idea involves using magnetic boards to hang metal makeup items. This approach not only saves drawer space but also turns your makeup collection into a wall art display. Customizable Drawer Dividers Investing in or DIYing customizable drawer dividers can help compartmentalize your makeup according to type, size, or frequency of use, making everything easily accessible. Space-Saving Ideas Vertical Storage Solutions Maximizing vertical space with shelves or hanging organizers can drastically increase your storage capacity without taking up additional floor space. Hidden Storage Tips Explore hidden storage opportunities in your existing furniture or walls. This could include under-the-desk trays or behind-the-mirror cabinets. DIY Makeup Storage Repurposed Items Look around your home for items that can be repurposed into makeup storage. Old jars, candle holders, and even desk organizers can find a new life as holders for brushes or lipsticks. Homemade Vanity Cases With a bit of creativity and some basic crafting supplies, you can create personalized makeup cases that reflect your style and meet your storage needs. Professional Makeup Storage Tips Insights from Makeup Artists Gleaning storage tips from professional makeup artists can provide insights into how to store and organize makeup efficiently, especially for those with extensive collections. Organizing by Makeup Type Lip Products Storing lip products in clear organizers can help you easily find your desired shade, making your morning routine faster and more efficient. Eye Makeup Consider using tiered shelves or drawers for eye makeup to separate palettes, mascaras, and eyeliners, keeping them tidy and accessible. Face Makeup For face makeup like foundations, powders, and blushes, drawer dividers or dedicated containers can help maintain an organized and clean setup. Seasonal Makeup Storage Switching Your Storage with the Seasons Adapting your makeup storage with the changing seasons can keep your vanity relevant and functional, ensuring that seasonal products are always within reach. Maintenance and Cleaning of Makeup Storage Routine Cleaning Tips Regular cleaning and decluttering of your makeup storage can prevent the buildup of dust and ensure that your products remain in good condition. Organizing for Longevity Properly organizing your makeup not only keeps it accessible but…

Nourishing Your Tresses A Comprehensive Guide To Choosing The Right Haircare Oil For Every Hair Type 1
Nourishing Your Tresses: A Comprehensive Guide to Choosing the Right Haircare Oil for Every Hair Type

Gorgeous, healthy hair is a reflection of overall well-being and proper hair care. One of the most effective and time-tested ways to nurture your locks is through the use of haircare oils. These natural elixirs are rich in nutrients, vitamins, and essential fatty acids that can address a range of hair concerns and types. From dry and damaged to curly and oily hair, each hair type requires specific care. In this comprehensive guide, we will explore the world of haircare oils and provide insights on how to choose the right oil for your hair type, ensuring your mane receives the nourishment it deserves. Understanding Haircare Oils Haircare oils are derived from various sources, such as seeds, nuts, fruits, and flowers. They are packed with essential nutrients like vitamins, minerals, antioxidants, and fatty acids that are beneficial for hair health. These oils can be applied directly to the hair and scalp or incorporated into hair care products like shampoos, conditioners, and masks. Choosing the Right Haircare Oil Selecting the appropriate haircare oil depends on your hair type and specific concerns. Let’s explore different hair types and the corresponding oils that work best for each: 1. Dry and Damaged Hair Dry and damaged hair requires intense hydration and nourishment to restore its vitality. Recommended Oils: Argan oil, coconut oil, jojoba oil, almond oil Benefits: These oils are rich in essential fatty acids that moisturize and repair damaged strands. They also provide a protective barrier against environmental stressors. 2. Curly and Textured Hair Curly and textured hair tends to be prone to frizz and requires extra care to maintain its natural pattern. Recommended Oils: Shea butter, castor oil, avocado oil, grapeseed oil Benefits: These oils provide deep moisture, enhance curl definition, and combat frizz. They also promote hair elasticity and minimize breakage. 3. Oily Hair Oily hair needs lightweight oils that won’t weigh it down while still offering benefits. Recommended Oils: Tea tree oil, rosemary oil, grapeseed oil, jojoba oil (in moderation) Benefits: These oils help balance excess oil production, soothe the scalp, and provide a clean, refreshed feeling without making the hair greasy. 4. Fine and Thin Hair Fine and thin hair requires oils that won’t overwhelm or flatten it. Recommended Oils: Grapeseed oil, sunflower oil, apricot kernel oil, flaxseed oil Benefits: These oils are light and won’t weigh down fine hair. They provide moisture without making the hair look limp. 5. Color-Treated Hair Color-treated hair needs oils that protect and enhance the vibrancy of the hair color. Recommended Oils: Sunflower oil, jojoba oil, apricot kernel oil Benefits: These oils help seal in color, prevent fading, and maintain the health of color-treated hair. 6. Normal Hair Normal hair can benefit from oils that provide general nourishment and shine. Recommended Oils: Argan oil, coconut oil, jojoba oil, sweet almond oil Benefits: These oils offer a balance of moisture and shine, keeping normal hair healthy and lustrous. Application Techniques Applying haircare oil correctly is essential to maximize its benefits: Tips for Effective Use Haircare oils are a valuable addition to any hair care routine, offering a…

Unlocking Hair Growth The Correct Usage Of A Derma Roller For Optimal Results
Unlocking Hair Growth: The Correct Usage of a Derma Roller for Optimal Results

Derma rollers have gained popularity as a beauty tool for promoting hair growth. These handheld devices, equipped with tiny needles, work by creating micro-injuries on the scalp, stimulating blood circulation and triggering the body’s natural healing response. When used correctly, derma rollers can enhance hair growth and improve the absorption of hair care products. In this article, we will delve into the proper technique and tips for using a derma roller to maximize its benefits and promote healthy hair growth. Understanding the Derma Roller:A derma roller consists of a cylindrical barrel-shaped handle with a roller head attached. The roller head contains numerous fine needles, usually between 0.25 to 1.5 millimeters in length. It’s important to select a derma roller with needle length appropriate for hair growth stimulation, typically ranging from 0.5 to 1.0 millimeters. Cleanse and Prepare the Scalp:Before using a derma roller, ensure your scalp is clean and free from any oils, products, or debris. Wash your hair thoroughly with a gentle shampoo and allow your scalp to dry completely. Avoid using any styling products or oils that may interfere with the rolling process or cause buildup on the needles. Divide the Scalp into Sections:To ensure thorough coverage, divide your scalp into manageable sections. Part your hair in the center and then create additional sections from front to back and side to side. This division will help you focus on one area at a time, ensuring proper treatment and minimizing the risk of overlapping or missing areas. Start with Gentle Pressure:Hold the derma roller at a slight angle and apply gentle pressure to the scalp. Begin rolling in one direction, such as front to back, and then switch to the perpendicular direction for the next pass. Maintain consistent and gentle pressure throughout the process to avoid excessive discomfort or skin irritation. Roll in Different Directions:To stimulate hair growth effectively, it’s important to roll the derma roller in different directions. Roll vertically, horizontally, and diagonally across each section of your scalp. This multidirectional approach ensures maximum coverage and stimulates blood flow from various angles. Be Mindful of Needle Length:Choose a needle length that suits your comfort level and hair growth goals. For beginners, it’s advisable to start with shorter needles, such as 0.5 millimeters, and gradually work your way up as your scalp becomes more tolerant. Longer needles should be used with caution and under the guidance of a professional. Avoid Excessive Pressure:While it’s important to apply gentle pressure, avoid pressing too hard with the derma roller. Excessive pressure can cause unnecessary discomfort, irritation, or damage to the scalp. The goal is to create micro-injuries, not to induce pain or harm the skin. Let the needles do the work with light and controlled pressure. Adjust Frequency:The frequency of derma roller usage depends on individual preferences and tolerance. Initially, start with once a week and gradually increase to a maximum of two to three times per week if desired. Allow your scalp to rest and recover between sessions to avoid overstimulation and potential adverse reactions. Follow with Hair Care Products:After using the derma…

What Is A Facial Roller
What is a Facial Roller?

Facial rollers, once shrouded in the mystique of ancient beauty rituals, have resurfaced with vigor in the contemporary skincare landscape, heralding a new era of facial care. These instruments, often hewn from exquisite stones such as jade, quartz, and amethyst, are not merely tools of vanity but vessels of holistic well-being, promising to enhance not only the skin’s appearance but its health. Delving into the Essence of Facial Rollers Crafted to perform gentle massages on the skin, facial rollers are more than their elegant appearances suggest. Originating from the ancient Chinese tradition, these tools are lauded for their ability to mitigate fine lines while invigorating the skin with a youthful glow. Beyond their aesthetic appeal, these rollers are imbued with therapeutic virtues, stimulating blood flow, bolstering skin resilience, and facilitating the removal of lymphatic waste. Unpacking the Scientific Foundation The efficacy of facial rollers extends beyond anecdotal evidence, anchored in the physiological benefits they offer. By activating blood circulation within the facial region, they contribute to a reduction in swelling, soothe inflammation, and support skin detoxification. The methodical application of pressure not only aids in expelling toxins through lymphatic drainage but also diminishes stress-induced signs of aging by relaxing facial tension. Exploring the Diversity of Facial Rollers The market abounds with a variety of facial rollers, each distinguished by its unique properties: Incorporating Facial Rollers into Your Skincare Regime Integrating facial rollers into your skincare routine is a seamless process. Start with a clean face, applying a serum, oil, or moisturizer to ease the roller’s movement. Employ gentle, upward motions to massage the face, neck, and décolletage, dedicating 5-10 minutes daily to this practice for optimal outcomes. The Multifaceted Benefits of Facial Rolling Consistent use of facial rollers transcends superficial beauty enhancements, offering improved skin elasticity, diminished puffiness, and better absorption of skincare formulations. The act of facial rolling itself is a meditative practice, fostering relaxation and a holistic sense of wellness. Choosing the Right Facial Roller The selection of a facial roller should be tailored to one’s skin type and specific concerns: Synergizing Facial Rollers with Skincare Products To amplify the benefits of facial rolling, pair the tool with compatible skincare products. This not only facilitates smoother rolling but also boosts the skin’s absorption and response to the products. Maintenance and Precautions Maintaining facial roller hygiene is imperative to avoid bacterial contamination. Regular cleansing post-use is advised. Individuals with specific skin conditions should seek dermatological guidance to prevent potential adverse reactions. Facial rollers epitomize the confluence of traditional beauty wisdom and modern skincare science. By embracing these ancient tools within contemporary beauty routines, individuals not only partake in a ritualistic practice of self-care but also contribute to the enduring vitality and luminosity of their skin. The act of facial rolling is an invitation to rediscover the radiance within, promising a visage that reflects the depth of one’s inner well-being.