Tubing Mascara: An Innovative Approach to Luscious Lashes and Easy Removal

Tubing Mascara: An Innovative Approach to Luscious Lashes and Easy Removal

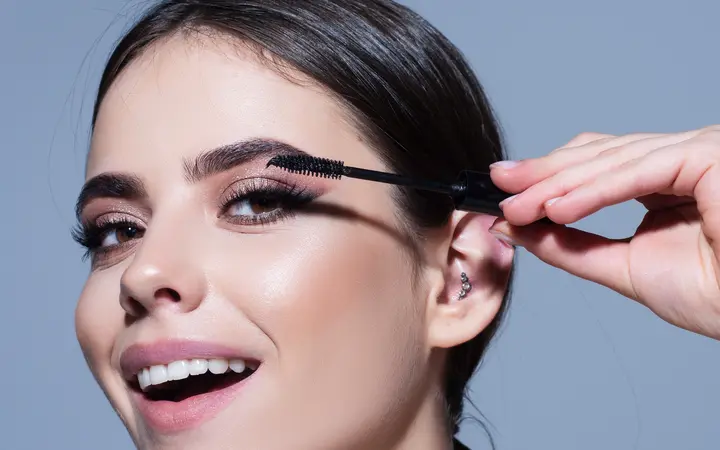
Tubing mascara has gained popularity in recent years as an innovative solution for achieving long, voluminous lashes. Unlike traditional mascaras, which rely on pigments to enhance lash appearance, tubing mascara utilizes a unique formulation that creates tiny polymer tubes around each individual lash. Not only does this provide impressive length and volume, but it also offers smudge-proof, flake-resistant, and long-lasting wear. Additionally, the removal process for tubing mascara is straightforward and gentle on the lashes. In this article, we will delve deeper into the world of tubing mascara, exploring its benefits and sharing effective techniques for its removal.

Tubing mascara is a revolutionary beauty product that offers several advantages over conventional mascaras. Its formulation contains flexible polymers that wrap around each lash, creating tube-like structures that enhance length and volume. These tubes are durable and remain intact throughout the day, resisting smudging, flaking, and smearing.

One of the key benefits of tubing mascara is its ability to provide a clean, clump-free application. The unique tubing formula ensures that each lash is individually coated, preventing clumping or the formation of spidery lashes. This allows for a more natural and defined look.

Furthermore, tubing mascara is highly resistant to water, humidity, and oil. It remains intact even in challenging conditions, making it an excellent choice for those with oily eyelids or individuals living in humid climates. Additionally, tubing mascara is a popular choice for individuals with sensitive eyes or contact lens wearers, as it is less likely to cause irritation or discomfort.

The Removal Process
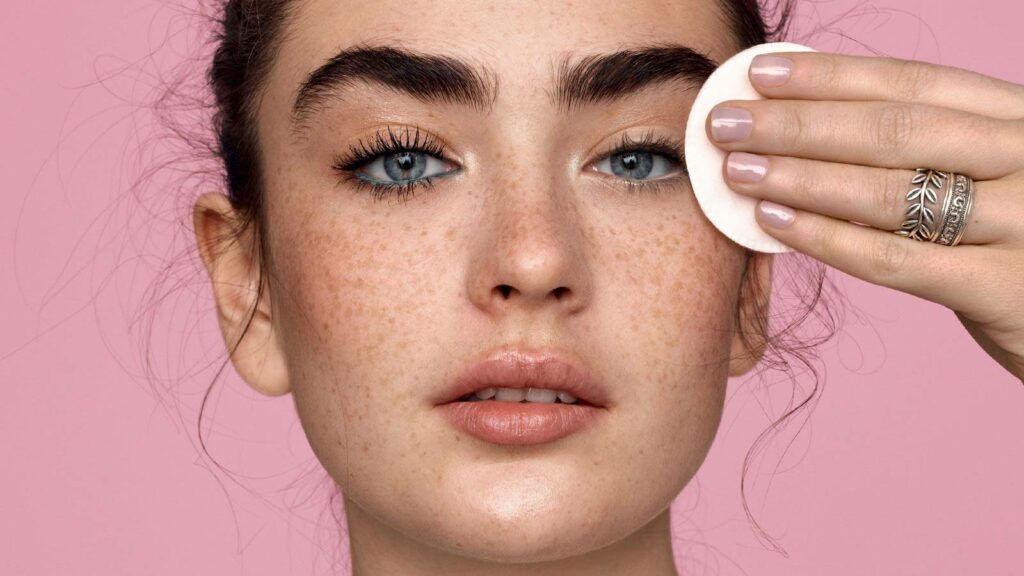
Removing tubing mascara is a straightforward process that requires warm water and a gentle cleanser. Unlike traditional mascaras that may necessitate harsh rubbing or the use of oil-based removers, tubing mascara can be easily removed without causing damage to the lashes. Here’s a step-by-step guide on how to remove tubing mascara effectively:

Begin by wetting your face with warm water. Ensure the water is comfortably warm, but not hot.

Gently splash warm water onto your closed eyes, allowing the mascara to become thoroughly soaked. The warmth of the water helps loosen the tubes.

Take a small amount of a gentle cleanser, such as a mild face wash or an eye makeup remover, and apply it onto your fingertips or a cotton pad.

Close your eyes and use gentle circular motions to massage the cleanser onto your lashes, focusing on the roots and working your way towards the tips. This helps break down the tubes.

Continue massaging for approximately 30 seconds to a minute, or until you feel the mascara starting to slide off. Be careful not to tug or pull on your lashes.

Once you’re satisfied with the cleansing process, rinse your face with warm water, ensuring that all the mascara has been washed away.

Gently pat your face dry with a clean towel, being careful not to rub your eyes vigorously.

By following these steps, you can effectively remove tubing mascara without causing any harm or irritation to your lashes or the delicate eye area.
Tubing Mascara: An Innovative Approach to Luscious Lashes and Easy Removal

Tips and Precautions
While tubing mascara removal is generally gentle, it’s essential to keep a few tips and precautions in mind. Firstly, ensure that the water used for removal is comfortably warm, as hot water can be damaging to the delicate eye area. Secondly, choose a gentle cleanser specifically formulated for the eye area or opt for a mild face wash that won’t irritate your eyes. Additionally, avoid rubbing or pulling on your lashes aggressively, as this can lead to lash damage or loss. Instead, be patient and gentle when massaging the cleanser onto your lashes.

It’s worth mentioning that some tubing mascaras are designed to be easily removed with warm water alone, without the need for a cleanser. In such cases, you can skip the cleanser step and follow the remaining steps as outlined above. However, if you prefer to use a cleanser for a more thorough cleanse, ensure it is compatible with tubing mascara and gentle on the eyes.


If you find that there are still residual mascara tubes after rinsing, you can use a clean mascara wand or a soft, lint-free cloth to gently brush or wipe them away. It’s crucial to be gentle during this process to prevent any unnecessary lash breakage or irritation.

When it comes to choosing a tubing mascara remover, it’s advisable to opt for products that are specifically formulated for this purpose. These removers are typically oil-free and designed to effectively dissolve the polymer tubes without leaving any greasy residue behind. They can be applied using a cotton pad or a clean fingertip and gently massaged onto the lashes. Follow the product instructions for the best results.

Lastly, as with any makeup product, it’s essential to follow proper hygiene practices. Replace your tubing mascara regularly, typically every three to six months, to prevent bacterial growth and ensure optimal performance. Avoid sharing your mascara with others to minimize the risk of eye infections.


Essential Hair Care Tips For Every Budget
Essential Hair Care Tips for Every Budget

The foundation of hair care lies in understanding your unique hair type and its specific needs. Recognizing whether your hair is oily, dry, normal, or combination can guide you in selecting products that enhance its natural beauty without causing damage. Tailoring your hair care routine to your hair’s characteristics ensures it receives the nourishment it needs to thrive. Shampooing Wisely Frequency Matters Over-washing can strip your hair of its natural oils, leading to dryness and brittleness. Aim to shampoo your hair every 2 to 3 days, adjusting based on your hair’s oil production. Those with particularly oily hair may need more frequent washing, while those with dry or textured hair might benefit from less. Choosing the Right Shampoo Select a shampoo that aligns with your hair type. For instance, volumizing shampoos are great for fine hair, while hydrating formulas are ideal for dry locks. Remember, a little goes a long way; a quarter-sized dollop is generally enough for medium-length hair. Concentrate the product on your scalp where oil and dirt accumulate, avoiding the ends to prevent drying them out. Conditioning Correctly Pre-Wash Treatments For an extra hydration boost, applying a small amount of oil to your hair before washing can work wonders. Oils like coconut or argan oil can be massaged into the ends and lengths of your hair before shampooing, providing a protective barrier that helps retain moisture during the washing process. Application Techniques Conditioner should be applied to the ends of your hair, where natural oils from the scalp seldom reach. This area is more prone to dryness and damage, so focusing your conditioning efforts here can help maintain hair health and prevent split ends. Strengthening Your Strands Natural Remedies Home remedies can be remarkably effective for strengthening hair. Ingredients like honey, eggs, and olive oil offer a bounty of nutrients and proteins that can help repair and fortify hair fibers. Apply these treatments directly to your scalp and hair, leave for about 15 minutes, then rinse with warm water before proceeding with your regular hair care routine. Look for Keratin Incorporating products that contain keratin into your hair care regimen can significantly enhance hair strength and elasticity. Keratin treatments help to rebuild the hair’s natural protective layer, improving its resilience against damage and environmental stressors. Protecting Your Hair Lifestyle Choices Simple lifestyle changes can have a profound impact on your hair’s health. Drinking plenty of water, eating a balanced diet, and minimizing heat styling can all contribute to stronger, healthier hair. When using heat tools, always apply a heat protectant to shield your hair from damage. Sun and Chemical Protection Just as your skin needs protection from the sun, so does your hair. Look for hair products that offer UVA/UVB protection to guard against color fading and dryness. If you color your hair, spacing out treatments allows your hair to recover, reducing the risk of damage. Moisturizing Regularly Moisture is key to preventing breakage and promoting shine. Regularly applying lightweight oils like argan or coconut oil can help maintain your hair’s moisture balance, leaving it soft, shiny, and less…

Awakening Your Hair Exploring The Benefits Of Caffeine Shampoo
Awakening Your Hair: Exploring the Benefits of Caffeine Shampoo

Caffeine is commonly known as a stimulant that provides an energy boost when consumed in beverages like coffee or tea. However, its benefits extend beyond just waking up your body and mind. In recent years, caffeine has made its way into the world of hair care, particularly in the form of caffeine shampoo. In this article, we will delve into the concept of caffeine shampoo and explore its potential benefits for hair health and growth. From its effects on the scalp to its impact on hair follicles, we will uncover the science behind caffeine shampoo and its role in maintaining luscious locks. Understanding Caffeine Shampoo:Caffeine shampoo is a specialized hair care product that contains caffeine as one of its active ingredients. Unlike traditional shampoos, caffeine shampoo is formulated to target specific hair concerns, such as hair loss, thinning, and sluggish hair growth. The caffeine content in these shampoos is designed to penetrate the scalp and hair follicles, offering potential benefits to promote healthier and stronger hair. Stimulating Hair Growth:One of the primary reasons caffeine shampoo has gained popularity is its potential to stimulate hair growth. Research suggests that caffeine can extend the anagen phase, which is the active growth phase of the hair follicle cycle. By prolonging this phase, caffeine may promote the growth of thicker and longer hair strands. Additionally, caffeine has been found to counteract the effects of dihydrotestosterone (DHT), a hormone known to contribute to hair thinning and miniaturization of hair follicles. By blocking DHT, caffeine can potentially prevent hair loss and promote hair density. Increasing Blood Circulation:Caffeine has vasodilatory properties, meaning it can dilate blood vessels and increase blood flow to the scalp. Improved blood circulation ensures that hair follicles receive an adequate supply of oxygen and nutrients, which are essential for healthy hair growth. By incorporating caffeine shampoo into your hair care routine, you may enhance blood circulation to the scalp, promoting a healthier environment for hair follicles to thrive. Reducing Inflammation:Inflammation can have a negative impact on hair health and growth. Conditions like dandruff, scalp irritation, and inflammation can disrupt the hair follicle cycle and impede hair growth. Caffeine possesses anti-inflammatory properties that can help soothe and calm the scalp, reducing inflammation and potential scalp-related issues. By incorporating caffeine shampoo into your routine, you may alleviate scalp conditions and create a healthier environment for optimal hair growth. Strengthening Hair Follicles:Caffeine has been found to have a strengthening effect on hair follicles. It can potentially improve the structure and integrity of the hair shaft, making it less prone to breakage and damage. This can result in stronger, healthier hair that is less susceptible to factors like environmental stressors, styling damage, and chemical treatments. By using caffeine shampoo regularly, you can fortify your hair follicles and promote overall hair strength. Boosting Shine and Manageability:In addition to its potential hair growth benefits, caffeine shampoo can also improve the appearance and manageability of your hair. Caffeine has been shown to enhance the hair’s natural shine and luster, giving it a healthy and vibrant look. Furthermore, it can contribute to increased…

Unlocking The Secrets Of Luxurious Locks: A Comprehensive Guide To Using Hair Masks
Unlocking the Secrets of Luxurious Locks: A Comprehensive Guide to Using Hair Masks

Beautiful, healthy hair is a reflection of your overall well-being and self-care routine. Hair masks are a potent tool in your hair care arsenal, designed to rejuvenate, nourish, and enhance the vitality of your tresses. Whether your hair is prone to dryness, damage, frizz, or you simply want to elevate its natural shine, incorporating hair masks into your routine can make a noticeable difference. This guide will take you through the ins and outs of using hair masks effectively to achieve luscious locks that turn heads. Understanding Hair Masks Hair masks are intensive treatments formulated to address specific hair concerns. They typically contain a higher concentration of nourishing ingredients compared to regular conditioners, penetrating deeply into the hair shaft to provide lasting benefits. Depending on your hair type and needs, you can find a variety of hair masks, such as hydrating masks, repair masks, volumizing masks, and color-enhancing masks. Choosing the Right Hair Mask Before delving into the usage techniques, it’s crucial to select a hair mask that caters to your hair’s unique needs. Consider the following factors: Hair Type: Determine whether your hair is oily, dry, normal, curly, straight, or wavy. This will help you choose a mask tailored to your specific hair type. Hair Concerns: Identify your hair concerns, such as frizz, damage, lack of shine, or color fading. Look for masks that address these concerns with the appropriate ingredients. Ingredients: Check the ingredient list for nourishing elements like natural oils (coconut, argan, jojoba), proteins (keratin, collagen), vitamins (vitamin E, B vitamins), and botanical extracts. Scent and Texture: Opt for a mask with a scent and texture that appeals to you, as this can enhance your overall experience. Prepping Your Hair for the Mask Properly prepping your hair sets the stage for an effective mask application. Follow these steps before applying the mask: Cleanse Your Hair: Wash your hair with a gentle shampoo to remove any dirt, product buildup, or excess oils. This ensures that the mask can penetrate deeply into the hair shaft. Towel Dry: Gently towel dry your hair to remove excess water. Your hair should be damp, not dripping wet. Detangle: Use a wide-tooth comb to detangle your hair, starting from the ends and working your way up. This prevents unnecessary hair breakage during the mask application. Applying the Hair Mask Now that your hair is prepped, it’s time to apply the mask. Follow these steps for a thorough and effective application: Section Your Hair: Divide your hair into sections. This ensures that you distribute the mask evenly and reach all parts of your hair. Scoop the Mask: Depending on your hair length and thickness, scoop an appropriate amount of the mask into your palm. Start with a small amount and add more if needed. Even Distribution: Rub the mask between your palms to evenly distribute it. Then, starting from the mid-lengths of your hair, work the mask downwards towards the ends. Avoid applying the mask directly to your scalp, as this can lead to greasiness. Massage Gently: Massage the mask into your hair using gentle, circular…

How To Use An Eyelash Curler
How to Use an Eyelash Curler

Transforming your lashes with an eyelash curler can dramatically enhance your look, creating an illusion of wider, more vibrant eyes that captivate and allure. While the prospect of using an eyelash curler may seem intimidating to some, this guide is designed to demystify the process, guiding you to safely and effectively achieve the perfect lash curl. Understanding Eyelash Curlers: A Primer Diverse Eyelash Curler Options The realm of eyelash curlers is filled with options to suit every need. The traditional manual curler, known for its simplicity and effectiveness, stands as the go-to choice. For those in pursuit of a more enduring curl, heated eyelash curlers gently warm lashes into shape. Precision curlers, on the other hand, are engineered to meticulously curl lashes at the eye’s corners or shorter lashes with exactitude. Lash Preparation: The Foundation for Curling Ensuring Lashes are Clean and Dry The cornerstone of a successful curl lies in beginning with lashes that are both clean and dry. Residues from makeup or oils can impede the curling process. A gentle cleanse followed by careful drying not only primes your lashes but also safeguards them against potential damage inflicted by the curler. The Mascara Dilemma: Before or After Curling? A common query revolves around the optimal timing for mascara application relative to curling. Applying mascara before curling can result in clumped lashes and potential damage, as the wet mascara may cause the curler to adhere to the lashes. It is advisable, therefore, to first curl your lashes and subsequently apply mascara, thus enhancing and preserving the curl. Mastering the Eyelash Curler: A Step-by-Step Tutorial Choosing the Ideal Curler Selecting an eyelash curler that complements your eye shape and lash length is critical. Wide-eyed individuals might favor a broader curler, while those with smaller eyes might find a narrower one more fitting. A flatter curve is often recommended for those with straighter lashes. Executing the Perfect Curl Enhancing Curl Longevity Employing heating techniques, such as a lightly warmed hairdryer on the curler (testing to ensure it’s not excessively hot), can significantly bolster the curl’s endurance. Alternatively, specialized heated curlers offer a secure way to achieve a more pronounced, lasting curl. Navigating Common Pitfalls Steer clear of over-curling to avoid lashes that look unnaturally bent or risking lash damage. Regularly cleaning your curler to remove any mascara residue is also essential to prevent lash sticking and pulling. Eyelash Curler Upkeep Recognizing When to Replace Your Curler Regularly inspect your curler for wear signs, like damaged pads or diminished tension, and replace as necessary to maintain effectiveness and safety. Maintaining a Clean Curler Frequent cleaning with a gentle soap and thorough drying are paramount to prevent bacterial accumulation and ensure optimal performance. Exploring Advanced Techniques Experimenting with varying curl intensities, from a subtle uplift to a dramatic curl, and utilizing additional tools like eyelash combs can refine your results for a flawless look. With diligent practice and adherence to the right techniques, mastering the eyelash curler can significantly enhance your makeup routine, drawing attention to your eyes with a natural, captivating allure. Perfect curls…

How To Choose The Perfect Blush For Your Skin Tone
How to Choose the Perfect Blush for Your Skin Tone

Blush is a pivotal element in the makeup routine, capable of transforming your look with just a few strokes. It adds a healthy, youthful glow and dimension to the face, but selecting the perfect shade for your skin tone can be daunting. This guide will help you navigate the nuances of choosing a blush that complements your complexion beautifully. Understanding Your Skin Tone Identifying Warm, Cool, and Neutral Undertones Your skin’s undertone is key to selecting makeup. Warm undertones look best with peach or coral blushes, cool undertones shine with pink or rose shades, and neutral undertones can flexibly wear either. The Importance of Natural Lighting Evaluate your skin tone and undertone in natural light to get the most accurate reading, ensuring you choose a blush that harmonizes naturally with your complexion. Blush Types and Textures Powder, Cream, Liquid, and Gel Formulas Different blush formulas cater to different needs and preferences. Powder blushes are great for oily skin, cream and liquid for dry skin, and gel blushes offer a sheer, natural look. Choosing the Right Texture for Your Skin Type Match the blush texture with your skin type for the best results. Oily skin benefits from powder blushes, whereas dry skin looks radiant with cream formulas. Selecting Blush for Fair Skin Tones Best Shades for a Natural Glow Fair skin tones should opt for soft peach, light pink, or coral to add a subtle warmth without overwhelming the complexion. Avoiding Overpowering Colors Steer clear of overly dark or bright shades that can look harsh against light skin. Instead, choose light, buildable colors. Choosing Blush for Medium Skin Tones Ideal Shades for Warmth and Depth Medium skin tones are complemented by rich peach, warm mauve, and soft berry shades, which add the right amount of color for a sun-kissed look. Balancing Pigmentation and Brightness Select a blush with enough pigmentation to show up on your skin, but with a brightness that enhances your natural glow. Finding the Right Blush for Dark Skin Tones Vibrant and Deep Tones for a Radiant Look Dark skin tones can carry vibrant reds, deep oranges, and bold berries beautifully, enhancing the skin’s natural depth. Ensuring Visibility and Flattering Hues Choose highly pigmented blushes that won’t get lost on your skin, and ensure the hues complement your undertone for a flattering effect. Application Tips for a Flawless Finish Techniques for Blending and Placement Apply blush to the apples of your cheeks and blend upwards towards the temples for a lifted, youthful effect. Use light strokes to build color gradually. Tools for Application: Brushes vs. Fingers vs. Sponges A fluffy brush is ideal for powder blush, fingers work well for cream and liquid formulas, and sponges can help blend for a seamless finish. Common Mistakes to Avoid Over-Application and Mismatched Undertones Start with a light hand to avoid over-application and select shades that match your undertone to avoid a clash with your natural coloring. Ignoring the Rest of Your Makeup Palette Ensure your blush harmonizes with the rest of your makeup, including lipstick and eyeshadow, to create a cohesive, balanced…

Banishing The Flakes: Effective Ways To Get Rid Of Dandruff
Banishing the Flakes: Effective Ways to Get Rid of Dandruff

Dandruff, those pesky white or yellow flakes that often appear on the scalp and can make their way onto your clothing, is a common condition that affects people of all ages. While it’s generally harmless, dandruff can be embarrassing and annoying. The good news is that there are numerous effective ways to combat dandruff, from simple home remedies to specialized dandruff shampoos and lifestyle adjustments. In this comprehensive guide, we will explore the causes of dandruff, the different treatment options available, and practical tips to keep your scalp flake-free. Understanding Dandruff: Causes and Contributing Factors Before diving into the remedies, it’s essential to understand what causes dandruff. Dandruff, scientifically known as “pityriasis simplex capillitii,” results from several factors, including: Now that we have a grasp of what causes dandruff let’s explore some effective ways to get rid of it. Home Remedies for Dandruff Over-the-Counter Dandruff Shampoos If home remedies aren’t providing relief, you can turn to over-the-counter (OTC) dandruff shampoos. These shampoos contain active ingredients that target dandruff and its underlying causes. There are three main types of OTC dandruff shampoos:

5secrets To Achieving Blackhead Free Skin
5 Secrets to Achieving Blackhead-Free Skin

Blackheads, those frustrating tiny black specks that frequently appear on our most noticeable areas like the nose, chin, and forehead, are a widespread concern for many individuals. Gaining an understanding of blackheads and the reasons behind their occurrence is the initial step towards effectively combating them. This guide is designed to provide you with the essential tools, knowledge, and advice needed to achieve and sustain a complexion free of blackheads, ensuring it remains radiant and healthy. The Underlying Science of Blackheads Known in medical terms as open comedones, blackheads develop when pores are blocked by a mix of sebum (skin oil) and dead skin cells. The exposure of this blockage to air leads to oxidation and turns it black, setting them apart from whiteheads. Grasping the origins of blackheads and the significance of sebum and dead skin cells in their development is key for their prevention and treatment. Fundamental Skincare Practices for Preventing Blackheads Preventing blackheads effectively hinges on a customized skincare routine. Essential steps include daily cleansing, consistent exfoliation, and appropriate moisturization. We will explore how these measures can avert the formation of blackheads and preserve skin vitality. Advanced Treatments for Blackheads For those in search of more profound solutions, advanced treatments like chemical peels, microdermabrasion, and laser therapy present promising outcomes. These procedures are instrumental in deeply purifying pores, eliminating dead skin cells, and diminishing blackheads’ visibility. Over-the-Counter Options A plethora of over-the-counter products are available for tackling blackheads, encompassing products with salicylic acid, retinoids, and masks containing charcoal or clay, each providing distinct advantages in the pursuit of clear skin. Prescription Solutions For cases that are more challenging, dermatologists might suggest prescription medications, including topical retinoids and oral alternatives. Recognizing when to resort to these options can significantly change the game for individuals battling persistent blackheads. Dietary Influence on Skin Health The connection between our diet and the condition and appearance of our skin is undeniable. This segment will delve into how dietary choices influence skin health, spotlighting foods to avoid and nutrients that foster a flawless complexion. Lifestyle Adjustments for Enhanced Skin In addition to skincare products and procedures, lifestyle aspects like hydration, managing stress, and the quality of sleep have substantial impacts on skin condition. Adopting positive lifestyle modifications can lead to remarkable enhancements in skin health. Home-based and Natural Solutions For enthusiasts of natural and home-based methods, alternatives such as tea tree oil and DIY exfoliating scrubs can provide gentle yet effective means to manage blackheads. The Crucial Role of Sun Protection Sun protection is an indispensable aspect of any skincare regime, especially for those prone to blackheads. Selecting the appropriate sunscreen and comprehending its importance in preventing blackheads are crucial measures towards maintaining skin health. Achieving a Complexion Without Blackheads This segment will outline an all-encompassing strategy, detailing the vital products, practices, and tips for securing and keeping a complexion devoid of blackheads, customized to various skin types and issues. Deciphering Your Skin Type Customizing your skincare routine to your specific skin type is essential. This part of the guide will assist in identifying your…

The Transformative Power Of Epsom Salt Baths A Haven Of Serenity
The Transformative Power of Epsom Salt Baths: A Haven of Serenity

A blend of magnesium, sulfate, and oxygen forms the essence of Epsom salt, a mineral compound revered for its healing attributes since its initial discovery in Epsom, England, during the early 17th century. Distinct from common table salt, Epsom salt’s chemical composition enables swift absorption through the skin, rendering it a perfect element for calming baths. This prelude paves the path for a detailed examination of the myriad advantages Epsom salt baths provide for both psychological and physical wellness. Exploring the Scientific Basis of Epsom Salt Baths The efficaciousness of Epsom salt baths primarily stems from its magnesium and sulfate content. Magnesium is pivotal in facilitating over 300 enzymatic reactions within the body, encompassing those related to muscle and nerve function, whereas sulfate plays a vital role in various biological activities. Immersing in warm water laden with these minerals allows for their skin absorption, thereby replenishing the body’s reserves and fostering health and well-being. The Sanctuary of Relaxation and Stress MitigationEpsom salt baths serve as a refuge for diminishing stress. By modulating nervous system activity, magnesium aids in easing muscle tension and fostering relaxation. This tranquil effect assists in mitigating stress and anxiety, thereby cultivating a sense of peace. Advancements in Skin Health The boon of Epsom salt extends to skin wellness. Its exfoliating nature aids in shedding dead skin cells, while its moisturizing effect revitalizes the skin, leaving it supple and refreshed. Additionally, Epsom salt’s sulfate content supports the body’s detoxification, promoting a clearer, healthier complexion. Natural Pain Alleviation and Muscle RecuperationFor individuals grappling with muscle discomfort, arthritis, or persistent pain, Epsom salt baths offer a natural alleviative solution. Magnesium’s role in relaxing muscle contractions and reducing pain renders it an invaluable recovery tool for athletes and those engaged in physically strenuous activities. Detoxification and Enhanced Mineral UptakeThrough facilitating the expulsion of toxins via the skin, Epsom salt baths aid in the body’s detoxification efforts. Furthermore, the direct uptake of magnesium and sulfate minerals through the skin can address deficiencies and bolster overall health. Augmented Sleep Quality and RelaxationThe influence of magnesium on enhancing sleep quality is well-established. A warm bath with Epsom salt prior to bedtime can relax muscles and soothe the mind, setting the stage for a deep, restorative sleep. Cardiovascular Health and Improved CirculationEngaging in regular Epsom salt baths may positively impact heart health and circulation. Magnesium’s capability to augment blood flow and lower blood pressure plays a crucial role in maintaining a healthy cardiovascular system. Benefits for Foot HealthNot limited to full-body applications, Epsom salt baths also offer significant benefits for foot health, addressing conditions like athlete’s foot, toenail fungus, and relieving foot pain after extensive standing or walking. Epsom Salt Baths: A Boon for GardenersGardeners may find Epsom salt baths particularly beneficial for soothing aching muscles post-gardening. Moreover, Epsom salt can enhance plant growth and nutrient uptake when used in gardening practices. Crafting Your Own Epsom Salt Bath Blends Personalizing your Epsom salt bath is straightforward, allowing for the incorporation of essential oils and herbs for added aromatherapy benefits. Whether seeking a simple soak or a…