Dewy All Day: Tips to Keep Your Makeup Fresh and Glowing

Dewy All Day- Tips to Keep Your Makeup Fresh and Glowing

Dewy makeup has become a popular trend, providing a fresh and radiant glow to the skin. However, maintaining that luminous look throughout the day can be a challenge, especially if you have oily skin or live in a humid climate. In this article, we will share effective tips and techniques to help you keep your dewy makeup going strong from morning to night. From prepping your skin to setting your makeup, we will guide you through the steps necessary to achieve long-lasting, flawless dewy makeup.

Prep Your Skin:
Proper skincare preparation is essential for achieving long-lasting dewy makeup. Start by cleansing your face to remove any dirt, oil, or impurities. Follow up with a lightweight moisturizer that hydrates your skin without making it greasy. Allow the moisturizer to absorb fully before moving on to the next step. Additionally, applying a primer formulated for dewy finishes can create a smooth canvas for your makeup and help it adhere better throughout the day.

Choose the Right Foundation:
When aiming for a dewy look, selecting the right foundation is crucial. Opt for foundations with a luminous or dewy finish that provide a natural glow to your skin. Avoid matte or oil-control foundations, as they can give a flat appearance. Consider using lightweight formulas that allow your skin to breathe while still providing coverage. Additionally, look for long-wearing foundations that are designed to stay put and maintain a dewy finish for extended periods.

Strategic Powder Application:
While powder helps control shine, using it sparingly is key to maintaining a dewy look. Focus on applying powder only to areas prone to excessive oiliness, such as the T-zone. Use a finely milled, translucent powder and a fluffy brush to gently dust the powder onto these areas. Avoid applying powder all over the face, as it can mattify the skin and diminish the dewy effect. The strategic application of powder helps set your makeup without compromising its luminosity.
Dewy All Day- Tips to Keep Your Makeup Fresh and Glowing

Use Cream or Liquid Highlighters:
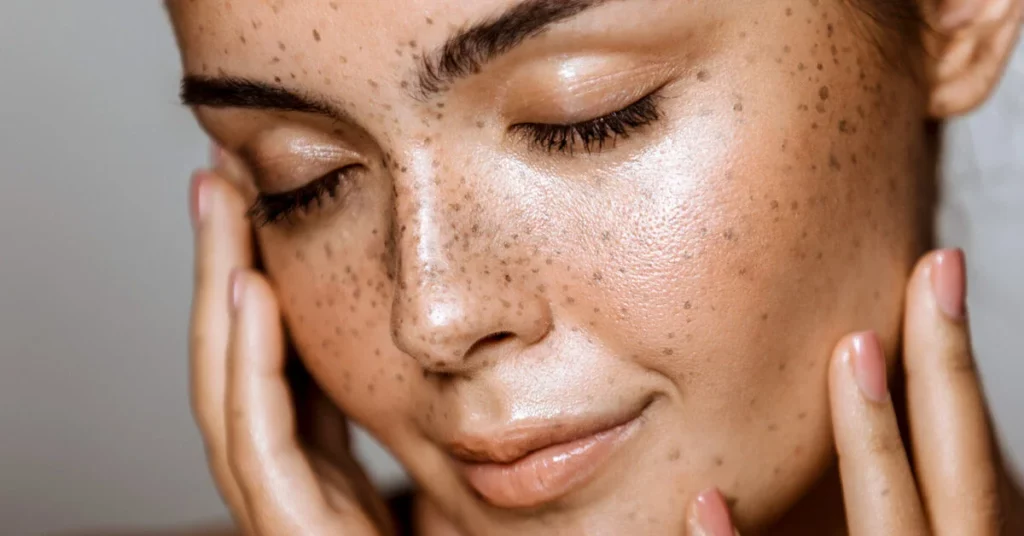
Highlighters are essential for achieving a dewy look. Opt for cream or liquid highlighters instead of powder formulas, as they blend seamlessly into the skin and provide a more natural-looking glow. Apply the highlighter to the high points of your face, such as the cheekbones, bridge of the nose, and cupid’s bow. Gently blend it in with your fingertips or a damp beauty sponge for a radiant and dewy finish.

Set Your Makeup:
To ensure your dewy makeup lasts all day, setting it with the right products is crucial. Instead of using a traditional setting powder, opt for a setting spray that provides a dewy or hydrating finish. Mist the setting spray over your entire face after completing your makeup application. This will help lock in your makeup, melt all the products together, and give a luminous boost to your skin. Carry a travel-size setting spray in your bag for touch-ups throughout the day to revive the dewy look.

Blotting Papers for Oil Control:
If you have oily skin, it’s common for excess oil to interfere with your dewy makeup. Keep blotting papers handy to absorb any excess oil without disturbing your makeup. Gently press the blotting paper onto the oily areas of your face, focusing on the T-zone. Avoid rubbing or dragging the blotting paper, as this can disturb your foundation. Blotting papers are a quick and effective way to control shine and maintain a fresh, dewy appearance.

Avoid Touching Your Face:
Touching your face throughout the day can transfer oils from your fingers to your skin, potentially causing your makeup to break down or become patchy. Resist the temptation to touch your face and remind yourself to keep your hands off your face. The natural oils and dirt on your hands can disrupt the dewy finish of your makeup and even lead to clogged pores. If you need to adjust or fix your makeup, use a clean brush or sponge instead of your fingers.

Stay Hydrated:
Hydrated skin is the foundation for a long-lasting dewy makeup look. Drink plenty of water throughout the day to keep your skin hydrated from within. Dry or dehydrated skin tends to look dull and can affect the overall appearance of your makeup. Additionally, using a hydrating facial mist or a refreshing facial spray during the day can help boost moisture and revive your dewy complexion.

Carry Blotting Papers and Essentials:
To maintain your dewy makeup on the go, it’s helpful to have a small makeup bag with essential touch-up products. Pack some blotting papers, a travel-size setting spray, and a mini powder puff or brush for any necessary touch-ups throughout the day. Blotting papers will help control shine, while the setting spray and powder can refresh and restore the dewy finish when needed.

Embrace a Skincare Routine:
Maintaining a consistent skincare routine can contribute to the longevity of your dewy makeup. Cleanse your face thoroughly in the morning and evening to remove any excess oils or makeup residue. Use a gentle exfoliator a few times a week to keep your skin smooth and free of dead skin cells that can dull your complexion. Finally, moisturize your skin daily to keep it hydrated and plump, enhancing the dewy effect of your makeup.

Achieving and maintaining a flawless, dewy makeup look is within your reach by following these tips and techniques. From proper skincare preparation to strategic powder application and using the right products, you can ensure that your dewy makeup stays fresh and glowing all day long. Remember to select foundations and highlighters with a luminous finish, use setting sprays instead of traditional powders, and keep blotting papers handy for oil control. With a little preparation and the right products, you can confidently rock a radiant and dewy complexion from morning to night.


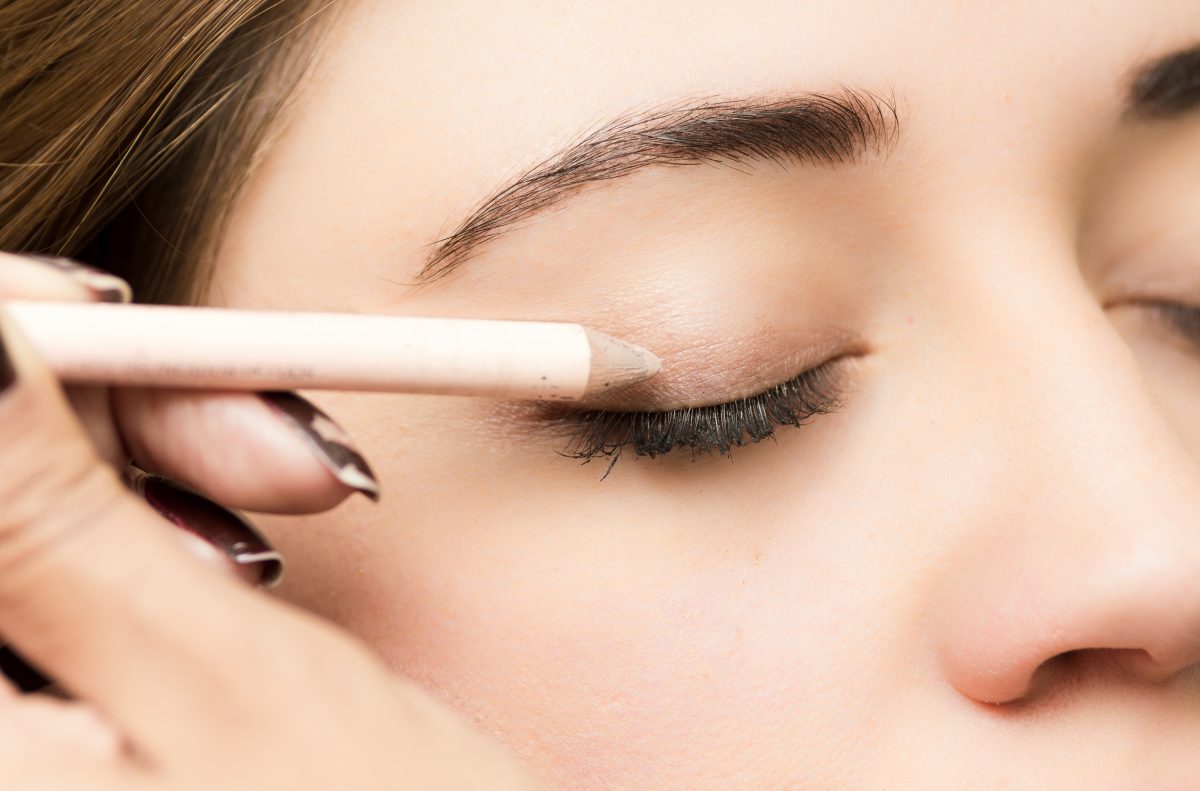
What Is Eyelashserum
What is Eyelash Serum?

Eyelash serum has emerged as a cornerstone in the beauty routines of those aiming to achieve fuller, healthier, and more vibrant lashes. This detailed guide explores eyelash serums, their composition, how they work, and their benefits, providing you with essential knowledge to transform your lashes and enhance your natural beauty. The allure of luscious, thick eyelashes has long been a symbol of beauty and femininity. Eyelash serums are specifically formulated products designed to promote the health, length, and thickness of the lashes, offering a non-invasive solution to the common desire for more pronounced eyelashes. Defining Eyelash Serum Eyelash serums are potent formulations that contain active ingredients aimed at stimulating the growth and improving the overall condition of eyelashes. These serums are applied directly to the lash line and work over time to enhance lash appearance. Composition and Types Eyelash serums vary widely in their composition, with key ingredients often including peptides, vitamins, and natural extracts designed to nourish and strengthen lashes. There are both over-the-counter options and prescription-strength formulations available, each catering to different needs and sensitivities. How Does Eyelash Serum Work? Eyelash serums penetrate the hair follicles to stimulate growth from within. By nourishing and supporting the lash follicles, these serums can extend the growth phase of the lash cycle, leading to longer, fuller lashes. The Science Behind the Serum Active ingredients like biotin, peptides, and hyaluronic acid support keratin production, enhance follicle health, and provide moisture to the lashes, respectively. Expected Results and Timeline Results vary, but many users report noticeable improvement in lash length and density after 4 to 6 weeks of consistent use. Maximum effects are often observed after 3 to 4 months. Benefits of Using Eyelash Serum The regular application of eyelash serum can lead to enhanced growth, increased thickness, strength, and improved health and hydration of the eyelashes. This can reduce lash loss and breakage, contributing to a fuller lash line. How to Choose the Right Eyelash Serum Key Ingredients to Look For Look for serums containing peptides for growth, biotin for strengthening, and hyaluronic acid for hydration. These ingredients are crucial for promoting healthy, robust lashes. Understanding Different Formulas Choose a serum based on your specific needs—whether it’s for growth, strengthening, or moisture. Always perform a patch test to ensure you don’t have an allergic reaction to the product. Application Tips for Maximum Effectiveness Best Practices Apply the serum to clean, dry lashes once a day, ideally at night, to allow the serum to work overnight. Use a single stroke at the base of the upper eyelashes. Common Mistakes to Avoid Avoid applying too much product, which can lead to irritation. Ensure the serum doesn’t get into your eyes, and refrain from using multiple lash products simultaneously to avoid adverse reactions. Safety and Side Effects While eyelash serums are generally safe, potential risks include eye irritation, darkening of the eyelid skin, and, in rare cases, changes in iris color, particularly with prescription-strength formulas. Minimize complications by following the product’s instructions carefully and consulting with a healthcare provider if you have sensitive eyes or skin. What…

Care Oils You Can Use To Get Shinyhair
Care Oils You Can Use to Get Shiny Hair

Haircare oils provide essential treatment and care to restore health to our locks with their rich formulas and promote strong, shiny locks – just what our locks need when exposed to sun, wind, pollution or styling tools such as blow dryers. Long term exposure can result in damage, breakage and moisture loss leading to dull and lifeless locks – ideal candidates for inclusion into daily hair routine. Let’s discover some great hair care oils available so we can select an oil regimen tailored for each of you today. Intensely Moisturizing Hair Oils Aloe and Argan-Based Hair Oils An aloe/argan hair care oil helps combat frizz while soothing your scalp, moisturizing hair from roots to tips – leaving it soft and shiny! For optimal results, massage this treatment oil onto the scalp 5-15 minutes prior to shampooing then rinse out after 5-15 minutes for best results. Aromatherapy Hair Care OilsOur Aromatherapy Hair Care Oils is a blend of cold-pressed argan oil, cold-pressed jojoba oil, ylang-ylang essential oil and rosemary essential oil that provides strong vitamin E support to hair. Apply a small amount to palms then rub into entire length and ends focusing on length and ends for 10-15 minutes while wearing shower cap before rinsing out hair thoroughly. Radiance-Boosting Hair Oils Care oils formulated from six precious botanical oils (flaxseed, hazelnut, sweet almond, macadamia nut oil, argan nut oil, camellia oil and tsubaki oil) nourish, repair and soften facial and body skin with just one application – giving radiance-boosting hair oils their power! You only need to buy one product to feel fabulously gorgeous. Treatment Oils for Processed Hair Treatment Oils for Processed Hair Oils containing nettle oil help combat hair loss while supporting growth. Argan oil also deeply moisturizing, making them suitable for chemically treated, sun damaged and otherwise processed hair. Incorporating eco-friendly principles in production and design with all-natural ingredients. Hair Oils for Shiny Hair Hair oils that contain ingredients like eucalyptus, sunflower, sesame or almond oils can provide shine-boosting shine with just a few drops applied directly onto hair ends. Argan, Jojoba and Almond Oils for Frizz ControlOils that include argan, jojoba and almond extract help repair and revitalize hair instantaneously while controlling static and frizz issues effectively. Coconut Care OilPacked with coconut oil, this care oil nourishes and repairs very dry, wavy and curly locks without weighing them down – providing silky-soft locks free from frizz and static that feel protected and secure against further frizz or static build up. Simply massage this onto clean hair from roots through to tips before waiting one hour to see results before doing another application session. Let’s get to know hair care oils better: When using hair oils, it’s essential to consider your hair type and specific needs. You can apply these oils as pre-shampoo treatments, leave-in conditioners, or scalp massages, depending on your preference. Additionally, a patch test is recommended, especially if you have sensitive skin, to ensure you don’t have any adverse reactions.

Flawless Foundation Tips And Tricks For Applying Liquid Foundation
Flawless Foundation: Tips and Tricks for Applying Liquid Foundation

Liquid foundation is a versatile and widely used makeup product that helps create a smooth and even complexion. However, achieving a flawless finish with liquid foundation requires proper application techniques and some helpful tricks. In this comprehensive guide, we will explore valuable tips and tricks to ensure that your liquid foundation application is seamless, long-lasting, and enhances your natural beauty. Prepping Your SkinBefore applying liquid foundation, it’s essential to prepare your skin to ensure a smooth and even canvas. Follow these steps to optimize your foundation application: a. Cleansing: Start with a clean face by washing away any dirt, oil, or makeup residue. Use a gentle cleanser suitable for your skin type. b. Exfoliation: Regular exfoliation helps remove dead skin cells, promoting smoother skin and preventing foundation from clinging to dry patches. Exfoliate 1-2 times per week. c. Moisturizing: Apply a lightweight, hydrating moisturizer to keep your skin supple and prevent the foundation from settling into fine lines or dry areas. d. Primer: Consider using a makeup primer to create a smooth base and extend the longevity of your foundation. Choose a primer that suits your skin type, whether you have oily, dry, or combination skin. Selecting the Right FoundationChoosing the appropriate liquid foundation for your skin type and desired coverage is crucial. Here are some pointers for selecting the right foundation: a. Skin Type: Identify your skin type (oily, dry, combination, or normal) to find a foundation that addresses your specific needs. Oil-free, matte foundations work well for oily skin, while hydrating formulas suit dry skin. b. Undertone: Determine your skin’s undertone, which can be warm, cool, or neutral. Select a foundation with a matching undertone for a natural look. c. Shade Matching: Test foundation shades on your jawline or wrist in natural light to find the most suitable match. The right shade should blend seamlessly with your neck and face. d. Coverage: Choose the level of coverage you desire—light, medium, or full—based on your skin concerns and the occasion. Applying Liquid FoundationNow that your skin is prepped and you have the right foundation, let’s explore different application techniques to achieve a flawless finish: a. Brush Application: Use a foundation brush to apply the product in downward strokes. Brushes provide even coverage and help buff the foundation into the skin for a polished look. b. Beauty Blender or Makeup Sponge: Dampen a makeup sponge or Beauty Blender and gently bounce it across your face to apply the foundation. This technique provides a natural, airbrushed finish and ensures seamless blending. c. Fingertip Application: For a more lightweight and natural finish, use clean fingers to apply the foundation. Warm the product between your fingers before patting it onto your skin. d. Layering: Start with a small amount of foundation and build up coverage gradually where needed. This approach prevents a cakey appearance and allows you to tailor the coverage to your preference. e. Sheer Application: For a light, sheer coverage, mix a drop of foundation with your moisturizer or primer before applying. Concealing and Color CorrectingTo achieve a flawless complexion, consider incorporating concealer…

Treating Fungal Facial Acne: Causes, Symptoms, And Effective Remedies
Treating Fungal Facial Acne: Causes, Symptoms, and Effective Remedies

Fungal facial acne, frequently confused with its bacterial counterpart, originates from an excessive proliferation of yeast, notably the Malassezia species, on the skin’s surface. This yeast finds a conducive environment in oily areas, setting fungal acne apart from traditional acne. This guide aims to demystify the condition, exploring its roots, identification methods, and effective treatment options. Root Causes of Fungal Acne The imbalance in the skin’s microbiome, prompted by factors such as intense perspiration, high humidity, constrictive apparel, and the application of oil-based skincare products, paves the way for yeast overgrowth. Recognizing these triggers is fundamental to both the management and prevention of fungal acne flare-ups. Symptom Recognition Characterized by small, consistent bumps that often itch, fungal acne predominantly appears in oily or sweaty zones like the forehead, chin, and chest. Its resistance to conventional acne remedies serves as a significant distinguishing feature. Diagnosing Fungal Acne Seeking a dermatologist’s expertise is advisable for accurately distinguishing fungal acne from other dermatological issues, possibly involving skin inspections or more intricate procedures like cultures or biopsies. Home Treatment Strategies Natural Remedies Skincare Regimen Adopting a skincare routine that eschews heavy oils, favoring non-comedogenic alternatives, and includes washing with a gentle cleanser twice daily is crucial to averting yeast accumulation. Medical Intervention for Fungal Acne Prescribed Solutions Dermatologists may prescribe antifungal creams or oral medications, with ketoconazole or clotrimazole being common choices to address yeast overgrowth. Over-the-Counter Options Consultation with a healthcare provider is recommended when choosing over-the-counter antifungal treatments to ensure their efficacy. Dietary Role in Management A diet low in sugars and refined carbs can curb internal yeast proliferation. Including antifungal foods like garlic and coconut oil may further aid in combating the condition. Skincare Product Selection Recommended Products Seek out oil-free, non-comedogenic products that do not feed the yeast. Ingredients such as zinc pyrithione can be effective in reducing skin yeast levels. Ingredients to AvoidSteer clear of skincare items containing ingredients like fatty acids, esters, and oils that Malassezia yeast thrives on, as they can worsen the condition. Preventive MeasuresWearing breathable clothing, adhering to a balanced diet, and judiciously selecting skincare products are key preventive steps. Additionally, regularly changing bedding and minimizing sweating can thwart fungal acne development.Effectively tackling fungal facial acne necessitates a holistic approach that includes accurate diagnosis, lifestyle modifications, and careful product selection. With an informed understanding of its causes and dedicated application of suitable remedies, achieving and maintaining healthy skin is attainable.

What Is Scrub And What Does It Do
What is Scrub and What Does It Do?

Navigating the path to luminous, vibrant skin, the inclusion of scrubs has become indispensable within the realm of meticulous skincare practices. Acting as a crucial intermediary that seamlessly connects the acts of cleansing and hydrating, scrubs are instrumental in not just refining the texture of the skin but significantly elevating its overall vitality. Delve into the core of what scrubs represent, unravel their extensive benefits, and discover actionable insights for seamlessly weaving them into your daily skincare ritual. The Essence of Scrubs: Pioneers of Skin Transformation Fundamentally, a scrub is crafted as a skin care concoction aimed at the gentle eradication of dead skin cells, grime, and additional contaminants blanketing the skin’s exterior. This exfoliation process is key to reviving the skin, ushering in an era of smoother and more effervescent skin layers below. Moreover, the very action of scrubbing invigorates circulation, infusing the skin with a renewed sense of vitality and radiance. But what elevates scrubs to an essential status within skincare? Unveiling the Mechanisms Behind Scrubs Scrubs come to life through their meticulously designed formulations, encompassing minute particles or granules that, upon being massaged onto the skin, perform the act of mechanical exfoliation. This transcends the capabilities of standard cleansing, promoting deeper purification while simultaneously fostering blood circulation and lymphatic detoxification, thus revitalizing skin wellness from within. Exploring the Diversity of Scrubs and Their Distinctive Merits Gel-Based Scrubs: Perfect for delivering hydration and a cooling sensation, these scrubs stand as a solace, especially after exposure to the sun or vigorous physical activities.Natural Exfoliators – Sugar and Salt Scrubs: Offering a spectrum of abrasiveness, these scrubs afford a personalized exfoliation experience.Coffee Scrubs: Laden with antioxidants, these variants not only slough off dead skin cells but also contribute to skin tightening and enhanced circulation. Incorporating Scrubs into Your Skincare Regimen Adopting a scrub into your routine is uncomplicated yet demands conscientiousness to sidestep the pitfalls of over-exfoliation. Here is a methodical approach: Begin with Cleansed Skin: Initiating with a pristine base ensures the scrub’s efficacy.Gentle Application: Employ soft, circular strokes to massage the scrub onto your skin, ensuring the process remains gentle.Rinse Off Completely: Utilize lukewarm water to remove the scrub, unveiling rejuvenated and lively skin.Hydrate: Conclude with a moisturizing agent to deeply nourish the newly exfoliated skin. Selecting an Ideal Scrub for Your Skin Type Oily Skin: Seek scrubs designed to regulate oil secretion whilst preserving natural moisture.Dry Skin: Opt for scrubs embedded with hydrating elements that promise gentle exfoliation, thereby preventing additional dryness.Sensitive Skin: Favor scrubs with fine particles and calming ingredients to reduce potential irritation. Custom Scrubs: Tailored to Your Skin’s Specifications Crafting scrubs within the comfort of your home allows for an unparalleled level of customization to cater to your skin’s unique requirements. Utilizing ingredients like sugar, olive oil, and lemon not only facilitates natural exfoliation but also ensures skin revival. Nonetheless, recognizing your skin type and sensitivities is paramount to guarantee the safety and efficacy of your DIY endeavors. Scrubs stand as formidable allies in the quest for thriving, resplendent skin. By gaining a comprehensive understanding of…

Flawless Makeup For Oblong Faces: Tips And Techniques To Enhance Your Features
Flawless Makeup for Oblong Faces: Tips and Techniques to Enhance Your Features

An oblong face shape is characterized by its elongated appearance, with a forehead, cheekbones, and jawline almost similar in width. While this face shape is often considered elegant, it may present some unique makeup challenges. The key to applying makeup to an oblong face is to create visual balance and enhance the natural beauty of your features. In this comprehensive guide, we will explore makeup techniques, contouring, and highlighting tips to help you achieve a stunning look that complements your oblong face shape. Understanding Your Oblong Face Shape Before delving into makeup application, it’s essential to identify your face shape accurately. An oblong face is longer than it is wide, with relatively straight sides and a slightly rounded chin. If you have an oblong face shape, your forehead, cheekbones, and jawline may have similar width measurements. Celebrities with oblong face shapes include Liv Tyler and Sarah Jessica Parker. Makeup Techniques for Oblong Faces Contouring for DefinitionContouring is a powerful technique that can add definition and balance to an oblong face shape. Focus on the following areas to create visual dimensions: a. Forehead: If you want to minimize the appearance of a long forehead, lightly contour the area just above the hairline with a matte bronzer or contour powder. Blend the product gently to avoid harsh lines. b. Cheekbones: Emphasize your cheekbones with contouring to add dimension to your face. Use a contour shade just below the cheekbones and blend upwards towards the ears to create the illusion of lifted cheekbones. c. Jawline: To soften a strong or elongated jawline, contour along the jawline with a cool-toned contour product. This will help add a touch of softness and balance to your face. Highlighting to EnhanceHighlighting is equally important in makeup application for oblong faces. It helps accentuate certain features and brings attention to the center of the face. a. Center of the Forehead: Apply a highlighter to the center of your forehead to draw attention upward and create the illusion of a shorter forehead. b. Brow Bone: Highlighting the brow bone opens up the eyes and adds a lift to the entire eye area. c. Bridge of the Nose: Apply a small amount of highlighter down the bridge of your nose to create the illusion of a shorter nose. d. Center of the Chin: Adding a touch of highlighter to the center of the chin brings attention to the center of your face, helping to visually balance the length. Focus on Eyes and BrowsEyes are a prominent feature on an oblong face, and proper eye makeup can help enhance their shape and bring balance to the face. a. Eyebrows: A well-defined brow with a slight arch can visually shorten the length of the face. Avoid overly straight brows, as they may further elongate the appearance of an oblong face. b. Eye Makeup: Emphasize your eyes with eyeshadows, eyeliner, and mascara. Focus on creating width at the outer corners of your eyes to add balance to the face. Full and Rounded LipsFor oblong faces, opting for fuller and slightly rounded lips can help create…

Sulfate Shampoo Vs. Sulfate Free Shampoo: Debunking The Myths And Choosing What's Best For Your Hair
Sulfate Shampoo vs. Sulfate-Free Shampoo: Debunking the Myths and Choosing What’s Best for Your Hair

When it comes to choosing the right shampoo for your hair, one of the main considerations is whether to opt for a sulfate shampoo or a sulfate-free shampoo. Sulfates are surfactants commonly found in many shampoos, known for their ability to create a rich lather and remove dirt and oil from the hair. However, there has been a growing trend towards sulfate-free shampoos, claiming that they are gentler and more beneficial for hair health. In this article, we will delve into the differences between sulfate and sulfate-free shampoos, explore their pros and cons, and help you make an informed decision about which option is better for your hair. Understanding Sulfates:Sulfates, such as sodium lauryl sulfate (SLS) and sodium laureth sulfate (SLES), are surfactants commonly used in shampoos due to their strong cleansing properties. They are effective at removing dirt, oil, and product buildup from the hair and scalp. However, sulfates can also strip away natural oils, which can lead to dryness, frizz, and color fading, especially for those with dry or chemically treated hair. The Benefits of Sulfate Shampoos:Sulfate shampoos have been the go-to choice for many people due to their ability to create a rich lather and provide a thorough cleansing experience. They can effectively remove excess oil and buildup, leaving the hair feeling clean and refreshed. Additionally, sulfate shampoos are often more affordable and readily available compared to sulfate-free alternatives. The Drawbacks of Sulfate Shampoos:While sulfate shampoos can effectively cleanse the hair, they are not without drawbacks. The stripping nature of sulfates can lead to dryness, irritation, and scalp sensitivity, particularly for individuals with dry or sensitive skin. Sulfates can also strip away the natural oils that help keep the hair moisturized and protected. Additionally, for those with color-treated hair, sulfates can cause premature fading, leading to dull and lackluster color. The Rise of Sulfate-Free Shampoos:Sulfate-free shampoos have gained popularity in recent years, largely due to claims of being gentler and more beneficial for hair health. These shampoos are formulated without sulfates, relying on alternative surfactants or cleansing agents to provide a milder cleansing experience. Many sulfate-free shampoos utilize natural ingredients and botanical extracts to cleanse the hair while maintaining its moisture balance. The Benefits of Sulfate-Free Shampoos:Sulfate-free shampoos offer several potential benefits for hair health. Firstly, they are considered gentler on the scalp and hair, making them suitable for individuals with sensitive or dry skin. By avoiding sulfates, these shampoos help retain the natural oils that keep the hair moisturized, resulting in softer, smoother, and more manageable hair. Sulfate-free shampoos are also often recommended for those with color-treated or chemically processed hair, as they help preserve the vibrancy and longevity of the color. The Misconceptions about Sulfate-Free Shampoos:There are a few misconceptions surrounding sulfate-free shampoos that need to be addressed. Some believe that sulfate-free shampoos do not lather as well as sulfate shampoos. While it is true that sulfate-free shampoos may not produce as much foam, it does not necessarily mean they are less effective at cleansing the hair. The absence of sulfates does not compromise the shampoo’s ability…

The Pros And Cons Of Hair Dye What You Need To Know
The Pros and Cons of Hair Dye: What You Need to Know

Hair dyeing is a common practice for both enhancing one’s appearance and expressing individuality. However, like any beauty treatment, it comes with its set of advantages and disadvantages. This article delves into the various aspects of hair dyeing, offering insights into what you need to know before deciding to color your hair. Understanding Hair Dye Hair dye comes in various forms, each serving different purposes and offering different results. From temporary sprays to permanent color changes, understanding how hair dye works can help you make better choices for your hair health and appearance. Pros of Hair Dye Enhancing Your Look Hair dye can dramatically change your look, giving you a new level of confidence. Whether you’re covering grays or just looking for a change, the right hair color can enhance your features and skin tone. Covering Gray Hair For many, hair dye is a means to cover gray hair, helping to maintain a youthful appearance and feel more comfortable with their looks. Experimentation with Colors Hair dye offers the freedom to experiment with different colors, allowing you to express your personality and style in unique ways. Boosting Self-Confidence A new hair color can significantly boost self-confidence, making individuals feel more attractive and refreshed. Cons of Hair Dye Potential Damage to Hair Chemical dyes can damage hair, leading to dryness, breakage, and loss of natural shine. Allergic Reactions Some individuals may experience allergic reactions to the chemicals found in hair dyes, which can range from mild irritation to severe health issues. Maintenance and Cost Colored hair requires more maintenance, including regular touch-ups and specialized hair care products, which can become costly over time. Limitations on Color Changes Frequent dyeing and drastic color changes can further damage hair and may not always produce the desired results due to underlying pigment and hair condition. Choosing the Right Hair Dye Understanding the differences between permanent, semi-permanent, and temporary dyes, as well as natural versus chemical options, can guide you to the best choice for your hair health and styling needs. Preparing Your Hair for Dyeing Proper preparation, including assessing your hair’s condition and applying pre-dye treatments, can minimize damage and enhance dye uptake for better results. Application Tips for Best Results Whether opting for a professional application or a DIY approach, following the product instructions, conducting a patch test, and using the right tools are crucial for achieving the best and safest results. Post-Dye Hair Care Maintaining your hair’s health and color post-dyeing involves using conditioning treatments and color preservation techniques to extend the life of your new hue. Alternatives to Traditional Hair Dye For those concerned about the chemicals in traditional dyes, alternatives like henna or color depositing shampoos and conditioners offer a safer way to change hair color. Making an Informed Decision Before diving into hair dyeing, consider your needs, lifestyle, and the potential impact on your hair. Consulting with a professional can provide personalized advice and ensure you make an informed decision. Dyeing your hair can be an exciting way to change your appearance, but it’s important to weigh the pros and cons….