Airbrush Makeup: Unveiling the Flawless Finish and How to Achieve It

Airbrush Makeup: Unveiling the Flawless Finish and How to Achieve It

Airbrush makeup has gained popularity in the beauty industry for its ability to create a flawless, long-lasting, and natural-looking complexion. Utilizing an airbrush gun and specialized makeup formulas, this technique offers a seamless application that leaves the skin looking smooth and radiant. In this article, we will explore the world of airbrush makeup, discussing its benefits, application process, and tips for achieving the coveted airbrushed look. Whether you’re a makeup enthusiast or a professional artist, understanding airbrush makeup can elevate your makeup game to new heights.

What is Airbrush Makeup?
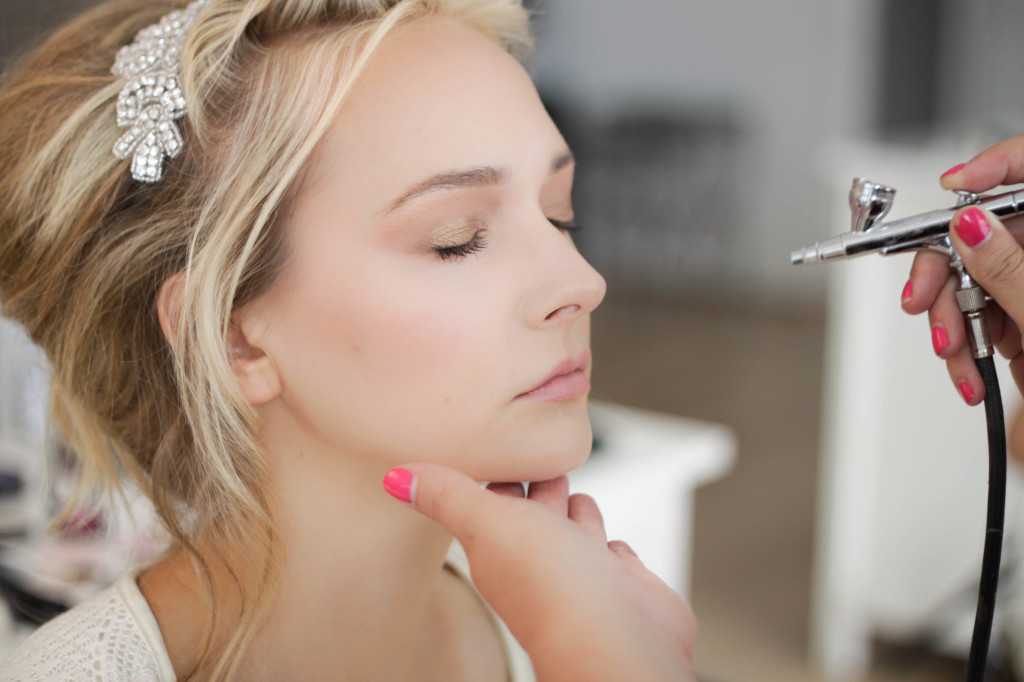
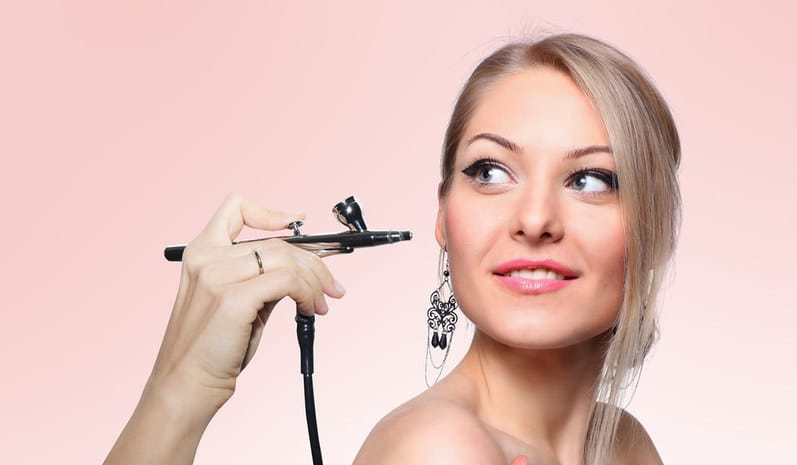
Airbrush makeup is a technique that involves applying makeup through an airbrush gun, which delivers a fine mist of foundation, blush, highlighter, and other makeup products onto the skin. The makeup formula is typically water-based, silicone-based, or a combination of both. This method allows for precise control and even distribution of makeup, resulting in a flawless, lightweight, and natural finish.

Benefits of Airbrush Makeup:
Airbrush makeup offers several advantages over traditional makeup application techniques:

Flawless Finish: The microfine mist of makeup particles creates a seamless, second-skin effect, minimizing the appearance of imperfections and providing a smooth, airbrushed finish.

Longevity: Airbrush makeup is known for its exceptional staying power. The formula adheres to the skin, resisting sweat, humidity, and transfer, making it ideal for special occasions, weddings, or events that require long-lasting makeup.

Buildable Coverage: The airbrush technique allows for customizable coverage. By layering the makeup in thin, even passes, you can achieve sheer to full coverage, depending on your preferences and the desired look.

Lightweight and Natural: Airbrush makeup feels lightweight on the skin, as the ultra-fine particles create a breathable layer. The result is a natural-looking finish that doesn’t look heavy or cakey.
Airbrush Makeup: Unveiling the Flawless Finish and How to Achieve It

The Airbrush Makeup Process:
To achieve the airbrushed look, follow these steps:
Step 1: Prep the Skin: Start with a clean and moisturized face. Ensure your skin is well-hydrated to create a smooth canvas for makeup application.

Step 2: Choose the Right Formula: Select an airbrush makeup formula that suits your skin type and desired finish. Water-based formulas are suitable for most skin types, while silicone-based formulas provide a longer-lasting and more waterproof finish.

Step 3: Set Up the Airbrush System: Assemble your airbrush system according to the manufacturer’s instructions. This typically involves connecting the airbrush gun to an air compressor and adjusting the airflow and pressure settings.

Step 4: Test the Spray: Before applying the makeup to your face, it’s crucial to test the spray on a tissue or your hand to ensure the desired coverage and adjust the air pressure if necessary.

Step 5: Apply Foundation: Begin by applying the foundation. Hold the airbrush gun approximately six to eight inches away from your face and move it in small, circular motions. Start from the center of your face and work outward for an even application.

Step 6: Build Coverage: For areas that require more coverage, such as blemishes or redness, apply additional layers of foundation using light, overlapping passes. Gradually build the coverage to achieve your desired look.

Step 7: Add Blush, Contour, and Highlight: Once the foundation is applied, you can use the airbrush gun to add blush, contour, and highlight to enhance your features. Follow the natural contours of your face for a seamless and sculpted effect.

Step 8: Set the Makeup: After completing your airbrush makeup application, allow it to dry for a few minutes before setting it with a setting spray or powder. This step helps to lock the makeup in place, ensuring its longevity throughout the day.


Tips for Achieving the Airbrushed Look:
Practice Makes Perfect: Like any makeup technique, airbrushing requires practice to achieve the desired results. Familiarize yourself with the airbrush gun, practice different motions, and experiment with different formulas to find what works best for you.

Less is More: Airbrush makeup is known for its lightweight and natural finish. Start with a light layer of foundation and build the coverage gradually to avoid a heavy or cakey appearance. Remember, it’s easier to add more makeup than to remove excess.

Customizing Colors: Airbrush makeup allows for custom color mixing. If you can’t find the perfect shade, experiment with blending different colors to achieve a seamless match to your skin tone.

Maintenance and Cleaning: Proper maintenance and cleaning of your airbrush system are essential for its longevity and optimal performance. Follow the manufacturer’s instructions for cleaning and storing the airbrush gun and regularly clean the needle, nozzle, and cup to prevent clogging.

Contouring and Highlighting: Airbrush makeup is excellent for creating subtle contours and highlights. Utilize different shades to sculpt your features, applying darker shades to areas you want to minimize and lighter shades to areas you want to highlight and enhance.

Blend, Blend, Blend: To achieve a seamless finish, blend the airbrushed makeup with a clean brush or sponge. This step helps to eliminate any visible edges or lines, creating a natural and flawless look.

Set for Longevity: To ensure your airbrush makeup lasts all day, set it with a setting spray or a light dusting of translucent powder. This step helps to lock the makeup in place, control shine, and increase its longevity.

Airbrush makeup offers a professional, flawless, and long-lasting finish that has become increasingly popular in the beauty industry. Its lightweight feel, buildable coverage, and ability to create a seamless complexion make it a preferred choice for special occasions or when a picture-perfect look is desired. By following the proper steps, practicing the technique, and experimenting with different formulas, you can achieve the coveted airbrushed look that leaves your skin looking flawless, radiant, and camera-ready. Whether you’re a makeup enthusiast or a professional artist, airbrush makeup is a skill worth exploring to enhance your makeup repertoire.


Skincare Tips Tofight Acne Proneskin
Skincare Tips to Fight Acne-Prone Skin

Acne is a skin condition in which pores become blocked with oil and dead cells, creating whiteheads, blackheads (comedones), or inflamed pimples that block out sunlight from penetrating deep enough. Though acne affects people of all ages, teenage teens seem most prone. Acne is caused by hair follicles becoming blocked with debris known as pores, leading to blockages that contribute to its development. There may be several contributing factors: 1.Sebum: an oily substance produced by our bodies as a protective barrier, however excessive production can clog pore openings and lead to acne formation. 2.Bacteria: Our skin naturally harbors some bacteria. C. acnes is known to flourish in oily environments, proliferating rapidly to cause acne breakouts by multiplying in clogged pores. 3.Dead Skin Cells: Our stratum corneum layer sheds to make room for new cell development; dead cells also play an integral part of pore blockage issues. Factors Contributing to AcneTight clothing such as sports helmets, hats and masks can contribute to acne breakouts. Working in environments which expose you frequently to oil – like restaurants using frying oil for instance – or exposure to high humidity with heavy lotions can also increase acne flare-ups. Stress increases cortisol hormone levels, leading to elevated cortisol hormones that in turn aggravate acne. Certain medications may have acne as a side effect. Squeezing or picking at pimples increases inflammation levels further still while cosmetic products might contribute to acne formation as well. New studies indicate high-glycemic index sugary food products could worsen acne problems further still. Adult Acne: What It Is and How it is Treated Adult acne refers to any acne which persists after age 25 (or begins after this age), whether continuing from its original source or new outbreaks starting after this point. Treatment options similar to adolescent acne may include topical products containing retinoids, benzoyl peroxide, salicylic acid or oral antibiotics including isotretinoin; ultimately however the choice of treatments are made after seeing a dermatologist following examination; factors that influence these decisions include severity of disease type left scars due to presence or absence of pitted scars on patient skin type tolerance tolerance tolerance as well as whether patient plans pregnancy. Can Adult Acne Be Prevented? Research suggests that only some adults suffering from adult acne have hormonal imbalances related to polycystic ovary syndrome gynecological issues which, if present, must be addressed immediately in order to be effective treatments of adult acne. Therefore treating any potential underling conditions is key for treating adult acne successfully. Particularly for acne-prone skin, having a meticulous skincare routine is of vital importance. Proper cleansing should always take precedence – sleeping with makeup on or skipping evening routines increases pore blockage risk leading to acne breakouts; excessive washing disrupts skin barriers leading to redness and increased sensitivity. Cleansing should involve using an effective cleansing gel and lathering it onto skin for 20 seconds before rinsing with warm water at least twice daily, including one application before bed. Cleansers containing salicylic acid have proven particularly helpful at clearing away debris such as excess keratin from pores to minimize acne…

Exploring Microcurrent Facial: Benefits, Process, And Risks
Exploring Microcurrent Facial: Benefits, Process, and Risks

Microcurrent facial is a non-invasive cosmetic treatment that uses low-level electrical currents to stimulate the facial muscles, tighten the skin, and improve overall skin appearance. This procedure is gaining popularity among people who want to look younger without undergoing surgical procedures like facelifts or Botox injections. In this article, we will delve into the microcurrent facial treatment, its benefits, process, and risks. What is Microcurrent Facial?Microcurrent facial is a non-surgical cosmetic treatment that uses low-level electrical currents to stimulate facial muscles and improve overall skin appearance. The procedure involves the use of a microcurrent device that emits low-frequency electrical currents that mimic the body’s natural electrical currents. These currents stimulate the facial muscles, improve circulation, and promote collagen production. GO TO THE NEXT PAGE TO CONTINUE… Benefits of Microcurrent Facial: Stimulates Collagen Production: Microcurrent facial stimulates collagen production, which is essential for maintaining skin elasticity, reducing wrinkles, and fine lines. Reduces Wrinkles and Fine Lines: Microcurrent facial tightens the skin, reduces wrinkles, and fine lines by stimulating facial muscles. Improves Skin Texture: Microcurrent facial helps to improve skin texture, making it smoother and more even. Increases Blood Circulation: Microcurrent facial improves blood circulation, bringing more nutrients and oxygen to the skin cells, resulting in healthier, glowing skin. Lifts and Tones the Face: Microcurrent facial tones facial muscles, resulting in a lifted and more youthful appearance. Process of Microcurrent Facial:The microcurrent facial process involves the following steps: Cleansing: The first step is to cleanse the face thoroughly to remove any dirt, oil, or makeup. Toning: The next step is to apply a toner to the face to restore its natural pH balance. Application of Conductive Gel: A conductive gel is applied to the face to help the microcurrent device glide smoothly over the skin. Microcurrent Treatment: The microcurrent device is then applied to the face, and low-level electrical currents are delivered to stimulate facial muscles. Mask Application: A mask is applied to the face to hydrate and soothe the skin. Moisturizing: The final step is to apply a moisturizer to lock in the moisture and provide additional hydration to the skin. Risks of Microcurrent Facial:Although microcurrent facial is generally safe, it may cause some risks, including: Skin Sensitivity: Microcurrent facial may cause skin sensitivity, redness, or irritation. Muscle Fatigue: Overstimulation of facial muscles may cause muscle fatigue or soreness. Nerve Damage: If the microcurrent device is not used correctly, it may cause nerve damage. Not Suitable for Everyone: Microcurrent facial is not suitable for everyone, including people with pacemakers or other electronic medical devices. Microcurrent facial is a non-surgical cosmetic treatment that uses low-level electrical currents to stimulate facial muscles, tighten the skin, and improve overall skin appearance. The benefits of microcurrent facial include stimulating collagen production, reducing wrinkles and fine lines, improving skin texture, increasing blood circulation, and lifting and toning the face. However, microcurrent facial may cause some risks, including skin sensitivity, muscle fatigue, nerve damage, and not suitable for everyone. Before undergoing microcurrent facial treatment, consult a qualified aesthetician or dermatologist to discuss if it is suitable for your skin…

The Art Of Blow Drying: History, Science, And Tips For Perfecting Your Technique
The Art of Blow Drying: History, Science, and Tips for Perfecting Your Technique

Blow drying is a staple in hair styling, and for good reason. It’s a quick and effective way to dry and style your hair at the same time, giving you the power to create a wide range of looks from sleek and straight to voluminous and curly. But have you ever wondered how blow dryers work or how they’ve evolved over time? In this article, we’ll explore the history and science of blow drying, as well as offer tips for using this versatile tool to achieve your desired style. How Blow Dryers Work At their core, blow dryers use a combination of heat and airflow to dry and style hair. The heating element inside the dryer heats up the air as it passes through, and the resulting hot air blows out of the nozzle and onto the hair. The speed and temperature of the airflow can be adjusted using the settings on the dryer. Most dryers have at least two speed settings (high and low) and two temperature settings (hot and cold). The high speed and hot temperature setting is typically used for drying wet hair quickly, while the low speed and cool temperature setting is used for setting a style or cooling down hair that’s been heated. In addition to the heating element and motor, blow dryers also have a filter to prevent dust and debris from getting sucked into the motor, and a nozzle to direct the airflow. Some dryers also come with attachments like diffusers or concentrators, which can be used to create different styles or enhance the natural texture of your hair. Tips for Using a Blow Dryer Blow drying your hair may seem straightforward, but there are a few tips and tricks that can help you get the best results. Here are some things to keep in mind: Prep Your HairBefore you start blow drying, it’s important to prep your hair properly. Start by washing your hair with a gentle shampoo and conditioner, then towel dry to remove excess water. If you have thick or curly hair, you may want to apply a leave-in conditioner or hair oil to help detangle and protect your strands from heat damage. Use the Right ToolsTo get the most out of your blow dryer, it’s important to use the right tools. This includes a quality dryer with adjustable settings, as well as any attachments (like a diffuser or concentrator) that you may need for your hair type and desired style. You’ll also want to have a round brush or a paddle brush on hand to help smooth and shape your hair as you dry. Divide and ConquerTo make blow drying easier and more effective, divide your hair into sections using clips or hair ties. Start at the back of your head and work your way forward, drying each section one at a time. This will help ensure that each section gets evenly dried and styled, and will also prevent you from getting tangled up in your own hair! Use the Right TechniqueTo get the best results with your blow dryer, it’s…

Illuminating Beauty: A Comprehensive Guide To Safely Lightening Your Skin Tone
Illuminating Beauty: A Comprehensive Guide to Safely Lightening Your Skin Tone

The pursuit of radiant and even-toned skin has been a beauty ideal across cultures and time. Whether for personal preferences, aesthetic reasons, or addressing skin concerns, individuals often explore methods to lighten their skin tone. It’s important to approach this process with mindfulness, understanding, and safety. In this comprehensive guide, we will delve into the world of skin tone lightening, exploring various techniques, products, and considerations to help you achieve your desired results while maintaining the health and integrity of your skin. Understanding Skin Tone and Pigmentation Skin tone is determined by the amount of melanin in the skin. Melanin, a natural pigment, provides protection against harmful UV rays and gives color to the skin, hair, and eyes. Skin tones range from very fair to deep brown, with variations influenced by genetics, environmental factors, and sun exposure. Why Lighten Your Skin Tone? People consider skin tone lightening for various reasons: Safe Approaches to Skin Tone Lightening It’s crucial to prioritize safety and choose methods that align with your skin’s health. Here are safe approaches to consider: Home Remedies for Skin Tone Lightening Tips for Achieving Safe and Effective Results Expert Insights and Considerations The journey toward achieving your desired skin tone involves thoughtful consideration, research, and a commitment to safe practices. Lightening your skin tone should prioritize your skin’s health, and the approaches you choose should align with your goals and preferences. Whether addressing hyperpigmentation, enhancing your confidence, or simply striving for an even complexion, maintaining a mindful and informed approach will contribute to the long-term health and radiance of your skin. Consultation with a dermatologist, practicing proper skincare, and embracing safe methods will guide you toward a successful and satisfying journey toward skin tone lightening.

Dive Into The World Of Effortless Eye Makeup With Our Beginner's Guide. Learn Simple, Chic Techniques For A Stunning Look That Radiates Elegance.
Effortless Elegance: A Step-by-Step Guide to Easy, Chic and Simple Eye Makeup for Beginners

Eye makeup can transform your look from ordinary to spectacular with just a few strokes. Whether you’re a beginner aiming for a natural day look or an evening glam, mastering the basics of eye makeup can elevate your style with an air of effortless elegance. This guide is designed to walk you through simple, chic, and easy eye makeup steps that cater to beginners, ensuring you achieve a flawless look every time. Understanding Eye Makeup Basics Before diving into the world of eye makeup, it’s crucial to familiarize yourself with the essential tools and products you’ll need. Additionally, understanding your eye shape is key to enhancing your natural beauty. This section will provide a comprehensive overview of everything from selecting the right brushes to recognizing the unique characteristics of your eyes. Preparing Your Eyes A clean canvas is essential for any masterpiece, and the same goes for your eye makeup. We’ll cover the importance of starting with a clean base and how using a primer can extend the wear of your eyeshadow, prevent creasing, and ensure a smooth application. Mastering the Natural Look The natural look is a timeless classic that suits any occasion. Learn how to select neutral shadows that complement your skin tone and master blending techniques for a seamless, subtle finish that enhances your eyes without overwhelming them. Elevating Your Look with Eyeliner Eyeliner can define your eyes and give them a dramatic lift. From pencil to gel and liquid options, this section will guide you through the types of eyeliner available and share easy application techniques for beginners to achieve that perfect wing or subtle definition. Mascara Magic Mascara is the finishing touch that brings your eye makeup together, offering volume and length to your lashes. Discover how to choose the right mascara for your needs and apply it for a clump-free, eye-opening effect. Defining Your Eyebrows Eyebrows play a crucial role in framing your face and complementing your eye makeup. This part will explore how to fill and shape your brows, even if you’re a beginner, to enhance your overall look. Eye Makeup for Different Occasions Whether you’re prepping for a day at the office or a night out, eye makeup can be tailored to fit any occasion. We’ll provide tips for creating a chic daytime look and how to effortlessly transition to an evening elegance. Adding a Pop of Color Incorporating color into your eye makeup can be daunting, but when done correctly, it can elevate your look. Learn how to choose and apply colored eyeshadows that enhance your eye color and add a fun twist to your makeup routine. The Do’s and Don’ts of Eye Makeup Avoid common pitfalls and ensure your eye makeup is both stunning and safe. This section covers the essential do’s and don’ts, from application techniques to hygiene practices to keep your eyes healthy. Fixing Common Eye Makeup Mishaps Mistakes happen to the best of us. Whether it’s smudged eyeliner or eyeshadow fallout, we’ll share quick and easy fixes to correct common eye makeup mishaps without starting over. Advanced Tips for…

Mastering The Art Of Pristine Complexion Your Definitive Guide To Makeup Dissolution
Mastering the Art of Pristine Complexion: Your Definitive Guide to Makeup Dissolution

The act of makeup removal transcends mere skin cleansing, positioning itself as a pivotal element in any skincare regimen. Its purpose extends beyond surface cleaning, aiming to safeguard the skin’s health, vitality, and radiance. Advanced makeup dissolution entails more than basic cleaning; it encompasses a suite of techniques and products crafted to fortify and enrich the skin, averting complications such as pore blockages, acne outbreaks, and early signs of aging. This exhaustive tutorial delivers all requisite insights for proficient makeup elimination, guaranteeing the preservation of your skin’s vigor and health. Decoding Makeup Dissolution Viewing makeup removal as a critical art form integral to your daily skincare ritual is essential. This process is not solely about removing the visible makeup layers; it’s fundamentally about enabling the skin to rejuvenate, breathe, and optimally absorb skincare products. It necessitates a comprehension of the makeup varieties applied, the skin’s specific requirements, and identifying the most suitable products and methods for removal. Key Instruments for Efficient Makeup Dissolution The selection of appropriate instruments and concoctions is crucial for effective makeup dissolution. The market is abundant with options catering to diverse skin types and makeup formulations, from mild eye makeup dissolvers to oil-infused solutions aimed at resilient foundation and lipstick forms. Products like micellar water, cleansing oils, balms, and wipes each serve distinct purposes, with the choice depending on individual skin sensitivity, makeup resilience, and personal inclinations. Sequential Guide for Makeup Dissolution Advanced Cleansing and Skincare Post-Makeup Dissolution Post-dissolution, deep cleansing ensures the elimination of all residual makeup, leaving the skin impeccably clean. This can be achieved through exfoliation, recommended 2-3 times weekly, followed by the application of a rich moisturizer to aid skin recovery throughout the night. Components such as hyaluronic acid, ceramides, and niacinamide are invaluable in moisturizers for post-dissolution care. Micellar Water’s Role in Makeup Dissolution Micellar water stands out as a mild yet effective choice, suitable for all skin varieties. Its micelles adeptly attract makeup, oil, and dirt, facilitating their removal without necessitating vigorous scrubbing. It is particularly beneficial for those with sensitive skin or for swift makeup changes. The Oil Cleansing Technique for Resilient Makeup For dissolving stubborn, waterproof makeup and deep skin cleansing, the oil cleansing method proves highly effective. It involves massaging a tailored oil blend into the skin to liquefy makeup, followed by using a warm washcloth to open pores and wipe away the oil, alongside any impurities and makeup. Circumventing Common Skin Irritations To prevent irritation, gentle removal techniques are paramount. This entails opting for hypoallergenic solutions, eschewing abrasive scrubbing, and treating the delicate eye area with care. Always conduct a patch test with new products to ascertain their compatibility with your skin. Natural and Home-Made Makeup Dissolvers For aficionados of natural skincare, ingredients like coconut oil, jojoba oil, and witch hazel present viable makeup removal alternatives. Crafting homemade solutions can be both cost-effective and kind to the skin. Significance of Regular Makeup Brush Cleansing Maintaining clean makeup brushes is essential to prevent skin irritation and acne. Brushes ought to be washed routinely with a gentle cleanser or brush…

Understanding Makeup Primer: Functions And Application Techniques
Understanding Makeup Primer: Functions and Application Techniques

Makeup primer is an essential product in the cosmetics industry, designed to create a smooth base for foundation and enhance the longevity and appearance of makeup. In this guide, we will explore the basics of makeup primer, its functions, and provide an overview of how to effectively use it in your beauty routine. What is Makeup Primer?Makeup primer is a cosmetic product applied before foundation or other makeup to prep the skin for smoother application and improved longevity. It is typically with ingredients that help fill in fine lines, minimize the appearance of pores, and create a barrier between the skin and makeup, resulting in a flawless finish. Functions of Makeup Primer Smoothing Texture: Primers are designed to create a smooth canvas for foundation application by filling in fine lines, wrinkles, and pores, resulting in a more even complexion.Extending Makeup Wear: A good primer helps makeup adhere to the skin and prevents it from fading, creasing, or melting throughout the day, ensuring a longer-lasting and fresher look. Oil Control: Some primers are specifically keeping to control excess oil production, the skin matte and reducing shine.Color Correction: Certain primers are tinted to help correct specific skin concerns, such as redness, dullness, or discoloration, providing a more even and balanced complexion. Hydration and Nourishment: Some primers contain moisturizing ingredients that hydrate the skin and improve its texture, resulting in a smoother makeup application. How to Use Makeup PrimerCleanse and Moisturize: Start with clean, moisturized skin. Gently cleanse your face and follow up with your regular moisturizer. Allow the moisturizer to absorb fully before applying the primer.Choose the Right Primer: Select a primer that suits your specific needs, whether it’s oil control, color correction, or hydration. Consider your skin type and any specific concerns you may have, such as large pores or uneven texture. Apply a Small Amount: Dispense a small amount of primer onto your fingertips or the back of your hand. Remember that a little goes a long way, so start with a pea-sized amount and add more if needed.Dot and Blend: Apply the primer onto the center of your face and then dot it on your forehead, cheeks, nose, and chin. Gently blend the primer using your fingertips, a brush, or a makeup sponge, working it into the skin in upward and outward motions. Focus on Problem Areas: Pay extra attention to areas that require additional smoothing or coverage, such as enlarged pores or fine lines. Pat the primer into these areas for more targeted results.Allow Absorption: Give the primer a few moments to settle into the skin and fully absorb before applying foundation or other makeup products. This allows the primer to create a smooth base for seamless makeup application. Proceed with Makeup Application: Once the primer has absorbed, apply your foundation, concealer, and other makeup products as usual. Notice how the primer helps the makeup adhere better and enhances its overall appearance.Touch-Up Throughout the Day: If necessary, carry a small tube of primer with you for touch-ups during the day. Gently pat a small amount onto areas that may need…

Luxurious Lashes: Exploring The Beauty Of Silk Eyelashes
Luxurious Lashes: Exploring the Beauty of Silk Eyelashes

Silk eyelashes have become increasingly popular in the world of beauty and makeup. Known for their softness, durability, and natural appearance, silk eyelashes offer a luxurious alternative to traditional synthetic or mink eyelashes. In this article, we will delve into the world of silk eyelashes, exploring their features, benefits, and why they have gained recognition as a favored choice for enhancing the beauty of the eyes. Understanding Silk Eyelashes:Silk eyelashes are made from synthetic fibers that are designed to mimic the look and feel of natural eyelashes. These lashes are created using fine threads of synthetic silk, resulting in a soft, lightweight, and fluttery appearance. The synthetic silk fibers used in silk eyelashes are carefully crafted to closely resemble the texture and shine of real lashes, providing a natural and glamorous effect. Softness and Comfort:One of the standout features of silk eyelashes is their remarkable softness and comfort. The fine synthetic silk fibers offer a gentle touch against the skin, ensuring a comfortable wearing experience. Unlike some other types of false lashes, silk lashes are lightweight and flexible, allowing for easy application and a seamless blend with your natural lashes. Durability and Longevity:Silk eyelashes are known for their durability and longevity. The synthetic silk fibers used in their construction are resilient and can withstand regular wear and tear. When properly cared for, silk lashes can be reused multiple times, making them a cost-effective choice in the long run. With proper maintenance and storage, silk eyelashes can retain their shape and beauty for an extended period. Natural-Looking Results:One of the main reasons why silk eyelashes have gained popularity is their ability to deliver natural-looking results. The fine and tapered silk fibers closely resemble the texture and appearance of real lashes, creating a seamless blend with your natural lash line. Silk lashes provide a subtle enhancement, adding length, volume, and definition without appearing overly dramatic or artificial. Versatility in Style:Silk eyelashes come in a wide range of styles and designs, offering versatility to suit different eye shapes and personal preferences. From natural-looking lashes with a subtle lift to more dramatic and voluminous options, there is a silk lash style to complement any makeup look or occasion. Whether you prefer a natural everyday look or a glamorous evening aesthetic, silk eyelashes can be tailored to meet your desired effect. Hypoallergenic and Suitable for Sensitive Eyes:For individuals with sensitive eyes or those prone to allergies, silk eyelashes can be a great option. The synthetic silk fibers used in their construction are typically hypoallergenic, reducing the risk of irritation or adverse reactions. However, it is important to note that everyone’s sensitivity levels may vary, so it’s always advisable to conduct a patch test before using any new lash product. Easy Application and Removal:Silk eyelashes are user-friendly and easy to apply, even for beginners. Their lightweight nature and flexibility make them simple to maneuver and position along the lash line. The soft band of silk lashes allows for seamless blending and a comfortable fit. Similarly, silk eyelashes are easily removable without causing any damage to the natural lashes…