Luxurious Lashes: Exploring the Beauty of Silk Eyelashes

Luxurious Lashes: Exploring the Beauty of Silk Eyelashes

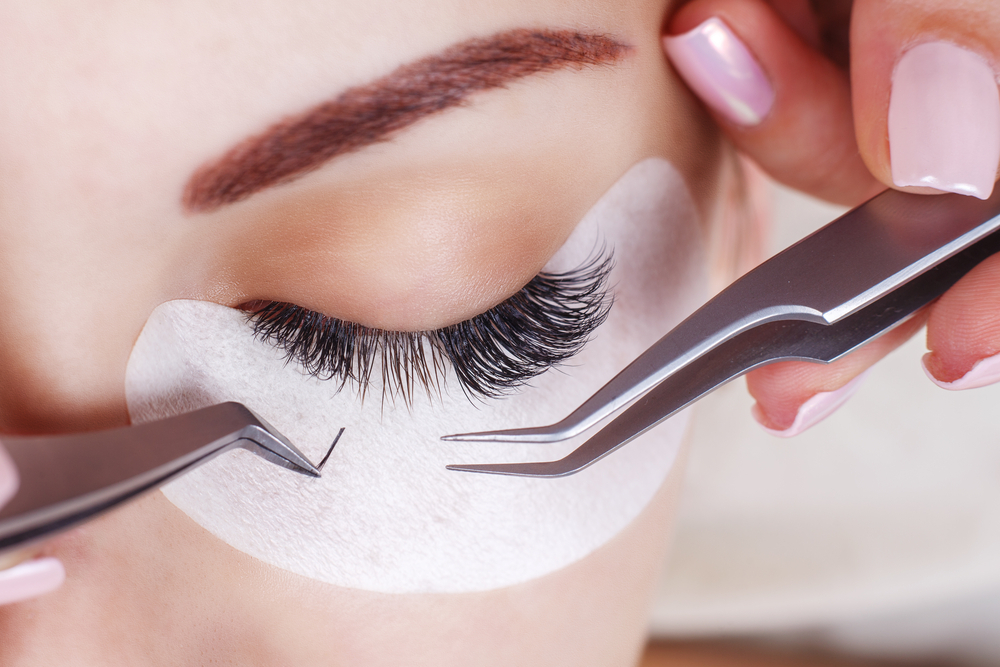
Silk eyelashes have become increasingly popular in the world of beauty and makeup. Known for their softness, durability, and natural appearance, silk eyelashes offer a luxurious alternative to traditional synthetic or mink eyelashes. In this article, we will delve into the world of silk eyelashes, exploring their features, benefits, and why they have gained recognition as a favored choice for enhancing the beauty of the eyes.

Understanding Silk Eyelashes:
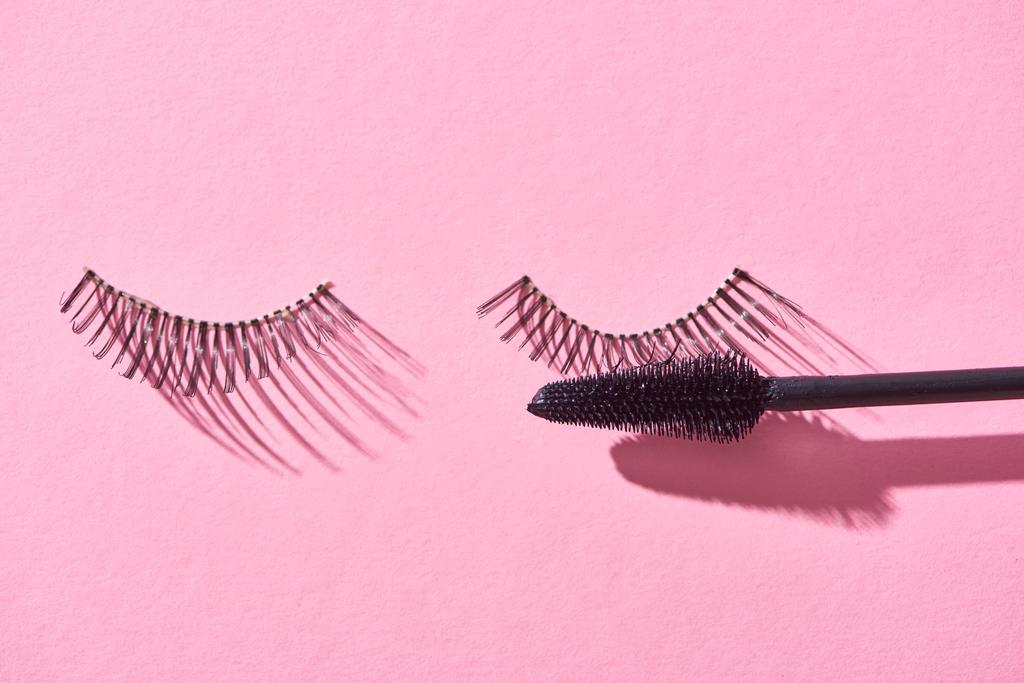
Silk eyelashes are made from synthetic fibers that are designed to mimic the look and feel of natural eyelashes. These lashes are created using fine threads of synthetic silk, resulting in a soft, lightweight, and fluttery appearance. The synthetic silk fibers used in silk eyelashes are carefully crafted to closely resemble the texture and shine of real lashes, providing a natural and glamorous effect.

Softness and Comfort:
One of the standout features of silk eyelashes is their remarkable softness and comfort. The fine synthetic silk fibers offer a gentle touch against the skin, ensuring a comfortable wearing experience. Unlike some other types of false lashes, silk lashes are lightweight and flexible, allowing for easy application and a seamless blend with your natural lashes.

Durability and Longevity:
Silk eyelashes are known for their durability and longevity. The synthetic silk fibers used in their construction are resilient and can withstand regular wear and tear. When properly cared for, silk lashes can be reused multiple times, making them a cost-effective choice in the long run. With proper maintenance and storage, silk eyelashes can retain their shape and beauty for an extended period.
Luxurious Lashes: Exploring the Beauty of Silk Eyelashes

Natural-Looking Results:
One of the main reasons why silk eyelashes have gained popularity is their ability to deliver natural-looking results. The fine and tapered silk fibers closely resemble the texture and appearance of real lashes, creating a seamless blend with your natural lash line. Silk lashes provide a subtle enhancement, adding length, volume, and definition without appearing overly dramatic or artificial.

Versatility in Style:
Silk eyelashes come in a wide range of styles and designs, offering versatility to suit different eye shapes and personal preferences. From natural-looking lashes with a subtle lift to more dramatic and voluminous options, there is a silk lash style to complement any makeup look or occasion. Whether you prefer a natural everyday look or a glamorous evening aesthetic, silk eyelashes can be tailored to meet your desired effect.

Hypoallergenic and Suitable for Sensitive Eyes:
For individuals with sensitive eyes or those prone to allergies, silk eyelashes can be a great option. The synthetic silk fibers used in their construction are typically hypoallergenic, reducing the risk of irritation or adverse reactions. However, it is important to note that everyone’s sensitivity levels may vary, so it’s always advisable to conduct a patch test before using any new lash product.

Easy Application and Removal:
Silk eyelashes are user-friendly and easy to apply, even for beginners. Their lightweight nature and flexibility make them simple to maneuver and position along the lash line. The soft band of silk lashes allows for seamless blending and a comfortable fit. Similarly, silk eyelashes are easily removable without causing any damage to the natural lashes when done correctly.

Customizable and Blendable:
Silk eyelashes offer the advantage of being customizable and blendable to create your desired look. The individual silk lashes can be trimmed to fit your eye shape and preference, allowing for a more personalized and precise application. Additionally, silk lashes seamlessly blend with your natural lashes, giving the appearance of naturally full and fluttery lashes.

Easy Maintenance and Care:
Maintaining silk eyelashes is relatively simple. After each use, gently remove any adhesive residue and ensure they are clean and free from makeup. Store them properly in their original packaging or a designated lash case to maintain their shape. With proper care, silk lashes can be reused multiple times, making them a cost-effective choice.

Cruelty-Free Alternative:
For those who prioritize ethical beauty choices, silk eyelashes offer a cruelty-free alternative to mink lashes. Silk lashes are made from synthetic materials, ensuring that no animals are harmed in the process. They provide a guilt-free option for enhancing the beauty of your eyes while still achieving a luxurious and natural effect.

Silk eyelashes offer a luxurious and versatile solution for enhancing the beauty of your eyes. With their softness, durability, and natural appearance, silk lashes have gained recognition as a favored choice among beauty enthusiasts. Whether you seek a natural everyday look or a more glamorous aesthetic, silk eyelashes provide a comfortable and customizable option that seamlessly blends with your natural lashes. Experience the allure and elegance of silk lashes as they enhance your eyes and elevate your overall beauty regimen.


How To Achieve The Dewy Makeup Look?
How to Achieve the Dewy Makeup Look?

Dewy makeup looks, popularly dubbed “glass skin,” have taken over beauty circles by storm for good reason. This natural and glowing style mimics healthy, well-hydrated skin for an ethereal and youthful appearance, creating an air of luminosity while emphasizing natural beauty – in this comprehensive guide we offer step-by-step instructions, product recommendations and expert tips to help you attain that coveted lit-from-within glow! Chapter 1: Prepping Canvases for Paintings Chapter 1 emphasizes the significance of proper skin preparation before delving into makeup application. You’ll gain knowledge on cleansing, exfoliating and moisturizing to provide a hydrated canvas on which to build makeup application skills. We will also cover how adding facial mist or primer may boost luminosity of the complexion. Chapter Two Choosing Appropriate Products Chapter 2 explores key product categories – foundation, concealer and highlighters – which provide tips for choosing dewy finish formulas such as lightweight foundations that hydrate well as well as luminious concealers to achieve radiant bases and bases with radiant bases. You will gain insights into selecting these formulas that help create that dewy look! Chapter 3 : Attaining Natural Coverage Chapter 3 explores the art of natural-looking coverage. Here you’ll learn to apply foundation and concealer sparingly to maintain skin’s natural texture while hiding imperfections, color matching techniques to achieve seamless coverage, color blending techniques for an ideally seamless result, as well as color blending blending to achieve seamless finishes. Chapter 4: Highlighters Provide Illuminating Solutions in Chapter 4 Highlighter is your go-to solution for creating dewy complexion, and Chapter 4 examines its application thoroughly. Here, you will learn to strategically apply highlighter to highlight high points on the face such as cheekbones, brow bone, and Cupid’s bow. Additionally, we introduce various types of highlighters including liquid powder cream types; providing advice for selecting one suitable to your skin tone and offering tips to find suitable shades to use with each. Chapter 5: Brighten Your Skin Tone Through Blush Blush plays an integral part in creating the dewy look, so Chapter 5 offers insights on selecting blush shades that work for your complexion and how best to apply it for an effortless flush of color. We will also cover how best to place blush to give an appearance of youth and vitality. Chapter 6: Establish the Look Setting your makeup correctly is vital to its longevity without jeopardizing its dewy finish. In Chapter 6, we’ll cover setting sprays and powders designed to maintain dewy effects without altering its dewiness, as well as techniques for powder application that avoid matte or cakey finishes. Chapter 7 : Dewy Eye Makeup Chapter 7 will help complete your dewy makeup look by exploring eye makeup techniques to achieve shimmering eyeshadow looks that enhance overall radiance, as well as using dewy-finish eyeliners and mascaras that complement this style. Chapter 8: Discover The Perfect Dewy Lips Now Chapter 8 examines lip makeup to create an integrated look. You’ll gain knowledge on selecting products with both hydration and subtle shine for best results, plus we will introduce tinted balms and glosses that enhance natural…

5 Essential Tips To Enhance Your Eye Shadowskills
5 Essential Tips to Enhance Your Eye Shadow Skills

Eye shadow can dramatically transform your look, adding depth, dimension, and a pop of color to your eyes. Whether you’re aiming for a subtle enhancement or a bold statement, mastering the art of eye shadow application is key. In this comprehensive guide, we’ll delve into five pivotal tips that will elevate your eye shadow game, ensuring your makeup not only looks stunning but also lasts longer. Prime Your Eyes Before diving into colors and techniques, it’s crucial to start with a clean canvas. Priming your eyelids is the first step towards ensuring your eye shadow adheres better and stays put for hours. A good eye primer prevents creasing and fading, making it indispensable for both daily wear and special occasions. You can opt for a dedicated eye primer or a versatile option that suits both your face and eyelids. The key is to apply a thin, even layer across your eyelid to create the perfect base for your eye shadow. Understand Your Eye Shape Eye shadow isn’t a one-size-fits-all affair; your application technique should be tailored to your unique eye shape. Whether you have almond, round, hooded, or monolid eyes, each shape has specific strategies to enhance and define its natural beauty. By recognizing your eye shape, you can apply eye shadow in a way that accentuates your best features, from lifting droopy lids to making small eyes appear larger. This personalization ensures your eye makeup complements your overall look. Select the Right Eye Shadow Type The type of eye shadow you choose plays a significant role in the final look. Cream eye shadows work wonders as a base color, offering a smooth application. However, for versatility and ease of blending, pressed powder eye shadows are generally preferred. They come in a wide range of finishes, from matte to shimmer, allowing you to create depth and dimension on your eyelids. When selecting eye shadows, consider the occasion, your skin type, and the look you’re aiming for. Invest in Quality Brushes The right tools can make all the difference in eye shadow application. A comprehensive set of brushes allows for precise application and seamless blending. Essentials include a large, fluffy brush for applying a base color, a smaller, denser brush for adding depth to the crease, and a blending brush to ensure there are no harsh lines. Additionally, a pencil brush is great for detailed work, like defining the lower lash line or inner corners. Quality brushes offer better control and can help you achieve a more professional finish. Choose Eye Shadow Colors That Complement Your Eye Color The colors you choose should enhance your natural eye color, making your eyes the focal point of your face. Here’s a quick guide: By incorporating these tips into your makeup routine, you’ll notice a significant improvement in your eye shadow application. Remember, practice makes perfect, and experimenting with different colors and techniques is part of the fun. Embrace your creativity, and let your eyes shine! Mastering eye shadow application is an art that enhances your natural beauty and allows for creative expression. By following these…

How To Choose The Perfect Blush For Your Skin Tone
How to Choose the Perfect Blush for Your Skin Tone

Blush is a pivotal element in the makeup routine, capable of transforming your look with just a few strokes. It adds a healthy, youthful glow and dimension to the face, but selecting the perfect shade for your skin tone can be daunting. This guide will help you navigate the nuances of choosing a blush that complements your complexion beautifully. Understanding Your Skin Tone Identifying Warm, Cool, and Neutral Undertones Your skin’s undertone is key to selecting makeup. Warm undertones look best with peach or coral blushes, cool undertones shine with pink or rose shades, and neutral undertones can flexibly wear either. The Importance of Natural Lighting Evaluate your skin tone and undertone in natural light to get the most accurate reading, ensuring you choose a blush that harmonizes naturally with your complexion. Blush Types and Textures Powder, Cream, Liquid, and Gel Formulas Different blush formulas cater to different needs and preferences. Powder blushes are great for oily skin, cream and liquid for dry skin, and gel blushes offer a sheer, natural look. Choosing the Right Texture for Your Skin Type Match the blush texture with your skin type for the best results. Oily skin benefits from powder blushes, whereas dry skin looks radiant with cream formulas. Selecting Blush for Fair Skin Tones Best Shades for a Natural Glow Fair skin tones should opt for soft peach, light pink, or coral to add a subtle warmth without overwhelming the complexion. Avoiding Overpowering Colors Steer clear of overly dark or bright shades that can look harsh against light skin. Instead, choose light, buildable colors. Choosing Blush for Medium Skin Tones Ideal Shades for Warmth and Depth Medium skin tones are complemented by rich peach, warm mauve, and soft berry shades, which add the right amount of color for a sun-kissed look. Balancing Pigmentation and Brightness Select a blush with enough pigmentation to show up on your skin, but with a brightness that enhances your natural glow. Finding the Right Blush for Dark Skin Tones Vibrant and Deep Tones for a Radiant Look Dark skin tones can carry vibrant reds, deep oranges, and bold berries beautifully, enhancing the skin’s natural depth. Ensuring Visibility and Flattering Hues Choose highly pigmented blushes that won’t get lost on your skin, and ensure the hues complement your undertone for a flattering effect. Application Tips for a Flawless Finish Techniques for Blending and Placement Apply blush to the apples of your cheeks and blend upwards towards the temples for a lifted, youthful effect. Use light strokes to build color gradually. Tools for Application: Brushes vs. Fingers vs. Sponges A fluffy brush is ideal for powder blush, fingers work well for cream and liquid formulas, and sponges can help blend for a seamless finish. Common Mistakes to Avoid Over-Application and Mismatched Undertones Start with a light hand to avoid over-application and select shades that match your undertone to avoid a clash with your natural coloring. Ignoring the Rest of Your Makeup Palette Ensure your blush harmonizes with the rest of your makeup, including lipstick and eyeshadow, to create a cohesive, balanced…

Diy Haircut Guide: How To Cut Your Own Hair At Home
DIY Haircut Guide: How to Cut Your Own Hair at Home

Whether you’re looking to save time and money or simply prefer the convenience of a DIY approach, cutting your own hair at home is a practical skill to have. While leaving major hair transformations to professional stylists is advisable, trimming your hair or giving yourself a simple haircut can be achieved with the right tools and techniques. In this comprehensive guide, we will walk you through step-by-step instructions on how to cut your own hair, along with helpful tips to ensure a successful and satisfying outcome. Gather the Right Tools:Before you start cutting your hair, gather the necessary tools to ensure a smooth process. You will need:Sharp haircutting scissors: Invest in a good pair of professional scissors designed for hair cutting. Using regular scissors can lead to uneven cuts and split ends. Hair clips or elastics: These will help you section your hair for easier cutting. Comb: A fine-toothed comb will assist in detangling and parting your hair. Mirror: A large, handheld mirror and a stationary mirror will allow you to see your hair from different angles during the cutting process. Spray bottle with water: Mist your hair with water to dampen it slightly before cutting. This makes the hair more manageable and prevents excessive flyaways. Decide on the Haircut:Decide on the type of haircut you want before you begin. For simple trims or maintaining your current hairstyle, follow your previous cut as a reference. If you plan to make significant changes to your hair, it’s best to seek guidance from a professional stylist to avoid potential mishaps. Start with Clean, Dry Hair:Cutting your hair when it’s clean and dry ensures more accurate results. Wash and dry your hair thoroughly before starting the haircutting process. Section Your Hair:Divide your hair into manageable sections using hair clips or elastics. Start by parting your hair down the center and then create additional sections horizontally. Pin each section securely to keep the hair you’re not cutting out of the way. Trim the Ends:For a simple trim, work with one section at a time. Take a small subsection of hair and comb it straight down. Hold the hair between your fingers and trim the ends evenly, following your desired length. Make small, cautious cuts to avoid removing too much hair at once. Create Layers (Optional):If you desire layers, you can achieve them at home with careful technique. To create face-framing layers, take a section of hair from the front and hold it at a 45-degree angle away from your face. Trim the hair diagonally, working from the shortest point to the longest point. Repeat this process on both sides of your face for balanced layers. Check for Evenness:After cutting each section, release the hair and check for evenness and balance. Use your mirror to view your hair from different angles, making any necessary adjustments to ensure a uniform cut. Tackle Bangs (Optional):If you have bangs, trim them carefully by combing them straight down over your forehead. Hold the scissors vertically and make small, gentle cuts to the desired length. Remember that it’s better to start with…

From Play Doh To Sunscreenthe Dangers Of Skincare For Kids Explained
From Play-Doh to Sunscreen: The Dangers of Skincare for Kids Explained

Children are facing an increasing amount of pressure to maintain a skincare routine, and dermatologists are growing anxious about the potential risks and health ramifications. This article offers a comprehensive rundown of the trend, as well as an overview of the reasons experts are growing more concerned about its implications for children. The Changing Face of the Beauty Industry The beauty industry has transitioned to target a younger audience, and there is an influx of products being marketed to children. As a result, more and more children are becoming users of skincare products, and dermatologists are raising concerns about the dangers of early adoption. However, it’s vital that these dangers are fully understood, as a child’s skin is fundamentally different and more sensitive than an adult’s. The Market for Children’s Skincare In recent years, the market for skincare products for children has expanded dramatically, with numerous brands offering ranges dedicated to a younger audience. This boom is largely the result of a turn in focus towards skin health, as well as aggressive marketing aimed at both parents and youngsters. Why Children’s Skin is Different Children’s skin is different from adults’ skin: It’s more delicate, more susceptible to irritation, and takes longer to form its own protective barrier. That’s because children’s skin has a different composition, is thinner, and performs its barrier function differently than adult skin, causing it to be more susceptible to moisture loss and external damage from harsh skincare ingredients. The Dangers of Early Skincare Adoption Using skincare in kids could pose a number of risks to skin condition, allergy development, and overall health. A number of ingredients can disrupt skin development, create allergies, or cause long-term health issues, making caution and knowledge two powerful skincare choices for children. Common Harmful Ingredients in Children’s Skincare Beware of the alarming chemicals housed in many skincare products for kids, including synthetic fragrance, parabens, and sulfates, because they can be harsh on young skin. Expert Dermatologists’ Warnings What do dermatologists think of the increasing phenomenon of kids using skincare products?Read their take on protecting sensitive, youthful skin. Alternatives to Traditional Skincare for Children Skip the chemicals and opt for the naturals in children’s skincare. Ingredients to look for, contain, and avoid as well as the brand leading the way in gentle, non-toxic children skincare. How Parents and Guardians Can Help Ultimately, parents and guardians are responsible for overseeing and guiding their children’s skincare routines. Here are some considerations that can help ensure that the products used on kids are safe, appropriate, and beneficial to their skin health. Choosing Safe Skincare Products for Kids Selecting safe kids skincare products is no easy task. This portion of the article gives an overview of how parents can approach product selections, including latching onto ingredient lists, looking for particular certifications, and seeking out dermatologist-recommended options. The Psychological Impact of Early Beauty Standards Introducing kids to skincare and beauty standards at a young age can lead to some significant psychological outcomes. This section examines what steering youth into beauty routines can do to their self-esteem and body image…

Easy With 10 Tips And Natural Ingredients For Healthy And Glowing Skin Skin Care Recipes
Easy with 10 Tips and Natural Ingredients for Healthy and Glowing Skin Skin Care Recipes

Having healthy and glowing skin is something that everyone desires. However, maintaining healthy skin requires effort and a good skincare routine. Here are some tips for achieving healthy and glowing skin: Protect your skin from the sun: Exposure to the sun’s harmful UV rays can cause premature aging and increase the risk of skin cancer. Apply sunscreen with at least SPF 30 daily, wear protective clothing, and avoid sun exposure during peak hours. Keep your skin moisturized: Moisturizing your skin is essential for maintaining its health and preventing dryness and irritation. Choose a moisturizer that is suitable for your skin type and apply it twice a day. Stay hydrated: Drinking plenty of water helps to keep your skin hydrated from the inside out. Aim for at least 8-10 glasses of water per day. Avoid smoking and limit alcohol consumption: Smoking and excessive alcohol consumption can damage your skin and cause premature aging. Quitting smoking and limiting alcohol consumption can help to improve your skin’s health. Follow a healthy diet: Eating a healthy diet rich in fruits, vegetables, and lean protein can help to nourish your skin and improve its overall health. Get enough sleep: Getting enough sleep is important for the health of your skin. Aim for at least 7-8 hours of sleep each night. Exercise regularly: Regular exercise can improve circulation, which helps to nourish your skin and keep it healthy. Cleanse your skin regularly: Cleansing your skin helps to remove dirt, oil, and makeup, which can clog your pores and lead to breakouts. Use a gentle cleanser twice a day. Exfoliate your skin: Exfoliating your skin helps to remove dead skin cells and promotes cell turnover, which can improve the appearance of your skin. Use a gentle exfoliator once or twice a week. Manage stress: Stress can take a toll on your skin’s health. Try stress-reducing activities like yoga or meditation to help manage stress and improve your skin’s health. Following these tips can help to improve the health and appearance of your skin. If you have any concerns about your skin’s health, consult a dermatologist for further advice. Here are some simple DIY skincare recipes that can be easily prepared at home using natural ingredients: Mix the honey and oats in a bowl until they form a paste. Apply the mixture to your face and leave it on for 10-15 minutes before rinsing it off with warm water. This mask can help soothe and moisturize dry or sensitive skin. Mash the avocado in a bowl until it is smooth, then add the yogurt and mix well. Apply the mixture to your face and leave it on for 10-15 minutes before rinsing it off with warm water. This mask can help nourish and hydrate dry or dull skin. Mix the brown sugar and coconut oil in a bowl until they form a paste. Gently massage the mixture onto your skin in circular motions for 1-2 minutes, then rinse it off with warm water. This scrub can help exfoliate and moisturize dry or rough skin. Mix the aloe vera gel and…

Unlock Clear Skin: 10 Proven Strategies To Combat Acne At Any Age
Unlock Clear Skin: 10 Proven Strategies to Combat Acne at Any Age

Acne is not just a teenage dilemma; it’s a skin condition that affects individuals of all ages, genders, and backgrounds. Whether it manifests as a mild annoyance or a significant challenge, understanding the causes of acne and implementing effective strategies for management and prevention is crucial. This comprehensive guide dives deep into the roots of acne formation and offers a roadmap to clearer skin, debunking myths and highlighting effective treatments along the way. Often remembered as the bane of our teenage years, acne is a persistent condition that spares no one, lingering into adulthood for many. Contrary to popular belief, acne is not confined to the face alone; it can emerge on the neck, chest, and back, leading to discomfort and a significant impact on self-esteem. The quest for clear skin is universal, crossing age and gender lines. In this detailed exploration, we’ll uncover the factors contributing to acne, delve into its various types, and equip you with actionable advice to manage and prevent it effectively. Understanding the Roots of Acne The journey to clear skin begins with a thorough understanding of what causes acne. Hormonal fluctuations, particularly during puberty, play a pivotal role by increasing sebum production. This excess oil, combined with dead skin cells, can clog pores, setting the stage for acne-causing bacteria to thrive. However, hormones are just one piece of the puzzle. Factors such as diet, stress levels, and genetics also contribute to this complex condition, making a one-size-fits-all solution elusive. The Many Faces of Acne Acne’s appearance can vary significantly, from the typical teenage outbreaks to the frustrating persistence of adult-onset acne. Understanding the different types of acne is key to selecting the appropriate treatment. Whether it’s the occasional blackhead or more severe forms like cystic acne, recognizing the type of acne you’re dealing with is the first step towards effective management. Strategies for Managing Acne Effective acne management often begins with a visit to a dermatologist, who can offer tailored advice and treatment options. However, not everyone can access professional care immediately. For those looking for at-home strategies, incorporating products containing salicylic acid or benzoyl peroxide into your skincare routine can make a significant difference. These ingredients target acne at its source, helping to clear existing breakouts and prevent new ones. Navigating the Challenge of Acne Scars The aftermath of acne, particularly acne scars, can be as challenging to address as the acne itself. Fortunately, there are both professional treatments and over-the-counter options available to help reduce scarring. From laser therapy to topical treatments, exploring these options can lead to smoother, clearer skin. Embracing a Holistic Approach to Acne Care Achieving clear skin goes beyond just topical treatments; it involves a holistic approach that considers diet, stress management, and lifestyle habits. Incorporating a balanced diet, staying hydrated, and practicing stress-reduction techniques can all contribute to healthier skin. Customized Skincare Routines for Acne-Prone Skin Creating a skincare routine tailored to acne-prone skin is crucial. This involves gentle cleansing, avoiding harsh scrubs, and selecting non-comedogenic products that won’t clog pores. A consistent, thoughtful approach to skincare can dramatically…

What Is Microblading Transform Your Eyebrows From Sparse To Gorgeous (1)
What is microblading? Transform Your Eyebrows from Sparse to Gorgeous

Microblading is a transformative beauty procedure that meticulously enhances the appearance of your eyebrows, offering a semi-permanent solution for those seeking fuller, more defined brows. This technique involves the manual insertion of pigment into the upper layers of skin to create the appearance of natural eyebrow hairs. However, achieving the best possible results requires more than just booking an appointment; it involves thorough preparation, understanding the process, and proper aftercare. Choosing the Right Microblading Technician The first step in your Microblading journey is to choose a skilled and certified aesthetician. Researching your options is crucial. Look for a salon that showcases an extensive portfolio of before and after photos, demonstrating their ability to produce the kind of results that captivate you. It’s essential that your chosen technician not only possesses the necessary certification but also has a wealth of experience, reflected in their hours of education and practical application. Remember, the quality of your results depends heavily on the skill and precision of the technician. State Regulations and Technician Licensing Be aware that each state has its own set of rules and regulations governing microblading. Before proceeding, verify the licensing requirements in your area and ensure your technician meets these standards. This step is crucial for both your safety and the legality of the procedure. Preparing for Your Microblading Session Proper preparation can significantly enhance the outcome of your Microblading procedure. Here are some essential tips to ensure you’re fully prepared: Understanding the Microblading Procedure Microblading is typically completed in three key steps: Preparation Initially, your aesthetician will apply a topical numbing cream to your eyebrow area to minimize discomfort. This preparation is vital for both your comfort and the steadiness of the microblading process. The Procedure Experience Pain tolerance varies from person to person. Some may only feel a slight scratching sensation, while others might experience a bit more discomfort. However, most find the procedure to be bearable, with the numbing cream significantly reducing any pain. Post-Procedure Care Immediately after your session, it’s normal for your eyebrows to appear darker and more pronounced than expected. This intensity will fade as they heal, usually within a week, resulting in a more natural look. It’s advised to avoid water exposure, including long showers and baths, during the initial healing phase to prevent the pigment from washing out prematurely. Post-Microblading Care To ensure the best healing and color retention, follow these aftercare tips: Potential Risks and How to Mitigate Them While microblading is generally safe, being informed about potential risks is crucial: Allergic Reactions Though rare, it’s possible to have an allergic reaction to the pigment used. Discuss any known allergies with your technician beforehand. Infection Infections can occur if the procedure is done with non-sterile equipment. Ensure your salon follows strict hygiene practices. Semi-Permanence Microblading results are semi-permanent. If you’re unhappy with the results, corrections or removal can be more challenging. Give yourself time to consider if microblading is right for you and choose a technician who can offer a result you’re confident you’ll be happy with. Microblading can significantly enhance your facial…