Pump Up the Volume in Your Hair: Here’s How!

Pump Up the Volume in Your Hair: Here's How

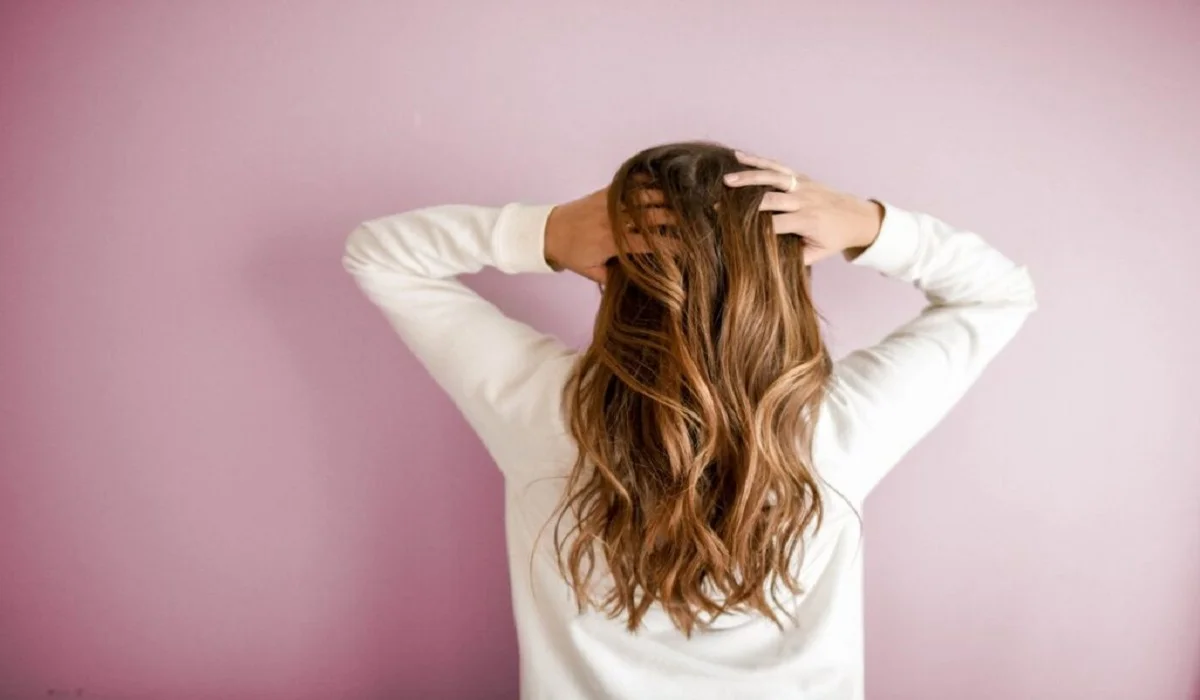
Having voluminous hair can instantly elevate your overall look and boost your confidence. However, achieving that full-bodied, bouncy hair can be a challenge, especially if you have fine or limp strands. Thankfully, there are various techniques, products, and styling tricks that can help you pump up the volume in your hair. In this article, we will explore effective ways to add volume to your hair, providing you with the luscious locks you desire.

Start with the Right Shampoo and Conditioner:
The foundation of voluminous hair starts with the right shampoo and conditioner. Look for products specifically formulated to add volume and lift to the hair. Avoid heavy, moisturizing formulas that can weigh down your strands. Instead, opt for lightweight, volumizing shampoos and conditioners that provide the necessary hydration without compromising on volume.

Use a Volumizing Mousse or Foam:
Volumizing mousses or foams can work wonders in adding volume and texture to your hair. Apply a golf ball-sized amount to your damp hair, focusing on the roots and working it through the lengths. These products create lift and hold, making your hair appear fuller and more voluminous. For extra volume, flip your hair upside down while applying the product and blow-dry in that position.

Blow-Dry Upside Down:
An easy and effective way to add volume to your hair is by blow-drying it upside down. This technique creates lift at the roots, giving your hair a fuller appearance. Flip your hair upside down and blow-dry it on a low heat setting, lifting the roots with your fingers for added volume. Once your hair is mostly dry, flip it back up and continue blow-drying in sections to create a smooth and voluminous finish.

Invest in a Diffuser:
If you have curly or wavy hair, using a diffuser attachment on your blow dryer can help enhance and define your natural texture while adding volume. The diffuser helps distribute the airflow evenly, reducing frizz and preserving the natural shape of your curls or waves. To maximize volume, scrunch your hair gently while diffusing.

Pump Up the Volume in Your Hair: Here's How

Tease Your Hair:
Teasing or backcombing is an age-old technique to instantly pump up the volume in your hair. Take small sections of hair at the crown of your head and tease them gently using a fine-toothed comb or a teasing brush. Remember to be gentle to avoid causing damage to your hair. Once you have teased the desired areas, smooth the top layer of hair over the teased sections for a polished look.

Use Velcro Rollers:
Velcro rollers are another fantastic tool to add volume and bounce to your hair. After blow-drying, roll sections of your hair onto Velcro rollers while they are still warm. Allow the rollers to cool completely before removing them. This technique sets your hair in a lifted position, creating voluminous curls that can last for hours.

Embrace Dry Shampoo:
Dry shampoo is a great product to have in your volumizing arsenal. Besides refreshing your hair between washes, dry shampoo adds texture and lift to your roots. Spray a small amount of dry shampoo at the roots and massage it in to absorb excess oil and add volume. Remember to choose a dry shampoo that matches your hair color to avoid any residue.

Opt for Layers in Your Haircut:
A layered haircut can do wonders in adding volume to your hair. Layers create movement and texture, giving the illusion of fuller and more voluminous locks. Consult with your hairstylist to determine the best layering technique that suits your hair type and face shape.

Consider Hair Extensions:
For those seeking instant volume, hair extensions can be a game-changer. Clip-in or tape-in hair extensions can add length and thickness to your hair, providing the volume you desire. Choose high-quality extensions that blend seamlessly with your natural hair for a natural-looking and voluminous result.

Finish with a Volumizing Hairspray:
Complete your volumizing routine with a volumizing hairspray that provides hold without stiffness. Choose a lightweight hairspray that offers lift and support to your hair, helping to maintain its volume throughout the day. Spray the product lightly over your hair, focusing on the roots for added lift and staying power.

Achieving voluminous hair doesn’t have to be a challenge. By incorporating the right products, styling techniques, and tools into your hair care routine, you can easily pump up the volume and enjoy luscious locks. Start with the right shampoo and conditioner, use volumizing mousses or foams, blow-dry upside down, and consider investing in a diffuser for curly or wavy hair. Tease your hair, use Velcro rollers, and embrace the benefits of dry shampoo to add texture and lift. A layered haircut can create movement and volume, while hair extensions offer an instant boost. Finish off your look with a volumizing hairspray for hold and lasting volume. With these tips and tricks, you’ll be able to enjoy voluminous, bouncy hair that leaves you feeling confident and fabulous.


Sculpting Beauty: A Comprehensive Guide To Contouring And Highlighting For Your Unique Face Shape
Sculpting Beauty: A Comprehensive Guide to Contouring and Highlighting for Your Unique Face Shape

Contouring and highlighting are makeup techniques that have the power to transform your facial features, enhancing your natural beauty by creating dimension and radiance. However, achieving the perfect contour and highlight requires an understanding of your face shape and how to work with its unique angles and proportions. Every face is distinct, and mastering the art of contouring and highlighting for your specific face shape can make all the difference. In this guide, we’ll delve into the world of contouring and highlighting, providing you with expert insights and step-by-step instructions to achieve a sculpted and radiant look that complements your individual face shape. The Importance of Contouring and Highlighting Contouring involves using darker shades to create shadows, while highlighting uses lighter shades to bring areas forward. By strategically applying these shades, you can reshape and accentuate your facial features, achieving the illusion of more defined cheekbones, a slimmer nose, and a lifted appearance. These techniques are particularly valuable in photography and special events, as they enhance the three-dimensional aspect of the face and create stunning visual effects. Understanding Different Face Shapes Before diving into the contouring and highlighting process, it’s crucial to determine your face shape. Common face shapes include: Contouring and Highlighting for Different Face Shapes Understanding your face shape is the first step to creating a tailored contouring and highlighting routine. Here’s a comprehensive guide for each face shape: 1. Oval Face Shape Contouring: Apply contour shade along the sides of the forehead, under the cheekbones, and along the jawline to add subtle definition without overemphasizing angles. Highlighting: Focus on the center of the forehead, tops of cheekbones, and center of the chin to enhance your naturally balanced features. 2. Round Face Shape Contouring: Apply contour shade along the sides of the forehead, under the cheekbones, and along the jawline to create the illusion of more angular features. Highlighting: Focus on the center of the forehead, tops of cheekbones, and center of the chin to add vertical dimension and elongate the face. 3. Heart Face Shape Contouring: Apply contour shade along the sides of the forehead, under the cheekbones, and along the jawline, softening the forehead’s width. Highlighting: Emphasize the center of the forehead, tops of cheekbones, and center of the chin to balance the narrower chin. 4. Square Face Shape Contouring: Apply contour shade along the sides of the forehead, under the cheekbones, and along the jawline, focusing on softening angular features. Highlighting: Highlight the center of the forehead, tops of cheekbones, and center of the chin to add softness and balance to the strong angles. 5. Diamond Face Shape Contouring: Apply contour shade along the sides of the forehead, under the cheekbones, and along the jawline, aiming to minimize the width of the cheekbones. Highlighting: Highlight the center of the forehead, tops of cheekbones, and center of the chin to create symmetry and balance between the forehead and chin. 6. Long (Oblong) Face Shape Contouring: Apply contour shade along the sides of the forehead and under the cheekbones, focusing on minimizing the appearance of height. Highlighting: Highlight the…

How To Dye Your Hair Usinghenna
How To Dye Your Hair Using Henna

Henna has been used for centuries to dye hair, skin, and even fabrics, offering a natural alternative to chemical hair dyes. Rich in color and conditioning properties, henna not only dyes your hair but also improves hair health. This guide provides a comprehensive overview of how to dye your hair using henna, ensuring a successful transition to vibrant, naturally colored hair. The choice of henna as a hair dye is rooted in its natural composition, which ensures a chemical-free process. Unlike synthetic dyes, henna coats the hair shaft, enhancing its strength and shine without altering its structure. Understanding Henna Origins and Benefits Derived from the Lawsonia inermis plant, henna has been celebrated for its dyeing and conditioning properties. It not only imparts a rich color but also reduces dandruff and conditions the scalp. Types of Henna Pure henna results in red-orange tones, but variations mixed with other natural dyes can achieve a range of colors from red to deep brown. Preparing for the Henna Dyeing Process Selecting Your Henna Opt for body art quality henna for the purest form, ensuring no additives compromise your hair’s health or color. Required Materials Gather gloves, plastic wrap, a mixing bowl, and an applicator brush to start your henna dyeing journey. The Mixing Phase How to Mix Henna for Hair Dye Combine henna powder with an acidic liquid like lemon juice to release the dye, adjusting the consistency to a yoghurt-like texture. Tips for Achieving the Perfect Consistency Adding oils or sugars can enhance the mixture’s texture, making it easier to apply and stick to your hair. Application Techniques Step-by-Step Guide to Applying Henna Starting from the roots, apply the henna evenly to sections of your hair, working your way down to the tips. Ensure every strand is covered for an even color. Ensuring Even Coverage Divide your hair into sections and apply the mixture thoroughly, using your hands for better maneuverability and coverage. Aftercare and Maintenance Post-Dye Care Tips Rinse your hair with water and a sulfate-free conditioner, avoiding shampoo for 48 hours to allow the color to set. Maintaining Your Color Regular touch-ups every 4 to 6 weeks will keep your color vibrant. Using henna-infused oil treatments can also prolong the dye’s life. Troubleshooting Common Henna Dye Issues Dealing with Dryness or Uneven Tones Hydrating hair masks and proper sectioning during application can mitigate dryness and ensure consistent color. Adjusting the Color Post-Application For darker or lighter shades, adjust the henna mixture with indigo or more water, respectively, for your next application. How To Dye Your Hair Using Henna Recap of Key Points: Dyeing your hair with henna is a rewarding process that not only offers a vibrant, natural color but also benefits hair health. Embracing Natural Beauty with Confidence: Henna allows you to embrace your natural beauty confidently, knowing you’re using a safe, sustainable product. Dyeing your hair with henna offers a sustainable and health-conscious alternative to chemical dyes. By following the steps outlined in this guide, you can achieve a beautiful, natural color that enhances your hair’s overall health and appearance. Embrace…

How To Wear Crystal Makeup: Tips And Tricks For A Glamorous Look
How to Wear Crystal Makeup: Tips and Tricks for a Glamorous Look

Crystal makeup has become a popular trend in recent years, and it’s not hard to see why. The shimmering, sparkling effect of crystals on the face can add a touch of glamour and elegance to any makeup look. If you’re interested in trying out this trend, there are a few things you need to know. In this article, we’ll go over some tips and tricks for how to wear crystal makeup like a pro. What is Crystal Makeup? First, let’s define what we mean by crystal makeup. This refers to any makeup look that incorporates crystals or other glittery, sparkly materials onto the face. This can range from subtle touches of shimmer to full-on, glittery glam. Some common types of crystal makeup include: Crystal eyeliner: This involves using a liquid liner with tiny crystals embedded in it to create a sparkling line along the eyelid.Crystal highlighter: This involves using a powder or cream highlighter with glittery particles to add a shimmering effect to the high points of the face, such as the cheekbones, brow bone, and cupid’s bow.Crystal lips: This involves using a glittery lip gloss or lipstick with tiny crystals or glitter particles to add a shimmering effect to the lips.Crystal face jewels: This involves using adhesive jewels or rhinestones on the face to create a glamorous, sparkling effect.Now that you know what we mean by crystal makeup, let’s get into some tips and tricks for how to wear it. Choose the Right ProductsThe key to a successful crystal makeup look is choosing the right products. You’ll want to look for makeup products that have glitter or crystals already built in, such as crystal eyeliner or glittery lip gloss. You can also create your own crystal makeup by using loose glitter or crystals and mixing them with a clear adhesive, such as eyelash glue. Prep Your SkinBefore applying any makeup, it’s important to prep your skin properly. This means cleansing your face thoroughly and applying a moisturizer to ensure your skin is hydrated and smooth. You may also want to use a primer to help your makeup stay in place and prevent it from creasing or smudging. Start SmallIf you’re new to crystal makeup, it’s best to start small and work your way up. Begin by adding a subtle touch of shimmer to your makeup, such as a crystal eyeliner or a glittery lip gloss. As you become more comfortable with the look, you can experiment with more elaborate crystal makeup looks. Use AdhesiveWhen applying crystals or glitter to your face, it’s important to use a strong adhesive that will hold them in place. You can use a clear adhesive, such as eyelash glue, or a specialized adhesive designed for use on the face. Be sure to apply the adhesive sparingly and allow it to dry fully before applying the crystals or glitter. Apply in LayersTo create a more dramatic effect, you can apply crystals or glitter in layers. Begin with a thin layer of adhesive and a small amount of crystals or glitter, and then gradually build up the layers…

Decoding Undertones: Understanding How Vein Color Can Indicate Your Skin Undertone

When it comes to finding the perfect makeup shades, hair colors, or clothing that flatter your complexion, understanding your skin’s undertone is key. While determining your undertone may seem like a daunting task, there is a simple method that can offer valuable insights: examining the color of your veins. The veins on your wrist can provide clues about your skin undertone, helping you make informed choices when it comes to beauty and fashion. In this article, we will delve into the correlation between vein color and undertone, explore the different undertone categories, and provide practical tips on how to determine and embrace your undertone to enhance your overall appearance. Understanding Undertones: Undertone refers to the underlying color that shines through your skin, regardless of its surface tone (fair, medium, or deep). It is categorized into three main types: cool, warm, and neutral. Cool Undertone:If you have a cool undertone, your skin may have hints of pink, red, or blue. People with cool undertones often have veins that appear bluish or purple on their wrists. Cool undertones are commonly associated with fair or light skin, but they can also be present in medium and deep skin tones. Warm Undertone:A warm undertone typically has undertones of yellow, peach, or golden hues. Veins on individuals with warm undertones may appear greenish or olive. Warm undertones are commonly found in people with golden or olive skin tones, but they can also be present in fair or deep skin tones. Neutral Undertone:A neutral undertone indicates a balance between cool and warm tones. Veins of individuals with neutral undertones may appear blue-green or a mix of blue and green. Neutral undertones are versatile and can suit a range of skin tones, from fair to deep. Determining Your Undertone Using Vein Color: To determine your undertone based on the color of your veins, follow these steps: Find natural light: Look for natural lighting or step outside to ensure accurate color perception. Examine your wrist: Observe the veins on the inside of your wrist or the underside of your forearm. Pay attention to their color and appearance. Cool Undertone: If your veins appear bluish or purple, you likely have a cool undertone. Warm Undertone: If your veins appear greenish or olive, you likely have a warm undertone. Neutral Undertone: If your veins appear blue-green or a mix of blue and green, you likely have a neutral undertone. Applying Your Undertone Knowledge: Understanding your undertone can guide your choices in various aspects of beauty and fashion: Foundation and Concealer:Knowing your undertone is crucial for selecting the right foundation and concealer shades that will blend seamlessly with your skin. Cool undertones are complemented by foundations with pink or neutral undertones, while warm undertones benefit from foundations with yellow or golden undertones. Neutral undertones can typically wear a range of shades from different undertone families. Lipstick and Blush:When choosing lipsticks and blushes, consider your undertone to find shades that enhance your natural beauty. Cool undertones tend to suit berry, pink, and blue-based red shades, while warm undertones can opt for coral, peach, and…

Exploring Microcurrent Facial: Benefits, Process, And Risks
Exploring Microcurrent Facial: Benefits, Process, and Risks

Microcurrent facial is a non-invasive cosmetic treatment that uses low-level electrical currents to stimulate the facial muscles, tighten the skin, and improve overall skin appearance. This procedure is gaining popularity among people who want to look younger without undergoing surgical procedures like facelifts or Botox injections. In this article, we will delve into the microcurrent facial treatment, its benefits, process, and risks. What is Microcurrent Facial?Microcurrent facial is a non-surgical cosmetic treatment that uses low-level electrical currents to stimulate facial muscles and improve overall skin appearance. The procedure involves the use of a microcurrent device that emits low-frequency electrical currents that mimic the body’s natural electrical currents. These currents stimulate the facial muscles, improve circulation, and promote collagen production. GO TO THE NEXT PAGE TO CONTINUE… Benefits of Microcurrent Facial: Stimulates Collagen Production: Microcurrent facial stimulates collagen production, which is essential for maintaining skin elasticity, reducing wrinkles, and fine lines. Reduces Wrinkles and Fine Lines: Microcurrent facial tightens the skin, reduces wrinkles, and fine lines by stimulating facial muscles. Improves Skin Texture: Microcurrent facial helps to improve skin texture, making it smoother and more even. Increases Blood Circulation: Microcurrent facial improves blood circulation, bringing more nutrients and oxygen to the skin cells, resulting in healthier, glowing skin. Lifts and Tones the Face: Microcurrent facial tones facial muscles, resulting in a lifted and more youthful appearance. Process of Microcurrent Facial:The microcurrent facial process involves the following steps: Cleansing: The first step is to cleanse the face thoroughly to remove any dirt, oil, or makeup. Toning: The next step is to apply a toner to the face to restore its natural pH balance. Application of Conductive Gel: A conductive gel is applied to the face to help the microcurrent device glide smoothly over the skin. Microcurrent Treatment: The microcurrent device is then applied to the face, and low-level electrical currents are delivered to stimulate facial muscles. Mask Application: A mask is applied to the face to hydrate and soothe the skin. Moisturizing: The final step is to apply a moisturizer to lock in the moisture and provide additional hydration to the skin. Risks of Microcurrent Facial:Although microcurrent facial is generally safe, it may cause some risks, including: Skin Sensitivity: Microcurrent facial may cause skin sensitivity, redness, or irritation. Muscle Fatigue: Overstimulation of facial muscles may cause muscle fatigue or soreness. Nerve Damage: If the microcurrent device is not used correctly, it may cause nerve damage. Not Suitable for Everyone: Microcurrent facial is not suitable for everyone, including people with pacemakers or other electronic medical devices. Microcurrent facial is a non-surgical cosmetic treatment that uses low-level electrical currents to stimulate facial muscles, tighten the skin, and improve overall skin appearance. The benefits of microcurrent facial include stimulating collagen production, reducing wrinkles and fine lines, improving skin texture, increasing blood circulation, and lifting and toning the face. However, microcurrent facial may cause some risks, including skin sensitivity, muscle fatigue, nerve damage, and not suitable for everyone. Before undergoing microcurrent facial treatment, consult a qualified aesthetician or dermatologist to discuss if it is suitable for your skin…

Mastering The Art Of Crimping: A Comprehensive Guide To Correct Usage
Mastering the Art of Crimping: A Comprehensive Guide to Correct Usage

Crimping is a fundamental technique used across various industries and DIY projects to create secure and reliable connections between wires, cables, or components. Whether you’re working with electronics, automotive repairs, or crafting jewelry, understanding how to use a crimper correctly is essential to ensure the integrity and longevity of your connections. This comprehensive guide will walk you through the step-by-step process of using a crimper effectively, along with essential tips and best practices. Understanding Crimping Crimping is the process of mechanically compressing a connector or terminal onto a wire to establish a secure electrical connection or physical attachment. This technique ensures a strong bond that resists vibrations, corrosion, and other environmental factors. Crimping is commonly used in applications such as electrical wiring, network cables, automotive wiring harnesses, and more. Using the right tools and techniques is crucial to achieving consistent and reliable results. Selecting the Right Crimper Before you begin, it’s vital to choose the right crimper for your specific application. There are various types of crimpers available, each designed for different connectors and wire sizes. Common types of crimpers include: Wire Crimpers: Used for electrical connections and available in various sizes to accommodate different wire gauges. Coaxial Cable Crimpers: Designed for attaching connectors to coaxial cables, commonly used in telecommunications and audio/video installations. Terminal Crimpers: Used to secure terminals onto wires, often found in automotive and industrial applications. Modular Crimpers: Specifically designed for Ethernet cables and connectors, ensuring accurate terminations in networking projects. Step-by-Step Guide to Proper Crimping Follow these steps to ensure you’re using a crimper correctly: Prepare the Wire: Strip the insulation off the wire end to expose the bare conductor. The length of exposed wire should match the length of the connector’s barrel or terminal. Prepare the Connector: Insert the stripped wire end into the appropriate terminal or connector. Make sure the wire fits snugly, without any excess sticking out. Position the Crimper: Place the connector and wire into the appropriate slot or cavity of the crimper. Ensure that the connector is properly aligned with the crimping jaws. Apply Pressure: Squeeze the crimper’s handles firmly and evenly. The tool’s jaws will compress the connector, creating a strong and secure connection. Avoid using excessive force, as it could deform or damage the connector. Inspect the Crimp: After crimping, inspect the connection visually. The crimped terminal should tightly grip the wire without any gaps. Ensure that the wire is properly crimped and that the insulation is not damaged. Tips for Successful Crimping Use High-Quality Connectors: Invest in reliable connectors and terminals from reputable manufacturers. Quality components are essential for achieving long-lasting and reliable connections. Choose the Right Wire Size: Match the wire gauge with the appropriate terminal size. Using undersized or oversized connectors can result in poor connections and potential safety hazards. Practice Proper Technique: Maintain steady pressure while crimping, and avoid jerky or uneven movements. Consistent pressure ensures a uniform and secure connection. Perform a Pull Test: After crimping, perform a gentle tug on the wire to ensure it’s securely attached to the connector. If the wire easily detaches,…

Skincare Tips Tofight Acne Proneskin
Skincare Tips to Fight Acne-Prone Skin

Acne is a skin condition in which pores become blocked with oil and dead cells, creating whiteheads, blackheads (comedones), or inflamed pimples that block out sunlight from penetrating deep enough. Though acne affects people of all ages, teenage teens seem most prone. Acne is caused by hair follicles becoming blocked with debris known as pores, leading to blockages that contribute to its development. There may be several contributing factors: 1.Sebum: an oily substance produced by our bodies as a protective barrier, however excessive production can clog pore openings and lead to acne formation. 2.Bacteria: Our skin naturally harbors some bacteria. C. acnes is known to flourish in oily environments, proliferating rapidly to cause acne breakouts by multiplying in clogged pores. 3.Dead Skin Cells: Our stratum corneum layer sheds to make room for new cell development; dead cells also play an integral part of pore blockage issues. Factors Contributing to AcneTight clothing such as sports helmets, hats and masks can contribute to acne breakouts. Working in environments which expose you frequently to oil – like restaurants using frying oil for instance – or exposure to high humidity with heavy lotions can also increase acne flare-ups. Stress increases cortisol hormone levels, leading to elevated cortisol hormones that in turn aggravate acne. Certain medications may have acne as a side effect. Squeezing or picking at pimples increases inflammation levels further still while cosmetic products might contribute to acne formation as well. New studies indicate high-glycemic index sugary food products could worsen acne problems further still. Adult Acne: What It Is and How it is Treated Adult acne refers to any acne which persists after age 25 (or begins after this age), whether continuing from its original source or new outbreaks starting after this point. Treatment options similar to adolescent acne may include topical products containing retinoids, benzoyl peroxide, salicylic acid or oral antibiotics including isotretinoin; ultimately however the choice of treatments are made after seeing a dermatologist following examination; factors that influence these decisions include severity of disease type left scars due to presence or absence of pitted scars on patient skin type tolerance tolerance tolerance as well as whether patient plans pregnancy. Can Adult Acne Be Prevented? Research suggests that only some adults suffering from adult acne have hormonal imbalances related to polycystic ovary syndrome gynecological issues which, if present, must be addressed immediately in order to be effective treatments of adult acne. Therefore treating any potential underling conditions is key for treating adult acne successfully. Particularly for acne-prone skin, having a meticulous skincare routine is of vital importance. Proper cleansing should always take precedence – sleeping with makeup on or skipping evening routines increases pore blockage risk leading to acne breakouts; excessive washing disrupts skin barriers leading to redness and increased sensitivity. Cleansing should involve using an effective cleansing gel and lathering it onto skin for 20 seconds before rinsing with warm water at least twice daily, including one application before bed. Cleansers containing salicylic acid have proven particularly helpful at clearing away debris such as excess keratin from pores to minimize acne…

The Transformative Power Of Epsom Salt Baths A Haven Of Serenity
The Transformative Power of Epsom Salt Baths: A Haven of Serenity

A blend of magnesium, sulfate, and oxygen forms the essence of Epsom salt, a mineral compound revered for its healing attributes since its initial discovery in Epsom, England, during the early 17th century. Distinct from common table salt, Epsom salt’s chemical composition enables swift absorption through the skin, rendering it a perfect element for calming baths. This prelude paves the path for a detailed examination of the myriad advantages Epsom salt baths provide for both psychological and physical wellness. Exploring the Scientific Basis of Epsom Salt Baths The efficaciousness of Epsom salt baths primarily stems from its magnesium and sulfate content. Magnesium is pivotal in facilitating over 300 enzymatic reactions within the body, encompassing those related to muscle and nerve function, whereas sulfate plays a vital role in various biological activities. Immersing in warm water laden with these minerals allows for their skin absorption, thereby replenishing the body’s reserves and fostering health and well-being. The Sanctuary of Relaxation and Stress MitigationEpsom salt baths serve as a refuge for diminishing stress. By modulating nervous system activity, magnesium aids in easing muscle tension and fostering relaxation. This tranquil effect assists in mitigating stress and anxiety, thereby cultivating a sense of peace. Advancements in Skin Health The boon of Epsom salt extends to skin wellness. Its exfoliating nature aids in shedding dead skin cells, while its moisturizing effect revitalizes the skin, leaving it supple and refreshed. Additionally, Epsom salt’s sulfate content supports the body’s detoxification, promoting a clearer, healthier complexion. Natural Pain Alleviation and Muscle RecuperationFor individuals grappling with muscle discomfort, arthritis, or persistent pain, Epsom salt baths offer a natural alleviative solution. Magnesium’s role in relaxing muscle contractions and reducing pain renders it an invaluable recovery tool for athletes and those engaged in physically strenuous activities. Detoxification and Enhanced Mineral UptakeThrough facilitating the expulsion of toxins via the skin, Epsom salt baths aid in the body’s detoxification efforts. Furthermore, the direct uptake of magnesium and sulfate minerals through the skin can address deficiencies and bolster overall health. Augmented Sleep Quality and RelaxationThe influence of magnesium on enhancing sleep quality is well-established. A warm bath with Epsom salt prior to bedtime can relax muscles and soothe the mind, setting the stage for a deep, restorative sleep. Cardiovascular Health and Improved CirculationEngaging in regular Epsom salt baths may positively impact heart health and circulation. Magnesium’s capability to augment blood flow and lower blood pressure plays a crucial role in maintaining a healthy cardiovascular system. Benefits for Foot HealthNot limited to full-body applications, Epsom salt baths also offer significant benefits for foot health, addressing conditions like athlete’s foot, toenail fungus, and relieving foot pain after extensive standing or walking. Epsom Salt Baths: A Boon for GardenersGardeners may find Epsom salt baths particularly beneficial for soothing aching muscles post-gardening. Moreover, Epsom salt can enhance plant growth and nutrient uptake when used in gardening practices. Crafting Your Own Epsom Salt Bath Blends Personalizing your Epsom salt bath is straightforward, allowing for the incorporation of essential oils and herbs for added aromatherapy benefits. Whether seeking a simple soak or a…