DIY Haircut Guide: How to Cut Your Own Hair at Home

DIY Haircut Guide: How to Cut Your Own Hair at Home

Whether you’re looking to save time and money or simply prefer the convenience of a DIY approach, cutting your own hair at home is a practical skill to have. While leaving major hair transformations to professional stylists is advisable, trimming your hair or giving yourself a simple haircut can be achieved with the right tools and techniques. In this comprehensive guide, we will walk you through step-by-step instructions on how to cut your own hair, along with helpful tips to ensure a successful and satisfying outcome.

Gather the Right Tools:
Before you start cutting your hair, gather the necessary tools to ensure a smooth process. You will need:
Sharp haircutting scissors: Invest in a good pair of professional scissors designed for hair cutting. Using regular scissors can lead to uneven cuts and split ends.

Hair clips or elastics: These will help you section your hair for easier cutting.

Comb: A fine-toothed comb will assist in detangling and parting your hair.

Mirror: A large, handheld mirror and a stationary mirror will allow you to see your hair from different angles during the cutting process.

Spray bottle with water: Mist your hair with water to dampen it slightly before cutting. This makes the hair more manageable and prevents excessive flyaways.

Decide on the Haircut:
Decide on the type of haircut you want before you begin. For simple trims or maintaining your current hairstyle, follow your previous cut as a reference. If you plan to make significant changes to your hair, it’s best to seek guidance from a professional stylist to avoid potential mishaps.
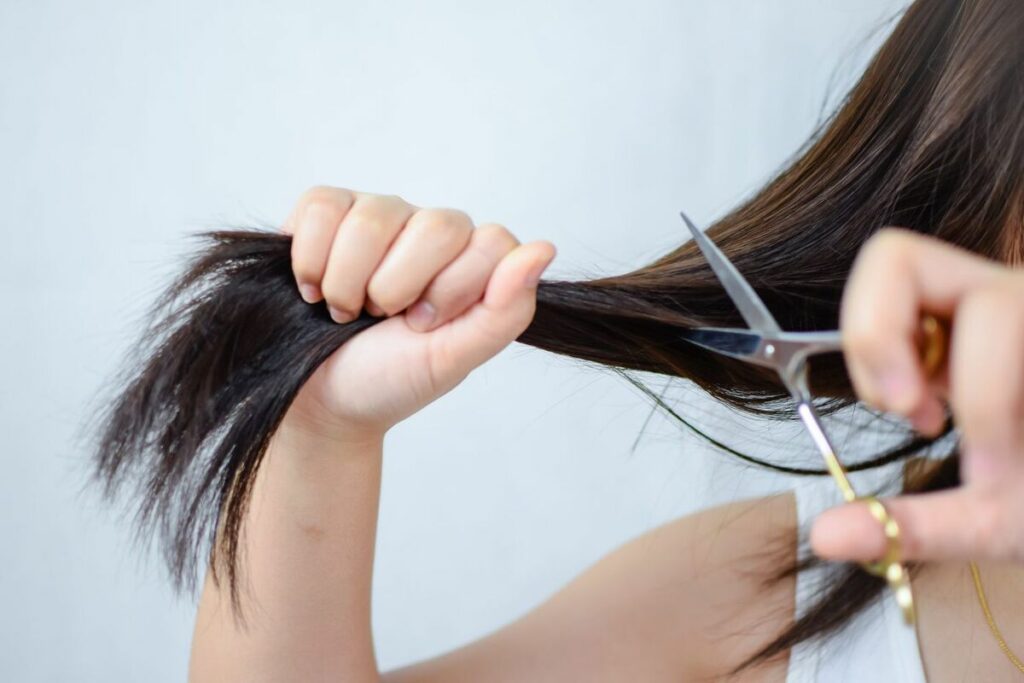
DIY Haircut Guide: How to Cut Your Own Hair at Home

Start with Clean, Dry Hair:
Cutting your hair when it’s clean and dry ensures more accurate results. Wash and dry your hair thoroughly before starting the haircutting process.

Section Your Hair:
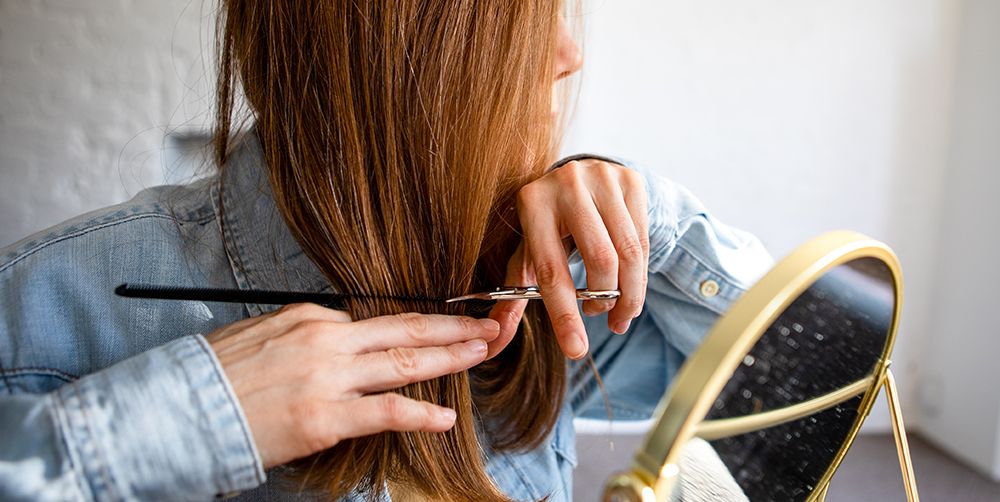
Divide your hair into manageable sections using hair clips or elastics. Start by parting your hair down the center and then create additional sections horizontally. Pin each section securely to keep the hair you’re not cutting out of the way.

Trim the Ends:
For a simple trim, work with one section at a time. Take a small subsection of hair and comb it straight down. Hold the hair between your fingers and trim the ends evenly, following your desired length. Make small, cautious cuts to avoid removing too much hair at once.

Create Layers (Optional):
If you desire layers, you can achieve them at home with careful technique. To create face-framing layers, take a section of hair from the front and hold it at a 45-degree angle away from your face. Trim the hair diagonally, working from the shortest point to the longest point. Repeat this process on both sides of your face for balanced layers.

Check for Evenness:
After cutting each section, release the hair and check for evenness and balance. Use your mirror to view your hair from different angles, making any necessary adjustments to ensure a uniform cut.

Tackle Bangs (Optional):
If you have bangs, trim them carefully by combing them straight down over your forehead. Hold the scissors vertically and make small, gentle cuts to the desired length. Remember that it’s better to start with longer bangs and trim gradually than to cut them too short.

Texturize (Optional):
For added texture and movement, you can use a technique called point cutting. Hold your scissors vertically and make small, upward cuts into the ends of your hair. This technique softens the edges and reduces the appearance of blunt cuts.

Embrace Imperfections:
It’s essential to remember that cutting your own hair may not result in a perfect salon finish, and that’s okay. Embrace minor imperfections and understand that hair grows back. If you’re sure about making significant changes to your hairstyle, it’s always wise to consult a professional stylist.


Cutting your own hair at home can be a rewarding experience when done carefully and with the right tools. Simple trims and maintenance cuts are achievable with practice and attention to detail. Remember to start small and avoid drastic changes until you feel more confident. However, for complex haircuts or significant changes in style, seeking professional help is recommended to ensure the best results. With patience and a bit of courage, you can master the art of DIY haircuts, saving time and money while maintaining your hair’s health and style.



Exploring The Revolution Of Magnetic Lashes A Guide To Elevating Your Aesthetic Appeal
Exploring the Revolution of Magnetic Lashes: A Guide to Elevating Your Aesthetic Appeal

Magnetic lashes have emerged as a groundbreaking solution in the realm of cosmetics, providing a novel method for attaining voluminous, striking eyelashes minus the complications and clutter associated with traditional glue-on extensions. Utilizing minuscule magnets for attachment directly above the natural lash line, these lashes offer a sturdy, comfortable, and reusable option, diverging from the conventional false eyelash approach. This piece explores the essence of magnetic lashes, elucidates their advantages, and demonstrates how they can be seamlessly integrated into your cosmetic regimen to achieve captivating outcomes. Deciphering Magnetic Lashes Standing at the forefront of eye makeup innovation, magnetic lashes dispense with the need for adhesive, instead employing diminutive magnets that cling to a magnetic eyeliner or to each other, enveloping the natural lashes. This mechanism guarantees a firm fit for the entire day, obviating the mess associated with traditional adhesives. Magnetic lashes come in a plethora of forms, including full strips and individual clusters, accommodating a wide array of tastes and aesthetics. Advantages of Magnetic Lashes Magnetic lashes boast several merits. Their simplicity of application renders them suitable for novices. The aspect of reusability stands out, permitting multiple uses from a single pair, thus ensuring economic efficiency. By eliminating the need for lash glue, these lashes reduce the likelihood of allergic reactions, offering a safer and more pleasant usage experience. Furthermore, their diversity in styles provides ample room for creative makeup expressions. Application Technique for Magnetic Lashes The application of magnetic lashes is uncomplicated and becomes intuitive with practice. It generally involves the application of magnetic eyeliner along the lash line, followed by attaching the magnetic lashes to the dried liner. For the sandwich-type lashes, precise placement directly on the natural lashes is crucial. Achieving a flawless look requires allowing the magnetic eyeliner to fully dry and employing a lash applicator for enhanced accuracy. Magnetic Versus Traditional Lashes: A Comparative Overview In comparing magnetic to traditional glue-on false lashes, notable distinctions include ease of application and removal for magnetic lashes, mitigating the risk of harming natural lashes. They also tend to provide a more reliable and enduring hold, eliminating concerns over detachment or displacement. Nonetheless, traditional lashes may present a broader selection in terms of materials and designs. Selecting Suitable Magnetic Lashes Choosing appropriate magnetic lashes involves assessing aspects such as length, volume, and design to complement your eye shape and desired appearance optimally. Prioritizing lashes made with superior magnets and materials is crucial for ensuring comfort and longevity. Maintenance and Upkeep of Magnetic Lashes Extending the life of magnetic lashes requires proper maintenance, including gentle cleansing post-use, safe storage in a dedicated case, and avoiding contact with water or makeup removers that could damage the magnets. Addressing Common Challenges with Magnetic Lashes Frequent issues encountered with magnetic lashes, such as application difficulties and discomfort, can typically be resolved through practice, correct placement, and selecting lashes that suit your eye shape. The Underlying Science of Magnetic Lashes The magnetic elements in these lashes are engineered to balance strength for retention and gentleness to avoid discomfort. Safety evaluations confirm that, when utilized correctly,…

All You Need To Know About Eyebrow Threading: The Ultimate Guide
All You Need to Know About Eyebrow Threading: The Ultimate Guide

Eyebrow threading is a popular method of hair removal that originated in South Asia and has become increasingly popular in the Western world. It is a precise and relatively painless way to shape and groom eyebrows. In this guide, we will cover everything you need to know about eyebrow threading, including what it is, how it works, the benefits, and what to expect during and after the procedure. What is Eyebrow Threading?Eyebrow threading is a hair removal technique that involves twisting and pulling a thread along the skin, which removes the hair from the follicle. The thread is typically made of cotton or polyester and is doubled over, creating a loop at one end and two loose ends at the other. The practitioner holds one end of the thread in their mouth and uses the other hand to manipulate the loop, allowing them to precisely remove individual hairs from the eyebrow area. How does Eyebrow Threading Work?Eyebrow threading works by pulling out hair from the root. The practitioner will use the looped end of the thread to trap and twist individual hairs, pulling them out from the follicle. Because threading only removes hair from the root, the results can last up to 4-6 weeks before the hair grows back. Additionally, threading is a relatively gentle technique, as it does not require any chemicals or heat, making it suitable for those with sensitive skin. Benefits of Eyebrow Threading:There are several benefits to eyebrow threading. First, it is a precise technique, allowing for a more defined and tailored eyebrow shape. Second, it is less painful than other hair removal methods, such as waxing, as it does not pull on the skin. Third, threading is a quick and easy procedure that can be done in a matter of minutes. Finally, because threading only removes hair from the root, the results can last up to 4-6 weeks, making it a low-maintenance option. What to Expect During an Eyebrow Threading Procedure:If you have never had your eyebrows threaded before, you may be wondering what to expect during the procedure. First, the practitioner will ask you about the shape and style you are looking for. They will then use a white eyeliner pencil to draw on the shape of your new eyebrows. Once you have approved the shape, the practitioner will begin the threading process, using the looped end of the thread to remove hairs from the eyebrow area. You may experience some mild discomfort during the procedure, but it should not be painful. Once the threading is complete, the practitioner will apply a soothing cream or gel to the area to reduce any redness or irritation. Aftercare for Eyebrow Threading:Aftercare for eyebrow threading is relatively simple. You should avoid touching or rubbing the eyebrow area for at least 24 hours after the procedure to allow the skin to heal. You may also experience some redness or mild swelling, which should subside within a few hours. You can apply a cool compress to the area to reduce any discomfort. Finally, it is important to keep the eyebrow area…

Explore Five Natural Strategies For Soothing Dry Hands
Explore Five Natural Strategies for Soothing Dry Hands

Dry hands are a frequent issue for many, often worsened by factors such as environmental conditions, regular hand washing, and the use of harsh chemicals, leading to discomfort, cracks, and potential infections. Yet, through proper care and natural remedies, it’s feasible to replenish moisture and restore your skin’s health. This piece delves into five natural remedies that alleviate dry hands, combining age-old wisdom with contemporary dermatological insights. Five Natural Strategies for Soothing Dry HandsThe Significance of HydrationHydrating the skin is essential to preserve its barrier function, prevent moisture loss, and shield against irritants. Consistently hydrating can markedly enhance the skin’s suppleness and hydration, diminishing the likelihood of dryness and fissures. Natural Remedy 1: Coconut Oil RegimenCoconut oil, a natural emollient, is laden with fatty acids that restore skin moisture. Nightly application of virgin coconut oil to the hands, followed by wearing cotton gloves, can boost absorption, rendering the hands supple and smooth. Natural Remedy 2: Oatmeal Honey ExfoliantA scrub made from oatmeal and honey not only exfoliates dead skin but deeply moisturizes. Combine ground oatmeal with honey and a small amount of water to create a paste. Gently rub this mixture on your hands and rinse after 10 minutes to rejuvenate the skin. Natural Remedy 3: Aloe Vera TreatmentRenowned for its calming and healing effects, aloe vera gel applied to the hands can moisturize, mend cracks, and alleviate irritation. Its anti-inflammatory qualities also lessen redness and discomfort. Natural Remedy 4: Shea Butter RemedyExtracted from shea tree nuts, shea butter is a superb moisturizer for parched hands. Its rich vitamin and fatty acid content is perfect for skin nourishment and repair. For optimal results, generously apply shea butter to your hands at nighttime. Natural Remedy 5: Glycerin-Rosewater CombinationGlycerin, a humectant, draws moisture to the skin. A hydrating concoction of glycerin and rosewater applied daily can prevent dryness and maintain soft skin. Preventing Dry HandsPrevent dry hands by wearing gloves in cold conditions and during household tasks. Opt for mild, unscented cleansers over harsh soaps. Prevention is equally critical as treatment. Diet and Hydration for Skin WellnessA diet rich in vitamins and omega-3 fatty acids, coupled with sufficient hydration, promotes skin health from within. Incorporate nutrient-dense foods like nuts, seeds, and green vegetables into your diet and drink ample water daily. Humidifiers’ Role in Dry Hand ManagementEmploying a humidifier in dry settings and colder months can increase air moisture, aiding in skin dryness prevention. Choose a suitable humidifier for your area and maintain it well for maximum effectiveness. Consulting a DermatologistShould home remedies fail to ameliorate dry hands, or if you observe severe cracking, bleeding, or infection signs, seeking a dermatologist’s counsel is prudent. They can offer specialized treatments and recommendations. Exploring Natural Oils for Skin CareInvestigating various natural oils can yield customized dry skin solutions. Each oil, from almond to jojoba, provides unique benefits like anti-inflammatory effects and vital nutrients for skin restoration. DIY Moisturizing Hand MasksCrafting your moisturizing hand masks with ingredients like avocado, banana, and yogurt is a delightful and efficacious method for treating dry hands. These natural components are rich…

What To Know About Putting Lotion On Your Face
What to Know About Putting Lotion on Your Face

Nurturing the skin of your face transcends mere indulgence; it embodies an essential regimen. An apt facial lotion not only shields your skin from detrimental pollutants but also preserves its innate equilibrium and wards off the signs of aging prematurely. The plethora of options on the market, however, can render the task of choosing and utilizing face lotion a formidable endeavor. This guide aims to illuminate the intricacies of face lotions, equipping you with the knowledge requisite for navigating your skincare regimen with confidence. Demystifying Skin Types Embarking on your quest for the ideal face lotion necessitates a deep comprehension of your skin’s unique constitution. Skin is predominantly classified into four types: oily, dry, combination, and sensitive, each with distinctive needs and care protocols. Oily Skin: Defined by an overproduction of sebum, resulting in a glossy appearance and potential for acne.Dry Skin: Characterized by a sensation of tightness and possible flaking, due to insufficient moisture.Combination Skin: Exhibits both oily and dry regions, with the T-zone often presenting increased oiliness.Sensitive Skin: Prone to adverse reactions from certain substances, manifesting as irritation, redness, or discomfort.Identifying your skin type is imperative for selecting a lotion that complements rather than contradicts your skin’s inherent behavior. The Significance of Lotion in Skincare Lotions play a pivotal role in moisturizing and safeguarding the skin. Generally lighter and less oily than creams, they are ideally suited for daytime application or for individuals with oily skin. Lotions are instrumental in sustaining the skin’s moisture barrier, averting dehydration, and rendering the skin supple and smooth. Lotion versus Cream: Delineating the Distinction Contrasting lotions, which are aqueous and lightweight, creams are denser and imbue greater hydration, typically catering to dry or maturing skin. The choice between them hinges on your skin type, environmental conditions, and personal preference. Selecting the Appropriate Lotion for Your Face Choosing the correct lotion entails consideration of your skin’s requirements and meticulous examination of ingredient labels. Ingredients to Embrace Hyaluronic Acid: A hydration titan capable of retaining up to 1000 times its weight in water.Glycerin: Draws moisture to the skin, ensuring hydration and a protective layer.Niacinamide (Vitamin B3): Mitigates inflammation, fortifies the skin’s barrier, and balances skin tone.Ceramides: Lipids essential for the skin’s barrier, aiding in moisture retention.Ingredients to EschewAlcohol: May deplete the skin’s natural oils, leading to dryness and irritation.Fragrances: Potential allergens or irritants, particularly for sensitive skin.Parabens: Preservatives with possible hormone-disruptive effects and associated health risks. Guidance for Various Skin Types Oily Skin: Opt for non-comedogenic, oil-free lotions.Dry Skin: Seek lotions rich in hyaluronic acid and ceramides for hydration.Combination Skin: Prefer lotions that maintain balance without aggravating oily or dry zones.Sensitive Skin: Choose lotions free from fragrances and allergens, specifically formulated for sensitive skin. Optimal Application Techniques for Lotion Maximizing the benefits of lotion involves: Seasonal Variations and Skin Care The changing seasons necessitate adjustments in your skincare approach; the chill of winter may induce dryness, whereas summer warmth can heighten oiliness. Adapt your lotion and skincare routine to suit these seasonal demands. Incorporating Sun ProtectionSun defense is paramount. Numerous facial lotions now incorporate SPF, marrying…

From Play Doh To Sunscreenthe Dangers Of Skincare For Kids Explained
From Play-Doh to Sunscreen: The Dangers of Skincare for Kids Explained

Children are facing an increasing amount of pressure to maintain a skincare routine, and dermatologists are growing anxious about the potential risks and health ramifications. This article offers a comprehensive rundown of the trend, as well as an overview of the reasons experts are growing more concerned about its implications for children. The Changing Face of the Beauty Industry The beauty industry has transitioned to target a younger audience, and there is an influx of products being marketed to children. As a result, more and more children are becoming users of skincare products, and dermatologists are raising concerns about the dangers of early adoption. However, it’s vital that these dangers are fully understood, as a child’s skin is fundamentally different and more sensitive than an adult’s. The Market for Children’s Skincare In recent years, the market for skincare products for children has expanded dramatically, with numerous brands offering ranges dedicated to a younger audience. This boom is largely the result of a turn in focus towards skin health, as well as aggressive marketing aimed at both parents and youngsters. Why Children’s Skin is Different Children’s skin is different from adults’ skin: It’s more delicate, more susceptible to irritation, and takes longer to form its own protective barrier. That’s because children’s skin has a different composition, is thinner, and performs its barrier function differently than adult skin, causing it to be more susceptible to moisture loss and external damage from harsh skincare ingredients. The Dangers of Early Skincare Adoption Using skincare in kids could pose a number of risks to skin condition, allergy development, and overall health. A number of ingredients can disrupt skin development, create allergies, or cause long-term health issues, making caution and knowledge two powerful skincare choices for children. Common Harmful Ingredients in Children’s Skincare Beware of the alarming chemicals housed in many skincare products for kids, including synthetic fragrance, parabens, and sulfates, because they can be harsh on young skin. Expert Dermatologists’ Warnings What do dermatologists think of the increasing phenomenon of kids using skincare products?Read their take on protecting sensitive, youthful skin. Alternatives to Traditional Skincare for Children Skip the chemicals and opt for the naturals in children’s skincare. Ingredients to look for, contain, and avoid as well as the brand leading the way in gentle, non-toxic children skincare. How Parents and Guardians Can Help Ultimately, parents and guardians are responsible for overseeing and guiding their children’s skincare routines. Here are some considerations that can help ensure that the products used on kids are safe, appropriate, and beneficial to their skin health. Choosing Safe Skincare Products for Kids Selecting safe kids skincare products is no easy task. This portion of the article gives an overview of how parents can approach product selections, including latching onto ingredient lists, looking for particular certifications, and seeking out dermatologist-recommended options. The Psychological Impact of Early Beauty Standards Introducing kids to skincare and beauty standards at a young age can lead to some significant psychological outcomes. This section examines what steering youth into beauty routines can do to their self-esteem and body image…

Ice Cubes 3
Chilling Beauty: The Many Benefits of Rubbing Ice Cubes on Your Face

Searching for healthy, glowing skin has led many individuals to experiment with various skincare practices. One such popular practice involves the use of ice cubes as a rejuvenative skincare treatment – something many find appealing! Rubbing them over your face has many advantages that range from improving tone, decreasing puffiness, increasing circulation and refreshing sensation to improving blood flow and providing relief from inflammation. In this article we’ll delve into this exciting realm known as an Ice Cube Facials as we uncover its many advantages to your skincare regime. What Happens When Ice Cubes Touch My Facial Skin: Intensive Topical Solutions Available Now Before exploring the potential benefits of this unique skincare practice, let’s first understand its effects. When the ice makes contact with skin it causes blood vessels to constrict temporarily reducing blood flow thereby temporarily relieving redness and inflammation; making this practice ideal for soothing irritated skin conditions. Moreover, its cold temperature helps stimulate lymphatic drainage thus flushing away waste products and toxins from your system more effectively than traditional techniques do. Benefits of Rubbing Ice Cubes on Your Facial Skin Pore Minimization: Ice cubes have many uses on your face, one being their ability to minimize pores. Their cold temperature forces skin tightening, making pores appear smaller and less noticeable over time – leading to smoother complexion overall! Regular usage could give way to an improvement of complexion over time. Reduces Puffiness: Ice cubes may provide relief if you wake up with puffy eyes or facial swelling; their cold temperature helps restrict blood vessels and decrease fluid retention, decreasing puffiness while providing more alert appearances. Ice cube facials can increase blood circulation to your facial tissues and give it a healthy, radiant look. Better circulation ensures your skin receives essential vitamins and oxygen that promote its overall wellbeing and ensure rosy cheeks! Soothe Skin Irritation: Ice cubes may help provide soothing relief from redness, irritation or sunburn by relieving inflammation and alleviating discomfort. Their cooling effect provides instantaneous comfort as you rub ice on your face to ease symptoms. Prevents and Treats Acne: Ice’s anti-inflammatory properties make it particularly helpful in managing acne. Ice can reduce redness, swelling and lesions associated with pimples while simultaneously decreasing their size and spreading. Makeup Primer: Many makeup artists swear by using ice cubes as a primer before applying makeup products on their faces, which helps the products go on more evenly and last for longer, which makes this method ideal for special events and celebrations. Youthful Skin: Ice cube therapy can contribute to firmer and tighter skin through regular application of cold therapy, helping preserve its elasticity and prevent it from sagging over time. Reduces Oiliness: Ice cubes can help regulate excess oil production in your skin, providing relief if you suffer from oily or combination skin types and maintaining matte finishes. If this sounds appealing to you, using them on an oily or combination skin type could provide great control and maintain matte results! Calm Skin After Hair Removal: After having undergone any form of hair removal – including waxing, threading…

Retinol: The Miracle Ingredient For Healthy And Youthful Skin
Retinol: The Miracle Ingredient for Healthy and Youthful Skin

Retinol is a form of vitamin A that has gained immense popularity in the beauty industry due to its numerous benefits for the skin. It is a powerful antioxidant that can help reduce the signs of aging, improve skin texture and tone, and promote overall skin health. In this article, we will explore the science behind retinol and why it is essential to have in your skincare routine. What is Retinol? Retinol is a type of retinoid, which is a derivative of vitamin A. It is a fat-soluble vitamin that is found in many foods, including carrots, sweet potatoes, and spinach. Retinol is used in skincare products as a topical treatment to improve the appearance and health of the skin. How Does Retinol Work? Retinol works by penetrating the skin’s surface and binding to specific receptors in the skin cells. It stimulates the production of collagen, which is essential for maintaining the skin’s elasticity and firmness. It also increases cell turnover, which helps to exfoliate the skin and reduce the appearance of fine lines, wrinkles, and hyperpigmentation. Why You Need to Have Retinol In Your Skincare Routine It Can Improve the Appearance of Fine Lines and WrinklesOne of the most significant benefits of retinol is its ability to reduce the appearance of fine lines and wrinkles. As we age, our skin’s collagen production decreases, and the skin becomes thinner and less elastic. Retinol helps to stimulate collagen production, which can improve the skin’s elasticity and reduce the appearance of wrinkles. It Can Improve Skin Texture and ToneRetinol can also help improve the texture and tone of the skin. It works by increasing cell turnover, which can help to exfoliate the skin and remove dead skin cells. This can help to improve the skin’s texture and make it appear smoother and more even-toned. It Can Help Prevent and Treat AcneRetinol can also be beneficial for those with acne-prone skin. It works by reducing the production of sebum, which can contribute to the development of acne. It also helps to exfoliate the skin and unclog pores, which can help to prevent and treat acne breakouts. It Can Improve Skin DiscolorationRetinol is also effective at reducing skin discoloration. It works by inhibiting the production of melanin, which can cause dark spots and hyperpigmentation. By reducing the production of melanin, retinol can help to even out skin tone and reduce the appearance of dark spots. It Can Protect Against Environmental DamageRetinol is a potent antioxidant that can help protect the skin against environmental damage. It works by neutralizing free radicals, which are molecules that can damage the skin and accelerate the aging process. By protecting the skin against environmental damage, retinol can help to keep the skin looking healthy and youthful. How to Incorporate Retinol Into Your Skincare Routine Retinol is a potent ingredient that can cause irritation, especially for those with sensitive skin. It is essential to start with a low concentration and gradually increase over time. It is also recommended to use retinol at night, as it can make the skin more sensitive to…

The Secret To Detangling Color Treated Hair: Essential Tips And Techniques For Healthy, Tangle Free Tresses
The Secret to Detangling Color-Treated Hair: Essential Tips and Techniques for Healthy, Tangle-Free Tresses

Color-treated hair requires extra care and attention to maintain its vibrancy and overall health. One common challenge faced by individuals with colored hair is dealing with tangles, which can be frustrating and lead to hair breakage. Detangling color-treated hair requires a gentle and targeted approach to minimize damage and preserve the integrity of the hair strands. In this article, we will explore the secret to detangling color-treated hair, providing you with essential tips and techniques to keep your tresses healthy, vibrant, and tangle-free. Choose the Right Tools:Detangling color-treated hair starts with selecting the right tools. Opt for a wide-toothed comb or a brush specifically designed for detangling. These tools have wider spaces between the teeth, which helps to prevent excessive pulling or snagging that could lead to breakage. Avoid using fine-toothed combs or brushes with harsh bristles, as they can cause damage to the hair cuticles and disrupt the color-treated strands. Start with Pre-Treatment:Before detangling your hair, it’s beneficial to give it a pre-treatment to minimize tangles. Apply a small amount of a lightweight, leave-in conditioner or a detangling spray to damp hair. These products work to smoothen the hair cuticles, reducing friction and making it easier to comb through the strands. Gently distribute the product from mid-length to the ends of your hair, focusing on areas prone to tangles. Divide and Conquer:To effectively detangle color-treated hair, it’s essential to divide it into manageable sections. This technique allows you to focus on one section at a time, minimizing the stress and tension on the hair. Start by parting your hair into two sections using a center or side parting. Then, further divide each section into smaller subsections, depending on the thickness of your hair. By detangling smaller sections, you can prevent unnecessary pulling and breakage. Gentle Detangling Technique:When detangling color-treated hair, it’s crucial to adopt a gentle technique to avoid causing damage. Begin by starting at the ends of your hair and gradually work your way up towards the roots. Hold the hair gently with one hand, supporting it near the roots to prevent unnecessary strain on the scalp. Use slow, deliberate strokes with your wide-toothed comb or detangling brush, releasing any tangles as you go. Avoid yanking or forcefully pulling through knots, as this can lead to hair breakage and loss of color intensity. Utilize a Detangling Product:If you encounter stubborn tangles, it can be helpful to incorporate a detangling product into your routine. Look for a detangling spray or leave-in conditioner specifically formulated for color-treated hair. These products contain ingredients that provide slip, making it easier to glide through the hair without causing damage. Apply the detangling product directly to the tangled area and use your fingers or a wide-toothed comb to gently work through the knot, starting from the ends and gradually moving upwards. Protective Hairstyles:Implementing protective hairstyles can significantly reduce the risk of tangles for color-treated hair. Styles such as braids, buns, or twists can keep your hair secure and minimize friction caused by movement and contact with clothing. When opting for a protective style, ensure that it…