Flawless Foundation: Tips and Tricks for Applying Liquid Foundation

Flawless Foundation- Tips and Tricks for Applying Liquid Foundation

Liquid foundation is a versatile and widely used makeup product that helps create a smooth and even complexion. However, achieving a flawless finish with liquid foundation requires proper application techniques and some helpful tricks. In this comprehensive guide, we will explore valuable tips and tricks to ensure that your liquid foundation application is seamless, long-lasting, and enhances your natural beauty.

Prepping Your Skin
Before applying liquid foundation, it’s essential to prepare your skin to ensure a smooth and even canvas. Follow these steps to optimize your foundation application:

a. Cleansing: Start with a clean face by washing away any dirt, oil, or makeup residue. Use a gentle cleanser suitable for your skin type.

b. Exfoliation: Regular exfoliation helps remove dead skin cells, promoting smoother skin and preventing foundation from clinging to dry patches. Exfoliate 1-2 times per week.

c. Moisturizing: Apply a lightweight, hydrating moisturizer to keep your skin supple and prevent the foundation from settling into fine lines or dry areas.

d. Primer: Consider using a makeup primer to create a smooth base and extend the longevity of your foundation. Choose a primer that suits your skin type, whether you have oily, dry, or combination skin.

Selecting the Right Foundation
Choosing the appropriate liquid foundation for your skin type and desired coverage is crucial. Here are some pointers for selecting the right foundation:

a. Skin Type: Identify your skin type (oily, dry, combination, or normal) to find a foundation that addresses your specific needs. Oil-free, matte foundations work well for oily skin, while hydrating formulas suit dry skin.

b. Undertone: Determine your skin’s undertone, which can be warm, cool, or neutral. Select a foundation with a matching undertone for a natural look.

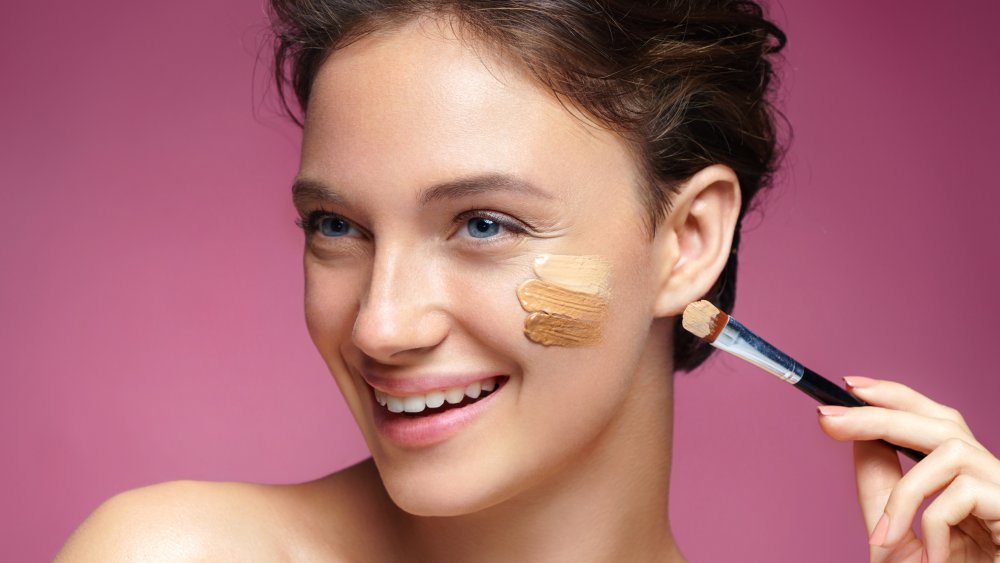
c. Shade Matching: Test foundation shades on your jawline or wrist in natural light to find the most suitable match. The right shade should blend seamlessly with your neck and face.

d. Coverage: Choose the level of coverage you desire—light, medium, or full—based on your skin concerns and the occasion.
Flawless Foundation- Tips and Tricks for Applying Liquid Foundation

Applying Liquid Foundation
Now that your skin is prepped and you have the right foundation, let’s explore different application techniques to achieve a flawless finish:

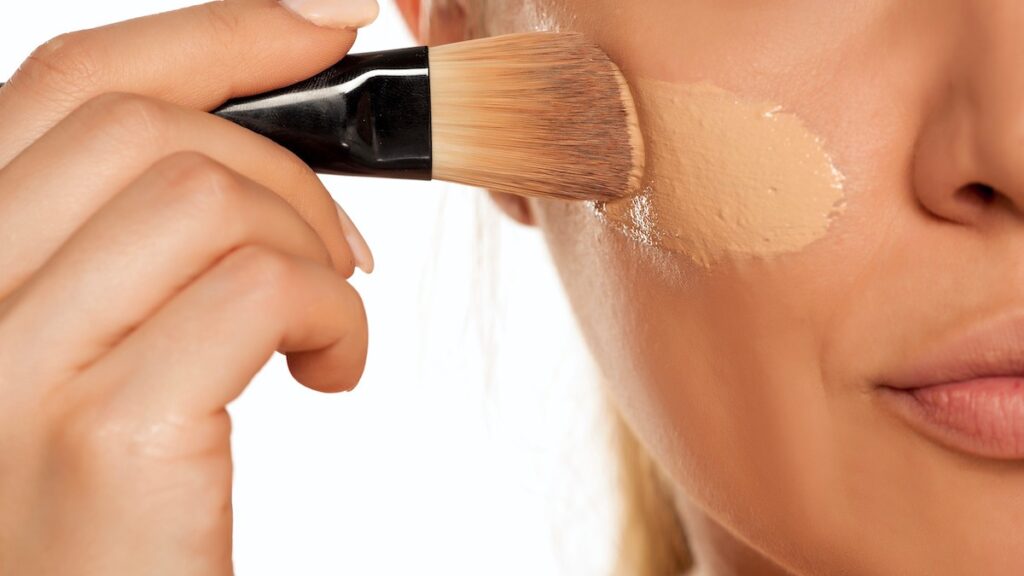
a. Brush Application: Use a foundation brush to apply the product in downward strokes. Brushes provide even coverage and help buff the foundation into the skin for a polished look.

b. Beauty Blender or Makeup Sponge: Dampen a makeup sponge or Beauty Blender and gently bounce it across your face to apply the foundation. This technique provides a natural, airbrushed finish and ensures seamless blending.

c. Fingertip Application: For a more lightweight and natural finish, use clean fingers to apply the foundation. Warm the product between your fingers before patting it onto your skin.

d. Layering: Start with a small amount of foundation and build up coverage gradually where needed. This approach prevents a cakey appearance and allows you to tailor the coverage to your preference.

e. Sheer Application: For a light, sheer coverage, mix a drop of foundation with your moisturizer or primer before applying.


Concealing and Color Correcting
To achieve a flawless complexion, consider incorporating concealer and color correctors into your routine:

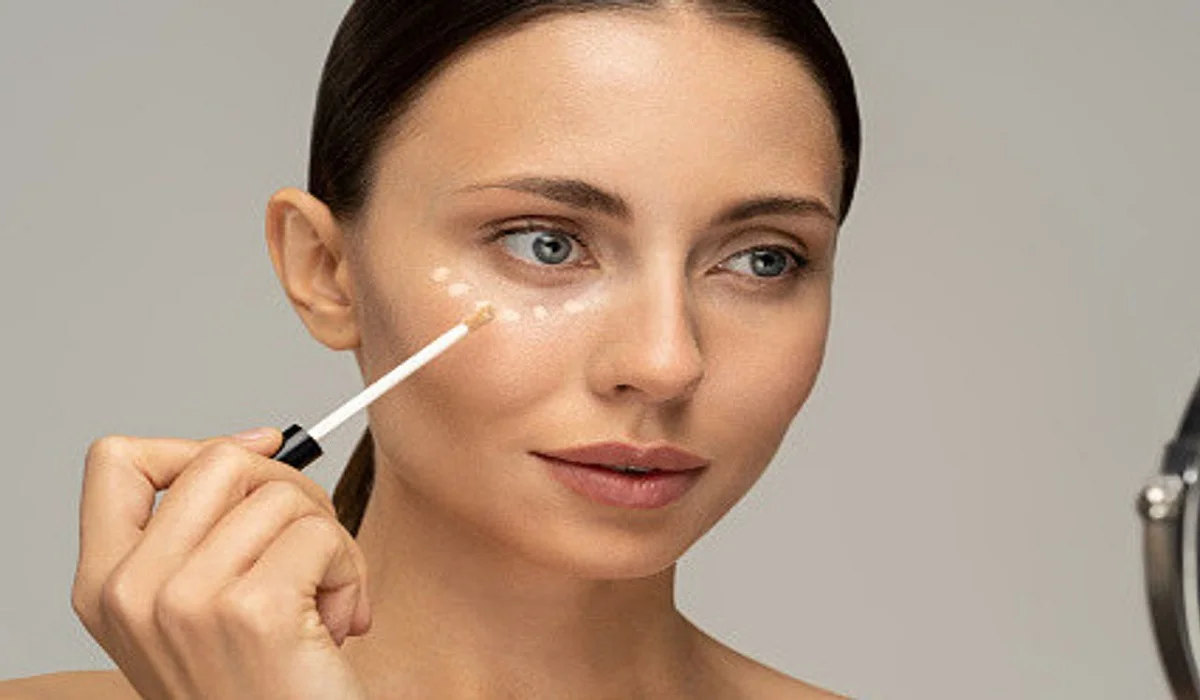
a. Concealer: Apply concealer after foundation to cover blemishes, dark circles, and any areas that need additional coverage. Use a shade close to your skin tone or one that is slightly lighter to brighten the under-eye area.

b. Color Correctors: Use color correctors to neutralize specific concerns, such as green for redness, peach for dark circles, and lavender for sallow skin. Apply them before foundation and concealer for the best results.

Setting the Foundation
Setting your liquid foundation helps prolong its wear and reduces the likelihood of smudging or transferring. Try the following techniques:

a. Translucent Powder: Use a fluffy powder brush to apply a thin layer of translucent setting powder. This minimizes shine and locks the foundation in place without adding additional coverage.

b. Baking: For longer-lasting coverage, use the baking technique. Apply a generous amount of setting powder to areas you want to highlight or where makeup tends to crease (under the eyes, T-zone), leave it on for a few minutes, and then dust it off.

Touch-Up Tips
To maintain a flawless look throughout the day, keep these touch-up tips in mind:

a. Blotting Papers: Use blotting papers to absorb excess oil without disturbing your foundation. This prevents a cakey appearance and keeps your skin looking fresh.

b. Setting Spray: Finish your makeup routine with a setting spray to lock everything in place and provide a dewy or matte finish, depending on your preference.

Liquid foundation is a powerful tool that can transform your complexion and boost your confidence. By following the tips and tricks outlined in this guide, you can ensure a flawless application that enhances your natural beauty and lasts throughout the day. From prepping your skin to selecting the right foundation and applying it with precision, these techniques will help you achieve a radiant and flawless finish every time you reach for your liquid foundation.


Head Scratcher Scalp Care Is Booming But Will It Make A Hair Of Difference 2
Head Scratcher: Scalp Care is Booming, But Will It Make a Hair of Difference?

The beauty industry is buzzing with the latest trend: scalp care. With an influx of specialized products hitting the shelves and the internet flooded with DIY remedies, one has to wonder—does focusing on the scalp truly translate to healthier, more vibrant hair, or is it just another fleeting beauty trend? This article delves deep into the scalp care phenomenon, exploring its merits, the science behind it, and whether it lives up to the hype. The Rise of Scalp Care Scalp care is not just about dandruff prevention anymore; it’s about nurturing the root of all hair health. With market analysts highlighting significant growth in this niche, it’s clear that consumers are buying into the idea. But what’s driving this trend, and is there a tangible connection between scalp health and hair quality? Understanding Scalp Health The scalp, like any other skin on your body, requires attention and care. Common issues like dryness, oiliness, and sensitivity can directly impact hair growth and quality. By understanding the anatomy of the scalp and how it affects hair follicles, we can better appreciate the need for specialized care. The Science Behind Scalp Care Products With countless products claiming to revitalize your scalp, it’s essential to know which ingredients actually benefit scalp health. This section will break down the key components of scalp care products, separating fact from fiction. DIY Scalp Care: Home Remedies Nature offers its bounty for scalp nourishment. From essential oils to kitchen staples, we’ll explore how these natural remedies can be used to maintain a healthy scalp, along with easy ways to integrate them into your care routine. Professional Scalp Treatments For those seeking deeper intervention, professional scalp treatments offer a range of services. We’ll examine the different treatments available and what they promise for those investing in their scalp health. Scalp Care and Hair Growth A primary question many have is whether scalp care directly influences hair growth. Through evidence-based insights, we’ll explore the relationship between a well-maintained scalp and the potential for hair regeneration. Product Overload: Can Too Much Harm Your Scalp? In the quest for perfect scalp health, could we be doing more harm than good? This section discusses the signs of product overload and how to strike a balance in your scalp care regimen. Scalp Care for Different Hair Types Scalp care is not one-size-fits-all. Tailoring your routine to fit your hair type is crucial for effectiveness. Here, we provide tips and tricks for adapting scalp care practices to suit curly, straight, thin, and thick hair types. The Future of Scalp Care As we look forward, what innovations and trends can we expect in the realm of scalp health? This section forecasts the future of scalp care, from technological advancements to emerging treatments. Head Scratcher: Scalp Care is Booming, But Will It Make a Hair of Difference? Weighing the evidence, it’s time to ask: does the booming interest in scalp care make a significant difference in hair health, or is it merely a cosmetic trend? Here, we combine personal anecdotes with professional opinions to get to the root of…

How To Wear Crystal Makeup: Tips And Tricks For A Glamorous Look
How to Wear Crystal Makeup: Tips and Tricks for a Glamorous Look

Crystal makeup has become a popular trend in recent years, and it’s not hard to see why. The shimmering, sparkling effect of crystals on the face can add a touch of glamour and elegance to any makeup look. If you’re interested in trying out this trend, there are a few things you need to know. In this article, we’ll go over some tips and tricks for how to wear crystal makeup like a pro. What is Crystal Makeup? First, let’s define what we mean by crystal makeup. This refers to any makeup look that incorporates crystals or other glittery, sparkly materials onto the face. This can range from subtle touches of shimmer to full-on, glittery glam. Some common types of crystal makeup include: Crystal eyeliner: This involves using a liquid liner with tiny crystals embedded in it to create a sparkling line along the eyelid.Crystal highlighter: This involves using a powder or cream highlighter with glittery particles to add a shimmering effect to the high points of the face, such as the cheekbones, brow bone, and cupid’s bow.Crystal lips: This involves using a glittery lip gloss or lipstick with tiny crystals or glitter particles to add a shimmering effect to the lips.Crystal face jewels: This involves using adhesive jewels or rhinestones on the face to create a glamorous, sparkling effect.Now that you know what we mean by crystal makeup, let’s get into some tips and tricks for how to wear it. Choose the Right ProductsThe key to a successful crystal makeup look is choosing the right products. You’ll want to look for makeup products that have glitter or crystals already built in, such as crystal eyeliner or glittery lip gloss. You can also create your own crystal makeup by using loose glitter or crystals and mixing them with a clear adhesive, such as eyelash glue. Prep Your SkinBefore applying any makeup, it’s important to prep your skin properly. This means cleansing your face thoroughly and applying a moisturizer to ensure your skin is hydrated and smooth. You may also want to use a primer to help your makeup stay in place and prevent it from creasing or smudging. Start SmallIf you’re new to crystal makeup, it’s best to start small and work your way up. Begin by adding a subtle touch of shimmer to your makeup, such as a crystal eyeliner or a glittery lip gloss. As you become more comfortable with the look, you can experiment with more elaborate crystal makeup looks. Use AdhesiveWhen applying crystals or glitter to your face, it’s important to use a strong adhesive that will hold them in place. You can use a clear adhesive, such as eyelash glue, or a specialized adhesive designed for use on the face. Be sure to apply the adhesive sparingly and allow it to dry fully before applying the crystals or glitter. Apply in LayersTo create a more dramatic effect, you can apply crystals or glitter in layers. Begin with a thin layer of adhesive and a small amount of crystals or glitter, and then gradually build up the layers…

Niacinamide Benefits 2
Unveiling the Power of Niacinamide: A Comprehensive Guide on Usage and Benefits

Unlocking the Power of Niacinamide: A Comprehensive Overview on Use and BenefitsNiacinamide (Vitamin B3) has taken the beauty world by storm with its abundance of skin benefits and widespread adoption by various skincare formulations. Understanding what niacinamide is and incorporating it into your routine will open a host of transformative skincare possibilities that could make a real difference to both its effectiveness and efficacy. Niacinamide plays a pivotal role in keeping skin health at optimal levels and treating common issues, from soothing irritations to stimulating collagen production for firmness and elasticity. Niacinamide also regulates oil production – making it an invaluable ally in treating acne-prone or oily complexions. Benefits of Niacinamide for Your Skin Reducing Fine Lines and Wrinkles: Niacinamide’s collagen-boosting effects result in smoother, younger-looking skin over time by diminishing fine lines and wrinkles over time.Hyperpigmentation/Dark Spots: Niacinamide’s anti-hyperpigmentation benefits can also help mitigate hyperpigmentation/darken spots to create smoother-looking complexion. Niacinamide, known for its brightening effects, helps fade hyperpigmentation and dark spots for an even skin tone. Niacinamide also regulates oil production to control acne flare-ups. Niacinamide’s sebum-balancing effects make it effective at managing oiliness and avoiding breakouts – an asset for those living with acne-prone skin. Reducing Redness and Inflammation: Niacinamide helps decrease redness and inflammation within skin pores as well as improving overall appearance, providing valuable therapeutic relief to acne sufferers. Niacinamide’s anti-inflammatory properties make it an effective yet gentle solution to reduce redness and soothe irritated skin, perfect for sensitive skin types. Add Niacinamide into Your Routine: Cleanser with Niacinamide: Start off your routine right with a cleanser containing niacinamide to reap its many advantages at the outset of your skincare regime.Niacinamide Serums: Niacinamide serums provide powerful solutions that target specific problems like hyperpigmentation or fine lines. Choose one to address them effectively. Niacinamide-rich moisturizers deliver both hydration and the vitamin’s skin-nourishing benefits, making these suitable for various skin types. Sunscreen with Niacinamide: Sunscreen should be part of any skincare regime, and one with Niacinamide offers multiple advantages for protecting skin against damage caused by UV radiation while offering additional skincare benefits. Incorporate it into treatments: Integrate Niacinamide into targeted treatments like face masks and overnight creams for intensive skin care. Niacinamide is an amazing skincare ingredient, offering benefits suitable for many different skin types and concerns. From targeting signs of aging and hyperpigmentation, to acne control and management – niacinamide offers something everyone could use more of in their skincare regime! When applied correctly into one’s routine it can transform to give one radiant, healthy-looking complexions. Are You Wondering If Niacinamide Causes Any Harm? Refuting Common Misconceptions Niacinamide (Vitamin B3) has become widely popular and celebrated due to its many therapeutic qualities. Niacinamide can be safely integrated into any skincare regime when administered correctly and it poses minimal risk. As with any product, however, it’s crucial that users follow recommended usage instructions and conduct patch tests, especially those with sensitive skin or concerns related to their treatment or condition. Consulting a dermatologist for customized advice about adding Niacinamide into their regime safely can offer invaluable assistance.

The Importance Of Washing Your Hair Brush: Maintaining Hair Health And Hygiene
The Importance of Washing Your Hair Brush: Maintaining Hair Health and Hygiene

A hair brush is an essential tool for maintaining the health and appearance of your hair. However, many people overlook the importance of cleaning their hair brushes regularly. In this article, we will explore the reasons why you should make washing your hair brush a regular part of your hair care routine. From preventing product buildup and dandruff to promoting scalp health and overall hygiene, keeping your hair brush clean offers numerous benefits. Read on to discover how a simple task like washing your hair brush can make a significant difference in the health and vitality of your hair. Prevents Product BuildupOver time, hair products such as styling gels, serums, and hairsprays accumulate on your hair brush bristles. When you use a dirty brush, these residues transfer back onto your hair, leading to product buildup. This buildup can weigh down your hair, making it appear dull and lifeless. By regularly washing your hair brush, you remove these residues, ensuring that your hair receives the full benefits of the styling products you use. To clean your hair brush, start by removing any loose hair from the bristles. Then, create a solution of warm water and mild shampoo or liquid soap. Gently scrub the brush with the solution, paying special attention to the bristle area. Rinse thoroughly and allow it to air dry before using it again. Promotes Scalp HealthA clean hair brush contributes to a healthy scalp. When you brush your hair, the bristles stimulate blood circulation in the scalp, promoting the delivery of essential nutrients to the hair follicles. However, if your brush is dirty, it can transfer bacteria, oil, and dead skin cells back onto your scalp, leading to irritation, itchiness, and even infections.Regularly cleaning your hair brush helps maintain a hygienic environment for your scalp. It removes bacteria, oil, and debris that may have accumulated on the brush, reducing the risk of scalp issues. Additionally, a clean brush ensures that your hair remains free from external pollutants, keeping it healthier and more vibrant. Prevents DandruffDandruff is a common scalp condition characterized by flaky, itchy skin. While various factors contribute to dandruff, a dirty hair brush can worsen the problem. Dead skin cells, oils, and bacteria trapped in the bristles can transfer back onto your scalp, exacerbating dandruff symptoms.By regularly washing your hair brush, you eliminate these potential triggers. A clean brush minimizes the chances of dandruff-causing substances making contact with your scalp, helping to reduce the occurrence and severity of dandruff. Extends the Lifespan of Your Hair BrushTaking care of your hair brush by cleaning it regularly can extend its lifespan. Product buildup, hair residue, and oils not only affect your hair but also accumulate on the bristles, making them less effective over time. Regular cleaning ensures that the bristles remain clean, strong, and properly aligned, allowing the brush to work optimally. Maintains Overall HygieneMaintaining good hygiene is essential for overall health and well-being. Your hair brush is exposed to a variety of external elements such as dust, dirt, and environmental pollutants, which can settle on the bristles. Additionally, if…

Why Sleeping With Braided Hair Is The Better Alternative To A Bun Or Ponytail
Braided Beauty: Why Sleeping with Braided Hair is a Better Alternative to a Bun or Ponytail

When it comes to nighttime hair care, finding the right hairstyle can make a significant difference in the health and appearance of your hair. Many people opt for buns or ponytails as a convenient way to keep their hair off their face while they sleep. However, sleeping with braided hair offers several benefits that make it a superior alternative. In this article, we will explore why sleeping with braided hair is a better option for overnight hair care, from minimizing breakage and tangles to promoting healthy hair growth and maintaining effortless waves. Minimizes Breakage:One of the primary advantages of sleeping with braided hair is the reduced risk of breakage. Buns and ponytails can create tension and stress on the hair shaft, leading to breakage and split ends. Braids, on the other hand, distribute the tension more evenly along the length of the hair, reducing the risk of damage. Prevents Tangling:Braiding your hair before bed can help prevent tangles and knots that can occur when hair is left loose or tied up in a bun or ponytail. The structured nature of a braid keeps the hair strands in place and minimizes friction, reducing the chances of waking up with tangled and unruly hair. Promotes Healthy Hair Growth:Sleeping with braided hair can contribute to healthier hair growth. By keeping your hair in a braid overnight, you minimize the risk of hair breakage, which can impede hair growth progress. Additionally, braids help protect the hair from external elements, such as friction against pillows or blankets, allowing the hair to grow longer and stronger. Maintains Effortless Waves:If you desire soft, natural waves, sleeping with braided hair is an excellent option. Braids create gentle, natural-looking waves when undone in the morning. This low-maintenance hairstyle saves time and effort in styling, as you wake up with beautiful, textured waves that can last throughout the day. Reduces Frizz and Flyaways:Braiding your hair at night can help control frizz and minimize flyaways. The contained structure of the braid keeps the hair strands in place, reducing the chances of friction-induced frizz. This is particularly beneficial for those with naturally curly or textured hair that tends to be prone to frizz and flyaways. Protects Hair from Environmental Factors:Sleeping with braided hair provides a protective barrier against external factors that can damage your hair. By keeping your hair contained in a braid, you minimize exposure to friction against pillows, blankets, or rough surfaces. This protection helps maintain the integrity of the hair cuticle and reduces the risk of damage caused by environmental stressors. Versatility for Next-Day Hairstyling:Another advantage of sleeping with braided hair is the versatility it offers for next-day hairstyling. Once you undo your braids in the morning, you can experiment with different hairstyles, such as a loose updo, a half-up half-down style, or leave your hair down with natural-looking waves. The textured foundation provided by the braids can add volume and hold to your hairstyles, making it easier to achieve a variety of looks. Comfortable and Relaxing:Braiding your hair before bed can provide a comfortable and relaxing experience. The gentle tension…

Framing Perfection: A Comprehensive Guide To Choosing The Best Haircuts For Oval Faces
Framing Perfection: A Comprehensive Guide to Choosing the Best Haircuts for Oval Faces

The oval face shape is often considered the most versatile and balanced among all face shapes, offering a canvas that can pull off a wide variety of hairstyles. Its balanced proportions and well-defined bone structure make it a prime candidate for experimenting with different haircut styles. Whether you’re looking to emphasize your natural beauty or create a dramatic change, selecting the right haircut can enhance your features and complement your overall look. In this guide, we’ll explore the world of haircuts that best suit oval faces, providing you with expert insights and a curated list of styles to help you make an informed decision. Understanding the Oval Face Shape An oval face shape is characterized by its balanced proportions and soft contours. The forehead is slightly wider than the chin, and the jawline is gently curved. This versatile shape allows for various hairstyles and lengths, as the facial features are already well-balanced. Considerations for Choosing Haircuts When selecting a haircut for an oval face shape, keep the following factors in mind: Best Haircuts for Oval Faces Styling Tips Celebrity Inspiration Looking at celebrities with oval faces can offer valuable inspiration for choosing the perfect haircut: The oval face shape provides a versatile canvas for exploring a wide range of haircuts and styles. Whether you opt for a classic bob, a daring pixie, or anything in between, the key is to enhance your features and embrace your personal style. By understanding your face shape and considering factors like hair texture and maintenance, you can confidently choose a haircut that frames your face beautifully and complements your overall look. As you experiment with different styles, remember that the goal is to enhance your natural beauty and create a harmonious balance that brings out the best in your oval face shape.

5 Essential Tips To Enhance Your Eye Shadowskills
5 Essential Tips to Enhance Your Eye Shadow Skills

Eye shadow can dramatically transform your look, adding depth, dimension, and a pop of color to your eyes. Whether you’re aiming for a subtle enhancement or a bold statement, mastering the art of eye shadow application is key. In this comprehensive guide, we’ll delve into five pivotal tips that will elevate your eye shadow game, ensuring your makeup not only looks stunning but also lasts longer. Prime Your Eyes Before diving into colors and techniques, it’s crucial to start with a clean canvas. Priming your eyelids is the first step towards ensuring your eye shadow adheres better and stays put for hours. A good eye primer prevents creasing and fading, making it indispensable for both daily wear and special occasions. You can opt for a dedicated eye primer or a versatile option that suits both your face and eyelids. The key is to apply a thin, even layer across your eyelid to create the perfect base for your eye shadow. Understand Your Eye Shape Eye shadow isn’t a one-size-fits-all affair; your application technique should be tailored to your unique eye shape. Whether you have almond, round, hooded, or monolid eyes, each shape has specific strategies to enhance and define its natural beauty. By recognizing your eye shape, you can apply eye shadow in a way that accentuates your best features, from lifting droopy lids to making small eyes appear larger. This personalization ensures your eye makeup complements your overall look. Select the Right Eye Shadow Type The type of eye shadow you choose plays a significant role in the final look. Cream eye shadows work wonders as a base color, offering a smooth application. However, for versatility and ease of blending, pressed powder eye shadows are generally preferred. They come in a wide range of finishes, from matte to shimmer, allowing you to create depth and dimension on your eyelids. When selecting eye shadows, consider the occasion, your skin type, and the look you’re aiming for. Invest in Quality Brushes The right tools can make all the difference in eye shadow application. A comprehensive set of brushes allows for precise application and seamless blending. Essentials include a large, fluffy brush for applying a base color, a smaller, denser brush for adding depth to the crease, and a blending brush to ensure there are no harsh lines. Additionally, a pencil brush is great for detailed work, like defining the lower lash line or inner corners. Quality brushes offer better control and can help you achieve a more professional finish. Choose Eye Shadow Colors That Complement Your Eye Color The colors you choose should enhance your natural eye color, making your eyes the focal point of your face. Here’s a quick guide: By incorporating these tips into your makeup routine, you’ll notice a significant improvement in your eye shadow application. Remember, practice makes perfect, and experimenting with different colors and techniques is part of the fun. Embrace your creativity, and let your eyes shine! Mastering eye shadow application is an art that enhances your natural beauty and allows for creative expression. By following these…

Expert Insights And Solutions For Eliminating Ingrown Hairs
Expert Insights and Solutions for Eliminating Ingrown Hairs

Ingrown hairs, a common yet often painful issue, occur when hairs grow sideways or curl back into the skin, leading to redness, inflammation, and possible infection. This detailed guide aims to shed light on the nature of ingrown hairs, explore their causes, and introduce a variety of effective strategies for both prevention and treatment. Deciphering the Phenomenon of Ingrown Hairs Characterized by the sideways growth or curling back of hair into the skin due to clogged follicles with dead skin, ingrown hairs are a widespread concern. Although anyone can suffer from ingrown hairs, those with curly or coarse textures are more prone, especially in areas subjected to regular hair removal like the face, neck, underarms, legs, and bikini line. Root Causes of Ingrown Hairs The act of hair removal, whether through shaving, waxing, or plucking, stands as the chief culprit for ingrown hairs. The type of skin, particularly oily or thick, may further predispose individuals to this condition by facilitating follicle clogging. Additionally, tight garments and friction can aggravate the situation, trapping hairs under the skin. Strategies to Forestall Ingrown Hairs Adopting correct hair removal practices is pivotal in averting ingrown hairs. Employing a sharp razor, shaving in the hair growth direction, and using a gentle shaving cream are key. Exfoliation plays a vital role in eliminating dead skin and ensuring proper hair growth. Selecting hair removal products that align with your skin type can also significantly reduce irritation. Eradicating Ingrown Hairs For those grappling with ingrown hairs, an array of home-based and clinical solutions are available. Home-Based Remedies for Ingrown Hairs Applying warm compresses can soften the skin, facilitating the emergence of the hair. Sugar scrubs can mildly exfoliate the skin, whereas essential oils like tea tree offer antiseptic benefits to diminish inflammation and avert infections. Clinical Interventions for Ingrown Hairs Techniques such as laser hair removal and electrolysis present more permanent answers by curbing hair growth and lessening ingrown hair occurrences. Chemical peels are effective in exfoliating dead skin and preventing follicle blockages. Pharmacy Solutions Applying creams with salicylic acid or benzoyl peroxide can mitigate inflammation and address infections in ingrown hairs. Products designed for exfoliation and serums to prevent ingrown hairs are specifically formulated to stop hairs from growing inward. Importance of Exfoliation Consistent exfoliation is crucial in warding off ingrown hairs by clearing dead skin that can ensnare hairs. Both manual and chemical exfoliants prove beneficial, yet selecting a suitable type for your skin to avoid irritation is essential. Post-Removal Care and Skin Recovery Post-extraction, maintaining cleanliness and hydration in the affected area is vital. Steer clear of tight-fitting clothes to reduce friction and irritation. Using a soothing balm or lotion can aid in healing and forestall future ingrown hairs. Consulting a Healthcare Provider Should signs of infection like pus, severe discomfort, or fever arise, seeking medical counsel is crucial. Persistent ingrown hairs that defy home-based treatments may necessitate professional care. Although ingrown hairs are bothersome, adopting appropriate preventative measures and treatments can lead to smooth, trouble-free skin. Whether through at-home remedies, clinical treatments, or over-the-counter products, grasping…