Unmasking the Types of Concealers: A Comprehensive Guide to Flawless Coverage

Unmasking the Types of Concealers: A Comprehensive Guide to Flawless Coverage

Concealers are a makeup essential that helps cover imperfections, dark circles, and blemishes, creating a flawless canvas for the rest of your makeup. With a wide range of concealers available, each designed to cater to specific needs and skin types, finding the perfect one can be overwhelming. In this comprehensive guide, we will explore the various types of concealers, their unique formulations, and the best ways to use them to achieve a flawless and radiant complexion.

Liquid Concealer
Liquid concealers are the most popular and versatile type of concealer. They come in a liquid form, which makes them easy to blend and build coverage as needed. Liquid concealers are suitable for all skin types and offer a natural finish. They are available in various formulations, including hydrating, matte, and illuminating, catering to different skin concerns.

a. Hydrating Liquid Concealer: Best for dry and mature skin, hydrating liquid concealers contain moisturizing ingredients that help prevent the product from settling into fine lines and wrinkles. They provide a dewy finish, adding a healthy glow to the skin.

b. Matte Liquid Concealer: Ideal for oily and combination skin, matte liquid concealers offer long-lasting coverage and help control excess oil throughout the day. They provide a natural matte finish, blurring imperfections and creating a smooth complexion.

c. Illuminating Liquid Concealer: Also known as radiant or luminous concealers, these are perfect for adding brightness and radiance to the under-eye area. They often contain light-reflecting particles that help reduce the appearance of dark circles and give the skin a youthful glow.

Cream Concealer
Cream concealers are thicker in texture than liquid concealers, making them suitable for medium to full coverage. They are especially effective in covering stubborn blemishes, scars, and discolorations. Cream concealers work well for normal to dry skin types and may require setting with powder to ensure long-lasting wear.

Stick Concealer
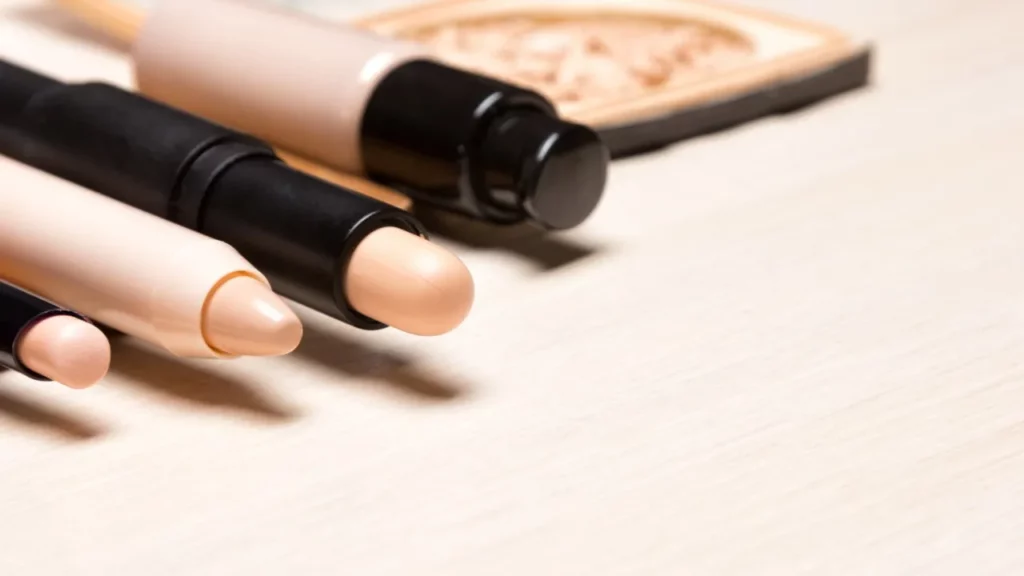
Stick concealers come in solid form and are easy to apply directly to the skin. They offer medium to full coverage and are perfect for concealing dark spots, acne, and redness. Stick concealers often have a thicker consistency, making them an excellent choice for those with normal to oily skin types.

Cream-to-Powder Concealer
Cream-to-powder concealers are formulated as creams but transform into a powder-like finish upon application. They work well for those who prefer the ease of cream concealers but desire a matte, powder-like finish. Cream-to-powder concealers are suitable for all skin types, depending on their specific formulations.

Color Correcting Concealer
Color correcting concealers are specially formulated to neutralize and cancel out specific skin concerns, such as redness, dark circles, and sallowness. They come in various colors that correspond to the color wheel and work to balance out the targeted skin concern.

a. Green Concealer: Green concealers are ideal for neutralizing redness, including acne, rosacea, and blemishes. The green color cancels out the red undertones on the skin, providing a more even complexion.

b. Peach/Orange Concealer: Peach or orange concealers are excellent for neutralizing blue or purple undertones, making them effective in covering dark circles and bruises.

c. Lavender/Purple Concealer: Lavender or purple concealers help counteract sallow or yellow tones, brightening the skin and providing a more refreshed appearance.

d. Yellow Concealer: Yellow concealers are versatile and can help conceal mild redness, as well as brighten and even out the skin tone.
Unmasking the Types of Concealers: A Comprehensive Guide to Flawless Coverage

Under-Eye Concealer
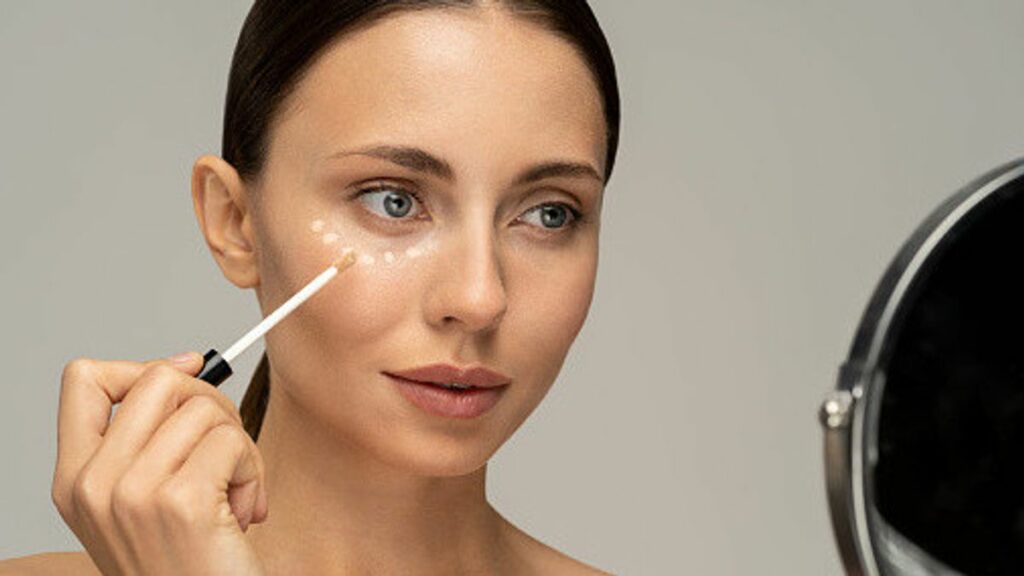
Under-eye concealers are specifically designed to address dark circles and brighten the under-eye area. They are usually formulated with light-reflecting properties to minimize the appearance of shadows and fatigue. Under-eye concealers can come in liquid, cream, or stick form, and they are often available in a range of shades to suit different skin tones.

Waterproof Concealer
Waterproof concealers are designed to withstand water and sweat, making them an excellent option for events, weddings, or hot and humid climates. They offer long-lasting coverage and are available in various formulations, including liquid and cream.

High Coverage Concealer
High coverage concealers are formulated to provide intense coverage, effectively concealing severe imperfections, scars, and tattoos. They often come in a cream or pot form and may require additional blending to achieve a natural finish.

Wand Applicator Concealer
Wand applicator concealers feature a built-in applicator wand, making them convenient for precise application. They are often available in liquid or cream formulations and work well for spot-concealing and under-eye brightening.


Cushion Concealer
Cushion concealers are similar to liquid concealers but come in a cushion compact. They offer a lightweight and hydrating formula and are perfect for those seeking a natural, no-makeup look.

Tips for Choosing and Using Concealers

Shade Selection: When choosing a concealer, select a shade that matches your skin tone or is one shade lighter. A lighter shade can help brighten the under-eye area, but avoid going too light, as it may appear unnatural.

Undertone: Consider your skin’s undertone when selecting a concealer. If you have warm undertones, opt for a concealer with yellow or peachy undertones. For cool undertones, choose a concealer with pink or neutral undertones.

Patch Test: Always patch test new concealers on a small area of your skin to ensure you don’t experience any allergic reactions or irritation.

Application Techniques:

a. Under-Eye: For under-eye concealing, apply the product in a triangular shape with the base at your lower lash line and the point towards your cheek. Blend the concealer with a damp makeup sponge for a seamless finish.

b. Blemishes and Spots: For concealing blemishes and spots, use a small brush or the tip of a concealer wand to apply the product directly to the area. Gently blend the edges into the surrounding skin for a natural look.

Set with Powder: To ensure your concealer stays in place and doesn’t crease, set it with a light dusting of translucent setting powder. This step is especially crucial for under-eye concealing.

Layering: For stubborn imperfections, layering thin coats of concealer is more effective than applying one heavy layer. Build up coverage gradually for a natural appearance.


Clean Brushes and Applicators: Regularly clean your concealer brushes and applicators to avoid bacteria buildup and maintain their performance.

Concealers are a makeup must-have that offers versatile coverage for various skin concerns. From liquid to stick, color-correcting to waterproof, understanding the types of concealers available can help you find the perfect match for your specific needs. Whether you want to brighten under-eyes, cover blemishes, or neutralize discolorations, a well-chosen concealer can be your secret weapon to achieving a flawless and radiant complexion. Remember to choose the right shade, consider your skin type and undertone, and apply concealer with precision for a seamless finish that enhances your natural beauty.

Mastering The Eyelash Curler
Mastering the Eyelash Curler

Transforming your lashes from straight to stunningly curled can be effortlessly achieved with the proper use of an eyelash curler, turning it into an indispensable tool in your beauty arsenal. However, mishandling it could result in discomfort, lash damage, or uneven curls. This detailed manual will guide you through mastering the eyelash curler, incorporating upkeep advice and solutions to frequent problems, enabling you to safely and effectively obtain those desirable, fluttering lashes. Selecting the Ideal Eyelash Curler Eyelash Curler Varieties The market offers eyelash curlers in metal, plastic, and heated models. Metal curlers stand out for their sturdiness and precision in curling, while plastic variants are perfect for on-the-go use due to their lightness. For those with hard-to-curl lashes, heated eyelash curlers can achieve a more defined and enduring curl. Choosing a Curler for Your Eye Shape Eyelash curlers are not one-size-fits-all; their efficiency varies with different eye shapes. It’s crucial to choose a curler that complements the curvature of your eye to ensure a uniform curl and avoid discomfort. Some manufacturers provide curlers tailored to specific eye shapes such as almond, round, or deep-set. Lash Preparation Ensure Lashes are Clean and Dry Commence with lashes that are devoid of any makeup or residue, as leftover products can lead to lashes sticking to the curler, risking damage. Post face-washing, ensure your lashes are thoroughly dried before proceeding with the curling process. Warming the Curler (Optional) To enhance the curl, consider gently warming your metal eyelash curler with a hairdryer for a brief period. Always test the curler’s temperature on your hand to confirm it’s warm, not hot, preventing any harm to your eye’s delicate surrounding skin or the lashes themselves. Curling Your Lashes Proper Curler Placement With the curler open, position your lashes between the pads, getting as close as possible to the lash base without touching the eyelid. Confirm that all lashes are captured by the curler’s opening. Executing the Curl Press the curler’s handles together gently for approximately 5 to 10 seconds. For a more natural curl, you may lightly pump the curler. Refrain from pulling or yanking the curler to avoid lash damage. Sectional Curling For a more pronounced curl, adopt a sectional approach: begin at the base, then mid-lash, and finally near the tips. This technique fosters a seamless, natural curl rather than an abrupt crimp. Post-Curling Mascara Application Follow up the curling with your preferred mascara to set the curl. Opt for a waterproof or curl-enhancing mascara for optimal results. Applying mascara post-curling prevents the lashes from sticking to the curler and potential damage. Curler Maintenance and Cleanliness Eyelash Curler Cleansing To ensure optimal performance, regularly clean your curler to eliminate any mascara residue or debris. Utilize a gentle makeup remover or isopropyl alcohol for cleaning, allowing the curler to dry thoroughly before its next use. Pad Replacement Change the curler’s rubber pads every few months or at signs of wear to maintain curl efficiency and lash safety. Neglecting to replace worn pads can compromise lash health and curl quality. Addressing Common Concerns Avoiding Eyelid Pinching Pinching…

Looking For A New Beauty And Fitness Routine These Are Myfavorite Tips To Get Fit
Looking for a New Beauty and Fitness Routine? These Are My Favorite Tips to Get Fit

The pursuit of fitness and beauty is a tandem journey towards overall wellness. Embracing a comprehensive approach to health and well-being not only augments your outward appearance but also elevates your physical condition, fostering a profound sense of wellness. In this discourse, we shall examine the synergy between fitness and beauty routines, presenting my select tips to initiate you on this path or infuse your current practices with fresh insights. The Crucial Role of a Nutritious Diet At the heart of any successful fitness and beauty strategy lies a nutritious diet. Consuming foods abundant in antioxidants, vitamins, and minerals can marvelously transform your skin, hair, and nails, alongside furnishing the vigor and nutritional support necessary for an effective exercise session. We will venture into optimal dietary choices, the advantages of meal planning, and strategies to integrate wholesome eating seamlessly into your everyday routine. Hydration: The Essence of Fitness and Beauty Staying adequately hydrated is pivotal for peak health and intrinsic beauty. Adequate water intake helps purge toxins, maintains skin moisture, and ensures peak performance during physical activities. Explore the significance of hydration for your physique and epidermis, along with practical advice for enhancing daily water consumption. Exercise as a Pillar of Beauty Enhancement Physical activity transcends mere fitness; it’s instrumental in any beauty regimen. Engaging in cardiovascular exercises, strength training, and flexibility workouts not only aids in sculpting your physique but also boosts circulation and dermal health. We will delve into diverse training programs suitable for various fitness levels and objectives, underlining the ways regular exercise can amplify your beauty regimen. Skincare for the Active Individual For those committed to an active lifestyle, sustaining skin health is imperative. This segment will address essential skincare advice for before and after workouts, and the impact of physical activity on your skin, providing key skincare recommendations for the physically active. The Importance of Mindfulness in Beauty and Fitness The connection between mind and body plays a significant role in any fitness and beauty regimen. Techniques such as meditation and yoga not only alleviate stress but also positively influence your appearance. Discover the benefits of integrating mindfulness into your routine for enhanced mental and physical well-being. The Role of Sleep in Recovery and Rejuvenation Sleep is fundamental to our body’s recovery and rejuvenation processes. This section emphasizes the necessity of sleep within any beauty and fitness routine, offering guidance to ensure restorative sleep that aligns with your objectives. Customizing Your Fitness Plan Understanding that fitness is not universally applicable, we’ll explore methods to evaluate your physical condition, establish attainable objectives, and customize your exercise strategy to reflect your unique preferences and requirements. Enhancing Beauty Through Nutritional Supplements Nutritional supplements can support your journey towards fitness and beauty objectives. We’ll investigate key vitamins and minerals that enhance natural beauty, in addition to supplements that increase energy and stamina for improved exercise outcomes. The Frontier of Beauty and Fitness Technology Technological advancements present novel opportunities to enrich your fitness and beauty routines. From tracking devices that monitor your progress to skincare gadgets that enhance your regimen, learn about…

Understanding Whitespots On Nails
Understanding White Spots on Nails: Causes, Treatment, and Prevention

White spots on the nails, often noticed as small, painless dots or patches, have intrigued and concerned people for generations. While they’re usually harmless, understanding their underlying causes is key to addressing any potential health issues. This article dives deep into the reasons behind white spots, debunking common myths, exploring diagnosis methods, treatment options, and offering prevention tips to keep your nails looking their best. What Are White Spots on Nails? Defining Leukonychia Leukonychia refers to the white discolorations that can appear on the nails. These spots can vary greatly in appearance, from tiny, pinpoint dots known as punctate leukonychia to larger, more diffuse areas known as partial or total leukonychia, depending on the extent of the white area over the nail. Common Myths and Facts There’s a common misconception that white spots are always a sign of calcium or zinc deficiency. However, they are more frequently attributed to minor nail trauma or could be indicative of a fungal infection, especially when accompanied by other symptoms like thickening or changes in nail shape. The Root Causes Identifying the cause of white spots is crucial for effective treatment and prevention. Nutritional Deficiencies Although not as common as once thought, deficiencies in certain nutrients, such as zinc or calcium, can occasionally manifest as white spots on the nails. Physical Trauma The most frequent cause of white spots is minor trauma to the nail matrix, the part of the nail bed that produces cells that become the nail plate. This trauma can occur from something as simple as aggressive manicure techniques, nail biting, or even typing. Fungal Infections Fungal infections, particularly those caused by dermatophytes, can lead to white spots. These infections may also cause the nail to become thick, brittle, or discolored. Allergic Reactions Allergic reactions to nail polish, hardeners, or nail polish removers containing harsh chemicals can also lead to white spots. Switching to hypoallergenic or less harsh products can help prevent their recurrence. How to Diagnose White Spots on Nails Professional Diagnosis If white spots on your nails are persistent or accompanied by other symptoms, it’s important to seek a professional diagnosis. A dermatologist can provide a thorough examination, possibly including a fungal culture or biopsy, to determine the exact cause. Home Observation Tips For white spots that are clearly linked to a minor injury and are not spreading or changing in appearance, home observation may be sufficient. Monitoring for changes in the nail’s color, texture, or thickness can help decide when professional advice is necessary. Effective Treatments and Remedies Over-the-Counter Solutions For fungal-related white spots, antifungal creams or polishes can be effective. It’s important to apply these treatments as directed and for the full course, even if the spots appear to improve, to ensure the infection is fully eradicated. Prescription Medications In cases of severe fungal infections, prescription oral antifungals may be necessary. These medications can have side effects, so they’re typically used when other treatments haven’t been successful. Natural and Home Remedies Applying tea tree oil, known for its antifungal properties, can be an effective natural treatment for fungal-induced white…

7best Nail Shapes For Unique Finger Shapes
7 Best Nail Shapes for Unique Finger Shapes

Nail art has transcended beyond mere fashion; it’s a form of self-expression. The right nail shape can complement your finger type, elevating your overall look and boosting your confidence. This guide explores the top 7 nail shapes suited for various finger shapes, offering insights into choosing and maintaining the ideal shape for your nails. Understanding Finger Shapes Before diving into nail shapes, it’s crucial to understand your finger type. Finger shapes vary from short and wide to long and slender. The right nail shape can accentuate the beauty of your hands by making your fingers appear more elongated or your hand more balanced. The Classic Round Nail Shape Best for Short and Wide Fingers: The round nail shape is timeless and versatile, perfect for those with short and wide fingers. It elongates the fingers, giving them a more graceful appearance. Elegant Almond Nail Shape Ideal for Long and Slim Fingers: The almond shape is characterized by slender sides and a tapered tip, resembling an actual almond. This shape is best for those with long, slim fingers, as it adds a touch of elegance. Chic Oval Nail Shape Suited for Most Finger Types: The oval shape is similar to the almond but with a softer, more rounded tip. It’s incredibly versatile, suiting most finger shapes and sizes. Bold Square Nail Shape Recommended for Long Fingers with Wide Nail Beds: The square nail shape features straight edges and a squared-off tip, ideal for those with long fingers and wide nail beds. It offers a modern, edgy look. Trendy Coffin/Ballerina Nail Shape Works Well with Long and Slender Fingers: The coffin or ballerina shape is dramatic and stylish, narrowing down to a flat tip. It’s best for those with long and slender fingers, adding an element of sophistication. Edgy Stiletto Nail Shape For the daring and adventurous, the stiletto shape, with its pointed tip, makes a bold statement. It’s not for the faint-hearted but can be a fun way to express your style. Mix and Match: Combining Shapes for Unique Styles Exploring hybrid shapes can result in a unique nail style that’s entirely your own. From squoval (a mix of square and oval) to almondette (a shorter almond), the possibilities are endless. Maintenance Tips for Different Nail Shapes Maintaining your chosen nail shape requires regular care, including filing and conditioning. Use quality nail care products to keep your nails strong and healthy. The Impact of Nail Length on Shape The length of your nails can significantly impact the final look. Whether you prefer short and chic or long and dramatic, choosing the right length is key to complementing your chosen nail shape. Color and Design Tips for Each Nail Shape Selecting the right color and design can further enhance your nail shape. Bright, bold colors can make short nails stand out, while nude or pastel shades can elongate the appearance of your fingers. Professional Advice on Nail Shaping When visiting a salon, it’s essential to communicate your desired nail shape clearly. A professional nail technician can offer advice tailored to your finger shape and lifestyle….

Papaya: The Superfood For Glowing Skin
Papaya: The Superfood for Glowing Skin

Papaya, also known as pawpaw, is a tropical fruit that is packed with essential nutrients and antioxidants that are beneficial for overall health. But did you know that papaya is also a superfood for skin? The enzymes and vitamins present in papaya make it an excellent ingredient for skincare products. In this article, we will explore the benefits of papaya for skin and how you can incorporate it into your skincare routine. Papaya helps to exfoliate dead skin cellsThe enzymes papain and chymopapain present in papaya are natural exfoliants that help to remove dead skin cells and unclog pores. Regular use of papaya-based skincare products can improve skin texture and make it smoother and softer. Papaya promotes collagen productionCollagen is a protein that gives skin its structure and elasticity. As we age, our body’s collagen production decreases, leading to wrinkles and sagging skin. Papaya is rich in vitamin C, which is essential for collagen production. Regular use of papaya-based skincare products can help to boost collagen production, resulting in firmer and more youthful-looking skin. Papaya reduces inflammationPapaya contains an enzyme called papain, which has anti-inflammatory properties. This makes papaya an excellent ingredient for those with sensitive or acne-prone skin. Regular use of papaya-based skincare products can help to soothe inflammation and redness, leaving skin looking calm and even-toned. Papaya brightens skinPapaya is rich in vitamin A and alpha hydroxy acids (AHAs), which help to brighten and even out skin tone. AHAs are natural exfoliants that help to remove dead skin cells and reveal brighter, more radiant skin. Regular use of papaya-based skincare products can help to fade dark spots and hyperpigmentation, leaving skin looking brighter and more youthful. Papaya hydrates skinPapaya is a great source of water and nutrients, making it an excellent ingredient for hydrating the skin. Regular use of papaya-based skincare products can help to plump up the skin and reduce the appearance of fine lines and wrinkles. Additionally, the antioxidants present in papaya help to protect the skin from environmental damage, such as pollution and UV rays. Papaya can help to treat acneThe antibacterial and anti-inflammatory properties of papaya make it an excellent ingredient for treating acne. Papaya-based skincare products can help to unclog pores, reduce inflammation, and kill acne-causing bacteria. Additionally, papaya contains vitamin C, which helps to fade acne scars and dark spots. Papaya can soothe sunburned skinPapaya contains enzymes that can help to soothe and heal sunburned skin. Applying papaya-based skincare products to sunburned skin can help to reduce inflammation, redness, and pain. Additionally, the hydrating properties of papaya can help to restore moisture to sun-damaged skin. Incorporating Papaya into your Skincare Routine Now that you know the benefits of papaya for skin, it’s time to incorporate it into your skincare routine. Here are some ways you can use papaya for glowing, healthy-looking skin: Papaya face maskYou can make a DIY papaya face mask by mashing up a ripe papaya and applying it to your face. Leave the mask on for 15-20 minutes, then rinse off with warm water. This mask will help to exfoliate dead…

Dewy All Day Tips To Keep Your Makeup Fresh And Glowing
Dewy All Day: Tips to Keep Your Makeup Fresh and Glowing

Dewy makeup has become a popular trend, providing a fresh and radiant glow to the skin. However, maintaining that luminous look throughout the day can be a challenge, especially if you have oily skin or live in a humid climate. In this article, we will share effective tips and techniques to help you keep your dewy makeup going strong from morning to night. From prepping your skin to setting your makeup, we will guide you through the steps necessary to achieve long-lasting, flawless dewy makeup. Prep Your Skin:Proper skincare preparation is essential for achieving long-lasting dewy makeup. Start by cleansing your face to remove any dirt, oil, or impurities. Follow up with a lightweight moisturizer that hydrates your skin without making it greasy. Allow the moisturizer to absorb fully before moving on to the next step. Additionally, applying a primer formulated for dewy finishes can create a smooth canvas for your makeup and help it adhere better throughout the day. Choose the Right Foundation:When aiming for a dewy look, selecting the right foundation is crucial. Opt for foundations with a luminous or dewy finish that provide a natural glow to your skin. Avoid matte or oil-control foundations, as they can give a flat appearance. Consider using lightweight formulas that allow your skin to breathe while still providing coverage. Additionally, look for long-wearing foundations that are designed to stay put and maintain a dewy finish for extended periods. Strategic Powder Application:While powder helps control shine, using it sparingly is key to maintaining a dewy look. Focus on applying powder only to areas prone to excessive oiliness, such as the T-zone. Use a finely milled, translucent powder and a fluffy brush to gently dust the powder onto these areas. Avoid applying powder all over the face, as it can mattify the skin and diminish the dewy effect. The strategic application of powder helps set your makeup without compromising its luminosity. Use Cream or Liquid Highlighters:Highlighters are essential for achieving a dewy look. Opt for cream or liquid highlighters instead of powder formulas, as they blend seamlessly into the skin and provide a more natural-looking glow. Apply the highlighter to the high points of your face, such as the cheekbones, bridge of the nose, and cupid’s bow. Gently blend it in with your fingertips or a damp beauty sponge for a radiant and dewy finish. Set Your Makeup:To ensure your dewy makeup lasts all day, setting it with the right products is crucial. Instead of using a traditional setting powder, opt for a setting spray that provides a dewy or hydrating finish. Mist the setting spray over your entire face after completing your makeup application. This will help lock in your makeup, melt all the products together, and give a luminous boost to your skin. Carry a travel-size setting spray in your bag for touch-ups throughout the day to revive the dewy look. Blotting Papers for Oil Control:If you have oily skin, it’s common for excess oil to interfere with your dewy makeup. Keep blotting papers handy to absorb any excess oil without disturbing your…

Mastering The Art Of Henna Hair Dye
Mastering the Art of Contouring: Tips and Tricks

The art of contouring has taken the beauty world by storm, offering a technique to enhance and define facial features like never before. This guide breaks down the steps, tips, and tricks to master contouring, transforming your makeup routine and elevating your look to new heights. The Basics of Contouring What is Contouring? Contouring is a makeup technique used to define, enhance, and sculpt the natural features of the face through strategic application of makeup. Tools You Will Need Discover the essential tools for contouring, including brushes, sponges, and the types of makeup best suited for the task. Understanding Face Shapes Identifying Your Face Shape Learn how to identify your face shape to tailor your contouring technique for the most flattering results. Contouring for Each Face Shape Detailed tips on contouring for round, oval, square, heart, and diamond-shaped faces, ensuring every reader can achieve their best look. Step-by-Step Guide to Contouring Preparing Your Skin The importance of a clean, moisturized base for seamless makeup application. Mapping Your Face Guidance on how to map the areas of your face for contouring, highlighting the regions that will help achieve a balanced and defined look. Blending Techniques Techniques and tips for blending contour makeup flawlessly, avoiding harsh lines for a natural finish. Highlighting: The Perfect Pair to Contouring Areas to Highlight Identify the areas of your face that should be highlighted to complement your contouring, enhancing your facial structure effectively. Choosing Highlighter Advice on selecting the right highlighter shade and formula for your skin tone and type. Contouring with Different Products Cream vs. Powder Contour Pros and cons of cream and powder contour products, helping you decide which is best for your skin type and desired finish. How to Choose Tips on choosing the right shades and formulas for your specific contouring needs. Advanced Contouring Techniques Nose Contouring Step-by-step guide to contouring your nose, making it appear slimmer or more defined. Jawline and Neck Contouring How to contour the jawline and neck for a more sculpted and defined appearance. Common Contouring Mistakes and How to Avoid Them Too Dark or Too Light How to select contour shades that match your skin tone to avoid a muddy or overly dramatic look. Mismatched Undertones Understanding the importance of matching the undertone of your contour product to your skin to ensure a natural look. Tips and Tricks for a Natural Contour Blending is Key Emphasize the importance of blending for a seamless, natural contour that enhances rather than overshadows your natural beauty. Less is More Advice on starting with a light hand and building up product gradually to avoid over-contouring. Maintaining Your Contour Throughout the Day Setting Your Contour Recommendations for setting sprays and powders to keep your contour in place all day. Touch-up Tips Quick fixes and touch-up tips for maintaining your contour, even on the go. Mastering the art of contouring can dramatically enhance your makeup routine, offering a sculpted, polished look that highlights your best features. With practice, the right tools, and a bit of creativity, anyone can become proficient in this transformative makeup technique….

The Myth And Reality: Does Toothpaste Get Rid Of Pimples?
The Myth and Reality: Does Toothpaste Get Rid of Pimples?

Dealing with pimples, those unwelcome guests on your skin, can be frustrating and often prompts people to seek quick solutions. One such age-old remedy that has circulated for decades is the use of toothpaste to banish pimples overnight. It’s a notion that’s been passed down through generations, seemingly offering a simple and cost-effective solution to a common skin concern. But does toothpaste genuinely get rid of pimples, or is it just another skincare myth? In this comprehensive guide, we’ll explore the science behind acne, the ingredients in toothpaste, whether toothpaste can help with pimples, potential risks and drawbacks, and better alternatives for pimple management. Understanding Acne: The Basics Before delving into the toothpaste-pimple connection, let’s first understand what acne is and how it forms. The Science Behind Toothpaste Now, let’s take a closer look at toothpaste and its ingredients. Toothpaste is designed for oral hygiene and contains various components meant to clean and protect your teeth and gums. Common ingredients found in toothpaste include: The Toothpaste-Pimple Connection: Myth or Reality? The idea that toothpaste can help get rid of pimples likely stems from the perception that toothpaste contains ingredients with drying or antibacterial properties. However, the reality is more complex. The Risks and Drawbacks of Using Toothpaste on Pimples Before considering toothpaste as a pimple remedy, it’s crucial to understand the potential risks and drawbacks: Better Alternatives for Pimple Management If you’re dealing with pimples and seeking effective ways to manage them, there are several better alternatives to toothpaste: While the notion of using toothpaste as a quick fix for pimples has circulated for years, it’s important to approach this remedy with caution. Toothpaste is not formulated for skincare and can lead to skin irritation, redness, and discomfort. There are more effective and safer alternatives for managing pimples, ranging from over-the-counter acne products to prescription medications and healthy skincare habits. Remember that the effectiveness of pimple treatments can vary from person to person, and it may take time to find the best approach for your unique skin. Patience, consistency, and a gentle approach to skincare are key to achieving and maintaining clear, healthy skin. If your acne is severe or persistent, seeking the guidance of a dermatologist is advisable to develop a personalized treatment plan tailored to your needs.