Effortlessly Chic: Mastering the Perfect Ponytail for Any Occasion

Effortlessly Chic: Mastering the Perfect Ponytail for Any Occasion

The ponytail, a timeless and versatile hairstyle, has graced the heads of countless individuals throughout history. From casual outings to formal events, the simplicity and elegance of a well-executed ponytail can enhance your overall appearance and make you feel confident and put-together. In this comprehensive guide, we will delve into the art of mastering the perfect ponytail, exploring various techniques, tips, and tricks to suit different hair types and occasions. Additionally, I’ll provide personal comments and insights to help you achieve a stunning look effortlessly.

  1. The Foundation: Preparing Your Hair
    A perfect ponytail starts with healthy, well-groomed hair. Before styling, make sure your hair is clean, conditioned, and free from tangles. A pre-styling step you can take is to apply a lightweight hair serum or leave-in conditioner to smoothen the strands and prevent frizz.

Maintaining the health of your hair is crucial for any hairstyle. Regular trims, proper conditioning, and minimal heat styling will contribute to a flawless ponytail.

  1. Finding Your Ideal Ponytail Placement
    The placement of your ponytail can significantly impact your overall look. For a classic and polished appearance, opt for a mid-height ponytail, situated at the back of your head. For a youthful and relaxed vibe, consider a high ponytail placed slightly above the crown. Alternatively, a low ponytail exudes sophistication and works well for formal events.

Experimenting with different placement options allows you to tailor the ponytail to your unique facial features and personal style.

  1. Sleek and Smooth Ponytail
    For a refined and sleek look, gather your hair with a boar bristle brush to minimize flyaways and create a clean line. Secure the ponytail with a snag-free elastic band, making sure it sits comfortably without pulling or causing tension on the hair.

The choice of hair tie matters – opt for soft fabric or elastic bands to avoid hair damage and breakage.

  1. Voluminous Ponytail
    To achieve a voluminous ponytail, use a volumizing mousse or dry shampoo to add texture and lift at the roots. Teasing the crown gently can also create the illusion of fuller hair. Once you’ve achieved the desired volume, gather your hair into a mid or high ponytail and secure it with an elastic band.

Embracing volume can add a touch of drama and glamour to your ponytail, making it perfect for special occasions.

  1. The Wrap-Around Ponytail
    The wrap-around ponytail is an elegant variation that conceals the hair tie for a polished finish. After securing your ponytail with an elastic band, take a small section of hair from the bottom and wrap it around the base of the ponytail, securing it discreetly with a bobby pin.

The wrap-around ponytail is an excellent choice for formal events or when you want to add a sophisticated touch to your look.

  1. Messy-Chic Ponytail
    For a laid-back and effortlessly stylish ponytail, embrace the messy-chic trend. Start by loosely gathering your hair into a low ponytail, leaving a few face-framing strands loose. Gently tug on the hair on top of the crown to create subtle height and texture.

The messy-chic ponytail is perfect for casual outings and can effortlessly transition into an evening look with the right outfit and makeup.

In the world of hairstyling, the clip-in ponytail has emerged as a game-changer for those seeking a quick and effortless updo. Whether you’re running late, have limited time for styling, or simply want to add volume and length to your natural hair, the clip-in ponytail is your ultimate go-to solution. In this article, we will explore the benefits and versatility of clip-in ponytails, offering insights into their application, maintenance, and styling options to help you achieve a flawless updo in minutes.

Effortlessly Chic: Mastering the Perfect Ponytail for Any Occasion

Instant Length and Volume:
One of the most significant advantages of the clip-in ponytail is its ability to add instant length and volume to your natural hair. With a variety of lengths and thicknesses available, you can choose a clip-in ponytail that perfectly matches your hair, seamlessly blending it for a natural look.

Effortless Application:
Applying a clip-in ponytail is a breeze, even for those with minimal hairstyling experience. Simply gather your natural hair into a ponytail and secure it with an elastic band. Then, clip the extension ponytail onto your hair by positioning it over the base of your natural ponytail. Secure the clips in place, and you’re ready to go!

Time-Saving Styling:
For busy individuals or last-minute occasions, the clip-in ponytail is a lifesaver. Instead of spending time on intricate updos, you can effortlessly create a polished look in seconds. Whether you’re heading to work, a party, or a date night, the clip-in ponytail ensures you look fabulous with minimal effort.

Various Styling Options:
The clip-in ponytail is incredibly versatile, allowing you to experiment with different styles and textures. From sleek and straight to curly or wavy, you can easily transform your clip-in ponytail to suit any event or mood. Additionally, you can incorporate braids or twists into your natural hair before attaching the clip-in ponytail for added flair.

Comfort and Security:
Concerned about the clip-in ponytail staying in place? Fear not! Quality clip-in ponytails come with secure clips that keep the extension firmly attached to your hair throughout the day or evening. Additionally, the lightweight and breathable design ensures comfort, so you can enjoy your updo without feeling weighed down.

Low Maintenance:
Unlike permanent hair extensions, clip-in ponytails require minimal maintenance. After each use, gently brush the extension to remove any tangles and store it properly in a dust-free bag. Washing and conditioning the clip-in ponytail periodically will help maintain its softness and shine.

The clip-in ponytail is a true blessing for those seeking a quick and easy updo solution. With its ability to add instant length and volume, effortless application, and versatility in styling options, the clip-in ponytail is a hairstyling must-have. Whether you want to achieve a sleek and sophisticated look or embrace loose curls for a carefree vibe, the clip-in ponytail allows you to experiment with various styles effortlessly. Embrace this transformative accessory and experience the joy of a flawless updo in mere minutes!

Mastering the perfect ponytail requires a blend of artistry and technique. By understanding the various styling options, tailoring the placement to your features, and selecting the right products and tools, you can effortlessly achieve a stunning ponytail for any occasion. Remember, practice makes perfect, and don’t be afraid to experiment with different styles to find the one that suits you best. With the knowledge gained from this guide and a little creativity, you’ll be ready to rock the ponytail with confidence and flair. Happy styling!

Simple Ways To Get Rid Of Facial Bloating
Deflate and Refresh: Simple Ways to Reduce Facial Bloating

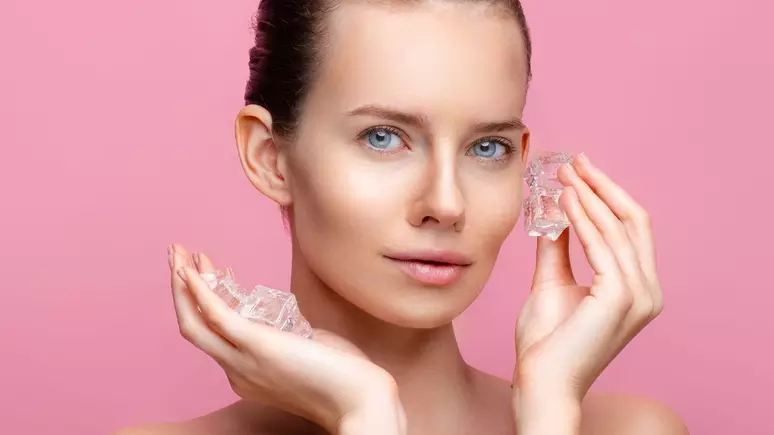
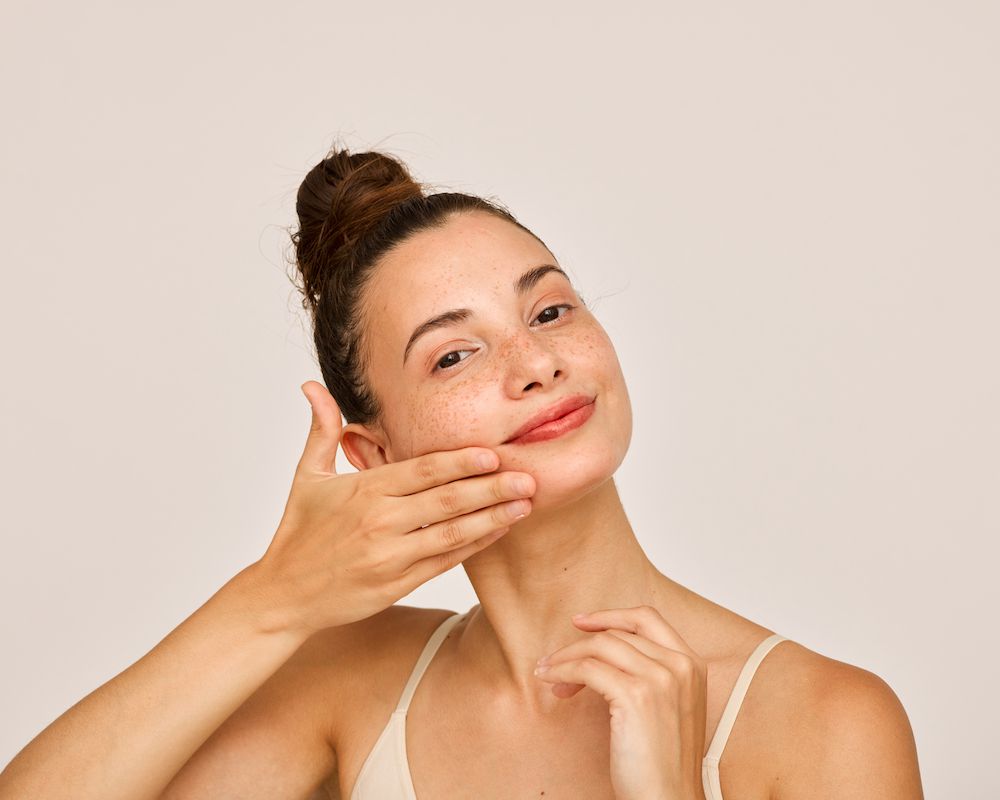
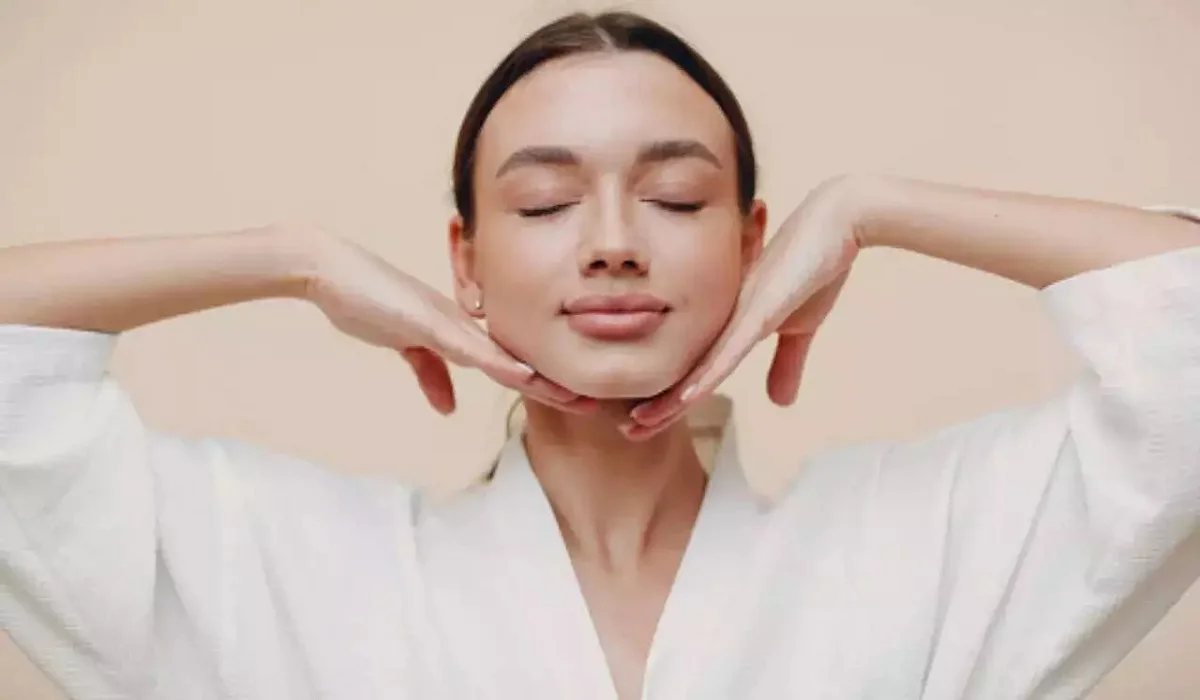
Facial bloating can be a frustrating and uncomfortable experience that affects our appearance and self-confidence. It is often caused by factors such as water retention, poor digestion, inflammation, or certain lifestyle habits. Fortunately, there are simple and effective ways to alleviate facial bloating and restore a more contoured and refreshed appearance. In this article, we will explore various techniques and lifestyle adjustments that can help reduce facial bloating and promote a healthier, more balanced complexion. Stay Hydrated:Contrary to popular belief, drinking an adequate amount of water can actually help reduce facial bloating. Proper hydration helps to flush out toxins, maintain optimal fluid balance, and prevent water retention. Aim to drink at least 8 glasses of water per day and include hydrating foods like cucumbers, watermelon, and citrus fruits in your diet. Limit Sodium Intake:Excessive sodium consumption can contribute to water retention and facial bloating. Avoid highly processed and salty foods, and opt for fresh, whole foods instead. Cooking at home allows you to control the amount of salt in your meals. Incorporate herbs and spices to enhance flavor without relying on excessive salt. Follow a Balanced Diet:A healthy, balanced diet plays a vital role in reducing facial bloating. Incorporate plenty of fresh fruits, vegetables, whole grains, and lean proteins into your meals. These nutrient-dense foods provide essential vitamins and minerals while supporting healthy digestion and reducing inflammation. Minimize Alcohol and Caffeine:Alcohol and caffeine can dehydrate the body and lead to facial bloating. Limit your consumption of alcohol and opt for non-alcoholic beverages whenever possible. Reduce your intake of caffeinated drinks like coffee and tea, or consider switching to herbal teas that have anti-inflammatory properties. Practice Facial Massage:Gentle facial massage can stimulate lymphatic drainage and reduce fluid retention, helping to relieve facial bloating. Use your fingertips to apply light pressure in circular motions, starting from the center of your face and moving outward. Focus on areas prone to bloating, such as the cheeks, jawline, and under-eye area. Apply a Cool Compress:A cool compress can help constrict blood vessels and reduce facial puffiness. Place a clean washcloth soaked in cold water or chilled cucumber slices on your face for a few minutes. The cool temperature will help reduce inflammation and promote a more refreshed appearance. Reduce Stress:Stress can contribute to facial bloating by triggering hormonal imbalances and affecting digestion. Practice stress-management techniques like deep breathing exercises, meditation, or engaging in activities that help you relax. Prioritize self-care and get enough sleep to support overall well-being and reduce facial puffiness. Avoid Chewing Gum:Chewing gum can lead to swallowing air, which can contribute to facial bloating. Opt for mints or natural breath fresheners instead. If you need to chew gum, choose sugar-free options and limit your intake. Improve Digestion:Promoting healthy digestion is essential for reducing facial bloating. Eat slowly, chew your food thoroughly, and avoid overeating. Consider incorporating probiotic-rich foods like yogurt, kefir, and sauerkraut into your diet to support a healthy gut and improve digestion. Consider Facial Exercises:Facial exercises can help strengthen and tone the muscles in your face, reducing the appearance of bloating. Try…

Unveiling The Jelly Skin C Beauty Technique: Radiant And Hydrated Complexion
Unveiling the Jelly Skin C-Beauty Technique: Radiant and Hydrated Complexion

The world of skincare is constantly evolving, introducing innovative techniques and trends from different corners of the globe. One such trend that has gained significant popularity is the Jelly Skin C-Beauty Technique. Originating from China, this skincare approach focuses on achieving a radiant and hydrated complexion reminiscent of the plump and translucent appearance of jelly. In this article, we will delve into the concept of Jelly Skin, explore the steps involved in the C-Beauty Technique, and discuss the key benefits it offers for your skin. Understanding Jelly Skin:Jelly Skin refers to a dewy, translucent, and hydrated complexion that appears plump, supple, and radiant. Inspired by the smooth and bouncy texture of jelly, this skincare concept aims to achieve a youthful and healthy-looking appearance. Jelly Skin prioritizes hydration and focuses on enhancing the skin’s natural glow by nourishing it from within. The C-Beauty Technique:The C-Beauty Technique encompasses a multi-step skincare routine designed to achieve Jelly Skin. It involves a combination of meticulous cleansing, intensive hydration, and targeted treatments to promote a translucent and luminous complexion. Let’s explore the key steps involved in the C-Beauty Technique: a. Double Cleansing: The C-Beauty Technique begins with a thorough double cleansing method, using an oil-based cleanser to remove makeup, SPF, and sebum, followed by a water-based cleanser to eliminate any remaining impurities. Double cleansing ensures a clean canvas for subsequent skincare steps. b. Gentle Exfoliation: Exfoliation is crucial in the Jelly Skin C-Beauty Technique, but it focuses on gentle exfoliation rather than harsh scrubs. Enzyme-based or chemical exfoliators are preferred to remove dead skin cells and promote a smoother texture without causing irritation or stripping the skin. c. Hydrating Toner: Hydration takes center stage in the C-Beauty Technique. A hydrating toner, often referred to as an essence or a lotion, is applied to infuse the skin with moisture and improve its ability to retain hydration. This step helps to plump the skin, creating a bouncy and resilient appearance. d. Essence and Serums: Next, lightweight essences and serums are used to address specific skin concerns. These products contain concentrated active ingredients that target issues such as uneven skin tone, dullness, or fine lines. They penetrate deeply into the skin, promoting clarity and enhancing overall radiance. e. Moisturizing and Sealing: Moisturization is essential in achieving Jelly Skin. A rich moisturizer is applied to replenish and lock in moisture, providing long-lasting hydration and nourishment. Some C-Beauty enthusiasts also incorporate a sealing step by using a facial oil or an occlusive product to create a protective barrier and prevent moisture loss. f. Sun Protection: The C-Beauty Technique emphasizes the importance of sun protection to maintain skin health and prevent sun damage. A broad-spectrum sunscreen with a high SPF is applied as a final step to shield the skin from harmful UV rays. Key Benefits of the Jelly Skin C-Beauty Technique:The Jelly Skin C-Beauty Technique offers several key benefits for your skin: a. Intense Hydration: By prioritizing hydration, the technique helps to restore the skin’s moisture balance, resulting in a plump and supple complexion. Well-hydrated skin appears more youthful and vibrant. b….

Mastering The Art Of Crimping: A Comprehensive Guide To Correct Usage
Mastering the Art of Crimping: A Comprehensive Guide to Correct Usage

Crimping is a fundamental technique used across various industries and DIY projects to create secure and reliable connections between wires, cables, or components. Whether you’re working with electronics, automotive repairs, or crafting jewelry, understanding how to use a crimper correctly is essential to ensure the integrity and longevity of your connections. This comprehensive guide will walk you through the step-by-step process of using a crimper effectively, along with essential tips and best practices. Understanding Crimping Crimping is the process of mechanically compressing a connector or terminal onto a wire to establish a secure electrical connection or physical attachment. This technique ensures a strong bond that resists vibrations, corrosion, and other environmental factors. Crimping is commonly used in applications such as electrical wiring, network cables, automotive wiring harnesses, and more. Using the right tools and techniques is crucial to achieving consistent and reliable results. Selecting the Right Crimper Before you begin, it’s vital to choose the right crimper for your specific application. There are various types of crimpers available, each designed for different connectors and wire sizes. Common types of crimpers include: Wire Crimpers: Used for electrical connections and available in various sizes to accommodate different wire gauges. Coaxial Cable Crimpers: Designed for attaching connectors to coaxial cables, commonly used in telecommunications and audio/video installations. Terminal Crimpers: Used to secure terminals onto wires, often found in automotive and industrial applications. Modular Crimpers: Specifically designed for Ethernet cables and connectors, ensuring accurate terminations in networking projects. Step-by-Step Guide to Proper Crimping Follow these steps to ensure you’re using a crimper correctly: Prepare the Wire: Strip the insulation off the wire end to expose the bare conductor. The length of exposed wire should match the length of the connector’s barrel or terminal. Prepare the Connector: Insert the stripped wire end into the appropriate terminal or connector. Make sure the wire fits snugly, without any excess sticking out. Position the Crimper: Place the connector and wire into the appropriate slot or cavity of the crimper. Ensure that the connector is properly aligned with the crimping jaws. Apply Pressure: Squeeze the crimper’s handles firmly and evenly. The tool’s jaws will compress the connector, creating a strong and secure connection. Avoid using excessive force, as it could deform or damage the connector. Inspect the Crimp: After crimping, inspect the connection visually. The crimped terminal should tightly grip the wire without any gaps. Ensure that the wire is properly crimped and that the insulation is not damaged. Tips for Successful Crimping Use High-Quality Connectors: Invest in reliable connectors and terminals from reputable manufacturers. Quality components are essential for achieving long-lasting and reliable connections. Choose the Right Wire Size: Match the wire gauge with the appropriate terminal size. Using undersized or oversized connectors can result in poor connections and potential safety hazards. Practice Proper Technique: Maintain steady pressure while crimping, and avoid jerky or uneven movements. Consistent pressure ensures a uniform and secure connection. Perform a Pull Test: After crimping, perform a gentle tug on the wire to ensure it’s securely attached to the connector. If the wire easily detaches,…

The Benefits And Risks Of Using Salicylic Acid For Skincare Routine
The Benefits and Risks of Using Salicylic Acid for Skincare Routine

Salicylic acid is a type of beta-hydroxy acid that is commonly used in skincare products to treat various skin conditions, including acne, blackheads, and whiteheads. It works by penetrating deep into the pores to dissolve and exfoliate dead skin cells, oil, and other impurities, thereby preventing clogged pores and reducing inflammation. In this article, we will discuss the benefits and risks of using salicylic acid for skincare routine. Benefits of Salicylic Acid for Skincare Routine Acne TreatmentSalicylic acid is one of the most effective ingredients for treating acne. It helps to unclog pores by removing dead skin cells, excess oil, and other impurities, thereby reducing the occurrence of acne. Salicylic acid also has anti-inflammatory properties that help to reduce redness and swelling associated with acne. Blackhead and Whitehead TreatmentBlackheads and whiteheads are caused by clogged pores. Salicylic acid helps to penetrate deep into the pores and dissolve the impurities that cause these types of blemishes. Regular use of salicylic acid can help to prevent the formation of blackheads and whiteheads. ExfoliationSalicylic acid is a natural exfoliant that helps to remove dead skin cells, leaving the skin looking brighter and smoother. It also helps to stimulate cell renewal, which can improve the texture and tone of the skin. Anti-aging BenefitsSalicylic acid can help to reduce the appearance of fine lines and wrinkles. It works by stimulating collagen production, which helps to improve the elasticity and firmness of the skin. Reduces the Appearance of PoresSalicylic acid can help to reduce the appearance of pores by unclogging them and removing excess oil and impurities. This can help to make the skin look smoother and more even. Risks of Salicylic Acid for Skincare Routine Skin IrritationSalicylic acid can cause skin irritation, especially if used in high concentrations or if you have sensitive skin. Symptoms of skin irritation may include redness, itching, and burning. It is important to start with a low concentration and gradually increase as tolerated. Dryness and PeelingSalicylic acid can cause dryness and peeling, especially if used in high concentrations or if you have dry or sensitive skin. It is important to use a moisturizer after applying salicylic acid to prevent dryness and peeling. Sun SensitivitySalicylic acid can make the skin more sensitive to the sun. It is important to use a sunscreen with a high SPF when using salicylic acid. Pregnancy and BreastfeedingSalicylic acid should be avoided during pregnancy and breastfeeding. There is a risk of harm to the developing fetus or infant. How to Use Salicylic Acid for Skincare Routine Start with a low concentration: If you are new to salicylic acid, it is important to start with a low concentration and gradually increase as tolerated. A concentration of 0.5% to 2% is usually effective for most people. Use it once or twice a week: Salicylic acid should be used once or twice a week, depending on your skin type and the concentration of the product. Use it at night: Salicylic acid can make the skin more sensitive to the sun, so it is best to use it at night. This will…

Unveiling The Secrets Of Face Yoga The Ultimate Guide To A Natural Facelift
Unveiling the Secrets of Face Yoga: The Ultimate Guide to a Natural Facelift

In an era where the quest for eternal youth and beauty seems endless, an ancient practice has been re-emerging as a beacon of hope for many: Face Yoga. This holistic approach to beauty combines the grace of yoga with the science of facial anatomy, offering a natural and non-invasive method to rejuvenate and tone the facial muscles. But what exactly is Face Yoga, and how does it work? Let’s embark on a journey to uncover the secrets behind this transformative practice. Origins and Evolution of Face Yoga Historical Background The roots of Face Yoga trace back to ancient wellness practices that emphasized the balance between mind, body, and spirit. However, it’s the recent adaptation of these principles for facial health that has sparked global interest. Recent Popularity In the digital age, Face Yoga has gained momentum through social media and the endorsements of wellness influencers, positioning it as a trendy, accessible, and effective regimen for facial care. Principles of Face Yoga Key Concepts At its core, Face Yoga is built on the premise that just like any other part of the body, the facial muscles can be trained and strengthened through regular exercise. How It Works By performing specific movements and expressions, Face Yoga aims to improve blood circulation, stimulate collagen production, and promote the elasticity of the skin, potentially leading to a more youthful appearance. Benefits of Face Yoga Physical Benefits Practitioners often report improvements in the tone and texture of their skin, reduction of wrinkles, and a more defined facial structure as some of the tangible benefits of Face Yoga. Mental and Emotional Benefits Beyond physical enhancements, this practice also encourages mindfulness, stress reduction, and a deeper connection with oneself, contributing to overall well-being. Common Face Yoga Techniques Basic Exercises Learn about foundational exercises designed to target specific areas, such as the forehead, eyes, cheeks, and neck. Advanced Techniques For those looking to deepen their practice, advanced techniques offer more intense workouts for facial rejuvenation. How to Incorporate Face Yoga into Your Routine Daily Practice Tips Incorporating Face Yoga into your daily routine can be simple and requires minimal time, making it a convenient addition to your self-care regimen. Incorporating with Skincare Combining Face Yoga with your existing skincare routine can enhance the absorption of products and improve their efficacy. Scientific Evidence Supporting Face Yoga Studies and Research Findings While anecdotal evidence abounds, scientific studies have begun to explore and validate the effectiveness of Face Yoga in facial toning and anti-aging. What is Face Yoga? Delving into the essence of Face Yoga reveals its potential as a game-changer in natural beauty and wellness, offering a holistic alternative to conventional anti-aging methods. Personal Testimonials and Success Stories Before and After Scenarios Real-life testimonials provide compelling evidence of the transformative impact Face Yoga can have on one’s appearance and confidence. Face Yoga for Different Age Groups Young Adults Explore how younger individuals can use Face Yoga as a preventative measure to delay the signs of aging. Middle-aged For those experiencing the natural changes that come with aging, Face Yoga offers techniques to…

Combination Skin: What It Is And How To Care For It
Combination Skin: What it is and How to Care for It

Combination skin is a skin type that is characterized by having both oily and dry areas on the face. People with combination skin often have an oily T-zone (forehead, nose, and chin) and dry cheeks. This can make it challenging to find the right skincare routine that balances the needs of both oily and dry areas. In this article, we will explore what combination skin is, its causes, and how to care for it. What is Combination Skin? Combination skin is a skin type that is a combination of oily and dry skin. This means that some areas of the face, typically the T-zone, produce excess oil, while other areas, usually the cheeks, are dry and flaky. Combination skin can be genetic or caused by environmental factors such as weather, pollution, and harsh skincare products. What Causes Combination Skin? The causes of combination skin are not fully understood, but genetics play a significant role. People with combination skin have a genetic predisposition to producing excess oil in the T-zone, which is then mixed with dryness in other areas of the face. Hormonal changes can also contribute to combination skin, particularly during puberty, pregnancy, and menopause. Environmental factors such as weather, pollution, and harsh skincare products can also cause combination skin. Exposure to extreme temperatures, UV radiation, and pollution can damage the skin’s natural barrier and lead to dehydration and oil overproduction. Using skincare products that are too harsh or contain alcohol and fragrances can also strip the skin of its natural oils and cause dryness and irritation. How to Care for Combination Skin Caring for combination skin requires a skincare routine that addresses both oily and dry areas of the face. The following steps can help to balance the skin’s needs and maintain healthy skin: Cleanse: Start by cleansing your face twice a day with a gentle, pH-balanced cleanser that is formulated for combination skin. Avoid cleansers that contain harsh ingredients like sulfates, alcohol, and fragrances, as these can strip the skin of its natural oils and cause dryness and irritation. Exfoliate: Exfoliation is an essential step in any skincare routine, but it is particularly important for combination skin. Exfoliating helps to remove dead skin cells, unclog pores, and promote cell turnover, which can help to reduce oil production and improve skin texture. Use a gentle exfoliator once or twice a week, depending on your skin’s sensitivity. Moisturize: Moisturizing is crucial for combination skin, as it helps to balance the skin’s oil and water content. Use a lightweight, non-comedogenic moisturizer that is formulated for combination skin. Look for ingredients like hyaluronic acid, which can help to hydrate the skin without adding excess oil. Treat: Treat any problem areas on the face, such as acne or dark spots, with targeted skincare products. Look for ingredients like salicylic acid, benzoyl peroxide, and vitamin C, which can help to unclog pores, reduce inflammation, and brighten the skin. Sun Protection: Protect your skin from UV damage by using a broad-spectrum sunscreen with at least SPF 30 every day, even if it’s cloudy outside. Look for sunscreen…

K Beauty's 10 Step Routine The Secret To Glowing, Healthy Skin 1
K-Beauty’s 10-Step Routine: The Secret to Glowing, Healthy Skin

K-Beauty (Korean Beauty), as the term is popularly known, has taken the skincare world by storm over recent years. What distinguishes it is its dedication to holistic and comprehensive approaches. A signature aspect of this regime is a 10-step skincare routine aimed at creating radiant and healthy skin through carefully chosen steps – these steps must also offer benefits tailored to each unique person’s specific skin needs. In this article we’ll look deeper at this trend’s components before exploring its many applications to our individual skincare needs in depth! Step 1: Oil Based Cleanser – Initial Step Beginning the 10-step routine begins with cleansing using an oil-based cleanser to effectively remove makeup, sunscreen and impurities that have built up throughout your day. Oil-based cleansers help break down oils on skin for an in-depth yet gentle clean that leaves it looking refreshed and primed to take on additional steps of this routine. They’re suitable for all skin types – perfect to get you going for step two of this regiment. Step 2: Water-Based Cleanser for an Improved Double Cleanse After performing your initial cleanse with soap-free cleansing products, use water-based cleaners to perform an in-depth second cleanse using water-based cleansers to further extract any sweat, dirt or impurities left behind from previous cleansing steps. A double cleanse ensures your skin remains flawless so as to be ready to absorb subsequent skincare products effectively; especially effective if dealing with oily or acne prone skin types. Step 3 – Exfoliation to Kick Start the Body’s Health Improvement Process Exfoliation is key to unclogging dead skin cells and stimulating renewal. K-Beauty recommends exfoliation 2-3 times weekly using physical scrubs (scrubs) or chemical exfoliants such as AHAs/BHAs to achieve radiant results and reveal fresh, youthful complexions. Step 4: Toners to Balance the pH Level of Skin Toning is an essential step to maintaining optimal pH levels after cleansing your skin, helping restore and replenish hydration and prepare it for treatments like Botox(r). Look out for toners made with ingredients like hyaluronic acid. Step 5 – Essence for intensive Hydration and Nourishment Essences are lightweight hydrating liquids designed to provide intensive skin moisture and nourishment, often considered the cornerstone of K-Beauty routines designed to target specific issues like fine lines and dullness. Essences penetrate deeply into skin tissue for improved absorption by subsequent products. Step 6: Use of Serum in Targeted Treatments Serums are powerful elixirs designed to address specific skin concerns such as wrinkles, pigmentation and uneven texture. These concentrated treatments work deep within the skin by infusing active ingredients like vitamin C, hyaluronic acid or peptides directly into its layers – whatever best meets your individual needs! Step 7: Sheet Mask For an Exclusive Treat Sheet masks have become an icon of K-Beauty culture. Made of cloth soaked in serum-like essence, sheet masks provide intensive hydration and nourishment while simultaneously treating specific skin concerns. Sheet mask steps allow you to relax as your skin absorbs all its needed nourishment! Step 8: Eye Cream for Delicate Skin Eye area skin is particularly fragile and susceptible to early…

12 More Makeup Mistakes That Might Be Making You Look Older

Makeup is a powerful tool that, when used correctly, can enhance natural beauty, conceal imperfections, and even take years off your appearance. However, certain makeup practices can have the opposite effect, adding years to your face instead of subtracting them. This article dives deep into 12 more makeup mistakes that might be making you look older and provides expert advice on how to avoid them for a fresher, more youthful look. Understanding Makeup and Aging The relationship between makeup and perceived age is intricate. While makeup has the potential to highlight our best features, certain application techniques and product choices can inadvertently age us. Factors such as texture, color, and formula play significant roles in how makeup interacts with mature skin. It’s crucial to adapt our makeup strategies as we age to complement our changing skin, rather than emphasize the signs of aging. Mistake #1: Skipping Primer The Role of Primer in Makeup Longevity Primer is essential for creating a smooth base, filling in fine lines and enlarged pores, which become more prominent as skin ages. A silicone-based primer, for example, can blur imperfections and provide a seamless surface for the rest of your makeup, ensuring it lasts longer without settling into wrinkles. Recommendations for Mature Skin Look for hydrating primers that contain ingredients like hyaluronic acid to add moisture to the skin, which helps in achieving a plump, youthful appearance. Avoid mattifying primers, as they can dry out the skin and make fine lines more visible. Mistake #2: Overusing Powder Powder’s Aging Effect Excessive use of powder, especially heavy or mattifying formulas, can settle into fine lines and emphasize wrinkles, making the skin look older. Powder absorbs moisture, and on mature skin, it can lead to a cakey appearance. Alternative Setting Options Opt for translucent setting powders applied sparingly with a fluffy brush to areas that tend to get oily, like the T-zone. Consider switching to liquid or cream-based products that provide a dewy finish, as they help maintain skin’s natural glow. Mistake #3: Neglecting Eyebrow Care Importance of Full Eyebrows Eyebrows frame the face, and fuller brows are associated with youth. With age, brows can become sparse. Filling in your eyebrows subtly can lift the face and make you look younger. Eyebrow Filling Techniques Use a brow pencil or powder that matches your eyebrow color to fill in sparse areas with light, feathery strokes. Avoid harsh lines or overfilling, as this can look unnatural. Consider a tinted brow gel for a more natural look that also sets hairs in place. Mistake #4: Heavy Foundation Use Choosing the Right Foundation A heavy, matte foundation can settle into fine lines and wrinkles, highlighting them. Instead, opt for lightweight, hydrating formulas that provide coverage without the weight. Tinted moisturizers or BB creams are excellent alternatives for mature skin. Application Tips for a Natural Look Apply foundation with a damp beauty sponge to sheer out the coverage and create a more natural, skin-like finish. Focus on areas that need coverage rather than applying a thick layer over the entire face. Mistake #5: Incorrect Concealer…