Unlocking the Secrets of Luxurious Locks: A Comprehensive Guide to Using Hair Masks

Unlocking the Secrets of Luxurious Locks: A Comprehensive Guide to Using Hair Masks

Beautiful, healthy hair is a reflection of your overall well-being and self-care routine. Hair masks are a potent tool in your hair care arsenal, designed to rejuvenate, nourish, and enhance the vitality of your tresses. Whether your hair is prone to dryness, damage, frizz, or you simply want to elevate its natural shine, incorporating hair masks into your routine can make a noticeable difference. This guide will take you through the ins and outs of using hair masks effectively to achieve luscious locks that turn heads.

Understanding Hair Masks

Hair masks are intensive treatments formulated to address specific hair concerns. They typically contain a higher concentration of nourishing ingredients compared to regular conditioners, penetrating deeply into the hair shaft to provide lasting benefits. Depending on your hair type and needs, you can find a variety of hair masks, such as hydrating masks, repair masks, volumizing masks, and color-enhancing masks.

Choosing the Right Hair Mask

Before delving into the usage techniques, it’s crucial to select a hair mask that caters to your hair’s unique needs. Consider the following factors:

Hair Type: Determine whether your hair is oily, dry, normal, curly, straight, or wavy. This will help you choose a mask tailored to your specific hair type.

Hair Concerns: Identify your hair concerns, such as frizz, damage, lack of shine, or color fading. Look for masks that address these concerns with the appropriate ingredients.

Ingredients: Check the ingredient list for nourishing elements like natural oils (coconut, argan, jojoba), proteins (keratin, collagen), vitamins (vitamin E, B vitamins), and botanical extracts.

Scent and Texture: Opt for a mask with a scent and texture that appeals to you, as this can enhance your overall experience.

Prepping Your Hair for the Mask

Properly prepping your hair sets the stage for an effective mask application. Follow these steps before applying the mask:

Cleanse Your Hair: Wash your hair with a gentle shampoo to remove any dirt, product buildup, or excess oils. This ensures that the mask can penetrate deeply into the hair shaft.

Towel Dry: Gently towel dry your hair to remove excess water. Your hair should be damp, not dripping wet.

Detangle: Use a wide-tooth comb to detangle your hair, starting from the ends and working your way up. This prevents unnecessary hair breakage during the mask application.

Applying the Hair Mask

Now that your hair is prepped, it’s time to apply the mask. Follow these steps for a thorough and effective application:

Section Your Hair: Divide your hair into sections. This ensures that you distribute the mask evenly and reach all parts of your hair.


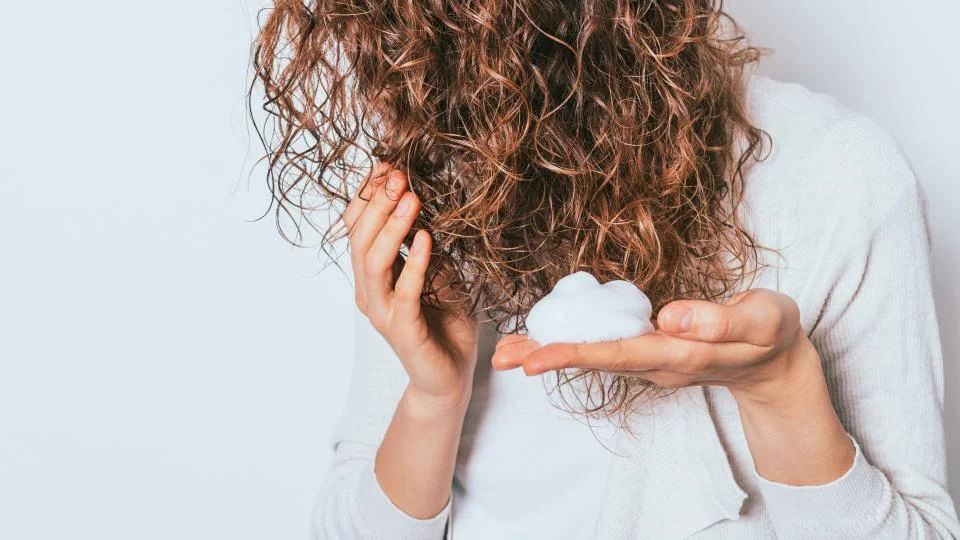
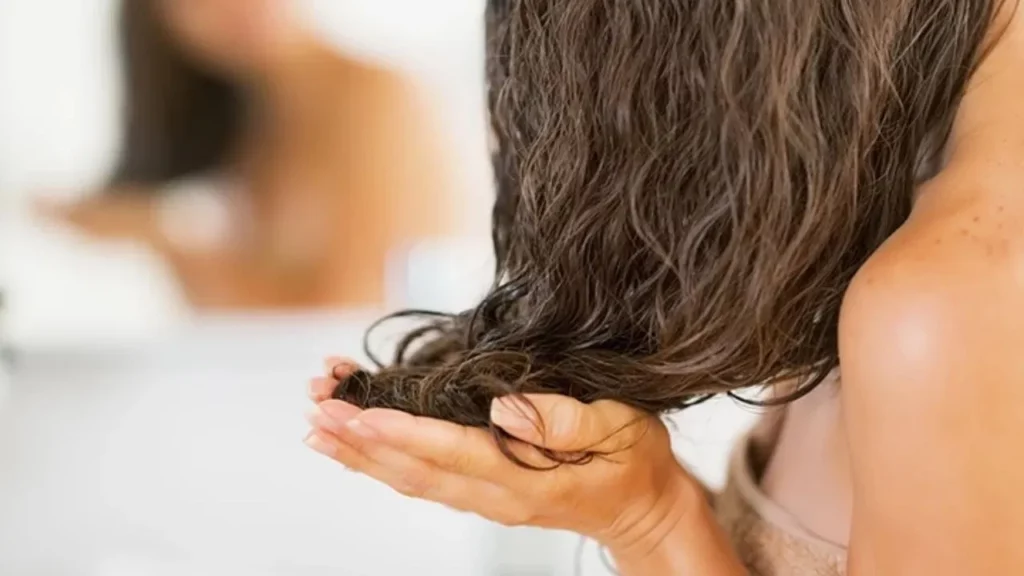
Scoop the Mask: Depending on your hair length and thickness, scoop an appropriate amount of the mask into your palm. Start with a small amount and add more if needed.

Even Distribution: Rub the mask between your palms to evenly distribute it. Then, starting from the mid-lengths of your hair, work the mask downwards towards the ends. Avoid applying the mask directly to your scalp, as this can lead to greasiness.

Massage Gently: Massage the mask into your hair using gentle, circular motions. This promotes better absorption and stimulates blood flow to the scalp.

Focus on the Ends: Concentrate the mask application on the ends of your hair, as they are the oldest and most prone to damage. If you have an oily scalp, you can apply a lightweight conditioner to the roots.

Comb Through: Once the mask is applied, use a wide-tooth comb again to ensure even distribution and detangle any remaining knots.
Unlocking the Secrets of Luxurious Locks: A Comprehensive Guide to Using Hair Masks

The Waiting Game: Allowing the Mask to Work

Hair masks require time to work their magic. Follow these guidelines for optimal results:

Read Instructions: Different masks have varying recommended application times. Always read the instructions on the packaging to determine how long to leave the mask on your hair.

Warmth Helps: To enhance the mask’s effectiveness, wrap your hair in a warm towel or use a shower cap. The warmth helps open up the hair cuticles, allowing the mask to penetrate deeper.

Relax and Wait: Use this time to relax and pamper yourself. Listen to soothing music, read a book, or simply enjoy some quiet moments.


Rinsing and Post-Mask Care

After the waiting period, it’s time to rinse off the mask and give your hair the finishing touch:

Thorough Rinse: Rinse your hair thoroughly with lukewarm water. Make sure there are no traces of the mask left in your hair.

Cool Water Finish: For an extra boost of shine, finish rinsing with a quick blast of cool water. This helps seal the hair cuticles, locking in the nourishing ingredients.

Pat Dry: Gently pat your hair dry with a clean, soft towel. Avoid rubbing your hair vigorously, as wet hair is more prone to damage.

Frequency of Use

The frequency of using a hair mask depends on your hair’s condition and the mask’s recommendations. Generally, using a hair mask once a week is a good starting point. However, if your hair is severely damaged or dry, you might benefit from using a mask more often, while those with normal hair can use it less frequently.

Hair masks are a luxurious and effective way to pamper your hair and address specific concerns. By choosing the right mask, prepping your hair properly, and following the application steps diligently, you can unlock the full potential of these treatments. Remember that consistency is key when it comes to seeing long-term improvements in your hair’s health and appearance. With dedication and a little extra care, you can achieve the luscious locks you’ve always dreamed of.

Beauty Sleep: Is It Real? Unveiling The Truth
Beauty sleep: Is it real? Unveiling the Truth

The concept of beauty has intrigued humanity for centuries, and throughout history, various methods and products have been employed in pursuit of it. But what if one of the most effective and natural beauty treatments has been right under our noses all along? Sleep, often underrated in the quest for beauty, plays a profound role in our overall appearance and well-being. In this in-depth exploration, we will delve into the fascinating science of how sleep impacts our beauty, including its effects on our skin, hair, eyes, and overall vitality. We will also uncover practical tips for optimizing your beauty sleep and debunk common misconceptions about this essential nightly ritual. The Beauty Sleep Connection: How Sleep Affects Your Appearance Your nightly slumber isn’t just about rest; it’s a crucial time when your body undergoes a myriad of processes that directly influence your physical appearance. Let’s explore how sleep affects different aspects of your beauty: 1. Skin Rejuvenation: During deep sleep stages, your body releases growth hormones, which stimulate cell repair and renewal. This process is vital for maintaining youthful and healthy-looking skin. Adequate sleep helps reduce the appearance of wrinkles, fine lines, and skin dullness. 2. Circulation and Glowing Skin: Improved blood circulation during sleep ensures that your skin receives essential nutrients and oxygen. This results in a natural radiance and even skin tone. Conversely, sleep deprivation can lead to a pale, sallow complexion. 3. Hydration: While you sleep, your body’s hydration balance is restored, helping to keep your skin moisturized. Sleep-deprived individuals are more prone to dryness and flakiness. 4. Acne and Breakouts: Lack of sleep can trigger an increase in stress hormones, leading to breakouts and worsening of skin conditions like acne and eczema. 5. Under-Eye Circles: Insufficient sleep can cause blood vessels under the eyes to dilate, resulting in dark circles and puffiness. Hair Health: Hair follicles receive nutrients and oxygen through blood circulation, which is optimized during sleep. A good night’s rest promotes hair growth and overall hair health. Bright Eyes: Rested eyes appear brighter and less bloodshot compared to tired, sleep-deprived eyes. Overall Vitality: Beauty isn’t just skin deep; it reflects your overall vitality. When you sleep well, you wake up feeling refreshed and rejuvenated, which translates to a more vibrant and attractive appearance. Optimizing Your Beauty Sleep: Tips for a Restorative Night Now that we’ve established the connection between sleep and beauty, here are some tips for ensuring you get the most out of your beauty sleep: 1. Consistent Sleep Schedule: Aim for a regular sleep schedule by going to bed and waking up at the same times each day, even on weekends. Consistency helps regulate your body’s internal clock. 2. Create a Relaxing Bedtime Routine: Engage in calming activities before bedtime, such as reading, taking a warm bath, or practicing relaxation exercises. This helps signal to your body that it’s time to wind down. 3. Comfortable Sleep Environment: Ensure your sleep environment is conducive to rest. Invest in a comfortable mattress and pillows, maintain a cool room temperature, and block out excess light and noise. 4….

Embrace Your Natural Curls: Why Curly Girls Should Ditch Heat Styling Tools In Warmer Weather
Embrace Your Natural Curls: Why Curly Girls Should Ditch Heat Styling Tools in Warmer Weather

Warmer weather brings with it a desire for carefree hairstyles that embrace the natural beauty of our hair. For curly girls, this means letting those gorgeous curls shine without the need for excessive heat styling. Heat styling tools like flat irons and curling wands can cause damage to curly hair, especially during the hotter months when the hair is already more prone to dryness and frizz. Embracing your natural curls in warmer weather not only helps protect your hair from damage but also allows you to rock effortlessly beautiful and unique hairstyles. In this comprehensive guide, we will explore the reasons why curly girls should ditch the heat styling tools during warmer weather and offer practical tips to help you rock your natural curls with confidence. Preserve Hair Health:Heat styling tools can cause significant damage to curly hair, as the high temperatures strip the hair of its natural moisture. When the weather is already warm and potentially more drying, it’s essential to preserve your hair’s health and hydration. By avoiding heat styling, you allow your curls to retain their natural moisture and elasticity, resulting in softer, more manageable hair. Prevent Heat Damage:Curly hair is already prone to dryness and frizz due to its unique structure, which makes it more susceptible to damage from heat styling. When the weather is hot and humid, the risk of heat damage increases, leading to split ends, breakage, and a loss of curl pattern. Embracing your natural curls during warmer weather helps prevent heat damage and keeps your locks looking healthy and vibrant. Embrace Natural Volume:Warm weather can often mean more humidity, which can work in your favor as a curly girl. Embracing your natural curls allows you to take advantage of the increased humidity, which can enhance your hair’s natural volume and bounce. Instead of fighting against the elements, work with them to create stunning and voluminous hairstyles. Low-Maintenance Styling:One of the greatest benefits of ditching heat styling tools is the ease and simplicity it brings to your hair care routine. Embracing your natural curls in warmer weather means less time spent in front of the mirror with heat tools and more time enjoying the outdoors. Low-maintenance styling not only saves time but also reduces the risk of heat-related damage to your hair. Rock Effortless Beach Waves:Warm weather often calls for beachy and carefree hairstyles, and curly hair is perfect for achieving those coveted beach waves. Letting your natural curls shine allows you to effortlessly rock beachy waves without the need for heat styling. Simply scrunch your damp hair with a curl-enhancing product and let it air dry for a laid-back and sun-kissed look. Experiment with Protective Styles:Ditching heat styling tools gives you the opportunity to experiment with various protective styles that not only shield your hair from the sun’s rays but also allow your curls to flourish. Protective styles like braids, twists, and buns can be fashionable and practical during warmer weather, helping to keep your hair off your neck and reducing exposure to damaging UV rays. Reduce Styling Stress:Curly hair can have a mind…

Unlocking The Secrets Key Ingredients In Hair Growth Shampoos 2
Unlocking the Secrets: Key Ingredients in Hair Growth Shampoos

Introduction: Unlocking the Secrets to Beautiful Locks As individuals strive for luxurious locks, many turn to shampoos designed specifically to stimulate growth. In this comprehensive examination of such treatments, specialized shampoos will be examined along their key ingredients and their potential impact in helping transform tresses. Chapter 1 : Understanding Hair Growth Shampoos (PDF Download). Before engaging in hair growth shampoo research, it is crucial to gain an understanding of the natural hair growth cycle. Anagen, catagen and telogen phases make up this natural cycle which governs its development as it transitions and rests periods; hair shampoos aim to accelerate anagen phase hair growth to promote active development. Dihydrotestosterone, or DHT for short, has long been suspected as being linked with hair loss and certain shampoos use DHT reduction agents as preventive measures against further hair thinning or loss. Dihydrotestosterone (DHT), one of the key molecules involved in hair biology, plays an integral part. While DHT plays an integral part in normal bodily processes and in dealing with issues related to hair health issues such as hair thinning or loss. Understanding its subtle impact is crucial when trying to find solutions. DHT, or dihydrotestosterone (DHT for short), is a derivative of testosterone hormone found both men and women at varying concentrations. While DHT plays an essential part during puberty in contributing to male secondary sexual characteristics development, its relationship with hair follicles can prove both rewarding and hinderful at once. The hair growth cycle comprises three distinct phases: anagen (growth), catagen (transition), and telogen (resting). Each hair follicle undergoes this cycle independently to ensure continual renewal process – however when DHT enters the picture it can disrupt this natural cycle, and lead to its disruption. Problems occur when hair follicles are genetically predisposed to respond negatively to DHT, leading to exposure leading to miniaturization; which involves gradual shrinkage of follicles over successive hair cycles and eventually leading to cessation in new hair production. DHT can contribute to both miniaturization and inflammation within the scalp, leading to conditions like androgenetic alopecia – commonly referred to as male-pattern or female-pattern baldness – through its effects on hair follicle health resulting in faster hair loss rates. These reactions further compromise follicle health leading to further hair follicle decline thereby hastening hair loss further. Understanding DHT’s place in hair growth becomes critical when searching for solutions to its effects. Hair growth shampoos typically contain ingredients designed to counteract its influence; compounds like saw palmetto extract may even inhibit DHT production – providing another avenue against hair loss or at least slowing its rate of decline. Acknowledging DHT’s role can provide us with the ability to take an individualized approach towards treating specific concerns about hair health and maintenance. From DHT-blocking ingredients to comprehensive regimens, understanding its impact opens doors for tailored solutions designed to restore and nourish tresses with exceptional health and shine. Chapter 2: Essential Components in Hair Growth Shampoos Key Ingredients in Hair Growth Shampoos: Nourishing the Scalp for Lush Locks Individuals looking for lush locks often turn to hair growth shampoos in search…

7 Makeup Mistakes That Might Be Making You Look Older
7 Makeup Mistakes That Might Be Making You Look Older: How to Avoid Them

Makeup is a powerful tool that can enhance your natural beauty and boost your confidence. However, certain makeup habits might be doing more harm than good, especially as they can inadvertently age your appearance. Identifying and correcting these mistakes can make a significant difference in looking effortlessly youthful. This guide will explore seven common makeup mistakes and provide practical advice for avoiding them. Mistake #1: Overdoing Foundation Choosing the Wrong Formula A heavy foundation or the wrong formula can settle into fine lines and wrinkles, accentuating them. Opt for lightweight, hydrating foundations that offer buildable coverage. Application Techniques to Avoid Avoid applying foundation too heavily. Use a damp beauty sponge or a stippling brush for a more natural, skin-like finish. Remember, less is more. Mistake #2: Neglecting Skincare Before Makeup The Importance of a Hydrated Base Skincare plays a crucial role in how makeup sits on your skin. Dehydrated skin can cause makeup to cling to dry patches, making you look older. Recommended Pre-Makeup Skincare Routine Always start with a clean face, followed by a hydrating serum or moisturizer, and don’t forget to apply a primer to smooth out the skin’s texture. Mistake #3: Using Too Much Powder The Effect of Powder on Mature Skin Setting powder, especially when overused, can highlight fine lines and dry out your skin. Use translucent powders sparingly and only in areas that need it. Alternative Setting Methods Consider setting sprays or lightly dusting powder only in the T-zone to maintain a dewy finish on the rest of the face. Mistake #4: Ignoring Eyebrow Care Filling Eyebrows Too Harshly Over-filled eyebrows can harden your features, making you appear older. Aim for a more natural look by using feathery strokes and choosing a shade that matches your hair color closely. The Role of Eyebrows in Facial Structure Well-groomed eyebrows can lift the face and frame the eyes, contributing to a more youthful appearance. Consider consulting a professional for the best shape. Mistake #5: Over-Contouring and Highlighting Finding the Balance Too much contouring or highlighting can look unnatural and aging. Use these products sparingly and blend thoroughly to enhance your natural bone structure subtly. Techniques for a Natural Contour Opt for cream products that can be blended out easily for a more natural-looking shadow and glow, rather than harsh lines. Mistake #6: Choosing the Wrong Lip Products The Impact of Matte and Dark Shades Matte and darker lip colors can make lips appear thinner and more aged. They can also emphasize lip lines. Hydrating Lip Color Options Choose lip colors that are closer to your natural lip color and opt for formulas that offer hydration and a slight sheen to give the appearance of fuller, younger lips. Mistake #7: Skipping Eyelid Primer Preventing Creased Eyeshadow Eyelid primer prevents eyeshadow from settling into creases, which can age the eyes. It creates a smooth canvas for eyeshadow, enhancing its color and longevity. Enhancing Eyeshadow Longevity A good primer can also intensify the pigment of your eyeshadow, making your eye makeup look more vibrant and youthful throughout the day. In conclusion, avoiding…

Mastering The Eyelash Curler
Mastering the Eyelash Curler

Transforming your lashes from straight to stunningly curled can be effortlessly achieved with the proper use of an eyelash curler, turning it into an indispensable tool in your beauty arsenal. However, mishandling it could result in discomfort, lash damage, or uneven curls. This detailed manual will guide you through mastering the eyelash curler, incorporating upkeep advice and solutions to frequent problems, enabling you to safely and effectively obtain those desirable, fluttering lashes. Selecting the Ideal Eyelash Curler Eyelash Curler Varieties The market offers eyelash curlers in metal, plastic, and heated models. Metal curlers stand out for their sturdiness and precision in curling, while plastic variants are perfect for on-the-go use due to their lightness. For those with hard-to-curl lashes, heated eyelash curlers can achieve a more defined and enduring curl. Choosing a Curler for Your Eye Shape Eyelash curlers are not one-size-fits-all; their efficiency varies with different eye shapes. It’s crucial to choose a curler that complements the curvature of your eye to ensure a uniform curl and avoid discomfort. Some manufacturers provide curlers tailored to specific eye shapes such as almond, round, or deep-set. Lash Preparation Ensure Lashes are Clean and Dry Commence with lashes that are devoid of any makeup or residue, as leftover products can lead to lashes sticking to the curler, risking damage. Post face-washing, ensure your lashes are thoroughly dried before proceeding with the curling process. Warming the Curler (Optional) To enhance the curl, consider gently warming your metal eyelash curler with a hairdryer for a brief period. Always test the curler’s temperature on your hand to confirm it’s warm, not hot, preventing any harm to your eye’s delicate surrounding skin or the lashes themselves. Curling Your Lashes Proper Curler Placement With the curler open, position your lashes between the pads, getting as close as possible to the lash base without touching the eyelid. Confirm that all lashes are captured by the curler’s opening. Executing the Curl Press the curler’s handles together gently for approximately 5 to 10 seconds. For a more natural curl, you may lightly pump the curler. Refrain from pulling or yanking the curler to avoid lash damage. Sectional Curling For a more pronounced curl, adopt a sectional approach: begin at the base, then mid-lash, and finally near the tips. This technique fosters a seamless, natural curl rather than an abrupt crimp. Post-Curling Mascara Application Follow up the curling with your preferred mascara to set the curl. Opt for a waterproof or curl-enhancing mascara for optimal results. Applying mascara post-curling prevents the lashes from sticking to the curler and potential damage. Curler Maintenance and Cleanliness Eyelash Curler Cleansing To ensure optimal performance, regularly clean your curler to eliminate any mascara residue or debris. Utilize a gentle makeup remover or isopropyl alcohol for cleaning, allowing the curler to dry thoroughly before its next use. Pad Replacement Change the curler’s rubber pads every few months or at signs of wear to maintain curl efficiency and lash safety. Neglecting to replace worn pads can compromise lash health and curl quality. Addressing Common Concerns Avoiding Eyelid Pinching Pinching…

Top 25 Hair Trends In February A Comprehensive Guide
Top 25 Hair Trends in February: A Comprehensive Guide

February brings not just a change in seasons but also fresh inspiration for hair enthusiasts and stylists around the globe. This month, we’re seeing a blend of nostalgic revivals, innovative techniques, and a strong emphasis on individuality and self-expression. Whether you’re looking to update your look or just curious about the latest trends, this guide will dive deep into the top 25 hair trends capturing attention this February. The Rise of Natural TexturesGone are the days when straight hair dominated the beauty scene. This February, embracing your natural texture is not just a trend; it’s a movement. Curls and coils are celebrated with products and techniques designed to enhance rather than tame. From lightweight leave-in conditioners to defining creams, the market is flooded with options catering to every type of curl. Bold Color Choices are making a statement this month, with vibrant reds and cool blues leading the charge. The art of color application is evolving, with techniques like balayage and ombre allowing for more personalized expressions of style. Retro RevivalThe past is a treasure trove of inspiration, and this February, the shag cut and bangs are making a powerful comeback. These styles offer a nostalgic yet fresh look, adaptable to various hair types and lengths. Sustainable Hair Care PracticesSustainability is more than a buzzword in the beauty industry; it’s a practice being embraced with open arms. This trend extends to hair care, with an increasing number of brands offering eco-friendly products and consumers turning to DIY natural hair masks for a more sustainable routine. Men’s Hair TrendsMen’s hair trends this February are all about versatility, from the sleek simplicity of the buzz cut to the laid-back vibe of long hair and man buns. There’s a noticeable shift towards more carefree, low-maintenance styles. Braids and TwistsBraids and twists remain a staple in hair styling, known for their versatility and protective qualities. This month, box braids and faux locs are particularly popular, with new braiding techniques offering a fresh twist on traditional styles. The Bob Cut: A Timeless TrendThe bob cut proves its timelessness, adapting to modern tastes with variations like the textured bob and the asymmetrical bob. This February, it’s all about finding the bob variation that best suits your personal style and face shape. Innovative Hair AccessoriesAccessories can transform any hairstyle, and this February, it’s all about making a statement. Clips, headbands, and even scarves are being used in creative ways to add a touch of personality to every look. The Wet LookThe sleek, wet hair effect is a trend that bridges the gap between sophistication and edge. Achieving this look requires the right products and techniques, with many turning to gel and pomades for that perfect glossy finish. Celebrity Hair InspirationsCelebrities often set the pace for hair trends, and this February is no exception. From the red carpet to Instagram, stars are showcasing a range of looks that are inspiring people to experiment with their own hair. DIY Hair Color at HomeWith the ongoing interest in personalization, many are opting to dye their hair at home. This trend is supported…

How Tocreate A Simple Makeup Look
How to Create a Simple Makeup Look

Embarking upon the path to perfecting an effortless makeup look necessitates a profound comprehension of your skin’s unique characteristics and a dedication to the minimalist ethos in beauty. This methodology transcends the mere reduction of cosmetic items; it’s centered on optimizing the impact of each selected product. Identifying whether your skin is oily, dry, or a combination thereof is fundamental. This knowledge shapes the selection of cosmetics that will most effectively highlight your features, maintaining a delicate balance without overburdening your skin. Rooted in the principle that “less is indeed more,” this approach seeks to amplify your innate allure rather than conceal it, aiming for an appearance that exudes an easy elegance, underscored by the use of premium products that provide a subtle enhancement and durability. Priming Your Canvas The preliminary step, devoid of any color application, is essential: skin preparation. A smooth and hydrated base not only elevates the appearance of your makeup but also extends its longevity. Begin with a mild cleanser to eliminate impurities, followed by a moisturizer tailored to your skin type to ensure hydration. Should your plans involve outdoor activities, applying sunscreen is imperative for shielding your skin from the detrimental effects of UV exposure. This regimen not only prepares your skin for cosmetic application but also promotes its long-term health. Curating a Fundamental Makeup Collection Assembling a foundational makeup kit need not be daunting or costly. Concentrate on securing versatile, high-quality staples that fulfill multiple roles. A BB cream or tinted moisturizer, offering light coverage while nurturing your skin, acts as both a foundation and a skincare solution. Essentials for daily use include a neutral eyeshadow palette, a mascara that both lengthens and volumizes, a blush in natural tones, and a lip color that flatters your skin tone. The significance of quality tools—a set of precise application brushes and a blending sponge—cannot be overstated, as they significantly enhance the makeup application experience. A Stepwise Tutorial for a Minimalist Makeup Look Commence with a Pristine Foundation: Post-skincare, a light primer application will smooth any imperfections, setting the stage for even coverage. Opt for a BB cream or tinted moisturizer for sheer, breathable coverage, complemented by a concealer for discreet blemish and under-eye circle camouflage, seamlessly blended with a moist beauty sponge. Subtly Defined Eyes: Choose neutral or nude shadows for a gentle color sweep across the lids. A slender eyeliner application on the upper lash line, paired with a single mascara coat, can brighten and enlarge the eyes, enhancing their sparkle. Cheek Color Enhancement: Apply a blush, cream or powder, to the cheeks’ apples, blending upwards toward the temples for a radiant, lifted look. Lip Color Refinement: Select a lip shade marginally deeper than your natural lip color for subtle emphasis. A tinted lip balm or gloss can impart a splash of color while maintaining lip hydration. Longevity Tips for a Minimalist Look For enduring makeup, a setting spray application post-makeup is advisable. For those with oily skin, a translucent powder’s light application in the T-zone can mitigate shine without heaviness. Compact powder or blotting paper touch-ups…

Latte Makeup Warm And Inviting Earthy Tones For A Naturally Radiant Look
Latte Makeup: Warm and Inviting Earthy Tones for a Naturally Radiant Look

In the world of makeup, trends come and go, and one that has been gaining popularity is the latte makeup trend. Inspired by the warm and inviting colors of a freshly brewed latte, this makeup style embraces earthy and neutral tones, creating a cozy and effortlessly chic look. From soft browns and warm caramels to creamy beiges and rich mochas, the latte makeup trend offers endless possibilities for creating natural yet stunning looks. In this comprehensive guide, we will delve into the essence of latte makeup, explore its key features, and provide tips on how to achieve this versatile and flattering style. At the heart of the latte makeup trend is a focus on earthy and neutral shades that mimic the colors found in a delicious cup of latte. These hues are warm, inviting, and universally flattering, making them suitable for various skin tones and occasions. a. Soft Browns: Emphasizing soft brown eyeshadows on the lids and along the lower lash line creates a warm and approachable look. The versatility of brown shades allows you to create subtle day looks or build up for more dramatic effects. b. Warm Caramels: Caramel tones on the eyes and lips add depth and dimension to the overall look. These shades offer a touch of sweetness and sophistication. c. Creamy Beiges: Creamy beige shades on the lids and as a base color create a bright and fresh canvas. Beige is an ideal shade for highlighting and creating a soft, seamless transition between colors. d. Rich Mochas: Deep mocha shades add intensity and sultriness to the eyes, making them ideal for a smoky eye or a more alluring evening look. Achieving a Natural Glow:The latte makeup trend is all about enhancing your natural beauty while exuding warmth and radiance. Achieving a natural glow is key to this look, and it can be accomplished through various makeup techniques: a. Dewy Foundation: Opt for a dewy or luminous foundation to achieve a radiant and hydrated complexion. Dewy foundations add a healthy sheen to the skin, giving it a natural and fresh appearance. b. Soft Highlighting: Highlight the high points of your face, such as the cheekbones, brow bone, and inner corners of the eyes, with a soft, champagne-toned highlighter. This enhances your features and imparts a subtle glow. c. Cream Blush: Use cream blush in soft peach or rosy shades for a natural flush of color on the cheeks. Cream blush blends seamlessly into the skin, creating a soft and effortless finish. d. Glossy Lips: Opt for glossy lip products in warm nude or soft brown shades to add dimension and plumpness to your lips. Glossy lips reflect light, giving the illusion of fuller and more luscious lips. Soft and Smudged Eyeliner:The latte makeup trend veers away from sharp and defined eyeliner, favoring a softer and smudged approach. This creates a more lived-in and effortless look that complements the earthy and natural vibe of the trend. a. Smudged Pencil Liner: Use a soft brown or chocolate-colored pencil eyeliner to line your upper and lower lash lines. Then, gently smudge…