Unveiling Confidence: Tailoring Makeup Techniques for the Square Face Shape

Unveiling Confidence- Tailoring Makeup Techniques for the Square Face Shape-1

Makeup is a powerful tool that allows us to enhance our features and express our individuality. When it comes to a square face shape, characterized by a strong jawline, straight sides, and a broad forehead, the right makeup techniques can soften angles and highlight your unique beauty. Whether you’re aiming to create balance, play up your favorite features, or achieve a more contoured look, understanding how to tailor your makeup to your square face shape is essential. In this comprehensive guide, we’ll explore customized makeup tips and techniques that will empower you to embrace your square face shape and radiate confidence.

Understanding the Square Face Shape

Before diving into makeup application, it’s crucial to grasp the distinctive characteristics of the square face shape:

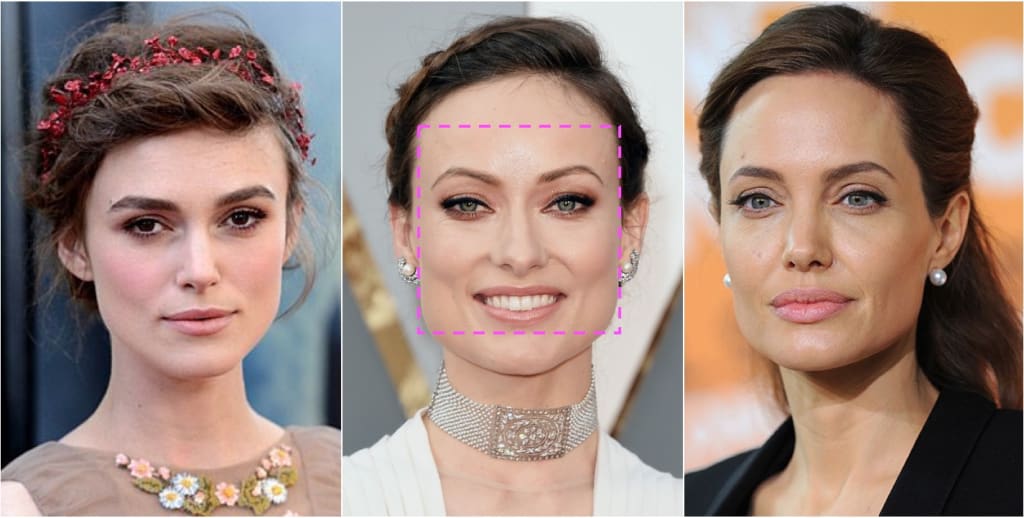
  1. Strong Jawline: The square face is defined by a well-defined and angular jawline.
  2. Straight Sides: The sides of the face are straight, and the forehead width is similar to the jaw width.
  3. Broad Forehead: The forehead is typically wide and well-proportioned to the rest of the face.

With this understanding, you can strategically use makeup to create harmony and enhance your facial features.

Creating a Smooth Canvas

Prepping your skin is the foundation of any makeup look. Follow these steps to ensure your skin is ready for makeup application:

  1. Cleansing and Moisturizing: Begin with clean skin. Use a gentle cleanser followed by a hydrating moisturizer to create a smooth canvas for makeup.
  2. Primer: Apply a primer to blur imperfections, even out the skin’s texture, and ensure your makeup lasts all day.
  3. Foundation: Choose a foundation that matches your skin tone and apply it evenly. Opt for a formula that provides a natural finish.
  4. Concealer: Use concealer to cover blemishes, redness, and under-eye circles. Blend well for a seamless finish.

Contouring and Highlighting

Contouring and highlighting techniques can create balance and soften the angles of a square face shape. Here’s how:

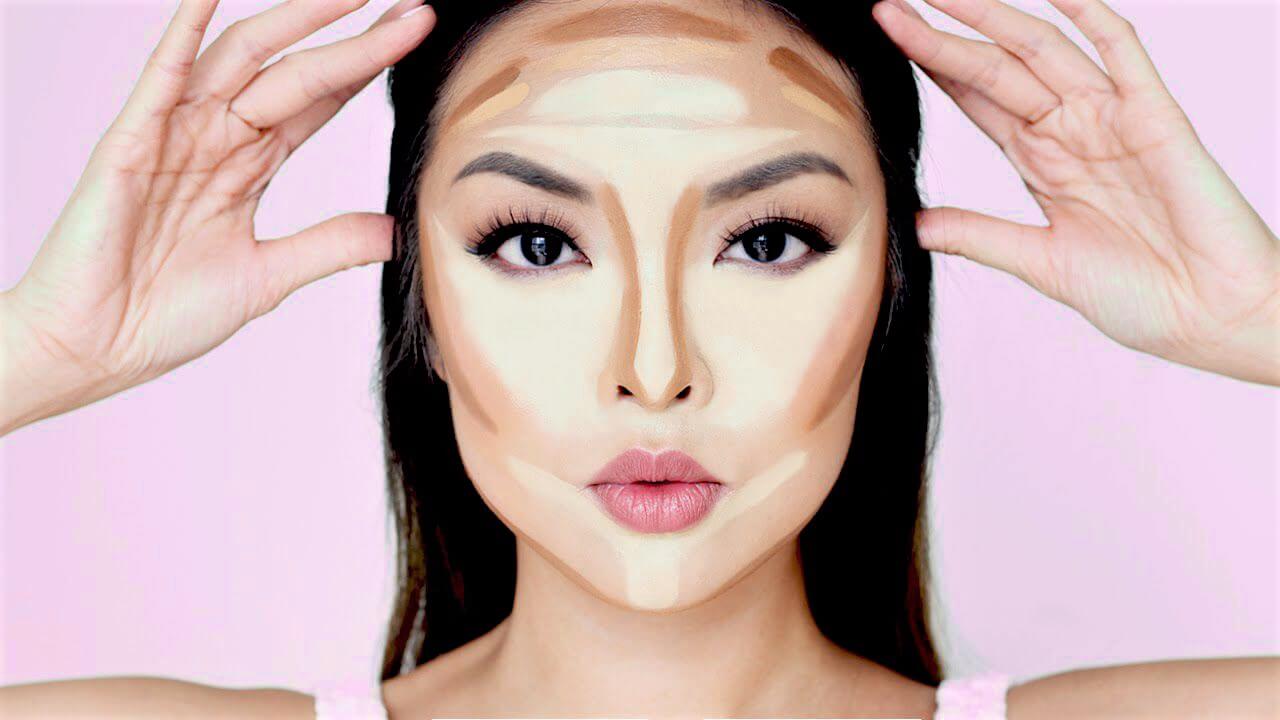
  1. Contouring: Apply a contour shade to the sides of your forehead and along your jawline. This softens the angular features and creates the illusion of a more oval face shape.
  2. Cheekbone Enhancement: Apply a contour shade just below your cheekbones to define them. This adds dimension and balances the strong jawline.
  3. Highlighting: Use a highlighter on the high points of your face, including the tops of your cheekbones, the bridge of your nose, and your cupid’s bow. This draws attention to your features and adds a luminous glow.

Eye Makeup Techniques

Eyes are a focal point of any makeup look. Consider these tips to complement your square face shape:

  1. Eyebrows: Opt for softly arched eyebrows that complement your strong jawline. Groom your brows to follow their natural shape.
  2. Eyeshadow Placement: Apply eyeshadow in a way that softens the angles of your face. Use lighter shades on the center of your eyelids and gradually deepen the colors toward the outer corners.
  3. Eyeliner: Apply eyeliner to your upper lash line, extending it slightly past the outer corners to create a subtle wing. This elongates the eyes and adds a touch of elegance.
  4. Mascara: Apply mascara to both your upper and lower lashes to open up your eyes and complete your eye makeup.
Unveiling Confidence- Tailoring Makeup Techniques for the Square Face Shape-2

Lip Makeup Recommendations

Lips are another feature you can play up to create balance on your square face:

  1. Lip Shape: Embrace your natural lip shape, but consider slightly rounding the corners of your lips with a lip liner. This softens the angular appearance of your face.
  2. Lip Color: Choose lip colors that suit your style and occasion. Soft pinks, berries, and neutral shades are flattering options.

Blush Application

Blush can add warmth and softness to your square face shape:

  1. Placement: Apply blush slightly above your cheekbones and blend it diagonally towards your temples. This technique softens the angles and complements the cheekbones.
  2. Application Technique: Use a light hand when applying blush. Start with a small amount and build up the color gradually for a natural flush.

Final Touches

Complete your makeup look with these final touches:

  1. Setting Spray: Use a setting spray to lock in your makeup and ensure it stays fresh throughout the day.
  2. Finishing Powder: Apply a translucent finishing powder to reduce shine and set your makeup.
  3. Highlighter: Add a touch of highlighter to the inner corners of your eyes and the high points of your face for a radiant finish.


Mastering makeup techniques that complement your square face shape empowers you to highlight your unique beauty while creating harmony and balance. By employing methods that soften angles, enhance your features, and add dimension, you can confidently embrace your facial structure. Remember that makeup is an art form, and experimenting with different styles and techniques allows you to discover what makes you feel most empowered and beautiful. With the right makeup techniques, you can celebrate your square face shape and showcase your confidence to the world.


Unlocking Hair Growth The Correct Usage Of A Derma Roller For Optimal Results
Unlocking Hair Growth: The Correct Usage of a Derma Roller for Optimal Results

Derma rollers have gained popularity as a beauty tool for promoting hair growth. These handheld devices, equipped with tiny needles, work by creating micro-injuries on the scalp, stimulating blood circulation and triggering the body’s natural healing response. When used correctly, derma rollers can enhance hair growth and improve the absorption of hair care products. In this article, we will delve into the proper technique and tips for using a derma roller to maximize its benefits and promote healthy hair growth. Understanding the Derma Roller:A derma roller consists of a cylindrical barrel-shaped handle with a roller head attached. The roller head contains numerous fine needles, usually between 0.25 to 1.5 millimeters in length. It’s important to select a derma roller with needle length appropriate for hair growth stimulation, typically ranging from 0.5 to 1.0 millimeters. Cleanse and Prepare the Scalp:Before using a derma roller, ensure your scalp is clean and free from any oils, products, or debris. Wash your hair thoroughly with a gentle shampoo and allow your scalp to dry completely. Avoid using any styling products or oils that may interfere with the rolling process or cause buildup on the needles. Divide the Scalp into Sections:To ensure thorough coverage, divide your scalp into manageable sections. Part your hair in the center and then create additional sections from front to back and side to side. This division will help you focus on one area at a time, ensuring proper treatment and minimizing the risk of overlapping or missing areas. Start with Gentle Pressure:Hold the derma roller at a slight angle and apply gentle pressure to the scalp. Begin rolling in one direction, such as front to back, and then switch to the perpendicular direction for the next pass. Maintain consistent and gentle pressure throughout the process to avoid excessive discomfort or skin irritation. Roll in Different Directions:To stimulate hair growth effectively, it’s important to roll the derma roller in different directions. Roll vertically, horizontally, and diagonally across each section of your scalp. This multidirectional approach ensures maximum coverage and stimulates blood flow from various angles. Be Mindful of Needle Length:Choose a needle length that suits your comfort level and hair growth goals. For beginners, it’s advisable to start with shorter needles, such as 0.5 millimeters, and gradually work your way up as your scalp becomes more tolerant. Longer needles should be used with caution and under the guidance of a professional. Avoid Excessive Pressure:While it’s important to apply gentle pressure, avoid pressing too hard with the derma roller. Excessive pressure can cause unnecessary discomfort, irritation, or damage to the scalp. The goal is to create micro-injuries, not to induce pain or harm the skin. Let the needles do the work with light and controlled pressure. Adjust Frequency:The frequency of derma roller usage depends on individual preferences and tolerance. Initially, start with once a week and gradually increase to a maximum of two to three times per week if desired. Allow your scalp to rest and recover between sessions to avoid overstimulation and potential adverse reactions. Follow with Hair Care Products:After using the derma…

Embracing Radiance Exploring The Multifaceted Benefits Of Rose Water For Skin 1
Embracing Radiance: Exploring the Multifaceted Benefits of Rose Water for Skin

For centuries, rose water has been cherished for its enchanting fragrance and a wide array of benefits for the skin. Derived from the petals of the rose flower through a meticulous distillation process, rose water is a natural elixir that has found a cherished place in skincare routines around the world. Packed with vitamins, antioxidants, and gentle astringent properties, rose water offers an array of advantages that can transform your skincare regimen. In this comprehensive guide, we delve into the multifaceted benefits of rose water for the skin, unveiling the secrets to achieving a radiant and rejuvenated complexion. Understanding Rose Water Rose water, also known as rose hydrosol, is a distilled water infused with the aromatic and therapeutic essence of roses. It is renowned for its gentle nature, making it suitable for various skin types, including sensitive and delicate skin. As a versatile skincare ingredient, rose water boasts an impressive array of benefits that contribute to healthier, more vibrant skin. Hydration and Moisture One of the primary benefits of rose water is its exceptional ability to provide hydration and moisture to the skin. The water-binding properties of rose water help lock in moisture, preventing dehydration and maintaining a supple complexion. Regular use of rose water can result in plumper, more radiant skin that glows with vitality. Calming and Soothing Rose water is a natural tonic for irritated or sensitive skin. Its anti-inflammatory properties help soothe redness, inflammation, and irritation caused by various factors, such as sunburn, allergies, or skin conditions like eczema. Applying rose water can provide instant relief and a sense of calm to your skin. Balancing pH Levels Balanced pH levels are crucial for healthy skin. Rose water has a slightly acidic pH, which makes it an excellent natural remedy for maintaining the skin’s optimal pH balance. By using rose water as a toner, you can help regulate the skin’s acidity, which in turn supports a strong skin barrier and prevents issues like acne and excessive dryness. Anti-Aging Effects The antioxidants present in rose water, including vitamin C, help combat free radicals that accelerate the aging process. Regular use of rose water can diminish the appearance of fine lines and wrinkles, promoting a smoother and more youthful complexion. Additionally, the astringent properties of rose water tighten pores and give the skin a firmer appearance. Cleansing and Refreshing Rose water serves as a gentle yet effective cleanser for the skin. It helps remove dirt, oil, and impurities from the pores, leaving your skin feeling fresh and rejuvenated. You can use rose water as a makeup remover or as a refreshing mist throughout the day to revitalize your skin and uplift your senses. Natural Astringent The natural astringent properties of rose water make it an ideal solution for toning the skin. It helps tighten the skin, reduce the appearance of pores, and control excess oil production. Incorporating rose water into your skincare routine can lead to a smoother, more refined complexion. Reduction of Under-Eye Puffiness Rose water’s soothing and anti-inflammatory properties extend to the delicate skin around the eyes. Applying a cotton…

How To Achieve The Tiktok Vanilla Girl Makeupaesthetic
How to Achieve the TikTok Vanilla Girl Makeup Aesthetic

In an era where TikTok dictates the pulse of beauty and fashion trends, the Vanilla Girl makeup aesthetic has emerged as a coveted look. It’s a celebration of simplicity and natural beauty, steering away from the bold and dramatic to embrace the understated elegance of minimal makeup. This aesthetic is all about enhancing your natural features in the most subtle way. Whether you’re a seasoned makeup enthusiast or new to the beauty scene, achieving the Vanilla Girl look can be simple with the right approach. This comprehensive guide will walk you through the essential steps to mastering this effortlessly chic look, turning you into a TikTok sensation in no time. Start with a Flawless Base Achieving the Vanilla Girl makeup look begins with perfecting your canvas. Cleanse and moisturize your face to ensure a smooth and hydrated base. Opt for a tinted moisturizer or a lightweight foundation that seamlessly matches your skin tone for that barely-there effect. Application is key; use a damp beauty sponge or a foundation brush for an even and natural finish. A good base not only enhances the makeup but also cares for your skin underneath. Embrace Neutral Shades The essence of the Vanilla Girl aesthetic lies in the palette of neutral tones that complement your natural skin tone. Earthy hues of brown, beige, and nude in matte finishes are your best friends for eyeshadows and blushes. For the lips, a hint of gloss over a nude lipstick or a swipe of tinted lip balm adds the perfect touch of understated glamour. Selecting the right shades is crucial for maintaining the authenticity of the aesthetic while playing up your best features. Illuminate Your Natural Features Highlighting is a game-changer in the Vanilla Girl makeup routine. Use a highlighter that’s just a shade lighter than your skin tone and possesses a subtle shimmer, not glitter. The key areas to focus on are the tops of your cheekbones, the bridge of the nose, and the cupid’s bow. A gentle application will lend you a soft, ethereal glow that defines the Vanilla Girl look. Subtly Defined Eyes For eyes that speak volumes without saying a word, stick to neutral eyeshadows to define the crease and the outer corners. A swipe of brown or black mascara adds definition to your lashes, making your eyes appear wider and more awake. Those seeking a bit more depth can lightly line the waterline with a brown or black pencil. Remember, the goal is to enhance, not overshadow, your natural beauty. Natural Brows Are Key Brows frame the face and play a pivotal role in the Vanilla Girl aesthetic. The focus here is on full, well-groomed brows that look as natural as possible. Fill in sparse areas with a brow pencil or gel, mimicking the natural hair direction. The shade chosen should closely match your hair color to avoid a harsh contrast, keeping the overall look soft and coherent. Seal with a Dewy Finish Lock in your makeup while adding a burst of hydration with a dewy setting spray. A fine mist enriched with glycerin or…

A Guide To Safely Lightening Your Skin Tone: Methods And Precautions
A Guide to Safely Lightening Your Skin Tone: Methods and Precautions

Skin tone can vary due to various factors, including genetics, sun exposure, and hormonal changes. Some individuals may desire a lighter skin tone for personal or cultural reasons. While there are several methods to achieve a lighter complexion, it is essential to approach skin lightening with caution and prioritize safety. In this comprehensive guide, we will explore various methods to lighten your skin tone, along with essential precautions to maintain skin health and avoid potential risks. Sun Protection:One of the most effective and safest ways to maintain a lighter skin tone is by protecting your skin from the harmful effects of the sun’s ultraviolet (UV) rays. UV radiation stimulates the production of melanin, the pigment responsible for skin color. Consistently using broad-spectrum sunscreen with a high SPF (30 or above) and seeking shade during peak sun hours can prevent excessive melanin production and help maintain a lighter complexion. GO TO THE NEXT PAGE TO CONTINUE… Topical Skin Lightening Products:There are numerous over-the-counter skin lightening products that contain ingredients such as hydroquinone, kojic acid, arbutin, and vitamin C. These ingredients work by inhibiting melanin production, leading to a gradual lightening of the skin. However, it is crucial to use these products with caution and follow the recommended usage instructions to avoid potential side effects such as irritation, redness, or skin sensitivity. Natural Remedies:Some natural ingredients are believed to have skin-lightening properties. For example, lemon juice, a natural source of vitamin C, is thought to have a mild bleaching effect. However, it’s essential to be cautious when using natural remedies, as some can cause skin irritation or even worsen pigmentation in certain individuals. Perform a patch test before applying any natural remedy to a larger area of your skin. Chemical Peels:Chemical peels are cosmetic treatments that involve applying a chemical solution to the skin, causing it to exfoliate and eventually peel off. This process can help improve skin tone and texture, leading to a lighter and more even complexion. However, chemical peels should be performed by a licensed professional, as they can cause skin irritation and are not suitable for all skin types. Laser Treatments:Laser treatments, such as laser resurfacing and intense pulsed light (IPL) therapy, can target melanin and dark spots in the skin, leading to a more even skin tone. These treatments should only be performed by trained dermatologists or cosmetic surgeons to avoid complications and ensure optimal results. Microneedling:Microneedling is a procedure that involves using tiny needles to create controlled micro-injuries in the skin, promoting collagen production and skin rejuvenation. It can improve skin texture and may help fade hyperpigmentation, leading to a more radiant and lighter skin tone. However, microneedling should be performed by a qualified professional to minimize the risk of infection and scarring. Precautions: Consult a Dermatologist:Before embarking on any skin-lightening journey, it is crucial to consult a dermatologist. A qualified dermatologist can assess your skin type, discuss your desired results, and recommend appropriate treatment options based on your skin’s specific needs. This consultation is essential to ensure that you choose safe and effective methods tailored to your…

Machen Sie Einen Depressionstest 1
Machen Sie Einen Depressionstest

Die psychische Gesundheit ist ein wichtiger Aspekt des allgemeinen Wohlbefindens. Es ist entscheidend, Anzeichen von Depressionen zu erkennen und zu behandeln, um eine angemessene Behandlung zu suchen. Wenn Sie vermuten, dass Sie an einer Depression leiden könnten, kann ein Depressionstest wertvolle Informationen und Ratschläge geben, wie weiter vorzugehen ist… GO TO THE NEXT PAGE TO CONTINUE…

What Is Permanenteyeliner
What is Permanent Eyeliner?

Permanent eyeliner, also known as eyeliner tattoo, stands as a beacon of innovation in the cosmetic industry, offering a semi-permanent solution for those seeking to enhance their eye definition without the daily fuss of makeup application. This detailed guide aims to unfold the layers of permanent eyeliner, exploring its procedure, types, benefits, and vital considerations to arm you with knowledge and confidence in your beauty decisions. At its core, permanent eyeliner involves the meticulous insertion of pigment into the skin’s dermal layer around the eyes, mimicking the appearance of traditional eyeliner. This method, rooted in the practice of cosmetic tattooing, transcends the temporary nature of conventional makeup, providing a durable solution that withstands time, sweat, and tears. Beyond mere aesthetic enhancement, permanent eyeliner serves as a testament to the fusion of art and technology in the pursuit of lasting beauty. The Procedure of Permanent Eyeliner The journey to permanent eyeliner is marked by precision, expertise, and customization, tailored to fit each individual’s unique features and desires. Pre-Procedure Preparation The road to permanent eyeliner begins with a thorough consultation with a certified and experienced technician. This initial meeting is crucial for discussing expectations, choosing the right pigment color, and determining the most flattering eyeliner style. Clients are advised to refrain from consuming alcohol, caffeine, and blood-thinning medications several days before the procedure to minimize bleeding and swelling. The Process Adorned with gloves and using sterile equipment, the technician delicately implants the chosen pigment along the lash line with the aid of a fine needle. Comfort is a priority, hence topical anesthetics are applied to mitigate discomfort. The session may last anywhere from one to several hours, contingent upon the complexity of the desired look and the intricacies involved in achieving it. Post-Procedure Care The aftermath of the procedure is pivotal for the longevity and appearance of the eyeliner. Adhering to aftercare instructions is paramount, including keeping the area clean and dry, avoiding makeup and direct sun exposure, and applying prescribed ointments to facilitate healing and prevent infection. Types of Permanent Eyeliner Permanent eyeliner offers a spectrum of styles, from subtle to bold, each capable of accentuating the eyes in unique ways. Lash Enhancement This technique, ideal for those seeking a natural enhancement, involves depositing pigment between the lashes. The result is a fuller lash base that subtly defines the eyes without the overt appearance of makeup. Traditional Eyeliner Traditional eyeliner offers a more pronounced look, customizable in thickness to either softly define the eyes or create a more dramatic effect. It’s perfect for individuals who desire a visible eyeliner look that remains impeccably in place from dawn till dusk. Winged and Designer Eyeliner For the bold and adventurous, winged or designer eyeliner allows for creative expression, extending beyond the eyelids to include intricate designs or extended flicks. This option caters to those looking to make a statement with their eyes, offering endless possibilities for customization. Benefits of Permanent Eyeliner The allure of permanent eyeliner lies not only in its aesthetic appeal but also in the myriad of benefits it offers. Time-saving and Convenience…

Flawless Makeup For Oblong Faces: Tips And Techniques To Enhance Your Features
Flawless Makeup for Oblong Faces: Tips and Techniques to Enhance Your Features

An oblong face shape is characterized by its elongated appearance, with a forehead, cheekbones, and jawline almost similar in width. While this face shape is often considered elegant, it may present some unique makeup challenges. The key to applying makeup to an oblong face is to create visual balance and enhance the natural beauty of your features. In this comprehensive guide, we will explore makeup techniques, contouring, and highlighting tips to help you achieve a stunning look that complements your oblong face shape. Understanding Your Oblong Face Shape Before delving into makeup application, it’s essential to identify your face shape accurately. An oblong face is longer than it is wide, with relatively straight sides and a slightly rounded chin. If you have an oblong face shape, your forehead, cheekbones, and jawline may have similar width measurements. Celebrities with oblong face shapes include Liv Tyler and Sarah Jessica Parker. Makeup Techniques for Oblong Faces Contouring for DefinitionContouring is a powerful technique that can add definition and balance to an oblong face shape. Focus on the following areas to create visual dimensions: a. Forehead: If you want to minimize the appearance of a long forehead, lightly contour the area just above the hairline with a matte bronzer or contour powder. Blend the product gently to avoid harsh lines. b. Cheekbones: Emphasize your cheekbones with contouring to add dimension to your face. Use a contour shade just below the cheekbones and blend upwards towards the ears to create the illusion of lifted cheekbones. c. Jawline: To soften a strong or elongated jawline, contour along the jawline with a cool-toned contour product. This will help add a touch of softness and balance to your face. Highlighting to EnhanceHighlighting is equally important in makeup application for oblong faces. It helps accentuate certain features and brings attention to the center of the face. a. Center of the Forehead: Apply a highlighter to the center of your forehead to draw attention upward and create the illusion of a shorter forehead. b. Brow Bone: Highlighting the brow bone opens up the eyes and adds a lift to the entire eye area. c. Bridge of the Nose: Apply a small amount of highlighter down the bridge of your nose to create the illusion of a shorter nose. d. Center of the Chin: Adding a touch of highlighter to the center of the chin brings attention to the center of your face, helping to visually balance the length. Focus on Eyes and BrowsEyes are a prominent feature on an oblong face, and proper eye makeup can help enhance their shape and bring balance to the face. a. Eyebrows: A well-defined brow with a slight arch can visually shorten the length of the face. Avoid overly straight brows, as they may further elongate the appearance of an oblong face. b. Eye Makeup: Emphasize your eyes with eyeshadows, eyeliner, and mascara. Focus on creating width at the outer corners of your eyes to add balance to the face. Full and Rounded LipsFor oblong faces, opting for fuller and slightly rounded lips can help create…

What Is Eyelashserum
What is Eyelash Serum?

Eyelash serum has emerged as a cornerstone in the beauty routines of those aiming to achieve fuller, healthier, and more vibrant lashes. This detailed guide explores eyelash serums, their composition, how they work, and their benefits, providing you with essential knowledge to transform your lashes and enhance your natural beauty. The allure of luscious, thick eyelashes has long been a symbol of beauty and femininity. Eyelash serums are specifically formulated products designed to promote the health, length, and thickness of the lashes, offering a non-invasive solution to the common desire for more pronounced eyelashes. Defining Eyelash Serum Eyelash serums are potent formulations that contain active ingredients aimed at stimulating the growth and improving the overall condition of eyelashes. These serums are applied directly to the lash line and work over time to enhance lash appearance. Composition and Types Eyelash serums vary widely in their composition, with key ingredients often including peptides, vitamins, and natural extracts designed to nourish and strengthen lashes. There are both over-the-counter options and prescription-strength formulations available, each catering to different needs and sensitivities. How Does Eyelash Serum Work? Eyelash serums penetrate the hair follicles to stimulate growth from within. By nourishing and supporting the lash follicles, these serums can extend the growth phase of the lash cycle, leading to longer, fuller lashes. The Science Behind the Serum Active ingredients like biotin, peptides, and hyaluronic acid support keratin production, enhance follicle health, and provide moisture to the lashes, respectively. Expected Results and Timeline Results vary, but many users report noticeable improvement in lash length and density after 4 to 6 weeks of consistent use. Maximum effects are often observed after 3 to 4 months. Benefits of Using Eyelash Serum The regular application of eyelash serum can lead to enhanced growth, increased thickness, strength, and improved health and hydration of the eyelashes. This can reduce lash loss and breakage, contributing to a fuller lash line. How to Choose the Right Eyelash Serum Key Ingredients to Look For Look for serums containing peptides for growth, biotin for strengthening, and hyaluronic acid for hydration. These ingredients are crucial for promoting healthy, robust lashes. Understanding Different Formulas Choose a serum based on your specific needs—whether it’s for growth, strengthening, or moisture. Always perform a patch test to ensure you don’t have an allergic reaction to the product. Application Tips for Maximum Effectiveness Best Practices Apply the serum to clean, dry lashes once a day, ideally at night, to allow the serum to work overnight. Use a single stroke at the base of the upper eyelashes. Common Mistakes to Avoid Avoid applying too much product, which can lead to irritation. Ensure the serum doesn’t get into your eyes, and refrain from using multiple lash products simultaneously to avoid adverse reactions. Safety and Side Effects While eyelash serums are generally safe, potential risks include eye irritation, darkening of the eyelid skin, and, in rare cases, changes in iris color, particularly with prescription-strength formulas. Minimize complications by following the product’s instructions carefully and consulting with a healthcare provider if you have sensitive eyes or skin. What…