Sculpting Beauty: A Comprehensive Guide to Contouring and Highlighting for Your Unique Face Shape

Contouring and Highlighting-2

Contouring and highlighting are makeup techniques that have the power to transform your facial features, enhancing your natural beauty by creating dimension and radiance. However, achieving the perfect contour and highlight requires an understanding of your face shape and how to work with its unique angles and proportions. Every face is distinct, and mastering the art of contouring and highlighting for your specific face shape can make all the difference. In this guide, we’ll delve into the world of contouring and highlighting, providing you with expert insights and step-by-step instructions to achieve a sculpted and radiant look that complements your individual face shape.

The Importance of Contouring and Highlighting

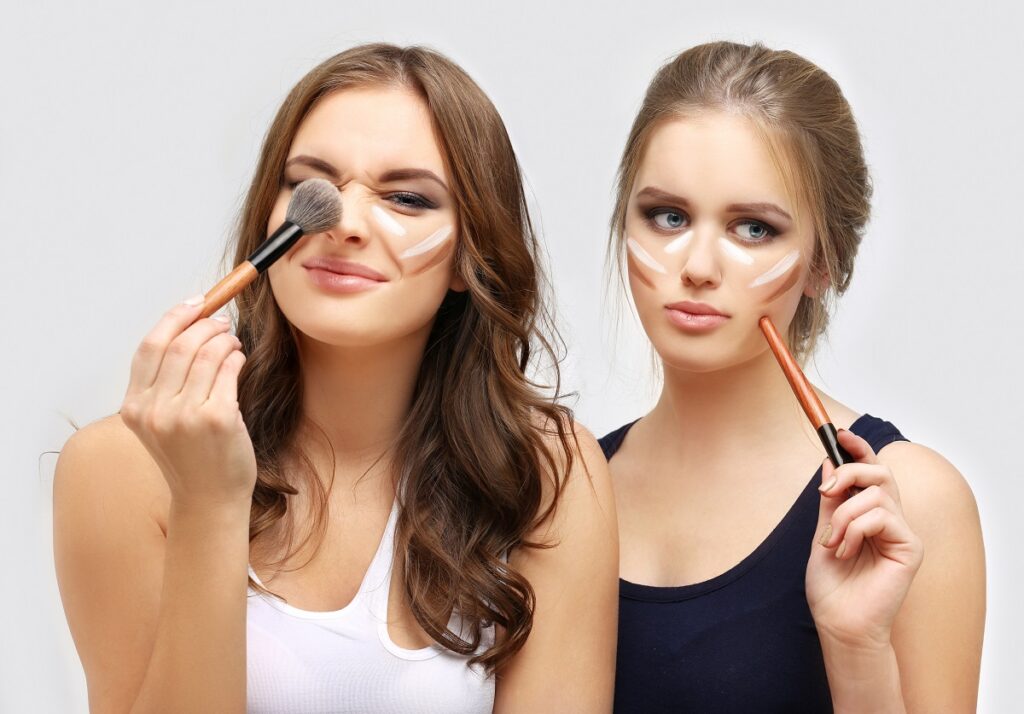
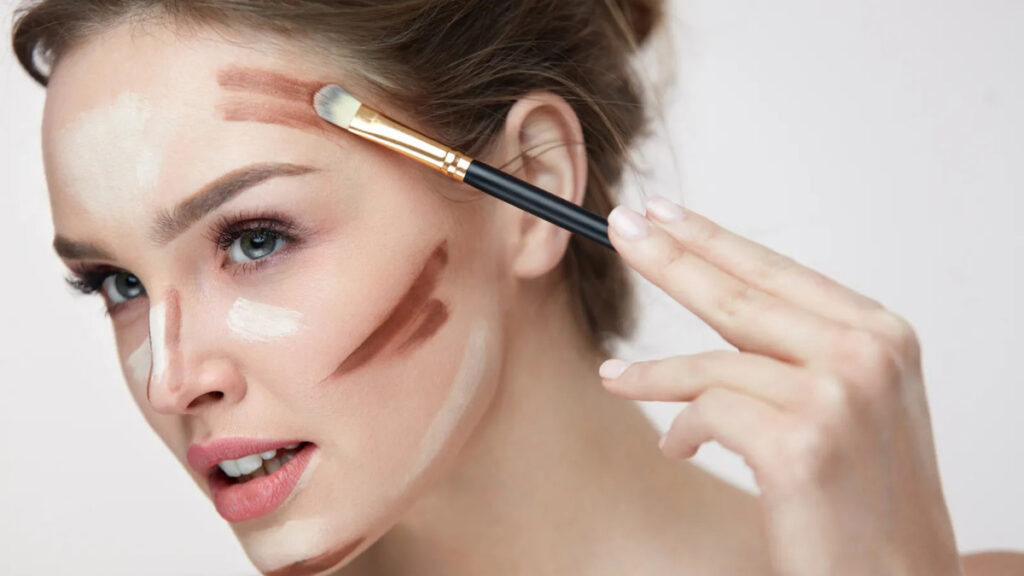
Contouring involves using darker shades to create shadows, while highlighting uses lighter shades to bring areas forward. By strategically applying these shades, you can reshape and accentuate your facial features, achieving the illusion of more defined cheekbones, a slimmer nose, and a lifted appearance. These techniques are particularly valuable in photography and special events, as they enhance the three-dimensional aspect of the face and create stunning visual effects.

Understanding Different Face Shapes

Before diving into the contouring and highlighting process, it’s crucial to determine your face shape. Common face shapes include:

  1. Oval: Forehead slightly wider than the chin, with gently rounded hairline and jawline.
  2. Round: Soft, circular shape with similar width and length, lacking prominent angles.
  3. Heart: Broad forehead, defined cheekbones, and narrow chin.
  4. Square: Prominent jawline and forehead, with a strong, angular appearance.
  5. Diamond: Defined cheekbones, narrow forehead, and jawline with a pointed chin.
  6. Long (Oblong): Elongated shape with a tall forehead and balanced width along the cheeks and jawline.
  7. Triangle (Pear): Narrow forehead, wider cheekbones, and a pronounced jawline.

Contouring and Highlighting for Different Face Shapes

Understanding your face shape is the first step to creating a tailored contouring and highlighting routine. Here’s a comprehensive guide for each face shape:

1. Oval Face Shape

Contouring: Apply contour shade along the sides of the forehead, under the cheekbones, and along the jawline to add subtle definition without overemphasizing angles.

Highlighting: Focus on the center of the forehead, tops of cheekbones, and center of the chin to enhance your naturally balanced features.

2. Round Face Shape

Contouring: Apply contour shade along the sides of the forehead, under the cheekbones, and along the jawline to create the illusion of more angular features.

Highlighting: Focus on the center of the forehead, tops of cheekbones, and center of the chin to add vertical dimension and elongate the face.
Contouring and Highlighting-1

3. Heart Face Shape

Contouring: Apply contour shade along the sides of the forehead, under the cheekbones, and along the jawline, softening the forehead’s width.

Highlighting: Emphasize the center of the forehead, tops of cheekbones, and center of the chin to balance the narrower chin.


4. Square Face Shape

Contouring: Apply contour shade along the sides of the forehead, under the cheekbones, and along the jawline, focusing on softening angular features.

Highlighting: Highlight the center of the forehead, tops of cheekbones, and center of the chin to add softness and balance to the strong angles.

5. Diamond Face Shape

Contouring: Apply contour shade along the sides of the forehead, under the cheekbones, and along the jawline, aiming to minimize the width of the cheekbones.

Highlighting: Highlight the center of the forehead, tops of cheekbones, and center of the chin to create symmetry and balance between the forehead and chin.

6. Long (Oblong) Face Shape

Contouring: Apply contour shade along the sides of the forehead and under the cheekbones, focusing on minimizing the appearance of height.

Highlighting: Highlight the center of the forehead, tops of cheekbones, and center of the chin to add width and balance to the face.

7. Triangle (Pear) Face Shape


Contouring: Apply contour shade along the sides of the forehead, under the cheekbones, and along the jawline, aiming to minimize the width of the cheeks.

Highlighting: Emphasize the center of the forehead, tops of cheekbones, and center of the chin to draw attention upward and balance the face.

Contouring and Highlighting Techniques

  1. Choose the Right Products: Opt for matte contouring products that are one or two shades darker than your skin tone. Highlighting products should be a shade or two lighter and can have a subtle shimmer.
  2. Blend, Blend, Blend: Use a makeup sponge or brush to blend both contour and highlight shades seamlessly into the skin. Harsh lines can ruin the illusion of natural shadows and highlights.
  3. Natural Lighting: Apply and assess your makeup in natural lighting to ensure a balanced and well-blended result.
  4. Use the Right Tools: Contouring brushes with angled bristles work well for precise application, while fluffy brushes are ideal for blending.
  5. Set with Powder: Lightly set your contour and highlight products with translucent powder to ensure longevity.

Contouring and highlighting are powerful tools that allow you to emphasize your best features and enhance your face’s unique structure. By understanding your face shape and applying the appropriate contour and highlight techniques, you can create a sculpted and radiant look that enhances your natural beauty. Whether you have an oval, round, heart, square, diamond, long, or triangle face shape, this guide equips you with the knowledge and skills to craft a personalized makeup routine that accentuates your individuality. As you practice and refine your contouring and highlighting skills, you’ll discover the artistry behind creating a harmonious interplay of shadows and light that results in a stunning, confident, and beautifully sculpted appearance.


Dive Into The World Of Effortless Eye Makeup With Our Beginner's Guide. Learn Simple, Chic Techniques For A Stunning Look That Radiates Elegance.
Effortless Elegance: A Step-by-Step Guide to Easy, Chic and Simple Eye Makeup for Beginners

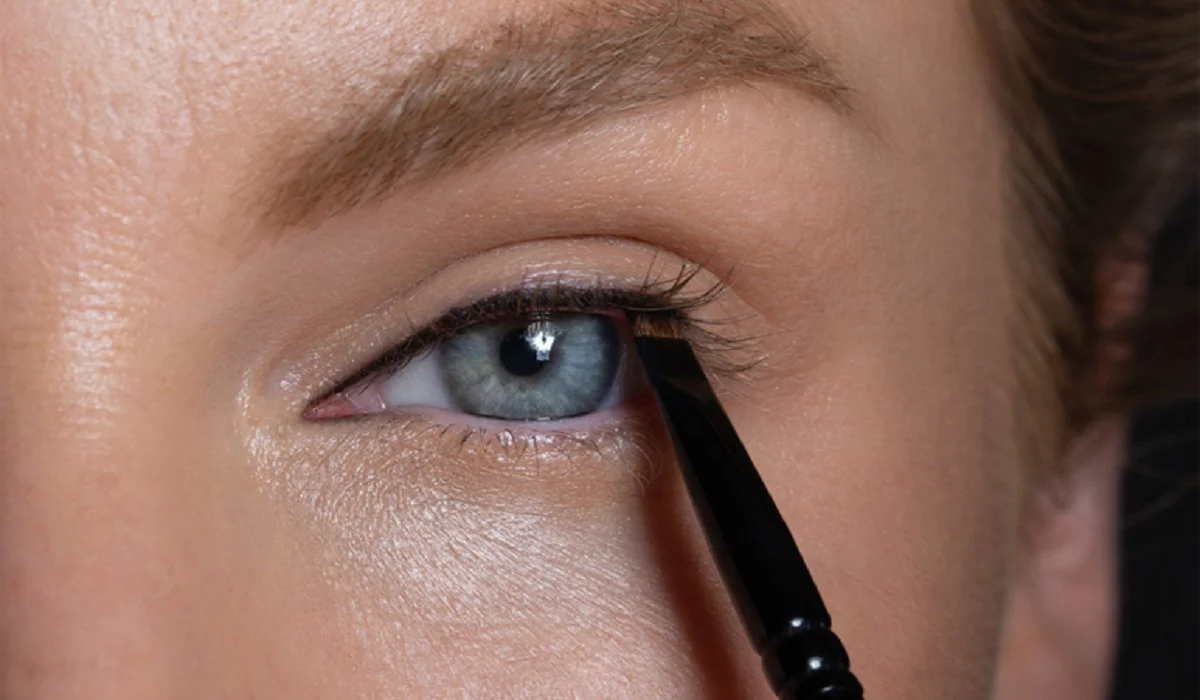
Eye makeup can transform your look from ordinary to spectacular with just a few strokes. Whether you’re a beginner aiming for a natural day look or an evening glam, mastering the basics of eye makeup can elevate your style with an air of effortless elegance. This guide is designed to walk you through simple, chic, and easy eye makeup steps that cater to beginners, ensuring you achieve a flawless look every time. Understanding Eye Makeup Basics Before diving into the world of eye makeup, it’s crucial to familiarize yourself with the essential tools and products you’ll need. Additionally, understanding your eye shape is key to enhancing your natural beauty. This section will provide a comprehensive overview of everything from selecting the right brushes to recognizing the unique characteristics of your eyes. Preparing Your Eyes A clean canvas is essential for any masterpiece, and the same goes for your eye makeup. We’ll cover the importance of starting with a clean base and how using a primer can extend the wear of your eyeshadow, prevent creasing, and ensure a smooth application. Mastering the Natural Look The natural look is a timeless classic that suits any occasion. Learn how to select neutral shadows that complement your skin tone and master blending techniques for a seamless, subtle finish that enhances your eyes without overwhelming them. Elevating Your Look with Eyeliner Eyeliner can define your eyes and give them a dramatic lift. From pencil to gel and liquid options, this section will guide you through the types of eyeliner available and share easy application techniques for beginners to achieve that perfect wing or subtle definition. Mascara Magic Mascara is the finishing touch that brings your eye makeup together, offering volume and length to your lashes. Discover how to choose the right mascara for your needs and apply it for a clump-free, eye-opening effect. Defining Your Eyebrows Eyebrows play a crucial role in framing your face and complementing your eye makeup. This part will explore how to fill and shape your brows, even if you’re a beginner, to enhance your overall look. Eye Makeup for Different Occasions Whether you’re prepping for a day at the office or a night out, eye makeup can be tailored to fit any occasion. We’ll provide tips for creating a chic daytime look and how to effortlessly transition to an evening elegance. Adding a Pop of Color Incorporating color into your eye makeup can be daunting, but when done correctly, it can elevate your look. Learn how to choose and apply colored eyeshadows that enhance your eye color and add a fun twist to your makeup routine. The Do’s and Don’ts of Eye Makeup Avoid common pitfalls and ensure your eye makeup is both stunning and safe. This section covers the essential do’s and don’ts, from application techniques to hygiene practices to keep your eyes healthy. Fixing Common Eye Makeup Mishaps Mistakes happen to the best of us. Whether it’s smudged eyeliner or eyeshadow fallout, we’ll share quick and easy fixes to correct common eye makeup mishaps without starting over. Advanced Tips for…

How To Cover Up Tattoos Withmakeup
How to Cover up Tattoos With Makeup

Whether for a job interview, special event, or personal reasons, there are times when you might wish to conceal a tattoo temporarily. With the right makeup and technique, covering up tattoos is entirely possible, allowing for flexibility in how and when your tattoos are visible. This comprehensive guide provides everything you need to know about hiding tattoos with makeup, ensuring a flawless finish. Covering up a tattoo with makeup is a practical solution for temporarily concealing ink without the commitment of permanent removal. The key is understanding which products to use and how to apply them for a cover-up that looks natural and stays put. Understanding Tattoo Coverage Makeup Types of Makeup for Tattoo Coverage Heavy-duty concealers and color correctors are essential for tattoo coverage. Look for products specifically designed for covering tattoos or those used for stage makeup, as they offer the high pigmentation and coverage needed. Selecting the Right Shade and Formula Choose a concealer that matches your skin tone closely. If your tattoo contains vivid colors, you may need a palette of color correctors to neutralize these hues before applying concealer. Preparing Your Skin for Makeup Application Cleansing and Priming Start with clean, dry skin. Use a primer to create a smooth canvas, which helps the makeup adhere better and last longer. Importance of Hydration Moisturize the area around the tattoo, but wait until the moisturizer is fully absorbed before applying makeup. Hydrated skin ensures an even application. Step-by-Step Guide to Covering a Tattoo With Makeup Tips for a Natural and Long-Lasting Finish Removing Makeup and Caring for Your Skin Gentle Removal Techniques Use a gentle makeup remover or micellar water to avoid scrubbing, which can irritate the skin. Post-removal Skin Care After removing the makeup, cleanse the skin thoroughly and apply a nourishing moisturizer to keep the skin healthy. How to Cover up Tattoos With Makeup Recap of Key Points: Concealing tattoos with makeup is a viable option for those seeking temporary coverage. By selecting the right products and following proper application techniques, you can achieve a cover-up that looks natural and withstands the rigors of your day. Covering tattoos with makeup is an art that combines the right products with skillful application to achieve a natural-looking concealment. Whether for a special occasion or everyday need, the ability to temporarily hide your tattoos gives you control over your appearance. With practice and patience, anyone can master this technique, embracing the flexibility and confidence that comes with flawless tattoo coverage.

Niacinamide Benefits 2
Unveiling the Power of Niacinamide: A Comprehensive Guide on Usage and Benefits

Unlocking the Power of Niacinamide: A Comprehensive Overview on Use and BenefitsNiacinamide (Vitamin B3) has taken the beauty world by storm with its abundance of skin benefits and widespread adoption by various skincare formulations. Understanding what niacinamide is and incorporating it into your routine will open a host of transformative skincare possibilities that could make a real difference to both its effectiveness and efficacy. Niacinamide plays a pivotal role in keeping skin health at optimal levels and treating common issues, from soothing irritations to stimulating collagen production for firmness and elasticity. Niacinamide also regulates oil production – making it an invaluable ally in treating acne-prone or oily complexions. Benefits of Niacinamide for Your Skin Reducing Fine Lines and Wrinkles: Niacinamide’s collagen-boosting effects result in smoother, younger-looking skin over time by diminishing fine lines and wrinkles over time.Hyperpigmentation/Dark Spots: Niacinamide’s anti-hyperpigmentation benefits can also help mitigate hyperpigmentation/darken spots to create smoother-looking complexion. Niacinamide, known for its brightening effects, helps fade hyperpigmentation and dark spots for an even skin tone. Niacinamide also regulates oil production to control acne flare-ups. Niacinamide’s sebum-balancing effects make it effective at managing oiliness and avoiding breakouts – an asset for those living with acne-prone skin. Reducing Redness and Inflammation: Niacinamide helps decrease redness and inflammation within skin pores as well as improving overall appearance, providing valuable therapeutic relief to acne sufferers. Niacinamide’s anti-inflammatory properties make it an effective yet gentle solution to reduce redness and soothe irritated skin, perfect for sensitive skin types. Add Niacinamide into Your Routine: Cleanser with Niacinamide: Start off your routine right with a cleanser containing niacinamide to reap its many advantages at the outset of your skincare regime.Niacinamide Serums: Niacinamide serums provide powerful solutions that target specific problems like hyperpigmentation or fine lines. Choose one to address them effectively. Niacinamide-rich moisturizers deliver both hydration and the vitamin’s skin-nourishing benefits, making these suitable for various skin types. Sunscreen with Niacinamide: Sunscreen should be part of any skincare regime, and one with Niacinamide offers multiple advantages for protecting skin against damage caused by UV radiation while offering additional skincare benefits. Incorporate it into treatments: Integrate Niacinamide into targeted treatments like face masks and overnight creams for intensive skin care. Niacinamide is an amazing skincare ingredient, offering benefits suitable for many different skin types and concerns. From targeting signs of aging and hyperpigmentation, to acne control and management – niacinamide offers something everyone could use more of in their skincare regime! When applied correctly into one’s routine it can transform to give one radiant, healthy-looking complexions. Are You Wondering If Niacinamide Causes Any Harm? Refuting Common Misconceptions Niacinamide (Vitamin B3) has become widely popular and celebrated due to its many therapeutic qualities. Niacinamide can be safely integrated into any skincare regime when administered correctly and it poses minimal risk. As with any product, however, it’s crucial that users follow recommended usage instructions and conduct patch tests, especially those with sensitive skin or concerns related to their treatment or condition. Consulting a dermatologist for customized advice about adding Niacinamide into their regime safely can offer invaluable assistance.

5secrets To Achieving Blackhead Free Skin
5 Secrets to Achieving Blackhead-Free Skin

Blackheads, those frustrating tiny black specks that frequently appear on our most noticeable areas like the nose, chin, and forehead, are a widespread concern for many individuals. Gaining an understanding of blackheads and the reasons behind their occurrence is the initial step towards effectively combating them. This guide is designed to provide you with the essential tools, knowledge, and advice needed to achieve and sustain a complexion free of blackheads, ensuring it remains radiant and healthy. The Underlying Science of Blackheads Known in medical terms as open comedones, blackheads develop when pores are blocked by a mix of sebum (skin oil) and dead skin cells. The exposure of this blockage to air leads to oxidation and turns it black, setting them apart from whiteheads. Grasping the origins of blackheads and the significance of sebum and dead skin cells in their development is key for their prevention and treatment. Fundamental Skincare Practices for Preventing Blackheads Preventing blackheads effectively hinges on a customized skincare routine. Essential steps include daily cleansing, consistent exfoliation, and appropriate moisturization. We will explore how these measures can avert the formation of blackheads and preserve skin vitality. Advanced Treatments for Blackheads For those in search of more profound solutions, advanced treatments like chemical peels, microdermabrasion, and laser therapy present promising outcomes. These procedures are instrumental in deeply purifying pores, eliminating dead skin cells, and diminishing blackheads’ visibility. Over-the-Counter Options A plethora of over-the-counter products are available for tackling blackheads, encompassing products with salicylic acid, retinoids, and masks containing charcoal or clay, each providing distinct advantages in the pursuit of clear skin. Prescription Solutions For cases that are more challenging, dermatologists might suggest prescription medications, including topical retinoids and oral alternatives. Recognizing when to resort to these options can significantly change the game for individuals battling persistent blackheads. Dietary Influence on Skin Health The connection between our diet and the condition and appearance of our skin is undeniable. This segment will delve into how dietary choices influence skin health, spotlighting foods to avoid and nutrients that foster a flawless complexion. Lifestyle Adjustments for Enhanced Skin In addition to skincare products and procedures, lifestyle aspects like hydration, managing stress, and the quality of sleep have substantial impacts on skin condition. Adopting positive lifestyle modifications can lead to remarkable enhancements in skin health. Home-based and Natural Solutions For enthusiasts of natural and home-based methods, alternatives such as tea tree oil and DIY exfoliating scrubs can provide gentle yet effective means to manage blackheads. The Crucial Role of Sun Protection Sun protection is an indispensable aspect of any skincare regime, especially for those prone to blackheads. Selecting the appropriate sunscreen and comprehending its importance in preventing blackheads are crucial measures towards maintaining skin health. Achieving a Complexion Without Blackheads This segment will outline an all-encompassing strategy, detailing the vital products, practices, and tips for securing and keeping a complexion devoid of blackheads, customized to various skin types and issues. Deciphering Your Skin Type Customizing your skincare routine to your specific skin type is essential. This part of the guide will assist in identifying your…

Perfectly Defined: A Guide To Choosing The Right Shade Of Eyebrow Pencil
Perfectly Defined: A Guide to Choosing the Right Shade of Eyebrow Pencil

Eyebrows play a significant role in framing the face and enhancing our overall appearance. Whether you prefer a natural or bold look, using an eyebrow pencil can help you achieve perfectly defined brows. However, selecting the right shade of eyebrow pencil can be a daunting task, as it can make or break your entire makeup look. In this article, we will guide you through the process of choosing the ideal shade of eyebrow pencil that complements your hair color, skin tone, and personal preferences. From understanding undertones to considering intensity, we will equip you with the knowledge to achieve flawlessly sculpted brows. Analyze Your Hair Color:When choosing an eyebrow pencil, the first step is to analyze your natural hair color or the color you dye your hair. Match your eyebrow pencil shade to the closest color or undertone of your hair for a harmonious and balanced look. If you have light hair, opt for a shade that is one to two shades darker. For dark hair, choose a pencil that is one to two shades lighter. This will ensure your brows look natural and complement your overall hair color. Consider Your Skin Tone:Your skin tone plays a crucial role in determining the most flattering shade of eyebrow pencil. Different undertones, such as warm, cool, or neutral, should be considered to achieve a cohesive and polished look. For Warm Undertones: If you have warm undertones with hints of yellow, peach, or golden hues in your skin, opt for eyebrow pencils with warm tones. Look for shades that have a slight reddish or bronze undertone to complement your warm complexion. For Cool Undertones: If your skin has cool undertones with hints of pink or blue, choose an eyebrow pencil with cool tones. Look for shades that have a slightly ashy or taupe undertone to mimic the natural color of cool-toned hair. For Neutral Undertones: If you have a neutral undertone, you have the flexibility to choose a variety of shades. Experiment with both warm and cool tones to find the shade that enhances your brows and balances your overall look. Evaluate the Intensity:The intensity of the eyebrow pencil refers to its level of darkness or lightness. Consider the intensity that suits your desired eyebrow look and the occasion.Natural and Soft Look: If you prefer a natural and soft brow look, choose a pencil with a lighter intensity. Opt for a shade that is closer to your natural hair color or one shade darker for added definition. Bold and Defined Look: For a more dramatic and defined brow, select an eyebrow pencil with a higher intensity. Choose a shade that is one to two shades darker than your hair color for a striking effect. Test Before Committing:Before purchasing an eyebrow pencil, it is crucial to test the shade on your skin or hair. Many beauty stores provide testers or samples for you to swatch and evaluate. Test the pencil on the back of your hand or along your brow area to see how it blends with your natural hair color and complements your skin tone….

The Allure Of Sea Salthairspray
The Allure of Sea Salt Hairspray

Within the expansive realm of haircare solutions, Sea Salt Hairspray stands out as a cherished selection, rivaling the essential dry shampoo in popularity. Its acclaim is well-deserved; this miraculous concoction bestows upon your hair an enviable vitality and volume, solidifying its position as a staple in daily hairstyling routines. However, the magic of Sea Salt Hairspray extends beyond mere volume enhancement. This guide aims to enlighten you on its comprehensive benefits, optimal usage techniques, and the simplicity of crafting your personalized version at home. Unraveling the Mystique of Sea Salt Hairspray Esteemed among hairstyling aficionados and homegrown experts, Sea Salt Hairspray is celebrated for its ability to texture hair, closely replicating the effect saltwater has on our tresses. Contrary to what its name might suggest, it forgoes a potent fragrance, presenting itself as an inclusive solution for anyone eager to amplify their hair’s natural charm. Regardless of whether your hair is curly and seeks definition, or straight and yearns for added volume, this spray stands as your quintessential ally in sculpting the ideal hairstyle. Maximizing the Efficacy of Sea Salt Hairspray To achieve unparalleled results, initiate the process on clean, slightly moist hair. Prior to application, ensure your hair is devoid of tangles and remnants of other styling products, then proceed to evenly distribute the spray from the mid-lengths to the tips. Employing a subtle scrunch or twist will further define waves or curls. Embrace the essence of a naturally windswept, beachy appearance by allowing your hair to air dry, steering clear of towel drying to avert frizz and potential damage. Sea Salt Spray’s Adaptability Across Hair Varieties Sea Salt Hairspray exhibits no prejudice, offering a spectrum of advantages to all hair types: Crafting Your Own Sea Salt Hairspray: Formulas Catered to Specific Hair Needs For Curly Hair: A concoction blending sea salt and heated water until dissolved, enriched with melted coconut oil and a hint of leave-in conditioner for a moisturizing effect. For Dry Hair: A mix of sea salt and warm water, enhanced with Epsom salt and macadamia oil to hydrate while texturizing. For Thin Hair: A solution of sea salt in warm water, amalgamated with avocado oil and a selection of essential oils for fragrance and additional moisture. Poised for a Textural Revolution? Armed with this knowledge and the tools for creation, you stand ready to leverage the transformative power of Sea Salt Hairspray. Whether you’re experimenting with crafting your blend or honing your application technique, the allure of voluminous, textured hair is now within your grasp. Which homemade recipe will you venture to explore first?: Sea Salt Hairspray transcends the ordinary, positioning itself as more than just a styling aid; it is a portal to achieving the coveted, effortless beachy waves. With its universal appeal across hair types and the feasibility of DIY variations, it becomes an indispensable component in the hair care repertoire of those in pursuit of a natural, textured look. Yield to the allure of sea salt and witness your hair flourish with unprecedented volume and dynamism. Can I use sea salt spray on colored…

7 Makeup Mistakes That Might Be Making You Look Older
7 Makeup Mistakes That Might Be Making You Look Older: How to Avoid Them

Makeup is a powerful tool that can enhance your natural beauty and boost your confidence. However, certain makeup habits might be doing more harm than good, especially as they can inadvertently age your appearance. Identifying and correcting these mistakes can make a significant difference in looking effortlessly youthful. This guide will explore seven common makeup mistakes and provide practical advice for avoiding them. Mistake #1: Overdoing Foundation Choosing the Wrong Formula A heavy foundation or the wrong formula can settle into fine lines and wrinkles, accentuating them. Opt for lightweight, hydrating foundations that offer buildable coverage. Application Techniques to Avoid Avoid applying foundation too heavily. Use a damp beauty sponge or a stippling brush for a more natural, skin-like finish. Remember, less is more. Mistake #2: Neglecting Skincare Before Makeup The Importance of a Hydrated Base Skincare plays a crucial role in how makeup sits on your skin. Dehydrated skin can cause makeup to cling to dry patches, making you look older. Recommended Pre-Makeup Skincare Routine Always start with a clean face, followed by a hydrating serum or moisturizer, and don’t forget to apply a primer to smooth out the skin’s texture. Mistake #3: Using Too Much Powder The Effect of Powder on Mature Skin Setting powder, especially when overused, can highlight fine lines and dry out your skin. Use translucent powders sparingly and only in areas that need it. Alternative Setting Methods Consider setting sprays or lightly dusting powder only in the T-zone to maintain a dewy finish on the rest of the face. Mistake #4: Ignoring Eyebrow Care Filling Eyebrows Too Harshly Over-filled eyebrows can harden your features, making you appear older. Aim for a more natural look by using feathery strokes and choosing a shade that matches your hair color closely. The Role of Eyebrows in Facial Structure Well-groomed eyebrows can lift the face and frame the eyes, contributing to a more youthful appearance. Consider consulting a professional for the best shape. Mistake #5: Over-Contouring and Highlighting Finding the Balance Too much contouring or highlighting can look unnatural and aging. Use these products sparingly and blend thoroughly to enhance your natural bone structure subtly. Techniques for a Natural Contour Opt for cream products that can be blended out easily for a more natural-looking shadow and glow, rather than harsh lines. Mistake #6: Choosing the Wrong Lip Products The Impact of Matte and Dark Shades Matte and darker lip colors can make lips appear thinner and more aged. They can also emphasize lip lines. Hydrating Lip Color Options Choose lip colors that are closer to your natural lip color and opt for formulas that offer hydration and a slight sheen to give the appearance of fuller, younger lips. Mistake #7: Skipping Eyelid Primer Preventing Creased Eyeshadow Eyelid primer prevents eyeshadow from settling into creases, which can age the eyes. It creates a smooth canvas for eyeshadow, enhancing its color and longevity. Enhancing Eyeshadow Longevity A good primer can also intensify the pigment of your eyeshadow, making your eye makeup look more vibrant and youthful throughout the day. In conclusion, avoiding…

The One Layer Skincare Technique: Simplifying Your Skincare Routine For Maximum Effectiveness
The One Layer Skincare Technique: Simplifying Your Skincare Routine for Maximum Effectiveness

In the realm of skincare, one can easily become overwhelmed by the vast array of products, elaborate routines, and complicated techniques. However, there is a growing trend towards simplification and efficiency, giving rise to the ‘One Layer’ skincare technique. This minimalist approach aims to streamline your skincare routine while still providing maximum effectiveness. In this article, we will delve into the essence of the One Layer technique, discussing its benefits, step-by-step implementation, and the ideal products to use. So, get ready to simplify your skincare routine and achieve radiant, healthy skin! Understanding the One Layer Skincare Technique: The One Layer skincare technique is rooted in the belief that using fewer products, but with a strategic focus on high-quality, multi-functional formulations, can yield excellent results. Instead of piling numerous layers of products onto your skin, this approach emphasizes selecting a select few products that address multiple skincare concerns. By simplifying your routine, you can save time, money, and potentially reduce the risk of overwhelming your skin with an excessive number of ingredients. Step-by-Step Implementation: Identify your skin concerns: Begin by determining the primary skincare concerns you wish to address. Whether it’s dryness, acne, hyperpigmentation, or aging, understanding your skin’s specific needs will guide your product selection. Choose multi-functional products: Look for products that offer multiple benefits in a single application. For example, a moisturizer that also contains SPF can provide hydration, sun protection, and even a touch of coverage. Cleanse thoroughly: Start your routine with a gentle cleanser to remove dirt, oil, and impurities from the skin. Opt for a cleanser that suits your skin type, whether it’s oily, dry, or sensitive. Apply your core treatment: This step involves applying your primary treatment product, such as a serum or treatment essence, that targets your specific skin concerns. Look for ingredients like hyaluronic acid for hydration, vitamin C for brightening, or retinol for anti-aging. Moisturize and protect: Follow up with a moisturizer that provides hydration and locks in the active ingredients from the previous steps. Choose a moisturizer suitable for your skin type, whether it’s lightweight for oily skin or richer for dry skin. If your moisturizer doesn’t contain SPF, apply a broad-spectrum sunscreen as the final step to protect your skin from harmful UV rays. Recommended Products: When practicing the One Layer skincare technique, it’s crucial to choose products that offer a comprehensive range of benefits. Here are some recommendations: Multi-functional serum: Look for a serum that combines various active ingredients, such as antioxidants, peptides, and hyaluronic acid. This will provide hydration, anti-aging benefits, and promote overall skin health. Moisturizer with SPF: Opt for a moisturizer that includes broad-spectrum SPF protection. This will help streamline your routine by combining hydration, sun protection, and potentially even a tint or coverage. Gentle cleanser: Choose a cleanser that effectively removes impurities without stripping the skin of its natural oils. Look for ingredients like ceramides or hyaluronic acid to maintain moisture balance while cleansing. Targeted treatment: If you have specific skincare concerns, such as acne or hyperpigmentation, select a treatment product that addresses those issues directly. Ingredients…