Quenching Radiance: The Profound Benefits of Water Consumption for Skin Health

Quenching Radiance- The Profound Benefits of Water Consumption for Skin Health-2

Water, the elixir of life, plays a vital role in our overall well-being. While its importance for bodily functions is well-known, its impact on skin health often takes a backseat. Our skin, the largest organ, requires adequate hydration to function optimally and radiate a healthy glow. In this comprehensive guide, we will dive into the world of water consumption and its profound benefits for skin health. From maintaining hydration to supporting a youthful complexion, the advantages of drinking water extend far beyond quenching our thirst.

The Role of Water in Skin Health

Water is essential for skin health due to several key functions it performs within the body:

  1. Hydration: Hydrated skin is plump, smooth, and supple. Water helps maintain the skin’s natural moisture barrier, preventing dehydration and dryness.
  2. Nutrient Transport: Water facilitates the transport of nutrients to skin cells, ensuring they receive essential vitamins and minerals for optimal function.
  3. Toxin Elimination: Adequate water intake supports the body’s detoxification processes, helping eliminate waste and toxins that can contribute to skin issues.
  4. Collagen Production: Collagen, a protein responsible for skin’s elasticity and firmness, requires water to form properly.
  5. Blood Circulation: Good blood circulation delivers oxygen and nutrients to skin cells, promoting a healthy complexion.

Benefits of Water Consumption for Skin

  1. Enhanced Hydration: Drinking enough water ensures that your skin cells are adequately hydrated, minimizing dryness, flakiness, and dullness.
  2. Youthful Appearance: Well-hydrated skin appears plump and youthful, reducing the appearance of fine lines and wrinkles.
  3. Natural Glow: Hydrated skin reflects light better, resulting in a natural, radiant glow.
  4. Clear Complexion: Water helps flush out toxins and excess oil, reducing the likelihood of clogged pores and breakouts.
  5. Even Skin Tone: Hydration can help even out skin tone by supporting the natural shedding of dead skin cells.
  6. Reduced Puffiness: Water consumption helps minimize water retention, reducing puffiness and under-eye bags.
  7. Faster Wound Healing: Hydrated skin heals faster due to improved circulation and nutrient delivery.

How Much Water Should You Drink for Skin Health?

While the “8×8” rule (eight 8-ounce glasses of water per day) is a commonly cited guideline, individual water needs can vary based on factors like age, activity level, climate, and overall health. A more personalized approach is to listen to your body’s signals. Thirst is an excellent indicator that your body needs water. Additionally, your urine color can offer insights into your hydration level—a light, pale yellow color indicates proper hydration.

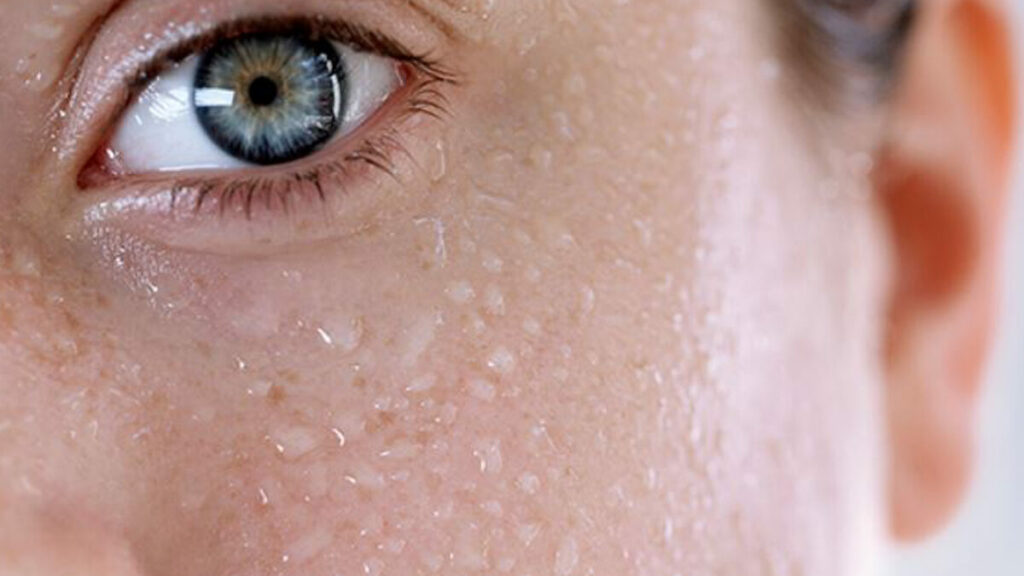
Photo,Of,Screaming,Woman,With,Drops,Of,Water,Around,Her

Tips for Increasing Water Consumption

  1. Carry a Reusable Bottle: Having a reusable water bottle with you makes it easier to drink water throughout the day.
  2. Set Reminders: Use alarms or phone apps to remind you to drink water regularly.
  3. Infuse with Flavors: If plain water doesn’t excite you, infuse it with slices of fruits like lemon, cucumber, or berries for added flavor.
  4. Incorporate Hydrating Foods: Many fruits and vegetables have high water content. Incorporate hydrating foods like watermelon, cucumber, and oranges into your diet.
  5. Create a Routine: Have a glass of water when you wake up, before meals, and before bedtime to establish a routine.
  6. Monitor Your Intake: Keep track of your daily water intake to ensure you’re meeting your hydration goals.

Expert Insights on Water and Skin Health

  1. Dr. Doris Day, Dermatologist: “Hydrated skin is the foundation of skin health. When your skin is properly hydrated, it functions optimally, which in turn enhances its appearance.”
  2. Dr. Harold Lancer, Dermatologist: “Water consumption is critical for maintaining skin’s moisture balance, elasticity, and overall health. It’s as important as a skincare regimen.”
  3. Dr. Joshua Zeichner, Dermatologist: “Drinking water is important, but also make sure you’re eating a well-balanced diet rich in fruits and vegetables that contribute to hydration.”

Considerations and Additional Practices for Skin Health

  1. Balanced Diet: Hydration works hand in hand with a balanced diet. Nutrient-rich foods contribute to healthy skin from the inside out.
  2. Avoid Excessive Caffeine and Alcohol: These beverages can have a diuretic effect, leading to increased fluid loss. Balance them with water intake.
  3. External Hydration: In addition to drinking water, consider using hydrating skincare products that contain ingredients like hyaluronic acid.
  4. Mindful Skincare: Skincare products can enhance water retention in the skin. Apply a moisturizer to damp skin to lock in hydration.

Water consumption isn’t just a mundane necessity; it’s a powerful tool for achieving and maintaining vibrant, healthy skin. The benefits of proper hydration extend beyond quenching your thirst, manifesting in a radiant complexion, youthful appearance, and overall skin health. By making conscious efforts to prioritize hydration through mindful consumption and complementary skincare practices, you’re laying the foundation for skin that not only looks beautiful but also functions optimally. Embrace the gift of water, and let its transformative effects illuminate your natural radiance from the inside out.


12 More Makeup Mistakes That Might Be Making You Look Older

Makeup is a powerful tool that, when used correctly, can enhance natural beauty, conceal imperfections, and even take years off your appearance. However, certain makeup practices can have the opposite effect, adding years to your face instead of subtracting them. This article dives deep into 12 more makeup mistakes that might be making you look older and provides expert advice on how to avoid them for a fresher, more youthful look. Understanding Makeup and Aging The relationship between makeup and perceived age is intricate. While makeup has the potential to highlight our best features, certain application techniques and product choices can inadvertently age us. Factors such as texture, color, and formula play significant roles in how makeup interacts with mature skin. It’s crucial to adapt our makeup strategies as we age to complement our changing skin, rather than emphasize the signs of aging. Mistake #1: Skipping Primer The Role of Primer in Makeup Longevity Primer is essential for creating a smooth base, filling in fine lines and enlarged pores, which become more prominent as skin ages. A silicone-based primer, for example, can blur imperfections and provide a seamless surface for the rest of your makeup, ensuring it lasts longer without settling into wrinkles. Recommendations for Mature Skin Look for hydrating primers that contain ingredients like hyaluronic acid to add moisture to the skin, which helps in achieving a plump, youthful appearance. Avoid mattifying primers, as they can dry out the skin and make fine lines more visible. Mistake #2: Overusing Powder Powder’s Aging Effect Excessive use of powder, especially heavy or mattifying formulas, can settle into fine lines and emphasize wrinkles, making the skin look older. Powder absorbs moisture, and on mature skin, it can lead to a cakey appearance. Alternative Setting Options Opt for translucent setting powders applied sparingly with a fluffy brush to areas that tend to get oily, like the T-zone. Consider switching to liquid or cream-based products that provide a dewy finish, as they help maintain skin’s natural glow. Mistake #3: Neglecting Eyebrow Care Importance of Full Eyebrows Eyebrows frame the face, and fuller brows are associated with youth. With age, brows can become sparse. Filling in your eyebrows subtly can lift the face and make you look younger. Eyebrow Filling Techniques Use a brow pencil or powder that matches your eyebrow color to fill in sparse areas with light, feathery strokes. Avoid harsh lines or overfilling, as this can look unnatural. Consider a tinted brow gel for a more natural look that also sets hairs in place. Mistake #4: Heavy Foundation Use Choosing the Right Foundation A heavy, matte foundation can settle into fine lines and wrinkles, highlighting them. Instead, opt for lightweight, hydrating formulas that provide coverage without the weight. Tinted moisturizers or BB creams are excellent alternatives for mature skin. Application Tips for a Natural Look Apply foundation with a damp beauty sponge to sheer out the coverage and create a more natural, skin-like finish. Focus on areas that need coverage rather than applying a thick layer over the entire face. Mistake #5: Incorrect Concealer…

How Tocreate A Simple Makeup Look
How to Create a Simple Makeup Look

Embarking upon the path to perfecting an effortless makeup look necessitates a profound comprehension of your skin’s unique characteristics and a dedication to the minimalist ethos in beauty. This methodology transcends the mere reduction of cosmetic items; it’s centered on optimizing the impact of each selected product. Identifying whether your skin is oily, dry, or a combination thereof is fundamental. This knowledge shapes the selection of cosmetics that will most effectively highlight your features, maintaining a delicate balance without overburdening your skin. Rooted in the principle that “less is indeed more,” this approach seeks to amplify your innate allure rather than conceal it, aiming for an appearance that exudes an easy elegance, underscored by the use of premium products that provide a subtle enhancement and durability. Priming Your Canvas The preliminary step, devoid of any color application, is essential: skin preparation. A smooth and hydrated base not only elevates the appearance of your makeup but also extends its longevity. Begin with a mild cleanser to eliminate impurities, followed by a moisturizer tailored to your skin type to ensure hydration. Should your plans involve outdoor activities, applying sunscreen is imperative for shielding your skin from the detrimental effects of UV exposure. This regimen not only prepares your skin for cosmetic application but also promotes its long-term health. Curating a Fundamental Makeup Collection Assembling a foundational makeup kit need not be daunting or costly. Concentrate on securing versatile, high-quality staples that fulfill multiple roles. A BB cream or tinted moisturizer, offering light coverage while nurturing your skin, acts as both a foundation and a skincare solution. Essentials for daily use include a neutral eyeshadow palette, a mascara that both lengthens and volumizes, a blush in natural tones, and a lip color that flatters your skin tone. The significance of quality tools—a set of precise application brushes and a blending sponge—cannot be overstated, as they significantly enhance the makeup application experience. A Stepwise Tutorial for a Minimalist Makeup Look Commence with a Pristine Foundation: Post-skincare, a light primer application will smooth any imperfections, setting the stage for even coverage. Opt for a BB cream or tinted moisturizer for sheer, breathable coverage, complemented by a concealer for discreet blemish and under-eye circle camouflage, seamlessly blended with a moist beauty sponge. Subtly Defined Eyes: Choose neutral or nude shadows for a gentle color sweep across the lids. A slender eyeliner application on the upper lash line, paired with a single mascara coat, can brighten and enlarge the eyes, enhancing their sparkle. Cheek Color Enhancement: Apply a blush, cream or powder, to the cheeks’ apples, blending upwards toward the temples for a radiant, lifted look. Lip Color Refinement: Select a lip shade marginally deeper than your natural lip color for subtle emphasis. A tinted lip balm or gloss can impart a splash of color while maintaining lip hydration. Longevity Tips for a Minimalist Look For enduring makeup, a setting spray application post-makeup is advisable. For those with oily skin, a translucent powder’s light application in the T-zone can mitigate shine without heaviness. Compact powder or blotting paper touch-ups…

The Definitive Manual On Mastering Eye Liner App
The Definitive Manual on Mastering Eye Liner Application: Insightful Strategies, Helpful Hints, and Current Styles

Eye liner, the quintessential tool in your makeup arsenal, can elevate your appearance from the mundane to the extraordinary with a few well-placed strokes. Acting as the defining instrument for the eyes, it introduces depth and intensity. Whether your goal is a modest enhancement or a striking declaration, the mastery of eye liner application is paramount. This guide provides an exhaustive approach to consistently achieving flawless eye liner application. Understanding Eye Liner Types Pencil Liners: The Foundation of Effortless ApplicationPencil liners stand as the cornerstone for both beginners and seasoned makeup artists, renowned for their straightforward use and lenient application method. They are the ideal choice for crafting soft, blended looks, embodying versatility for daily usage. Gel Liners: The Epitome of Boldness and DurabilityGel liners deliver a pronounced, enduring line while boasting a smudge-resistant quality. When applied with a brush, they allow for a customizable thickness and style, ranging from sleek lines to bold wings. Liquid Liners: The Hallmark of PrecisionLiquid liners are celebrated for their exactness and longevity. Though they demand a steady hand, the payoff includes sharp lines and impeccable wings, making them essential for achieving defined and dramatic eye looks. Preparing Your Eyes Cleansing and Priming Your EyelidsInitiate with a pristine base by eliminating any oil or existing makeup from your eyelids. An eye primer will enhance the liner’s grip, guaranteeing its endurance throughout the day without the worry of smudging or fading. Selecting the Ideal Eye Liner for Your Eye ShapeRecognizing your eye shape is crucial in choosing an eye liner style that complements you. From almond to monolid eyes, each shape can be accentuated with specific application techniques to highlight your innate beauty. Basic Techniques for Eye Liner Application Mastering Liner GripHold your liner akin to a pencil, albeit with a gentler grasp, to facilitate more fluid motion. This grip ensures enhanced control over the application’s pressure and angle, yielding smoother lines. Steadying Your Hand for Meticulous ApplicationAnchor your elbow on a stable platform and slightly stretch your eyelid for a steadier application process. This method is particularly effective for clean, sharp lines, especially when using liquid and gel liners. The Pencil Liner Technique Step-by-Step ApproachCommence at the inner corner, drawing brief, interconnected strokes along your lash line, incrementally thickening the line as you progress outward. For a softer appearance, smudge slightly, or for a more defined look, leave as drawn. Advice for NovicesPencil liners are forgiving, allowing for straightforward corrections. Continual practice will help you discover the most effective pressures and angles for your desired outcome. Mastering Gel Liner Essential Tools: Brush SelectionYour choice of brush can greatly influence your application experience. Angled brushes facilitate precision, whereas fine-tip brushes excel in intricate work and crafting sharp wings. Securing a Smudge-Proof LookGel liners set swiftly, necessitating work in small segments and immediate smoothing of any lines. Once dry, their resistance to smudging renders them perfect for extended wear. Perfecting the Art of Liquid Liner Crafting the Ultimate Wing: An In-depth TutorialBegin with a slender line from the inner corner, thickening towards the outer edge. For the wing,…

Women Work Together For Years Then Discover They’re Biological Sisters
Women work together for years then discover they’re biological sisters

Children who are adopted often hope to be reunited with their biological family so they can have some idea of where they are from. This story is about two women who were adopted from another country and somehow fate helped them find their way to one another. 31-year-old Julia Tinetti, and 32-year-old Cassandra Madison met in 2013 when both of them were working at the Russian Lady Bar in New Haven. Julia noticed a tattoo of the Dominican Republic’s flag on Cassandra’s arm and commented on how she is Dominican as well but was adopted from there. Julia stopped in her tracks to reveal that she had a similar story, she was Dominican but adopted by an American family as a baby. We would go out for drinks, for dinner. The two women would often get told by their other co-workers that they looked so much alike that they could be sisters. The women entertained the idea and looked at their adoption documents but they did not match up. But based on the similarities in their adoption timelines and resemblance, both women did feel they had some sort of connection with one another. Tinetti was born in 1989 and was adopted shortly after her birth while Madison was born a year earlier in 1988 and adopted shortly after as well. The women were confident that they would be related to one another but a look at their adoption papers which did not match made them second guess their instincts and conclude that they might not be related after all. In 2015, Madison moved from Connecticut to Virginia Beach, Virginia however still kept in touch with Tinetti. In 2018, her adoptive mother gave her a 23andMe DNA testing kit for Christmas so she could know more about her background. What she found out was shocking… “I did not know that you can find a relative, so that was very much a shock,” Madison said, she was matched to several distant relatives. Madison’s childhood friend Molly Sapadin helped piece the puzzle together. Sapadin was adopted shortly after her birth in 1990 from the Dominican Republic as well. Her adoptive mother was friends with Madison’s adoptive mother and the girls grew up together in New Haven, Connecticut. Sapadin compared her adoption paperwork with Madison’s and they realized they might be half-sisters as they had the same last name and the same person listed as their birth mother. Sapadin and Tinetti were adopted on the same day and in close proximity to one another and hence think their paperwork must have been mixed up by whoever had been filling it out. Madison was able to match with a first cousin due to her DNA results. The cousin helped connect her to her biological father Adriano Luna Collado. Her birth father still resides in the Dominican Republic. As for her biological mother, Yulianna Collado passed away in 2015 after suffering from a heart attack. In 2018, Madison made a trip to the Dominican Republic to meet her biological father and her siblings. When she met her family,…

The One Layer Skincare Technique: Simplifying Your Skincare Routine For Maximum Effectiveness
The One Layer Skincare Technique: Simplifying Your Skincare Routine for Maximum Effectiveness

In the realm of skincare, one can easily become overwhelmed by the vast array of products, elaborate routines, and complicated techniques. However, there is a growing trend towards simplification and efficiency, giving rise to the ‘One Layer’ skincare technique. This minimalist approach aims to streamline your skincare routine while still providing maximum effectiveness. In this article, we will delve into the essence of the One Layer technique, discussing its benefits, step-by-step implementation, and the ideal products to use. So, get ready to simplify your skincare routine and achieve radiant, healthy skin! Understanding the One Layer Skincare Technique: The One Layer skincare technique is rooted in the belief that using fewer products, but with a strategic focus on high-quality, multi-functional formulations, can yield excellent results. Instead of piling numerous layers of products onto your skin, this approach emphasizes selecting a select few products that address multiple skincare concerns. By simplifying your routine, you can save time, money, and potentially reduce the risk of overwhelming your skin with an excessive number of ingredients. Step-by-Step Implementation: Identify your skin concerns: Begin by determining the primary skincare concerns you wish to address. Whether it’s dryness, acne, hyperpigmentation, or aging, understanding your skin’s specific needs will guide your product selection. Choose multi-functional products: Look for products that offer multiple benefits in a single application. For example, a moisturizer that also contains SPF can provide hydration, sun protection, and even a touch of coverage. Cleanse thoroughly: Start your routine with a gentle cleanser to remove dirt, oil, and impurities from the skin. Opt for a cleanser that suits your skin type, whether it’s oily, dry, or sensitive. Apply your core treatment: This step involves applying your primary treatment product, such as a serum or treatment essence, that targets your specific skin concerns. Look for ingredients like hyaluronic acid for hydration, vitamin C for brightening, or retinol for anti-aging. Moisturize and protect: Follow up with a moisturizer that provides hydration and locks in the active ingredients from the previous steps. Choose a moisturizer suitable for your skin type, whether it’s lightweight for oily skin or richer for dry skin. If your moisturizer doesn’t contain SPF, apply a broad-spectrum sunscreen as the final step to protect your skin from harmful UV rays. Recommended Products: When practicing the One Layer skincare technique, it’s crucial to choose products that offer a comprehensive range of benefits. Here are some recommendations: Multi-functional serum: Look for a serum that combines various active ingredients, such as antioxidants, peptides, and hyaluronic acid. This will provide hydration, anti-aging benefits, and promote overall skin health. Moisturizer with SPF: Opt for a moisturizer that includes broad-spectrum SPF protection. This will help streamline your routine by combining hydration, sun protection, and potentially even a tint or coverage. Gentle cleanser: Choose a cleanser that effectively removes impurities without stripping the skin of its natural oils. Look for ingredients like ceramides or hyaluronic acid to maintain moisture balance while cleansing. Targeted treatment: If you have specific skincare concerns, such as acne or hyperpigmentation, select a treatment product that addresses those issues directly. Ingredients…

How To Choose The Perfect Blush For Your Skin Tone
How to Choose the Perfect Blush for Your Skin Tone

Blush is a pivotal element in the makeup routine, capable of transforming your look with just a few strokes. It adds a healthy, youthful glow and dimension to the face, but selecting the perfect shade for your skin tone can be daunting. This guide will help you navigate the nuances of choosing a blush that complements your complexion beautifully. Understanding Your Skin Tone Identifying Warm, Cool, and Neutral Undertones Your skin’s undertone is key to selecting makeup. Warm undertones look best with peach or coral blushes, cool undertones shine with pink or rose shades, and neutral undertones can flexibly wear either. The Importance of Natural Lighting Evaluate your skin tone and undertone in natural light to get the most accurate reading, ensuring you choose a blush that harmonizes naturally with your complexion. Blush Types and Textures Powder, Cream, Liquid, and Gel Formulas Different blush formulas cater to different needs and preferences. Powder blushes are great for oily skin, cream and liquid for dry skin, and gel blushes offer a sheer, natural look. Choosing the Right Texture for Your Skin Type Match the blush texture with your skin type for the best results. Oily skin benefits from powder blushes, whereas dry skin looks radiant with cream formulas. Selecting Blush for Fair Skin Tones Best Shades for a Natural Glow Fair skin tones should opt for soft peach, light pink, or coral to add a subtle warmth without overwhelming the complexion. Avoiding Overpowering Colors Steer clear of overly dark or bright shades that can look harsh against light skin. Instead, choose light, buildable colors. Choosing Blush for Medium Skin Tones Ideal Shades for Warmth and Depth Medium skin tones are complemented by rich peach, warm mauve, and soft berry shades, which add the right amount of color for a sun-kissed look. Balancing Pigmentation and Brightness Select a blush with enough pigmentation to show up on your skin, but with a brightness that enhances your natural glow. Finding the Right Blush for Dark Skin Tones Vibrant and Deep Tones for a Radiant Look Dark skin tones can carry vibrant reds, deep oranges, and bold berries beautifully, enhancing the skin’s natural depth. Ensuring Visibility and Flattering Hues Choose highly pigmented blushes that won’t get lost on your skin, and ensure the hues complement your undertone for a flattering effect. Application Tips for a Flawless Finish Techniques for Blending and Placement Apply blush to the apples of your cheeks and blend upwards towards the temples for a lifted, youthful effect. Use light strokes to build color gradually. Tools for Application: Brushes vs. Fingers vs. Sponges A fluffy brush is ideal for powder blush, fingers work well for cream and liquid formulas, and sponges can help blend for a seamless finish. Common Mistakes to Avoid Over-Application and Mismatched Undertones Start with a light hand to avoid over-application and select shades that match your undertone to avoid a clash with your natural coloring. Ignoring the Rest of Your Makeup Palette Ensure your blush harmonizes with the rest of your makeup, including lipstick and eyeshadow, to create a cohesive, balanced…

The Ultimate Guide: How To Properly Apply Sunscreen Under Foundation
The Ultimate Guide: How to Properly Apply Sunscreen Under Foundation

Wearing sunscreen is crucial for maintaining healthy and youthful skin, protecting it from the harmful effects of the sun’s ultraviolet (UV) rays. However, many people struggle with incorporating sunscreen into their makeup routine, particularly when it comes to applying it under foundation. In this comprehensive guide, we will walk you through the steps to ensure that you can effectively wear sunscreen under foundation, allowing you to enjoy the benefits of both sun protection and flawless makeup. Step 1: Choose the Right Sunscreen:Before applying sunscreen, it is essential to select a product that suits your skin type and provides broad-spectrum protection against both UVA and UVB rays. Look for a lightweight formula that is specifically designed for the face and has a minimum SPF (Sun Protection Factor) of 30. Opt for non-comedogenic and oil-free options to prevent clogged pores and excessive shine. Step 2: Cleanse and Moisturize:Start with a clean canvas by washing your face with a gentle cleanser. Follow up with a lightweight moisturizer suitable for your skin type. Allow the moisturizer to absorb completely before proceeding to the next step. Hydrated skin ensures a smooth application of sunscreen and foundation. Step 3: Apply Sunscreen:Take a dime-sized amount of sunscreen and dot it onto your forehead, cheeks, chin, and nose. Gently spread the sunscreen across your face, ensuring even coverage. Pay extra attention to areas prone to sun exposure, such as the bridge of the nose, cheekbones, and temples. Avoid rubbing vigorously, as it may cause the sunscreen to pill or ball up. Step 4: Wait for Sunscreen to Set:Allow the sunscreen to absorb into your skin for at least 10 to 15 minutes before applying foundation. This waiting period allows the sunscreen to form a protective barrier on your skin and ensures better adherence of the foundation. Step 5: Choose a Foundation Formula:To ensure compatibility between sunscreen and foundation, opt for a foundation with a lightweight and liquid consistency. Oil-free and water-based formulas tend to work best with sunscreen, as they minimize the risk of clogged pores and allow for smoother application. Step 6: Mix Sunscreen with Foundation (Optional):If you prefer a more streamlined application process, you can mix a small amount of sunscreen with your foundation. This method helps to ensure even distribution of sun protection and foundation, providing a combined layer of coverage. However, it is important to maintain the recommended amount of sunscreen for adequate sun protection. Step 7: Apply Foundation:Using a clean makeup brush, sponge, or your fingertips, apply the foundation onto your face in gentle, downward strokes. Start from the center of your face and blend outward for a seamless finish. Avoid using excessive pressure, as it may disrupt the sunscreen layer beneath. Step 8: Set with Powder (Optional):If you prefer to set your foundation with powder, choose a translucent or mineral-based powder with sun-protective properties. Apply a light dusting to ensure your makeup stays in place while adding an extra layer of sun protection. Step 9: Reapply Sunscreen Throughout the Day:Remember that sunscreen needs to be reapplied every two hours, especially if you are exposed…