Decoding Your Skin Type: A Comprehensive Guide to Determine Your Unique Skin Profile

HOW TO DETERMINE YOUR SKIN TYPE-1

Embarking on an effective skincare journey begins with a fundamental understanding of your skin type. Your skin is as unique as your fingerprints, and its characteristics play a pivotal role in selecting the right products and routines to maintain its health and radiance. Determining your skin type is the first step toward tailoring your skincare regimen to address its specific needs. This guide will delve into the various skin types, their identifying features, and methods to accurately identify where your skin falls on the spectrum.

The Importance of Knowing Your Skin Type

Understanding your skin type is not just about aesthetics; it’s about ensuring the overall health and vitality of your skin. Different skin types have distinct needs, tendencies, and vulnerabilities. Using the wrong products or adopting an incompatible skincare routine can lead to various issues, such as excessive dryness, oiliness, breakouts, and even premature aging. By accurately identifying your skin type, you can make informed choices that promote balance, clarity, and a radiant complexion.

Common Skin Types

  1. Normal Skin: Normal skin is characterized by a well-balanced complexion. It neither feels excessively oily nor overly dry. Pores are generally small and not very noticeable. This skin type is less prone to sensitivity, breakouts, and redness.
  2. Oily Skin: Oily skin is characterized by an overproduction of sebum, the skin’s natural oil. This can lead to a shiny appearance, especially in the T-zone (forehead, nose, and chin). Oily skin is often associated with larger pores and an increased likelihood of acne and blemishes.
  3. Dry Skin: Dry skin lacks sufficient moisture and can feel tight, rough, or flaky. Pores are generally smaller, and fine lines may be more noticeable due to the lack of hydration. Dry skin is more susceptible to irritation and redness.
  4. Combination Skin: Combination skin features a mix of different skin types on different areas of the face. Typically, the T-zone is oilier (as seen in oily skin), while the cheeks and other areas may be drier. This type can be a bit challenging to manage since different areas require different approaches.
  5. Sensitive Skin: Sensitive skin is prone to redness, irritation, and discomfort in response to various stimuli such as skincare products, weather changes, or certain ingredients. It may exhibit traits of any of the aforementioned skin types but reacts more intensely.
HOW TO DETERMINE YOUR SKIN TYPE

Determining Your Skin Type

  1. The Bare-Faced Test: Start with a clean face, free from any makeup or skincare products. After a few hours, observe how your skin feels and looks. Pay attention to areas like the forehead, nose, cheeks, and chin (T-zone).
    • If your skin feels comfortable, not too oily or dry, and you don’t notice any significant shine or flakiness, you likely have normal skin.
    • If your skin feels slick and you notice shine, particularly in the T-zone, you likely have oily skin.
    • If your skin feels tight, looks flaky, and lacks a healthy glow, you likely have dry skin.
    • If your T-zone is oily while other areas feel dry or normal, you likely have combination skin.
  2. Blotting Paper Test: This test helps assess oiliness. Gently press blotting paper against different areas of your face, focusing on the T-zone.
    • If the blotting paper is saturated with oil, especially in the T-zone, you have oily skin.
    • If the blotting paper shows minimal oil in some areas, you likely have combination skin.
    • If the blotting paper doesn’t pick up much oil, you may have normal or dry skin.
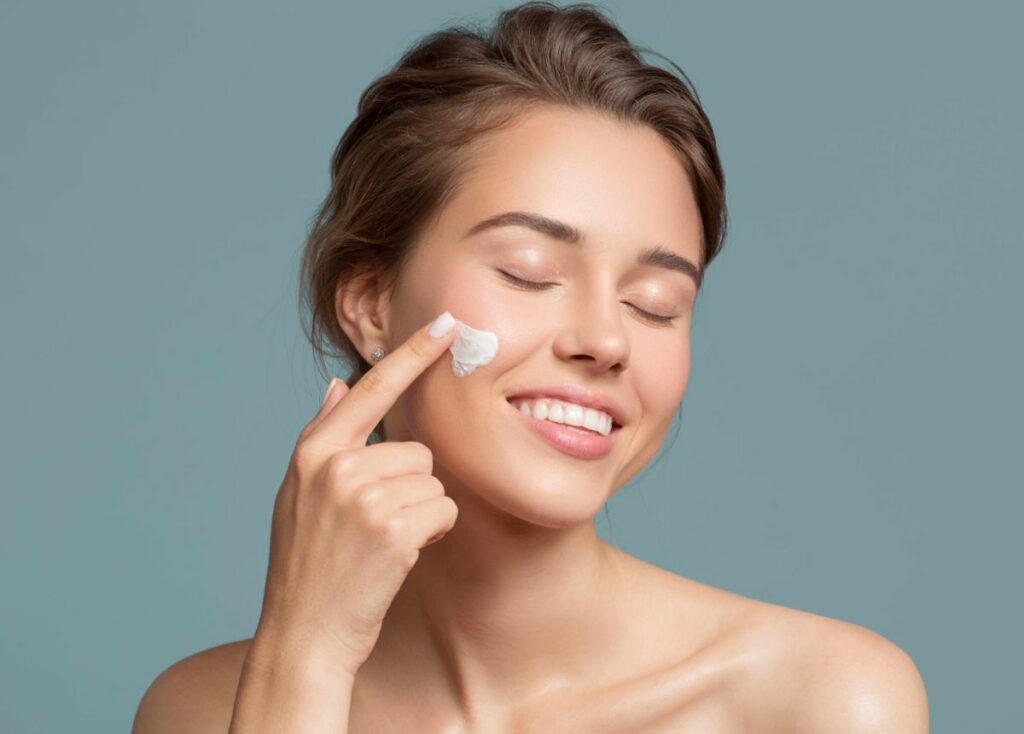
  3. Touch and Texture: Gently touch your skin with clean fingers and assess how it feels.
    • If your skin feels comfortable, neither too oily nor too dry, you have normal skin.
    • If your skin feels tight, dry, and rough, you likely have dry skin.
    • If your skin feels oily and looks shiny, you have oily skin.
  4. Reaction to Products: Pay attention to how your skin reacts to different skincare products.
    • If your skin shows redness, irritation, or stinging with various products, you likely have sensitive skin.
    • If certain areas feel dry while others remain oily, you have combination skin.
  5. Consulting a Professional: If you’re still unsure about your skin type, consider consulting a dermatologist or skincare professional. They can provide a thorough analysis and recommend suitable products and routines.

Tailoring Your Skincare Routine to Your Skin Type

Once you’ve accurately determined your skin type, you can tailor your skincare routine to cater to its unique needs:

  1. Cleansing: Use a gentle cleanser that doesn’t strip your skin of its natural oils. Avoid harsh, drying cleansers if you have dry skin, and opt for oil-free or foaming cleansers if you have oily skin.
  2. Moisturizing: Choose a moisturizer that matches your skin type. If you have dry skin, opt for richer, hydrating formulas. Oily skin benefits from lightweight, oil-free moisturizers. Normal skin can generally tolerate a wide range of moisturizers.
  3. Serums and Treatments: Incorporate serums and treatments that target your specific concerns, whether it’s anti-aging, acne, or hyperpigmentation. Ensure that these products are suitable for your skin type to avoid exacerbating any issues.
  4. Sun Protection: Regardless of your skin type, sun protection is crucial. Use a broad-spectrum sunscreen with at least SPF 30 daily to shield your skin from UV damage.
  5. Special Care: Sensitive skin may require fragrance-free and hypoallergenic products. Dry skin benefits from regular exfoliation and the inclusion of hydrating masks. Oily skin can benefit from products with salicylic acid or niacinamide to control excess oil and minimize breakouts.

Discovering your skin type is an essential step in establishing a skincare routine that caters to your skin’s unique needs. Armed with this knowledge, you can make informed choices about products, ingredients, and techniques that will promote a healthy and radiant complexion. Keep in mind that your skin’s needs may evolve with time, so it’s essential to periodically reassess your skin type and adjust your routine accordingly. By taking the time to understand your skin, you’re empowering yourself to embark on a skincare journey that not only enhances your natural beauty but also supports your skin’s overall well-being.

Tips To Pick The Right Foundation For Oily Skin
Tips to Pick the Right Foundation for Oily Skin

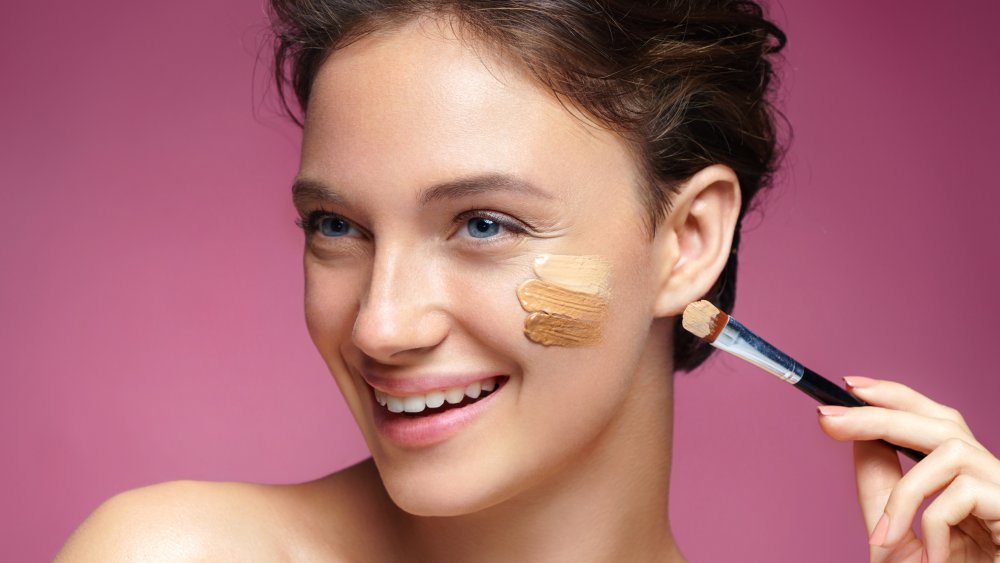
For individuals grappling with oily skin, pinpointing the ideal foundation is transformative, elevating the entire makeup regimen. Characterized by an overproduction of sebum, oily skin necessitates a foundation that delivers an impeccable, shine-free finish while ensuring pores remain unblocked. This detailed exploration delves into essential considerations for selecting the optimal foundation for oily skin, aiming for a matte, enduring aesthetic. A Deep Dive into Foundation Selection for Oily Skin Grasping the nuances of your skin type stands as the cornerstone in the journey toward the ultimate foundation. Oily skin, marked by dilated pores, a glossy sheen, and a propensity for acne, benefits immensely from a foundation that not only mitigates shine but also enhances skin quality over time. The endeavor extends beyond mere concealment of flaws; it’s about discovering a formulation that synergizes with your skin’s specific requirements. Exploring Foundation Varieties for Oily Complexions Crucial Ingredients to Seek Components to Avoid Foundation Testing: Shade and Type Evaluation Application Insights for Oily Skin Oily Skin Maintenance via Foundation Reviewing Popular Foundations for Oily Skin A comprehensive review of both accessible and premium foundations, accentuating their advantages for oily skin, equips readers with varied options that align with their financial plan and preferences. Enhancing Foundation Endurance Navigating the selection of a suitable foundation for oily skin need not be overwhelming. Armed with the correct information and tools, you can uncover a foundation that not only enhances your appearance but also promotes skin health. The aim is to secure a balanced, matte finish that offers comfort and a natural look.

The Magic Of Hair Mascara
The Magic of Hair Mascara

Hair mascaras are temporary hair colors designed to cover gray roots, touch up between coloring sessions, add highlights, or control frizz and flyaways. Available in many shades, these products wash out with each shampooing session. To use hair mascara, separate a section of your hair and streak it with the color you desire. As it dries, the product will blend in seamlessly with your natural hue. Cover Your Gray Brush-In Wand Coverup solution designed specifically to target sideburns and scattered gray hairs throughout your locks, this wand features a mascara-style applicator which makes application simple – no water required; simply open and apply without mattifying or clumping, lasting all day until being washed off easily with shampoo. Available in four shades, this waterproof formula is sweat proof and rain proof and provides three shampoo applications of coverage. Comb hair after application to blend into existing hue. Also works well on eyebrows! Ingredients: Water/Aqua/Eau, Stearic Acid, Cetearyl Alcohol Ceteareth-20 Paraffin Triethanolamine Polyvinyl Alcohol Imidazolidinyl Urea Phenoxyethanol Propylene Glycol Mica Titanium Dioxide CI 77891 Iron Oxides CI 77492/CI 77499. Instructions for short hair include dabbing on short strokes using short strokes while long hair sectioned holds are applied from root to end before combing and brushing off. Permanent hair color! Temporary! Mascara for Hair Flyaways Hair mascara is a temporary (washable) solution to add temporary (and washable) color to the scalp for various uses. Like eyelash mascara, hair mascara comes in a tube with a thin wand for combing through hair to add color and create different styles – from covering gray locks or adding highlights/lowlights, to touching up roots between haircuts or adding an unexpected pop of color for special events! Hair mascara comes in an assortment of vibrant hues that can be streaked for temporary highlights to achieve an eye-catching up-do. Unlike permanent dyeing techniques, however, this form of application washes out easily without leaving behind any color residue behind. If you find yourself struggling to control flyaways, a bit of clear hair mascara may be just the thing! Coat a clean mascara wand with several drops of this product and then use it to smooth through any flyaways before combing through them for maximum control before an important meeting or event. This trick is especially effective at controlling frizz before key events! Another effective solution to flyaways is using heatless products to tame and smooth your locks. A small dab of multipurpose balm like Vaseline, Jurlique Love Balm or Nurse Peppy Healing Balm works wonders when it comes to smoothing flyaways without using hot tools. You could also try running an old toothbrush through your locks to smooth any unruly strands, or applying some clear gloss as an added measure to keep flyaways at bay and stop them sticking together with the rest of your locks. If you are struggling with grey hair or beard hairs, a high quality hair mascara could be just the solution! Brush on within minutes for instantaneous coverage that washes away with shampoo. Also perfect for adding subtle highlight or controlling an entirely grey beard! Mascara…

Top Skincare Trends Of 2024 You Need To Know 1
Top Skincare Trends of 2024 You Need to Know

Discover the revolutionary skincare trends of 2024 that will redefine beauty routines. From personalized regimens to sustainable practices, get ahead with these must-know innovations. The beauty industry is perpetually evolving, with each year bringing in a new wave of skincare trends that promise to revolutionize our routines and enhance our skin health. In 2024, these trends are not only about the latest in ingredients or the next big brand; they reflect deeper shifts in consumer awareness, technological advancements, and a collective move towards sustainability and personalization in skincare. Understanding these trends is crucial for anyone looking to maintain a radiant, healthy complexion while aligning with the ethical and environmental values that are becoming increasingly important in the beauty world. Sustainable and Eco-Friendly Products The green beauty movement has transformed from a niche trend into a foundational aspect of the skincare industry. In 2024, sustainability is no longer optional but a necessity, with consumers demanding products that are not only effective but also environmentally friendly. This trend has led to innovative product packaging solutions, such as biodegradable containers and refillable options, significantly reducing waste and carbon footprint. Brands that embrace these practices are not only winning customer loyalty but also contributing to a healthier planet. Personalized Skincare Regimens With the advent of advanced skin analysis technologies, personalized skincare has taken a front seat in the beauty industry. Customized skincare regimens, tailored to individual skin types, concerns, and goals, are becoming the norm. This bespoke approach ensures that each person receives the most effective products, maximizing benefits and minimizing trial and error. Companies offering these personalized services are leveraging AI and machine learning to analyze skin characteristics, providing recommendations that are as unique as the individual’s skin. The Influence of Technology in Skincare Technology’s impact on skincare extends beyond personalization. Wearable devices that monitor skin health and environmental impacts on the skin are becoming more common, providing real-time data that can inform skincare choices. Furthermore, the development of products now often involves AI, which can predict skin reactions to different ingredients and help formulate products that are more effective and safer for a broader range of skin types. Probiotic Skincare Solutions The recognition of the skin’s microbiome as a key factor in overall skin health has led to the rise of probiotic skincare. These products aim to balance the skin’s natural flora, enhancing its defense against pollutants and other harmful agents while promoting a healthy, radiant complexion. Probiotic skincare lines are among the fastest-growing segments in the beauty industry, with research backing their benefits for various skin conditions. Waterless Beauty Products In an effort to conserve water, an increasingly scarce resource, the beauty industry is seeing a rise in waterless or solid beauty products. These concentrated formulas are not only more sustainable but also often more effective, as they contain less filler and more active ingredients. From solid serums to shampoo bars, these products offer an eco-friendly alternative without compromising on performance. Skincare as Self-Care The link between skincare and mental health has never been clearer, with many viewing their skincare routine as a…

Achieving A Flawless At Home Manicure: Tips And Tricks For Beautiful Nails
Achieving a Flawless At-Home Manicure: Tips and Tricks for Beautiful Nails

A well-manicured set of nails can enhance your overall appearance and boost your confidence. While visiting a salon for a professional manicure is a popular option, there are times when an at-home manicure is more convenient and cost-effective. With the right techniques and tools, you can achieve salon-quality results from the comfort of your own home. In this article, we will explore a variety of tips and tricks to help you achieve a flawless at-home manicure, ensuring beautiful and well-groomed nails. Prepping Your Nails:The key to a flawless manicure lies in the preparation of your nails. Start by removing any existing nail polish using an acetone-based remover. Trim your nails to the desired length and file them to shape. Gently push back your cuticles using a cuticle pusher or an orangewood stick, being careful not to damage or cut them. Soaking and Exfoliating:For an added pampering step, soak your nails in warm, soapy water for a few minutes. This softens the cuticles and makes them easier to push back or remove. After soaking, use a gentle exfoliating scrub or a soft toothbrush to gently scrub your hands and nails, removing any dead skin cells and leaving your skin feeling smooth and rejuvenated. Choosing the Right Nail Polish:Selecting the right nail polish is crucial for a flawless manicure. Look for polishes that have a smooth and even consistency, as this will make the application process easier. Opt for high-quality brands that offer a wide range of colors and finishes. If you’re new to doing your own manicures, consider starting with a classic shade that is forgiving and easier to apply evenly. Proper Application Techniques:When applying nail polish, use thin and even coats to achieve a smooth and streak-free finish. Begin with a base coat, which helps protect your nails and prevents staining. Apply two coats of your chosen nail polish color, allowing each coat to dry completely before applying the next. Finish off with a top coat to seal the color and add shine. Ensure that you cover the entire nail surface, including the tips, for maximum longevity and a polished look. Cleaning Up Mistakes:No matter how careful you are, it’s common to make small mistakes during the nail polish application process. To clean up any smudges or excess polish around the edges, dip a small brush or an angled eyeliner brush into nail polish remover and carefully clean up the mistakes. Alternatively, you can use a cotton swab dipped in nail polish remover to remove any stray polish. Drying Time:Patience is key when it comes to allowing your nails to dry. Wait for each coat of polish to dry completely before proceeding with the next layer or any activities that may risk smudging your nails. To speed up the drying process, you can use a quick-dry top coat or apply a nail polish drying spray. Hydrating and Nourishing:After your manicure is complete, it’s important to hydrate and nourish your nails and cuticles. Massage a cuticle oil or a moisturizing hand cream into your nails and cuticles to keep them healthy and prevent…

The Ultimate Guide To Selecting The Perfect Bronzer Brush
The Ultimate Guide to Selecting the Perfect Bronzer Brush

Bronzer application is an art form, reminiscent of painting, where the choice of brush plays a crucial role in the final effect. Selecting an appropriate bronzer brush not only elevates the application process but guarantees that the bronzer melds impeccably with your skin, yielding a natural, luminous finish. Bronzer: Purpose and Essence Bronzer, a beauty staple, aims to bestow your skin with a warm, sun-kissed radiance, enriching your complexion. Beyond its primary purpose, it’s instrumental in contouring, allowing for the meticulous sculpting and highlighting of facial contours. The secret to mastering bronzer application lies in the symbiosis between the product and the applicator. Diverse Spectrum of Bronzer Brushes The realm of bronzer brushes is diverse, with each variant designed to fulfill a distinct aspect of bronzer application. From angled, fluffy, dense, to stippling brushes, each type is tailored to meet specific application desires, guiding you towards achieving your envisioned makeup look. Natural vs. Synthetic Bristle Debate The selection between natural and synthetic bristle brushes remains a topic of debate. Natural bristles excel in their ability to pick up and distribute powder products seamlessly, while synthetic bristles stand out for their versatility, ease of maintenance, and ethical stance. Your choice should align with your personal ethics and the specific effects you wish to achieve. Impact of Shape and Size on Application The geometry and dimensions of a brush significantly dictate its application efficacy. Broad, fluffy brushes are ideal for an overall radiant effect, whereas compact, dense brushes allow for meticulous contouring. Angled brushes are adept at chiseling cheekbones, and stippling brushes offer a refined, airbrushed finish. Angled Brushes: Masters of Contouring Angled brushes, characterized by their tapered bristles, facilitate focused application, rendering them perfect for contouring endeavors with bronzer. They are the tools of choice for sculpting cheekbones, jawlines, and temple areas with precision. Fluffy Brushes: Architects of a Natural Glow For a subtle, natural glow, fluffy brushes are unparalleled. Their plush, expansive bristles ensure even distribution of bronzer, achieving a delicate, radiant sheen. Dense Brushes: Precision in Sculpting Dense brushes, known for their compact bristles, provide unparalleled control, making them indispensable for detailed face sculpting. Employing a gentle approach allows for the gradual intensification of the bronzer, ensuring a sculpted yet natural appearance. Stippling Brushes: Pioneers of a Flawless Finish Stippling brushes, with their unique dual-fiber bristles, are celebrated for achieving an impeccable, airbrushed complexion. They excel in seamlessly blending bronzer into the skin, eliminating any potential for unevenness or streaks. Influence of Brush Handle on Application The design and balance of a brush handle can significantly enhance application control, offering a comfortable and precise makeup experience. Bronzer Brush Maintenance Maintaining your bronzer brush through regular cleaning is crucial for its performance and longevity, ensuring a clean and hygienic application process. Bronzer Application Mastery To sidestep common pitfalls, such as excessive application or misplaced product, heed expert advice. Employing a gentle hand, thorough blending, and selecting a bronzer shade that complements your skin tone are essential techniques. Evaluating Budget vs. Premium Brushes The decision between investing in a premium brush or opting…

Essential Insights For Mastering The Ultimatesmokey Eye Look
Essential Insights for Mastering the Ultimate Smokey Eye Look

The smokey eye, an enduring symbol of elegance that lends both depth and intensity to the gaze, has maintained its prominence within the realm of beauty for generations. The journey to perfecting the smokey eye may appear challenging, yet with the appropriate instruments, a grasp of the necessary techniques, and dedicated practice, this iconic aesthetic is within anyone’s reach. We aim to escort you through the process, detailing everything from the selection of fitting eyeshadows to their expert application. Grasping the Essentials of Smokey Eye Makeup Defining the Smokey Eye: Embodying a seamless gradation of eyeshadow hues that transition from dark near the lash line to lighter shades approaching the brow bone, the smokey eye technique focuses on crafting contrast and depth, positioning the eyes as the centerpiece of the visage. Essential Tools and Products: Prior to embarking on the application process, assembling the correct tools and products is critical. Essential items include a spectrum of eyeshadows (spanning dark to light hues), an eyeshadow primer, blending and flat eyeshadow brushes, eyeliner, and mascara. Eye Preparation The Significance of a Pristine Base: Commencing with a clean, primed eyelid is foundational to the smokey eye technique. The application of primer not only enhances the eyeshadow’s adherence and longevity but also mitigates creasing and fading. Recommendations for Primer Application: Distribute a slender layer of primer across the entire eyelid, allowing it to settle briefly. This step ensures a smooth foundation for subsequent eyeshadow application. Selecting Appropriate Colors Harmonizing Eyeshadow with Eye Color: Choosing eyeshadow shades that complement your eye color can significantly enhance the impact. For instance, bronze and gold hues accentuate blue eyes, whereas purples and pinks amplify the vibrancy of green eyes. Choosing Eyeshadow Textures: Integrating various textures contributes dimension to the smokey eye. Employ matte shades for blending purposes and incorporate shimmer or metallic textures at the center of the lid to attract light. A Detailed Guide to Smokey Eye Application Advanced Smokey Eye Techniques Creating a Cut Crease: For a strikingly dramatic effect, craft a cut crease by layering a dark eyeshadow within the crease and blending upwards, followed by a contrasting lighter shade on the lid. Customizing for Different Eye Shapes: Adapt the smokey eye method to complement your unique eye shape. Individuals with hooded eyes, for instance, should emphasize the dark shadow on the outer corner and incorporate shimmer on the lid to simulate depth. Avoidable Errors Excessive Blending: While blending is essential, overdoing it can result in a lackluster mix of colors. Aim for just enough blending to soften stark lines without diminishing the colors’ vibrancy. Neglecting the Lower Lash Line: Incorporating a hint of dark eyeshadow along the lower lash line enhances the smokey effect and gives the illusion of larger eyes, contributing to a more balanced appearance. Ensuring the Longevity of Your Smokey Eye Makeup Utilizing Setting Spray: A light misting of setting spray can secure your makeup, preserving its pristine condition for extended periods. Touch-Up Kit: Keep essentials such as pressed powder and a compact eyeshadow brush handy for quick adjustments, ensuring your smokey eye…

Achieving A Brighter Smile: The Most Effective Ways To Whiten Your Teeth
Achieving a Brighter Smile: The Most Effective Ways to Whiten Your Teeth

A bright, white smile is something that many people desire. However, it’s not always easy to achieve. There are many factors that can cause teeth to become discolored, such as aging, smoking, consuming certain foods and drinks, and poor dental hygiene. Fortunately, there are several effective ways to whiten your teeth and achieve the smile of your dreams. In this article, we’ll explore the most effective ways to whiten your teeth, including both professional and at-home options. Professional Teeth Whitening If you’re looking for the most effective way to whiten your teeth, professional teeth whitening is a great option. This is typically done in a dental office, and involves the use of high-concentration whitening agents. There are two main types of professional teeth whitening: In-Office Whitening: This involves the use of a high-concentration whitening gel, which is applied to your teeth by a dental professional. The gel is then activated using a special light or laser. This type of whitening treatment typically takes around an hour, and can whiten your teeth by several shades. Take-Home Whitening Kits: These kits are prescribed by a dentist and typically include a custom-made tray and a whitening gel. You’ll need to wear the tray for a certain amount of time each day, typically for several weeks. Take-home whitening kits are less expensive than in-office treatments, but they take longer to produce results. Both of these professional teeth whitening options are effective at removing stains and discoloration from your teeth. However, they can be quite expensive, with in-office treatments typically costing several hundred dollars and take-home kits costing around $100-$200. At-Home Teeth Whitening If you’re looking for a more affordable way to whiten your teeth, at-home teeth whitening options are a great choice. There are many different types of at-home whitening products available, including: Whitening Toothpaste: This type of toothpaste contains special abrasives and chemicals that can help to remove surface stains from your teeth. However, they are not effective at removing deeper stains. Whitening Strips: These are thin, flexible strips that are coated with a whitening gel. You’ll need to apply the strips to your teeth for a certain amount of time each day, typically for several weeks. Whitening strips are a relatively affordable option, with most kits costing around $20-$50. Whitening Trays: These are similar to the trays used in professional take-home whitening kits. You’ll need to fill the tray with a whitening gel and wear it for a certain amount of time each day, typically for several weeks. Whitening trays can be purchased over-the-counter or prescribed by a dentist. Whitening Pens: These are small, portable pens that contain a whitening gel. You can apply the gel directly to your teeth using the pen’s brush. Whitening pens are a convenient option, but they may not be as effective as other at-home whitening products. While at-home teeth whitening products are generally less expensive than professional treatments, they may not be as effective. They also take longer to produce results, and you may need to use them for several weeks before seeing a noticeable improvement in the…

Explore Zodiac Sign Inspired Makeupstyles
Explore Zodiac Sign-Inspired Makeup Styles

Discover tips for makeup styles according to zodiac signs, and gain the motivation needed to craft an original style all your own. Each zodiac sign’s unique personality influences their makeup choices and this content explores makeup styles based on zodiac signs as a reflection of each sign’s characteristic styles and personality traits. When combined, zodiacs and makeup create a beautiful combination that expresses themselves uniquely! Aries: Exert Your PresenceAs Aries marks the first sign in the zodiac, they manage to grab attention with their enthusiasm, courage and energetic nature. Aries is well known for acting immediately upon plans they develop – waiting can only delay progress further! For maximum impact in daily life they often opt for bold red lipstick as an accessory essential to everyday success! Taurus: Capturing Timeless Looks For Taurus, who are ruled by Venus, life’s pleasures revolve around beautiful scents, exquisite tastes, quality textures, aesthetic visuals and pleasant sounds. Their comfortable yet harmonious nature make them much sought-after friends as well passionate lovers; beauty plays an integral role in their lives with timeless aesthetic beyond trendiness reflected by makeup choices that feature their features. Gemini: Express Your Colorful Energy Its Geminis, as members of the versatile zodiac, excel at communicating clearly, quickly witted quips, adaptability to change and rapid learning abilities. Their eagerness and curiosity lead them rapidly through makeup trends quickly while reflecting ever-evolving perspectives in their styles – be that temporary or long term! Products which allow Geminis to experiment creatively will often prove popular choices among them. Cancer: Highlight Natural Tones With their strong intuition, loyalty, and homely disposition, Cancerians represent strong emotions represented by the Moon; therefore they excel at creating comfortable spaces for loved ones. Water elementians that represent Cancer prefer soft-toned makeup looks such as feminine blush. Easily adapting nostalgic looks into their style comes naturally due to strong memories connected with past. Leo: Enhance Your RadianceLeos, who are ruled by the Sun at the center of the zodiac, tend to draw the focus in social situations quite naturally due to their leadership, confidence and warm nature – qualities which become apparent as soon as they walk into a room. Leos tend towards strong presences with fashion bases designed to cover flaws while upholding glowing features. Mercury, ruling over Virgos, lends them analytical and detail-oriented abilities that enable them to tackle even complex tasks efficiently and precisely. If you want order in any task at hand, look no further. Their precise minds often quickly find the most logical solutions; and in makeup application their sharp lines create beautiful looks; no other sign can rival Virgo when it comes to drawing identical eyeliner on both eyes! Libra: Reflect Your Elegance Libras ruled by Venus are known for being graceful diplomats of the zodiac circle. Through their pleasant language and delicate demeanor, Libras often win everyone over with their charm and elegant ways. Their appearance matters greatly to them and makeup artists delight them by amplifying natural radiance within. Scorpio: Attract GazesWhen it comes to captivating looks, Scorpios immediately come to mind. Their fiery…