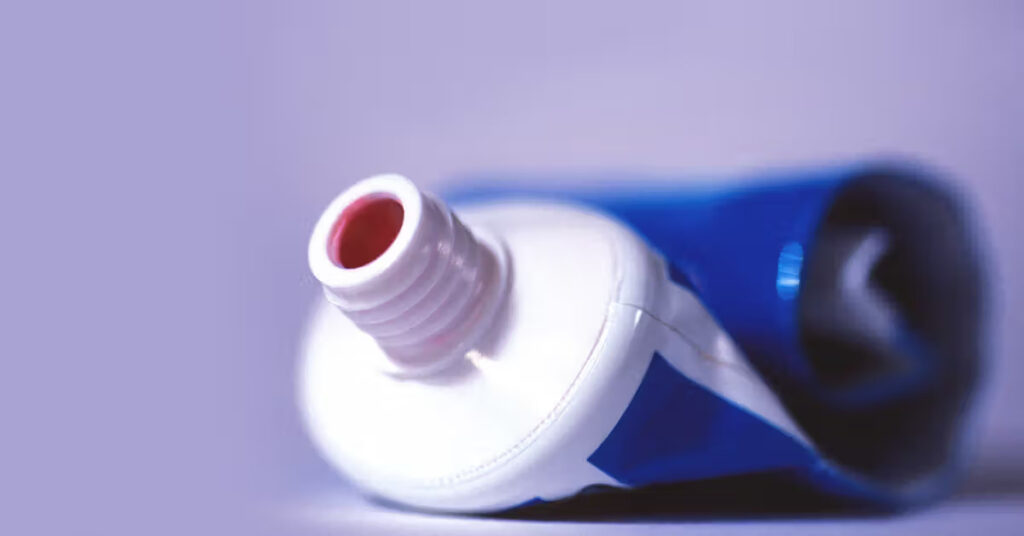
The Myth and Reality: Does Toothpaste Get Rid of Pimples?

The Myth and Reality- Does Toothpaste Get Rid of Pimples-1

Dealing with pimples, those unwelcome guests on your skin, can be frustrating and often prompts people to seek quick solutions. One such age-old remedy that has circulated for decades is the use of toothpaste to banish pimples overnight. It’s a notion that’s been passed down through generations, seemingly offering a simple and cost-effective solution to a common skin concern. But does toothpaste genuinely get rid of pimples, or is it just another skincare myth?

In this comprehensive guide, we’ll explore the science behind acne, the ingredients in toothpaste, whether toothpaste can help with pimples, potential risks and drawbacks, and better alternatives for pimple management.

Understanding Acne: The Basics

Before delving into the toothpaste-pimple connection, let’s first understand what acne is and how it forms.

  1. What is Acne?Acne is a common skin condition that occurs when hair follicles become clogged with oil and dead skin cells. It can manifest as various types of blemishes, including blackheads, whiteheads, papules, pustules, cysts, and, of course, pimples.
  2. Causes of Acne:Acne is primarily driven by four main factors:
    • Excess Sebum Production: Sebum is the skin’s natural oil. Overproduction of sebum can lead to clogged pores.
    • Clogged Pores: When hair follicles become clogged with excess sebum and dead skin cells, they form the basis for acne lesions.
    • Bacterial Activity: The presence of Propionibacterium acnes (P. acnes) bacteria within clogged pores can lead to inflammation and the development of pimples.
    • Inflammation: The body’s immune response to P. acnes bacteria causes redness, swelling, and the characteristic appearance of pimples.

The Science Behind Toothpaste

Now, let’s take a closer look at toothpaste and its ingredients. Toothpaste is designed for oral hygiene and contains various components meant to clean and protect your teeth and gums. Common ingredients found in toothpaste include:

  1. Fluoride: Fluoride is the primary active ingredient in toothpaste. It helps prevent tooth decay by strengthening tooth enamel and reducing the risk of cavities.
  2. Abrasive Agents: These are particles or compounds that help remove plaque and stains from teeth. They include substances like hydrated silica, calcium carbonate, and baking soda.
  3. Detergents: Detergents create foam when you brush your teeth. Sodium lauryl sulfate (SLS) is a common detergent found in many toothpaste brands.
  4. Humectants: These ingredients keep the toothpaste from drying out and help maintain its consistency. Glycerin is a typical humectant used in toothpaste.
  5. Flavoring Agents: Toothpaste often contains artificial or natural flavorings to make it more palatable.
  6. Thickeners: Thickeners are responsible for the toothpaste’s texture and consistency. They include various gums and binders.
  7. Antimicrobial Agents: Some toothpaste brands include antimicrobial agents like triclosan to help combat oral bacteria.

The Toothpaste-Pimple Connection: Myth or Reality?

The idea that toothpaste can help get rid of pimples likely stems from the perception that toothpaste contains ingredients with drying or antibacterial properties. However, the reality is more complex.

  1. Drying Effect: Toothpaste does have a drying effect on the skin. It can absorb excess oil, which might temporarily reduce the appearance of pimples. This is why some people believe that applying toothpaste to a pimple can help it dry out.
  2. Potential Irritants: On the flip side, toothpaste contains various ingredients that can be harsh on the skin. For instance, fluoride, abrasive agents, flavorings, and detergents may irritate the skin when applied topically. Toothpaste is not formulated for use on the skin, and applying it to your face can lead to redness, peeling, and further irritation.
  3. Risk of Allergic Reactions: Toothpaste may contain allergens or irritants that can trigger allergic reactions when applied to the skin. These reactions can be uncomfortable and may worsen the condition of your skin.
  4. Ineffectiveness Against Underlying Causes: While toothpaste may temporarily dry out a pimple, it doesn’t address the underlying causes of acne. It doesn’t target excess sebum production, clogged pores, bacterial activity, or inflammation—all of which contribute to acne development.
  5. Uneven Results: The effectiveness of toothpaste varies from person to person and depends on the specific toothpaste brand and formulation. What works for one individual may not work for another.

The Risks and Drawbacks of Using Toothpaste on Pimples

Before considering toothpaste as a pimple remedy, it’s crucial to understand the potential risks and drawbacks:

  1. Skin Irritation: Toothpaste can cause skin irritation, redness, peeling, and burning sensations. These side effects can be uncomfortable and may worsen the appearance of your skin.
  2. Allergic Reactions: Some people may be allergic to certain ingredients in toothpaste, leading to allergic skin reactions.
  3. Dryness: While toothpaste may dry out a pimple, it can also dry out the surrounding skin, potentially causing flakiness and further discomfort.
  4. Post-Inflammatory Hyperpigmentation (PIH): Picking at or applying toothpaste to pimples can increase the risk of PIH, which are dark marks that can persist after the pimple has healed.
  5. Potential for Worsening Acne: Instead of improving the condition of your skin, applying toothpaste can worsen acne by causing more inflammation and potentially clogging pores.
  6. Ineffectiveness: Toothpaste is not a scientifically proven or recommended treatment for acne. Its effectiveness is anecdotal at best.
The Myth and Reality: Does Toothpaste Get Rid of Pimples?

Better Alternatives for Pimple Management

If you’re dealing with pimples and seeking effective ways to manage them, there are several better alternatives to toothpaste:

  1. Over-the-Counter (OTC) Acne Products:
    • OTC acne products containing ingredients like salicylic acid, benzoyl peroxide, or alpha hydroxy acids (AHAs) are formulated specifically to treat acne. They target the underlying causes of acne and can be more effective than toothpaste.
  2. Prescription Medications:
    • For more severe or persistent acne, consider consulting a dermatologist. They can prescribe topical or oral medications tailored to your specific skin condition.
  3. Gentle Skincare Routine:
    • Adopt a gentle skincare routine that includes a mild cleanser and a moisturizer suitable for your skin type. Avoid harsh products that can irritate the skin.
  4. Healthy Lifestyle Choices:
    • Maintain a balanced diet, stay hydrated, and manage stress, as these factors can influence the development of acne.
  5. Hands-Off Approach:
    • Resist the urge to pick or squeeze pimples, as this can worsen inflammation and lead to scarring.
  6. Use Non-Comedogenic Products (Continued):
    • Choosing skincare and makeup products labeled as “non-comedogenic” means they are less likely to clog pores and contribute to the development of pimples.
  7. Regularly Change Pillowcases and Face Towels:
    • Changing your pillowcases and face towels regularly can help reduce the transfer of oils, dirt, and bacteria to your face, which can contribute to acne.
  8. Spot Treatments:
    • Consider spot treatments containing benzoyl peroxide or salicylic acid. These can be applied directly to pimples to speed up their healing without affecting the surrounding skin.
  9. Sun Protection:
    • Protect your skin from the sun by using a broad-spectrum sunscreen with SPF 30 or higher. Sunburn and UV radiation can exacerbate acne.
  10. Consult a Dermatologist:
    • If your acne is severe, persistent, or causing emotional distress, consult a dermatologist. They can provide personalized treatment plans, including prescription medications and advanced therapies.
  11. Patience:
    • Be patient with your skin. Pimples can take time to heal, and using multiple treatments at once can lead to over-drying and irritation.
  12. Avoid Harsh Scrubs:
    • Avoid using harsh physical scrubs or brushes on acne-prone skin, as they can exacerbate inflammation.
  13. Hydrate and Moisturize:
    • Hydration is essential for maintaining skin health. Even if you have oily skin, use a lightweight, non-comedogenic moisturizer to prevent excessive dryness.
  14. The Role of Prevention
  15. Preventing pimples is often more manageable than treating them after they’ve appeared. Consider adopting the following prevention strategies:
  16. Regular Face Washing:
    • Wash your face twice daily with a mild cleanser to remove excess oil, dirt, and impurities.
  17. Avoid Touching Your Face:
    • Touching your face can transfer bacteria from your hands to your skin, potentially leading to breakouts.
  18. Clean Makeup Brushes:
    • Regularly clean your makeup brushes and sponges to prevent the buildup of bacteria and oils.
  19. Balanced Diet:
    • A diet rich in fruits, vegetables, whole grains, and lean proteins can promote overall skin health.
  20. Stress Management:
    • High stress levels can trigger acne or exacerbate existing breakouts. Practice stress-reduction techniques like meditation or yoga.
  21. Avoid Overly Oily or Heavy Products:
    • Skincare and makeup products that are too heavy or oily can clog pores. Opt for products designed for your skin type.
  22. Limit Sugar and Dairy:
    • Some studies suggest that a diet high in sugar and dairy products may contribute to acne in some individuals. Consider reducing your intake of these items if you suspect they may be triggers for your acne.

While the notion of using toothpaste as a quick fix for pimples has circulated for years, it’s important to approach this remedy with caution. Toothpaste is not formulated for skincare and can lead to skin irritation, redness, and discomfort. There are more effective and safer alternatives for managing pimples, ranging from over-the-counter acne products to prescription medications and healthy skincare habits.

Remember that the effectiveness of pimple treatments can vary from person to person, and it may take time to find the best approach for your unique skin. Patience, consistency, and a gentle approach to skincare are key to achieving and maintaining clear, healthy skin. If your acne is severe or persistent, seeking the guidance of a dermatologist is advisable to develop a personalized treatment plan tailored to your needs.


7 Essential Tips For Mastering Setting Powder A Guide To Flawlessmakeup
7 Essential Tips for Mastering Setting Powder: A Guide to Flawless Makeup

Setting powder is the unsung hero of a flawless makeup look, acting as the final touch that locks your foundation and concealer in place, providing a smooth, long-lasting finish. But despite its importance, many find the process of applying setting powder correctly a bit of a mystery. This guide demystifies the art of setting powder application, ensuring your makeup stays put from morning until night, without the dreaded cakey appearance. The Purpose of Setting Powder Setting powder plays a pivotal role in your makeup regimen. It’s not just about mattifying; it’s about creating a seamless canvas that enhances the longevity of your makeup. Whether you’re battling oiliness or looking for that perfect photo finish, setting powder can transform your look. Different skin types will benefit from setting powder in unique ways, from locking in moisture for dry skin to controlling shine for oily complexions. Types of Setting Powder Choosing the right setting powder can be as crucial as the application itself. Loose powders offer a lightweight, buildable coverage ideal for a natural look, while pressed powders provide convenience and precision for touch-ups on the go. The debate between translucent and colored setting powders boils down to your desired finish and skin tone match. Preparing Your Skin for Setting Powder A flawless finish starts with well-prepared skin. Hydrating your skin is essential to prevent the powder from clinging to dry patches, while a good primer sets the stage for smooth application. Understanding how to create the perfect base is the first step toward mastering setting powder. The Right Tools for Application The tools you choose for applying setting powder can make a significant difference. Brushes offer a light, airy finish, ideal for a natural look, whereas sponges provide precision and denser coverage. Selecting the right tool depends on your personal preference and the specific needs of your skin. Step-by-Step Guide to Applying Setting Powder Achieving a seamless finish with setting powder is all about technique. From ensuring even distribution to mastering the art of layering, this section will guide you through each step, offering tips to avoid common application mistakes. How to Apply Setting Powder the Right Way Tailoring your setting powder application to your skin’s needs is crucial for a flawless finish. Whether you’re aiming for full coverage or a light dusting, understanding how to adjust your technique is key. Setting Your Under-Eye Area The under-eye area requires special attention due to its delicate nature. This section will explore techniques to prevent creasing and ensure your concealer stays put without settling into fine lines. Long-Lasting Makeup: Setting Powder’s Role Discover how setting powder can extend the wear of your makeup, keeping it looking fresh and perfect throughout the day. From combating oiliness to ensuring your foundation doesn’t budge, setting powder is your ally in achieving enduring beauty. The Dos and Don’ts of Setting Powder Navigating the dos and don’ts of setting powder can help you avoid common pitfalls and achieve a more natural, radiant look. This section will arm you with best practices and what to avoid for optimal results. Troubleshooting Common…

Head Scratcher Scalp Care Is Booming But Will It Make A Hair Of Difference 2
Head Scratcher: Scalp Care is Booming, But Will It Make a Hair of Difference?

The beauty industry is buzzing with the latest trend: scalp care. With an influx of specialized products hitting the shelves and the internet flooded with DIY remedies, one has to wonder—does focusing on the scalp truly translate to healthier, more vibrant hair, or is it just another fleeting beauty trend? This article delves deep into the scalp care phenomenon, exploring its merits, the science behind it, and whether it lives up to the hype. The Rise of Scalp Care Scalp care is not just about dandruff prevention anymore; it’s about nurturing the root of all hair health. With market analysts highlighting significant growth in this niche, it’s clear that consumers are buying into the idea. But what’s driving this trend, and is there a tangible connection between scalp health and hair quality? Understanding Scalp Health The scalp, like any other skin on your body, requires attention and care. Common issues like dryness, oiliness, and sensitivity can directly impact hair growth and quality. By understanding the anatomy of the scalp and how it affects hair follicles, we can better appreciate the need for specialized care. The Science Behind Scalp Care Products With countless products claiming to revitalize your scalp, it’s essential to know which ingredients actually benefit scalp health. This section will break down the key components of scalp care products, separating fact from fiction. DIY Scalp Care: Home Remedies Nature offers its bounty for scalp nourishment. From essential oils to kitchen staples, we’ll explore how these natural remedies can be used to maintain a healthy scalp, along with easy ways to integrate them into your care routine. Professional Scalp Treatments For those seeking deeper intervention, professional scalp treatments offer a range of services. We’ll examine the different treatments available and what they promise for those investing in their scalp health. Scalp Care and Hair Growth A primary question many have is whether scalp care directly influences hair growth. Through evidence-based insights, we’ll explore the relationship between a well-maintained scalp and the potential for hair regeneration. Product Overload: Can Too Much Harm Your Scalp? In the quest for perfect scalp health, could we be doing more harm than good? This section discusses the signs of product overload and how to strike a balance in your scalp care regimen. Scalp Care for Different Hair Types Scalp care is not one-size-fits-all. Tailoring your routine to fit your hair type is crucial for effectiveness. Here, we provide tips and tricks for adapting scalp care practices to suit curly, straight, thin, and thick hair types. The Future of Scalp Care As we look forward, what innovations and trends can we expect in the realm of scalp health? This section forecasts the future of scalp care, from technological advancements to emerging treatments. Head Scratcher: Scalp Care is Booming, But Will It Make a Hair of Difference? Weighing the evidence, it’s time to ask: does the booming interest in scalp care make a significant difference in hair health, or is it merely a cosmetic trend? Here, we combine personal anecdotes with professional opinions to get to the root of…

7 Essential Steps To Perfectly Filed Nails Elevate Your Manicuregame
7 Essential Steps to Perfectly Filed Nails: Elevate Your Manicure Game

Learn how to hone this skill for beautiful and healthy nails. Introduction Properly maintained nails are more than just a style statement; they’re a condition of one’s personal hygiene and one of the first things people notice about you in social and professional interactions. Whether you have an essential job interview, a critical date, or just want to look and feel your best, the state of your nails is bound to get noticed. This step-by-step guide is intended to help you master all of the aspects of nail filing, to guarantee that not only do they look fantastic but also remain healthy . The Critical Aspect of Nail Maintenance Why You Only Have One Chance to Make a First Impression? You might not be able to conduct business with someone or communicate your love for them immediately. But your nails don’t have that luxury – they touch everything you do: giving and receiving, opening bags of chips, flipping through books, and who knows what else. You may be unable to immediately establish a rapport with others, but you can always rely on your nails – whether they exude warmth and care or suggest “I got this far, what’re you going to do about it?.” However, it is not only a matter of passive stress relief and feeling good “in your skin” – it is a question of survival . The Meeting Point Between Beauty and Health Looking for the Best Fitting Nail Tools How to Figure Out the Grit Code Not all nail files are created equal; they come in different grit sizes and strengths to fit differing nails and filing requirements. While a grit size of around 240 is safe for everyone, as it is smooth enough to protect the nail bed and superior enough to file the nail successfully. Tools to Nail Types Once again, if one has weak or defective nails, a diamond file such as the Diamancel range may make all the difference. Do not be frightened by the phrase “diamond,” as most metal nail files are sharper and harmfully the nail surface more than ever. Glass is another good choice, but it is always more expensive due to its good quality. Glass files can be utilized on any kind of nail because they are not as PMY as other substances, and a gloss finish means that there are less chances that a nail will cut. The Nail Filing Art Although selecting the proper sort of nail file is essential, it is idle without proper filing procedure. People must never “saw” through their nails to remove them, as they will harm the nail edge and make them soft and simple to rip. Put a pointy edge back on the nail since the original is with no edges off to construct upon. Proper File Start by placing your hammer file at an angle on one file side. Pass the device of the file just over the nail. Achieve the desired form, focusing always on the edges in a gentle bevel with small balls beneath the files’ middle. Nail Forms:…

Pump Up The Volume In Your Hair: Here's How To Achieve Bouncy And Voluminous Locks
Pump Up the Volume in Your Hair: Here’s How to Achieve Bouncy and Voluminous Locks

Having luscious, voluminous hair can transform your entire look, boosting your confidence and leaving you feeling fabulous. However, not everyone is naturally blessed with thick, voluminous hair. If you find yourself struggling to achieve the desired volume, don’t worry—there are various techniques and tricks you can employ to pump up the volume in your hair and create stunning, bouncy locks. In this guide, we’ll explore a range of methods, from styling techniques to product recommendations, that can help you achieve the voluminous hair of your dreams. Section 1: Preparing Your Hair for Volume Before diving into styling techniques, it’s essential to prepare your hair properly for volume-enhancing methods. Here are a few steps you can take to set the foundation for voluminous hair: Choosing the Right Haircut: Opt for layered cuts or styles that add texture and movement to your hair. Layers can create the illusion of fuller hair by removing weight and adding dimension. Proper Shampooing and Conditioning: Use volumizing shampoos and conditioners specifically designed to add fullness to your hair. Avoid heavy, oil-based products that can weigh down your strands. Blow-Drying Techniques: Blow-drying your hair in an upward motion using a round brush can provide a lift at the roots and create a voluminous base for styling. Section 2: Styling Techniques for Volume Now that your hair is prepped, it’s time to explore different styling techniques that can help you achieve volume: Teasing or Backcombing: Using a fine-toothed comb, gently tease the roots of your hair to create instant lift and volume. Remember to be gentle to avoid damaging your hair. Velcro Rollers: Before blow-drying, set sections of your hair in velcro rollers. This technique allows your hair to cool and set in a voluminous shape, creating long-lasting volume. Root-Lifting Products: Applying root-lifting sprays or mousses directly to your roots can add height and volume. Massage the product into your roots for extra lift. Heat Styling Tools: Curling irons or straighteners can be used strategically to add volume. By curling sections of your hair away from your face or creating loose waves, you can achieve a fuller appearance. Dry Shampoo: Not only does dry shampoo refresh your hair between washes, but it can also add texture and volume. Spritz dry shampoo onto your roots and massage it in to absorb excess oil and create lift. Section 3: Product Recommendations for Volume In addition to styling techniques, certain hair products can work wonders in creating volume. Here are a few recommendations: Volumizing Shampoos and Conditioners: Look for products that are specifically formulated to add volume and thickness to your hair. These products usually contain ingredients that plump up the hair shaft and create fullness. Texturizing Sprays: These sprays are designed to give your hair grip and create a tousled, voluminous look. Spray onto your roots and mid-lengths to add texture and body. Hairsprays: Opt for lightweight hairsprays that provide a flexible hold. They will help maintain your volume throughout the day without weighing down your hair. Mousse: Apply a golf ball-sized amount of mousse to your roots before blow-drying. It adds…

How Tocreate A Simple Makeup Look
How to Create a Simple Makeup Look

Embarking upon the path to perfecting an effortless makeup look necessitates a profound comprehension of your skin’s unique characteristics and a dedication to the minimalist ethos in beauty. This methodology transcends the mere reduction of cosmetic items; it’s centered on optimizing the impact of each selected product. Identifying whether your skin is oily, dry, or a combination thereof is fundamental. This knowledge shapes the selection of cosmetics that will most effectively highlight your features, maintaining a delicate balance without overburdening your skin. Rooted in the principle that “less is indeed more,” this approach seeks to amplify your innate allure rather than conceal it, aiming for an appearance that exudes an easy elegance, underscored by the use of premium products that provide a subtle enhancement and durability. Priming Your Canvas The preliminary step, devoid of any color application, is essential: skin preparation. A smooth and hydrated base not only elevates the appearance of your makeup but also extends its longevity. Begin with a mild cleanser to eliminate impurities, followed by a moisturizer tailored to your skin type to ensure hydration. Should your plans involve outdoor activities, applying sunscreen is imperative for shielding your skin from the detrimental effects of UV exposure. This regimen not only prepares your skin for cosmetic application but also promotes its long-term health. Curating a Fundamental Makeup Collection Assembling a foundational makeup kit need not be daunting or costly. Concentrate on securing versatile, high-quality staples that fulfill multiple roles. A BB cream or tinted moisturizer, offering light coverage while nurturing your skin, acts as both a foundation and a skincare solution. Essentials for daily use include a neutral eyeshadow palette, a mascara that both lengthens and volumizes, a blush in natural tones, and a lip color that flatters your skin tone. The significance of quality tools—a set of precise application brushes and a blending sponge—cannot be overstated, as they significantly enhance the makeup application experience. A Stepwise Tutorial for a Minimalist Makeup Look Commence with a Pristine Foundation: Post-skincare, a light primer application will smooth any imperfections, setting the stage for even coverage. Opt for a BB cream or tinted moisturizer for sheer, breathable coverage, complemented by a concealer for discreet blemish and under-eye circle camouflage, seamlessly blended with a moist beauty sponge. Subtly Defined Eyes: Choose neutral or nude shadows for a gentle color sweep across the lids. A slender eyeliner application on the upper lash line, paired with a single mascara coat, can brighten and enlarge the eyes, enhancing their sparkle. Cheek Color Enhancement: Apply a blush, cream or powder, to the cheeks’ apples, blending upwards toward the temples for a radiant, lifted look. Lip Color Refinement: Select a lip shade marginally deeper than your natural lip color for subtle emphasis. A tinted lip balm or gloss can impart a splash of color while maintaining lip hydration. Longevity Tips for a Minimalist Look For enduring makeup, a setting spray application post-makeup is advisable. For those with oily skin, a translucent powder’s light application in the T-zone can mitigate shine without heaviness. Compact powder or blotting paper touch-ups…

Exploring The American Manicure: What It Is And How To Get It
Exploring the American Manicure: What It Is and How to Get It

The beauty industry is constantly evolving, and new trends are emerging every day. One of the latest trends to take the world of nails by storm is the American Manicure. While it may sound similar to the French Manicure, there are some key differences that set the two apart. In this article, we will delve into what an American Manicure is, the key differences between it and a French Manicure, and how you can achieve the perfect American Manicure look. What is an American Manicure? An American Manicure is a type of nail treatment that involves shaping and polishing the nails in a way that appears natural and understated. The aim of this type of manicure is to create a clean, well-groomed appearance that looks polished and professional. American Manicures have become increasingly popular in recent years, thanks to their simplicity and versatility. The Key Differences Between American and French Manicures: While the two styles may sound similar, there are some key differences between American and French Manicures that set them apart. One of the main differences is the shape of the nail tip. French Manicures typically have a more pronounced tip that is squared off, while American Manicures have a slightly rounded tip that is more natural-looking. Another difference is the color of the polish used for the tip of the nail. In a French Manicure, the tip is usually painted with a stark white polish, while an American Manicure uses a more subtle shade that closely matches the color of the nail bed. Finally, the thickness of the line used to separate the tip of the nail from the rest of the nail bed is typically thinner in an American Manicure than in a French Manicure. This gives the American Manicure a more natural, blended look. How to Achieve the Perfect American Manicure: If you’re interested in achieving the perfect American Manicure, the good news is that it’s relatively easy to do at home. Here are the steps you’ll need to follow: Step 1: Start by cleaning and shaping your nails. Use a nail file to shape them into a slightly rounded tip and gently buff them to create a smooth surface. Step 2: Apply a base coat to your nails to protect them and ensure the polish goes on smoothly. Step 3: Choose a polish color that closely matches the color of your nail bed. Apply two coats of polish, allowing each coat to dry fully before applying the next. Step 4: Once the polish is dry, use a slightly lighter shade of polish to paint the tips of your nails. You can use a special nail stencil or a steady hand to create a rounded tip. Step 5: Finally, apply a top coat to protect the polish and give your nails a glossy finish. The American Manicure is a popular nail trend that is perfect for those who want a natural and understated look. While it may share some similarities with the French Manicure, there are some key differences that set the two apart. With a little bit…

Tips To Make The Wedding Of Your Dream Makeup
Tips to Make the Wedding of Your Dream Makeup

At every wedding celebration of love and union is an emotional day filled with meticulous planning of every last detail and the spotlight shining bright on the bride-to-be. Of the numerous decisions to be made for this grand occasion, wedding makeup should take top priority; hiring professional artists may help with this aspect or undertaking it on your own may prove useful; either way achieving wedding makeup of your dreams takes careful planning, preparation and personal flair for maximum effect – here is our complete guide of tips and tricks designed to ensure beauty and confidence on this milestone day! 1. Starting With SkincareAchie a flawless makeup look begins with skincare. In the months prior to your wedding day, establish an effective regimen designed to address acne, dry skin and uneven tone with regular cleansing, exfoliation and moisturization for radiant and flawless complexions. Tip: Plan in advance to take care of any specific skincare requirements by scheduling professional facials or dermatological treatments with qualified providers. 2. Trial Runs Are NecessaryIt is crucial that both brides and grooms make time for trial runs ahead of the big day to try different looks and find one that complements both your features and vision for how your day should unfold. By conducting multiple runs before, this ensures your final selection satisfies both of these objectives. Tip: Wear something similar to your wedding dress color during your trial makeup appointment in order to judge how the makeup will match up against it. 3. Consider Your Wedding Style Makeup should complement the overall aesthetic and atmosphere of your event, from romantic garden ceremonies and city receptions, to beachside affairs and celebrations. Adapt it according to what works for each of these occasions! Tip: Select makeup colors that complement the hues in your wedding color palette for a polished and cohesive appearance. 4. Enhance Your Natural Features: Wedding makeup should emphasize, rather than hide your natural beauty. Focus on emphasizing the highlights in terms of eyes, lips or cheekbones in particular and subtly contour to add dimension while not looking over-dramatic. Tip: Choose natural-looking false eyelashes to increase definition, while still remaining comfortable for every day use. 5. Long-Lasting Formulas Are KeyWedding days can be filled with joyous memories. Makeup that stays put all day or night such as foundation, mascara and eyeliner will ensure a fresh appearance for photos taken all night long! Tip: Use translucent powder to set your makeup and reduce shine and keep everything in its proper place. 6. Coordinate With Your HairstyleYour hair and makeup should match effortlessly and harmonize. Discussing plans with a makeup artist to make sure the overall effect is harmonious is key for creating an aesthetically pleasing overall look. Tip: For an updo look, emphasize your eyes and lips for maximum impact. With loose flowing locks, go for more neutral yet romantic makeup to complete the look. 7. Photography-Friendly MakeupWedding photographs capture special memories for eternity, so your makeup should be camera-ready. Avoid products with SPF as these may cause flashback when photographed; choose matte finish foundation to minimize…

Foilyage: The Perfect Fusion Of Foil Highlights And Balayage
Foilyage: The Perfect Fusion of Foil Highlights and Balayage

When it comes to hair color trends, there’s always something new and exciting on the horizon. One such trend that has taken the hair industry by storm is “foilyage.” Foilyage is a hair coloring technique that combines the best of both worlds: the precise placement of foil highlights and the seamless, natural look of balayage. This technique has gained immense popularity among hairstylists and clients alike, offering a stunning and low-maintenance hair color option. In this article, we will delve into the details of foilyage, exploring what it is, how it differs from other coloring techniques, its benefits, and why it has become a go-to choice for many individuals seeking a sun-kissed, dimensional look. What is Foilyage? Foilyage is a term coined by hairstylists to describe a hair coloring technique that combines the foil highlighting method with balayage. Foil highlights involve separating sections of hair and applying color or lightener to the selected strands, which are then covered with foil to process the color more efficiently. On the other hand, balayage is a freehand technique where the colorist paints the color or lightener directly onto the hair, creating a soft, graduated effect. Foilyage bridges the gap between these two techniques by incorporating the precise placement of foil highlights with the natural blending and softness of balayage. How is Foilyage Different from Traditional Highlights and Balayage? Traditional highlights involve placing foils throughout the hair to create contrast and dimension. While this technique can produce beautiful results, the final look can sometimes appear too structured and uniform. Balayage, on the other hand, offers a more natural and effortless look by painting color directly onto the hair. However, without the aid of foils, it can be challenging to achieve maximum lift and create a more dramatic contrast. Foilyage strikes the perfect balance between these two techniques. By using foils strategically, colorists can achieve more lift and control while still maintaining a soft and blended appearance. The foils help to incubate the color, resulting in a more vibrant and dimensional effect compared to traditional balayage. Additionally, foilyage allows for precise placement of color, making it an excellent choice for those looking for specific highlights or lightening in certain areas of the hair. Benefits of Foilyage: Natural and Gradual: Foilyage creates a seamless, sun-kissed effect that mimics the natural way hair lightens under the sun. The color transition is soft and gradual, giving the hair a dimensional and lived-in appearance. Low Maintenance: One of the key advantages of foilyage is its low maintenance nature. Since the color is applied in a way that blends seamlessly with the hair, regrowth is less noticeable, reducing the frequency of touch-up appointments. This makes foilyage an ideal choice for those who prefer a more effortless hair color that grows out gracefully. Customizable: Foilyage offers endless possibilities for customization. Colorists can tailor the placement and intensity of the highlights to complement a client’s skin tone, hair type, and personal style. Whether you desire a subtle change or a bold transformation, foilyage can be adapted to suit your preferences. Versatile for All Hair…