Harms of Sleeping with Make-up: Why You Should Never Skip the Cleansing Ritual

Harms of Sleeping with Make-up- Why You Should Never Skip the Cleansing Ritual-1

The allure of a perfectly made-up face is undeniable, and makeup has become a powerful tool for enhancing beauty and boosting confidence. However, as the day turns into night, the temptation to skip the makeup removal process and fall into bed can be strong. It’s a common scenario; you’re tired, and removing makeup feels like an unnecessary chore. But what happens when you choose to sleep with makeup on? In this comprehensive guide, we will explore the perils of sleeping with makeup, the profound effects it can have on your skin, and why you should never neglect the vital nightly ritual of makeup removal.

The Consequences of Sleeping with Makeup

Before we delve into the specifics, let’s understand the potential consequences of sleeping with makeup:

  1. Clogged Pores: Makeup, combined with the natural oils and sweat your skin produces throughout the day, can clog your pores. This sets the stage for acne breakouts, including whiteheads and blackheads.
  2. Premature Aging: Leaving makeup on overnight can contribute to the breakdown of collagen and elastin in your skin. This leads to the development of fine lines, wrinkles, and a loss of skin elasticity – all hallmarks of premature aging.
  3. Dull Skin: Makeup residue can make your skin appear dull and lifeless. It hinders the natural process of skin cell turnover, leading to a lackluster complexion.
  4. Eye Irritation: Sleeping with eye makeup can result in eye irritation, redness, and even infections. Mascara and eyeliner can flake off into your eyes, causing discomfort.
  5. Infections: Makeup can trap dirt, bacteria, and allergens against your skin, increasing the risk of skin infections and allergies.
  6. Uneven Skin Tone: The buildup of makeup can lead to an uneven skin tone, with areas of hyperpigmentation or redness.
  7. Dryness and Dehydration: Makeup can impair your skin’s ability to maintain moisture, leading to dryness and dehydration.
  8. Lip Problems: Sleeping with lipstick or lip gloss can cause chapping and dryness of the lips.

The Role of Makeup in Clogged Pores

One of the most significant consequences of sleeping with makeup on is clogged pores. Your skin naturally produces sebum (oil) throughout the day to keep itself moisturized and protected. Makeup can mix with this oil, along with sweat and environmental pollutants, forming a potent cocktail that seeps into your pores.

When these pores become clogged, several issues can arise:

  • Acne: Clogged pores are a breeding ground for acne-causing bacteria. This can lead to the development of various types of acne, including whiteheads, blackheads, and pimples.
  • Enlarged Pores: Over time, the accumulation of debris in your pores can stretch them, making them appear larger and more noticeable.
  • Uneven Texture: Clogged pores can result in an uneven skin texture, characterized by rough patches and small bumps.
  • Increased Oiliness: Paradoxically, clogged pores can lead to increased oiliness as your skin tries to compensate for the blockages.
  • Skin Sensitivity: Clogged pores can also make your skin more sensitive to external irritants, making it prone to redness and inflammation.

The Impact on Collagen and Elastin

Collagen and elastin are two essential proteins that give your skin its firmness, elasticity, and youthful appearance. They work together to maintain the skin’s structure and prevent sagging.

Sleeping with makeup on can have a detrimental impact on these proteins. Makeup residue, along with environmental pollutants, can generate free radicals. These free radicals are unstable molecules that can damage collagen and elastin fibers, causing them to break down more rapidly. As a result, you may notice the development of fine lines, wrinkles, and sagging skin, even at a younger age than expected.

Skin Cell Turnover and Dullness

Your skin goes through a natural process of shedding dead skin cells and replacing them with new, healthy ones. This process, known as skin cell turnover, contributes to a fresh and radiant complexion. However, sleeping with makeup can disrupt this essential cycle.

Makeup residue can form a barrier on your skin’s surface, trapping dead skin cells and preventing them from shedding properly. This leads to a buildup of old, dead cells that contribute to a dull and lackluster complexion. Additionally, when skin cell turnover is compromised, you’re more likely to experience clogged pores and acne breakouts.

Eye Irritation and Infections

The delicate skin around your eyes is particularly vulnerable to the adverse effects of sleeping with makeup. Leaving mascara, eyeliner, or eyeshadow on overnight can result in various eye-related issues:

  • Irritation: Eye makeup can flake off into your eyes, causing irritation, redness, and discomfort.
  • Infections: Sleeping with eye makeup increases the risk of eye infections, including conjunctivitis (pink eye). Bacteria can thrive in the warm, moist environment created by makeup residue.
  • Styes: Makeup can clog the oil glands in your eyelids, leading to the development of painful styes.
  • Eyelash Damage: The weight of mascara can cause your eyelashes to become brittle and more prone to breakage.

Preventing the Damage: The Importance of Makeup Removal

To protect your skin from the perils of sleeping with makeup, the importance of a thorough makeup removal routine cannot be overstated. Here’s how to do it effectively:

Step 1: Begin with the Eyes


Start by focusing on the eye makeup, as it’s often the most stubborn to remove:

  • Use a gentle, oil-based makeup remover or micellar water on a cotton pad.
  • Hold the soaked pad against your closed eyelid for a few seconds to allow the makeup to dissolve.
  • Gently wipe away the eye makeup, moving from the inner corner to the outer corner.
  • Use a different cotton pad for each eye to avoid transferring makeup or dirt.

Step 2: Cleanse Your Face

Now, it’s time to remove the makeup from the rest of your face:

  • Apply makeup remover or micellar water to a cotton pad or use a cleansing oil or balm.
  • Gently wipe away face makeup, starting from your forehead and moving down to your chin and neck.
  • Use upward, circular motions to help dissolve makeup and impurities.
  • Pay extra attention to areas with heavy makeup, like the cheeks and jawline.

Step 3: Double Cleanse

To ensure all makeup, sunscreen, and impurities are thoroughly removed, follow up with a second cleanse using a gentle facial cleanser:

  • Wet your face with lukewarm water.
  • Apply a small amount of cleanser to your fingertips and lather it by rubbing your hands together.
  • Gently massage the cleanser onto your face using upward, circular motions.
  • Pay attention to the areas around your nose and hairline where makeup can accumulate.
  • Rinse your face thoroughly with lukewarm water until all cleanser is removed.

Step 4: Pat Dry Your Face

After cleansing, use a clean towel to gently pat your face dry. Avoid rubbing your skin, as this can cause irritation.

Step 5: Final Check

Take a moment to ensure all makeup is removed. Check around your eyes, hairline, and jawline for any remaining traces. If necessary, repeat steps 2 and 3 to double cleanse these areas.

Step 6: Toning (Optional)


Using a toner can help balance your skin’s pH levels and remove any residual makeup or cleanser:

  • Apply a small amount of toner to a cotton pad.
  • Gently swipe the pad across your face, focusing on the T-zone and areas prone to breakouts.

Step 7: Apply Skincare Products

Once your skin is clean and toned (if desired), it’s time to apply your usual skincare products:

  • Start with a lightweight serum, followed by a moisturizer that suits your skin type.
  • Finish with an eye cream and, if it’s your nighttime routine, a suitable night cream.

Step 8: Don’t Forget Your Neck

Extend your skincare routine to your neck to maintain an even skin tone and prevent premature aging.

Step 9: Cleanse Your Makeup Tools

Remember to clean your makeup brushes and sponges regularly to prevent the buildup of bacteria and makeup residue. Use a gentle brush cleanser or mild shampoo, and allow them to dry thoroughly before using them again.

The Importance of Makeup Removal: A Recap

Proper makeup removal is not just a cosmetic ritual; it is a vital aspect of maintaining healthy skin. It ensures that your skin remains clean, unclogged, and able to breathe, preventing a host of issues like acne, premature aging, and dullness. By following the steps outlined in this guide, you can effortlessly remove makeup without compromising the health and radiance of your skin.

The allure of a perfectly made-up face may be strong, but it should never tempt you into skipping the nightly ritual of makeup removal. Sleeping with makeup on can lead to a litany of skin problems, from clogged pores and acne to premature aging and eye irritation. It’s a small effort that yields significant rewards in the form of clear, healthy, and vibrant skin.

So, next time you’re tempted to fall into bed without removing your makeup, remember the potential consequences and take a few extra minutes to properly cleanse your face. Your skin will thank you with a fresh, radiant complexion, and you’ll enjoy the long-term benefits of a diligent skincare routine. Embrace the habit of makeup removal, and your skin will reward you with its natural beauty.


Unlocking The Secrets Of Luxurious Locks: A Comprehensive Guide To Using Hair Masks
Unlocking the Secrets of Luxurious Locks: A Comprehensive Guide to Using Hair Masks

Beautiful, healthy hair is a reflection of your overall well-being and self-care routine. Hair masks are a potent tool in your hair care arsenal, designed to rejuvenate, nourish, and enhance the vitality of your tresses. Whether your hair is prone to dryness, damage, frizz, or you simply want to elevate its natural shine, incorporating hair masks into your routine can make a noticeable difference. This guide will take you through the ins and outs of using hair masks effectively to achieve luscious locks that turn heads. Understanding Hair Masks Hair masks are intensive treatments formulated to address specific hair concerns. They typically contain a higher concentration of nourishing ingredients compared to regular conditioners, penetrating deeply into the hair shaft to provide lasting benefits. Depending on your hair type and needs, you can find a variety of hair masks, such as hydrating masks, repair masks, volumizing masks, and color-enhancing masks. Choosing the Right Hair Mask Before delving into the usage techniques, it’s crucial to select a hair mask that caters to your hair’s unique needs. Consider the following factors: Hair Type: Determine whether your hair is oily, dry, normal, curly, straight, or wavy. This will help you choose a mask tailored to your specific hair type. Hair Concerns: Identify your hair concerns, such as frizz, damage, lack of shine, or color fading. Look for masks that address these concerns with the appropriate ingredients. Ingredients: Check the ingredient list for nourishing elements like natural oils (coconut, argan, jojoba), proteins (keratin, collagen), vitamins (vitamin E, B vitamins), and botanical extracts. Scent and Texture: Opt for a mask with a scent and texture that appeals to you, as this can enhance your overall experience. Prepping Your Hair for the Mask Properly prepping your hair sets the stage for an effective mask application. Follow these steps before applying the mask: Cleanse Your Hair: Wash your hair with a gentle shampoo to remove any dirt, product buildup, or excess oils. This ensures that the mask can penetrate deeply into the hair shaft. Towel Dry: Gently towel dry your hair to remove excess water. Your hair should be damp, not dripping wet. Detangle: Use a wide-tooth comb to detangle your hair, starting from the ends and working your way up. This prevents unnecessary hair breakage during the mask application. Applying the Hair Mask Now that your hair is prepped, it’s time to apply the mask. Follow these steps for a thorough and effective application: Section Your Hair: Divide your hair into sections. This ensures that you distribute the mask evenly and reach all parts of your hair. Scoop the Mask: Depending on your hair length and thickness, scoop an appropriate amount of the mask into your palm. Start with a small amount and add more if needed. Even Distribution: Rub the mask between your palms to evenly distribute it. Then, starting from the mid-lengths of your hair, work the mask downwards towards the ends. Avoid applying the mask directly to your scalp, as this can lead to greasiness. Massage Gently: Massage the mask into your hair using gentle, circular…

Essential Insights For Mastering The Ultimatesmokey Eye Look
Essential Insights for Mastering the Ultimate Smokey Eye Look

The smokey eye, an enduring symbol of elegance that lends both depth and intensity to the gaze, has maintained its prominence within the realm of beauty for generations. The journey to perfecting the smokey eye may appear challenging, yet with the appropriate instruments, a grasp of the necessary techniques, and dedicated practice, this iconic aesthetic is within anyone’s reach. We aim to escort you through the process, detailing everything from the selection of fitting eyeshadows to their expert application. Grasping the Essentials of Smokey Eye Makeup Defining the Smokey Eye: Embodying a seamless gradation of eyeshadow hues that transition from dark near the lash line to lighter shades approaching the brow bone, the smokey eye technique focuses on crafting contrast and depth, positioning the eyes as the centerpiece of the visage. Essential Tools and Products: Prior to embarking on the application process, assembling the correct tools and products is critical. Essential items include a spectrum of eyeshadows (spanning dark to light hues), an eyeshadow primer, blending and flat eyeshadow brushes, eyeliner, and mascara. Eye Preparation The Significance of a Pristine Base: Commencing with a clean, primed eyelid is foundational to the smokey eye technique. The application of primer not only enhances the eyeshadow’s adherence and longevity but also mitigates creasing and fading. Recommendations for Primer Application: Distribute a slender layer of primer across the entire eyelid, allowing it to settle briefly. This step ensures a smooth foundation for subsequent eyeshadow application. Selecting Appropriate Colors Harmonizing Eyeshadow with Eye Color: Choosing eyeshadow shades that complement your eye color can significantly enhance the impact. For instance, bronze and gold hues accentuate blue eyes, whereas purples and pinks amplify the vibrancy of green eyes. Choosing Eyeshadow Textures: Integrating various textures contributes dimension to the smokey eye. Employ matte shades for blending purposes and incorporate shimmer or metallic textures at the center of the lid to attract light. A Detailed Guide to Smokey Eye Application Advanced Smokey Eye Techniques Creating a Cut Crease: For a strikingly dramatic effect, craft a cut crease by layering a dark eyeshadow within the crease and blending upwards, followed by a contrasting lighter shade on the lid. Customizing for Different Eye Shapes: Adapt the smokey eye method to complement your unique eye shape. Individuals with hooded eyes, for instance, should emphasize the dark shadow on the outer corner and incorporate shimmer on the lid to simulate depth. Avoidable Errors Excessive Blending: While blending is essential, overdoing it can result in a lackluster mix of colors. Aim for just enough blending to soften stark lines without diminishing the colors’ vibrancy. Neglecting the Lower Lash Line: Incorporating a hint of dark eyeshadow along the lower lash line enhances the smokey effect and gives the illusion of larger eyes, contributing to a more balanced appearance. Ensuring the Longevity of Your Smokey Eye Makeup Utilizing Setting Spray: A light misting of setting spray can secure your makeup, preserving its pristine condition for extended periods. Touch-Up Kit: Keep essentials such as pressed powder and a compact eyeshadow brush handy for quick adjustments, ensuring your smokey eye…

Keratin 1
What is keratin care?

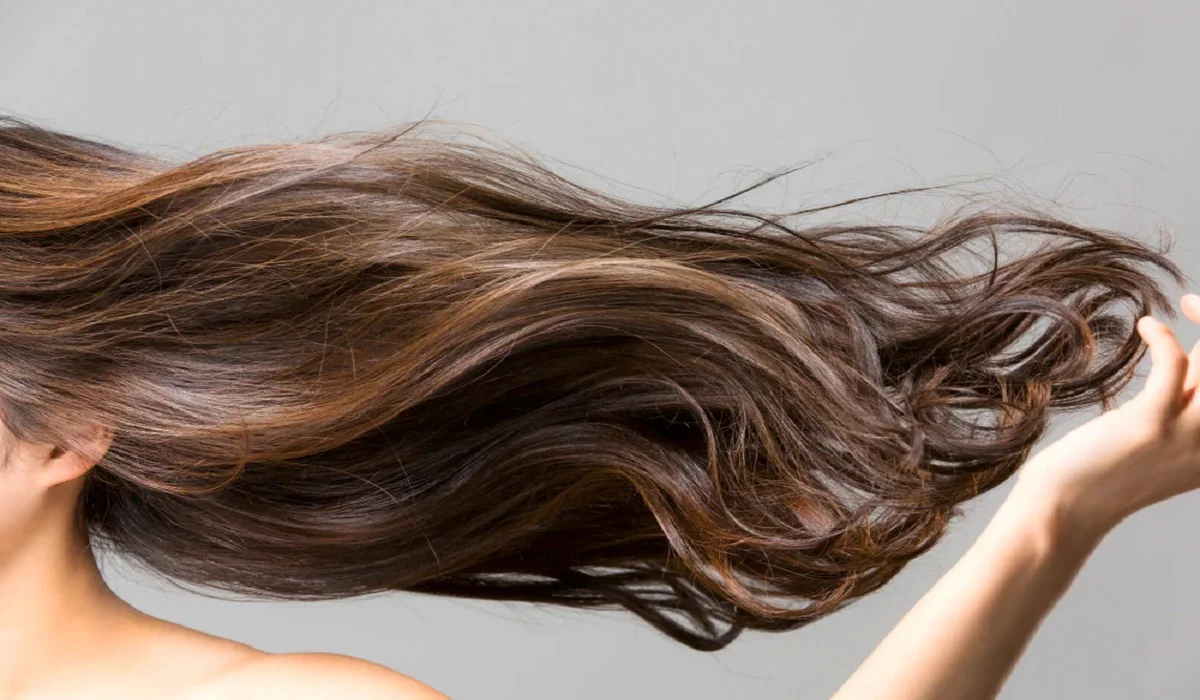
Keratin is an essential protein component that serves as the building block for our hair, nails and the outermost layer of our skin. When it comes to maintaining healthy locks and maintaining their beauty, understanding keratin’s benefits for haircare are paramount in order to maintaining them at peak condition. Let’s dive deep into its world and uncover its contribution towards overall hair wellbeing! Keratin: An Overview of Its Function and Composition: Keratin is a fibrous structural protein found at the core of hair strands and composed mostly of amino acids derived from cysteine that provides strength, structure, and resilience for healthy hair follicles. Keratin’s unique composition also makes it a key element of various hair care treatments and products available today. Keratin for Hair Benefits: Here Are Three Advantages Strength and Resilience Keratin plays an integral part in strengthening hair shafts, imparting strength, and increasing overall resilience. By binding with existing structures within hair strands, it helps prevent breakage while strengthening each individual strand for external stressors such as weather changes. Keratin therapy may even restore vitality to damaged or weakened tresses by helping restore vitality while decreasing the chance of split ends. Smoothness and ManageabilityKeratin stands out among its many advantages as an exceptional solution for smoothness and manageability, working to eliminate frizz for an easier styling experience. Keratin can particularly beneficial to individuals suffering from unruly or frizzy locks by creating an even surface and making styling simpler each day. Keratin should become part of everyone’s daily styling regimen for optimal results! Keratin contributes to hair’s elasticity, an integral factor for its flexibility. Elastic locks stretch without snapping back when stretched without breakage allowing various styling options without jeopardizing its health; this advantage can especially come in handy for people who engage in heat styling or other forms of hairstyling regularly. Repair for Damage Repair Keratin’s reparative properties make it an invaluable ally in combatting these damages to hair from heat styling tools, chemical treatments and environmental elements. By filling gaps in hair cuticle gaps it repairs damage by filling any missing portions and restore the overall integrity of hair shaft; ultimately resulting in hair that looks and feels healthier! Reduce Porosity:High porosity can result in excessive moisture absorption or loss, leaving hair more susceptible to dryness or breakage. Keratin helps combat this issue by filling gaps and creating a smoother surface – not only will this benefit overall texture of hair but it will also create more balanced moisture levels throughout. Professional Keratin Treatments Are Renowned For Their Long-Lasting Smoothing Effects:Keratin treatments are well known for providing lasting smoothing effects. By creating a protective shield around each hair strand, these treatments create long-term smoothness – making keratin treatments an appealing semi-permanent solution to manage frizzy or unruly locks. Overall, keratin’s benefits to hair extend well beyond its surface layers; from structural issues and overall hair health benefits to smoother, stronger and more manageable locks due to professional treatments or products infused with this transformative protein. Keratin stands as an indispensable ingredient when it comes to haircare products and professional…

Dermaplaning: The Popular Skincare Treatment Explained

Dermaplaning is a non-invasive, exfoliating skincare treatment that has gained popularity in recent years. It involves the use of a sharp, surgical-grade scalpel to remove the outermost layer of dead skin cells and vellus hair (also known as peach fuzz) from the face. The result is a smoother, brighter, and more radiant complexion. In this article, we’ll explore the benefits, risks, and considerations for dermaplaning. Benefits of Dermaplaning One of the primary benefits of dermaplaning is its ability to exfoliate the skin. The scalpel removes the outer layer of dead skin cells, which can help to reduce the appearance of fine lines, wrinkles, and acne scars. Additionally, by removing the dead skin cells, it allows for better absorption of skincare products, making them more effective. This can be especially beneficial for individuals who have hyperpigmentation or uneven skin tone, as the exfoliation can help to even out the complexion. Another benefit of dermaplaning is the removal of vellus hair. While many people are hesitant to remove peach fuzz, it can actually be beneficial for the skin. Vellus hair can trap dirt and oil, which can contribute to breakouts. By removing the hair, it can help to prevent breakouts and make the skin appear smoother and more refined. Dermaplaning is also a quick and painless procedure. It typically takes around 30 minutes to complete and is done in-office by a licensed esthetician or dermatologist. Unlike other exfoliating treatments, such as chemical peels, dermaplaning does not require any downtime. Patients can immediately return to their normal activities without any redness or irritation. Risks and Considerations While dermaplaning is generally considered safe, there are some risks and considerations to keep in mind. The use of a sharp scalpel on the face can be dangerous if not done correctly, so it’s important to only have the procedure done by a licensed professional. It’s also important to avoid any sun exposure for a few days after the procedure, as the skin will be more sensitive. Another consideration is that dermaplaning is not suitable for everyone. Individuals with active acne, eczema, or rosacea should avoid the procedure, as it can exacerbate these conditions. Additionally, those with a history of cold sores should take precautions, as the procedure can trigger an outbreak. It’s also important to note that dermaplaning is a temporary solution. While the results can last for a few weeks, the skin will eventually return to its natural state. For best results, it’s recommended to have the procedure done every 4-6 weeks. How to Prepare for Dermaplaning Before having a dermaplaning treatment, it’s important to properly prepare your skin. This includes avoiding any exfoliating treatments for at least a week prior to the procedure. It’s also important to avoid any sun exposure or tanning beds for at least a week before the procedure. On the day of the procedure, it’s important to arrive with a clean face, free of any makeup or skincare products. The esthetician or dermatologist will then apply a numbing cream to the face, which will help to minimize any discomfort during the procedure….

Women Work Together For Years Then Discover They’re Biological Sisters
Women work together for years then discover they’re biological sisters

Children who are adopted often hope to be reunited with their biological family so they can have some idea of where they are from. This story is about two women who were adopted from another country and somehow fate helped them find their way to one another. 31-year-old Julia Tinetti, and 32-year-old Cassandra Madison met in 2013 when both of them were working at the Russian Lady Bar in New Haven. Julia noticed a tattoo of the Dominican Republic’s flag on Cassandra’s arm and commented on how she is Dominican as well but was adopted from there. Julia stopped in her tracks to reveal that she had a similar story, she was Dominican but adopted by an American family as a baby. We would go out for drinks, for dinner. The two women would often get told by their other co-workers that they looked so much alike that they could be sisters. The women entertained the idea and looked at their adoption documents but they did not match up. But based on the similarities in their adoption timelines and resemblance, both women did feel they had some sort of connection with one another. Tinetti was born in 1989 and was adopted shortly after her birth while Madison was born a year earlier in 1988 and adopted shortly after as well. The women were confident that they would be related to one another but a look at their adoption papers which did not match made them second guess their instincts and conclude that they might not be related after all. In 2015, Madison moved from Connecticut to Virginia Beach, Virginia however still kept in touch with Tinetti. In 2018, her adoptive mother gave her a 23andMe DNA testing kit for Christmas so she could know more about her background. What she found out was shocking… “I did not know that you can find a relative, so that was very much a shock,” Madison said, she was matched to several distant relatives. Madison’s childhood friend Molly Sapadin helped piece the puzzle together. Sapadin was adopted shortly after her birth in 1990 from the Dominican Republic as well. Her adoptive mother was friends with Madison’s adoptive mother and the girls grew up together in New Haven, Connecticut. Sapadin compared her adoption paperwork with Madison’s and they realized they might be half-sisters as they had the same last name and the same person listed as their birth mother. Sapadin and Tinetti were adopted on the same day and in close proximity to one another and hence think their paperwork must have been mixed up by whoever had been filling it out. Madison was able to match with a first cousin due to her DNA results. The cousin helped connect her to her biological father Adriano Luna Collado. Her birth father still resides in the Dominican Republic. As for her biological mother, Yulianna Collado passed away in 2015 after suffering from a heart attack. In 2018, Madison made a trip to the Dominican Republic to meet her biological father and her siblings. When she met her family,…

Radiant Revival: The Vital Role Of Vitamin C In Skincare
Radiant Revival: The Vital Role of Vitamin C in Skincare

The pursuit of healthy, glowing skin is a universal endeavor, and the world of skincare continually introduces innovative ingredients to achieve this goal. Among these, Vitamin C stands out as a powerhouse ingredient celebrated for its remarkable benefits. Revered for its brightening, antioxidant, and anti-aging properties, Vitamin C has become a staple in skincare routines. In this comprehensive guide, we will delve into the importance of Vitamin C in skincare, exploring its numerous advantages and how it contributes to achieving a revitalized and radiant complexion. The Science Behind Vitamin C Vitamin C, also known as ascorbic acid, is a water-soluble vitamin renowned for its role in overall health and wellness. In skincare, Vitamin C plays a pivotal role due to its ability to stimulate collagen production, neutralize free radicals, and inhibit the formation of melanin—the pigment responsible for skin discoloration. The Benefits of Vitamin C in Skincare Incorporating Vitamin C into Your Skincare Routine Introducing Vitamin C into your skincare routine can be a transformative step toward healthier skin. Here’s how to do it effectively: Expert Insights on Vitamin C Skincare The journey toward radiant and healthy skin often leads to the discovery of effective skincare ingredients, and Vitamin C undoubtedly holds a place of prominence. With its ability to brighten, protect, and rejuvenate, Vitamin C has earned its reputation as a skincare superhero. By incorporating Vitamin C into your skincare routine, you’re embracing the transformative power of science-backed skincare that addresses a range of concerns, from aging to pigmentation. Remember that consistency is key—over time, the benefits of Vitamin C will become evident as you witness your skin’s transformation into a luminous canvas of beauty and vitality.

Essential Hair Care Tips For Every Budget
Essential Hair Care Tips for Every Budget

The foundation of hair care lies in understanding your unique hair type and its specific needs. Recognizing whether your hair is oily, dry, normal, or combination can guide you in selecting products that enhance its natural beauty without causing damage. Tailoring your hair care routine to your hair’s characteristics ensures it receives the nourishment it needs to thrive. Shampooing Wisely Frequency Matters Over-washing can strip your hair of its natural oils, leading to dryness and brittleness. Aim to shampoo your hair every 2 to 3 days, adjusting based on your hair’s oil production. Those with particularly oily hair may need more frequent washing, while those with dry or textured hair might benefit from less. Choosing the Right Shampoo Select a shampoo that aligns with your hair type. For instance, volumizing shampoos are great for fine hair, while hydrating formulas are ideal for dry locks. Remember, a little goes a long way; a quarter-sized dollop is generally enough for medium-length hair. Concentrate the product on your scalp where oil and dirt accumulate, avoiding the ends to prevent drying them out. Conditioning Correctly Pre-Wash Treatments For an extra hydration boost, applying a small amount of oil to your hair before washing can work wonders. Oils like coconut or argan oil can be massaged into the ends and lengths of your hair before shampooing, providing a protective barrier that helps retain moisture during the washing process. Application Techniques Conditioner should be applied to the ends of your hair, where natural oils from the scalp seldom reach. This area is more prone to dryness and damage, so focusing your conditioning efforts here can help maintain hair health and prevent split ends. Strengthening Your Strands Natural Remedies Home remedies can be remarkably effective for strengthening hair. Ingredients like honey, eggs, and olive oil offer a bounty of nutrients and proteins that can help repair and fortify hair fibers. Apply these treatments directly to your scalp and hair, leave for about 15 minutes, then rinse with warm water before proceeding with your regular hair care routine. Look for Keratin Incorporating products that contain keratin into your hair care regimen can significantly enhance hair strength and elasticity. Keratin treatments help to rebuild the hair’s natural protective layer, improving its resilience against damage and environmental stressors. Protecting Your Hair Lifestyle Choices Simple lifestyle changes can have a profound impact on your hair’s health. Drinking plenty of water, eating a balanced diet, and minimizing heat styling can all contribute to stronger, healthier hair. When using heat tools, always apply a heat protectant to shield your hair from damage. Sun and Chemical Protection Just as your skin needs protection from the sun, so does your hair. Look for hair products that offer UVA/UVB protection to guard against color fading and dryness. If you color your hair, spacing out treatments allows your hair to recover, reducing the risk of damage. Moisturizing Regularly Moisture is key to preventing breakage and promoting shine. Regularly applying lightweight oils like argan or coconut oil can help maintain your hair’s moisture balance, leaving it soft, shiny, and less…

Mastering The Eyelash Curler
Mastering the Eyelash Curler

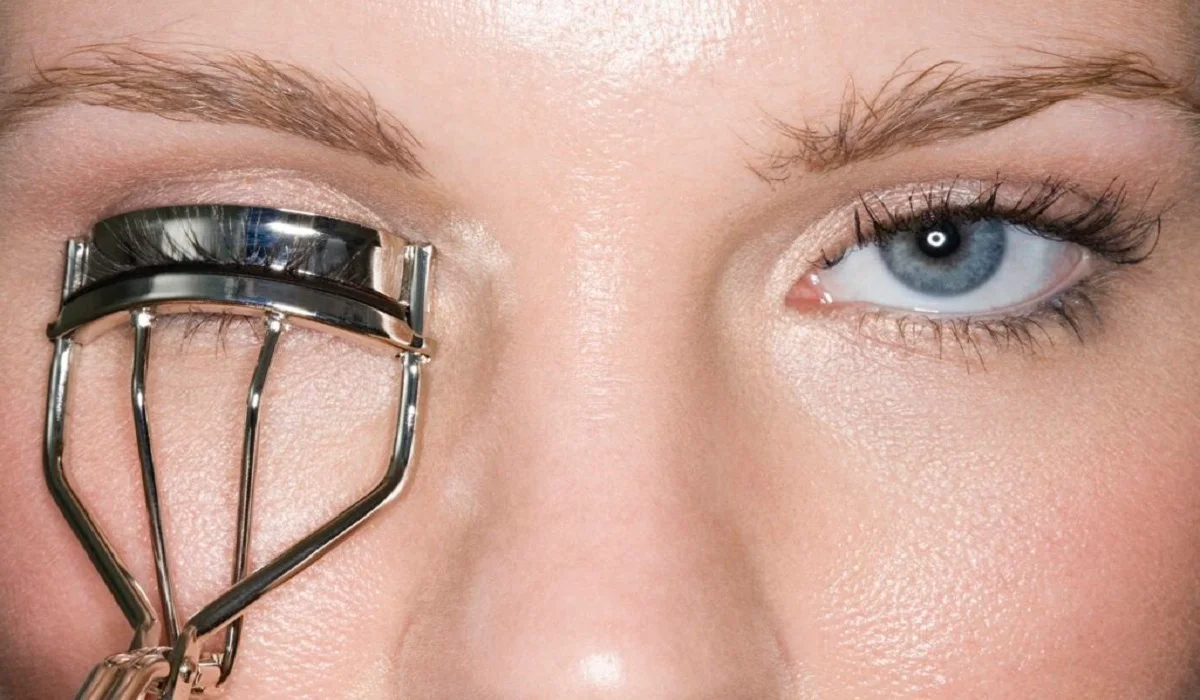
Transforming your lashes from straight to stunningly curled can be effortlessly achieved with the proper use of an eyelash curler, turning it into an indispensable tool in your beauty arsenal. However, mishandling it could result in discomfort, lash damage, or uneven curls. This detailed manual will guide you through mastering the eyelash curler, incorporating upkeep advice and solutions to frequent problems, enabling you to safely and effectively obtain those desirable, fluttering lashes. Selecting the Ideal Eyelash Curler Eyelash Curler Varieties The market offers eyelash curlers in metal, plastic, and heated models. Metal curlers stand out for their sturdiness and precision in curling, while plastic variants are perfect for on-the-go use due to their lightness. For those with hard-to-curl lashes, heated eyelash curlers can achieve a more defined and enduring curl. Choosing a Curler for Your Eye Shape Eyelash curlers are not one-size-fits-all; their efficiency varies with different eye shapes. It’s crucial to choose a curler that complements the curvature of your eye to ensure a uniform curl and avoid discomfort. Some manufacturers provide curlers tailored to specific eye shapes such as almond, round, or deep-set. Lash Preparation Ensure Lashes are Clean and Dry Commence with lashes that are devoid of any makeup or residue, as leftover products can lead to lashes sticking to the curler, risking damage. Post face-washing, ensure your lashes are thoroughly dried before proceeding with the curling process. Warming the Curler (Optional) To enhance the curl, consider gently warming your metal eyelash curler with a hairdryer for a brief period. Always test the curler’s temperature on your hand to confirm it’s warm, not hot, preventing any harm to your eye’s delicate surrounding skin or the lashes themselves. Curling Your Lashes Proper Curler Placement With the curler open, position your lashes between the pads, getting as close as possible to the lash base without touching the eyelid. Confirm that all lashes are captured by the curler’s opening. Executing the Curl Press the curler’s handles together gently for approximately 5 to 10 seconds. For a more natural curl, you may lightly pump the curler. Refrain from pulling or yanking the curler to avoid lash damage. Sectional Curling For a more pronounced curl, adopt a sectional approach: begin at the base, then mid-lash, and finally near the tips. This technique fosters a seamless, natural curl rather than an abrupt crimp. Post-Curling Mascara Application Follow up the curling with your preferred mascara to set the curl. Opt for a waterproof or curl-enhancing mascara for optimal results. Applying mascara post-curling prevents the lashes from sticking to the curler and potential damage. Curler Maintenance and Cleanliness Eyelash Curler Cleansing To ensure optimal performance, regularly clean your curler to eliminate any mascara residue or debris. Utilize a gentle makeup remover or isopropyl alcohol for cleaning, allowing the curler to dry thoroughly before its next use. Pad Replacement Change the curler’s rubber pads every few months or at signs of wear to maintain curl efficiency and lash safety. Neglecting to replace worn pads can compromise lash health and curl quality. Addressing Common Concerns Avoiding Eyelid Pinching Pinching…