Wonders of Eye Contour Creams

Eye contour cream has quickly become one of the go-to products in skincare to combat signs of aging, fatigue and environmental stressors; many individuals swear by it to revitalize and rejuvenate the delicate skin around their eyes. We will discuss what eye contour cream is as a product; its key ingredients, benefits, application techniques and much more in depth so that by the end you are well informed to decide whether adding this transformative product into your routine or not.

Understanding Eye Contouring

Before diving deeper into eye contour cream products, let’s first grasp their concept. Eye contour refers to the delicate area surrounding our eyes which is especially prone to skin concerns due to having thin skin which is particularly susceptible to UV rays, pollution and the natural aging process.

Eye Contour Related Issues and Concerns

Eyelid skin can be particularly susceptible to various issues that could potentially include:

Fine Lines and Wrinkles: Over time, thin skin combined with constant movements such as blinking and squinting can contribute to fine lines and wrinkles on our faces, particularly as we age.

Dark Circles: Sleep deprivation, genetics and other contributing factors may create dark circles under your eyes that give an appearance of tiredness.

Puffiness: Fluid retention and inflammation may result in puffy or bag-like formation under the eyes, giving an appearance of being tired or puffy.

Flakeiness and irritation: With few oil glands to protect its eye contour from drying out and flakiness, eye contours often suffer from dryness, flakiness, and irritation.

Crow’s Feet: These fine lines radiating out from the corners of your eyes often due to repeated facial expressions or sun exposure can occur as a result of repeated expressions or exposure.

Now that we are more acquainted with the challenges affecting eye contour, let’s investigate whether eye contour cream could provide any solutions to address them.

What Are My Eye Contour Options?

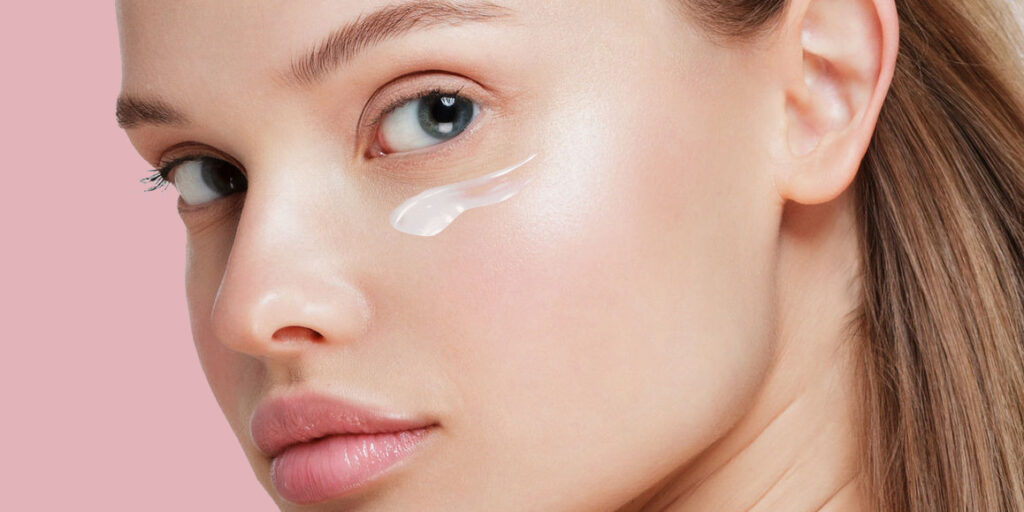
Eye contour cream (also referred to as eye cream) is a targeted skincare product developed specifically to address issues pertaining to the delicate area surrounding the eyes. Formulated to offer hydration, nourishment and protection to this delicate region. Eye creams tend to have thicker textures than facial moisturizers due to containing ingredients tailored towards targeting common concerns about this delicate region of the face.

Key Components in Eye Contour Creams

Hyaluronic Acid: Hyaluronic acid acts as an excellent moisturizer that locks in moisture within your skin cells to plump it up and diminish fine lines and wrinkles.

Peptides: Peptides are amino acids which can aid collagen production, providing skin elasticity benefits while slowing signs of aging.

Retinol: Derived from vitamin A, Retinol has long been recognized for its ability to promote cell turnover, increase collagen production and diminish dark spots.


Antioxidants: Vitamin C and E provide powerful protection from free radicals, helping prevent premature aging while diminishing puffiness.

Caffeine: Caffeine’s ability to constrict blood vessels and decrease inflammation makes it an effective remedy against puffiness and dark circles.

Ceramides: Ceramides help the skin maintain an effective moisture barrier to combat dryness while improving texture overall.

Botanical Extracts: Natural botanical extracts such as chamomile, cucumber and aloe vera help soothe and calm skin irritation by soothing natural remedies like aloe vera gel or creams.
Benefits of Eye Contour Cream

Hydration: Eye contour creams offer essential moisture for keeping skin supple and smooth around the eyes. Hydrating is key for maintaining youthful eyes!

Wrinkle Reducing Ingredients: Peptides and retinol are proven effective ingredients that promote collagen production, helping reduce fine lines and wrinkles with time.

Reducing Dark Circles: Eye creams containing antioxidants and caffeine may help minimize dark circle appearance by improving circulation and decreasing pigmentation.

Puffiness Reduction: Caffeine and anti-inflammatory ingredients present in eye creams may help constrict blood vessels to help diminish puffiness or bags under your eyes, thus decreasing puffiness or bags underneath them.


Protection: Eye contour creams contain antioxidants and other protective ingredients which provide essential defense from environmental stressors like UV radiation and pollution, keeping delicate skin protected against adverse influences such as UV rays.

Select the Appropriate Eye Contour Cream

Selecting an eye contour cream that meets your specific needs is of utmost importance, here are a few factors you should keep in mind when making this important decision:

Skin Type: Before selecting an eye cream for yourself, take into consideration your unique skin needs – dryness, oiliness, sensitiveness or combinations among them all may all factor in. Choose one specifically crafted to meet them!

Your Concerns: Determine your primary eye concerns – be they wrinkles, dark circles or puffiness – then search for an eye cream designed specifically to address those.

Ingredients: Pay close attention to the list of ingredients, looking out for key components like hyaluronic acid, retinol and antioxidants that align with your skincare goals.

Texture: Eye contour creams come in many textures – from lightweight gels to luxurious creams – so find one that feels right for you and fits with your aesthetic needs.

Allergies or Sensitivities: If you suffer from allergies or sensitivities to specific ingredients, be sure to carefully read over product labels for potential triggers that might irritate you.

How to Apply Eye Contour Cream

Proper application of eye contour cream is crucial to maximize its benefits while mitigating potential side-effects. Here’s our step-by-step guide:

Start With Clean Skin: Begin your facial skincare regime by cleansing with a mild sulfate-free cleanser to effectively eliminate makeup, dirt and impurities from the surface of the skin.

Use Your Ring Finger: Since its gentle pressure exerted on delicate skin is unrivaled, using your ring finger is the optimal method for applying eye cream without risk of tugging or stretching it further than necessary.

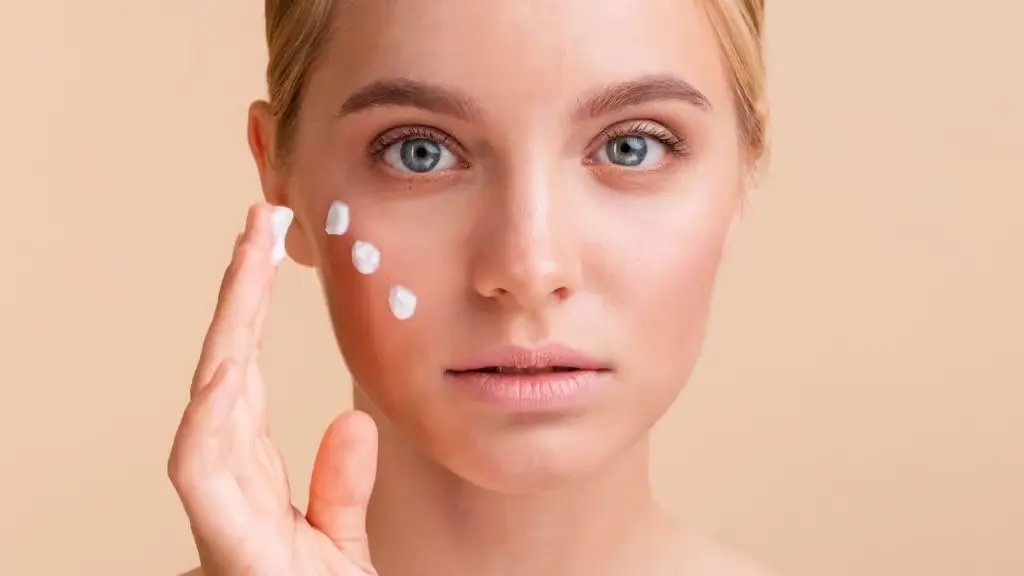
Start Small: Eye contour cream can go a long way when applied sparingly – use just a pinch-sized amount on each eye for optimal results.

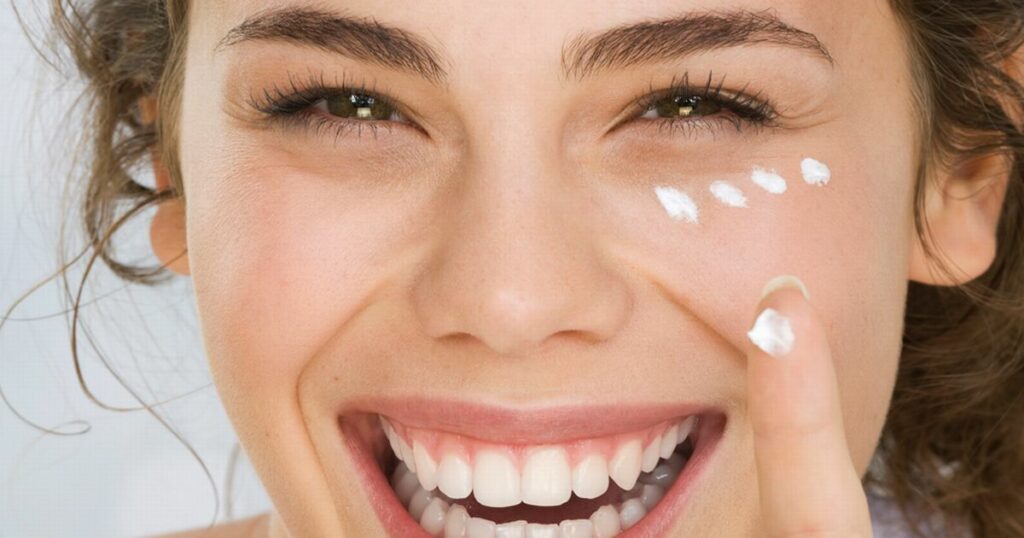
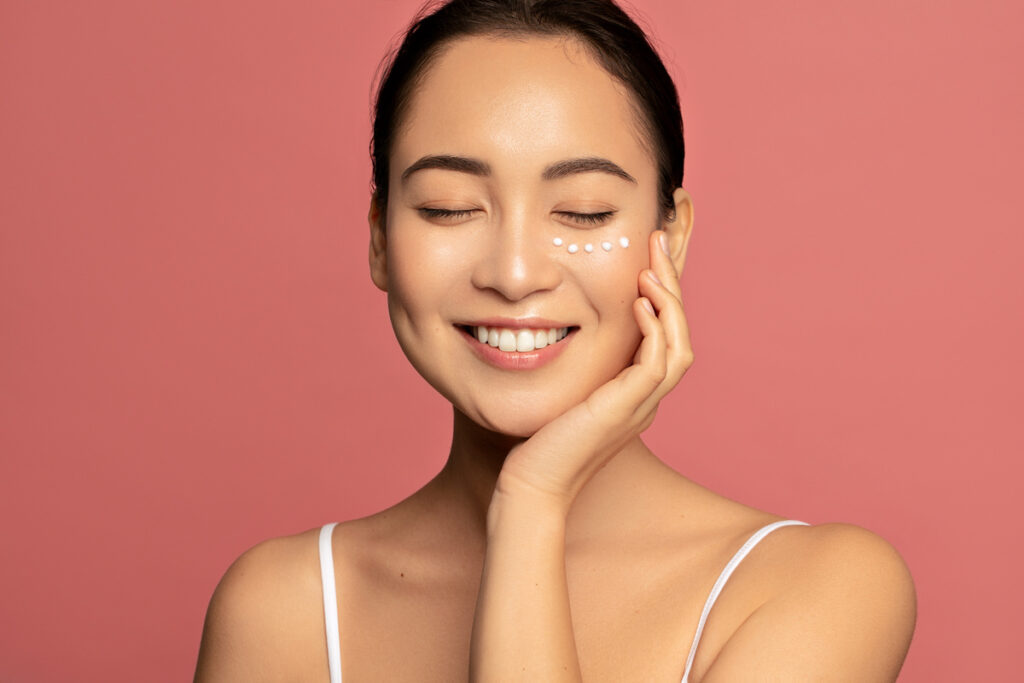
Dot the Cream: Gently dot cream along your orbital bone – which encases your eye socket – until just beyond where your eyelash line lies to avoid accidentally getting any in your eyes. Avoid applying too close to lashes as well, to prevent irritation of eyeballs.

Pat, Don’t Rub: To maximize absorption without frictional forces, patting gently using your ring finger is best way. Patting will promote absorption without creating too much tension on skin surfaces.

Wait a Moment: Allow the cream to absorb for several minutes prior to applying any makeup or other skincare products.

Apply Twice Daily: For optimal results, apply eye contour cream twice daily as part of your skincare regime in the morning and evening. This ensures maximum benefits!

Be Reliable: Consistency is key when it comes to skincare; daily application of eye contour cream will yield optimal results over time.

Misconceptions About Eye Contour Creams (ECWBs)

There are various myths related to eye contour cream which we should dispel:

“Eye Creams Can Replace Moisturizers”: Eye contour creams may offer targeted benefits; however they should not replace regular moisturizer. Your eye area benefits equally from both types of treatment products: an eye cream with specific formulation for eye area needs as well as one designed specifically to moisturize facial tissue.

“Eye Cream Should Begin Use in Your 40s”: Preventative measures can often prove more successful than corrective ones, so starting using eye contour cream early to maintain youthful eye contour area health and youthfulness could prove advantageous in helping prevent fine lines, wrinkles, puffy eye bags or dark circles from developing in later years. Doing this early could reduce wrinkles as well as other concerns like puffiness or dark circles more effectively than waiting.

“One Eye Cream Fits All”: Not all eye contour creams are created equal; what works well for one person may not work at all for someone else. Therefore, it is crucial that you select an eye cream tailored specifically to your own unique needs and skin type – one product may reduce puffiness but be ineffective against fine lines; so make your selection accordingly.

“Eye Creams Can Completely Erase Wrinkles”: While eye contour creams may help improve the appearance of wrinkles and fine lines around your eye area, they won’t completely erase them if they have long-established wrinkles and lines. Setting realistic expectations when it comes to using eye cream as part of an overall skincare regime will lead to optimal results.

“More is Better”: Overeager application of eye contour cream may waste product and not produce better results; typically a small amount should suffice for both eyes. Applying too much can overstretch delicate skin, leading to irritation.

“Eye Creams Work Overnight”: While eye contour cream may produce noticeable improvements within weeks or months of consistent usage, be patient. Maintaining skin health requires long-term commitment; using eye cream consistently over the span of weeks or months can bring about much-needed results.

Advanced Techniques and Tips

Are You Looking to Upgrade your Eye Contour Cream Application Process? Consider these advanced techniques and tips:

Layering: If your concerns include both puffiness and fine lines, layer different eye creams accordingly. Apply one that targets puffiness first; allow time for its absorption before continuing with another that targets fine lines.

Cooling Tools: Some individuals find that using cooling tools such as jade rollers or metal eye massagers to maximize the efficacy of eye contour cream can enhance its benefits, including product absorption and decreasing puffiness. These devices help minimize puffy eye bags.

Patch Testing: When trying a new eye contour cream or having sensitive skin, always conduct a patch test first to ensure no adverse reactions occur. This should prevent any unexpected skin reactions when applied around your eyes.

Consistency Is Key: For long-lasting results, consistency is of utmost importance. Maintain your eye contour cream routine even once improvements begin to show as this will help preserve their benefits over time.

Sun Protection: When outside, wear sunscreen. UV rays from the sun accelerate skin aging, making it critical to shield this sensitive eye area with adequate sun protection.

Diet and Hydration: Don’t limit skincare products alone as an approach – diet and hydration play an integral part in maintaining skin health and beauty – including eye contour health.

Integrate an Eye Contour Cream into Your Skincare Routine

Now that you understand what eye contour cream is and its workings, let’s go through how best to incorporate it into your skincare regimen:

Cleaning: Before any product application occurs, start off with a gentle cleanser to clear away makeup, dirt and oil build-up and ensure maximum product absorption.

Toning (Optional): If using toner, be sure to apply it after cleansing – however make sure it’s alcohol-free and gentle as harsh toners may dry out your eye contour too much.

Serums (Optional): When applying serums as part of your skincare regime, use it before your eye contour cream application. Many serums contain active ingredients that will complement its effectiveness and can work to reinforce the benefits.

Eye Contour Cream: As directed in the previous section, apply a small amount of eye contour cream directly under each eye area by patting in gently until completely absorbed into skin.

Moisturizer: Use an appropriate moisturizer that fits with the needs of your skin type to lock in moisture and create an additional barrier against environmental stressors.

Sunscreen (Daytime): For daytime protection, finish your morning routine off right by applying broad spectrum SPF that offers UVA/UVB ray protection.
Makeup (if Desired): For best results, apply makeup only after sunscreen has been applied to avoid tugging at eye area tissues during removal processes at night. Use gentle methods when taking it off each evening in order to preserve eyelid tissue health and minimize tugging at eyes and other sensitive parts.

Routine for Nighttime Care: In the evening, follow a similar regimen but without using sunscreen. In addition, using an intensive eye contour cream at night for added hydration and repair may provide extra hydration and repair benefits.

Eye contour creams are tailor-made to address the special needs of delicate eye tissue. By understanding its requirements and selecting an eye cream suitable to your skin type and concerns, you can access all its advantages – ranging from diminishing fine lines and wrinkles to decreasing puffiness and dark circles.

Keep consistency at the core of your skincare regime: by including eye contour cream in your daily regimen – alongside proper cleansing, moisturization and sun protection measures – can yield impressive long-term results. While eye contour cream alone may work wonders in helping achieve youthful-looking skin; holistic approaches including diet management, hydration practices and overall proper skincare practices provide lasting solutions.

Unveiling Confidence Tailoring Makeup Techniques For The Square Face Shape 1
Unveiling Confidence: Tailoring Makeup Techniques for the Square Face Shape

Makeup is a powerful tool that allows us to enhance our features and express our individuality. When it comes to a square face shape, characterized by a strong jawline, straight sides, and a broad forehead, the right makeup techniques can soften angles and highlight your unique beauty. Whether you’re aiming to create balance, play up your favorite features, or achieve a more contoured look, understanding how to tailor your makeup to your square face shape is essential. In this comprehensive guide, we’ll explore customized makeup tips and techniques that will empower you to embrace your square face shape and radiate confidence. Understanding the Square Face Shape Before diving into makeup application, it’s crucial to grasp the distinctive characteristics of the square face shape: With this understanding, you can strategically use makeup to create harmony and enhance your facial features. Creating a Smooth Canvas Prepping your skin is the foundation of any makeup look. Follow these steps to ensure your skin is ready for makeup application: Contouring and Highlighting Contouring and highlighting techniques can create balance and soften the angles of a square face shape. Here’s how: Eye Makeup Techniques Eyes are a focal point of any makeup look. Consider these tips to complement your square face shape: Lip Makeup Recommendations Lips are another feature you can play up to create balance on your square face: Blush Application Blush can add warmth and softness to your square face shape: Final Touches Complete your makeup look with these final touches: Mastering makeup techniques that complement your square face shape empowers you to highlight your unique beauty while creating harmony and balance. By employing methods that soften angles, enhance your features, and add dimension, you can confidently embrace your facial structure. Remember that makeup is an art form, and experimenting with different styles and techniques allows you to discover what makes you feel most empowered and beautiful. With the right makeup techniques, you can celebrate your square face shape and showcase your confidence to the world.

From Play Doh To Sunscreenthe Dangers Of Skincare For Kids Explained
From Play-Doh to Sunscreen: The Dangers of Skincare for Kids Explained

Children are facing an increasing amount of pressure to maintain a skincare routine, and dermatologists are growing anxious about the potential risks and health ramifications. This article offers a comprehensive rundown of the trend, as well as an overview of the reasons experts are growing more concerned about its implications for children. The Changing Face of the Beauty Industry The beauty industry has transitioned to target a younger audience, and there is an influx of products being marketed to children. As a result, more and more children are becoming users of skincare products, and dermatologists are raising concerns about the dangers of early adoption. However, it’s vital that these dangers are fully understood, as a child’s skin is fundamentally different and more sensitive than an adult’s. The Market for Children’s Skincare In recent years, the market for skincare products for children has expanded dramatically, with numerous brands offering ranges dedicated to a younger audience. This boom is largely the result of a turn in focus towards skin health, as well as aggressive marketing aimed at both parents and youngsters. Why Children’s Skin is Different Children’s skin is different from adults’ skin: It’s more delicate, more susceptible to irritation, and takes longer to form its own protective barrier. That’s because children’s skin has a different composition, is thinner, and performs its barrier function differently than adult skin, causing it to be more susceptible to moisture loss and external damage from harsh skincare ingredients. The Dangers of Early Skincare Adoption Using skincare in kids could pose a number of risks to skin condition, allergy development, and overall health. A number of ingredients can disrupt skin development, create allergies, or cause long-term health issues, making caution and knowledge two powerful skincare choices for children. Common Harmful Ingredients in Children’s Skincare Beware of the alarming chemicals housed in many skincare products for kids, including synthetic fragrance, parabens, and sulfates, because they can be harsh on young skin. Expert Dermatologists’ Warnings What do dermatologists think of the increasing phenomenon of kids using skincare products?Read their take on protecting sensitive, youthful skin. Alternatives to Traditional Skincare for Children Skip the chemicals and opt for the naturals in children’s skincare. Ingredients to look for, contain, and avoid as well as the brand leading the way in gentle, non-toxic children skincare. How Parents and Guardians Can Help Ultimately, parents and guardians are responsible for overseeing and guiding their children’s skincare routines. Here are some considerations that can help ensure that the products used on kids are safe, appropriate, and beneficial to their skin health. Choosing Safe Skincare Products for Kids Selecting safe kids skincare products is no easy task. This portion of the article gives an overview of how parents can approach product selections, including latching onto ingredient lists, looking for particular certifications, and seeking out dermatologist-recommended options. The Psychological Impact of Early Beauty Standards Introducing kids to skincare and beauty standards at a young age can lead to some significant psychological outcomes. This section examines what steering youth into beauty routines can do to their self-esteem and body image…

Blushing Beauty: A Comprehensive Guide To Choosing The Perfect Blush For Your Skin Tone
Blushing Beauty: A Comprehensive Guide to Choosing the Perfect Blush for Your Skin Tone

Blush is a makeup essential that adds a healthy flush of color to your cheeks, brightening up your complexion and enhancing your natural beauty. However, selecting the right blush shade to match your skin tone can be a daunting task. With numerous options available, it’s essential to understand your skin tone and undertone to pick the perfect blush that complements your features. In this in-depth guide, we will walk you through the process of identifying your skin tone and undertone and provide expert tips on choosing the ideal blush shade for a radiant and harmonious look. Determining Your Skin ToneBefore diving into blush selection, it’s crucial to determine your skin tone accurately. Skin tones generally fall into three categories: fair, medium, and deep. a. Fair Skin Tone: Fair skin usually burns easily in the sun and rarely tans. It often has a translucent quality, and veins on the wrist might appear blue or purple. b. Medium Skin Tone: Medium skin has a more balanced undertone and tans moderately in the sun. Veins on the wrist appear blue-green. c. Deep Skin Tone: Deep skin tans deeply and rarely burns. Veins on the wrist appear green. Understanding Your UndertoneApart from your skin tone, understanding your undertone is crucial for selecting the most flattering blush shade. Undertones can be warm, cool, or neutral. a. Warm Undertone: If your veins appear green and gold jewelry complements your skin better, you likely have a warm undertone. Warm undertones have hints of yellow, peach, or golden hues. b. Cool Undertone: If your veins appear blue or purple, and silver jewelry looks better on you, you likely have a cool undertone. Cool undertones have hints of pink, red, or blue. c. Neutral Undertone: If you find it challenging to distinguish whether your veins appear green or blue and both gold and silver jewelry suit you, you may have a neutral undertone. Neutral undertones have a balanced mix of warm and cool tones. Best Blush Shades for Different Skin Tones and UndertonesNow that you’ve identified your skin tone and undertone, let’s explore the best blush shades that complement each combination: a. Fair Skin Tones: Fair with Warm Undertone: Opt for soft peach, warm pink, or light coral blushes to add a natural flush to your cheeks. Fair with Cool Undertone: Choose rosy pink, cool mauve, or soft berry shades for a fresh and radiant look. Nötr Alt Tonla Adil: Şanslısın! Nötr bir alt ton olarak, yumuşak pembe, şeftali pembesi ve leylak rengi gibi çok çeşitli allık tonlarını deneyebilirsiniz. b. Medium Skin Tones: Medium with Warm Undertone: Embrace warm peach, apricot, and coral blushes for a sun-kissed glow. Medium with Cool Undertone: Opt for berry, plum, or deep rose blushes to add a pop of color to your cheeks. Nötr Alt Tonlu Orta: Nötr alt tonlu açık ten gibi, sıcak terakotadan soğuk güle kadar çeşitli allık tonlarını çekebilirsiniz. c. Deep Skin Tones: Derin ve Sıcak Alt Ton: Cildinizle çarpıcı bir kontrast oluşturmak için zengin, sıcak kiremit kırmızısı, mandalina veya derin mercan allıklarını tercih edin. Deep with Cool Undertone: Opt for bold…

Effortless Yetchic School Hairstyles
Revitalizing Your Look for the New Academic Year: Trendy and Easy Hairstyles

The transition from a leisurely vacation back to the structured schedules of school or work marks a perfect opportunity for a personal makeover. As we embrace the new academic year or return to our routine jobs, updating our appearance can provide a fresh burst of energy and confidence. This season, why not consider revamping your hairstyle? Easy, trendy, and quick to style, the right hairstyle can significantly uplift your look and mood. In this comprehensive guide, we’ll explore a variety of simple yet stylish hairstyles suitable for short, medium, and long hair, ensuring you can easily craft a chic look from the comfort of your home. Trendy Hairstyles to Kickstart the Season Transforming your look with a new hairstyle is a fantastic way to mark the beginning of a new season or academic year. Let’s delve into some effortless and fashionable hairstyles that can be achieved in minutes, making them perfect for busy mornings before school or work. Simple Hairstyles for Short Hair Short hair offers a plethora of styling options that are both easy and quick to execute. Cute Hairstyles for Effortless Charm Cute hairstyles can be achieved quickly, ensuring you look stylish without spending too much time. Easy Hairstyles For Braids Braids are versatile and can be styled in minutes, offering a quick solution for a polished look. Simple Hairstyles for Long Hair Long hair provides a canvas for various hairstyles that are easy and quick to manage, perfect for school settings. Simple Hairstyles for Medium-Length Hair Medium-length hair is incredibly versatile, allowing for a range of styles from beach waves to sleek bobs, all of which are easy to style and maintain for school. Simple and Stylish Twists Twists are exactly as they sound—simple yet capable of adding either a fun or sophisticated flair to your look with minimal effort. Embrace Your Natural Beauty Leveraging your natural hair texture not only simplifies your routine but also highlights your innate beauty. Elevate Your Look with Accessories Even the simplest hairstyles can be elevated with the right accessories, adding a personal touch to your school look. Streamlining Your Morning Hair Routine For those mornings when every second counts, these tips can be lifesavers: Styles for Every Hair Length Regardless of whether your hair is short, medium, or long, this guide offers stylish and manageable options for every student. Maintaining Luscious Locks The secret to any great hairstyle is healthy hair. A consistent care routine and regular trims are essential to maintaining your hair’s vitality. Visual Learning Aids For those who prefer visual guidance, numerous online tutorials and resources are available to walk you through these hairstyles step-by-step. Refreshing your look with a new hairstyle is an excellent way to start the new academic year or to return to your routine with renewed vigor. Whether you have short, medium, or long hair, there are countless simple and trendy hairstyles that can elevate your appearance with minimal effort. By incorporating these styles into your daily routine, you can ensure you look and feel your best, ready to tackle the challenges and opportunities of…

All You Need To Know About Eyebrow Threading: The Ultimate Guide
All You Need to Know About Eyebrow Threading: The Ultimate Guide

Eyebrow threading is a popular method of hair removal that originated in South Asia and has become increasingly popular in the Western world. It is a precise and relatively painless way to shape and groom eyebrows. In this guide, we will cover everything you need to know about eyebrow threading, including what it is, how it works, the benefits, and what to expect during and after the procedure. What is Eyebrow Threading?Eyebrow threading is a hair removal technique that involves twisting and pulling a thread along the skin, which removes the hair from the follicle. The thread is typically made of cotton or polyester and is doubled over, creating a loop at one end and two loose ends at the other. The practitioner holds one end of the thread in their mouth and uses the other hand to manipulate the loop, allowing them to precisely remove individual hairs from the eyebrow area. How does Eyebrow Threading Work?Eyebrow threading works by pulling out hair from the root. The practitioner will use the looped end of the thread to trap and twist individual hairs, pulling them out from the follicle. Because threading only removes hair from the root, the results can last up to 4-6 weeks before the hair grows back. Additionally, threading is a relatively gentle technique, as it does not require any chemicals or heat, making it suitable for those with sensitive skin. Benefits of Eyebrow Threading:There are several benefits to eyebrow threading. First, it is a precise technique, allowing for a more defined and tailored eyebrow shape. Second, it is less painful than other hair removal methods, such as waxing, as it does not pull on the skin. Third, threading is a quick and easy procedure that can be done in a matter of minutes. Finally, because threading only removes hair from the root, the results can last up to 4-6 weeks, making it a low-maintenance option. What to Expect During an Eyebrow Threading Procedure:If you have never had your eyebrows threaded before, you may be wondering what to expect during the procedure. First, the practitioner will ask you about the shape and style you are looking for. They will then use a white eyeliner pencil to draw on the shape of your new eyebrows. Once you have approved the shape, the practitioner will begin the threading process, using the looped end of the thread to remove hairs from the eyebrow area. You may experience some mild discomfort during the procedure, but it should not be painful. Once the threading is complete, the practitioner will apply a soothing cream or gel to the area to reduce any redness or irritation. Aftercare for Eyebrow Threading:Aftercare for eyebrow threading is relatively simple. You should avoid touching or rubbing the eyebrow area for at least 24 hours after the procedure to allow the skin to heal. You may also experience some redness or mild swelling, which should subside within a few hours. You can apply a cool compress to the area to reduce any discomfort. Finally, it is important to keep the eyebrow area…

Henna Vs. Regular Tattoos: An In Depth Comparison Of Body Art Forms
Henna vs. Regular Tattoos: An In-Depth Comparison of Body Art Forms

Choosing between henna and regular tattoos can be a challenging decision for anyone looking to get body art done on their skin. Both options have their unique characteristics, advantages, and considerations that can influence the final choice. In this comprehensive article, we will compare henna tattoos and regular tattoos, providing all the necessary information to help individuals make an informed decision. From the creation process to the duration, pain factor, design possibilities, and potential risks, we will explore each aspect of these body art forms. Section 1: Understanding Henna and Regular Tattoos 1.1 Henna Tattoos: Henna tattoos are temporary body art made using natural henna plant powder. The powder is mixed with water to form a paste, which is applied to the skin using a piping bag. The dye from the henna plant stains the skin temporarily, creating intricate and mesmerizing patterns. Henna tattoos are a popular choice for those seeking a temporary design without the permanence of regular tattoos. 1.2 Regular Tattoos: Regular tattoos, also known as permanent tattoos, involve using a tattoo machine gun, tattoo needles, and tattoo ink. The tattoo gun pushes the ink into the dermis layer of the skin, resulting in long-lasting body art. Regular tattoos offer a vast array of design possibilities and can be highly detailed and intricate. Section 2: Comparing Henna and Regular Tattoos 2.1 The Process of Creating: Henna tattoos rely on a henna paste that is skillfully applied to the skin’s surface. The patterns are created by the artist pushing the paste out of the piping bag. On the other hand, regular tattoos involve the use of a tattoo machine gun and needles to insert ink into the dermis, creating a permanent design. Both techniques require skilled professionals, but the application methods are vastly different. 2.2 Duration of the Tattoos: Henna tattoos are temporary and typically last between 4 and 7 days, with the possibility of lasting up to 12 days with high-quality henna paste. After this period, the dye fades away, leaving the skin clear again. Regular tattoos, however, are designed to be permanent and can last a lifetime if desired. Tattoo removal options, such as laser tattoo removal, are available for those who want to remove a regular tattoo. 2.3 The Pain Issue: Henna tattoos are pain-free as the henna paste is placed on the skin’s surface. Conversely, getting a regular tattoo involves piercing the skin with needles, causing pain and discomfort during the process. However, the pain level can vary depending on the tattoo’s location, size, and the skill of the artist. The healing process of a regular tattoo can also cause some discomfort, but proper aftercare can minimize any issues. 2.4 Design Possibilities: Henna tattoos are limited in design possibilities compared to regular tattoos. Henna’s application technique is suited for pattern work, while regular tattoos offer limitless design options with intricate details, shading, and various colors. Regular tattoos’ versatility allows for almost lifelike creations, providing a wide range of design choices. 2.5 Skin Impact and Risks: Henna tattoos, when done with natural henna plant powder, have minimal impact…

How To Cover A Tattoo With Makeup 2
A Comprehensive Guide on How to Cover a Tattoo with Makeup

Expressive Expression Canvas Tattoos are powerful signs of art and identity etched onto our skins, yet sometimes we need them covered temporarily for job interviews, special events, or simply trying out something different. Makeup offers the ideal combination of artistry and practicality as a skillful solution that conceals tattoos without altering their essence. Chapter 1: Selecting Appropriate Tools for Any Task Correctors and Concealers Finding an appropriate concealer to cover your tattoo can be the key to its effective concealment. A highly pigmented, long-wearing concealer which complements your skin tone should do. Color correctors may help neutralize any hues present in the tattoo design that have bright hues. Primer for Smooth Canvases (Creating A Smooth Background ) Primer helps create an even surface, helping makeup adhere well and remain in place throughout the day. Choose one suitable for your skin type – perhaps one which hydrates, mattifies or fills pores. Chapter 2 : Mastering Technique Layering: the Key to Seamless Coverage Acchieve flawless coverage requires applying several thin coats of concealer over time – rather than applying all at once, build up gradually for natural-looking coverage that also prevents caking or creasing of makeup. Blending: the Art of Seamless Transitions Blending is key for creating a natural-looking finish, so use makeup sponges, brushes or your fingertips to blend concealer seamlessly into surrounding skin and especially at tattoo edges to ensure a seamless transition. Chapter 3 : Color Matching and Customization Perfecting Your Match Acknowledging the importance of selecting a concealer shade suitable to your skin tone, you may require experimentation in order to find your ideal hue. While some individuals might like their concealer exactly matching their foundation shade, others might choose for something lighter or darker depending on their desired look. Customization with Special Effects Makeup Special effects makeup offers endless creative potential. Experiment with different color palettes, stencils and techniques to craft unique designs that either seamlessly merge into the skin’s surface or transform a tattoo into works of art. Chapter 4 : Establishing Longevity Strategies Setting Powders and Sprays Setting is crucial when creating your masterpiece. Apply translucent setting powder generously across any concealed areas to avoid smudging and create a matte finish, and consider adding an additional protective measure such as setting spray if sweaty conditions or humid climates exist. Enhance Your Longevity Through Touch-Up Tips Maintaining excellent coverage may require touch-ups throughout the day to protect areas vulnerable to friction. Keep a small makeup kit handy to quickly apply touch-ups as necessary and guarantee your hidden tattoo remains looking its best! Chapter 5 : Removing Makeup Canvases Gentle Cleansing to Give you a Fresh Start At the end of every day, it’s essential to remove makeup carefully to maintain healthy skin. A gentle oil-based cleanser will break down makeup without harsh scrubbing while your regular skincare regime should then nourish and soothe it further. Conclusion: Revealing or Concealing Are Your Choices Makeup artistry provides endless possibilities when it comes to covering tattoos – be it forever embracing it proudly, temporarily hiding it for special events or temporarily…

A Guide To Safely Lightening Your Skin Tone: Methods And Precautions
A Guide to Safely Lightening Your Skin Tone: Methods and Precautions

Skin tone can vary due to various factors, including genetics, sun exposure, and hormonal changes. Some individuals may desire a lighter skin tone for personal or cultural reasons. While there are several methods to achieve a lighter complexion, it is essential to approach skin lightening with caution and prioritize safety. In this comprehensive guide, we will explore various methods to lighten your skin tone, along with essential precautions to maintain skin health and avoid potential risks. Sun Protection:One of the most effective and safest ways to maintain a lighter skin tone is by protecting your skin from the harmful effects of the sun’s ultraviolet (UV) rays. UV radiation stimulates the production of melanin, the pigment responsible for skin color. Consistently using broad-spectrum sunscreen with a high SPF (30 or above) and seeking shade during peak sun hours can prevent excessive melanin production and help maintain a lighter complexion. GO TO THE NEXT PAGE TO CONTINUE… Topical Skin Lightening Products:There are numerous over-the-counter skin lightening products that contain ingredients such as hydroquinone, kojic acid, arbutin, and vitamin C. These ingredients work by inhibiting melanin production, leading to a gradual lightening of the skin. However, it is crucial to use these products with caution and follow the recommended usage instructions to avoid potential side effects such as irritation, redness, or skin sensitivity. Natural Remedies:Some natural ingredients are believed to have skin-lightening properties. For example, lemon juice, a natural source of vitamin C, is thought to have a mild bleaching effect. However, it’s essential to be cautious when using natural remedies, as some can cause skin irritation or even worsen pigmentation in certain individuals. Perform a patch test before applying any natural remedy to a larger area of your skin. Chemical Peels:Chemical peels are cosmetic treatments that involve applying a chemical solution to the skin, causing it to exfoliate and eventually peel off. This process can help improve skin tone and texture, leading to a lighter and more even complexion. However, chemical peels should be performed by a licensed professional, as they can cause skin irritation and are not suitable for all skin types. Laser Treatments:Laser treatments, such as laser resurfacing and intense pulsed light (IPL) therapy, can target melanin and dark spots in the skin, leading to a more even skin tone. These treatments should only be performed by trained dermatologists or cosmetic surgeons to avoid complications and ensure optimal results. Microneedling:Microneedling is a procedure that involves using tiny needles to create controlled micro-injuries in the skin, promoting collagen production and skin rejuvenation. It can improve skin texture and may help fade hyperpigmentation, leading to a more radiant and lighter skin tone. However, microneedling should be performed by a qualified professional to minimize the risk of infection and scarring. Precautions: Consult a Dermatologist:Before embarking on any skin-lightening journey, it is crucial to consult a dermatologist. A qualified dermatologist can assess your skin type, discuss your desired results, and recommend appropriate treatment options based on your skin’s specific needs. This consultation is essential to ensure that you choose safe and effective methods tailored to your…