Lip Pencil: The Star Of Your Lip Makeup

Lip Pencil 2

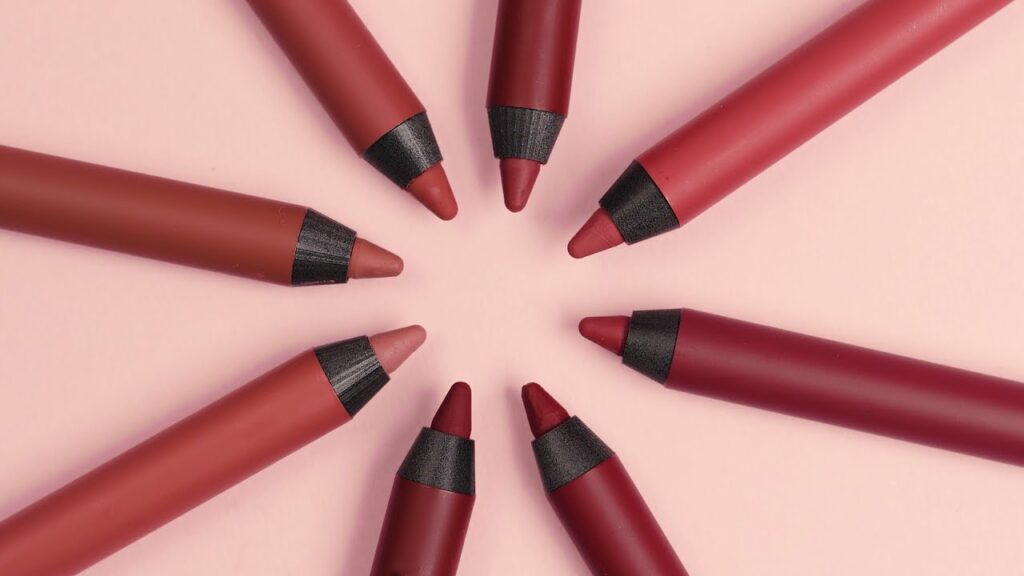
Lip pencils are often overlooked when it comes to makeup application. Although lipstick and gloss may garner all of the glory, lip pencils play an integral part in creating well-defined, long-wearing lip looks. From outlining lips to preventing feathering of lipstick pigment, these versatile tools perform multiple duties that contribute to flawless and stunning lip makeup looks. In this comprehensive guide we’ll dive deep into lip pencil world and discover their purpose while learning how to best utilise them to achieve flawless and stunning lip makeup looks.

Chapter 1 : Anatomy of a Lip Pencil

Before beginning with lip pencils, it’s essential to understand their basic structure and composition. Lip pencils (sometimes known as lip liners ) are makeup tools used for enhancing and defining lips; their usual components typically consist of:

Wooden or Mechanical Barrel: Traditional lip pencils typically feature wooden barrels similar to standard pencils; however, more modern options have evolved into mechanical or retractable lip pencils with twist-up or click mechanisms, providing convenient on-the-go application without sharpening needs.

Pigmented Core: At the core of every lip pencil lies its pigmented, waxy and slightly firm makeup material – responsible for providing color delivery while creating precise lines when applied directly onto lips. Lip pencils come in an assortment of shades designed to complement different lip hues.

Emollients and Binders: For an effortless application, lip pencils contain emollients and binders which help ensure an effortless glide across lips while adhering closely to skin to avoid feathering or smudging. These ingredients create creamy textures which effortlessly glide on lips with adhesion properties to skin that prevent smudging or feathering of makeup application.

Preservatives: As with many cosmetic products, lip pencils can contain preservatives in order to increase shelf life and ensure product integrity.

Additional Features: Lip pencils may come equipped with additional features like brushes or smudgers on one end that allow users to feather out lip liner and achieve more natural-looking applications. These extra tools may come in handy for creating seamless transitions when it comes to applying it and feathering its application onto lips.

Understanding how a lip pencil works is the first step to becoming proficient with its use. From traditional wooden lip pencils to convenient mechanical models, understanding its components’ interdependencies will enable you to craft well-defined lip looks with striking effects.

Chapter 2 : Lip Definition Technology and its Advantages

Lip pencils serve one primary function: they help define lip contours precisely and precisely. No matter whether your target look is natural everyday lip look or bold dramatic pout, lip definition remains powerfully transformative. Here’s how lip pencils can help achieve ideal lips:

Enhancing Lip Shape: Lip pencils can be invaluable tools in improving the natural shape of lips. By subtly overlining or slightly adjusting their outline, lip pencils allow users to achieve fuller lips or an evenly balanced profile if their contours differ greatly from each other. They’re especially beneficial if there are uneven contours.

Avoid Feathering and Smudging: Feathering and smudging of lipstick are two common makeup problems, especially with more creamy or vibrant lip colors. Lip pencils act as barriers against bleeding into fine lines around your lips by outlining their edges using lip pencil. By doing this, they ensure your lip color stays put all day.

Attaining Clean Lines: Utilizing a lip pencil makes creating crisp and clean lip lines effortless. From classic well-defined lips outlines to experimental new shapes, lip pencils provide precision necessary for artistic flourishes in lip designs and shapes.

Long-Lasting Lip Color: Lip pencils can extend the wear time of lipstick or gloss products by outlining and filling in lips first with lip pencil before applying lipstick or gloss, creating a base which anchors them securely allowing longer-wear even through meals and drinks.

Versatile Lip Effects: Lip pencils offer versatility when it comes to lip makeup. From classic looks such as the iconic red lip, all the way through trendy options like gradient or ombre lips – using them allows you to express your creativity while staying on-trend! These artistic options allow for self-expression while being on-trend!

To fully unleash the potential of lip definition, it is crucial that you learn proper methods for outlining and shaping lips. From natural everyday looks to bold dramatic styles, lip pencils are your greatest allies when creating beautifully defined lips – in these chapters we will delve further into these techniques so you can master this art form of lip definition!
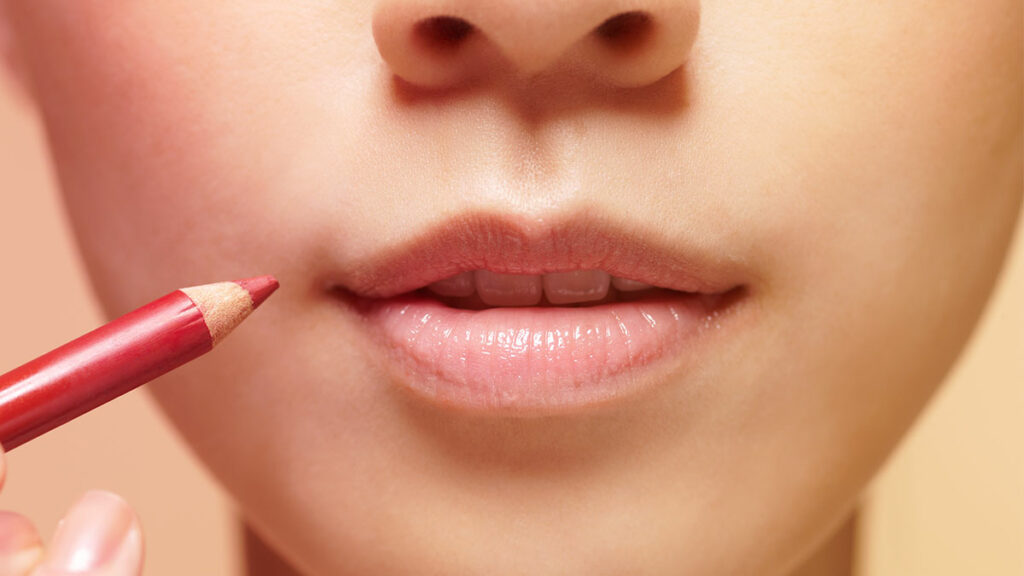


Lip Pencil 1

Chapter 3 : Lip Priming Technique

Before diving into lip pencils and lipsticks, it’s essential to understand their role in creating flawless and long-term lip looks. Lip priming sets the scene for your lip makeup routine by helping keep pencil and lipstick in place throughout the day – it truly should not be underestimated as an integral step of lip makeup routines! Here’s why lip priming should become part of your everyday lip makeup regimen:

Hydrating and Smooth Texture: Lip primers are specifically designed to provide a hydrating and smooth foundation for lip makeup applications, helping protect lips from becoming dry or flaky, which could hinder application. By offering moisture replenishment they help preserve an even surface that makes application of lipstick products possible.

Extended Lipstick Wear: Lip primers extend the longevity of lipstick color by acting as a barrier between it and feathering, smudging or fading prematurely. Thanks to an effective primer application, vibrant lips colors can last even in challenging circumstances for hours at a time!

Increased Lipstick Pigmentation: Lip primer can boost the pigmentation of any lipstick product you wear, creating vibrant, true-to-shade colors that pop. This feature can especially come in handy with sheer or light hued lipsticks which may need some additional depth of hue for optimal wearability.

Smooth Lip Surface: Lip primers create an unobstructed surface for lip products to adhere to, making application effortless with clean and precise lip lines as a result of effortless pencil application. This results in beautiful looking lipstick looks.

Improved Lip Texture: For those suffering from fine lines and wrinkles on their lips or uneven texture issues, using lip primer may provide relief by filling in any imperfections and creating more even and youthful-looking lips.

Effective lip primer use starts by applying a thin coat over clean and dry lips and waiting two or three minutes before proceeding with lip pencil and lipstick application. This small step can dramatically enhance both quality and longevity of lip makeup application.

Lip primers come in various formulations such as balms, gels and creams to meet individual preferences and meet various lip concerns, including dryness, color correction or anti-feathering properties. By mastering lip priming techniques you ensure that your makeup looks its best no matter the style you desire!

Chapter 4: Lip Contouring and Ombre Effects


Lip pencils are powerful tools, offering more than simply outlining of lips. They play a pivotal role in contouring lips with stunning ombre effects for exploring various lip makeup styles and trends. Here’s how you can master these artistic techniques:

  1. Lip Contouring: Lip contouring involves adding dimension and definition to your natural shape of lips without resorting to fillers or other invasive procedures – creating fuller lips while giving more shapely shapes without fillers or surgery being required! Here’s how lip contouring with pencil can work:

Highlight the Cupid’s Bow: Start by outlining your Cupid’s Bow, the curved area in the center of your upper lip. Use a lighter shade lip pencil to highlight this area; this technique draws attention to it while emphasizing natural lip contours.

Create Shadows: For added depth and dimension, try shading your lips using a darker lip pencil shade on both the outer corners. Apply along both the upper lip edges as well as lower lips; blend this using either your lip brush or fingertip so as to achieve a natural-looking result.

Blend and Layer: Lip contouring requires expert blending and layering skills. A brush or your fingertip are an effective way of seamlessly blending lighter and darker tones together for an attractive contoured effect. By creating transition between highlighted and shaded areas on your lips, this creates an alluring angled contoured effect and ensures maximum volume at every spot on each lip contoured by lip contouring techniques.

  1. Ombre Effects: Ombre lips have become an increasingly fashionable trend in makeup, creating an eye-catching gradient of colors on lips. Lip pencils can help achieve this captivating effect; here’s how:

Choose Your Colors: Select two or more lip pencils whose hues blend harmoniously together for an ombre lip look, such as transitioning from darker edges to lighter tones in the center of your lips.

Outline and Fill: Start by outlining your lips using a darker lip pencil, filling only in outer edges using that same pencil, leaving center unfilled.

Add the Lighter Shade: With either a lighter lip pencil or different shade in mind, apply an even lighter tone in the center of your lips using an application tool and gently blend where dark and lighter tones meet, to achieve an attractive gradient look.

Attain a Perfect Gradient: For an effective gradient effect, blend and layer colors until you achieve an eye-catching play of hues from outer corners to center lips. The goal should be an elegant blend between hues from their respective corners to center of lips.

Lip contouring and ombre effects are versatile techniques that let you express your creativity while adapting your lipstick look to various occasions or styles. From bold contoured lips to subtle ombre effects, lip pencils provide essential tools for producing these artistic effects – in subsequent chapters we will also examine further techniques and tips that help perfect these techniques.

Chapter 5 : Lip Liner Use

Lip liners are essential tools in creating an appealing and long-wearing lip look. Not only can they prevent feathered lipstick from feathering out or smudging but they can also allow precise lines and enhance lip shape by helping prevent feathering or feathering of lip liner. Here is a step-by-step guide on how to effectively use a lip liner:

  1. Select an Appropriate Shade: Choose a lip liner shade that complements or slightly darkens your lipstick shade for best results. Any shade significantly lighter could create an unintentional contrast between lipliner and lipstick color that could appear unnatural, so be careful.
  1. Start With Clean Lips: Begin with clean, dry lips. You may use lip balm for additional moisturization if preferred – however any excess balm must be removed so the lip liner adheres securely.
  2. Outline Your Lips: Start by outlining your lips using lip liner to achieve precise lines. Start at the center of your upper Lip’s Cupid’s Bow and move outward, following its natural lipline towards corners; do this on lower lips as well, though start from center first and work your way towards outer edges for best results.
  3. Define Corners: Once your lips have been outlined, it is crucial that the corners are defined to prevent lipstick feathering around where your lips meet the skin. Draw small lines at each of the outer corners where upper and lower lips meet in a “V” formation to achieve this step.
  4. Fill In Lips: To optimize the long-term durability and smoothness of your lipstick application, filling your lips in with lip liner can serve as an underlayer that protects even if some or all of it fades with time – providing your lipstick will still have color even as its lasting power wanes over time. This step acts like an insurance policy against faded lipstick coverage!
  5. Blend Your Liner: After outlining and filling in your lips, use either a lip brush, fingertip, or the actual liner itself to subtly blend its edges inward towards the center for an unobtrusive gradient that softens any harsh contrast between liner and lipstick. This blending technique prevents an abrupt transition.
  6. Apply Lipstick: Once your lips have been carefully defined and filled in with filler products and blended, the final step in lip care should be applying lipstick. Be sure to follow the lip liner lines when doing so for more accurate and effortless application of the hue.
  7. Clean Up Any Errors: If any mistakes arise during application of lip makeup, or you need to perfect its shape further, use either a clean lip brush or cotton swab dipped in makeup remover to perfect its edges by cleaning off your lip makeup with precision and refinement. This step ensures your final lip makeup results look polished and well-defined.
  8. Add Translucent Powder for Better Coverage: Add lasting lip color by dusting lips lightly with translucent setting powder for increased longevity, locking lip products into place without risk of them feathering throughout the day. This step also serves to avoid accidental smudging of colors used.

Following these steps will enable you to master lip liner application to enhance lip shape, prevent feathering and create stunning lip looks with lasting appeal. Lip liners are versatile tools which can be tailored specifically to meet the aesthetic preferences of each person – be they natural or bold lips.

Lip pencils are essential tools in every makeup artist and beauty enthusiast’s kit, offering precision, versatility, and the power to transform lip makeup looks. From defining lips to feather prevention and following current lip art trends – lip pencils play a significant role. By following this guide you’ll become well equipped to master lip pencil use for stunning and long-term lip looks that turn heads and make an impressionful statement about you and your aesthetic!



5 Practices To Getglowing Skin Beyond The Cosmetic Counter
5 Practices to Get Glowing Skin Beyond the Cosmetic Counter

The Way to Radiant Skin Glowing skin is considered vital and healthy. But obtaining this sought after look calls for more than just cosmetic application on the surface. It is about knowing what our skin requires and ways we can supply it with holistic methods. This guidebook will highlight the practices which give glowing skin from the inside out, focusing on natural methods instead of cosmetic quick fixes. Understanding Your Skin Needs Your road to radiant skin starts with knowing your skin type and requirements. Whether or not your skin is oily, dry, mixture or even sensitive, there’s an individual approach for you personally. Knowing your skin type helps you select the very best natural cures and lifestyle modifications for your skin health. Diet Skin Health What we eat impacts the way our skin appears. Foods loaded with antioxidants, minerals and vitamins might combat free radicals slow down inflammation for clearer, much more radiant skin. Fruits, veggies, good fats and lean proteins are excellent sources of nutrition for your skin. Holistic Skincare: More Than Just Products Glow-in-the-skin is far more than the products you use: It is about looking after your skin internally. Just how adequate hydration, quality sleep and stress management support skin health and appearance is discussed. Everyday Skincare Rituals For All Types of Skin Healthy, glowing skin starts with daily skincare rituals. This includes mild cleansing to take out impurities without stripping the skin, moisturizing to keep skin moisturized and applying sunscreen to block UV rays. You are able to personalize these rituals to your type of skin to help attain radiant skin. Advanced Skincare Techniques Without the Chemicals For all those searching for more sophisticated skincare, the following are some advanced methods without strong chemicals. Natural exfoliation, DIY facial masks for particular skin concerns and face massage are discussed for enhancing skin texture and luminosity. Lifestyle Changes for Lasting Skin Health Lifestyle factors such as exercising, cleansing your living area, and switching your skincare regime with all the seasons impact long-term skin health. These adjustments could support your skin’s processes and enhance its well being and appearance. 5 Essential practices for Getting glowing skin Beyond the Cosmetic Counter This section summarizes the core Practices discussed in the article and what they all help Glowing Skin. It is a quick reference guide which readers can refer to quickly recall and incorporate these practices into their personal lives. FAQs: Your Skincare Questions Answered by Experts What natural ingredients are best for glowing skin? How frequently do I exfoliate the skin naturally? Can diet improve my skin? What exactly are highly effective stress-reduction methods for better skin? How can I protect skin from environmental harm? Conclusion: A Holistic Way of Glowing Skin Glowing skin is more than a surface job. By knowing your skin and feeding it right nutrition and also making lifestyle modifications, you can have radiant skin from within. Remember, true beauty starts with healthy practices that go beyond the cosmetic counter.

From Play Doh To Sunscreenthe Dangers Of Skincare For Kids Explained
From Play-Doh to Sunscreen: The Dangers of Skincare for Kids Explained

Children are facing an increasing amount of pressure to maintain a skincare routine, and dermatologists are growing anxious about the potential risks and health ramifications. This article offers a comprehensive rundown of the trend, as well as an overview of the reasons experts are growing more concerned about its implications for children. The Changing Face of the Beauty Industry The beauty industry has transitioned to target a younger audience, and there is an influx of products being marketed to children. As a result, more and more children are becoming users of skincare products, and dermatologists are raising concerns about the dangers of early adoption. However, it’s vital that these dangers are fully understood, as a child’s skin is fundamentally different and more sensitive than an adult’s. The Market for Children’s Skincare In recent years, the market for skincare products for children has expanded dramatically, with numerous brands offering ranges dedicated to a younger audience. This boom is largely the result of a turn in focus towards skin health, as well as aggressive marketing aimed at both parents and youngsters. Why Children’s Skin is Different Children’s skin is different from adults’ skin: It’s more delicate, more susceptible to irritation, and takes longer to form its own protective barrier. That’s because children’s skin has a different composition, is thinner, and performs its barrier function differently than adult skin, causing it to be more susceptible to moisture loss and external damage from harsh skincare ingredients. The Dangers of Early Skincare Adoption Using skincare in kids could pose a number of risks to skin condition, allergy development, and overall health. A number of ingredients can disrupt skin development, create allergies, or cause long-term health issues, making caution and knowledge two powerful skincare choices for children. Common Harmful Ingredients in Children’s Skincare Beware of the alarming chemicals housed in many skincare products for kids, including synthetic fragrance, parabens, and sulfates, because they can be harsh on young skin. Expert Dermatologists’ Warnings What do dermatologists think of the increasing phenomenon of kids using skincare products?Read their take on protecting sensitive, youthful skin. Alternatives to Traditional Skincare for Children Skip the chemicals and opt for the naturals in children’s skincare. Ingredients to look for, contain, and avoid as well as the brand leading the way in gentle, non-toxic children skincare. How Parents and Guardians Can Help Ultimately, parents and guardians are responsible for overseeing and guiding their children’s skincare routines. Here are some considerations that can help ensure that the products used on kids are safe, appropriate, and beneficial to their skin health. Choosing Safe Skincare Products for Kids Selecting safe kids skincare products is no easy task. This portion of the article gives an overview of how parents can approach product selections, including latching onto ingredient lists, looking for particular certifications, and seeking out dermatologist-recommended options. The Psychological Impact of Early Beauty Standards Introducing kids to skincare and beauty standards at a young age can lead to some significant psychological outcomes. This section examines what steering youth into beauty routines can do to their self-esteem and body image…

What Is Niacinamide And How To Use It 2
What Is Niacinamide And How To Use It?

Niacinamide (Vitamin B3) stands out in skincare as one of its standout performers; this comprehensive guide seeks to decode its many mysteries while exploring its origins, scientific basis and practical tips for using it effectively in skincare regimens to unlock all its full potential. Chapter 1 : Understanding Niacinamide Niacinamide DefinedNiacinamide, the water-soluble form of Vitamin B3, is an amazing ingredient with numerous advantages for skin health and appearance. Unlike its predecessor niacin, which could irritate sensitive skin types, niacinamide offers many non-irritant benefits that could make this powerhouse ingredient ideal for all kinds of complexions. Sources of NiacinamideNiacinamide can be obtained in numerous natural and synthetic sources, from meat, fish, nuts and green vegetables to skincare formulations. Natural sources typically consist of meat and fish while its synthetic form can often be seen used for skincare formulations. Chapter 2 : Science Behind Niacinamide Niacinamide’s Mode of Action Understanding how niacinamide functions at its molecular core is crucial to comprehend its impact on skin. Niacinamide acts as an intermediary in activating essential coenzymes such as NAD and NADP which play an integral role in energy production and repair mechanisms in cells. Benefits to Skin Barrier Niacinamide has earned widespread renown for its ability to strengthen skin’s natural barrier function by stimulating ceramide production and supporting an adequate lipid profile, effectively helping prevent moisture loss while keeping its integrity. Chapter 3: Niacinamide Offers Multiple Advantages Niacinamide’s brightening effects cannot be overstated: from hyperpigmentation and uneven skin tone issues to melanin production suppression resulting in brighter complexions. Niacinamide’s Anti-Aging Properties Niacinamide acts as an antioxidant to fight off free radical damage to skin from environmental elements and help smoother, younger-looking skin by combatting oxidative stress. Furthermore, it assists in the reduction of fine lines and wrinkles to promote smoother and younger-looking complexion. Niacinamide Can Help Manage Acne Niacinamide’s anti-inflammatory properties make niacinamide an invaluable weapon when dealing with acne concerns, helping regulate sebum production while decreasing excess oiliness and avoiding pore blockages – contributing greatly towards its use for acne management. Chapter 4: Selecting an Appropriate Niacinamide Product Niacinamide comes in different concentrations to meet specific skin care needs; selecting one depends on individual preferences. Lower concentrations (around 2-5%) may be suitable for newcomers while higher doses (10% or greater) could address more targeted concerns. Niacinamide comes in various formulations from serums to creams; lightweight serums work great for layering while rich creams offer nourishment for those with dry skin. Chapter 5: Integrating Niacinamide Into Your Skincare Routine Understanding Layering Techniques Niacinamide should play an integral part of your skincare regime, typically after cleansing and before heavier creams or sunscreens are applied. Pairing it with complementary ingredients enhances its effectiveness further. Niacinamide can easily fit into daily skin care regimes. Integrating it both morning and evening routines ensures consistent benefits, whether your goal is brighter skin or treating specific concerns. Chapter 6: Addressing Concerns and Misconceptions Niacinamide is generally well tolerated; however, some individuals may experience mild irritation. Patch testing a new product and gradually adding it into your routine is one effective strategy…

Mastering The Eyelash Curler
Mastering the Eyelash Curler

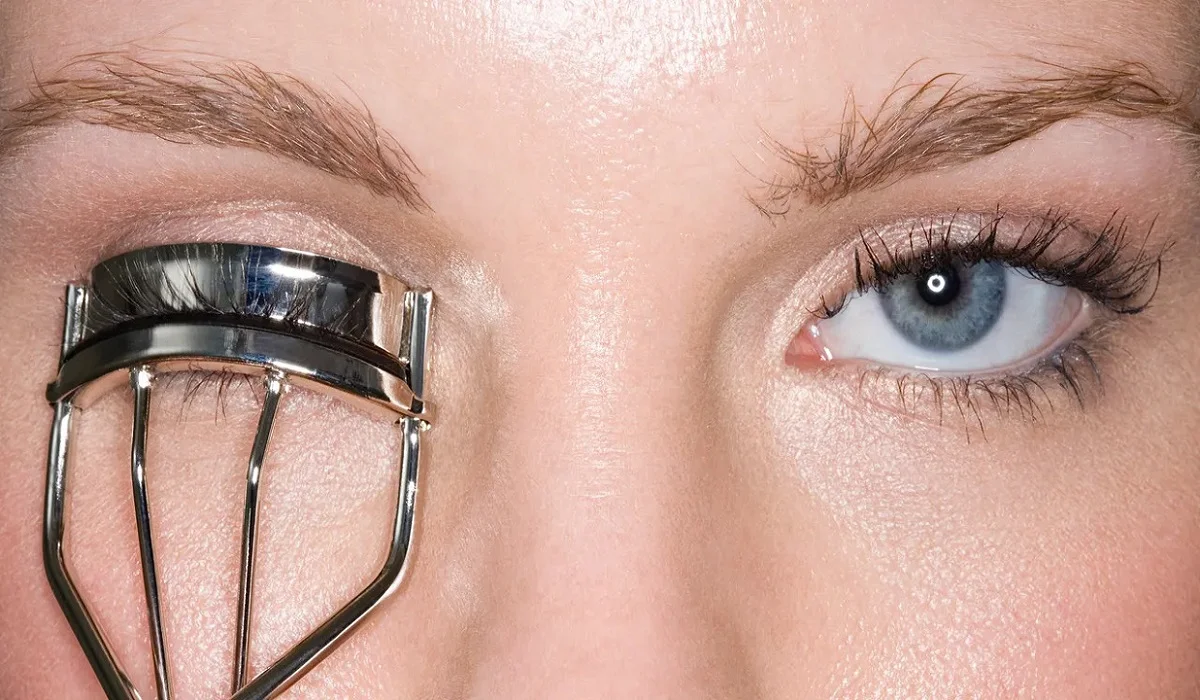
Transforming your lashes from straight to stunningly curled can be effortlessly achieved with the proper use of an eyelash curler, turning it into an indispensable tool in your beauty arsenal. However, mishandling it could result in discomfort, lash damage, or uneven curls. This detailed manual will guide you through mastering the eyelash curler, incorporating upkeep advice and solutions to frequent problems, enabling you to safely and effectively obtain those desirable, fluttering lashes. Selecting the Ideal Eyelash Curler Eyelash Curler Varieties The market offers eyelash curlers in metal, plastic, and heated models. Metal curlers stand out for their sturdiness and precision in curling, while plastic variants are perfect for on-the-go use due to their lightness. For those with hard-to-curl lashes, heated eyelash curlers can achieve a more defined and enduring curl. Choosing a Curler for Your Eye Shape Eyelash curlers are not one-size-fits-all; their efficiency varies with different eye shapes. It’s crucial to choose a curler that complements the curvature of your eye to ensure a uniform curl and avoid discomfort. Some manufacturers provide curlers tailored to specific eye shapes such as almond, round, or deep-set. Lash Preparation Ensure Lashes are Clean and Dry Commence with lashes that are devoid of any makeup or residue, as leftover products can lead to lashes sticking to the curler, risking damage. Post face-washing, ensure your lashes are thoroughly dried before proceeding with the curling process. Warming the Curler (Optional) To enhance the curl, consider gently warming your metal eyelash curler with a hairdryer for a brief period. Always test the curler’s temperature on your hand to confirm it’s warm, not hot, preventing any harm to your eye’s delicate surrounding skin or the lashes themselves. Curling Your Lashes Proper Curler Placement With the curler open, position your lashes between the pads, getting as close as possible to the lash base without touching the eyelid. Confirm that all lashes are captured by the curler’s opening. Executing the Curl Press the curler’s handles together gently for approximately 5 to 10 seconds. For a more natural curl, you may lightly pump the curler. Refrain from pulling or yanking the curler to avoid lash damage. Sectional Curling For a more pronounced curl, adopt a sectional approach: begin at the base, then mid-lash, and finally near the tips. This technique fosters a seamless, natural curl rather than an abrupt crimp. Post-Curling Mascara Application Follow up the curling with your preferred mascara to set the curl. Opt for a waterproof or curl-enhancing mascara for optimal results. Applying mascara post-curling prevents the lashes from sticking to the curler and potential damage. Curler Maintenance and Cleanliness Eyelash Curler Cleansing To ensure optimal performance, regularly clean your curler to eliminate any mascara residue or debris. Utilize a gentle makeup remover or isopropyl alcohol for cleaning, allowing the curler to dry thoroughly before its next use. Pad Replacement Change the curler’s rubber pads every few months or at signs of wear to maintain curl efficiency and lash safety. Neglecting to replace worn pads can compromise lash health and curl quality. Addressing Common Concerns Avoiding Eyelid Pinching Pinching…

How To Cover A Tattoo With Makeup 2
A Comprehensive Guide on How to Cover a Tattoo with Makeup

Expressive Expression Canvas Tattoos are powerful signs of art and identity etched onto our skins, yet sometimes we need them covered temporarily for job interviews, special events, or simply trying out something different. Makeup offers the ideal combination of artistry and practicality as a skillful solution that conceals tattoos without altering their essence. Chapter 1: Selecting Appropriate Tools for Any Task Correctors and Concealers Finding an appropriate concealer to cover your tattoo can be the key to its effective concealment. A highly pigmented, long-wearing concealer which complements your skin tone should do. Color correctors may help neutralize any hues present in the tattoo design that have bright hues. Primer for Smooth Canvases (Creating A Smooth Background ) Primer helps create an even surface, helping makeup adhere well and remain in place throughout the day. Choose one suitable for your skin type – perhaps one which hydrates, mattifies or fills pores. Chapter 2 : Mastering Technique Layering: the Key to Seamless Coverage Acchieve flawless coverage requires applying several thin coats of concealer over time – rather than applying all at once, build up gradually for natural-looking coverage that also prevents caking or creasing of makeup. Blending: the Art of Seamless Transitions Blending is key for creating a natural-looking finish, so use makeup sponges, brushes or your fingertips to blend concealer seamlessly into surrounding skin and especially at tattoo edges to ensure a seamless transition. Chapter 3 : Color Matching and Customization Perfecting Your Match Acknowledging the importance of selecting a concealer shade suitable to your skin tone, you may require experimentation in order to find your ideal hue. While some individuals might like their concealer exactly matching their foundation shade, others might choose for something lighter or darker depending on their desired look. Customization with Special Effects Makeup Special effects makeup offers endless creative potential. Experiment with different color palettes, stencils and techniques to craft unique designs that either seamlessly merge into the skin’s surface or transform a tattoo into works of art. Chapter 4 : Establishing Longevity Strategies Setting Powders and Sprays Setting is crucial when creating your masterpiece. Apply translucent setting powder generously across any concealed areas to avoid smudging and create a matte finish, and consider adding an additional protective measure such as setting spray if sweaty conditions or humid climates exist. Enhance Your Longevity Through Touch-Up Tips Maintaining excellent coverage may require touch-ups throughout the day to protect areas vulnerable to friction. Keep a small makeup kit handy to quickly apply touch-ups as necessary and guarantee your hidden tattoo remains looking its best! Chapter 5 : Removing Makeup Canvases Gentle Cleansing to Give you a Fresh Start At the end of every day, it’s essential to remove makeup carefully to maintain healthy skin. A gentle oil-based cleanser will break down makeup without harsh scrubbing while your regular skincare regime should then nourish and soothe it further. Conclusion: Revealing or Concealing Are Your Choices Makeup artistry provides endless possibilities when it comes to covering tattoos – be it forever embracing it proudly, temporarily hiding it for special events or temporarily…

What Is A Charcoalmask
What Is a Charcoal Mask?

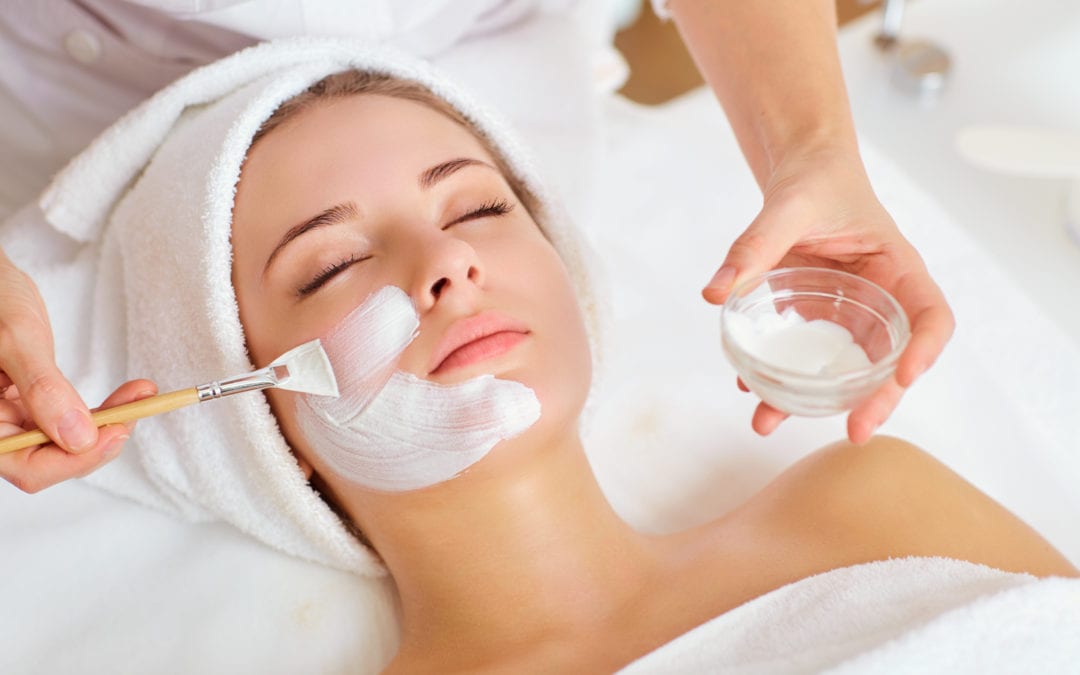
The beauty and skincare realm has witnessed a remarkable surge in the adoption of charcoal masks, celebrated for their profound cleaning and detoxifying capabilities. But the question arises, what are charcoal masks, and how do they perform their skin-transforming feats? In this discussion, we demystify the concept of charcoal masks, delving into their merits, varieties, and the optimal way to integrate them into your skincare regimen. The Scientific Foundation of Charcoal MasksAt the heart of charcoal masks lies activated charcoal, renowned for its ability to function as a magnet, drawing in and ensnaring dirt, oil, and toxins from the epidermis and its underlying pores. The porous characteristic of activated charcoal facilitates the entrapment of these contaminants, which are subsequently eliminated upon the removal of the mask. Key Components in Charcoal MasksIn addition to activated charcoal, these formulations typically incorporate other elements such as clays, tea tree oil, or salicylic acid, each chosen for its capacity to augment the mask’s purifying and calming effects. These ingredients collectively work to diminish oiliness, ward off acne, and pacify the skin. Detoxification Mechanism of Charcoal MasksThe detoxifying procedure employed by charcoal masks is straightforward yet potent. As the mask dries, activated charcoal attracts and captures impurities lodged within the pores, not only cleansing the skin but also minimizing pore visibility and thwarting future acne outbreaks. Varieties of Charcoal MasksCharcoal masks come in various formats, catering to individual preferences and skin needs, each with its distinct application and removal methodology. Peel-off VariantsDesigned to harden upon application, these variants form a peelable layer that, upon removal, strips away dead skin cells and surface debris. Wash-off VariantsThese are rinsed off with water, offering a milder detoxification alternative, ideal for sensitive skin types or those seeking a less intense cleansing experience. Sheet Mask VariantsThese blend the convenience of a no-mess application with the hydrating benefits of a fabric sheet mask, enriched with activated charcoal. Advantages of Charcoal MasksIncorporating charcoal masks into your skincare routine promises a myriad of benefits: Optimal Application of Charcoal MasksFor maximum efficacy, it’s vital to adhere to correct application practices. Preparation and Application:Initiate with a cleansed face, ensuring even application while steering clear of the eyes and lips. Duration and Frequency:Maintain the mask for the suggested duration—typically 10 to 20 minutes—and limit use to once or twice weekly for optimal skin health. Post-Application Care:Conclude with a moisturizer to hydrate and seal in the mask’s benefits. Potential Adverse Effects and SafeguardsGenerally, charcoal masks are safe for most skin types, though some individuals may encounter dryness or irritation. Awareness of Side Effects:Being cognizant of potential adverse effects equips users to manage them effectively. Risk Mitigation:Conduct a patch test prior to using a new charcoal mask, especially for sensitive skin, and meticulously follow usage instructions. DIY Charcoal Mask FormulationsFor enthusiasts of homemade skincare solutions, here are straightforward recipes for crafting your charcoal masks. Simple DIY Charcoal Mask:Combine activated charcoal powder with aloe vera gel for a calming, purifying mask. Charcoal Mask for Acne-Prone Skin:Blend activated charcoal with tea tree oil and water to target acne while soothing the skin….

The Power And Purpose Of Face Serums 22
The Power and Purpose of Face Serums

Face serums have emerged as powerful tools in skincare’s ever-evolving world, winning praise from dermatologists and beauty experts alike. Packed with potency ingredients designed to address multiple skin concerns, face serums have quickly become one of the must-use skincare items of recent times. If you want to learn why serums work so effectively for skin health purposes and what their powers entails, read this guide in its entirety for answers about face serum’s efficacy! Chapter 1: Understanding Facial Serums Face serums are highly concentrated formulations designed to deliver concentrated amounts of active ingredients directly into the skin, such as anti-aging agents or brighteners. While moisturizers typically focus on providing generalized hydration benefits for all types of skin issues, serums focus on treating specific skin concerns that have arisen over time. Available in various varieties that address issues related to anti-ageing, brightening or hydration needs; Chapter 2 : Understanding Facial Serums Understanding how face serums work is integral for appreciating their value. Formulations contain various active ingredients selected specifically to meet certain benefits – some common components found in serums include: Hyaluronic Acid: Hyaluronic acid acts like an attractant for moisture, helping skin retain more water to give a plumped and youthful complexion. Vitamin C: Packed with powerful antioxidants, vitamin C can brighten and even out skin tone as well as help fight signs of aging by brightening it from within. Retinol (Vitamin A): Renowned for its anti-ageing benefits, Retinol has long been touted for stimulating collagen production to reduce fine lines and wrinkles as well as improve skin texture. Peptides: Peptides are amino acid compounds which promote collagen production, helping to firm and lift skin by encouraging its formation. Niacinamide (Vitamin B3): Niacinamide is an effective solution to address various skin concerns, from redness reduction and pores tightening, to overall texture improvements and redness reduction. Glycolic Acid: Glycolic acid is an alpha hydroxy acid (AHA). When applied topically, glycolic acid helps reveal brighter and smoother complexion by exfoliating. Chapter 3: Benefits of Facial Serums Face serums offer multiple advantages that make them indispensable in skincare regimens. Here are just a few: Targeted Treatment: Serums are highly concentrated treatments designed to address specific skin concerns effectively, whether that means fine lines, dark spots or dehydration. Lightweight Absorption: Serums’ lightweight texture facilitates fast absorption into skin layers, quickly dispensing active ingredients deep within dermal tissues for full penetration of active ingredients into dermis layers. Enhance Hydration: Serums typically contain moisturizing agents like hyaluronic acid that help improve moisture levels in skin, providing essential hydration boost. Brighter, Even Skin Tone: Serums that contain vitamin C or niacinamide may help reduce hyperpigmentation for an even complexion. Retinol Serums Are Amazing for Anti-Aging Properties: Retinol-containing serums can do wonders at combatting signs of aging such as wrinkles and sagging skin, making retinol an invaluable ally in this fight against time. Enhance Texture: Exfoliating serums containing glycolic acid are known to significantly refine skin texture, leaving behind radiant-looking and more even-toned complexions. Customizable Routine: Customizing your skincare regimen is easily possible by choosing serums tailored specifically to address…

Factors That Can Make Or Break Your Mascara's Quality: Understanding Key Influences
Factors That Can Make or Break Your Mascara’s Quality: Understanding Key Influences

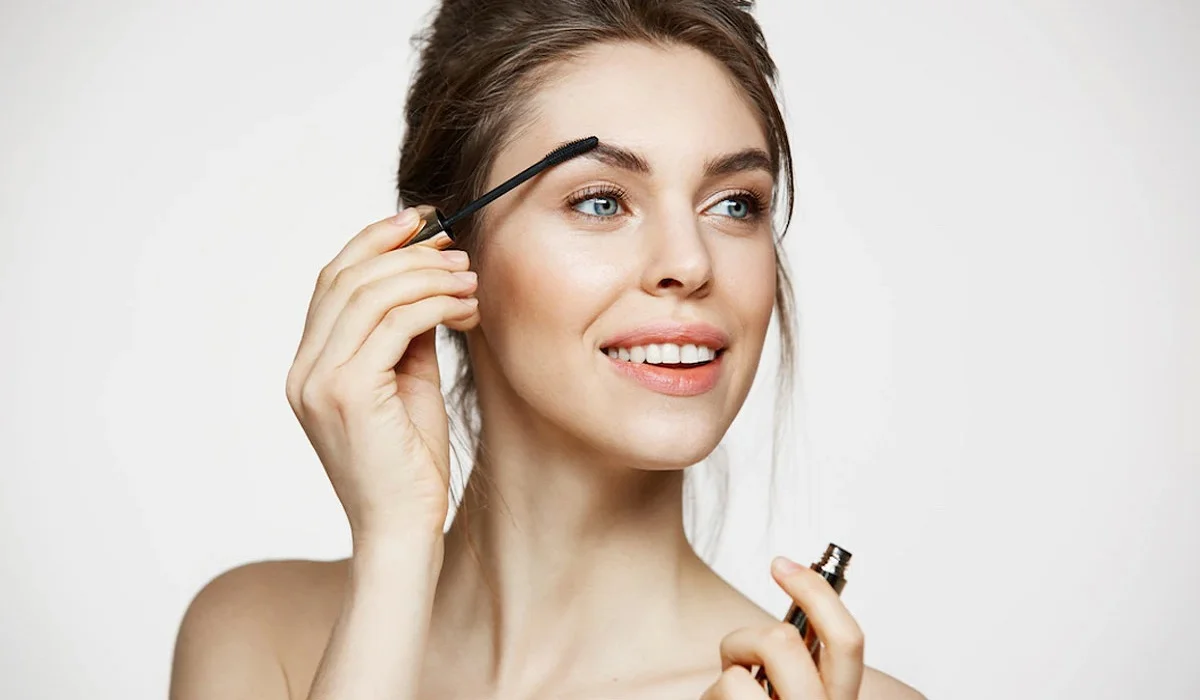
Mascara is a staple in many makeup routines, providing length, volume, and definition to lashes. However, not all mascaras are created equal, and several factors can significantly impact their quality and performance. In this article, we will explore the key factors that can make or break your mascara’s quality. By understanding these influences, you can make informed choices when selecting and using mascara to achieve the desired lash effect. Formula Composition:The quality of a mascara largely depends on its formula composition. Factors such as the type of waxes, pigments, and additives used can greatly affect the mascara’s performance. Look for mascaras that contain high-quality ingredients, as they tend to provide better coverage, enhance lash volume, and minimize clumping or flaking. Mascara is a staple in many makeup routines, providing length, volume, and definition to lashes. However, not all mascaras are created equal, and several factors can significantly impact their quality and performance. In this article, we will explore the key factors that can make or break your mascara’s quality. By understanding these influences, you can make informed choices when selecting and using mascara to achieve the desired lash effect. Formula Composition:The quality of a mascara largely depends on its formula composition. Factors such as the type of waxes, pigments, and additives used can greatly affect the mascara’s performance. Look for mascaras that contain high-quality ingredients, as they tend to provide better coverage, enhance lash volume, and minimize clumping or flaking. Brush Design:The design and quality of the mascara wand or brush play a crucial role in the application and overall outcome. Different brush shapes and bristle configurations can achieve varying effects, from lengthening to volumizing. Look for brushes that are well-designed, with bristles that are evenly spaced and of appropriate length. This ensures that the mascara coats each lash evenly and separates them for a natural and defined look. Lash Type:The natural characteristics of your lashes can significantly impact how a mascara performs on them. Factors such as length, thickness, and curl pattern vary from person to person. Consider your lash type when selecting a mascara. For example, if you have naturally long lashes, a lengthening mascara may be more suitable. If your lashes are sparse, a volumizing formula can help create the illusion of fuller lashes. Desired Effect:The desired effect you want to achieve with your mascara will determine the type of formula and brush you should choose. Different mascaras cater to specific needs, such as lengthening, volumizing, curling, or waterproof properties. Define your desired lash look and select a mascara that aligns with those goals to ensure optimal results. Application Technique:How you apply mascara can greatly impact its quality and performance. Applying too many coats or layering mascara on dry lashes can lead to clumping, flaking, and an unnatural appearance. It’s important to apply mascara in thin, even coats, starting from the base of the lashes and wiggling the wand upward. Use a lash comb or a clean spoolie brush to separate any clumps and achieve a more polished look. Product Freshness:Mascara has a limited shelf life, and using expired…