A Comprehensive Guide on How to Cover a Tattoo with Makeup

How To Cover A Tattoo With Makeup 2

Expressive Expression Canvas

Tattoos are powerful signs of art and identity etched onto our skins, yet sometimes we need them covered temporarily for job interviews, special events, or simply trying out something different. Makeup offers the ideal combination of artistry and practicality as a skillful solution that conceals tattoos without altering their essence.

Chapter 1: Selecting Appropriate Tools for Any Task

Correctors and Concealers

Finding an appropriate concealer to cover your tattoo can be the key to its effective concealment. A highly pigmented, long-wearing concealer which complements your skin tone should do. Color correctors may help neutralize any hues present in the tattoo design that have bright hues.

Primer for Smooth Canvases (Creating A Smooth Background )

Primer helps create an even surface, helping makeup adhere well and remain in place throughout the day. Choose one suitable for your skin type – perhaps one which hydrates, mattifies or fills pores.

Chapter 2 : Mastering Technique

Layering: the Key to Seamless Coverage

Acchieve flawless coverage requires applying several thin coats of concealer over time – rather than applying all at once, build up gradually for natural-looking coverage that also prevents caking or creasing of makeup.

Blending: the Art of Seamless Transitions

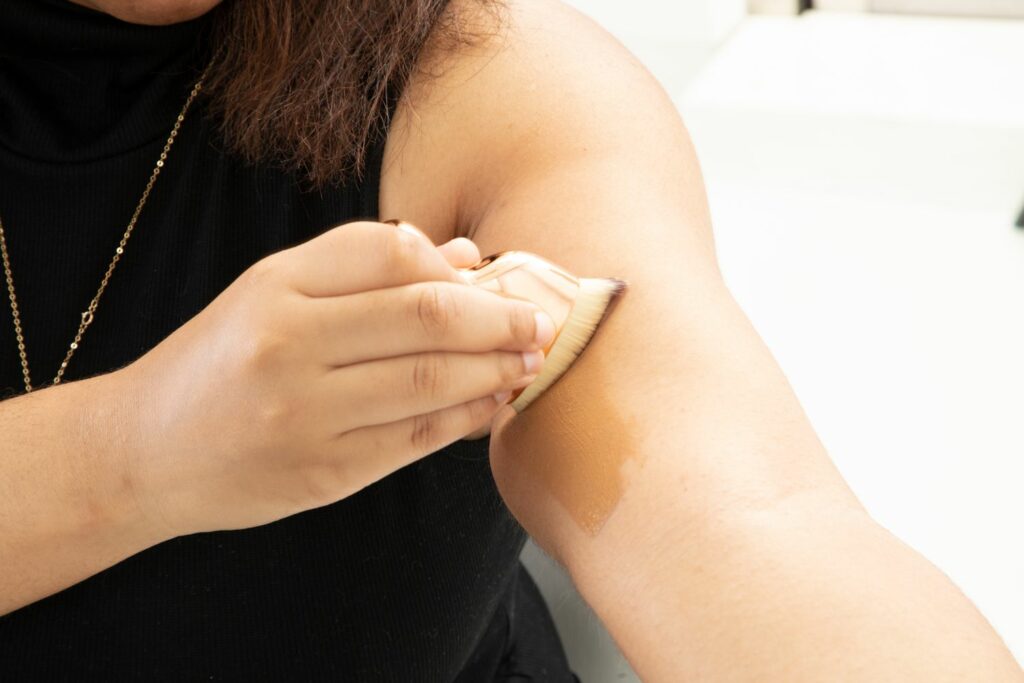
Blending is key for creating a natural-looking finish, so use makeup sponges, brushes or your fingertips to blend concealer seamlessly into surrounding skin and especially at tattoo edges to ensure a seamless transition.

Chapter 3 : Color Matching and Customization

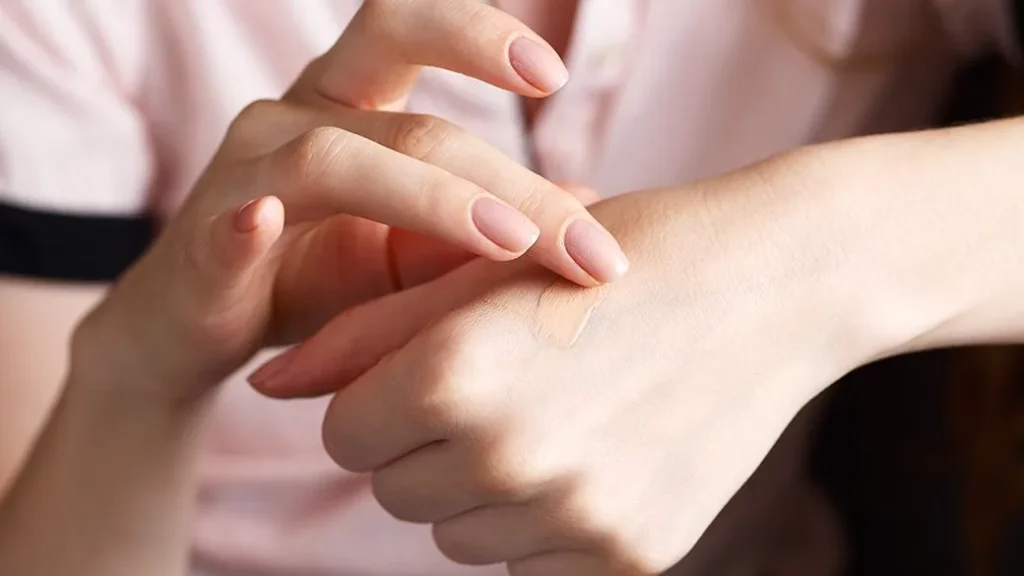
Perfecting Your Match Acknowledging the importance of selecting a concealer shade suitable to your skin tone, you may require experimentation in order to find your ideal hue. While some individuals might like their concealer exactly matching their foundation shade, others might choose for something lighter or darker depending on their desired look.

Customization with Special Effects Makeup

Special effects makeup offers endless creative potential. Experiment with different color palettes, stencils and techniques to craft unique designs that either seamlessly merge into the skin’s surface or transform a tattoo into works of art.
How To Cover A Tattoo With Makeup 1

Chapter 4 : Establishing Longevity Strategies


Setting Powders and Sprays

Setting is crucial when creating your masterpiece. Apply translucent setting powder generously across any concealed areas to avoid smudging and create a matte finish, and consider adding an additional protective measure such as setting spray if sweaty conditions or humid climates exist.

Enhance Your Longevity Through Touch-Up Tips

Maintaining excellent coverage may require touch-ups throughout the day to protect areas vulnerable to friction. Keep a small makeup kit handy to quickly apply touch-ups as necessary and guarantee your hidden tattoo remains looking its best!

Chapter 5 : Removing Makeup Canvases

Gentle Cleansing to Give you a Fresh Start

At the end of every day, it’s essential to remove makeup carefully to maintain healthy skin. A gentle oil-based cleanser will break down makeup without harsh scrubbing while your regular skincare regime should then nourish and soothe it further.

Conclusion: Revealing or Concealing Are Your Choices

Makeup artistry provides endless possibilities when it comes to covering tattoos – be it forever embracing it proudly, temporarily hiding it for special events or temporarily covering up an inkblotch for special events – using these creative methods allows for maximum self-expression. This guide shows how these powerful techniques can empower individuals take control of their self-expression through artful self-expression techniques that take control of themselves.

Keep this in mind: makeup should not just be used to hide imperfections; rather it can serve as an artistic form of self-expression and transformation on the canvas of skin. So whether bringing out vibrant tattoo colours, or skillfully concealing them for the day – use makeup as an artistic form and allow it to transform you.


Hormonal Changes Navigating The Road To Feminine Wellness
Hormonal Changes: Navigating the Road to Feminine Wellness

Just what is Feminine Wellness? Feminine health includes the entire being of a female. A crucial idea is comprehending and control hormonal changes which have remarkable consequences on physical, emotional and mental condition all through life cycles. Understanding Hormonal Changes Hormones Female’s Health Hormones serve as messengers through the body and control tasks like metabolism, reproduction, and mood. In females, these consist of testosterone, progesterone, and estrogen, which are crucial health indicators. Typical Hormonal Changes in WomenHormonal changes happen in females all their life from puberty to the menopause. These shifts happen during menstrual cycles, pregnancy, postpartum and menopause and pose special issues and transitions. Hormonal Imbalance Identifying Hormonal Imbalance SymptomsHormonal imbalance signs vary from abnormal time periods to mood swings, exhaustion and reduced libido. Recognizing these signs is vital for seeking proper interventions. Factors causing Hormonal UnbalanceStress, bad diet, insufficient exercise along with other health conditions can cause hormonal imbalances. Defining and treating these triggers is crucial to restoring hormonal balance. Impacts on Physical Health Effects of Hormonal Changes on Physical HealthBody chemistry could be influenced by hormonal fluctuations, leading to bloating, weight gain, zits and hair loss. Understanding these effects enables symptom management targeted methods. Handling Physical SymptomsPhysical symptom management entails the right diet, exercising, and practicing self care. Special remedies might also be recommended under medical supervision, which includes hormonal therapy. Impact on Mental Health Rollercoaster of emotions: Understanding the Psychological EffectHormonal variations profoundly impact brain health triggering mood swings, anxiety, irritability and depression. Understanding these emotional fluctuations is vital for coping methods. Coping With Emotional StabilityMindfulness strategies, journaling and help from loved ones or close friends are effective coping resources. Activities which relax and help to decrease anxiety also help to ease mental pain. Lifestyle Modifications Dieting Exercise Are Important for Hormonal BalanceA diet loaded with fruits and veggies, healthy fats and lean proteins maintains hormonal balance. Too much exercise, which includes cardiovascular and strength training, boosts well being and stabilizes hormones. Snooze Hygiene: Hormonal Health ImprovementGood sleep is crucial for hormone health since it can help regulate hormones and repair damaged cells. Regular sleep pattern and favourable sleep atmosphere support restful sleep and hormonal stability. Holistic Methods Organic Remedies & SupplementsTypical herbal cures and supplements consist of black cohosh, evening primrose oil, and chasteberry to cure hormonal issues. But one should seek guidance from physicians prior to introducing these remedies to a regimen. Conventional Chinese Medicine and AcupunctureAcupuncture along with traditional Chinese medicine combine to present an entirely systemic approach to hormonal regulation, concentrating on blocked energy pathways to alleviate symptoms and bring balance back into the entire body. Wanting Professional Help Consulting with Healthcare ProvidersFor ongoing or severe symptoms of imbalanced hormones, see your physician. Hormonal testing could be accomplished by doctors and personalized therapy plans developed — frequently medication or hormone therapy — could be prescribed. Hormonal Regulation Therapy OptionsSpecific treatments could be suggested for treating underlying psychological or hormonal imbalances (cognitive behavioral therapy; HRT). These therapies boost health and life quality. Systems of Support Creating a Support NetworkCreating a supportive community of friends, loved…

The Spf Threshold: Understanding Why You Should Never Use Sunscreen Below 30 Spf
The SPF Threshold: Understanding Why You Should Never Use Sunscreen Below 30 SPF

Sunscreen is a crucial component of any skincare routine, providing protection against the harmful effects of the sun’s ultraviolet (UV) rays. Sun Protection Factor (SPF) is a measure of a sunscreen’s ability to shield the skin from UVB radiation, which is primarily responsible for sunburns. While a variety of SPF options are available, there is a consensus among dermatologists that using a sunscreen with an SPF below 30 is inadequate for adequate sun protection. In this article, we will explore the reasons why you should never use sunscreen below 30 SPF and understand the significance of SPF in safeguarding your skin against sun damage. Understanding SPF:SPF indicates the level of protection a sunscreen offers against UVB rays. For instance, an SPF 30 sunscreen theoretically allows you to stay in the sun 30 times longer than if you were not wearing any sunscreen before burning. SPF primarily measures protection against UVB rays, while UVA rays can also cause long-term skin damage. Therefore, it is crucial to choose a broad-spectrum sunscreen that protects against both UVA and UVB rays. Insufficient Protection from Sunburns:Using a sunscreen with an SPF below 30 significantly diminishes its ability to protect your skin from sunburns. Sunburns are not only painful but also a sign of skin damage. Sunscreens with higher SPF values provide a greater level of protection against UVB radiation, reducing the risk of sunburns and subsequent skin damage. Opting for an SPF below 30 increases your vulnerability to sunburns, making it essential to choose a higher SPF to effectively shield your skin. Inadequate Protection against Skin Cancer:Prolonged exposure to UV radiation is a major risk factor for skin cancer. Using a sunscreen with an SPF below 30 offers limited protection against UVB rays, which can lead to an increased risk of skin cancer. Skin cancer, including melanoma, the deadliest form of skin cancer, is strongly linked to sun exposure. By opting for a higher SPF sunscreen, you provide your skin with an added layer of defense against harmful UV rays, reducing the risk of developing skin cancer. Lesser Shielding against Premature Aging:UV radiation is a significant contributor to premature aging, including wrinkles, fine lines, and age spots. Sunscreens with SPF below 30 provide inadequate protection against UVB rays, allowing them to penetrate the skin and accelerate the aging process. By using a higher SPF sunscreen, you can minimize the damage caused by UV radiation, helping to preserve your skin’s youthful appearance and preventing premature aging. Increased Vulnerability to Sun Damage:Sun damage goes beyond sunburns and premature aging. Exposure to UV radiation without adequate protection can result in other harmful effects, including hyperpigmentation, uneven skin tone, and the breakdown of collagen and elastin fibers. These factors can lead to a loss of skin elasticity, sagging, and a dull complexion. To maintain the health and integrity of your skin, it is crucial to choose a sunscreen with an SPF of 30 or higher to provide robust protection against sun damage. Underestimating Sun Exposure:It is important to note that many individuals underestimate their sun exposure and the duration they spend…

What Is Mousse Foundation 11
What Is Mousse Foundation ?

Foundation serves as the canvas upon which we can express ourselves with makeup, providing us with an opportunity to realize our desired looks. While liquid and powder foundation are both popular choices, mousse foundation has made its own mark thanks to its lightweight texture, seamless blending capabilities, and airbrushed look. In this article we take an in-depth look into mousse foundation’s world – its lightweight texture, seamless blending abilities, airbrushed effect – why makeup enthusiasts adore it and most importantly how we can perfect its application whether we are beginners or pros in applying makeup will elevate both aspects of beauty games beyond compare! Understanding and mastering its application can take beauty game another level altogether – no matter whether novice or experienced pro who may already possess it or learn another art form a whole different level. Mousse Foundation Is an Epic Success Mousse foundation’s appeal lies in its innovative formulation and numerous advantages it affords makeup enthusiasts. Mousse is notable for its lightweight texture which mimics that of delicate clouds. Mousse foundation’s lightweight texture facilitates effortless application and blending, making it the go-to product for those seeking natural or airbrushed looks. Mousse’s matte look effectively hides pores for an airbrushed effect with velvety soft skin feeling underneath – an irresistibly velvety feel and velvety touch await your face with mousse foundation! Due to its non-comedogenic qualities, which make it less likely to block pores., this product makes an ideal selection for individuals with sensitive or acne-prone skin. Mousse foundation stands out as an elegant solution suitable for various skin types – oily to combination to dry – as well as various makeup preferences, making it one of the more beloved options available in cosmetics. Not only is its formulation incredible; mousse foundation can enhance overall makeup experience for greater creativity. Select the Appropriate Shade and Formula Selecting the ideal shade and formulation of mousse foundation is key to creating a flawless makeup look. In selecting your ideal hue, it is vital that you understand your skin’s undertone – either warm, cool, or neutral – in order to select an apt match. Identification of one’s undertone will assist them in selecting an ideal foundation shade to complement their complexion. Individuals with warmer undertones might favor foundations with golden or peachy tones while individuals with cooler ones might favor shades with pinkish/rosy undertones. Neutral undertones allow those with neutral undertones the freedom of selecting shades which don’t lean too strongly toward warm or cool shades, plus mousse foundations come with many formulations designed specifically to address various preferences and skin types. Choose a matte formula to achieve an oil-free matte look, radiant for healthy glow, or long-wear for extended durability – tailoring your choice according to your individual needs and desired finish will guarantee that it suits both you and your complexion perfectly. Prepping Your Face Prior to applying mousse foundation, it is vitally important that your face is appropriately prepared – starting with thorough cleansing to rid any dirt, excess oil or impurities from your skin. Follow that up by toning,…

Mastering Nail Stamps Your Ultimate Guide To Exquisite Nail Art
Mastering Nail Stamps: Your Ultimate Guide to Exquisite Nail Art

Nail stamping is not just a beauty trend; it’s an art form that allows for personalized, intricate nail designs that were once only achievable by seasoned nail artists. Whether you’re a seasoned nail artist or a beginner, this guide will walk you through the essentials of nail stamping, ensuring your next manicure stands out. Understanding Nail Stamps Nail stamps are innovative tools designed to transfer designs from etched plates to your nails, creating detailed and precise nail art. The key components include the stamping plate, stamper, scraper, and stamping polish. Stamping plates are made from metal or plastic and feature engraved designs. Stampers, typically made from silicone, pick up the polish from these designs. The scraper removes excess polish from the plate, ensuring a clean transfer. Types of Nail Stamps Preparation for Nail Stamping Preparing your nails is crucial for a flawless finish. Start with clean, shaped nails, and apply a base coat to protect your natural nails and enhance polish adherence. Choose a smooth, flat surface for your work area, and lay out all your tools within easy reach. Selecting Your Design When selecting a design, consider the size of your nails and the complexity of the design. Beginners may find simpler designs easier to work with, while more experienced users can explore intricate patterns and layered looks. Choosing the Right Nail Polish for Stamping The success of nail stamping heavily relies on the polish used. Stamping polishes are specifically formulated to be thick and highly pigmented, ensuring a crisp, opaque design. While not all regular polishes work for stamping, metallic and cream polishes often yield good results due to their pigmentation and consistency. Tips for Color Selection Step-by-Step Guide to Nail Stamping Advanced Techniques As you become more comfortable with the basics of nail stamping, explore advanced techniques to elevate your nail art. Troubleshooting Common Issues Aftercare and Maintenance Extend the longevity of your stamped nails by applying a clear top coat to seal in the design. For maintenance, clean your stamping plate and tools with nail polish remover after each use. Avoid using acetone on silicone stampers, as it can cause them to deteriorate. How long do nail stamped designs last? With proper application and aftercare, including a quality top coat, nail stamped designs can last as long as a traditional manicure, typically around one to two weeks. Can nail stamps be used on artificial nails? Absolutely! Nail stamps can be used on both natural and artificial nails. Just ensure the artificial nails are properly prepped and the surface is smooth for stamping. How can I remove nail stamping polish? Nail stamping polish can be removed with regular nail polish remover. However, for long-lasting designs sealed with a gel top coat, you might need a gel polish remover or acetone. Nail stamping opens up a world of creativity and personal expression right at your fingertips. With practice, you can achieve salon-quality designs from the comfort of your home. Embrace the learning curve, and don’t be afraid to experiment with different techniques and styles. Happy stamping!

Dewy Vs. Matte Foundation
Moist Foundation or Matte Foundation? The Ultimate Guide to Choosing the Right Foundation for Your Skin

When it comes to makeup, foundation acts as the canvas for your entire look. However, with the myriad options available, selecting the right foundation can be daunting. Among the various choices, moist and matte foundations stand out for their unique benefits and finishes. This comprehensive guide dives deep into the world of foundations, helping you decide whether moist foundation or matte foundation is the ideal choice for your skin type and aesthetic preferences. Understanding Foundation Types What is Moist Foundation?Moist foundation, often referred to as hydrating or dewy foundation, is designed to offer a luminous finish. Infused with hydrating ingredients, it aims to provide a healthy glow, making it an excellent option for those with dry or dull skin. What is Matte Foundation?Matte foundation offers a flat, non-shiny finish that controls oil and minimizes the appearance of pores. It’s favored by individuals with oily skin or those looking for long-lasting coverage without a glossy look. Key Differences Between Moist and Matte Foundations Benefits of Moist Foundation Benefits of Matte Foundation How to Choose the Right Foundation for Your Skin Type Application Tips for Moist Foundation Application Tips for Matte Foundation Combining Moist and Matte Foundations Popular Moist Foundation Brands Discover brands that offer top-rated moist foundations, praised for their hydrating formulas and natural finish. Popular Matte Foundation Brands Explore the favorites among matte foundation brands, known for their oil-control capabilities and flawless coverage. Expert Tips for Foundation Application How to Transition Between Foundation Types The Role of Foundation in Makeup Routine Caring for Your Skin with Foundation Future Trends in Foundation Moist Foundation or Matte Foundation? Deciding between moist and matte foundation ultimately depends on your skin type, desired finish, and personal preference. Understanding the nuances of each can empower you to make the best choice for your makeup routine, ensuring that your foundation enhances rather than detracts from your natural beauty. Whether you opt for a moist foundation to achieve a dewy glow or a matte foundation for a shine-free finish, the key is to choose a product that complements your skin type and meets your beauty goals. By considering the factors outlined in this guide, you can select a foundation that not only looks great but also feels comfortable and enhances your overall makeup look. Remember, the right foundation is the cornerstone of any successful makeup routine, setting the stage for a flawless, confidence-boosting appearance. FAQs What is the best foundation for oily skin?Can you mix moist and matte foundations?How do I know if a foundation is right for my skin type?Is it necessary to use a primer with foundation?How can I make my foundation last longer throughout the day?What should I do if my foundation causes breakouts?

The Transformative Power Of Epsom Salt Baths A Haven Of Serenity
The Transformative Power of Epsom Salt Baths: A Haven of Serenity

A blend of magnesium, sulfate, and oxygen forms the essence of Epsom salt, a mineral compound revered for its healing attributes since its initial discovery in Epsom, England, during the early 17th century. Distinct from common table salt, Epsom salt’s chemical composition enables swift absorption through the skin, rendering it a perfect element for calming baths. This prelude paves the path for a detailed examination of the myriad advantages Epsom salt baths provide for both psychological and physical wellness. Exploring the Scientific Basis of Epsom Salt Baths The efficaciousness of Epsom salt baths primarily stems from its magnesium and sulfate content. Magnesium is pivotal in facilitating over 300 enzymatic reactions within the body, encompassing those related to muscle and nerve function, whereas sulfate plays a vital role in various biological activities. Immersing in warm water laden with these minerals allows for their skin absorption, thereby replenishing the body’s reserves and fostering health and well-being. The Sanctuary of Relaxation and Stress MitigationEpsom salt baths serve as a refuge for diminishing stress. By modulating nervous system activity, magnesium aids in easing muscle tension and fostering relaxation. This tranquil effect assists in mitigating stress and anxiety, thereby cultivating a sense of peace. Advancements in Skin Health The boon of Epsom salt extends to skin wellness. Its exfoliating nature aids in shedding dead skin cells, while its moisturizing effect revitalizes the skin, leaving it supple and refreshed. Additionally, Epsom salt’s sulfate content supports the body’s detoxification, promoting a clearer, healthier complexion. Natural Pain Alleviation and Muscle RecuperationFor individuals grappling with muscle discomfort, arthritis, or persistent pain, Epsom salt baths offer a natural alleviative solution. Magnesium’s role in relaxing muscle contractions and reducing pain renders it an invaluable recovery tool for athletes and those engaged in physically strenuous activities. Detoxification and Enhanced Mineral UptakeThrough facilitating the expulsion of toxins via the skin, Epsom salt baths aid in the body’s detoxification efforts. Furthermore, the direct uptake of magnesium and sulfate minerals through the skin can address deficiencies and bolster overall health. Augmented Sleep Quality and RelaxationThe influence of magnesium on enhancing sleep quality is well-established. A warm bath with Epsom salt prior to bedtime can relax muscles and soothe the mind, setting the stage for a deep, restorative sleep. Cardiovascular Health and Improved CirculationEngaging in regular Epsom salt baths may positively impact heart health and circulation. Magnesium’s capability to augment blood flow and lower blood pressure plays a crucial role in maintaining a healthy cardiovascular system. Benefits for Foot HealthNot limited to full-body applications, Epsom salt baths also offer significant benefits for foot health, addressing conditions like athlete’s foot, toenail fungus, and relieving foot pain after extensive standing or walking. Epsom Salt Baths: A Boon for GardenersGardeners may find Epsom salt baths particularly beneficial for soothing aching muscles post-gardening. Moreover, Epsom salt can enhance plant growth and nutrient uptake when used in gardening practices. Crafting Your Own Epsom Salt Bath Blends Personalizing your Epsom salt bath is straightforward, allowing for the incorporation of essential oils and herbs for added aromatherapy benefits. Whether seeking a simple soak or a…

10 Tips For Concealing Under Eye Bags Like A Pro
10 Tips for Concealing Under-Eye Bags Like a Pro

Under-eye bags are a common problem for many people, whether it’s due to genetics, lack of sleep, or aging. These bags can make you look tired and older than you actually are. Luckily, there are many ways to conceal under-eye bags and make your eyes look brighter and more youthful. In this article, we will share 10 tips for concealing under-eye bags like a pro. Use a Color CorrectorIf you have dark circles under your eyes, a color corrector can help neutralize the discoloration. Look for a peach or orange color corrector, depending on your skin tone. Apply it gently to the under-eye area using your ring finger. Be careful not to tug or pull on the delicate skin around your eyes. Use a Concealer with a Yellow or Peach UndertoneAfter applying a color corrector, use a concealer that has a yellow or peach undertone. This will help brighten your under-eye area and make you look more awake. Use a small, fluffy brush to apply the concealer in a triangle shape under your eyes, then blend it in with a damp beauty sponge. Use a Hydrating Eye CreamDry skin can make under-eye bags look worse. Make sure to use a hydrating eye cream before applying any makeup. Look for an eye cream that contains hyaluronic acid, which helps to plump and hydrate the skin. Apply a Cooling Eye GelIf you’re dealing with puffiness under your eyes, try applying a cooling eye gel. Keep the eye gel in the fridge for a few minutes before applying it to your under-eye area. The coolness will help reduce inflammation and puffiness. Use a Light-Reflecting PowderAfter applying your concealer, use a light-reflecting powder to set it. This will help brighten your under-eye area even more and prevent creasing. Use a fluffy brush to apply the powder lightly under your eyes. Use a Matte BronzerIf you have under-eye bags that are more prominent, you can use a matte bronzer to create a shadow effect. Apply the bronzer lightly in the hollows under your cheekbones and around your temples. This will help to create the illusion of depth and make your under-eye bags less noticeable. Apply Mascara and EyelinerApplying mascara and eyeliner can help draw attention away from your under-eye bags. Curl your lashes and apply mascara to open up your eyes. Use a thin line of eyeliner along your lash line to define your eyes further. Use a Bright LipstickIf you’re still feeling self-conscious about your under-eye bags, try wearing a bright lipstick. A bold lip color will draw attention away from your under-eye area and make you feel more confident. Use a Makeup Setting SprayTo make sure your makeup stays in place all day, use a makeup setting spray. This will also help prevent your under-eye area from getting oily and causing your makeup to smudge. Get Plenty of Sleep and Drink WaterWhile these tips can help conceal under-eye bags, the best way to get rid of them is to get plenty of sleep and drink water. Aim for at least 7-8 hours of sleep each…

How To Make Fake Freckles A Guide To Achieving Sun Kissed Splendor
How to Make Fake Freckles: A Guide to Achieving Sun-Kissed Splendor

Fake freckles have become a coveted beauty trend, adored for their ability to mimic the sun-kissed speckles naturally bestowed by the sun. Unlike natural freckles that are the result of genetics and sun exposure, fake freckles offer a temporary way to sprinkle one’s face with these charming spots. This beauty trend celebrates the uniqueness and appeal of freckles, allowing anyone to adopt this endearing feature regardless of their natural skin type. Tools and Materials Needed Creating fake freckles that look authentic requires more than just a brown eyeliner. The choice of products is crucial; for a believable effect, opt for waterproof, smudge-proof pens or pencils in colors that complement your skin tone. Additionally, fine brushes or sponges can help in blending and achieving the perfect dot size. Step-by-Step Guide to Creating Fake Freckles Preparing Your Skin Begin with a clean, moisturized face. A smooth canvas is key to ensuring your fake freckles adhere well and look part of your skin. Technique for Natural-Looking Freckles Dot the product lightly across the nose and cheekbones, where the sun naturally hits. Vary the size and density of the dots for a more realistic look, and gently tap them with your fingertips or a sponge to blend them into the skin. Setting Your Freckles To ensure longevity, lightly dust a setting powder over your freckles. This step prevents them from smudging and helps integrate them seamlessly with the rest of your makeup. Different Methods for Creating Fake Freckles Using Eyeliner or Brow Pencil A fine-tipped eyeliner or brow pencil can provide the precision needed for creating small, defined dots. Choose a color that mimics natural freckles and lightly apply it to the desired areas. Freckle Stencils and Stamps For those seeking an easier application, freckle stencils and stamps offer a quick way to achieve a freckled look. Simply apply the product to the stencil or stamp and press onto the skin. Using Henna for Semi-Permanent Freckles Henna provides a semi-permanent option for those looking to enjoy their fake freckles for longer. However, practice caution with this method, as it requires a certain skill level and understanding of henna application. Tips for Achieving a Natural Look Color Matching Choosing the right color is essential. Opt for hues that naturally occur in freckles, considering your skin tone for the best match. Placement and Size Variation Randomness is key. Freckles naturally appear in an unpredictable pattern, so avoid creating uniform dots. Mix up the placement and size for authenticity. Maintaining and Removing Fake Freckles How to Make Them Last To extend the wear of your fake freckles, avoid touching your face and apply a setting spray after completing your makeup. Removing Freckles Safely When you’re ready to remove your freckles, gently cleanse your face with a makeup remover. Opt for products that are kind to your skin to avoid irritation. Common Mistakes to Avoid Overapplication Less is often more. Start with a few dots and gradually add more if needed. Overdoing it can quickly take your freckles from natural to noticeable makeup. Wrong Color Selection Using a color that’s…