Explore Five Natural Strategies for Soothing Dry Hands

Dry hands are a frequent issue for many, often worsened by factors such as environmental conditions, regular hand washing, and the use of harsh chemicals, leading to discomfort, cracks, and potential infections. Yet, through proper care and natural remedies, it’s feasible to replenish moisture and restore your skin’s health. This piece delves into five natural remedies that alleviate dry hands, combining age-old wisdom with contemporary dermatological insights.
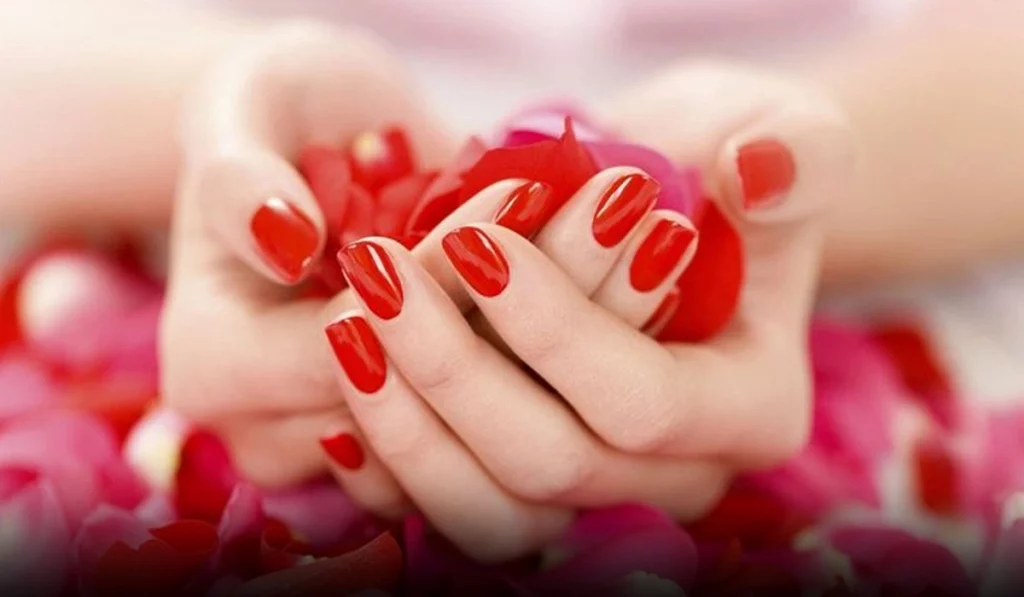
Explore Five Natural Strategies For Soothing Dryhands


Five Natural Strategies for Soothing Dry Hands
The Significance of Hydration
Hydrating the skin is essential to preserve its barrier function, prevent moisture loss, and shield against irritants. Consistently hydrating can markedly enhance the skin’s suppleness and hydration, diminishing the likelihood of dryness and fissures.

Natural Remedy 1: Coconut Oil Regimen
Coconut oil, a natural emollient, is laden with fatty acids that restore skin moisture. Nightly application of virgin coconut oil to the hands, followed by wearing cotton gloves, can boost absorption, rendering the hands supple and smooth.

Natural Remedy 2: Oatmeal Honey Exfoliant
A scrub made from oatmeal and honey not only exfoliates dead skin but deeply moisturizes. Combine ground oatmeal with honey and a small amount of water to create a paste. Gently rub this mixture on your hands and rinse after 10 minutes to rejuvenate the skin.

Natural Remedy 3: Aloe Vera Treatment
Renowned for its calming and healing effects, aloe vera gel applied to the hands can moisturize, mend cracks, and alleviate irritation. Its anti-inflammatory qualities also lessen redness and discomfort.

Natural Remedy 4: Shea Butter Remedy
Extracted from shea tree nuts, shea butter is a superb moisturizer for parched hands. Its rich vitamin and fatty acid content is perfect for skin nourishment and repair. For optimal results, generously apply shea butter to your hands at nighttime.

Natural Remedy 5: Glycerin-Rosewater Combination
Glycerin, a humectant, draws moisture to the skin. A hydrating concoction of glycerin and rosewater applied daily can prevent dryness and maintain soft skin.

Preventing Dry Hands
Prevent dry hands by wearing gloves in cold conditions and during household tasks. Opt for mild, unscented cleansers over harsh soaps. Prevention is equally critical as treatment.

Diet and Hydration for Skin Wellness
A diet rich in vitamins and omega-3 fatty acids, coupled with sufficient hydration, promotes skin health from within. Incorporate nutrient-dense foods like nuts, seeds, and green vegetables into your diet and drink ample water daily.

Humidifiers’ Role in Dry Hand Management
Employing a humidifier in dry settings and colder months can increase air moisture, aiding in skin dryness prevention. Choose a suitable humidifier for your area and maintain it well for maximum effectiveness.

Consulting a Dermatologist
Should home remedies fail to ameliorate dry hands, or if you observe severe cracking, bleeding, or infection signs, seeking a dermatologist’s counsel is prudent. They can offer specialized treatments and recommendations.

Exploring Natural Oils for Skin Care
Investigating various natural oils can yield customized dry skin solutions. Each oil, from almond to jojoba, provides unique benefits like anti-inflammatory effects and vital nutrients for skin restoration.

DIY Moisturizing Hand Masks
Crafting your moisturizing hand masks with ingredients like avocado, banana, and yogurt is a delightful and efficacious method for treating dry hands. These natural components are rich in essential vitamins and minerals for skin vitality.

Skin Hydration Science
Comprehending skin moisture retention and the stratum corneum’s role can enhance your skincare regimen. Employing hydrating substances and protective actions can significantly benefit skin wellness.

Explore Five Natural Strategies For Soothing Dry Hands


Weather’s Impact on Skin
Seasonal shifts can substantially impact skin health. Tailoring your skincare routine to these changes can assist in maintaining your skin’s moisture equilibrium and overall well-being.

Complementary Skin Care Therapies
Incorporating complementary therapies such as massage and acupuncture can foster relaxation and improved circulation, which benefits skin health and aids in dry hand management.

Adopting a Comprehensive Hand Care Strategy
Addressing dry hands involves a blend of potent home remedies, preventive strategies, and lifestyle modifications. Integrating these natural solutions into your routine can lead to soft, healthy hands. For ongoing issues, professional evaluation is advised to ensure comprehensive skin health.


What leads to dry hands?
Typically, environmental factors, frequent cleansing, and chemical exposure are to blame.

Are these remedies suitable for sensitive skin?
Yes, though conducting a patch test with new remedies is wise.

How frequently should I hydrate my hands?
Aim to moisturize at least twice daily and following handwashing.

Can dietary choices influence skin health?
Indeed. A nourishing diet underpins skin health from the inside.

What is the optimal application method for these remedies?
Adhere to each remedy’s specific guidelines for the best outcomes.

When is professional intervention for dry hands necessary?
If symptoms persist or exacerbate, a dermatologist’s expertise is recommended.


A Radiant Glow: Mastering Blush Application For Round Face Shapes
A Radiant Glow: Mastering Blush Application for Round Face Shapes

Blush is a makeup essential that can transform your look from dull to radiant, adding a healthy flush to your cheeks and enhancing your facial features. When it comes to applying blush, one size does not fit all, as different face shapes require specific techniques to achieve the most flattering results. If you have a round face shape, this guide is tailored to help you unlock the secrets of applying blush to accentuate your natural beauty. In this comprehensive guide, we’ll explore step-by-step instructions and valuable tips to ensure that your blush application complements your round face shape impeccably. Understanding the Round Face Shape Before delving into the tips for blush application, it’s crucial to understand the characteristics of a round face shape. A round face typically has soft, curved lines with a width and height that are approximately equal. The goal when applying blush to a round face is to create the illusion of more definition and angles, enhancing the natural bone structure. Choosing the Right Blush Shade Selecting the right blush shade is the first step towards achieving a flawless look. For a round face shape, opt for shades that offer a warm, natural glow. Peach, coral, and rosy tones work wonderfully as they provide a subtle radiance while imparting a hint of color. Avoid shades that are too dark or overly intense, as they can make your face appear even rounder. Prep and Prime Before you start applying blush, ensure that your skin is well-prepped and primed. Cleanse your face, apply a moisturizer suitable for your skin type, and follow up with a primer to create a smooth canvas for makeup application. This ensures that your blush adheres evenly and lasts longer throughout the day. Blush Application Steps Choose the Right Brush: Opt for a fluffy, angled blush brush for the best application. The angled shape helps you apply the blush precisely to the apples of your cheeks while blending seamlessly. Smile and Locate the Apples: Smile to identify the apples of your cheeks – the round, slightly raised areas that pop up when you smile. This is where you’ll focus your blush application. Light Hand for Building Color: Start with a small amount of blush on your brush. It’s easier to build up the color gradually rather than trying to tone it down if you apply too much at once. Apply in a Diagonal Line: Begin applying the blush in a diagonal line from the apples of your cheeks towards your temples. This technique adds a gentle lift to your face, creating the illusion of higher cheekbones. Blend, Blend, Blend: Blending is key to achieving a natural, seamless look. Use gentle, upward strokes to blend the blush into your skin. Make sure there are no visible lines, and the color diffuses evenly. Focus on the High Points: Concentrate the majority of the blush color on the apples of your cheeks, and then lightly sweep the remaining product along your cheekbones towards your hairline. Less is More for Round Faces: Remember, less is more when applying blush to a…

Retinol: The Miracle Ingredient For Healthy And Youthful Skin
Retinol: The Miracle Ingredient for Healthy and Youthful Skin

Retinol is a form of vitamin A that has gained immense popularity in the beauty industry due to its numerous benefits for the skin. It is a powerful antioxidant that can help reduce the signs of aging, improve skin texture and tone, and promote overall skin health. In this article, we will explore the science behind retinol and why it is essential to have in your skincare routine. What is Retinol? Retinol is a type of retinoid, which is a derivative of vitamin A. It is a fat-soluble vitamin that is found in many foods, including carrots, sweet potatoes, and spinach. Retinol is used in skincare products as a topical treatment to improve the appearance and health of the skin. How Does Retinol Work? Retinol works by penetrating the skin’s surface and binding to specific receptors in the skin cells. It stimulates the production of collagen, which is essential for maintaining the skin’s elasticity and firmness. It also increases cell turnover, which helps to exfoliate the skin and reduce the appearance of fine lines, wrinkles, and hyperpigmentation. Why You Need to Have Retinol In Your Skincare Routine It Can Improve the Appearance of Fine Lines and WrinklesOne of the most significant benefits of retinol is its ability to reduce the appearance of fine lines and wrinkles. As we age, our skin’s collagen production decreases, and the skin becomes thinner and less elastic. Retinol helps to stimulate collagen production, which can improve the skin’s elasticity and reduce the appearance of wrinkles. It Can Improve Skin Texture and ToneRetinol can also help improve the texture and tone of the skin. It works by increasing cell turnover, which can help to exfoliate the skin and remove dead skin cells. This can help to improve the skin’s texture and make it appear smoother and more even-toned. It Can Help Prevent and Treat AcneRetinol can also be beneficial for those with acne-prone skin. It works by reducing the production of sebum, which can contribute to the development of acne. It also helps to exfoliate the skin and unclog pores, which can help to prevent and treat acne breakouts. It Can Improve Skin DiscolorationRetinol is also effective at reducing skin discoloration. It works by inhibiting the production of melanin, which can cause dark spots and hyperpigmentation. By reducing the production of melanin, retinol can help to even out skin tone and reduce the appearance of dark spots. It Can Protect Against Environmental DamageRetinol is a potent antioxidant that can help protect the skin against environmental damage. It works by neutralizing free radicals, which are molecules that can damage the skin and accelerate the aging process. By protecting the skin against environmental damage, retinol can help to keep the skin looking healthy and youthful. How to Incorporate Retinol Into Your Skincare Routine Retinol is a potent ingredient that can cause irritation, especially for those with sensitive skin. It is essential to start with a low concentration and gradually increase over time. It is also recommended to use retinol at night, as it can make the skin more sensitive to…

Brain Power Challenge

Welcome to the Ultimate IQ Challenge! Are you ready to test your limits? This IQ test is designed to push your analytical skills to their peak. You have 20 minutes to answer 20 carefully crafted questions. Did you know? The average IQ in the U.S. is 98. Can you prove you’re smarter than the average American? Push your boundaries and see where you stand. Challenge yourself and aim for the top! Start the Test

Dermaplaning: The Popular Skincare Treatment Explained

Dermaplaning is a non-invasive, exfoliating skincare treatment that has gained popularity in recent years. It involves the use of a sharp, surgical-grade scalpel to remove the outermost layer of dead skin cells and vellus hair (also known as peach fuzz) from the face. The result is a smoother, brighter, and more radiant complexion. In this article, we’ll explore the benefits, risks, and considerations for dermaplaning. Benefits of Dermaplaning One of the primary benefits of dermaplaning is its ability to exfoliate the skin. The scalpel removes the outer layer of dead skin cells, which can help to reduce the appearance of fine lines, wrinkles, and acne scars. Additionally, by removing the dead skin cells, it allows for better absorption of skincare products, making them more effective. This can be especially beneficial for individuals who have hyperpigmentation or uneven skin tone, as the exfoliation can help to even out the complexion. Another benefit of dermaplaning is the removal of vellus hair. While many people are hesitant to remove peach fuzz, it can actually be beneficial for the skin. Vellus hair can trap dirt and oil, which can contribute to breakouts. By removing the hair, it can help to prevent breakouts and make the skin appear smoother and more refined. Dermaplaning is also a quick and painless procedure. It typically takes around 30 minutes to complete and is done in-office by a licensed esthetician or dermatologist. Unlike other exfoliating treatments, such as chemical peels, dermaplaning does not require any downtime. Patients can immediately return to their normal activities without any redness or irritation. Risks and Considerations While dermaplaning is generally considered safe, there are some risks and considerations to keep in mind. The use of a sharp scalpel on the face can be dangerous if not done correctly, so it’s important to only have the procedure done by a licensed professional. It’s also important to avoid any sun exposure for a few days after the procedure, as the skin will be more sensitive. Another consideration is that dermaplaning is not suitable for everyone. Individuals with active acne, eczema, or rosacea should avoid the procedure, as it can exacerbate these conditions. Additionally, those with a history of cold sores should take precautions, as the procedure can trigger an outbreak. It’s also important to note that dermaplaning is a temporary solution. While the results can last for a few weeks, the skin will eventually return to its natural state. For best results, it’s recommended to have the procedure done every 4-6 weeks. How to Prepare for Dermaplaning Before having a dermaplaning treatment, it’s important to properly prepare your skin. This includes avoiding any exfoliating treatments for at least a week prior to the procedure. It’s also important to avoid any sun exposure or tanning beds for at least a week before the procedure. On the day of the procedure, it’s important to arrive with a clean face, free of any makeup or skincare products. The esthetician or dermatologist will then apply a numbing cream to the face, which will help to minimize any discomfort during the procedure….

Airbrush Makeup: Unveiling The Flawless Finish And How To Achieve It
Airbrush Makeup: Unveiling the Flawless Finish and How to Achieve It

Airbrush makeup has gained popularity in the beauty industry for its ability to create a flawless, long-lasting, and natural-looking complexion. Utilizing an airbrush gun and specialized makeup formulas, this technique offers a seamless application that leaves the skin looking smooth and radiant. In this article, we will explore the world of airbrush makeup, discussing its benefits, application process, and tips for achieving the coveted airbrushed look. Whether you’re a makeup enthusiast or a professional artist, understanding airbrush makeup can elevate your makeup game to new heights. What is Airbrush Makeup?Airbrush makeup is a technique that involves applying makeup through an airbrush gun, which delivers a fine mist of foundation, blush, highlighter, and other makeup products onto the skin. The makeup formula is typically water-based, silicone-based, or a combination of both. This method allows for precise control and even distribution of makeup, resulting in a flawless, lightweight, and natural finish. Benefits of Airbrush Makeup:Airbrush makeup offers several advantages over traditional makeup application techniques: Flawless Finish: The microfine mist of makeup particles creates a seamless, second-skin effect, minimizing the appearance of imperfections and providing a smooth, airbrushed finish. Longevity: Airbrush makeup is known for its exceptional staying power. The formula adheres to the skin, resisting sweat, humidity, and transfer, making it ideal for special occasions, weddings, or events that require long-lasting makeup. Buildable Coverage: The airbrush technique allows for customizable coverage. By layering the makeup in thin, even passes, you can achieve sheer to full coverage, depending on your preferences and the desired look. Lightweight and Natural: Airbrush makeup feels lightweight on the skin, as the ultra-fine particles create a breathable layer. The result is a natural-looking finish that doesn’t look heavy or cakey. The Airbrush Makeup Process:To achieve the airbrushed look, follow these steps:Step 1: Prep the Skin: Start with a clean and moisturized face. Ensure your skin is well-hydrated to create a smooth canvas for makeup application. Step 2: Choose the Right Formula: Select an airbrush makeup formula that suits your skin type and desired finish. Water-based formulas are suitable for most skin types, while silicone-based formulas provide a longer-lasting and more waterproof finish. Step 3: Set Up the Airbrush System: Assemble your airbrush system according to the manufacturer’s instructions. This typically involves connecting the airbrush gun to an air compressor and adjusting the airflow and pressure settings. Step 4: Test the Spray: Before applying the makeup to your face, it’s crucial to test the spray on a tissue or your hand to ensure the desired coverage and adjust the air pressure if necessary. Step 5: Apply Foundation: Begin by applying the foundation. Hold the airbrush gun approximately six to eight inches away from your face and move it in small, circular motions. Start from the center of your face and work outward for an even application. Step 6: Build Coverage: For areas that require more coverage, such as blemishes or redness, apply additional layers of foundation using light, overlapping passes. Gradually build the coverage to achieve your desired look. Step 7: Add Blush, Contour, and Highlight: Once the foundation is applied,…

10 Tips For Concealing Under Eye Bags Like A Pro
10 Tips for Concealing Under-Eye Bags Like a Pro

Under-eye bags are a common problem for many people, whether it’s due to genetics, lack of sleep, or aging. These bags can make you look tired and older than you actually are. Luckily, there are many ways to conceal under-eye bags and make your eyes look brighter and more youthful. In this article, we will share 10 tips for concealing under-eye bags like a pro. Use a Color CorrectorIf you have dark circles under your eyes, a color corrector can help neutralize the discoloration. Look for a peach or orange color corrector, depending on your skin tone. Apply it gently to the under-eye area using your ring finger. Be careful not to tug or pull on the delicate skin around your eyes. Use a Concealer with a Yellow or Peach UndertoneAfter applying a color corrector, use a concealer that has a yellow or peach undertone. This will help brighten your under-eye area and make you look more awake. Use a small, fluffy brush to apply the concealer in a triangle shape under your eyes, then blend it in with a damp beauty sponge. Use a Hydrating Eye CreamDry skin can make under-eye bags look worse. Make sure to use a hydrating eye cream before applying any makeup. Look for an eye cream that contains hyaluronic acid, which helps to plump and hydrate the skin. Apply a Cooling Eye GelIf you’re dealing with puffiness under your eyes, try applying a cooling eye gel. Keep the eye gel in the fridge for a few minutes before applying it to your under-eye area. The coolness will help reduce inflammation and puffiness. Use a Light-Reflecting PowderAfter applying your concealer, use a light-reflecting powder to set it. This will help brighten your under-eye area even more and prevent creasing. Use a fluffy brush to apply the powder lightly under your eyes. Use a Matte BronzerIf you have under-eye bags that are more prominent, you can use a matte bronzer to create a shadow effect. Apply the bronzer lightly in the hollows under your cheekbones and around your temples. This will help to create the illusion of depth and make your under-eye bags less noticeable. Apply Mascara and EyelinerApplying mascara and eyeliner can help draw attention away from your under-eye bags. Curl your lashes and apply mascara to open up your eyes. Use a thin line of eyeliner along your lash line to define your eyes further. Use a Bright LipstickIf you’re still feeling self-conscious about your under-eye bags, try wearing a bright lipstick. A bold lip color will draw attention away from your under-eye area and make you feel more confident. Use a Makeup Setting SprayTo make sure your makeup stays in place all day, use a makeup setting spray. This will also help prevent your under-eye area from getting oily and causing your makeup to smudge. Get Plenty of Sleep and Drink WaterWhile these tips can help conceal under-eye bags, the best way to get rid of them is to get plenty of sleep and drink water. Aim for at least 7-8 hours of sleep each…

Closeup,macro,of,woman,face,with,blue,eyes,make Up.,fashion
Revealing the Beauty of Blue Eyes

Eyes have always held an alluring allure; for those blessed with striking blue eyes, eyeshadow can serve as the canvas to highlight and emphasize them further. From daily looks to bold statements, choosing an appropriate eyeshadow shade can elevate your gaze and take it to new heights – in this exploration we unveil an assortment of captivating looks tailored specifically for blue-eyed individuals. Understanding Complementary Colors: Understanding complementary colors is key when it comes to creating eyeshadow looks designed to emphasize blue eyes. Warm tones such as orange, copper and earthy browns make excellent choices to amplify and bring out their richness – providing the ideal contrast against their cool tone of blue. This timeless eyeshadow look is ideal for everyday wear, offering subtle enhancement that brings out the natural beauty of blue eyes. Warm brown hues add depth without overshadowing; creating an adaptable and timeless appearance suitable for any special occasion or event. Welcome the warmth of a sunset with this eyeshadow look that brings out blue eyes’ captivating glow. A combination of peach hues and burnt orange tones bring life and vibrancy to this look; conjuring vivid imagery associated with dusk. Ideal for evening events and occasions where your eyes need to command attention! Explore purples and lavenders for an air of dreaminess and ethereality, or explore light lavender to deep plum transitioning between them for added dimension and allure, creating a whimsical aesthetic. Blue eyes contrast beautifully against these calming tones for a captivating contrast effect, mesmerizing audiences wherever they may roam. Their soft transition between light lavender to deep plum adds dimension and allure that sets this eyeshadow look apart as an option to those wanting something different from standard everyday eyeshadow looks. Amp up the drama with an eyeshadow look that elevates drama through sophistication: an alluring smoky eye that adds intensity and depth to blue eyes. Cool tones like gray and charcoal create an arresting contrast, drawing the focus towards your blue eye color as the center point. Perfect for evening events or making an impressionful statement, this sophisticated yet alluring eyeshadow look exudes sophistication and allure. Plunge into oceanic hues with an amazing teal eyeshadow look! Teals and aquas work well when combined with blue eyes for an engaging and eye-catching effect – ideal for summer events when adding sea-inspired elegance into your gaze! This eyeshadow look makes an impactful statement! Gold shimmer adds luxuriousness and glamour, exacerbating blue eye’s natural luminosity for an eye-catching effect that exudes luxuriousness. Perfect for special events or simply when exuding sophisticated charm, this eyeshadow look elevates glamor! Use olive tones’ earthy charm for an eyeshadow look that stands out. Green hues – olive and forest green in particular – bring depth and intensity to blue eyes, providing depth without losing elegance or sophistication. This look makes an excellent statement! Expert Tips for Enhancing Blue Eyes Utilize an Eyeshadow Primer To enhance long-term and vibrant wear of eye shadow looks, an eyeshadow primer can ensure their longevity and vibrancy by helping avoid creasing while making colors pop more vividly….

Create The Perfect Eyebrows Using These Easy Eyebrow Filling Steps Kopya
Create The Perfect Eyebrows Using These Easy Eyebrow Filling Steps

Eyebrows are more than just facial features; they are the frame to the masterpiece that is your face. Perfectly filled and shaped eyebrows can significantly enhance your overall look, highlighting your best facial features and expressing your emotions with precision. Understanding the art and science behind eyebrow filling is essential for anyone looking to perfect their makeup routine. This expanded guide will cover every step, tool, and tip you need to master the skill of eyebrow filling. Understanding Eyebrow Shapes The journey to perfect eyebrows begins with a clear understanding of the natural shape of your brows and how it complements your facial structure. Each face shape benefits from different eyebrow shapes—arched brows can lift and open up the eye area on a round face, while straight brows can soften the angles of a square face. Learning to identify your face shape and corresponding brow shape is the first step to eyebrow perfection. We’ll delve into how different eyebrow shapes can enhance various facial features, providing visual harmony and balance. The Essentials for Eyebrow Filling The right tools are your best allies in achieving perfect brows. This section will explore the myriad of products available—from pencils that offer precision to powders that provide a softer look and gels that keep every hair in place. We’ll guide you in choosing the right shades to complement your hair color and skin tone, ensuring a natural and cohesive look. Step-by-Step Guide to Filling Your Eyebrows Tips for Achieving Symmetry Symmetry is often cited as the hardest goal to achieve in eyebrow filling. We’ll provide practical advice on how to measure and adjust for even eyebrows, recognizing that perfect symmetry is not always attainable or natural. Techniques for using your facial features as guides to achieve as much balance as possible will be covered extensively. Long-Lasting Eyebrow Filling Sweat, oil, and daily activities can wear down even the best-applied brow makeup. This section will focus on methods and products to ensure your brows stay perfect from morning till night, discussing waterproof products, primers, and setting sprays designed specifically for brows. Fixing Common Eyebrow Filling Mistakes From overfilled brows to mismatched colors, mistakes happen. We’ll explore common pitfalls in eyebrow filling and offer expert solutions, including how to lighten too-dark brows and reshape without starting from scratch. Advanced Eyebrow Filling Techniques For those ready to take their brow game to the next level, we’ll delve into advanced techniques such as creating texture for a more natural appearance, mastering the gradient or ombre effect, and even experimenting with eyebrow wigs for bold transformations. Maintaining Your Perfect Eyebrows Achieving the perfect brows is one thing; maintaining them is another. We’ll provide advice on regular grooming practices, touch-up strategies, and how to extend the life of your brow look between fillings. The Role of Professional Eyebrow Services While DIY techniques are invaluable, professional services like threading, waxing, and microblading offer another level of precision and longevity. We’ll discuss when it might be beneficial to seek professional help and what to expect from these services, including the benefits of professional shaping…