Mastering the Art of DIY Haircuts: An In-Depth Tutorial

Embarking on the journey of self-haircutting can seem challenging, yet with adequate preparation, the right set of tools, and mastering various techniques, it transforms into a deeply satisfying endeavor. This tutorial is designed to guide you through every step of the process, whether you aim to maintain your existing hairstyle, experiment with a new look, or simply snip away those split ends.

Mastering The Art Of Diy Haircuts An Indepth Tutorial


Haircut Preparation Essentials

Choosing the Correct Tools

A successful self-haircut begins with selecting the appropriate tools. Essential items include razor-sharp hairdressing shears, a fine-toothed comb, hair clips for sectioning, and a mirror. For those considering clipper cuts, selecting a set with a comprehensive range of guard lengths is crucial.

Hair Washing and Conditioning

To facilitate a smoother cutting process, start with freshly washed and conditioned hair. After washing, towel-dry your hair to eliminate excess moisture, leaving it more pliable and ready for a precise cut.

Fundamental Haircutting Techniques

Precision Scissor Work

Master the correct grip of the scissors and practice executing fine, accurate snips. The cutting angle is pivotal in determining the final look, hence begin with straightforward cuts before advancing to intricate angles.

Clipper Usage for Shorter Styles

For those desiring shorter or buzzed styles, clippers become an indispensable tool. Initiate the cut with a higher guard setting to preclude removing too much hair abruptly, progressively adjusting to achieve the desired length.

Detailed Haircutting Guide

Designing Your Hairstyle

Prior to cutting, formulate a clear vision of the desired hairstyle, considering factors such as hair texture, facial structure, and maintenance commitment.

Hair Sectioning

Segmenting your hair into manageable sections simplifies the cutting process. Utilize clips to divide the hair in alignment with your planned hairstyle.

Executing the Cut

Start with the lower layers, gradually ascending. Exercise restraint in the initial cuts—it’s preferable to trim further if necessary than to remedy overly short lengths.

DIY Haircutting Pro Tips

Circumventing Common Errors

A prevalent error in self-haircutting is removing too much hair simultaneously. Proceed slowly, bearing in mind that it’s more feasible to cut additional length later than to correct an overly short cut.

Layering Techniques

Incorporating layers can introduce movement and dimension. Begin with the frontal layers, advancing rearward, using your digits as a guide to ensure uniformity.

Men’s Haircutting Tutorial

Men’s Cutting Tools and Methods

Typically, men’s haircuts involve clippers for the sides and back and shears for the top. Acquiring skills in blending these methods is essential for a polished look.

Post-Cut Styling

The foundation of a stellar hairstyle is a proficient cut. Select styling products that enhance your hair type and intended style.

Women’s Haircutting Guide

Women’s haircuts range from straightforward trims to elaborate layered cuts, with texture and volume playing pivotal roles.

Mastering The Art Of Diy Haircuts An In Depth Tutoriall


Crafting Layers and Bangs

Layers and bangs can significantly alter your appearance. Tailor each cut to complement your facial shape and hair texture for optimal outcomes.

Timing Your Trims

To maintain hair health and style, aim for trims every 6-8 weeks, varying with hair growth rates.

Promoting Hair Health

Maintaining hair health simplifies cutting and styling. Develop a care routine that includes balanced nutrition, regular cleansing, and minimal thermal styling.


Advanced Cutting Techniques

Texturizing for Volume and Reduction

Learn texturizing techniques, such as point cutting, to eliminate bulk and enhance volume.

Razor Cutting for Softness

Razor cutting can produce delicate, feathered layers but requires careful handling to prevent excessive hair removal.

Children’s Haircutting Tips

Preparing for a Child’s Haircut

Ensure the child is relaxed and entertained. Employ distractions like toys or videos to maintain their calmness throughout the cut.

Simplistic Approaches for Children

Opt for uncomplicated cuts for children, focusing on quick and safe trimming methods to minimize discomfort.

Avoiding and Rectifying DIY Haircutting Mistakes

Steering Clear of Common Errors

Familiarize yourself with typical haircutting missteps to avoid them in your practice.

Mistake Correction Strategies

In case of errors, remain calm. Most mistakes can be blended or adjusted, and accessories can help conceal them as hair grows back.

Professional Haircuts vs. Home Techniques

Consulting a Professional for Complex Styles

Although home haircuts can be efficient and economical, intricate styles might necessitate a professional’s touch. Recognize when to seek a hairstylist for complex designs.

The Advantages of Home Haircuts

Home haircuts offer cost savings and convenience, allowing for style experimentation within your personal space.

Tool Maintenance and Cleanliness

Tool Cleaning Imperatives

Regular cleaning and oiling of your haircutting tools are vital to prevent infections and prolong their usability.

Proper Tool Storage

Safeguard your tools from damage through correct storage, keeping them dry and out of reach from children.


Trendsetting in Haircutting

Embracing Current Hair Trends

Keep abreast of the latest hair trends, from shag cuts to contemporary bobs, and consider adapting these styles to suit your unique hair type and facial structure.

Tailoring Trends to Your Hair Type

Not all trends suit every hair type. Discover how to modify the latest styles to flatter your individual hair texture, whether curly, straight, or wavy.

Diverse Style Haircutting Techniques

Short Hair Styles

Explore the fundamentals of fashionable short haircuts, including pixie cuts and bobs, for a chic, low-maintenance look.

Long Hair Care and Styles

Long hair offers styling flexibility but demands regular upkeep. Learn strategies for maintaining the health and appearance of long locks.

Curly Hair Cutting Methods

Curly hair requires special attention to preserve its shape and volume. Delve into cutting techniques tailored for curly hair textures.

Leveraging Technology for Haircut Planning

Virtual Haircutting Tools

Utilize virtual tools to preview various hairstyles on your face shape before committing to a cut. Investigate the top applications for this purpose.

Top Recommended Apps

Numerous applications are available to assist in haircut planning. Identify those offering the most accurate simulations and useful functionalities.

Self-haircutting can be a gratifying venture. With patience and dedication, achieving salon-quality results at home is within reach. Remember, gradual steps and cautious experimentation are key to mastering the art of home haircuts.

Mastering home haircuts is both a practical and rewarding skill, offering savings in time and expenses. By adhering to this guide, you are well-equipped to take on the role of your own stylist. Remember, proficiency comes with practice, and each haircut enhances your confidence and skill set.

  • How frequently should hair be cut?
  • Can a poor haircut be fixed?
  • What is the optimal technique for cutting curly hair?
  • Is it preferable to cut hair when it’s wet or dry?
  • Can home haircuts lead to significant savings?
  • What are the must-haves for a home haircut kit?


Dewy All Day Tips To Keep Your Makeup Fresh And Glowing
Dewy All Day: Tips to Keep Your Makeup Fresh and Glowing

Dewy makeup has become a popular trend, providing a fresh and radiant glow to the skin. However, maintaining that luminous look throughout the day can be a challenge, especially if you have oily skin or live in a humid climate. In this article, we will share effective tips and techniques to help you keep your dewy makeup going strong from morning to night. From prepping your skin to setting your makeup, we will guide you through the steps necessary to achieve long-lasting, flawless dewy makeup. Prep Your Skin:Proper skincare preparation is essential for achieving long-lasting dewy makeup. Start by cleansing your face to remove any dirt, oil, or impurities. Follow up with a lightweight moisturizer that hydrates your skin without making it greasy. Allow the moisturizer to absorb fully before moving on to the next step. Additionally, applying a primer formulated for dewy finishes can create a smooth canvas for your makeup and help it adhere better throughout the day. Choose the Right Foundation:When aiming for a dewy look, selecting the right foundation is crucial. Opt for foundations with a luminous or dewy finish that provide a natural glow to your skin. Avoid matte or oil-control foundations, as they can give a flat appearance. Consider using lightweight formulas that allow your skin to breathe while still providing coverage. Additionally, look for long-wearing foundations that are designed to stay put and maintain a dewy finish for extended periods. Strategic Powder Application:While powder helps control shine, using it sparingly is key to maintaining a dewy look. Focus on applying powder only to areas prone to excessive oiliness, such as the T-zone. Use a finely milled, translucent powder and a fluffy brush to gently dust the powder onto these areas. Avoid applying powder all over the face, as it can mattify the skin and diminish the dewy effect. The strategic application of powder helps set your makeup without compromising its luminosity. Use Cream or Liquid Highlighters:Highlighters are essential for achieving a dewy look. Opt for cream or liquid highlighters instead of powder formulas, as they blend seamlessly into the skin and provide a more natural-looking glow. Apply the highlighter to the high points of your face, such as the cheekbones, bridge of the nose, and cupid’s bow. Gently blend it in with your fingertips or a damp beauty sponge for a radiant and dewy finish. Set Your Makeup:To ensure your dewy makeup lasts all day, setting it with the right products is crucial. Instead of using a traditional setting powder, opt for a setting spray that provides a dewy or hydrating finish. Mist the setting spray over your entire face after completing your makeup application. This will help lock in your makeup, melt all the products together, and give a luminous boost to your skin. Carry a travel-size setting spray in your bag for touch-ups throughout the day to revive the dewy look. Blotting Papers for Oil Control:If you have oily skin, it’s common for excess oil to interfere with your dewy makeup. Keep blotting papers handy to absorb any excess oil without disturbing your…

Creating An Editorial Makeup Look Tips And Tricks For A High Fashion Look
Creating an Editorial Makeup Look: Tips and Tricks for a High-Fashion Look

Editorial makeup transcends the boundaries of everyday beauty, venturing into the realms of art and high fashion. It’s where creativity knows no bounds, and makeup artists unleash their imagination to create looks that are not just beautiful but tell a story. Whether for magazine spreads, fashion shows, or brand campaigns, editorial makeup is about making a statement and leaving a lasting impression. This guide will walk you through the essentials of creating captivating editorial makeup looks, from the tools you need to the techniques that will set your work apart. Understanding Editorial Makeup Editorial makeup is distinguished by its innovation and artistic flair. It’s about pushing boundaries, experimenting with textures, colors, and shapes to create looks that are often bold, sometimes surreal, and always impactful. The evolution of editorial makeup reflects the changing trends in fashion and art, constantly challenging and redefining beauty standards. Essential Tools for Editorial Makeup The right tools are your best allies in crafting editorial looks. High-quality brushes and applicators ensure precision and ease of application, while specialty products like pigmented shadows, vibrant liners, and unique textures allow for endless creativity. Investing in a diverse makeup kit will enable you to bring any vision to life. Mastering the Base A flawless base is the canvas for any makeup look, especially in editorial where perfection is key. Choosing the right foundation formula and applying it with skill can make all the difference. Techniques like layering, blending, and setting are crucial for a base that complements rather than competes with your creative elements. The Art of Eye Makeup Eye makeup in editorial looks can be daring and dramatic. Bold shadows, graphic liners, and false lashes are often used to create eye-catching designs. Mastering innovative techniques, such as cut-creases, bold color blocking, and intricate liner work, can elevate your makeup artistry. Sculpting with Contours and Highlights Contouring and highlighting are powerful techniques to shape and define the face. In editorial makeup, they can be used more artistically to exaggerate or alter facial features, playing with light and shadow to achieve the desired effect. Choosing the right shades and blending meticulously are key to a sculpted, high-fashion look. Lip Makeup for Editorial Looks Lips are a focal point in many editorial looks, whether the goal is a bold statement or a subtle enhancement. Selecting the right color and texture to complement the overall theme is essential. Tips for precise application and ensuring longevity will help your lip makeup stand out and last through long photoshoots. Adding Drama with Textures and Glitters Textures and glitters can add a unique dimension to editorial makeup. From glossy finishes to metallic foils, incorporating different textures can create depth and interest. Safe application techniques are important, especially when working with glitters, to achieve a dramatic effect without compromising safety. The Role of Color Theory in Editorial Makeup A deep understanding of color theory can elevate your editorial makeup by ensuring harmony or deliberate contrast within your look. Using color to evoke emotions or convey a theme is a powerful tool in your artistic arsenal. Blending Techniques for…

Banishing Shadows A Comprehensive Strategy To Concealingdark Circles
Banishing Shadows: A Comprehensive Strategy to Concealing Dark Circles

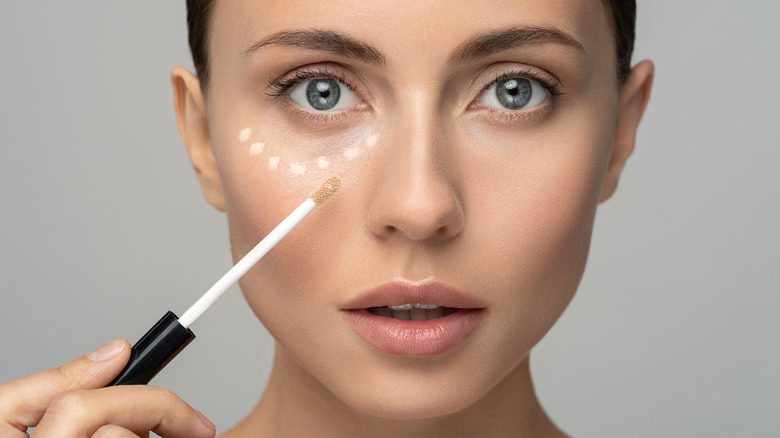
Dark circles under the eyes are more than just a telltale sign of a restless night—they’re a multifaceted beauty challenge that can detract from your skin’s natural glow and affect your overall appearance. This guide expands on the complexities of dark circles, offering not only makeup solutions but also insights into lifestyle and skincare routines that can minimize their appearance. With a focus on holistic beauty and wellness, we aim to empower you with the knowledge and techniques to achieve a bright, vibrant look. Delving Deeper into Dark Circles: Beyond the Basics Understanding the root causes of dark circles is the first step toward effectively concealing them. This section delves deeper into the physiological and environmental factors contributing to dark circles, including detailed explanations of how skin pigmentation, blood circulation, and hydration levels affect the under-eye area. By recognizing these underlying factors, you can tailor your skincare and lifestyle choices to better combat dark circles. The Art of Selecting the Perfect Concealer Choosing the right concealer is an art form that requires consideration of texture, coverage, and color. This expanded section includes expert advice on identifying your skin’s needs and selecting products that not only conceal but also treat the delicate under-eye area. We’ll introduce a wider range of product recommendations, catering to diverse skin types and concerns, ensuring that everyone can find their ideal match. Mastering Concealer Application: A Step-by-Step Guide Achieving flawless coverage without caking or creasing is possible with the right application techniques. This comprehensive guide provides a step-by-step tutorial on applying concealer, including advanced techniques such as baking and layering products for increased longevity and hydration. High-definition photos and diagrams accompany the instructions, making it easier to visualize the process and replicate the techniques at home. Beyond Concealer: A Holistic Approach to Eye Care Covering dark circles is just one aspect of eye care; maintaining the health and vitality of the under-eye area is equally important. This section offers a holistic approach to eye care, detailing preventative measures and treatments that can improve skin texture and tone. From the benefits of regular facial massages to the importance of sunscreen and antioxidants, we cover a range of strategies to enhance the health of your under-eye skin. Lifestyle Adjustments for Brighter Eyes The condition of your skin, especially around the eyes, is a reflection of your overall health and lifestyle. This part of the guide emphasizes the importance of hydration, nutrition, sleep, and stress management in minimizing dark circles. Including expert tips and actionable advice, we explore how small changes in your daily routine can have a significant impact on the appearance of dark circles. When Makeup Meets Technology: Innovative Concealing Solutions In today’s digital age, makeup technology is evolving rapidly, offering new solutions for age-old concerns like dark circles. This section introduces the latest advancements in cosmetic products and tools, from color-changing concealers to light-diffusing powders that reflect technology’s role in modern makeup application. Discover how these innovations can simplify your beauty routine while delivering superior results. Concealing dark circles is more than a quick fix; it’s about embracing…

Brow Perfection At Home The Comprehensive Guide To Diy Brow Lamination
Brow Perfection at Home: The Comprehensive Guide to DIY Brow Lamination

In the realm of beauty, eyebrows are a pivotal feature, framing the face and highlighting one’s eyes. Brow lamination, a groundbreaking beauty trend, offers a solution for those seeking fuller, more defined eyebrows without daily makeup. This treatment has traditionally been a salon-exclusive, but with the right guidance, achieving salon-quality results at home is within reach. This expanded guide dives into the nuances of DIY brow lamination, covering everything from the initial prep work to the crucial aftercare, ensuring you can safely achieve and maintain impeccable brows. Deep Dive into Brow Lamination Brow lamination works by restructuring the brow hairs, giving them a uniform, desired direction and appearance. It’s particularly beneficial for those with unruly, sparse, or downward-growing hairs, providing a fuller and more even look. This section explores the technique’s origins, its rise to prominence, and how it has become a beloved alternative to more permanent treatments like microblading, offering insight into why it’s worth considering for your brow grooming routine. Advantages of Going DIY with Brow Lamination Choosing to laminate your brows at home comes with a plethora of benefits, including cost-efficiency, the comfort of your own home, and the ability to tailor the process to your specific brow needs. Here, we’ll outline the key advantages of DIY brow lamination, from the personal satisfaction of self-care to the convenience of touch-ups on your schedule, highlighting why many beauty enthusiasts are opting to take their brow treatments into their own hands. Essential Tools for At-Home Brow Lamination Successful DIY brow lamination hinges on having the right tools and products. This comprehensive checklist ensures you’re well-prepared, listing everything from reputable brow lamination kits to the specific cleansers, brushes, and aftercare serums that will make the process smooth and effective. We also include tips for selecting quality products that are safe and reliable, ensuring your DIY endeavor leads to beautiful, healthy brows. Step-by-Step Guide: Achieving Professional-Quality Lamination With the right preparation, DIY brow lamination can be straightforward and rewarding. This detailed, step-by-step guide walks you through the entire process, from conducting a patch test to applying the lamination solution, shaping, and setting your brows. Each step is broken down with precision, incorporating professional tips and visual aids to ensure clarity and ease, empowering you to achieve professional-quality results at home. Navigating Aftercare for Lasting Results The longevity and quality of your brow lamination significantly depend on proper aftercare. This section delves into the dos and don’ts following your treatment, advising on everything from how to avoid water and makeup in the initial hours to the best practices for nourishing and maintaining your newly laminated brows. Tailored advice on extending the durability of your lamination, including recommended products and routines, ensures your brows remain flawless for as long as possible. Common Pitfalls and How to Avoid Them Even with careful planning, DIY treatments can encounter hiccups. This segment addresses the most common issues encountered during home brow lamination, such as uneven application, overprocessing, or irritation, and provides expert solutions. Learning how to anticipate and remedy these challenges will bolster your confidence, ensuring a smooth…

Unlock The Secrets To Luxuriant Eyelashes Your Ultimate Guide
Unlock the Secrets to Luxuriant Eyelashes: Your Ultimate Guide

Eyelashes serve as a natural defense mechanism for our eyes, trapping debris and dust, while simultaneously accentuating the beauty of our eyes and playing a pivotal role in facial aesthetics. Unfortunately, not everyone is naturally endowed with voluminous and lengthy lashes. This comprehensive guide delves into a variety of strategies and treatments aimed at augmenting eyelash growth, equipping you with the necessary insights to nurture full, vibrant eyelashes. The Science Behind Eyelash Growth Exploring the Eyelash Growth Cycle Grasping the life cycle of eyelashes is essential for understanding how various interventions can impact their growth. Eyelashes undergo three distinct phases: the anagen (growth), catagen (transition), and telogen (resting) stages, before shedding to make way for new growth. Determinants of Eyelash Growth Eyelash length and health are influenced by multiple factors, such as genetics, aging, hormonal shifts, and lifestyle choices. Recognizing these elements allows for a customized eyelash growth strategy. Natural Strategies for Eyelash Enhancement Vitamins and Supplements Key vitamins and minerals, including biotin, vitamin E, and omega-3 fatty acids, are crucial for hair and eyelash growth, promoting fuller and healthier lashes. The Benefits of Essential Oils Oils such as lavender, castor, and rosemary are celebrated for their hair growth-promoting properties. Applied judiciously, they can fortify and elongate lashes naturally. Optimal Eyelash Care Habits Adopting gentle makeup removal techniques and steering clear of harsh chemicals can safeguard your lashes and foster their natural growth. Over-the-Counter Eyelash Growth Enhancers Key Ingredients in Eyelash Serums Eyelash serums often contain peptides, biotin, and botanical extracts designed to stimulate lash growth. Familiarizing yourself with these components can aid in selecting the most effective serums. Selecting the Ideal Product Amidst a plethora of options, it’s pivotal to choose serums that are clinically proven to be safe and effective. Prescription Eyelash Growth Solutions The Lowdown on Latisse Latisse, a treatment approved by the FDA, is known to prolong the anagen phase of eyelashes, resulting in longer and denser lashes. Weighing the Pros and Cons of Prescriptions Although potent, these treatments may have side effects. It’s important to balance the advantages with potential drawbacks. DIY Eyelash Growth Formulas Crafting Homemade Eyelash Serums DIY eyelash serum recipes typically incorporate natural oils and vitamins, offering an economical approach to lash growth. DIY Safety Precautions Ensuring the safety of homemade concoctions is vital, especially given the sensitivity of the eye area. Eyelash Extensions and Artificial Lashes Advantages and Disadvantages While they provide immediate enhancement, extensions and false lashes can cause long-term damage if improperly applied. Safe Practices for Eyelash Extensions Opting for a skilled technician and adhering to proper aftercare can mitigate risks associated with eyelash extensions. Diet’s Impact on Eyelash Growth Essential Nutrients for Hair Growth A diet rich in proteins, vitamins, and minerals can bolster overall health and contribute to robust eyelash growth. Dietary Recommendations Incorporating nutrient-dense foods like salmon, nuts, and eggs can furnish the essential nutrients for thriving lashes. Eyelash Care and Upkeep Establishing a Daily Eyelash Routine A gentle, daily care regimen, including thorough cleansing and moisturizing, can promote lash health and longevity. Avoiding Eyelash Care Pitfalls Identifying…

The Secret To Detangling Color Treated Hair: Essential Tips And Techniques For Healthy, Tangle Free Tresses
The Secret to Detangling Color-Treated Hair: Essential Tips and Techniques for Healthy, Tangle-Free Tresses

Color-treated hair requires extra care and attention to maintain its vibrancy and overall health. One common challenge faced by individuals with colored hair is dealing with tangles, which can be frustrating and lead to hair breakage. Detangling color-treated hair requires a gentle and targeted approach to minimize damage and preserve the integrity of the hair strands. In this article, we will explore the secret to detangling color-treated hair, providing you with essential tips and techniques to keep your tresses healthy, vibrant, and tangle-free. Choose the Right Tools:Detangling color-treated hair starts with selecting the right tools. Opt for a wide-toothed comb or a brush specifically designed for detangling. These tools have wider spaces between the teeth, which helps to prevent excessive pulling or snagging that could lead to breakage. Avoid using fine-toothed combs or brushes with harsh bristles, as they can cause damage to the hair cuticles and disrupt the color-treated strands. Start with Pre-Treatment:Before detangling your hair, it’s beneficial to give it a pre-treatment to minimize tangles. Apply a small amount of a lightweight, leave-in conditioner or a detangling spray to damp hair. These products work to smoothen the hair cuticles, reducing friction and making it easier to comb through the strands. Gently distribute the product from mid-length to the ends of your hair, focusing on areas prone to tangles. Divide and Conquer:To effectively detangle color-treated hair, it’s essential to divide it into manageable sections. This technique allows you to focus on one section at a time, minimizing the stress and tension on the hair. Start by parting your hair into two sections using a center or side parting. Then, further divide each section into smaller subsections, depending on the thickness of your hair. By detangling smaller sections, you can prevent unnecessary pulling and breakage. Gentle Detangling Technique:When detangling color-treated hair, it’s crucial to adopt a gentle technique to avoid causing damage. Begin by starting at the ends of your hair and gradually work your way up towards the roots. Hold the hair gently with one hand, supporting it near the roots to prevent unnecessary strain on the scalp. Use slow, deliberate strokes with your wide-toothed comb or detangling brush, releasing any tangles as you go. Avoid yanking or forcefully pulling through knots, as this can lead to hair breakage and loss of color intensity. Utilize a Detangling Product:If you encounter stubborn tangles, it can be helpful to incorporate a detangling product into your routine. Look for a detangling spray or leave-in conditioner specifically formulated for color-treated hair. These products contain ingredients that provide slip, making it easier to glide through the hair without causing damage. Apply the detangling product directly to the tangled area and use your fingers or a wide-toothed comb to gently work through the knot, starting from the ends and gradually moving upwards. Protective Hairstyles:Implementing protective hairstyles can significantly reduce the risk of tangles for color-treated hair. Styles such as braids, buns, or twists can keep your hair secure and minimize friction caused by movement and contact with clothing. When opting for a protective style, ensure that it…

Caffeine In Skin Care: Exploring Its Potential Benefits And Mechanisms
Caffeine in Skin Care: Exploring its Potential Benefits and Mechanisms

In recent years, the use of caffeine in skincare products has gained considerable attention. Caffeine, a natural stimulant commonly found in coffee, tea, and other beverages, has been recognized for its potential benefits beyond providing a morning energy boost. This article delves into the topic of caffeine in skincare, examining its purported effects, the scientific basis behind its use, and its potential applications. We will explore how caffeine works on the skin, its claimed benefits, and discuss scientific research supporting its efficacy. Understanding the Science behind Caffeine: Caffeine belongs to a group of compounds known as methylxanthines. When applied topically, caffeine has the ability to penetrate the skin and interact with various cellular components. Its molecular structure allows it to target specific receptors, enzymes, and signaling pathways, leading to potential effects on the skin’s appearance and health. Benefits of Caffeine in Skincare Products: Scientific Studies and Evidence: Several scientific studies have investigated the effects of caffeine in skincare. For instance, a study published in the Journal of Investigative Dermatology found that caffeine applied topically can help protect against UV-induced skin damage and even potentially reduce the risk of skin cancer. Other studies have reported positive outcomes in terms of reducing cellulite, improving wound healing, and reducing the appearance of fine lines and wrinkles. Application and Considerations: Caffeine can be found in a variety of skincare products, including creams, serums, eye gels, and masks. When choosing caffeine-infused products, it is essential to consider factors such as the concentration of caffeine, additional active ingredients, and compatibility with your skin type. Patch testing is advisable, especially for those with sensitive or allergy-prone skin. Caffeine, when incorporated into skincare formulations, holds promise for various benefits, including anti-inflammatory effects, antioxidant protection, skin firming, and reduction of puffiness and dark circles. While scientific research supports many of these claims, it is important to note that individual results may vary. As with any skincare ingredient, understanding your skin’s specific needs and consulting with a dermatologist or skincare professional can help you make informed decisions about incorporating caffeine-based products into your skincare routine. Please note that while the information provided here is based on current knowledge and scientific findings, further research may uncover new insights and perspectives on the topic. Why Caffeine Is Added to Skin-Care Products? Caffeine is added to skin-care products for several reasons, as it offers potential benefits for the skin. Here are some of the main reasons why caffeine is incorporated into skin-care formulations: It’s important to note that while caffeine offers these potential benefits, individual results may vary, and the concentration and formulation of caffeine in skin-care products can impact its effectiveness. Additionally, caffeine may not be suitable for everyone, particularly those with caffeine sensitivity or specific skin conditions. Patch testing and consulting with a dermatologist or skincare professional are recommended when incorporating caffeine-based products into your skincare routine. What are the potential benefits of caffeine skin-care products? Caffeine skin-care products offer several potential benefits for the skin. Here are some of the main advantages: It’s important to note that the effectiveness of caffeine skin-care…

Expert Tips For Hassle Free Makeup Removal And Skin Brightening
Expert Tips for Hassle-Free Makeup Removal and Skin Brightening

Removing makeup is an essential step in any skincare routine, crucial for maintaining healthy, clear skin. Proper makeup removal prevents clogged pores, breakouts, and skin irritation, ensuring your skin can breathe and rejuvenate overnight. This guide provides a detailed, step-by-step approach to effectively remove makeup, highlighting best practices, recommended products, and aftercare tips for optimal skin health. Understanding the Importance of Makeup Removal The journey to flawless skin begins with understanding why thorough makeup removal is non-negotiable. This section delves into the adverse effects of sleeping with makeup on, including accelerated aging and increased susceptibility to environmental damage. Learn about the significance of removing makeup to maintain the integrity of your skin barrier and prevent common skin concerns. Step 1: Choosing the Right Makeup Remover The first step in your makeup removal routine is selecting a product that suits your skin type and the kind of makeup you use. From micellar water and cleansing oils to makeup removal wipes and balms, this part explores the various options available, offering guidance on choosing the most effective and gentle formula for your needs. Step 2: Removing Eye Makeup Gently Eye makeup, especially waterproof products, requires special attention due to the delicate nature of the skin around the eyes. This section provides tips for safely and gently removing mascara, eyeliner, and eyeshadow, reducing the risk of irritation and ensuring no residue is left behind. Step 3: Cleansing Your Face Thoroughly After addressing the eye area, the next step focuses on removing foundation, concealer, and other face makeup. Discover techniques for using your chosen cleanser to dissolve and lift away makeup, dirt, and oil, ensuring a deep clean that leaves your skin fresh and clear. Tips for double cleansing are also included for those wearing heavy or long-wear makeup. Step 4: Toning and Moisturizing Post-cleansing care is crucial for restoring your skin’s natural balance. This section emphasizes the importance of using a gentle toner to remove any lingering traces of makeup and balance the skin’s pH, followed by a hydrating moisturizer to nourish and protect the skin barrier. Special Considerations for Sensitive Skin Individuals with sensitive skin may require special considerations during the makeup removal process. This part provides recommendations for hypoallergenic, fragrance-free products and techniques that minimize irritation, ensuring a soothing and effective makeup removal experience for all skin types. The Role of Exfoliation Incorporating exfoliation into your skincare routine can enhance the effectiveness of makeup removal and improve overall skin health. Learn about the benefits of exfoliation for removing dead skin cells and promoting cell renewal, along with advice on how to exfoliate safely without over-stripping the skin. Aftercare: Nurturing Your Skin Post-Makeup After makeup removal, taking additional steps to care for your skin can make a significant difference in its appearance and health. This section covers aftercare practices such as applying targeted treatments, serums, and overnight masks to address specific skin concerns and support skin recovery and rejuvenation. Common Mistakes to Avoid Even with the best intentions, common mistakes during the makeup removal process can compromise skin health. This segment highlights pitfalls to…