Master the Art of Bronzing: Pro Tips for a Flawless Glow

Mastering the art of bronzing can elevate your beauty regimen by infusing your complexion with warmth, depth, and a vibrant, healthy radiance. Unlike the sculpting effects of contouring or the luminosity added by highlighting, bronzing recreates the natural warmth of sunlight on the skin, ensuring a look that’s both natural and glowing. This comprehensive guide will equip you with the knowledge to use your bronzer brush with the finesse of an expert artist.
Master The Art Of Bronzing Pro Tips For Aflawless Glow


Choosing Your Ideal Bronzer

Embarking on the journey to find the quintessential bronzer involves navigating through the varieties of powder, cream, and liquid forms. Each type offers distinct advantages, suited to different skin types and personal preferences. Powder bronzers excel for those with oily skin and facilitate straightforward application, cream bronzers provide a moist finish ideal for dry skin, and liquid bronzers deliver an unparalleled natural effect suitable for every skin type. The cornerstone of a flawless selection is picking a hue one or two shades deeper than your skin, ensuring a blend that’s both seamless and devoid of an unnatural, muddy, or orange cast.

Essential Application Tools

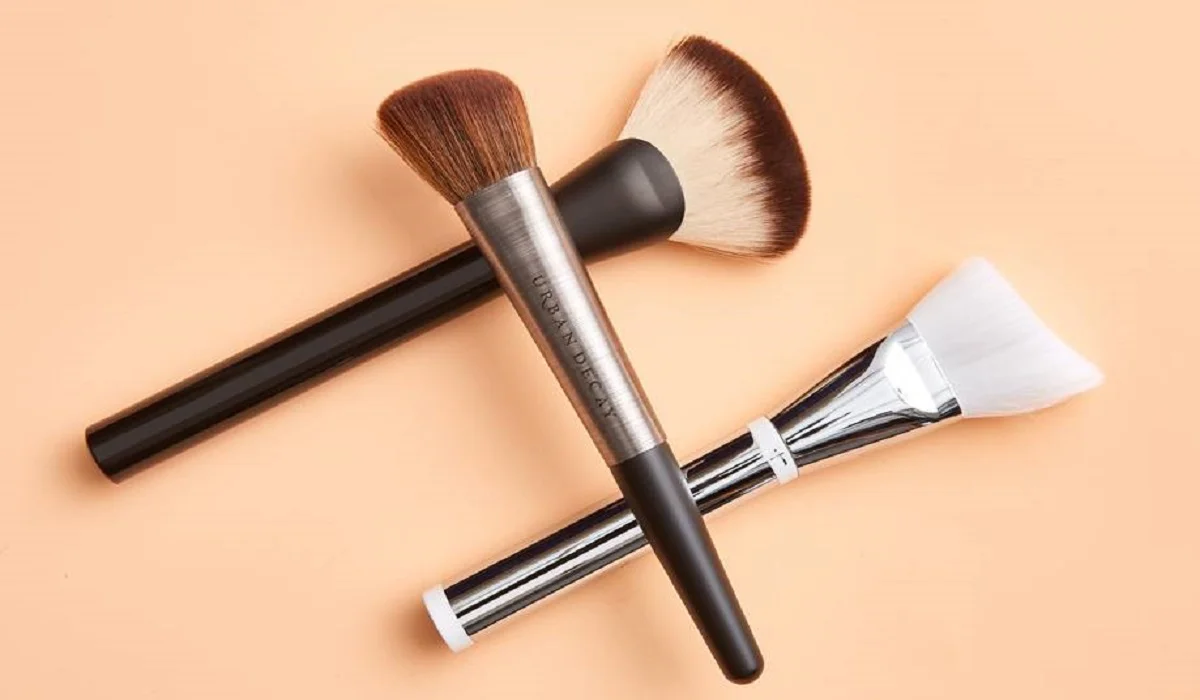
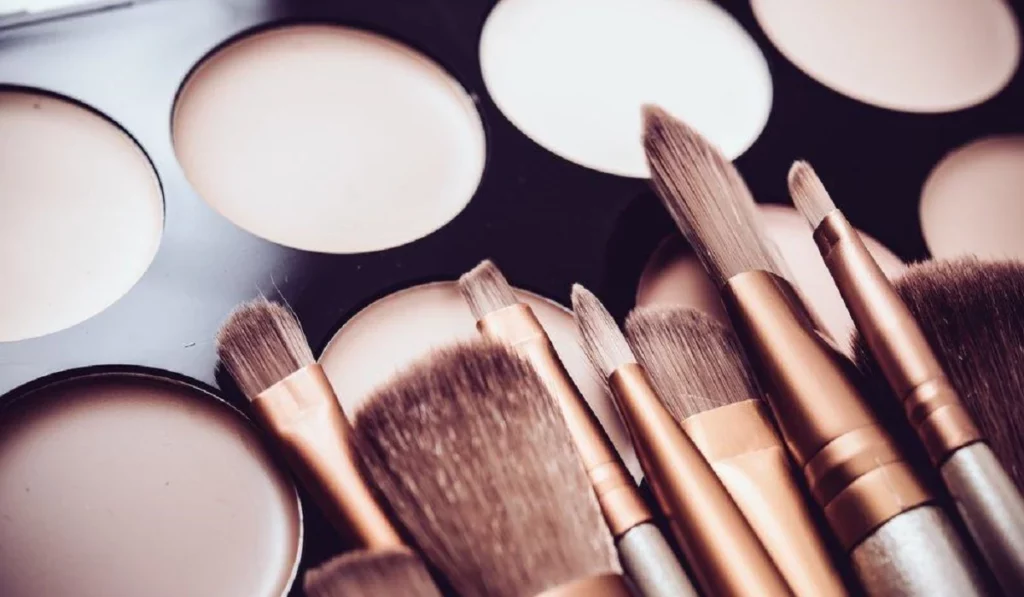
The transformative power of bronzer is not solely in the product but also in the technique of application. Essential for achieving a perfect finish, the right tools are indispensable. A plush, angled brush is the best match for powder bronzers, offering a soft, widespread application, while a stippling brush is most effective for creams and liquids, providing the blendability and precision needed. Maintaining these tools through regular cleansing is vital to prevent buildup and guarantee a smooth application every time.

Skin Preparation for Bronzer

The foundation of a stellar bronzer application lies in the initial skin preparation. A regimen that includes a hydrating moisturizer and a smoothing primer sets up the perfect canvas, enhancing both the bronzer’s appearance and its durability. A foundation that mirrors your skin tone acts as a seamless base, facilitating the bronzer’s blendability and ensuring an absence of streaks or uneven areas.

Fundamental Application Methods

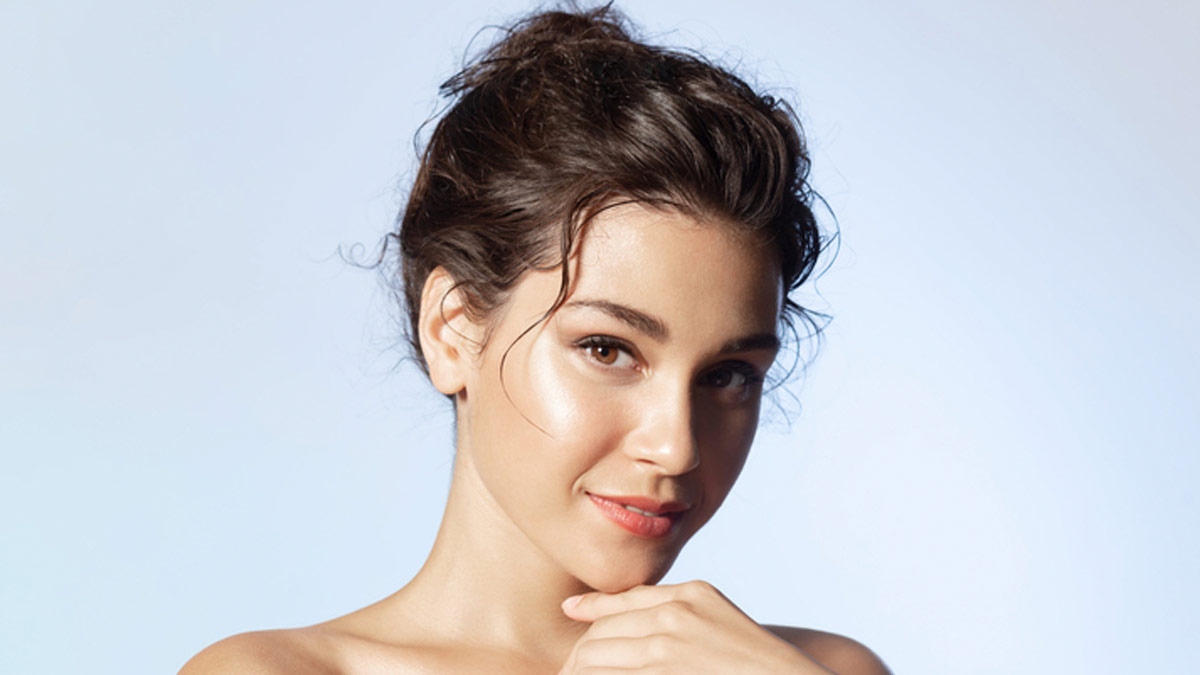
The essence of bronzing is to mimic a genuine sun-kissed effect, as though returning from a seaside getaway. To achieve this, apply the bronzer to areas typically kissed by the sun: your forehead, cheekbones, and jawline, employing a light touch and building intensity gradually to avoid stark lines or patchiness. The mantra “less is more” holds true in the realm of bronzing.

Elevated Bronzing Strategies

For those aspiring to refine their bronzing skills, utilizing bronzer for subtle contouring and enhancing the natural radiance is a strategy worth exploring. Applying the bronzer in a “3” shape on your face’s sides, blending from the forehead down under the cheekbones and across the jawline, not only adds warmth but also softly contours, imparting definition in a manner far more subdued than traditional contour products.

Avoidable Bronzing Faux Pas

Over-application ranks high among common bronzing errors, leading to an unnatural appearance. It’s crucial to shake off excess product before application and use a restrained hand. Equally, choosing an incorrect shade can create an undesired orange or muddy look. Opting for a bronzer with a neutral undertone that complements your skin color, steering clear of excessively red or orange options, is advisable.

Bronzer for Varied Skin Shades

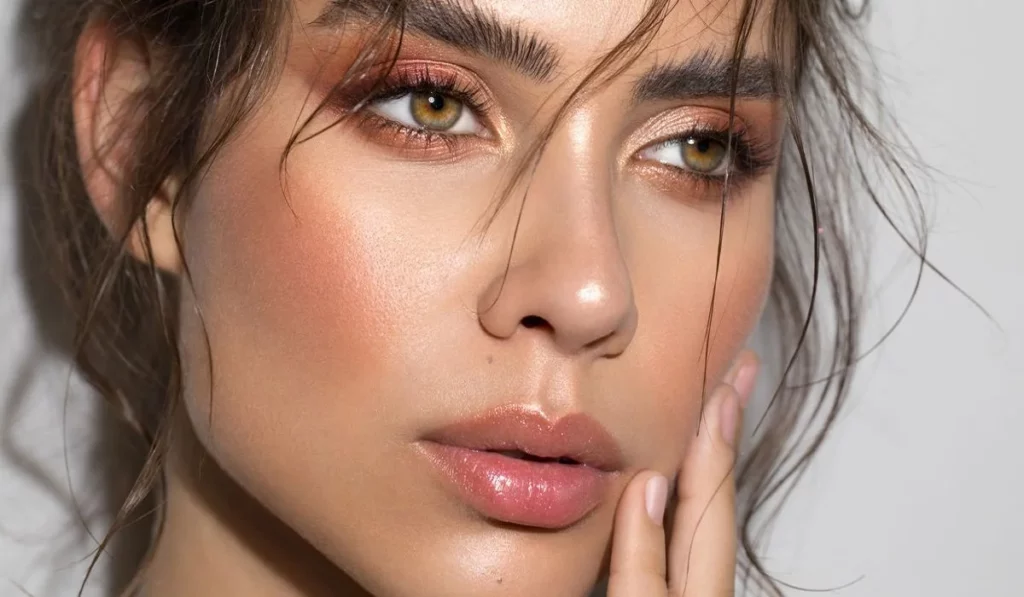
Bronzing should be customized to suit individual skin tones. Light, peach-toned bronzers are recommended for fair skin, while medium skin tones can embrace golden or rose gold variations, and deep, warm bronzers with red or golden undertones are perfect for dark skin. Experimentation is key to discovering your ideal shade, with the option to mix colors for a tailored glow.

Adapting Bronzer Use Across Seasons

With the changing seasons, your bronzing approach should also evolve. In summer, enhance your tan with a shimmering bronzer for a radiant, golden sheen, applying it sparingly. Winter, on the other hand, demands a toned-down application focused on adding warmth and counteracting the pale, faded look typical of the colder months. Seasonal adjustments in your bronzer’s shade and application method ensure a consistently natural and fitting radiance all year round.


Bronzer Techniques for Different Facial Structures

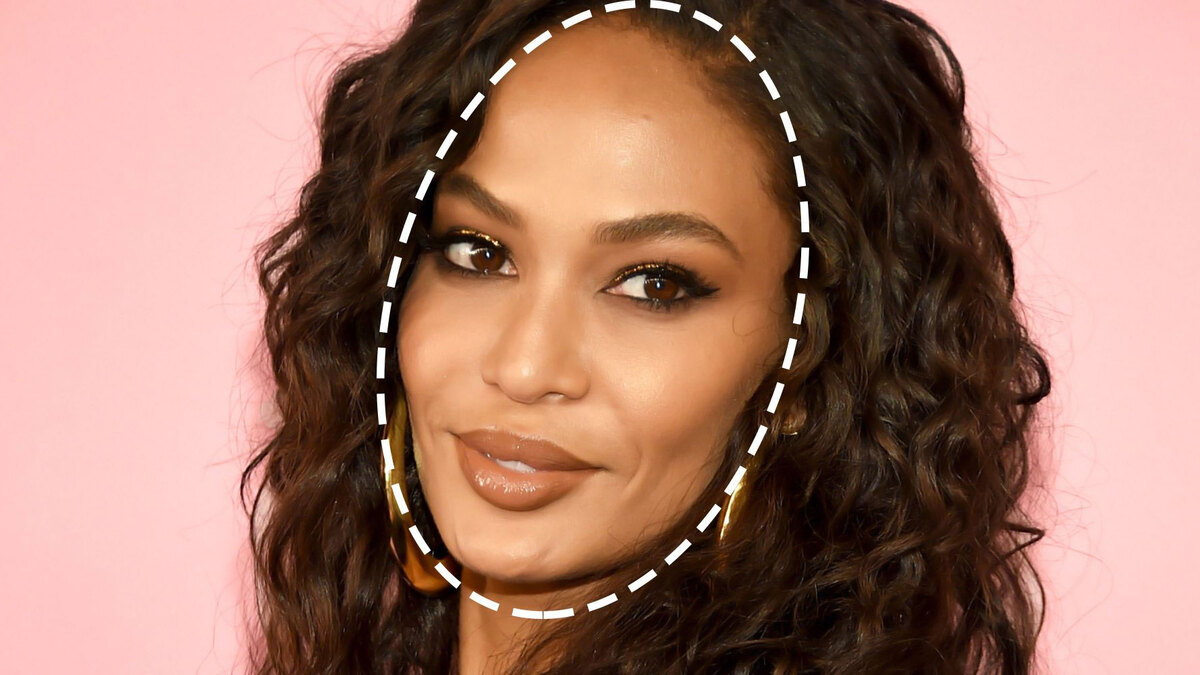
Recognizing your facial shape can significantly improve your bronzing technique. Round faces benefit from bronzer along the cheekbones and jawline to define, while square faces should soften their features by applying bronzer on the face’s sides and jawline. For heart-shaped faces, bronzer should be applied on the lower cheekbones and along the hairline to harmonize facial proportions.
Master The Art Of Bronzing Pro Tips For A Flawless Glow


Integrating Bronzer into Your Makeup Routine

For a unified makeup appearance, merge bronzer with your blush and highlighter seamlessly. Begin with blush on the cheeks’ apples, then sweep bronzer along the cheekbones, ensuring a smooth transition where they meet. Apply highlighter last, on the face’s high points, to craft a radiant, dimensional effect. A final mist sets the makeup, blending the products flawlessly for an impeccable finish.

Bronzer Beyond the Face: Body Contouring

Expand the use of bronzer beyond your face to contour the body. Enhance the collarbones, shoulders, and neck sides for a slimming effect. For the legs and arms, employ bronzer to accentuate muscles and create a more toned appearance, ensuring thorough blending for a believable look.

Ensuring Bronzer Endurance

For bronzer that lasts all day, finalize the application with a setting spray. Keep a compact bronzer and brush handy for quick touch-ups. Layering bronzer over a cream base can also amplify its staying power, averting fading or blotchiness as the day progresses.

Troubleshooting Bronzer Complications

Should you encounter blotchiness or uneven application, a clean brush or sponge can be used to blend the bronzer more evenly. If the bronzer appears overly dark or intense, a light dusting of translucent powder can help soften and lighten the color. Adjusting your bronzer application to suit different lighting conditions, such as natural daylight versus artificial light, ensures a consistently natural appearance in any environment.


Natural Bronzer Formulations

For those inclined towards a more natural makeup approach, DIY bronzer recipes present a customizable, chemical-free option. Ingredients like cocoa powder, cinnamon, and cornstarch can be mixed to create a bronzer perfectly matched to your skin tone, offering an enjoyable and environmentally friendly alternative.

Sustainable and Organic Bronzer Choices

The current beauty landscape sees a rising demand for sustainable and organic makeup solutions. Numerous brands now provide eco-friendly bronzers, formulated with natural ingredients, devoid of harmful chemicals, and presented in recyclable packaging. Choosing these products benefits not only your skin but also promotes environmental stewardship.

Achieving Bronzing Mastery

The path to bronzing mastery is one of exploration and practice. By comprehending your skin type, selecting the appropriate tools and techniques, and sidestepping common mistakes, you can secure a flawless, sun-kissed complexion that amplifies your natural allure. Remember, makeup serves as an outlet for personal expression; fearlessly experiment to discover what best suits you.

What is the optimal method for applying bronzer to attain a natural look?
For a naturally radiant appearance, sparingly apply bronzer to areas typically touched by sunlight, such as the forehead, cheekbones, and jawline, utilizing a fluffy brush for a soft, diffused finish, and gradually building up the color to prevent over-application.

How do I identify the most suitable bronzer shade for my skin tone?
Choose a bronzer one or two shades darker than your natural skin tone that harmonizes with your undertone. Those with fair skin should opt for light, peachy bronzers; individuals with medium skin may prefer golden or rose gold hues, and those with dark skin should select deeper, warm bronzers with red or golden undertones.

Is bronzer applicable for contouring purposes?
Indeed, bronzer can be employed for a gentle, natural contour. Apply it beneath your cheekbones, along your jawline, and at your forehead’s edges, opting for a matte bronzer that closely matches your skin tone for the most natural outcome.

What strategies can enhance the durability of my bronzer?
To guarantee enduring bronzer wear, commence with a primer, apply the bronzer atop a foundation or cream base, and set your makeup with a setting spray. For midday touch-ups, bring along a compact bronzer and brush.

What are some environmentally friendly bronzer options?
Seek out bronzers from brands that utilize natural, organic ingredients and sustainable packaging. A growing number of beauty brands now offer products that are free from harmful chemicals, cruelty-free, and environmentally conscious.

Can bronzer be applied to the body?
Absolutely, bronzer can be applied to enhance the collarbones, shoulders, and even the legs for a cohesive, sun-kissed effect. Employ a large, fluffy brush for uniform application and ensure thorough blending.

How can I rectify bronzer that appears too dark or muddy?
If your bronzer seems overly dark or muddy, use a clean, fluffy brush to blend it out. Lightly applying translucent powder over the area can also help to soften and lighten the bronzer’s appearance.

The Astonishing Reality Could Lip Balm Be Deteriorating Your Chapped Lips 2
The Astonishing Reality: Could Lip Balm Be Deteriorating Your Chapped Lips?

Turning to lip balm for immediate solace from chapped lips is a common practice, yet there’s growing curiosity about whether these comforting tubes may actually be perpetuating a cycle of lip dryness and dependence. This article investigates the composition of lip balms, their influence on lip health, and strategies for judiciously choosing and utilizing lip care products. Deciphering Lip Balm and Its ConstituentsActing as a moisture-locking barrier, lip balm shields lips from harsh external conditions like cold climates and dry environments. Key components typically encompass occlusives such as petroleum jelly, humectants including hyaluronic acid, and emollients like shea butter. Although these constituents are mainly beneficial, some lip balm formulas may incorporate potential irritants, for instance, fragrances or menthol, aggravating sensitivity and intensifying dryness. The Phenomenon of Lip Balm DependenceThe notion of becoming reliant on lip balm is not unfounded. Such dependence arises when lips start relying on artificial moisture, diminishing their innate hydrating capabilities. Indications of excessive use involve constant reapplication needs and experiencing a sense of tightness or aridity sans balm. Evaluating Ingredients’ Effects on Lip WellnessIngredients vary significantly in their impact on lip health. While substances like lanolin and beeswax offer profound moisturization and protection, certain essential oils and synthetic additives might irritate the lips, further exacerbating chapped conditions. Contrasting Balms, Salves, and OintmentsComprehending the distinctions among these products aids in making informed choices. Balms provide a balanced mix of occlusion and hydration, salves focus on healing with their denser consistencies, and ointments are ideal for extreme dryness, offering substantial protective layers. Hydration’s Role in Lip CareBoth internal and external hydration are pivotal for lip health. Adequate water intake fosters natural moisture, whereas applying products enriched with aloe vera and glycerin enhances the lips’ moisture retention. Debunking Lip Balm Myths and TruthsMisconceptions abound, such as the belief in lip balms causing addictive dryness or the superiority of all-natural ingredients. The essence lies in identifying products that are meticulously formulated to meet individual lip requirements. Dermatologists’ Insights on Lip Balm ApplicationExperts advocate for balms devoid of allergenic or irritating substances, recommending those with straightforward, hydrating ingredients. The preference between natural versus synthetic components often comes down to personal sensitivity and skin reactivity. Optimizing Personal Lip Care PracticesAn effective daily lip care regimen should encompass gentle exfoliation, adequate hydration, and protection against environmental elements. Tailoring care according to weather conditions, like applying SPF-infused balms in sunny settings, can mitigate damage. Assessing the Dilemma: Does Lip Balm Aggravate Chapped Lips?The response is nuanced. For the majority, a carefully selected lip balm delivers vital moisture and protection. Yet, for individuals with sensitive skin or allergies to certain substances, some balms might indeed worsen dryness. Tailoring Lip Care to Individual NeedsIdentifying personal lip types and issues is crucial for customized care. Those with a predisposition to dryness might find solace in more occlusive formulas, whereas individuals with sensitive lips might seek hypoallergenic and unscented options. The Mental Aspect of Lip Balm UseBeyond physical dependency, the habitual use of lip balm can encompass an emotional dimension, with some developing a psychological attachment to their lip care…

Effortlessly Chic: Mastering The Perfect Ponytail For Any Occasion
Effortlessly Chic: Mastering the Perfect Ponytail for Any Occasion

The ponytail, a timeless and versatile hairstyle, has graced the heads of countless individuals throughout history. From casual outings to formal events, the simplicity and elegance of a well-executed ponytail can enhance your overall appearance and make you feel confident and put-together. In this comprehensive guide, we will delve into the art of mastering the perfect ponytail, exploring various techniques, tips, and tricks to suit different hair types and occasions. Additionally, I’ll provide personal comments and insights to help you achieve a stunning look effortlessly. Maintaining the health of your hair is crucial for any hairstyle. Regular trims, proper conditioning, and minimal heat styling will contribute to a flawless ponytail. Experimenting with different placement options allows you to tailor the ponytail to your unique facial features and personal style. The choice of hair tie matters – opt for soft fabric or elastic bands to avoid hair damage and breakage. Embracing volume can add a touch of drama and glamour to your ponytail, making it perfect for special occasions. The wrap-around ponytail is an excellent choice for formal events or when you want to add a sophisticated touch to your look. The messy-chic ponytail is perfect for casual outings and can effortlessly transition into an evening look with the right outfit and makeup. In the world of hairstyling, the clip-in ponytail has emerged as a game-changer for those seeking a quick and effortless updo. Whether you’re running late, have limited time for styling, or simply want to add volume and length to your natural hair, the clip-in ponytail is your ultimate go-to solution. In this article, we will explore the benefits and versatility of clip-in ponytails, offering insights into their application, maintenance, and styling options to help you achieve a flawless updo in minutes. Instant Length and Volume:One of the most significant advantages of the clip-in ponytail is its ability to add instant length and volume to your natural hair. With a variety of lengths and thicknesses available, you can choose a clip-in ponytail that perfectly matches your hair, seamlessly blending it for a natural look. Effortless Application:Applying a clip-in ponytail is a breeze, even for those with minimal hairstyling experience. Simply gather your natural hair into a ponytail and secure it with an elastic band. Then, clip the extension ponytail onto your hair by positioning it over the base of your natural ponytail. Secure the clips in place, and you’re ready to go! Time-Saving Styling:For busy individuals or last-minute occasions, the clip-in ponytail is a lifesaver. Instead of spending time on intricate updos, you can effortlessly create a polished look in seconds. Whether you’re heading to work, a party, or a date night, the clip-in ponytail ensures you look fabulous with minimal effort. Various Styling Options:The clip-in ponytail is incredibly versatile, allowing you to experiment with different styles and textures. From sleek and straight to curly or wavy, you can easily transform your clip-in ponytail to suit any event or mood. Additionally, you can incorporate braids or twists into your natural hair before attaching the clip-in ponytail for added flair. Comfort and…

Pump Up The Volume In Your Hair: Here's How To Achieve Bouncy And Voluminous Locks
Pump Up the Volume in Your Hair: Here’s How to Achieve Bouncy and Voluminous Locks

Having luscious, voluminous hair can transform your entire look, boosting your confidence and leaving you feeling fabulous. However, not everyone is naturally blessed with thick, voluminous hair. If you find yourself struggling to achieve the desired volume, don’t worry—there are various techniques and tricks you can employ to pump up the volume in your hair and create stunning, bouncy locks. In this guide, we’ll explore a range of methods, from styling techniques to product recommendations, that can help you achieve the voluminous hair of your dreams. Section 1: Preparing Your Hair for Volume Before diving into styling techniques, it’s essential to prepare your hair properly for volume-enhancing methods. Here are a few steps you can take to set the foundation for voluminous hair: Choosing the Right Haircut: Opt for layered cuts or styles that add texture and movement to your hair. Layers can create the illusion of fuller hair by removing weight and adding dimension. Proper Shampooing and Conditioning: Use volumizing shampoos and conditioners specifically designed to add fullness to your hair. Avoid heavy, oil-based products that can weigh down your strands. Blow-Drying Techniques: Blow-drying your hair in an upward motion using a round brush can provide a lift at the roots and create a voluminous base for styling. Section 2: Styling Techniques for Volume Now that your hair is prepped, it’s time to explore different styling techniques that can help you achieve volume: Teasing or Backcombing: Using a fine-toothed comb, gently tease the roots of your hair to create instant lift and volume. Remember to be gentle to avoid damaging your hair. Velcro Rollers: Before blow-drying, set sections of your hair in velcro rollers. This technique allows your hair to cool and set in a voluminous shape, creating long-lasting volume. Root-Lifting Products: Applying root-lifting sprays or mousses directly to your roots can add height and volume. Massage the product into your roots for extra lift. Heat Styling Tools: Curling irons or straighteners can be used strategically to add volume. By curling sections of your hair away from your face or creating loose waves, you can achieve a fuller appearance. Dry Shampoo: Not only does dry shampoo refresh your hair between washes, but it can also add texture and volume. Spritz dry shampoo onto your roots and massage it in to absorb excess oil and create lift. Section 3: Product Recommendations for Volume In addition to styling techniques, certain hair products can work wonders in creating volume. Here are a few recommendations: Volumizing Shampoos and Conditioners: Look for products that are specifically formulated to add volume and thickness to your hair. These products usually contain ingredients that plump up the hair shaft and create fullness. Texturizing Sprays: These sprays are designed to give your hair grip and create a tousled, voluminous look. Spray onto your roots and mid-lengths to add texture and body. Hairsprays: Opt for lightweight hairsprays that provide a flexible hold. They will help maintain your volume throughout the day without weighing down your hair. Mousse: Apply a golf ball-sized amount of mousse to your roots before blow-drying. It adds…

Mastering The Art Of Hair Straightening Tips And Tricks 22
Mastering the Art of Hair Straightening – Tips and Tricks

Hair straighteners (also referred to as flat irons) are indispensable tools in hairstyling. No matter if your natural curls, waves or frizziness is curlier, wavier or frizzier than others; using one correctly requires some skill and knowledge – we offer this comprehensive guide on using one safely for salon-worthy results – whether that be beginner or veteran level experience! This comprehensive guide offers expert tips and insights so that anyone using one will discover its full potential and unlock its true power! Chapter 1 : Selecting an Appropriate Hair Straightener Before engaging in hair straightening techniques, selecting an effective straightener that meets both your hair type and styling requirements is of vital importance. In Chapter 1, we will explore different kinds of straighteners available including ceramic, tourmaline and titanium models as you learn about plate size considerations, temperature settings and features to make an informed decision that suits your hair. Chapter 2: Styling Your Hair Proper preparation is key to attaining salon-quality straight hair. Chapter 2 covers how essential it is to start off with clean, dry locks before applying a heat protectant spray for added heat protection and detangling and sectioning your locks for even straightening. Chapter 3: Establish the Appropriate Temperature Setting the Right Temperature Chapter 3 explores the significance of setting the appropriate temperature on a hair straightener, explaining how you can tailor its heat output according to your hair type (lower temperatures for fine or damaged strands, higher for thick or coarse ones) as well as exploring advantages associated with using an adjustable straightener with digital temperature controls. Chapter 4: Proper Straightening Technique Chapter 4 delves deep into straightening technique. Here you’ll learn to hold and glide a straightener correctly along your hair’s shaft to maintain an even pace – without creating creases or burns! Additionally, different straightening methods such as the chase method or flick method will be discussed to enable different styles. Chapter 5 : Sectioning for Success Sub-dividing hair sections is key to creating perfectly straight locks. Chapter 5 offers step-by-step instructions on how to divide up your locks into manageable sections and straighten each section systematically for superior control and results. Working with smaller sections ensures superior control and results! Chapter 6: Finishing Touches Chapter 6 explores finishing touches and styling options to achieve an ideal result, so as to achieve the ideal end product. Here, you’ll learn how to add volume, curl your straightened locks or add shine using straighteners; hair serums, shine sprays or hair spritz can further amplify your style! Chapter 7: Maintenance and Care Plan Proper hair straightener care and maintenance are crucial in order to extend its longevity and effectiveness. In Chapter 7, we offer tips for cleaning and storing your straightener, as well as troubleshooting issues like sticky plates or uneven heating. Chapter 8 : Preserving Your Hair from Harm Maintaining the health of your hair when straightening is of utmost importance, which is why Chapter 8 explores ways to minimize heat damage using products and techniques available, while we share tips for scheduling heat-free days in your…

Makeup Styles That Reveal Your Unique Beauty, According To Your Zodiac Sign
Makeup Styles That Reveal Your Unique Beauty, According to Your Zodiac Sign

As far as beauty goes, your zodiac sign can reveal much about both you and your makeup preferences. Each zodiacal sign possesses distinct traits which tend to influence what kinds of styles people gravitate towards when applying makeup based on zodiac signs. We will explore makeup tips tailored specifically for every zodiac sign here as we gain more insight into this realm of expression and beauty through makeup artist inspiration for crafting signature looks using zodiac sign makeup styles! Let’s dive deep into these fascinating universe of makeup styles inspired by these cosmic bodies! Aries (March 21 – April 19): Make A Bold Statement With Your Words! Aries individuals, representing the zodiac’s first sign, are famous for their enthusiasm, courage and limitless energy. With little patience for waiting around or being left behind when making plans come into fruition, Aries individuals excel at creating powerful presence with minimum effort – something best symbolized by bold red lipstick which always seem to find their way into their handbags! A true reflection of Aries energy! Red, symbolising fire, is an ideal color choice for Aries. Makeup that stays put all day, such as long-wear smudge-proof foundations or waterproof mascara is suitable to their active lifestyles. Taurus (April 20 – May 20): Bring Timeless Elegance Into your Lifestyle Taureans, led by Venus – the goddess of beauty and affection – find immense satisfaction from sensuous scents, exquisite flavors, quality textures, aesthetic visuals, and soothing sounds that bring them pleasure. Taureans value timeless elegance over passing fads when it comes to cosmetics – hence they tend to seek harmonious relationships as much as romantic partners. Taureans who seek to emphasize both their femininity and eyes with eye makeup will love YSL Lash Clash Mascara. Though some may view Taureans’ unwavering energy as stubbornness, don’t try forcing fashion on them; rather they set their own rules which they are adept at abiding by. Thin and weightless textures that feel barely there provide all-day comfort on lips for these energetic individuals. Gemini (May 21-June 20): Find Ways To Express Your Vivid Energy Ruled by Mercury, our planet’s fastest planet, Geminis are among the brightest members of mutable zodiac signs. Their strong communication skills, sharp intellect, and quick adaptability set them apart. Their keen sense for new experiences enables them to quickly explore makeup trends which reflect ever-evolving perspectives into their style; Geminis can express themselves creatively when testing different products! Cancer (June 21-July 22): To Highlight Natural Tones Cancerians, under the sign of Cancerius the Moon’s influence, are noted for their strong intuition as well as their homely and faithful qualities. Cancer people prefer soft feminine makeup looks inspired by water’s element. Through memories they easily incorporate nostalgic styles into their look. Leo (July 23 – August 22): Expand Your Radiance As Leos are associated with the Sun, they tend to attract notice in social gatherings due to their leadership, self-confidence, and warmth – qualities which stand them out immediately upon entering a room. Leos enjoy grandeur and shimmer; when starting makeup routines they should opt for primer…

The Importance Of Washing Your Hair Brush: Maintaining Hair Health And Hygiene
The Importance of Washing Your Hair Brush: Maintaining Hair Health and Hygiene

A hair brush is an essential tool for maintaining the health and appearance of your hair. However, many people overlook the importance of cleaning their hair brushes regularly. In this article, we will explore the reasons why you should make washing your hair brush a regular part of your hair care routine. From preventing product buildup and dandruff to promoting scalp health and overall hygiene, keeping your hair brush clean offers numerous benefits. Read on to discover how a simple task like washing your hair brush can make a significant difference in the health and vitality of your hair. Prevents Product BuildupOver time, hair products such as styling gels, serums, and hairsprays accumulate on your hair brush bristles. When you use a dirty brush, these residues transfer back onto your hair, leading to product buildup. This buildup can weigh down your hair, making it appear dull and lifeless. By regularly washing your hair brush, you remove these residues, ensuring that your hair receives the full benefits of the styling products you use. To clean your hair brush, start by removing any loose hair from the bristles. Then, create a solution of warm water and mild shampoo or liquid soap. Gently scrub the brush with the solution, paying special attention to the bristle area. Rinse thoroughly and allow it to air dry before using it again. Promotes Scalp HealthA clean hair brush contributes to a healthy scalp. When you brush your hair, the bristles stimulate blood circulation in the scalp, promoting the delivery of essential nutrients to the hair follicles. However, if your brush is dirty, it can transfer bacteria, oil, and dead skin cells back onto your scalp, leading to irritation, itchiness, and even infections.Regularly cleaning your hair brush helps maintain a hygienic environment for your scalp. It removes bacteria, oil, and debris that may have accumulated on the brush, reducing the risk of scalp issues. Additionally, a clean brush ensures that your hair remains free from external pollutants, keeping it healthier and more vibrant. Prevents DandruffDandruff is a common scalp condition characterized by flaky, itchy skin. While various factors contribute to dandruff, a dirty hair brush can worsen the problem. Dead skin cells, oils, and bacteria trapped in the bristles can transfer back onto your scalp, exacerbating dandruff symptoms.By regularly washing your hair brush, you eliminate these potential triggers. A clean brush minimizes the chances of dandruff-causing substances making contact with your scalp, helping to reduce the occurrence and severity of dandruff. Extends the Lifespan of Your Hair BrushTaking care of your hair brush by cleaning it regularly can extend its lifespan. Product buildup, hair residue, and oils not only affect your hair but also accumulate on the bristles, making them less effective over time. Regular cleaning ensures that the bristles remain clean, strong, and properly aligned, allowing the brush to work optimally. Maintains Overall HygieneMaintaining good hygiene is essential for overall health and well-being. Your hair brush is exposed to a variety of external elements such as dust, dirt, and environmental pollutants, which can settle on the bristles. Additionally, if…

Tips, Tricks And Secrets To Filling Your Nails With Style Kopya
Elevate Your Nail Game: Ultimate Guide to Filing with Flair

The secret to eye-catching manicures extends far beyond the color of your polish. The foundation of stunning nails lies in the art of filing. This skill not only shapes the nails but also sets the stage for nail health and beauty. From the essential selection of the right tools to mastering advanced techniques for unique styles, this guide dives deep into the world of nail filing. Prepare to discover professional insights that will transform your nail care routine, ensuring your nails are not just styled but styled with flair and finesse. The Basics of Nail Filing Understanding the fundamentals of nail filing is akin to an artist selecting the perfect brush. The choice of nail file and the technique applied can significantly influence the health and appearance of your nails. Shaping Your Nails with Precision Each nail shape can dramatically alter the look of your hands and is an expression of personal style. This section will guide you through creating and maintaining popular and unique nail shapes. The Secret to a Smooth Finish A smooth nail surface is crucial for a flawless manicure. Discover how to achieve a mirror-like finish on your nails that enhances polish adherence and shine. Creative Filing Techniques for Unique Styles Stand out from the crowd by incorporating creative filing techniques into your nail care routine. This section will inspire you with ideas for personalizing your nail art. Maintaining Healthy Nails While Filing Preserving the health of your nails during the filing process is paramount. Discover how to file correctly without compromising nail strength and integrity. The Role of Filing in Nail Extensions Nail extensions require precise filing to blend seamlessly with natural nails and maintain a realistic appearance. Learn the secrets to perfecting this technique. Trending Nail Styles and How to File for Them Stay ahead of nail fashion trends by mastering the filing techniques that form the basis of the latest styles. DIY Nail Filing Kits: What to Look For Assembling a DIY nail filing kit is essential for any nail enthusiast. Learn what to include for a comprehensive set that meets all your nail styling needs. Professional Filing Techniques Revealed Gain insider knowledge from nail industry professionals. These advanced techniques can elevate your filing game and introduce you to new styles and finishes. Filing your nails is a skill that blends art and science, requiring patience, precision, and the right tools. By adopting the techniques and secrets shared in this guide, you’ll not only achieve the desired shape and finish but also maintain the health and strength of your nails. Whether you’re preparing for a simple polish, an elaborate nail art project, or maintaining extensions, these insights will ensure your nails are always filed with flair.

Mastering The Inner Corner Eyeliner Trend: A Step By Step Guide
Mastering the Inner Corner Eyeliner Trend: A Step-by-Step Guide

The inner corner eyeliner trend has taken the beauty world by storm, adding a touch of brightness and glamour to any eye look. This trendy technique involves applying eyeliner to the inner corners of the eyes to create a wide-eyed and radiant appearance. Whether you’re a makeup enthusiast or a beginner, mastering the inner corner eyeliner is simple and can elevate your eye makeup game instantly. In this comprehensive guide, we will walk you through the three easy steps to pull off the inner corner eyeliner trend flawlessly. Step 1: Gather the Right Tools and Products Before you start applying the inner corner eyeliner, ensure you have the right tools and products on hand: A fine-tipped eyeliner brush or a precision eyeliner pencil: Choose a brush or pencil with a fine tip to create precise lines in the inner corners of your eyes. Gel eyeliner or liquid eyeliner: These formulas work best for achieving clean and defined lines in the inner corners. Eyeshadow primer or concealer: Prepping your eyelids with a primer or concealer will ensure the eyeliner stays in place and enhances its color intensity. Setting powder or eyeshadow: A setting powder or eyeshadow close to your skin tone will set the primer or concealer and prevent creasing. Optional: Shimmery or metallic eyeshadow: If you want to add a pop of sparkle to your inner corner, opt for a shimmery or metallic eyeshadow in a complementary shade. Step 2: Prep and Prime the Inner Corners Prepping your inner corners is essential to ensure a smooth application and enhance the longevity of the eyeliner. Cleanse your face and eyes: Start with a clean canvas by thoroughly cleansing your face and removing any makeup residue from your eyes. Apply eyeshadow primer or concealer: Gently dab a small amount of eyeshadow primer or concealer on the inner corners of your eyes using your fingertips or a small brush. Blend it evenly to create a smooth base for the eyeliner. Set the primer or concealer: Dust a setting powder or a neutral eyeshadow close to your skin tone over the primed area. This step will set the base and prevent creasing. Step 3: Apply the Inner Corner Eyeliner Now that your inner corners are prepped and ready, follow these steps to achieve the perfect inner corner eyeliner look: Choose your eyeliner color: You can opt for classic black for a bold and defined look, or you can experiment with colored eyeliners to add a fun and unique twist. Dip your brush or eyeliner pencil into the gel or liquid eyeliner: Ensure the brush or pencil is coated evenly with the product. Create the inner corner line: For a subtle and natural look, start by drawing a thin line along the inner corners of your eyes. Begin from the tear ducts and extend the line slightly outwards. For a more dramatic and elongated look, extend the line further towards the middle of your eyelids. Blend or smudge (optional): If you prefer a softer effect, you can gently blend or smudge the eyeliner with a cotton swab…