Goodbye Acne, Hello Clean Skin!: Unveiling the Secrets to a Clear Complexion

Acne is more than just a skin condition; it’s a common struggle that affects millions worldwide. Whether you’re a teenager grappling with hormonal changes or an adult dealing with stress-induced breakouts, the quest for clear skin can seem endless. This guide dives deep into understanding acne, debunking myths, and providing a clear path to achieving and maintaining acne-free skin.

Goodbye Acne, Hello Clean Skin


Understanding Acne Causes

Exploring the Root Causes of Acne

Acne is primarily caused by the overproduction of oil, clogged hair follicles, bacteria, and inflammation. Hormonal fluctuations, particularly during puberty, pregnancy, and certain periods of adult life, play a significant role. Genetics can also predispose individuals to acne, making some more likely to experience severe forms than others.

The Psychological Impact of Acne

The effects of acne extend beyond the skin. It can severely impact self-esteem and mental well-being, leading to social withdrawal, anxiety, and depression. Acknowledging this aspect is crucial for a holistic approach to acne treatment, emphasizing the importance of addressing both physical and psychological health.

The Science of Acne

Differentiating Types of Acne

Understanding the types of acne (such as blackheads, whiteheads, papules, pustules, and cystic acne) is fundamental in choosing the right treatment. Each type has unique characteristics and requires specific approaches to treatment.

Unpacking the Causes of Acne

The formation of acne involves complex biological processes, including the overproduction of sebum, proliferation of acne-causing bacteria, and inflammation of the skin. Lifestyle factors, such as diet and stress, can exacerbate these processes.

Myths vs. Facts About Acne

Debunking Common Acne Myths

There are numerous myths surrounding acne, such as the idea that chocolate and greasy foods cause breakouts, or that sun exposure can cure acne. It’s vital to separate myth from fact to avoid counterproductive treatment efforts.

The Truth Behind Home Remedies

While some home remedies may offer mild benefits, others can aggravate the skin. Understanding which natural ingredients are scientifically backed is key to incorporating them safely into your skincare routine.

Essential Skincare Routines

Crafting a Daily Skincare Routine

A gentle yet effective skincare routine is paramount for managing acne-prone skin. This includes cleansing, moisturizing, and applying treatments that target acne without over-drying or irritating the skin.

Key Products for Your Skincare Arsenal

Certain ingredients, such as salicylic acid, benzoyl peroxide, and retinoids, are proven to combat acne. Understanding these ingredients and their proper use is essential for curating an effective skincare regimen.

Professional Treatments for Acne

Recognizing When to Consult a Dermatologist

Knowing when to seek professional help can save time and prevent scarring. Dermatologists can offer personalized advice, prescribe medications, and recommend treatments like chemical peels and laser therapy.

Overview of Popular Acne Treatments

There’s a range of professional treatments available for acne, including prescription-strength topical and oral medications, light therapy, and dermatological procedures. Each has its benefits and suitability depending on the type and severity of acne.
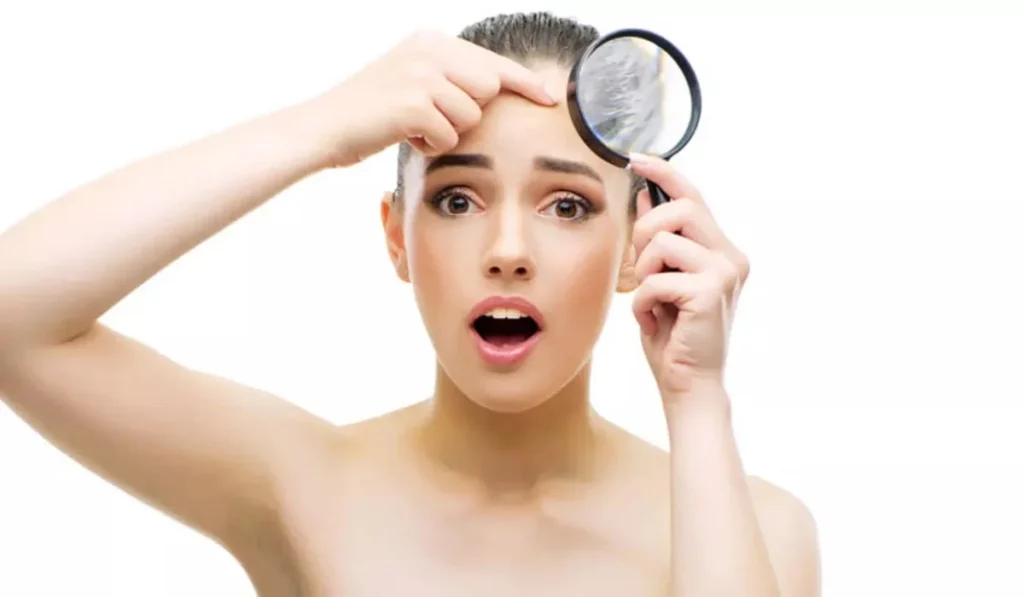
Goodbye Acne, Hello Clean Skin!


Natural Remedies and Their Efficacy

Evaluating DIY Natural Solutions

Natural remedies can be a supplementary approach to acne treatment. Ingredients like tea tree oil and green tea have shown promise in reducing inflammation and acne severity.

Balancing Natural Remedies with Scientific Evidence

While natural remedies can be appealing, it’s important to approach them with caution and understand that they may not work for everyone. Integrating them with conventional treatments under the guidance of a healthcare professional is advisable.

Diet and Lifestyle Changes for Clear Skin

Nutritional Adjustments for Acne Reduction

Emerging research suggests a link between diet and acne. Diets high in sugar and dairy have been associated with increased acne risk, while a diet rich in fruits, vegetables, and omega-3 fatty acids might help reduce breakouts.

Lifestyle Modifications to Support Skin Health

Stress management, regular exercise, and sufficient sleep can positively impact skin health and reduce the severity of acne. These lifestyle changes, combined with proper skincare, can lead to significant improvements.

Understanding Skincare Products

Navigating Ingredients for Acne-Prone Skin

Choosing the right skincare products involves understanding which ingredients are beneficial and which could potentially cause irritation or worsen acne. Labels like “non-comedogenic” and “oil-free” can be helpful indicators.

The Importance of Over-the-Counter Products

Over-the-counter acne treatments can be effective for mild to moderate acne. Products containing active ingredients like salicylic acid and benzoyl peroxide can reduce pimples and prevent new ones from forming.


Preventing Acne Scars and Marks

Proactive Measures Against Scarring

Preventing acne scars begins with effective acne management. Avoiding picking or popping pimples and incorporating products that promote skin healing can minimize the risk of scarring.

Options for Treating Existing Scars

For those already dealing with acne scars, treatments such as laser therapy, microneedling, and chemical peels can improve the skin’s appearance. Consulting with a dermatologist is crucial for choosing the most appropriate treatment.

The Role of Stress in Acne

Understanding the Link Between Stress and Acne

Stress can exacerbate acne by triggering hormonal fluctuations and increasing inflammation. Managing stress through relaxation techniques, exercise, and adequate rest is an important aspect of acne treatment.

Stress Management Techniques for Better Skin

Practices such as mindfulness, yoga, and meditation can help reduce stress levels, potentially leading to clearer skin. These techniques, combined with a comprehensive skincare routine, can amplify the benefits.

Goodbye Acne, Hello Clean Skin!

Embracing a Comprehensive Approach to Clear Skin

Achieving clear skin is a multifaceted journey that involves understanding the underlying causes of acne, debunking myths, and adopting a tailored skincare routine. This guide offers a roadmap to navigate the complex landscape of acne treatment, empowering you to take control of your skin health.

A Lifelong Commitment to Skin Health

Saying “Goodbye Acne, Hello Clean Skin” is not just about treating acne; it’s about embracing a lifestyle that promotes overall skin health. With dedication, patience, and the right approach, achieving and maintaining clear skin is within reach.

Remember, clear skin starts with understanding, evolves with care, and lasts with commitment. Embrace your journey to acne-free skin with confidence, armed with the knowledge and strategies outlined in this guide.

  • What are the primary causes of acne?
  • How can diet affect acne?
  • What are the best skincare practices for acne-prone skin?
  • Are there effective natural remedies for acne?
  • When should I consider prescription acne treatment?
  • How can I prevent acne scars?


How To Cover Dark Eye Circles In 5steps
How to cover dark eye circles in 5 steps?

On the other hand, the chronic dark under-eye circles can shadow even the best and brightest version of us. In this case, the shadows that genetics, lack of sleep, or lifestyle choices are attributed to make us look much older or more fatigued than we actually are. Most of the time, it’s actually within your reach. This is an in-depth article looking into the causes of under-eye circles and how to hide them with a multi-step approach, finally discussing other strategies that may be of benefit in ensuring your eyes reflect your inner vibrancy. The Genesis of Shadows: Unveiling the CausesEven before going through the process of how to hide the dark circles on a journey, it is paramount to understand where they come from. There are several reasons that bring this about, and all have to be given full, separate, covered-up attention.Genual Inheritance: A common culprit, especially when it comes to thin skin running in the family around the eyes, making the blood vessels more pronounced.The Sleep Factor: Poor sleep may lead to the dilation of the blood vessels located under the eyes, hence contributing to the dark circles. Step One: Prime Your Canvas Preparing the Under-Eye Area for ConcealmentA flawless makeup application begins with preparation. Here’s how to ensure the under-eye area is primed and ready: Choosing Your Concealer Finding Your Perfect MatchSelecting an ideal concealer is more art than science, involving consideration of shade, formula, and skin undertone: Shade Selection: If the discoloration that needs to be corrected is of a bluish or purplish tinge, then look for a concealer that is one or two shades lighter than your natural skin tone, concealing with peach or salmon undertones. Step 3: Masterful Application Techniques for Seamless ConcealmentApplication technique can make or break your concealing efforts. Achieve a natural, even coverage with these steps: Concealing Mastery Elevating Your Technique Enhance your concealing game with additional tips: Step 5: Final Touches Setting Your MasterpieceTo maintain your under-eye concealment throughout the day: Conclusion Surely, the steps provided could cover the dark circles under the eyes, given the right information and tools offered, knowing the causes in advance, precise preparation, selection, application, and setting of all steps scrupulously. Bring forth bright and youthful eyes with these tips followed; and with them, the natural beauty shall shine more confidently.

Exploring The Revolution Of Magnetic Lashes A Guide To Elevating Your Aesthetic Appeal
Exploring the Revolution of Magnetic Lashes: A Guide to Elevating Your Aesthetic Appeal

Magnetic lashes have emerged as a groundbreaking solution in the realm of cosmetics, providing a novel method for attaining voluminous, striking eyelashes minus the complications and clutter associated with traditional glue-on extensions. Utilizing minuscule magnets for attachment directly above the natural lash line, these lashes offer a sturdy, comfortable, and reusable option, diverging from the conventional false eyelash approach. This piece explores the essence of magnetic lashes, elucidates their advantages, and demonstrates how they can be seamlessly integrated into your cosmetic regimen to achieve captivating outcomes. Deciphering Magnetic Lashes Standing at the forefront of eye makeup innovation, magnetic lashes dispense with the need for adhesive, instead employing diminutive magnets that cling to a magnetic eyeliner or to each other, enveloping the natural lashes. This mechanism guarantees a firm fit for the entire day, obviating the mess associated with traditional adhesives. Magnetic lashes come in a plethora of forms, including full strips and individual clusters, accommodating a wide array of tastes and aesthetics. Advantages of Magnetic Lashes Magnetic lashes boast several merits. Their simplicity of application renders them suitable for novices. The aspect of reusability stands out, permitting multiple uses from a single pair, thus ensuring economic efficiency. By eliminating the need for lash glue, these lashes reduce the likelihood of allergic reactions, offering a safer and more pleasant usage experience. Furthermore, their diversity in styles provides ample room for creative makeup expressions. Application Technique for Magnetic Lashes The application of magnetic lashes is uncomplicated and becomes intuitive with practice. It generally involves the application of magnetic eyeliner along the lash line, followed by attaching the magnetic lashes to the dried liner. For the sandwich-type lashes, precise placement directly on the natural lashes is crucial. Achieving a flawless look requires allowing the magnetic eyeliner to fully dry and employing a lash applicator for enhanced accuracy. Magnetic Versus Traditional Lashes: A Comparative Overview In comparing magnetic to traditional glue-on false lashes, notable distinctions include ease of application and removal for magnetic lashes, mitigating the risk of harming natural lashes. They also tend to provide a more reliable and enduring hold, eliminating concerns over detachment or displacement. Nonetheless, traditional lashes may present a broader selection in terms of materials and designs. Selecting Suitable Magnetic Lashes Choosing appropriate magnetic lashes involves assessing aspects such as length, volume, and design to complement your eye shape and desired appearance optimally. Prioritizing lashes made with superior magnets and materials is crucial for ensuring comfort and longevity. Maintenance and Upkeep of Magnetic Lashes Extending the life of magnetic lashes requires proper maintenance, including gentle cleansing post-use, safe storage in a dedicated case, and avoiding contact with water or makeup removers that could damage the magnets. Addressing Common Challenges with Magnetic Lashes Frequent issues encountered with magnetic lashes, such as application difficulties and discomfort, can typically be resolved through practice, correct placement, and selecting lashes that suit your eye shape. The Underlying Science of Magnetic Lashes The magnetic elements in these lashes are engineered to balance strength for retention and gentleness to avoid discomfort. Safety evaluations confirm that, when utilized correctly,…

Dewy All Day Tips To Keep Your Makeup Fresh And Glowing
Dewy All Day: Tips to Keep Your Makeup Fresh and Glowing

Dewy makeup has become a popular trend, providing a fresh and radiant glow to the skin. However, maintaining that luminous look throughout the day can be a challenge, especially if you have oily skin or live in a humid climate. In this article, we will share effective tips and techniques to help you keep your dewy makeup going strong from morning to night. From prepping your skin to setting your makeup, we will guide you through the steps necessary to achieve long-lasting, flawless dewy makeup. Prep Your Skin:Proper skincare preparation is essential for achieving long-lasting dewy makeup. Start by cleansing your face to remove any dirt, oil, or impurities. Follow up with a lightweight moisturizer that hydrates your skin without making it greasy. Allow the moisturizer to absorb fully before moving on to the next step. Additionally, applying a primer formulated for dewy finishes can create a smooth canvas for your makeup and help it adhere better throughout the day. Choose the Right Foundation:When aiming for a dewy look, selecting the right foundation is crucial. Opt for foundations with a luminous or dewy finish that provide a natural glow to your skin. Avoid matte or oil-control foundations, as they can give a flat appearance. Consider using lightweight formulas that allow your skin to breathe while still providing coverage. Additionally, look for long-wearing foundations that are designed to stay put and maintain a dewy finish for extended periods. Strategic Powder Application:While powder helps control shine, using it sparingly is key to maintaining a dewy look. Focus on applying powder only to areas prone to excessive oiliness, such as the T-zone. Use a finely milled, translucent powder and a fluffy brush to gently dust the powder onto these areas. Avoid applying powder all over the face, as it can mattify the skin and diminish the dewy effect. The strategic application of powder helps set your makeup without compromising its luminosity. Use Cream or Liquid Highlighters:Highlighters are essential for achieving a dewy look. Opt for cream or liquid highlighters instead of powder formulas, as they blend seamlessly into the skin and provide a more natural-looking glow. Apply the highlighter to the high points of your face, such as the cheekbones, bridge of the nose, and cupid’s bow. Gently blend it in with your fingertips or a damp beauty sponge for a radiant and dewy finish. Set Your Makeup:To ensure your dewy makeup lasts all day, setting it with the right products is crucial. Instead of using a traditional setting powder, opt for a setting spray that provides a dewy or hydrating finish. Mist the setting spray over your entire face after completing your makeup application. This will help lock in your makeup, melt all the products together, and give a luminous boost to your skin. Carry a travel-size setting spray in your bag for touch-ups throughout the day to revive the dewy look. Blotting Papers for Oil Control:If you have oily skin, it’s common for excess oil to interfere with your dewy makeup. Keep blotting papers handy to absorb any excess oil without disturbing your…

What Is A Fan Brush
What is a Fan Brush?

A fan brush, often a staple in both art and beauty kits, is characterized by its unique fan-shaped bristles, designed to spread out wide while still allowing for delicate work. Originating from the need for artists to blend paint and create textures with finesse, the fan brush has a rich history in the arts. It has evolved over time, with variations developed for specific mediums and techniques. Today, it is available in several types, including soft and stiff bristles, each serving a distinct purpose. Uses of Fan Brushes in Art Fan brushes are invaluable for artists looking to achieve a range of effects in their work. They are particularly adept at blending colors on the canvas, creating smooth transitions between hues without harsh lines. This blending capability makes them ideal for skies, water, and other natural elements that require a soft touch. Additionally, fan brushes can be used to create interesting textures and patterns, such as the impression of leaves, grass, or hair, adding a layer of realism and depth to paintings. For techniques like glazing and layering, the fan brush applies thin, even coats of paint, allowing for the gradual build-up of color and luminosity. Uses of Fan Brushes in Makeup In the beauty world, fan brushes have a different set of uses but are equally cherished for their precision and versatility. Their light, feathery bristles are perfect for applying powdered makeup products like highlighters, bronzers, and blushes, offering a soft, natural finish. The unique shape of the fan brush allows for targeted application, enabling makeup artists to accentuate features like cheekbones and the bridge of the nose with ease. Additionally, fan brushes are excellent for gently sweeping away any excess or fallen product, ensuring a clean, flawless makeup application. Choosing the Right Fan Brush The key to harnessing the full potential of a fan brush lies in selecting the right one for your needs. Bristle material plays a significant role, with synthetic fibers offering durability and ease of cleaning, while natural bristles provide a softer touch ideal for sensitive skin and fine art. The size and shape of the brush will dictate its suitability for specific tasks, with larger brushes covering more area and smaller brushes offering precision. Proper care and maintenance, including regular cleaning and storage, will ensure the longevity of your fan brush. Creative Projects with Fan Brushes Beyond their traditional uses, fan brushes can inspire a variety of creative projects. Artists can experiment with different painting techniques, such as stippling and scumbling, to achieve unique effects on the canvas. DIY enthusiasts might find fan brushes handy for home decor projects, like creating textured finishes on walls or furniture. In mixed media art, the fan brush can be used to apply adhesives or create dynamic layers, adding dimension and interest to the artwork. Professional Tips for Using Fan Brushes To get the most out of your fan brush, consider the following tips from professionals: always select the right size and type of brush for your project, use a light touch to avoid overapplication of product, and experiment with…

What Is Microblading Transform Your Eyebrows From Sparse To Gorgeous (1)
What is microblading? Transform Your Eyebrows from Sparse to Gorgeous

Microblading is a transformative beauty procedure that meticulously enhances the appearance of your eyebrows, offering a semi-permanent solution for those seeking fuller, more defined brows. This technique involves the manual insertion of pigment into the upper layers of skin to create the appearance of natural eyebrow hairs. However, achieving the best possible results requires more than just booking an appointment; it involves thorough preparation, understanding the process, and proper aftercare. Choosing the Right Microblading Technician The first step in your Microblading journey is to choose a skilled and certified aesthetician. Researching your options is crucial. Look for a salon that showcases an extensive portfolio of before and after photos, demonstrating their ability to produce the kind of results that captivate you. It’s essential that your chosen technician not only possesses the necessary certification but also has a wealth of experience, reflected in their hours of education and practical application. Remember, the quality of your results depends heavily on the skill and precision of the technician. State Regulations and Technician Licensing Be aware that each state has its own set of rules and regulations governing microblading. Before proceeding, verify the licensing requirements in your area and ensure your technician meets these standards. This step is crucial for both your safety and the legality of the procedure. Preparing for Your Microblading Session Proper preparation can significantly enhance the outcome of your Microblading procedure. Here are some essential tips to ensure you’re fully prepared: Understanding the Microblading Procedure Microblading is typically completed in three key steps: Preparation Initially, your aesthetician will apply a topical numbing cream to your eyebrow area to minimize discomfort. This preparation is vital for both your comfort and the steadiness of the microblading process. The Procedure Experience Pain tolerance varies from person to person. Some may only feel a slight scratching sensation, while others might experience a bit more discomfort. However, most find the procedure to be bearable, with the numbing cream significantly reducing any pain. Post-Procedure Care Immediately after your session, it’s normal for your eyebrows to appear darker and more pronounced than expected. This intensity will fade as they heal, usually within a week, resulting in a more natural look. It’s advised to avoid water exposure, including long showers and baths, during the initial healing phase to prevent the pigment from washing out prematurely. Post-Microblading Care To ensure the best healing and color retention, follow these aftercare tips: Potential Risks and How to Mitigate Them While microblading is generally safe, being informed about potential risks is crucial: Allergic Reactions Though rare, it’s possible to have an allergic reaction to the pigment used. Discuss any known allergies with your technician beforehand. Infection Infections can occur if the procedure is done with non-sterile equipment. Ensure your salon follows strict hygiene practices. Semi-Permanence Microblading results are semi-permanent. If you’re unhappy with the results, corrections or removal can be more challenging. Give yourself time to consider if microblading is right for you and choose a technician who can offer a result you’re confident you’ll be happy with. Microblading can significantly enhance your facial…

Konjac Sponge 1
Exploring the Wonders of Konjac Sponge

As skincare evolves, consumers search for innovative yet natural solutions. Recently, one such breakthrough has been the Konjac sponge: widely celebrated for its gentle yet effective approach to cleansing and exfoliation. Made from material harvested from Asia’s Konjac plant rootbed, this eco-friendly option has quickly become one of the go-to choices among those searching for holistic and eco-friendly additions to their routine. Origin of Konjac Sponge:Konjac sponge can be traced back to Asia where Amorphophallus konjac, commonly referred to as Konjac plant has long been utilized as both culinary ingredients and traditional medicinal remedies. Over the centuries its porous root provided inspiration for creating this natural yet eco-friendly skincare tool known as the Konjac sponge. What Is a Konjac Sponge? A Konjac sponge is an extremely soft, flexible, and slightly rubbery cleansing tool derived from the fibrous root of the Konjac plant, known for being rich in minerals and antioxidants – perfect for skincare enthusiasts seeking gentle exfoliators and cleansers! Composition and Manufacturing Process:The Konjac sponge’s journey from plant to skincare staple involves an ingenious yet straightforward process. Once harvested and dried out, its root is ground into fine powder which then gets mixed with water before shaping it into sponge form. Sometimes additional natural ingredients such as French clay, charcoal or green tea may also be included during this stage to meet specific skincare requirements. Variety of Konjac Sponges: Wrought Iron Sponges are beloved beauty tools thanks to their versatile nature. Available in various shapes, sizes and with specific additives to meet an array of skincare preferences – popular varieties of these sponges include Wrought Iron Sponges. Pure Konjac Sponge:Our flagship option made entirely of Konjac root powder provides gentle exfoliation while being ideal for daily use. It offers mild exfoliation while being suitable for all skin types. Konjac Sponge with Charcoal:When activated charcoal is added to Konjac sponge mixtures, making this product perfect for those suffering with oily or acne-prone skin. Charcoal helps absorb excess oils and impurities that clog your pores – leading to clearer complexions overall! Konjac Sponge with Green Tea Extract:Packed full of anti-aging benefits, green tea extract is well known to soothe and rejuvenate skin – making this sponge one of the top choices among anti-ageing enthusiasts. Konjac Sponge with French Clay: for those wanting additional detoxifying benefits. Ideal for refining pores and revitalized appearance. Benefits of Utilizing a Konjac Sponge:These sponges have long been prized due to their many uses in skincare practices – making them indispensable tools. With numerous applications including exfoliation and purifying properties as well as being gentle enough for daily use on sensitive skin types. Gentle Exfoliation: With its soft, porous surface and low exfoliating power, Konjac sponge is suitable for daily use to slough off dead skin cells without irritating skin or cause redness or inflammation. It promotes smoother and brighter complexion without irritation to create smoother and brighter complexion without harm. Deep Cleansing: The sponge’s fibrous structure aids in providing effective cleansing without stripping away natural hydration from skin cells and providing an overall deep clean that won’t compromise…

Flawless Foundation Tips And Tricks For Applying Liquid Foundation
Flawless Foundation: Tips and Tricks for Applying Liquid Foundation

Liquid foundation is a versatile and widely used makeup product that helps create a smooth and even complexion. However, achieving a flawless finish with liquid foundation requires proper application techniques and some helpful tricks. In this comprehensive guide, we will explore valuable tips and tricks to ensure that your liquid foundation application is seamless, long-lasting, and enhances your natural beauty. Prepping Your SkinBefore applying liquid foundation, it’s essential to prepare your skin to ensure a smooth and even canvas. Follow these steps to optimize your foundation application: a. Cleansing: Start with a clean face by washing away any dirt, oil, or makeup residue. Use a gentle cleanser suitable for your skin type. b. Exfoliation: Regular exfoliation helps remove dead skin cells, promoting smoother skin and preventing foundation from clinging to dry patches. Exfoliate 1-2 times per week. c. Moisturizing: Apply a lightweight, hydrating moisturizer to keep your skin supple and prevent the foundation from settling into fine lines or dry areas. d. Primer: Consider using a makeup primer to create a smooth base and extend the longevity of your foundation. Choose a primer that suits your skin type, whether you have oily, dry, or combination skin. Selecting the Right FoundationChoosing the appropriate liquid foundation for your skin type and desired coverage is crucial. Here are some pointers for selecting the right foundation: a. Skin Type: Identify your skin type (oily, dry, combination, or normal) to find a foundation that addresses your specific needs. Oil-free, matte foundations work well for oily skin, while hydrating formulas suit dry skin. b. Undertone: Determine your skin’s undertone, which can be warm, cool, or neutral. Select a foundation with a matching undertone for a natural look. c. Shade Matching: Test foundation shades on your jawline or wrist in natural light to find the most suitable match. The right shade should blend seamlessly with your neck and face. d. Coverage: Choose the level of coverage you desire—light, medium, or full—based on your skin concerns and the occasion. Applying Liquid FoundationNow that your skin is prepped and you have the right foundation, let’s explore different application techniques to achieve a flawless finish: a. Brush Application: Use a foundation brush to apply the product in downward strokes. Brushes provide even coverage and help buff the foundation into the skin for a polished look. b. Beauty Blender or Makeup Sponge: Dampen a makeup sponge or Beauty Blender and gently bounce it across your face to apply the foundation. This technique provides a natural, airbrushed finish and ensures seamless blending. c. Fingertip Application: For a more lightweight and natural finish, use clean fingers to apply the foundation. Warm the product between your fingers before patting it onto your skin. d. Layering: Start with a small amount of foundation and build up coverage gradually where needed. This approach prevents a cakey appearance and allows you to tailor the coverage to your preference. e. Sheer Application: For a light, sheer coverage, mix a drop of foundation with your moisturizer or primer before applying. Concealing and Color CorrectingTo achieve a flawless complexion, consider incorporating concealer…

The Importance Of Using A Base Coat During Your At Home Manicure Session
The Importance of Using a Base Coat During Your At-Home Manicure Session

The allure of a professional-looking manicure from the comfort of home has never been stronger. With the advent of high-quality nail care products available for consumer purchase, the dream of achieving a salon-worthy finish without stepping out the door is now a reality. Essential to this DIY manicure kit is the often-overlooked yet crucial base coat, a foundational element that sets the stage for a flawless finish. What is a Base Coat? Definition and Purpose: A base coat is a clear or slightly tinted polish applied before the color coat. Its primary role is to prepare the nail surface for color application, ensuring a smooth, even, and long-lasting finish. Types of Base Coats and Their Benefits: From strengthening formulas to ridge fillers, each type of base coat serves a specific purpose, addressing various nail concerns while providing a solid foundation for nail color. The Importance of a Base Coat Protection Against Staining: One of the key benefits of applying a base coat is its ability to protect nails from staining, especially when using dark or highly pigmented colors. Enhancing Nail Strength: For those with brittle or weak nails, a base coat can add an extra layer of strength, reducing the likelihood of breakage and peeling. Smoothing the Nail Surface: A quality base coat can fill ridges and imperfections, creating a perfectly smooth canvas for color application. Improving Polish Adhesion: By forming a sticky layer, a base coat enhances the adhesion of the nail polish, extending the life of your manicure. Choosing the Right Base Coat Factors to Consider: Selecting the right base coat involves considering your nail type, concerns, and the finish you desire. Recommended Products for Different Nail Types: Recommendations will include products tailored to strengthen, hydrate, or smooth nails, ensuring there’s an ideal base coat for everyone. Step-by-Step Guide to Applying Base Coat Preparing Your Nails: Proper nail preparation is essential for a successful application. This section will guide readers through cleaning, filing, and buffing their nails for optimal results. Application Tips for an Even Coat: Achieving an even base coat is key to a flawless manicure. This guide will offer tips and techniques to master the application process. The Role of Base Coat in Nail Health Preventing Yellowing and Damage: Regular use of a base coat can prevent the yellowing and damage often caused by frequent nail polish application. Nutrient-Infused Base Coats for Nail Care: Highlighting base coats infused with vitamins and nutrients that promote nail health and growth. Comparing Base Coats with Top Coats and Nail Hardeners Differences and Purposes: This section will clarify the distinct roles of base coats, top coats, and nail hardeners, ensuring readers understand when and how to use each product. DIY Manicure Tips and Tricks Achieving Long-lasting Results: Tips for extending the life of your manicure, from application techniques to maintenance advice. Creative Ways to Enhance Your Manicure: Inspiration for readers to get creative with their at-home manicure sessions, incorporating art, accents, and more. Troubleshooting Common Manicure Issues Peeling and Chipping: Solutions and preventive measures for common manicure pitfalls, ensuring your hard work…