A Deep Dive into Deodorants

In the quest for personal freshness and confidence, deodorants play a pivotal role. They are not just about combating body odor; they are also an essential aspect of daily hygiene and self-care. This guide takes you through the intricacies of deodorants, from their working mechanism to the variety of options available, focusing on how to select and use them effectively while addressing health and environmental concerns.
A Deep Dive Into Deodorants


Introduction to Deodorants

Elevating Personal Hygiene and Confidence

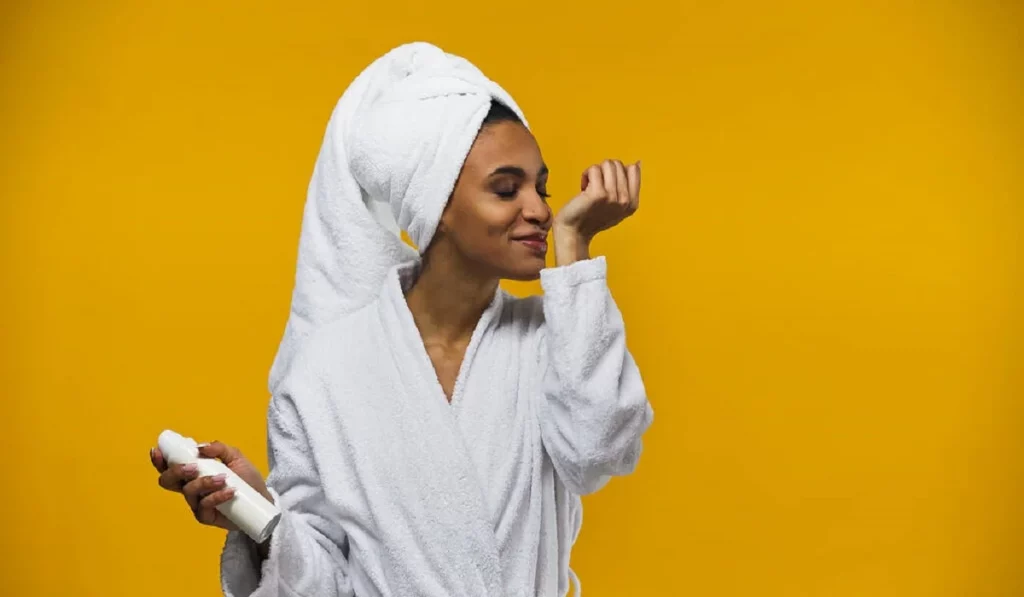
Deodorants are a fundamental component of personal care, crucial for managing body odor and enhancing self-confidence. They work by targeting and neutralizing odor-causing bacteria, ensuring that you remain fresh throughout the day. This section delves into their significance in daily routines, underscoring the importance of choosing a product that aligns with your personal hygiene and wellness goals.

The Mechanism Behind Deodorants

Neutralizing Odors at Their Source

Understanding how deodorants work is key to appreciating their role in personal hygiene. Unlike antiperspirants, which reduce sweat by blocking pores with aluminum-based compounds, deodorants focus on eliminating odor. They contain ingredients that kill bacteria or inhibit bacterial growth, preventing the smell before it starts. This distinction is crucial for making an informed choice between deodorants and antiperspirants based on your body’s needs and health considerations.

Exploring the Types of Deodorants

A Spectrum of Choices for Every Need

The deodorant market is diverse, offering products in various forms like sprays, sticks, roll-ons, and creams. Each type caters to different preferences and application styles, from the convenience of sprays to the moisture of creams. Understanding the pros and cons of each form can help you select a product that best fits your lifestyle, whether you prioritize ease of use, application control, or skin sensitivity.

Key Ingredients in Deodorants

The Backbone of Effective Odor Control

Deodorants contain a range of ingredients that serve various purposes, from odor neutralization to skin care. Key components include baking soda, ethanol, and essential oils, which work together to keep you smelling fresh. However, it’s equally important to be aware of ingredients that may pose health risks, such as parabens and phthalates. This section provides a comprehensive look at what to look for and what to avoid, empowering you to make choices that benefit your health and well-being.


Choosing the Right Deodorant

Personalizing Your Deodorant Selection

Selecting the right deodorant is a personal decision influenced by factors such as skin sensitivity, scent preferences, and ethical considerations like animal testing and environmental impact. This part of the guide offers detailed advice on tailoring your choice to match your individual needs, ensuring that your deodorant not only effectively combats odor but also aligns with your values and lifestyle.
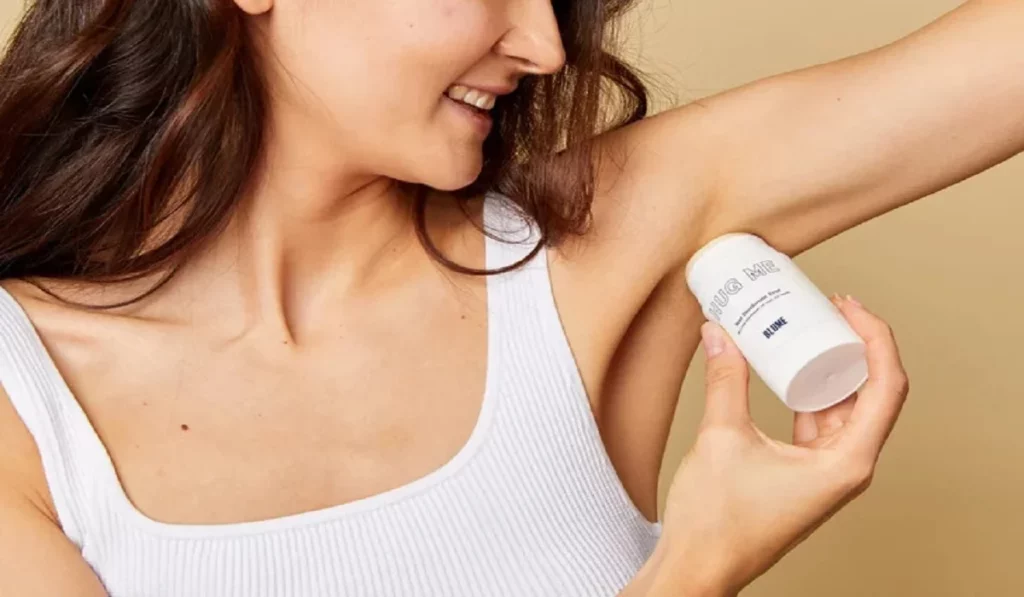
Adeepdive Into Deodorants

Application Tips for Optimal Results

Enhancing Efficacy Through Proper Use

Maximizing the benefits of your deodorant involves more than just selecting the right product; it also requires correct application. Tips include applying to clean, dry skin, focusing on problem areas, and allowing the deodorant to dry completely before dressing. These best practices ensure that the deodorant works as intended, providing lasting protection against body odor.

Addressing Health Concerns

Navigating Myths and Facts

The health implications of deodorant ingredients, especially aluminum in antiperspirants, have been the subject of much debate. This section aims to demystify common concerns by presenting up-to-date research, helping you make informed decisions based on facts rather than fear. Whether considering the potential link between aluminum and health issues or the impact of synthetic fragrances on skin sensitivity, this guide provides the clarity needed to choose your deodorant wisely.

Natural and Aluminum-Free Options

Discovering Health-Conscious Alternatives

For those seeking alternatives to traditional deodorants, the market offers a variety of natural and aluminum-free options. These products use ingredients like charcoal, magnesium, and essential oils to combat odor without relying on synthetic chemicals. Exploring these alternatives can be a healthier choice for both your body and the environment, offering effective odor control with a focus on natural wellness.

Environmental Considerations

Making Eco-Friendly Choices

The environmental impact of deodorants extends from their ingredients to their packaging. Opting for products with recyclable packaging, minimal plastic use, and ethically sourced ingredients can significantly reduce your ecological footprint. This section highlights the importance of environmentally conscious choices in deodorants, encouraging a shift towards sustainability in personal care.

Making Informed Choices for Freshness and Well-Being

Navigating the world of deodorants with an informed perspective allows you to choose products that not only keep you fresh but also support your health and environmental values. By understanding the types, ingredients, and best practices for deodorant use, you can make choices that enhance your personal hygiene routine while aligning with your lifestyle and well-being goals.

Remember, the right deodorant is out there for everyone. With this guide, you’re equipped to find yours, ensuring confidence and freshness every day.

Face Mits 1
A Comprehensive Guide to Facial Mists

As beauty enthusiasts strive for radiant and rejuvenated skin, beauty enthusiasts continually search out innovative solutions they can incorporate into their skincare regimens. An exciting discovery has been face mists; an ingenious product which has quickly become an indispensable staple. This comprehensive guide explores everything about face mists: their history and key ingredients as well as benefits and applications, giving an insider’s view into this versatile product that holds power within delicate droplets of mist spray. Face Mist Origins:Facial mists have their origins in ancient skincare practices such as those practiced by Egyptians and Romans who valued such rituals by using water infused with botanical extracts for refreshment and hydration of their skin. Over time, however, their creation was refined further to include advanced formulations and delivery systems to become what are known today as face mists. Ingredients of Facial Mists: At the core of facial mists’ magic lies their carefully chosen ingredients – each selected for its specific properties that benefit skin health. Formulations may differ, yet common components found within face mists include: Benefits of Face Mists:Facial mists have become an invaluable addition to skincare regimes for their ability to provide numerous advantages for the skin. Notable advantages are: How to Use Face Mists:Facial mists have numerous applications. Here is our guide on how best to take advantage of them for rejuvenating purposes: Face Mists for Different Skin Types: Facial mists offer effective solutions for various skin concerns and types, with specific formulations tailored specifically for you and your concerns. When selecting one to meet these criteria: DIY Face Mists: For those who enjoy taking control of their skincare, crafting their own face mist is an engaging DIY activity, offering plenty of opportunities for customization and experimentation with various ingredients. A basic recipe might include: Ingredients include purified water, aloe vera gel, rosewater and lavender essential oil. Instructions: Conclusion: Elevating Skincare With Luxury: Facial mists have quickly become an indispensable addition to skincare regimes, embodying hydration, rejuvenation and self-care in one refreshing mist spray. From ancient roots to contemporary formulations, face mists have transformed from an occasional product used just to wake you up during the day to serving various needs and preferences alike – be it as an early wakeup call during your workday; setting spray for makeup application or aromatherapy ritual – their transformative power cannot be denied; so embrace its luxury today and let this luxurious facial spray do just what its name promises – unleash it now and experience its transformative power today! So embrace its elegance today; indulge its transformative power is undeniable! So indulge the elegance of facial spray and experience all its transformative power for yourself today and let go.

Flawless Makeup For Oblong Faces: Tips And Techniques To Enhance Your Features
Flawless Makeup for Oblong Faces: Tips and Techniques to Enhance Your Features

An oblong face shape is characterized by its elongated appearance, with a forehead, cheekbones, and jawline almost similar in width. While this face shape is often considered elegant, it may present some unique makeup challenges. The key to applying makeup to an oblong face is to create visual balance and enhance the natural beauty of your features. In this comprehensive guide, we will explore makeup techniques, contouring, and highlighting tips to help you achieve a stunning look that complements your oblong face shape. Understanding Your Oblong Face Shape Before delving into makeup application, it’s essential to identify your face shape accurately. An oblong face is longer than it is wide, with relatively straight sides and a slightly rounded chin. If you have an oblong face shape, your forehead, cheekbones, and jawline may have similar width measurements. Celebrities with oblong face shapes include Liv Tyler and Sarah Jessica Parker. Makeup Techniques for Oblong Faces Contouring for DefinitionContouring is a powerful technique that can add definition and balance to an oblong face shape. Focus on the following areas to create visual dimensions: a. Forehead: If you want to minimize the appearance of a long forehead, lightly contour the area just above the hairline with a matte bronzer or contour powder. Blend the product gently to avoid harsh lines. b. Cheekbones: Emphasize your cheekbones with contouring to add dimension to your face. Use a contour shade just below the cheekbones and blend upwards towards the ears to create the illusion of lifted cheekbones. c. Jawline: To soften a strong or elongated jawline, contour along the jawline with a cool-toned contour product. This will help add a touch of softness and balance to your face. Highlighting to EnhanceHighlighting is equally important in makeup application for oblong faces. It helps accentuate certain features and brings attention to the center of the face. a. Center of the Forehead: Apply a highlighter to the center of your forehead to draw attention upward and create the illusion of a shorter forehead. b. Brow Bone: Highlighting the brow bone opens up the eyes and adds a lift to the entire eye area. c. Bridge of the Nose: Apply a small amount of highlighter down the bridge of your nose to create the illusion of a shorter nose. d. Center of the Chin: Adding a touch of highlighter to the center of the chin brings attention to the center of your face, helping to visually balance the length. Focus on Eyes and BrowsEyes are a prominent feature on an oblong face, and proper eye makeup can help enhance their shape and bring balance to the face. a. Eyebrows: A well-defined brow with a slight arch can visually shorten the length of the face. Avoid overly straight brows, as they may further elongate the appearance of an oblong face. b. Eye Makeup: Emphasize your eyes with eyeshadows, eyeliner, and mascara. Focus on creating width at the outer corners of your eyes to add balance to the face. Full and Rounded LipsFor oblong faces, opting for fuller and slightly rounded lips can help create…

10 Tips For Concealing Under Eye Bags Like A Pro
10 Tips for Concealing Under-Eye Bags Like a Pro

Under-eye bags are a common problem for many people, whether it’s due to genetics, lack of sleep, or aging. These bags can make you look tired and older than you actually are. Luckily, there are many ways to conceal under-eye bags and make your eyes look brighter and more youthful. In this article, we will share 10 tips for concealing under-eye bags like a pro. Use a Color CorrectorIf you have dark circles under your eyes, a color corrector can help neutralize the discoloration. Look for a peach or orange color corrector, depending on your skin tone. Apply it gently to the under-eye area using your ring finger. Be careful not to tug or pull on the delicate skin around your eyes. Use a Concealer with a Yellow or Peach UndertoneAfter applying a color corrector, use a concealer that has a yellow or peach undertone. This will help brighten your under-eye area and make you look more awake. Use a small, fluffy brush to apply the concealer in a triangle shape under your eyes, then blend it in with a damp beauty sponge. Use a Hydrating Eye CreamDry skin can make under-eye bags look worse. Make sure to use a hydrating eye cream before applying any makeup. Look for an eye cream that contains hyaluronic acid, which helps to plump and hydrate the skin. Apply a Cooling Eye GelIf you’re dealing with puffiness under your eyes, try applying a cooling eye gel. Keep the eye gel in the fridge for a few minutes before applying it to your under-eye area. The coolness will help reduce inflammation and puffiness. Use a Light-Reflecting PowderAfter applying your concealer, use a light-reflecting powder to set it. This will help brighten your under-eye area even more and prevent creasing. Use a fluffy brush to apply the powder lightly under your eyes. Use a Matte BronzerIf you have under-eye bags that are more prominent, you can use a matte bronzer to create a shadow effect. Apply the bronzer lightly in the hollows under your cheekbones and around your temples. This will help to create the illusion of depth and make your under-eye bags less noticeable. Apply Mascara and EyelinerApplying mascara and eyeliner can help draw attention away from your under-eye bags. Curl your lashes and apply mascara to open up your eyes. Use a thin line of eyeliner along your lash line to define your eyes further. Use a Bright LipstickIf you’re still feeling self-conscious about your under-eye bags, try wearing a bright lipstick. A bold lip color will draw attention away from your under-eye area and make you feel more confident. Use a Makeup Setting SprayTo make sure your makeup stays in place all day, use a makeup setting spray. This will also help prevent your under-eye area from getting oily and causing your makeup to smudge. Get Plenty of Sleep and Drink WaterWhile these tips can help conceal under-eye bags, the best way to get rid of them is to get plenty of sleep and drink water. Aim for at least 7-8 hours of sleep each…

Machen Sie Einen Depressionstest 1
Machen Sie Einen Depressionstest

Die psychische Gesundheit ist ein wichtiger Aspekt des allgemeinen Wohlbefindens. Es ist entscheidend, Anzeichen von Depressionen zu erkennen und zu behandeln, um eine angemessene Behandlung zu suchen. Wenn Sie vermuten, dass Sie an einer Depression leiden könnten, kann ein Depressionstest wertvolle Informationen und Ratschläge geben, wie weiter vorzugehen ist… GO TO THE NEXT PAGE TO CONTINUE…

The Ultimate Guide To Cream Blush: How To Use, Choose And Apply
The Ultimate Guide to Cream Blush: How to Use, Choose and Apply

Cream blush has been gaining popularity in recent years, thanks to its ability to provide a natural, dewy glow to the cheeks. Unlike powder blushes, cream blushes have a creamy, emollient texture that blends effortlessly into the skin, giving a soft and seamless finish. In this guide, we’ll explore everything you need to know about cream blush, including how to choose the right shade for your skin tone, how to apply it, and some of the best cream blushes on the market. Why Choose Cream Blush? Cream blushes have many benefits over their powder counterparts. Here are just a few: Natural Finish: Cream blush gives a natural-looking flush to the cheeks, as it blends seamlessly into the skin. It’s perfect for those who want a subtle, understated look. Hydrating: Cream blushes contain moisturizing ingredients that keep the skin hydrated and glowing. This is especially beneficial for those with dry skin, as it can help to prevent flakiness and enhance the overall appearance of the skin. Versatile: Cream blush can be used not just on the cheeks, but also on the lips and eyes. This makes it a versatile product that can be used for a range of looks. How to Choose the Right Shade of Cream Blush? Choosing the right shade of cream blush is important to ensure that it looks natural and complements your skin tone. Here are some tips to help you choose the right shade: Skin Undertones: Determine your skin’s undertones, whether it’s warm, cool or neutral. Warm skin tones look best with peachy or golden shades, while cool tones look great with pink or berry shades. Neutral skin tones can pull off a wider range of shades. Depth of Shade: Consider the depth of the shade you’re choosing. If you have fair skin, lighter shades like baby pink or peach will look best. If you have medium skin, opt for shades that are more saturated and pigmented. For deeper skin tones, rich shades like brick or berry will look best. Consider Your Makeup Look: Think about the overall makeup look you’re going for. If you’re going for a natural, no-makeup look, a subtle pink or peachy shade would be perfect. If you’re going for a more dramatic look, a brighter or deeper shade would be more suitable. How to Apply Cream Blush? Applying cream blush is simple and easy. Here’s how to do it: Preparation: Start by prepping your skin with moisturizer and primer to create a smooth, even base. Application: Using your fingertips or a makeup sponge, apply a small amount of cream blush to the apples of your cheeks. Start with a small amount, and build up as needed. Blend: Use your fingers or a sponge to blend the blush into your skin, ensuring that there are no harsh lines or streaks. Set: Once you’re happy with the application, set the blush with a light dusting of powder to ensure it lasts all day. Final Thoughts Cream blush is a versatile and easy-to-use product that can give a natural, radiant glow to the cheeks. When choosing…

Dermaplaning: The Popular Skincare Treatment Explained

Dermaplaning is a non-invasive, exfoliating skincare treatment that has gained popularity in recent years. It involves the use of a sharp, surgical-grade scalpel to remove the outermost layer of dead skin cells and vellus hair (also known as peach fuzz) from the face. The result is a smoother, brighter, and more radiant complexion. In this article, we’ll explore the benefits, risks, and considerations for dermaplaning. Benefits of Dermaplaning One of the primary benefits of dermaplaning is its ability to exfoliate the skin. The scalpel removes the outer layer of dead skin cells, which can help to reduce the appearance of fine lines, wrinkles, and acne scars. Additionally, by removing the dead skin cells, it allows for better absorption of skincare products, making them more effective. This can be especially beneficial for individuals who have hyperpigmentation or uneven skin tone, as the exfoliation can help to even out the complexion. Another benefit of dermaplaning is the removal of vellus hair. While many people are hesitant to remove peach fuzz, it can actually be beneficial for the skin. Vellus hair can trap dirt and oil, which can contribute to breakouts. By removing the hair, it can help to prevent breakouts and make the skin appear smoother and more refined. Dermaplaning is also a quick and painless procedure. It typically takes around 30 minutes to complete and is done in-office by a licensed esthetician or dermatologist. Unlike other exfoliating treatments, such as chemical peels, dermaplaning does not require any downtime. Patients can immediately return to their normal activities without any redness or irritation. Risks and Considerations While dermaplaning is generally considered safe, there are some risks and considerations to keep in mind. The use of a sharp scalpel on the face can be dangerous if not done correctly, so it’s important to only have the procedure done by a licensed professional. It’s also important to avoid any sun exposure for a few days after the procedure, as the skin will be more sensitive. Another consideration is that dermaplaning is not suitable for everyone. Individuals with active acne, eczema, or rosacea should avoid the procedure, as it can exacerbate these conditions. Additionally, those with a history of cold sores should take precautions, as the procedure can trigger an outbreak. It’s also important to note that dermaplaning is a temporary solution. While the results can last for a few weeks, the skin will eventually return to its natural state. For best results, it’s recommended to have the procedure done every 4-6 weeks. How to Prepare for Dermaplaning Before having a dermaplaning treatment, it’s important to properly prepare your skin. This includes avoiding any exfoliating treatments for at least a week prior to the procedure. It’s also important to avoid any sun exposure or tanning beds for at least a week before the procedure. On the day of the procedure, it’s important to arrive with a clean face, free of any makeup or skincare products. The esthetician or dermatologist will then apply a numbing cream to the face, which will help to minimize any discomfort during the procedure….

The Butterfly Haircut: A Nostalgic Hairstyle From The Past
The Butterfly Haircut: A Nostalgic Hairstyle from the Past

The butterfly haircut was a popular hairstyle in the 1970s and 1980s. This hairstyle was characterized by short hair on the top and longer hair on the sides and back. The hair on the sides and back was often layered, giving the hair a flowing, butterfly-like appearance. This hairstyle was especially popular among women, but it was also worn by men. The butterfly haircut was often paired with a perm, which added volume and texture to the hair. The perm created curls or waves in the longer hair on the sides and back, while the shorter hair on the top was often styled with a slight wave or curl as well. This created a contrast in textures that added to the overall appearance of the hairstyle. The butterfly haircut was not just a hairstyle, but a cultural phenomenon. It was popularized by celebrities like Farrah Fawcett, who wore the hairstyle on the hit television show “Charlie’s Angels.” Fawcett’s hairstyle became so popular that it was named after her, and it became known as the “Farrah Fawcett hairstyle.” The butterfly haircut was also popular among African American women, who often wore the hairstyle with cornrows or braids on the sides and back. This created a unique look that combined traditional African American hairstyles with the popular butterfly haircut. Despite its popularity, the butterfly haircut eventually fell out of fashion. In the 1990s, shorter haircuts became more popular, and the perm fell out of fashion as well. However, the butterfly haircut remains a nostalgic hairstyle from the past, and it is still worn by some today. If you’re considering getting a butterfly haircut, there are a few things you should know. First, the haircut requires regular maintenance to keep it looking its best. The longer hair on the sides and back will need to be trimmed regularly to prevent split ends, and the shorter hair on the top will need to be styled to maintain its shape. Second, the butterfly haircut works best on those with straight or slightly wavy hair. If you have curly hair, you may need to straighten it to achieve the desired look. If you have very thick or coarse hair, you may need to have it thinned out to achieve the flowing, butterfly-like appearance. Finally, the butterfly haircut can be a great choice if you’re looking for a nostalgic hairstyle that harkens back to the 1970s and 1980s. It’s a fun and playful hairstyle that can add a touch of whimsy to your look. Whether you’re wearing it with a perm or without, the butterfly haircut is sure to turn heads and make you stand out in a crowd. In conclusion, the butterfly haircut is a hairstyle that has stood the test of time. Although it may no longer be as popular as it once was, it remains a nostalgic hairstyle from the past that is still worn by some today. If you’re considering getting a butterfly haircut, be sure to do your research and talk to your hairstylist to make sure it’s the right choice for you. With…

Navigating The Challenge Of Preventingteeth Discoloration
Navigating the Challenge of Preventing Teeth Discoloration: A Guide to Protecting Your Sparkling Smile

A dazzling smile is widely regarded as a hallmark of wellness, attractiveness, and self-assurance. Yet, keeping that sparkle isn’t straightforward, given the daily habits that may cause our teeth to lose their brilliance. By identifying and avoiding the main culprits of discoloration, you can take significant steps toward preserving the sparkle of your smile. This guide explores the top five factors leading to teeth discoloration, offering advice and techniques to evade these common pitfalls and maintain a gleaming, healthy smile. Decoding Teeth Discoloration The reasons behind teeth discoloration are varied, encompassing diet, oral hygiene, and more. It is crucial to distinguish between extrinsic stains, which mar the tooth’s surface, and intrinsic stains, which lie deeper and pose a greater challenge to remove. Recognizing these causes enables individuals to actively prevent teeth discoloration. Diet’s Influence on Teeth Shade The impact of our diet on teeth color is substantial. Some foods and drinks are infamous for causing stains. Being aware of which ones to limit or avoid can have a notable effect on the luminosity of your smile. 1. Coffee and Tea: The Harsh Reality Despite their popularity for their invigorating properties, coffee and tea are prominent offenders in teeth staining. Their intense pigments cling to the enamel, gradually dimming your smile. Adopting routines such as drinking water post-consumption can help lessen their staining impact. 2. Tobacco: A Hazard to Your Smile The use of tobacco, through smoking or chewing, introduces noxious chemicals that lead to severe teeth discoloration. Abstaining from tobacco not only boosts your overall health but is also essential for keeping your smile white. 3. Red Wine: Benefits with a Catch Although red wine is celebrated for its health advantages, it is equally known for causing teeth stains. Its acidity and rich pigments can compromise the enamel, though moderation and diligent oral care can mitigate these effects. 4. Sodas and Acidic Drinks: Dual Threats Acidic drinks, like sodas, wear down the enamel, rendering the teeth more prone to stains. Choosing healthier alternatives and curbing consumption can safeguard your smile. 5. Berries and Vibrantly Colored Foods: Innocent Offenders Berries, despite their antioxidant benefits, can leave stains on teeth due to their deep hues. Conscious consumption and thorough oral hygiene can lessen their staining potential. Preventing and Maintaining a White Smile Adhering to daily oral hygiene practices, including brushing, flossing, and rinsing with mouthwash, is vital in averting discoloration. Regular visits for dental checkups and cleanings further contribute to a luminous smile. Opting for Professional Teeth Whitening For immediate enhancements, professional teeth whitening provides a reliable and efficient method. Understanding the various treatments available assists in selecting the most suitable option. Natural Teeth Whitening Solutions While certain home remedies may offer benefits, it’s crucial to approach teeth whitening cautiously. Knowledge of safe practices ensures the preservation of your smile’s health. The Foundation of a Bright Smile: Oral Hygiene Excellent oral hygiene is essential for maintaining a gleaming smile. Choosing appropriate dental care products plays a significant role in preventing discoloration. Lifestyle Changes for Enhancing Your Smile Embracing healthy habits and avoiding those that…