7 Best Nail Shapes for Unique Finger Shapes

Nail art has transcended beyond mere fashion; it’s a form of self-expression. The right nail shape can complement your finger type, elevating your overall look and boosting your confidence. This guide explores the top 7 nail shapes suited for various finger shapes, offering insights into choosing and maintaining the ideal shape for your nails.
7 Best Nail Shapes For Unique Finger Shapes

Understanding Finger Shapes

Before diving into nail shapes, it’s crucial to understand your finger type. Finger shapes vary from short and wide to long and slender. The right nail shape can accentuate the beauty of your hands by making your fingers appear more elongated or your hand more balanced.

The Classic Round Nail Shape

Best for Short and Wide Fingers: The round nail shape is timeless and versatile, perfect for those with short and wide fingers. It elongates the fingers, giving them a more graceful appearance.

Elegant Almond Nail Shape

Ideal for Long and Slim Fingers: The almond shape is characterized by slender sides and a tapered tip, resembling an actual almond. This shape is best for those with long, slim fingers, as it adds a touch of elegance.

Chic Oval Nail Shape

Suited for Most Finger Types: The oval shape is similar to the almond but with a softer, more rounded tip. It’s incredibly versatile, suiting most finger shapes and sizes.

Bold Square Nail Shape

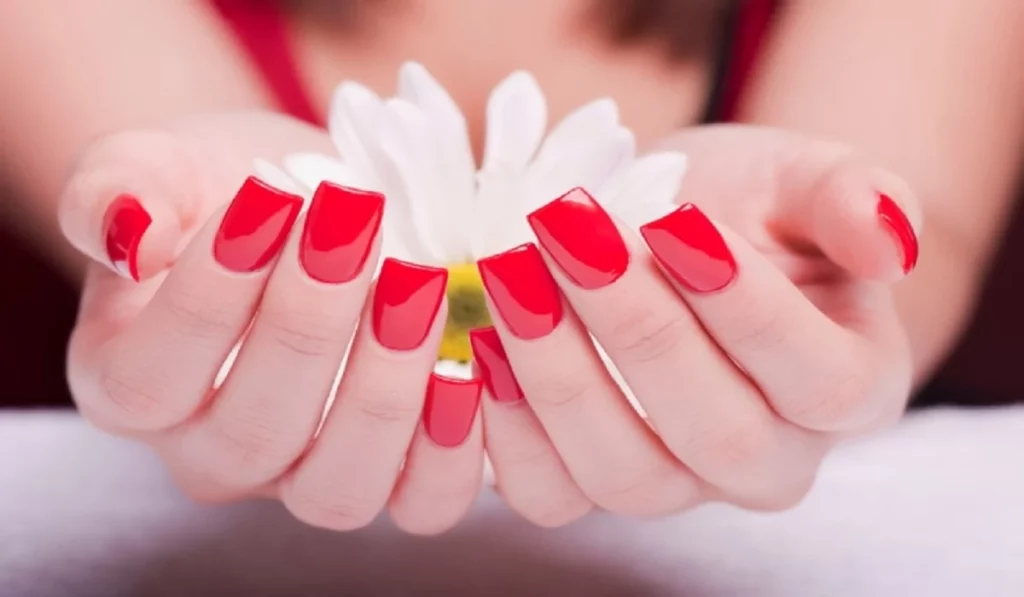
Recommended for Long Fingers with Wide Nail Beds: The square nail shape features straight edges and a squared-off tip, ideal for those with long fingers and wide nail beds. It offers a modern, edgy look.

Trendy Coffin/Ballerina Nail Shape

Works Well with Long and Slender Fingers: The coffin or ballerina shape is dramatic and stylish, narrowing down to a flat tip. It’s best for those with long and slender fingers, adding an element of sophistication.

Edgy Stiletto Nail Shape

For the daring and adventurous, the stiletto shape, with its pointed tip, makes a bold statement. It’s not for the faint-hearted but can be a fun way to express your style.

Mix and Match: Combining Shapes for Unique Styles

Exploring hybrid shapes can result in a unique nail style that’s entirely your own. From squoval (a mix of square and oval) to almondette (a shorter almond), the possibilities are endless.
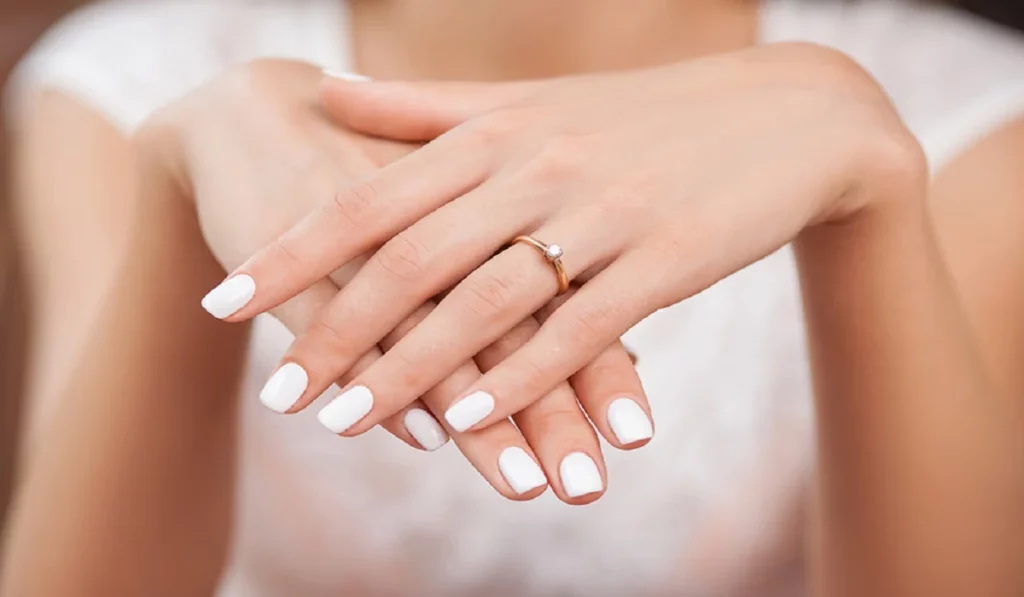
7best Nail Shapes For Unique Finger Shapes

Maintenance Tips for Different Nail Shapes

Maintaining your chosen nail shape requires regular care, including filing and conditioning. Use quality nail care products to keep your nails strong and healthy.

The Impact of Nail Length on Shape

The length of your nails can significantly impact the final look. Whether you prefer short and chic or long and dramatic, choosing the right length is key to complementing your chosen nail shape.

Color and Design Tips for Each Nail Shape

Selecting the right color and design can further enhance your nail shape. Bright, bold colors can make short nails stand out, while nude or pastel shades can elongate the appearance of your fingers.

Professional Advice on Nail Shaping

When visiting a salon, it’s essential to communicate your desired nail shape clearly. A professional nail technician can offer advice tailored to your finger shape and lifestyle.

DIY Nail Shaping Techniques

For those who prefer to shape their nails at home, investing in the right tools, such as a good quality file and cuticle oil, is crucial. Follow a gentle filing technique to avoid damaging your nails.

Common Mistakes to Avoid While Shaping Nails

Avoid over-filing or using a back-and-forth motion, as this can weaken your nails. Instead, file in one direction to achieve a smooth finish.

Celebrity Inspirations for Nail Shapes

Many celebrities flaunt unique nail shapes, providing plenty of inspiration. From Rihanna’s bold choices to Taylor Swift’s classic styles, you can find a celebrity look that resonates with your personal style.

Choosing the right nail shape can significantly enhance your hand’s appearance and complement your personal style. Whether you prefer a classic round or a bold stiletto, there’s a nail shape suited for every finger type. Experiment with different shapes and maintenance techniques to discover the perfect look for your hands.


  • How often should I file my nails to maintain their shape?
  • Can changing my nail shape affect the health of my nails?
  • What nail shape is best for typing or playing an instrument?
  • How do I choose the right nail shape for my wedding or special event?
  • Is it possible to change my nail shape if I don’t like it?


Luxurious Lashes: Exploring The Beauty Of Silk Eyelashes
Luxurious Lashes: Exploring the Beauty of Silk Eyelashes

Silk eyelashes have become increasingly popular in the world of beauty and makeup. Known for their softness, durability, and natural appearance, silk eyelashes offer a luxurious alternative to traditional synthetic or mink eyelashes. In this article, we will delve into the world of silk eyelashes, exploring their features, benefits, and why they have gained recognition as a favored choice for enhancing the beauty of the eyes. Understanding Silk Eyelashes:Silk eyelashes are made from synthetic fibers that are designed to mimic the look and feel of natural eyelashes. These lashes are created using fine threads of synthetic silk, resulting in a soft, lightweight, and fluttery appearance. The synthetic silk fibers used in silk eyelashes are carefully crafted to closely resemble the texture and shine of real lashes, providing a natural and glamorous effect. Softness and Comfort:One of the standout features of silk eyelashes is their remarkable softness and comfort. The fine synthetic silk fibers offer a gentle touch against the skin, ensuring a comfortable wearing experience. Unlike some other types of false lashes, silk lashes are lightweight and flexible, allowing for easy application and a seamless blend with your natural lashes. Durability and Longevity:Silk eyelashes are known for their durability and longevity. The synthetic silk fibers used in their construction are resilient and can withstand regular wear and tear. When properly cared for, silk lashes can be reused multiple times, making them a cost-effective choice in the long run. With proper maintenance and storage, silk eyelashes can retain their shape and beauty for an extended period. Natural-Looking Results:One of the main reasons why silk eyelashes have gained popularity is their ability to deliver natural-looking results. The fine and tapered silk fibers closely resemble the texture and appearance of real lashes, creating a seamless blend with your natural lash line. Silk lashes provide a subtle enhancement, adding length, volume, and definition without appearing overly dramatic or artificial. Versatility in Style:Silk eyelashes come in a wide range of styles and designs, offering versatility to suit different eye shapes and personal preferences. From natural-looking lashes with a subtle lift to more dramatic and voluminous options, there is a silk lash style to complement any makeup look or occasion. Whether you prefer a natural everyday look or a glamorous evening aesthetic, silk eyelashes can be tailored to meet your desired effect. Hypoallergenic and Suitable for Sensitive Eyes:For individuals with sensitive eyes or those prone to allergies, silk eyelashes can be a great option. The synthetic silk fibers used in their construction are typically hypoallergenic, reducing the risk of irritation or adverse reactions. However, it is important to note that everyone’s sensitivity levels may vary, so it’s always advisable to conduct a patch test before using any new lash product. Easy Application and Removal:Silk eyelashes are user-friendly and easy to apply, even for beginners. Their lightweight nature and flexibility make them simple to maneuver and position along the lash line. The soft band of silk lashes allows for seamless blending and a comfortable fit. Similarly, silk eyelashes are easily removable without causing any damage to the natural lashes…

Diy Haircut Guide: How To Cut Your Own Hair At Home
DIY Haircut Guide: How to Cut Your Own Hair at Home

Whether you’re looking to save time and money or simply prefer the convenience of a DIY approach, cutting your own hair at home is a practical skill to have. While leaving major hair transformations to professional stylists is advisable, trimming your hair or giving yourself a simple haircut can be achieved with the right tools and techniques. In this comprehensive guide, we will walk you through step-by-step instructions on how to cut your own hair, along with helpful tips to ensure a successful and satisfying outcome. Gather the Right Tools:Before you start cutting your hair, gather the necessary tools to ensure a smooth process. You will need:Sharp haircutting scissors: Invest in a good pair of professional scissors designed for hair cutting. Using regular scissors can lead to uneven cuts and split ends. Hair clips or elastics: These will help you section your hair for easier cutting. Comb: A fine-toothed comb will assist in detangling and parting your hair. Mirror: A large, handheld mirror and a stationary mirror will allow you to see your hair from different angles during the cutting process. Spray bottle with water: Mist your hair with water to dampen it slightly before cutting. This makes the hair more manageable and prevents excessive flyaways. Decide on the Haircut:Decide on the type of haircut you want before you begin. For simple trims or maintaining your current hairstyle, follow your previous cut as a reference. If you plan to make significant changes to your hair, it’s best to seek guidance from a professional stylist to avoid potential mishaps. Start with Clean, Dry Hair:Cutting your hair when it’s clean and dry ensures more accurate results. Wash and dry your hair thoroughly before starting the haircutting process. Section Your Hair:Divide your hair into manageable sections using hair clips or elastics. Start by parting your hair down the center and then create additional sections horizontally. Pin each section securely to keep the hair you’re not cutting out of the way. Trim the Ends:For a simple trim, work with one section at a time. Take a small subsection of hair and comb it straight down. Hold the hair between your fingers and trim the ends evenly, following your desired length. Make small, cautious cuts to avoid removing too much hair at once. Create Layers (Optional):If you desire layers, you can achieve them at home with careful technique. To create face-framing layers, take a section of hair from the front and hold it at a 45-degree angle away from your face. Trim the hair diagonally, working from the shortest point to the longest point. Repeat this process on both sides of your face for balanced layers. Check for Evenness:After cutting each section, release the hair and check for evenness and balance. Use your mirror to view your hair from different angles, making any necessary adjustments to ensure a uniform cut. Tackle Bangs (Optional):If you have bangs, trim them carefully by combing them straight down over your forehead. Hold the scissors vertically and make small, gentle cuts to the desired length. Remember that it’s better to start with…

Unlocking The Secrets To Flawless Skin Pore Care And Minimization 1
Unlocking the Secrets to Flawless Skin: Pore Care and Minimization

Pores, those tiny openings on our skin, are a natural and essential part of our skin’s structure. However, for many, they can be a source of frustration, leading to questions about their size, appearance, and whether it’s possible to minimize them. In this comprehensive guide, we will embark on a journey to demystify the world of skin pores, addressing the common misconceptions and revealing the science-backed methods for achieving smoother, refined-looking skin. From understanding the basics of pores to exploring various skincare routines and treatments, we will uncover the truth about pore minimization and empower you with the knowledge to achieve your skin goals. Chapter 1: The Basics of Skin Pores In this chapter, we’ll start by laying the foundation for understanding skin pores: Chapter 2: The Genetics of Pores Genetics play a significant role in determining the size and appearance of your pores. In this chapter, we will explore: Chapter 3: Common Misconceptions About Pores This chapter will address some of the most prevalent misconceptions surrounding pores: Chapter 4: The Role of Skincare in Minimizing Pores Skincare routines can have a significant impact on the appearance of pores. In this chapter, we will delve into: Chapter 5: The Power of Ingredients Certain skincare ingredients are known for their pore-refining properties. In this chapter, we will explore: Chapter 6: Professional Treatments for Pore Minimization For those seeking more advanced solutions, professional treatments can make a difference. In this chapter, we will discuss: Chapter 7: Lifestyle and Pore Health The choices you make in your daily life can affect the appearance of your pores. In this chapter, we will cover: Chapter 8: Makeup Techniques for Pore Minimization Makeup can be a powerful tool in achieving the appearance of smoother skin. In this chapter, we will discuss: Chapter 9: Acceptance and Self-Care In this chapter, we will explore the importance of self-acceptance and self-care when it comes to pores: In conclusion, the pursuit of flawless skin and the minimization of pores is a journey that combines science, skincare, and self-care. Pores are an integral part of our skin’s structure, and while we cannot change their size permanently, we can take steps to keep them clear, refined, and healthy. By adopting a consistent skincare routine, making informed product choices, and seeking professional treatments when needed, you can achieve the appearance of minimized pores. Additionally, a holistic approach that includes a balanced diet, hydration, stress management, and self-acceptance is essential for overall skin health and confidence. Remember, beautiful skin is not about perfection; it’s about embracing your unique skin and nurturing it to radiate with health and vitality. Your journey to pore perfection begins with knowledge and self-care, and the results are worth every step.

Framing Perfection: A Comprehensive Guide To Choosing The Best Haircuts For Oval Faces
Framing Perfection: A Comprehensive Guide to Choosing the Best Haircuts for Oval Faces

The oval face shape is often considered the most versatile and balanced among all face shapes, offering a canvas that can pull off a wide variety of hairstyles. Its balanced proportions and well-defined bone structure make it a prime candidate for experimenting with different haircut styles. Whether you’re looking to emphasize your natural beauty or create a dramatic change, selecting the right haircut can enhance your features and complement your overall look. In this guide, we’ll explore the world of haircuts that best suit oval faces, providing you with expert insights and a curated list of styles to help you make an informed decision. Understanding the Oval Face Shape An oval face shape is characterized by its balanced proportions and soft contours. The forehead is slightly wider than the chin, and the jawline is gently curved. This versatile shape allows for various hairstyles and lengths, as the facial features are already well-balanced. Considerations for Choosing Haircuts When selecting a haircut for an oval face shape, keep the following factors in mind: Best Haircuts for Oval Faces Styling Tips Celebrity Inspiration Looking at celebrities with oval faces can offer valuable inspiration for choosing the perfect haircut: The oval face shape provides a versatile canvas for exploring a wide range of haircuts and styles. Whether you opt for a classic bob, a daring pixie, or anything in between, the key is to enhance your features and embrace your personal style. By understanding your face shape and considering factors like hair texture and maintenance, you can confidently choose a haircut that frames your face beautifully and complements your overall look. As you experiment with different styles, remember that the goal is to enhance your natural beauty and create a harmonious balance that brings out the best in your oval face shape.

Forehead Wrinkles & Fine Lines: Top Causes And How To Fix Them
Forehead Wrinkles & Fine Lines: Top Causes and How to Fix Them

As we age, our skin goes through many changes, one of which is the development of wrinkles and fine lines. Forehead wrinkles and fine lines are some of the most noticeable signs of aging, and they can be a cause of concern for many people. However, there are many factors that contribute to the development of these wrinkles and fine lines, and there are also many ways to fix them. In this article, we will explore the top causes of forehead wrinkles and fine lines and discuss how to fix them. Causes of Forehead Wrinkles and Fine Lines Aging: As we age, our skin loses its elasticity and becomes thinner, making it more prone to wrinkles and fine lines. Sun damage: Exposure to the sun’s UV rays can damage the skin, causing it to lose elasticity and develop wrinkles and fine lines. Genetics: Some people are more prone to developing wrinkles and fine lines due to their genetics. Smoking: Smoking is known to accelerate the aging process and can lead to the development of wrinkles and fine lines. Repetitive facial expressions: Repeatedly making the same facial expressions can cause the skin to crease, leading to the development of wrinkles and fine lines. Dehydration: When the skin is dehydrated, it can become dry and more prone to wrinkles and fine lines. Poor diet: A poor diet that is low in nutrients and antioxidants can contribute to the development of wrinkles and fine lines. How to Fix Forehead Wrinkles and Fine Lines Sun protection: Protecting your skin from the sun’s UV rays is one of the best ways to prevent the development of wrinkles and fine lines. Always wear sunscreen when you are outside and try to stay in the shade during the hottest parts of the day. Moisturize: Keeping your skin moisturized can help to prevent wrinkles and fine lines from developing. Use a high-quality moisturizer that contains hyaluronic acid, which helps to hydrate the skin and reduce the appearance of wrinkles. Facial exercises: Performing facial exercises can help to strengthen the muscles in your face and prevent the development of wrinkles and fine lines. Quit smoking: Quitting smoking is one of the best things you can do for your skin. Smoking is known to accelerate the aging process and can lead to the development of wrinkles and fine lines. Hydration: Staying hydrated is essential for maintaining healthy skin. Make sure to drink plenty of water throughout the day to keep your skin hydrated and prevent the development of wrinkles and fine lines. Healthy diet: Eating a healthy diet that is rich in nutrients and antioxidants can help to prevent the development of wrinkles and fine lines. Foods that are high in vitamin C, such as citrus fruits, can help to boost collagen production, which can help to reduce the appearance of wrinkles. Cosmetic treatments: There are many cosmetic treatments available that can help to reduce the appearance of wrinkles and fine lines. Botox injections, dermal fillers, and chemical peels are just a few of the treatments that are available. Forehead wrinkles and…

From Sparse To Spectacular A Journey To Rejuvenating Youreyelashes
From Sparse to Spectacular: A Journey to Rejuvenating Your Eyelashes

The diminution of eyelashes not only detracts from the visual appeal and the lively expressiveness of the eyes but also causes considerable distress. Eyelashes, serving as both a protective barrier against environmental irritants and a key feature enhancing facial symmetry, necessitate proper attention and care to maintain their health and aesthetics. This detailed guide aims to unveil a holistic approach towards curbing eyelash loss and fostering the regeneration of fuller, more robust eyelashes through a combination of effective care strategies, nutritional insights, and professional advice. Optimal Makeup Conduct and Removal Techniques The manner in which makeup is applied and subsequently removed plays a critical role in preserving eyelash integrity. The application of heavy, waterproof eye cosmetics often leads to undue stress on the lashes, contributing to their fragility and loss during the removal process. Favoring cosmetics formulated to be gentle on the lashes and employing a careful, thorough makeup removal process with appropriate products can significantly mitigate these risks. It’s imperative to abstain from harshly rubbing or tugging at the lashes to avoid exacerbating the loss. Nutritional Foundations for Eyelash Vitality The correlation between diet and hair health extends to eyelashes, with a nutrient-dense diet being foundational to their growth and resilience. A balanced intake of proteins, vitamins (notably B vitamins), minerals (including iron and zinc), and essential fatty acids promotes the vitality of eyelashes. Consuming foods rich in these nutrients, such as fish, eggs, legumes, and nuts, supports not only the health of your eyelashes but also their potential for more rapid growth. Enhancement through Eyelash Growth Serums and Natural Oils The targeted application of growth serums and natural oils can significantly enhance the thickness and length of eyelashes. Ingredients such as peptides, biotin, and botanical extracts in serums are known to aid hair growth, while natural oils like castor oil, coconut oil, and vitamin E oil offer nourishment and strength to the lashes when applied consistently with a clean applicator. Sidestepping Detrimental Habits Many everyday habits unwittingly contribute to the loss of eyelashes, such as vigorous eye rubbing, excessive use of lash curlers, or neglecting to remove makeup before sleep. Adopting a more mindful and gentle approach to eye care can help avert unnecessary damage and loss. Advancements through Professional Eyelash Treatments For individuals desiring more noticeable enhancements, professional options such as advanced growth serums and eyelash extensions present viable alternatives. These treatments, however, warrant careful consideration and should always be undertaken with professional guidance to circumvent adverse effects and ensure the health of your eyelashes. Instituting a Regular Eyelash Maintenance Regimen The establishment of a consistent eyelash care regimen is instrumental in maintaining their health and aesthetic appeal. Routine actions such as gentle cleansing, conditioning, and occasional light brushing can greatly influence the condition of your lashes, promoting their health and natural growth. Stress Reduction for Optimal Eyelash Health The pervasive effects of stress on the body include detrimental impacts on hair and eyelash growth. Engaging in activities that lower stress levels, such as physical exercise, meditation, or pursuing enjoyable hobbies, can help in reducing these adverse effects and…

Understanding Facial Warts: Causes, Symptoms, Treatment, And Prevention
Understanding Facial Warts: Causes, Symptoms, Treatment, and Prevention

Facial warts are a common skin condition that affects many people around the world. They are small, raised, rough, and often flesh-colored or brownish growths that appear on the face, neck, or other areas of the body. While they are usually harmless, they can be unsightly and can cause embarrassment, especially if they appear on prominent areas of the face. In this article, we will discuss everything you need to know about facial warts, including their causes, symptoms, treatment, and prevention. Causes of Facial Warts: Facial warts are caused by a type of virus called human papillomavirus (HPV). There are more than 100 different strains of HPV, and some of them can cause warts to develop on the skin. HPV is highly contagious and can be spread through direct skin-to-skin contact or by touching surfaces that have come into contact with the virus. People with weakened immune systems are more susceptible to developing warts, including facial warts. Symptoms of Facial Warts: Facial warts are usually small, raised, and rough to the touch. They may appear as a single wart or in clusters, and can range in size from a pinhead to a pea. Facial warts can appear on any part of the face, including the forehead, cheeks, nose, chin, and around the eyes. They may be flesh-colored or brownish in color, and can have a rough or smooth surface. Facial warts may also cause other symptoms, such as itching, bleeding, or pain. If a facial wart becomes irritated, it may bleed or become infected, which can lead to further complications. Treatment of Facial Warts: Facial warts can be treated using a variety of methods, depending on their size, location, and severity. Some of the most common treatments for facial warts include: Topical medications: Over-the-counter creams and ointments containing salicylic acid or other chemicals can be applied directly to the wart to help dissolve it. These medications may take several weeks or months to work, and may cause mild irritation or redness. Cryotherapy: This involves freezing the wart with liquid nitrogen. This causes the wart to blister and eventually fall off. Cryotherapy is usually performed by a dermatologist and may require several treatments. Laser treatment: This involves using a laser to destroy the wart tissue. Laser treatment is usually reserved for larger or more stubborn warts, and may require local anesthesia. Surgery: In rare cases, surgery may be necessary to remove a facial wart. This is usually only recommended for large or painful warts that do not respond to other treatments. Prevention of Facial Warts: Preventing facial warts involves taking steps to reduce your risk of being exposed to the HPV virus. Some of the most effective ways to prevent facial warts include: Practice good hygiene: Wash your hands regularly, especially after touching surfaces that may be contaminated with the virus. Avoid touching your face: This can help reduce your risk of spreading the virus to your face. Avoid sharing personal items: Do not share towels, razors, or other personal items that may be contaminated with the virus. Wear shoes in public places:…

Enhancing Makeup Perfection: Exploring The Power Of Setting Spray And Primer
Enhancing Makeup Perfection: Exploring the Power of Setting Spray and Primer

In the world of cosmetics, setting spray and primer have become essential tools for makeup enthusiasts and professionals alike. These products play a crucial role in achieving a flawless and long-lasting makeup look. In this article, we will explore the purpose and benefits of makeup setting spray, as well as provide guidance on the proper use of primer. By understanding the role of these products and learning effective application techniques, you can take your makeup game to the next level. Part 1: Unveiling the Magic of Makeup Setting Spray Defining Makeup Setting Spray: Makeup setting spray, also known as finishing spray or fixing spray, is a product designed to prolong the wear of makeup and help it stay in place.It typically comes in a spray bottle and contains ingredients that provide a light mist over the face, setting the makeup and creating a protective layer. The Benefits of Makeup Setting Spray: Prolongs Makeup Wear: Setting spray helps to extend the longevity of your makeup, preventing it from smudging or fading throughout the day.Enhances Makeup Appearance: Setting spray can give your makeup a more seamless, airbrushed finish, making it look more natural and blended.Increases Makeup Durability: By creating a protective barrier, setting spray helps to shield your makeup from external factors such as humidity, sweat, and oiliness.Hydrates the Skin: Some setting sprays contain hydrating ingredients that can provide an added boost of moisture to your skin, giving it a fresh and dewy appearance. How to Use Makeup Setting Spray: After completing your makeup application, hold the setting spray bottle about 8-10 inches away from your face.Close your eyes and mist the spray in a circular motion, ensuring that your entire face is covered.Allow the spray to dry naturally without touching or blending it in.If you prefer a more intense hold, you can repeat the process by layering the setting spray.Part 2: Unleashing the Potential of Primer Understanding Primer: Primer is a preparatory product applied before makeup to create a smooth and even canvas for foundation and other cosmetics.It typically comes in a gel, cream, or lotion form and is available in various types such as silicone-based, water-based, color-correcting, or illuminating.The Benefits of Using Primer: Smoothes the Skin: Primer helps to fill in fine lines, wrinkles, and pores, creating a smoother surface for makeup application.Improves Makeup Longevity: By providing a base for makeup to adhere to, primer helps to extend the wear time of your cosmetics.Enhances Makeup Pigmentation: Primer can intensify the color and vibrancy of your makeup, making it appear more vibrant and true to shade.Addresses Specific Skin Concerns: Different types of primers cater to specific skin concerns, such as oil control, hydration, or color correction. How to Apply Primer: Start with a clean and moisturized face.Dispense a small amount of primer onto your fingertips or a makeup brush.Apply the primer onto specific areas of concern, such as the T-zone or areas with visible pores or texture.Gently blend the primer into your skin using upward strokes, ensuring an even and seamless application.Allow the primer to settle for a few minutes before proceeding with…