Mastering the Art of Liquid Concealer for a Flawless Finish

Liquid concealer isn’t just a makeup product; it’s a magic wand for your complexion. Essential for brightening the complexion, highlighting facial features, and concealing signs of fatigue or blemishes, liquid concealer serves as a color corrector. Ideally, it should be a shade or two lighter than your skin tone to effectively mask dark circles and imperfections, ensuring a seamless blend with your foundation for a natural, yet polished look.
How To Choose The Best Liquid Concealer


Liquid vs. Powder Concealer: Making the Right Choice

The Supremacy of Liquid Concealer

Liquid concealer reigns supreme in the beauty world for its ease of application, blendability, and exceptional coverage. Its dense formula surpasses traditional foundation in concealing power, catering to those seeking medium to full coverage.

Understanding Powder Concealer

While less common, powder concealer offers a lightweight alternative, ideal for individuals with sensitive or acne-prone skin seeking a more natural finish. Unlike liquid formulas, powder concealers boast a shine-free finish without the need for setting, and are celebrated for their durability and crease-resistant properties.

Choosing Your Concealer Wisely

Consider Your Skin Type

Your skin type plays a pivotal role in concealer selection. Liquid concealers are versatile, catering to normal, sensitive, combination, and dry skin types by offering hydrating formulas that minimize flakiness. For oily skin, seek out oil-free liquid options that provide a matte finish without clogging pores.

Coverage and Finish

Determine your coverage needs: full coverage for concealing significant imperfections or medium coverage for a balance between concealment and a natural look. Your desired finish, be it dewy or matte, also influences your choice. For acne-prone skin, non-comedogenic formulas are essential, while those looking for added benefits should consider concealers with SPF.

The Art of Application: Liquid Concealer

Foundation First or Concealer?

The application sequence depends on your foundation type. With powder foundation, apply concealer first to avoid a patchy finish. For liquid foundation, applying concealer afterward allows for precise coverage of any remaining imperfections and enhances facial contours through strategic light and shadow play.


Application Techniques

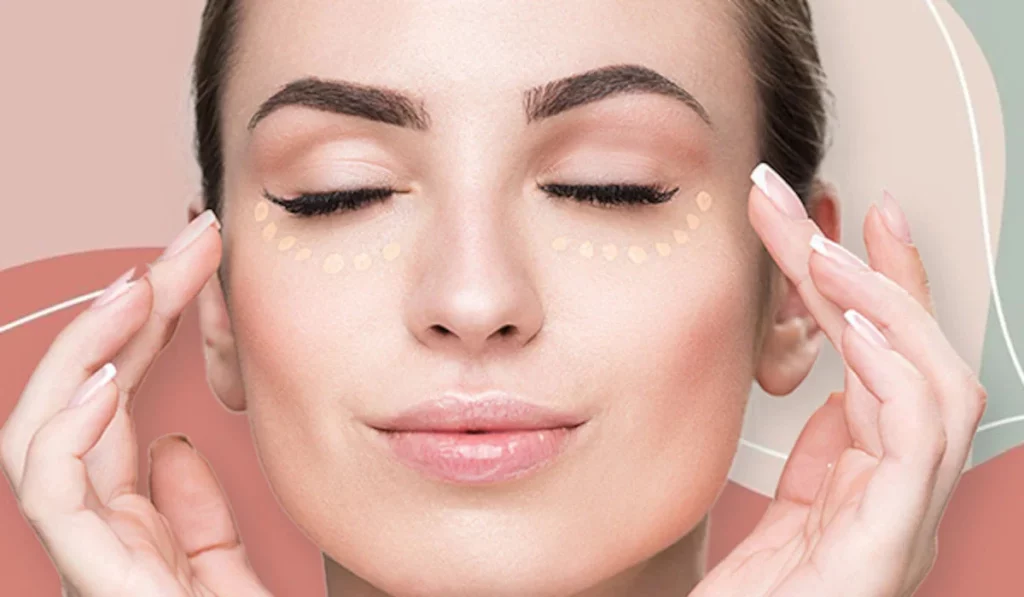
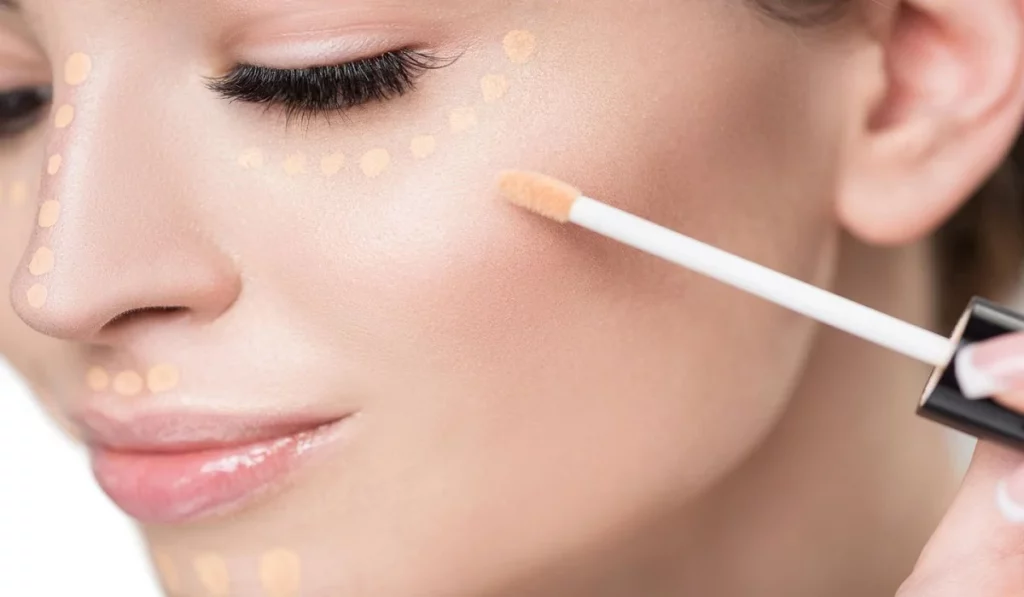
Apply your foundation evenly, then dot liquid concealer under the eyes, along the T-zone, or on blemishes. Using a concealer brush or damp makeup sponge, blend gently for a seamless integration with your foundation. Remember, less is more to avoid a cakey appearance.
How To Choose The Best Liquid Concealer

Setting Your Concealer

Finalize your application with a translucent setting powder to ensure your concealer stays in place and maintains its brightness. Be mindful that the concealer should be slightly lighter than your foundation, but beware of setting powders altering its shade. Opt for a concealer one shade darker if using a tinted setting powder to compensate for any light-diffusing effects.

Tips for a Flawless Finish

  • Shade Selection: Test concealer shades in natural light for the best match.
  • Hydration: Moisturize your skin before application, especially under the eyes, to prevent creasing.
  • Blending: Blend edges meticulously for a natural transition between concealer and skin.
  • Layering: For extra coverage, layer your concealer gradually, allowing each layer to set before applying the next.
  • Touch-ups: Carry a mini concealer for quick touch-ups to maintain a fresh look throughout the day.

Mastering liquid concealer is key to achieving a flawless makeup base. By selecting the right product for your skin type and coverage needs, and employing proper application techniques, you can enhance your natural beauty while concealing imperfections. Remember, the best makeup is not about transformation but about accentuating your inherent beauty with confidence and grace.

  • How do I choose the right shade of liquid concealer?
  • Can liquid concealer be used on acne-prone skin?
  • How can I prevent my liquid concealer from creasing?
  • Is it necessary to use setting powder over liquid concealer?
  • How often should I replace my liquid concealer?


The One Layer Skincare Technique: Simplifying Your Skincare Routine For Maximum Effectiveness
The One Layer Skincare Technique: Simplifying Your Skincare Routine for Maximum Effectiveness

In the realm of skincare, one can easily become overwhelmed by the vast array of products, elaborate routines, and complicated techniques. However, there is a growing trend towards simplification and efficiency, giving rise to the ‘One Layer’ skincare technique. This minimalist approach aims to streamline your skincare routine while still providing maximum effectiveness. In this article, we will delve into the essence of the One Layer technique, discussing its benefits, step-by-step implementation, and the ideal products to use. So, get ready to simplify your skincare routine and achieve radiant, healthy skin! Understanding the One Layer Skincare Technique: The One Layer skincare technique is rooted in the belief that using fewer products, but with a strategic focus on high-quality, multi-functional formulations, can yield excellent results. Instead of piling numerous layers of products onto your skin, this approach emphasizes selecting a select few products that address multiple skincare concerns. By simplifying your routine, you can save time, money, and potentially reduce the risk of overwhelming your skin with an excessive number of ingredients. Step-by-Step Implementation: Identify your skin concerns: Begin by determining the primary skincare concerns you wish to address. Whether it’s dryness, acne, hyperpigmentation, or aging, understanding your skin’s specific needs will guide your product selection. Choose multi-functional products: Look for products that offer multiple benefits in a single application. For example, a moisturizer that also contains SPF can provide hydration, sun protection, and even a touch of coverage. Cleanse thoroughly: Start your routine with a gentle cleanser to remove dirt, oil, and impurities from the skin. Opt for a cleanser that suits your skin type, whether it’s oily, dry, or sensitive. Apply your core treatment: This step involves applying your primary treatment product, such as a serum or treatment essence, that targets your specific skin concerns. Look for ingredients like hyaluronic acid for hydration, vitamin C for brightening, or retinol for anti-aging. Moisturize and protect: Follow up with a moisturizer that provides hydration and locks in the active ingredients from the previous steps. Choose a moisturizer suitable for your skin type, whether it’s lightweight for oily skin or richer for dry skin. If your moisturizer doesn’t contain SPF, apply a broad-spectrum sunscreen as the final step to protect your skin from harmful UV rays. Recommended Products: When practicing the One Layer skincare technique, it’s crucial to choose products that offer a comprehensive range of benefits. Here are some recommendations: Multi-functional serum: Look for a serum that combines various active ingredients, such as antioxidants, peptides, and hyaluronic acid. This will provide hydration, anti-aging benefits, and promote overall skin health. Moisturizer with SPF: Opt for a moisturizer that includes broad-spectrum SPF protection. This will help streamline your routine by combining hydration, sun protection, and potentially even a tint or coverage. Gentle cleanser: Choose a cleanser that effectively removes impurities without stripping the skin of its natural oils. Look for ingredients like ceramides or hyaluronic acid to maintain moisture balance while cleansing. Targeted treatment: If you have specific skincare concerns, such as acne or hyperpigmentation, select a treatment product that addresses those issues directly. Ingredients…

5. Tips To Achieve Flawless Foundation On Oily Skin
Tips to Achieve Flawless Foundation on Oily Skin

Oily skin can make finding foundation difficult, particularly when trying to find one suitable to your complexion. Oily skin makes makeup appear uneven and cakey and causes it to wear off within hours; with the proper techniques and products though, flawless long-wearing foundation looks are possible for oily skin – this article provides tips and tricks for writing foundation for oily skin! Understanding Your Skin TypeBefore selecting the appropriate foundation, it is crucial that you are familiar with your skin type. Oily skin produces more sebum than normal skin and this excess production of sebum may result in breakouts, enlarged pores and overall shiny appearances. When looking for foundation formulas to purchase for oily skin conditions such as breakouts and shiny appearance, look for ones which are oil-free, non-comedogenic and lightweight which will help regulate sebum production while simultaneously unclog pores for an even appearance resulting in smoother complexions overall. Prepping Your SkinProper preparation of oily skin before foundation application is of utmost importance, particularly for those who prefer foundation with full coverage. Start by cleansing with a gentle cleanser designed for oily skin to gently dissolve extra dirt and oil from pores before toning to balance pH levels while tightening pores with toner and apply lightweight, oil-free moisturizer to hydrate without adding further oil production. When your skin has been properly prepped and primed for foundation, then start the application process! Selecting an Oil-Free Foundation FormulaWhen it comes to selecting an appropriate foundation formula for oily skin, several things need to be kept in mind. First and foremost is choosing one which is oil-free as this will help regulate excess production of sebum; furthermore a matte finish foundation is ideal as this absorbs oils while leaving skin looking non-greasy; powder foundations also work very well while powder foundations offer long lasting matte coverage while liquid formulas with water bases tend not clog pores as easily and cause breakouts; alternatively powder foundations could also work just fine but powder foundations could give your complexion long lasting matte coverage while powder based foundations provide long lasting matte coverage; powder based foundations work great too if preferred but liquid foundation is your preference; powder based options could offer long lasting matte coverage while powder foundations provide long lasting matte coverage; powder based formulations could even offer long lasting matte coverage while liquid formulas would likely cause less likely breakouts than their liquid counterparts can. Application Techniques for Oily SkinTo achieve an outstanding foundation application on oily skin, proper techniques must be utilized. Apply a thin coat of primer first in order to create an even surface; use either a makeup brush or sponge to evenly apply foundation over this thin base layer using thin strokes until coverage becomes noticeable in problem areas like T-zone where oil production levels tend to peak. Setting Your Foundation Applying foundation is critical when dealing with oily skin as it will control oil production and keep makeup in place all day long. Once foundation has been applied, use translucent powder to set it into place using thin, even layers…

The Spf Threshold: Understanding Why You Should Never Use Sunscreen Below 30 Spf
The SPF Threshold: Understanding Why You Should Never Use Sunscreen Below 30 SPF

Sunscreen is a crucial component of any skincare routine, providing protection against the harmful effects of the sun’s ultraviolet (UV) rays. Sun Protection Factor (SPF) is a measure of a sunscreen’s ability to shield the skin from UVB radiation, which is primarily responsible for sunburns. While a variety of SPF options are available, there is a consensus among dermatologists that using a sunscreen with an SPF below 30 is inadequate for adequate sun protection. In this article, we will explore the reasons why you should never use sunscreen below 30 SPF and understand the significance of SPF in safeguarding your skin against sun damage. Understanding SPF:SPF indicates the level of protection a sunscreen offers against UVB rays. For instance, an SPF 30 sunscreen theoretically allows you to stay in the sun 30 times longer than if you were not wearing any sunscreen before burning. SPF primarily measures protection against UVB rays, while UVA rays can also cause long-term skin damage. Therefore, it is crucial to choose a broad-spectrum sunscreen that protects against both UVA and UVB rays. Insufficient Protection from Sunburns:Using a sunscreen with an SPF below 30 significantly diminishes its ability to protect your skin from sunburns. Sunburns are not only painful but also a sign of skin damage. Sunscreens with higher SPF values provide a greater level of protection against UVB radiation, reducing the risk of sunburns and subsequent skin damage. Opting for an SPF below 30 increases your vulnerability to sunburns, making it essential to choose a higher SPF to effectively shield your skin. Inadequate Protection against Skin Cancer:Prolonged exposure to UV radiation is a major risk factor for skin cancer. Using a sunscreen with an SPF below 30 offers limited protection against UVB rays, which can lead to an increased risk of skin cancer. Skin cancer, including melanoma, the deadliest form of skin cancer, is strongly linked to sun exposure. By opting for a higher SPF sunscreen, you provide your skin with an added layer of defense against harmful UV rays, reducing the risk of developing skin cancer. Lesser Shielding against Premature Aging:UV radiation is a significant contributor to premature aging, including wrinkles, fine lines, and age spots. Sunscreens with SPF below 30 provide inadequate protection against UVB rays, allowing them to penetrate the skin and accelerate the aging process. By using a higher SPF sunscreen, you can minimize the damage caused by UV radiation, helping to preserve your skin’s youthful appearance and preventing premature aging. Increased Vulnerability to Sun Damage:Sun damage goes beyond sunburns and premature aging. Exposure to UV radiation without adequate protection can result in other harmful effects, including hyperpigmentation, uneven skin tone, and the breakdown of collagen and elastin fibers. These factors can lead to a loss of skin elasticity, sagging, and a dull complexion. To maintain the health and integrity of your skin, it is crucial to choose a sunscreen with an SPF of 30 or higher to provide robust protection against sun damage. Underestimating Sun Exposure:It is important to note that many individuals underestimate their sun exposure and the duration they spend…

Flawless Foundation Tips And Tricks For Applying Liquid Foundation
Flawless Foundation: Tips and Tricks for Applying Liquid Foundation

Liquid foundation is a versatile and widely used makeup product that helps create a smooth and even complexion. However, achieving a flawless finish with liquid foundation requires proper application techniques and some helpful tricks. In this comprehensive guide, we will explore valuable tips and tricks to ensure that your liquid foundation application is seamless, long-lasting, and enhances your natural beauty. Prepping Your SkinBefore applying liquid foundation, it’s essential to prepare your skin to ensure a smooth and even canvas. Follow these steps to optimize your foundation application: a. Cleansing: Start with a clean face by washing away any dirt, oil, or makeup residue. Use a gentle cleanser suitable for your skin type. b. Exfoliation: Regular exfoliation helps remove dead skin cells, promoting smoother skin and preventing foundation from clinging to dry patches. Exfoliate 1-2 times per week. c. Moisturizing: Apply a lightweight, hydrating moisturizer to keep your skin supple and prevent the foundation from settling into fine lines or dry areas. d. Primer: Consider using a makeup primer to create a smooth base and extend the longevity of your foundation. Choose a primer that suits your skin type, whether you have oily, dry, or combination skin. Selecting the Right FoundationChoosing the appropriate liquid foundation for your skin type and desired coverage is crucial. Here are some pointers for selecting the right foundation: a. Skin Type: Identify your skin type (oily, dry, combination, or normal) to find a foundation that addresses your specific needs. Oil-free, matte foundations work well for oily skin, while hydrating formulas suit dry skin. b. Undertone: Determine your skin’s undertone, which can be warm, cool, or neutral. Select a foundation with a matching undertone for a natural look. c. Shade Matching: Test foundation shades on your jawline or wrist in natural light to find the most suitable match. The right shade should blend seamlessly with your neck and face. d. Coverage: Choose the level of coverage you desire—light, medium, or full—based on your skin concerns and the occasion. Applying Liquid FoundationNow that your skin is prepped and you have the right foundation, let’s explore different application techniques to achieve a flawless finish: a. Brush Application: Use a foundation brush to apply the product in downward strokes. Brushes provide even coverage and help buff the foundation into the skin for a polished look. b. Beauty Blender or Makeup Sponge: Dampen a makeup sponge or Beauty Blender and gently bounce it across your face to apply the foundation. This technique provides a natural, airbrushed finish and ensures seamless blending. c. Fingertip Application: For a more lightweight and natural finish, use clean fingers to apply the foundation. Warm the product between your fingers before patting it onto your skin. d. Layering: Start with a small amount of foundation and build up coverage gradually where needed. This approach prevents a cakey appearance and allows you to tailor the coverage to your preference. e. Sheer Application: For a light, sheer coverage, mix a drop of foundation with your moisturizer or primer before applying. Concealing and Color CorrectingTo achieve a flawless complexion, consider incorporating concealer…

How To Clean A Beauty Blender
How to Clean a Beauty Blender?

Beauty blenders have revolutionized the way we apply makeup, offering a flawless finish that brushes and fingers simply cannot match. Made from hydrophilic foam, they’re designed to absorb water, allowing makeup to sit on the surface and blend seamlessly into the skin. However, this same feature that makes them so effective also makes them a breeding ground for bacteria if not cleaned properly. Preparation for Cleaning Before diving into the cleaning process, you’ll need a few essentials: mild soap (liquid or bar), warm water, a clean towel, and a drying area. Start by wetting your beauty blender under warm running water, squeezing it several times to ensure it’s fully saturated. Daily Cleaning Techniques For daily cleaning, a quick rinse under warm water with a bit of soap will do. Gently work the soap into the sponge with your fingers, rinse thoroughly until the water runs clear, and then squeeze out any excess water. This daily ritual can significantly extend the life of your beauty blender and prevent the buildup of harmful bacteria. Deep Cleaning Methods Every week, your beauty blender deserves a deep clean. Fill a bowl with warm water and a squirt of gentle soap, submerge your beauty blender, and let it soak for a few hours. After soaking, gently massage the sponge to release trapped makeup and rinse thoroughly. For stubborn stains, olive oil mixed with dish soap can work wonders. Natural and Eco-Friendly Cleaning Options If you prefer a more natural approach, consider using a mixture of baking soda and water to form a paste. This natural abrasive can help remove stubborn stains without damaging the sponge. Rinse thoroughly after application to remove any residue. Drying and Storage Tips After cleaning, it’s crucial to dry your beauty blender properly to prevent mold growth. Squeeze out any excess water with a clean towel and leave it in a well-ventilated area away from direct sunlight. Avoid storing it in airtight containers while it’s still damp. Troubleshooting Common Issues Stains and odors can be persistent problems, but soaking your beauty blender in a vinegar and water solution can help neutralize odors and loosen stains. Regular cleaning and proper storage are key to preventing these issues. How to Clean a Beauty Blender This consolidated guide emphasizes the importance of both daily and deep cleaning routines, utilizing both commercial and natural cleaning agents, and following proper drying and storage protocols to maintain your beauty blender’s effectiveness and longevity. Maintaining a clean beauty blender is crucial for flawless makeup application and skin health. By incorporating these cleaning methods into your beauty routine, you can ensure that your beauty blender remains in top condition, providing the perfect blend every time. How often should I clean my Beauty Blender? To ensure your Beauty Blender remains hygienic and performs at its best, it’s recommended to clean it after every use. Daily cleaning removes makeup residue, oils, and bacteria, preventing skin irritations or breakouts. For a thorough deep clean, aim to do so once a week. This routine helps maintain the sponge’s integrity and extends its usability. Can I…

12 More Makeup Mistakes That Might Be Making You Look Older

Makeup is a powerful tool that, when used correctly, can enhance natural beauty, conceal imperfections, and even take years off your appearance. However, certain makeup practices can have the opposite effect, adding years to your face instead of subtracting them. This article dives deep into 12 more makeup mistakes that might be making you look older and provides expert advice on how to avoid them for a fresher, more youthful look. Understanding Makeup and Aging The relationship between makeup and perceived age is intricate. While makeup has the potential to highlight our best features, certain application techniques and product choices can inadvertently age us. Factors such as texture, color, and formula play significant roles in how makeup interacts with mature skin. It’s crucial to adapt our makeup strategies as we age to complement our changing skin, rather than emphasize the signs of aging. Mistake #1: Skipping Primer The Role of Primer in Makeup Longevity Primer is essential for creating a smooth base, filling in fine lines and enlarged pores, which become more prominent as skin ages. A silicone-based primer, for example, can blur imperfections and provide a seamless surface for the rest of your makeup, ensuring it lasts longer without settling into wrinkles. Recommendations for Mature Skin Look for hydrating primers that contain ingredients like hyaluronic acid to add moisture to the skin, which helps in achieving a plump, youthful appearance. Avoid mattifying primers, as they can dry out the skin and make fine lines more visible. Mistake #2: Overusing Powder Powder’s Aging Effect Excessive use of powder, especially heavy or mattifying formulas, can settle into fine lines and emphasize wrinkles, making the skin look older. Powder absorbs moisture, and on mature skin, it can lead to a cakey appearance. Alternative Setting Options Opt for translucent setting powders applied sparingly with a fluffy brush to areas that tend to get oily, like the T-zone. Consider switching to liquid or cream-based products that provide a dewy finish, as they help maintain skin’s natural glow. Mistake #3: Neglecting Eyebrow Care Importance of Full Eyebrows Eyebrows frame the face, and fuller brows are associated with youth. With age, brows can become sparse. Filling in your eyebrows subtly can lift the face and make you look younger. Eyebrow Filling Techniques Use a brow pencil or powder that matches your eyebrow color to fill in sparse areas with light, feathery strokes. Avoid harsh lines or overfilling, as this can look unnatural. Consider a tinted brow gel for a more natural look that also sets hairs in place. Mistake #4: Heavy Foundation Use Choosing the Right Foundation A heavy, matte foundation can settle into fine lines and wrinkles, highlighting them. Instead, opt for lightweight, hydrating formulas that provide coverage without the weight. Tinted moisturizers or BB creams are excellent alternatives for mature skin. Application Tips for a Natural Look Apply foundation with a damp beauty sponge to sheer out the coverage and create a more natural, skin-like finish. Focus on areas that need coverage rather than applying a thick layer over the entire face. Mistake #5: Incorrect Concealer…

Dewy Vs. Matte Foundation
Moist Foundation or Matte Foundation? The Ultimate Guide to Choosing the Right Foundation for Your Skin

When it comes to makeup, foundation acts as the canvas for your entire look. However, with the myriad options available, selecting the right foundation can be daunting. Among the various choices, moist and matte foundations stand out for their unique benefits and finishes. This comprehensive guide dives deep into the world of foundations, helping you decide whether moist foundation or matte foundation is the ideal choice for your skin type and aesthetic preferences. Understanding Foundation Types What is Moist Foundation?Moist foundation, often referred to as hydrating or dewy foundation, is designed to offer a luminous finish. Infused with hydrating ingredients, it aims to provide a healthy glow, making it an excellent option for those with dry or dull skin. What is Matte Foundation?Matte foundation offers a flat, non-shiny finish that controls oil and minimizes the appearance of pores. It’s favored by individuals with oily skin or those looking for long-lasting coverage without a glossy look. Key Differences Between Moist and Matte Foundations Benefits of Moist Foundation Benefits of Matte Foundation How to Choose the Right Foundation for Your Skin Type Application Tips for Moist Foundation Application Tips for Matte Foundation Combining Moist and Matte Foundations Popular Moist Foundation Brands Discover brands that offer top-rated moist foundations, praised for their hydrating formulas and natural finish. Popular Matte Foundation Brands Explore the favorites among matte foundation brands, known for their oil-control capabilities and flawless coverage. Expert Tips for Foundation Application How to Transition Between Foundation Types The Role of Foundation in Makeup Routine Caring for Your Skin with Foundation Future Trends in Foundation Moist Foundation or Matte Foundation? Deciding between moist and matte foundation ultimately depends on your skin type, desired finish, and personal preference. Understanding the nuances of each can empower you to make the best choice for your makeup routine, ensuring that your foundation enhances rather than detracts from your natural beauty. Whether you opt for a moist foundation to achieve a dewy glow or a matte foundation for a shine-free finish, the key is to choose a product that complements your skin type and meets your beauty goals. By considering the factors outlined in this guide, you can select a foundation that not only looks great but also feels comfortable and enhances your overall makeup look. Remember, the right foundation is the cornerstone of any successful makeup routine, setting the stage for a flawless, confidence-boosting appearance. FAQs What is the best foundation for oily skin?Can you mix moist and matte foundations?How do I know if a foundation is right for my skin type?Is it necessary to use a primer with foundation?How can I make my foundation last longer throughout the day?What should I do if my foundation causes breakouts?

How To Choose The Perfect Blush For Your Skin Tone
How to Choose the Perfect Blush for Your Skin Tone

Blush is a pivotal element in the makeup routine, capable of transforming your look with just a few strokes. It adds a healthy, youthful glow and dimension to the face, but selecting the perfect shade for your skin tone can be daunting. This guide will help you navigate the nuances of choosing a blush that complements your complexion beautifully. Understanding Your Skin Tone Identifying Warm, Cool, and Neutral Undertones Your skin’s undertone is key to selecting makeup. Warm undertones look best with peach or coral blushes, cool undertones shine with pink or rose shades, and neutral undertones can flexibly wear either. The Importance of Natural Lighting Evaluate your skin tone and undertone in natural light to get the most accurate reading, ensuring you choose a blush that harmonizes naturally with your complexion. Blush Types and Textures Powder, Cream, Liquid, and Gel Formulas Different blush formulas cater to different needs and preferences. Powder blushes are great for oily skin, cream and liquid for dry skin, and gel blushes offer a sheer, natural look. Choosing the Right Texture for Your Skin Type Match the blush texture with your skin type for the best results. Oily skin benefits from powder blushes, whereas dry skin looks radiant with cream formulas. Selecting Blush for Fair Skin Tones Best Shades for a Natural Glow Fair skin tones should opt for soft peach, light pink, or coral to add a subtle warmth without overwhelming the complexion. Avoiding Overpowering Colors Steer clear of overly dark or bright shades that can look harsh against light skin. Instead, choose light, buildable colors. Choosing Blush for Medium Skin Tones Ideal Shades for Warmth and Depth Medium skin tones are complemented by rich peach, warm mauve, and soft berry shades, which add the right amount of color for a sun-kissed look. Balancing Pigmentation and Brightness Select a blush with enough pigmentation to show up on your skin, but with a brightness that enhances your natural glow. Finding the Right Blush for Dark Skin Tones Vibrant and Deep Tones for a Radiant Look Dark skin tones can carry vibrant reds, deep oranges, and bold berries beautifully, enhancing the skin’s natural depth. Ensuring Visibility and Flattering Hues Choose highly pigmented blushes that won’t get lost on your skin, and ensure the hues complement your undertone for a flattering effect. Application Tips for a Flawless Finish Techniques for Blending and Placement Apply blush to the apples of your cheeks and blend upwards towards the temples for a lifted, youthful effect. Use light strokes to build color gradually. Tools for Application: Brushes vs. Fingers vs. Sponges A fluffy brush is ideal for powder blush, fingers work well for cream and liquid formulas, and sponges can help blend for a seamless finish. Common Mistakes to Avoid Over-Application and Mismatched Undertones Start with a light hand to avoid over-application and select shades that match your undertone to avoid a clash with your natural coloring. Ignoring the Rest of Your Makeup Palette Ensure your blush harmonizes with the rest of your makeup, including lipstick and eyeshadow, to create a cohesive, balanced…