Exploring the World of Microneedling: Revitalize Your Skin

Exploring The Worldof Microneedling Revitalize Your Skin


Microneedling has firmly established itself as a pivotal innovation in the realm of aesthetic and dermatological care. By inflicting minuscule injuries on the skin’s surface, it activates the body’s inherent healing mechanisms, catalyzing the generation of collagen and elastin. The outcome is a notable enhancement in skin texture, a reduction in scar visibility, minimized fine lines, and a complexion that radiates youthfulness and vitality. This comprehensive exploration will guide you through every aspect of microneedling, from its myriad benefits and the procedure itself to post-treatment care and frequently asked questions.

Delving into Microneedling

At its core, microneedling, or collagen induction therapy, utilizes slender needles to create almost imperceptible punctures on the skin’s uppermost layer. Renowned for its efficacy in refining the skin’s texture and tone, it is especially advantageous for mitigating scars, wrinkles, and enlarged pores, fostering skin renewal from within.

The Scientific Foundation of Microneedling

Microneedling’s underlying science is both straightforward and deeply rooted in biology. The microscopic injuries it induces prompt the body to initiate a healing response, which includes the production of new collagen and elastin. This response not only repairs the tiny wounds but also rejuvenates the adjacent skin that may be aged or damaged, resulting in a visibly rejuvenated appearance.

The Advantages of Microneedling

  • Refined Skin Texture: Regular treatments can significantly soften and smooth the skin, enhancing its overall feel.
  • Scar Mitigation: It proves particularly effective in lessening the visibility of acne scars.
  • Even Skin Tone: It is beneficial in addressing hyperpigmentation and age spots, including sunspots and melasma.
  • Anti-Aging Benefits: It helps in reducing the visible signs of aging, such as lines and wrinkles, for a more youthful appearance.
  • Enhanced Topical Absorption: It boosts the effectiveness of skin care treatments by improving their penetration into the skin.

Device Varieties for Microneedling

The market offers an array of microneedling devices, from professional-grade equipment found in clinics to home-use derma rollers. Professional treatments are generally more impactful, owing to the customizable depth of needle penetration and the intensity of the treatment.

Preparing for a Microneedling Session

The preparatory phase involves a consultation with a skincare expert to evaluate if your skin is suited for the treatment and to address any concerns. Avoiding certain medications and sun exposure prior to the session is advised.

The Microneedling Process

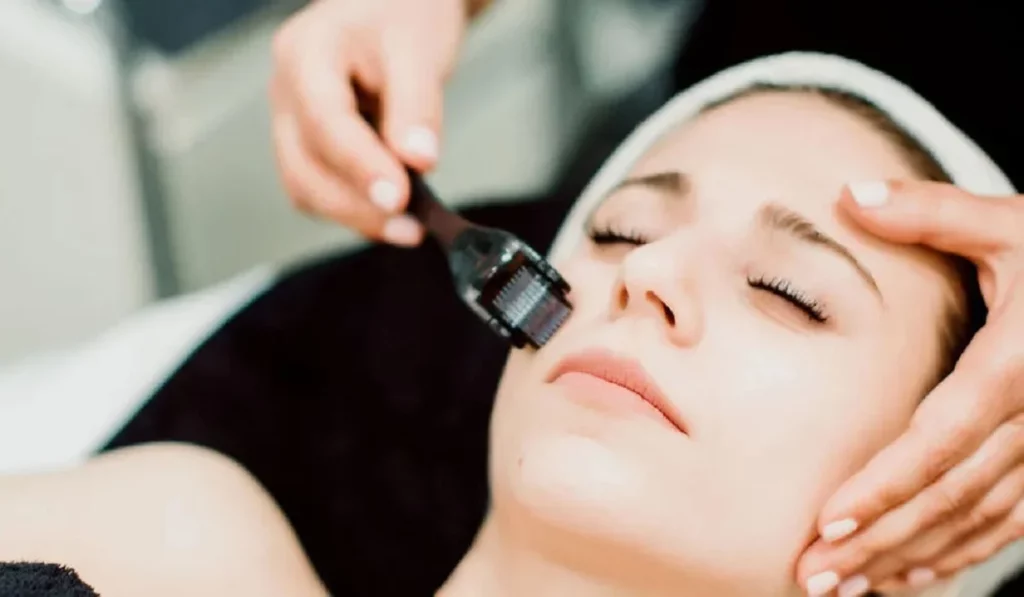
A standard session includes cleaning the skin, applying a numbing cream, followed by the microneedling procedure, which lasts about 30 minutes. Afterwards, a calming serum or mask may be applied to soothe the skin.
Exploring The World Of Microneedling Revitalize Your Skin


Post-Treatment Care and Healing

Post-treatment care is crucial for enhancing the benefits of the procedure. It involves the application of recommended serums or creams, avoiding sun exposure, and maintaining skin hydration.

Safety and Potential Side Effects

Microneedling is generally safe for all skin types, though some may experience redness, swelling, and sensitivity after the treatment, which usually subsides within a few days.

Microneedling Across Different Skin Types

This versatile treatment is suitable for a wide range of skin types and concerns, from aging to acne scars. Nonetheless, individuals with specific skin conditions should seek professional advice before proceeding.

Enhancing Results with Combined Treatments

For superior outcomes, microneedling can be paired with other treatments, such as PRP (Platelet-Rich Plasma) or hyaluronic acid serums, to augment the healing and rejuvenative effects.

Cost Considerations and Choosing a Provider

The expense of microneedling varies based on location, clinic, and treatment scope. Despite its growing accessibility, selecting a qualified provider is crucial for ensuring both safety and efficacy.

Insights from Personal Experiences

Testimonials from those who have experienced microneedling offer valuable perspectives and reassurance regarding the procedure’s effectiveness and what one might anticipate.

Optimal Frequency of Treatments

To achieve the best results, undergoing a series of treatments spaced 4-6 weeks apart is advised, with maintenance sessions every 6-12 months.

Pain and Discomfort

Thanks to numbing creams applied before the procedure, most individuals report minimal discomfort.

Risk of Scarring

Under the care of a skilled professional, the likelihood of scarring is minimal.

Visibility of Results

Immediate effects are noticeable, but the most profound results, particularly in collagen production, manifest over several weeks to months.

Contraindications for Microneedling

People with active skin infections, chronic skin conditions, or a history of poor wound healing might be advised against undergoing microneedling.Microneedling: Looking Ahead


As research advances and technology evolves, the potential of microneedling continues to expand. Innovations in equipment and treatment methodologies promise even more personalized and effective skincare solutions.

Microneedling presents a promising avenue for addressing a multitude of skin concerns, leading to a complexion that is not only more youthful but also healthier and more vibrant. Its capacity to stimulate natural healing and rejuvenation positions microneedling as a cornerstone in the future landscape of skincare.

Sculpting Beauty: A Comprehensive Guide To Contouring And Highlighting For Your Unique Face Shape
Sculpting Beauty: A Comprehensive Guide to Contouring and Highlighting for Your Unique Face Shape

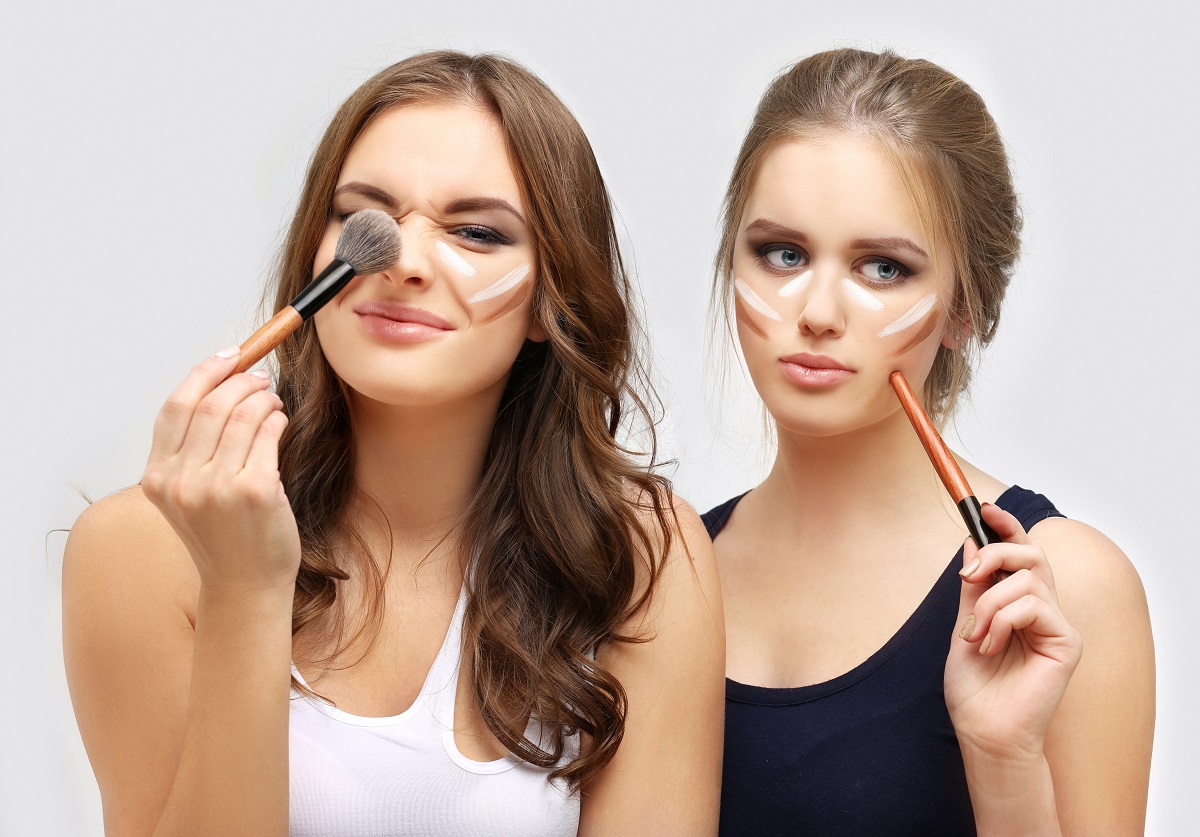
Contouring and highlighting are makeup techniques that have the power to transform your facial features, enhancing your natural beauty by creating dimension and radiance. However, achieving the perfect contour and highlight requires an understanding of your face shape and how to work with its unique angles and proportions. Every face is distinct, and mastering the art of contouring and highlighting for your specific face shape can make all the difference. In this guide, we’ll delve into the world of contouring and highlighting, providing you with expert insights and step-by-step instructions to achieve a sculpted and radiant look that complements your individual face shape. The Importance of Contouring and Highlighting Contouring involves using darker shades to create shadows, while highlighting uses lighter shades to bring areas forward. By strategically applying these shades, you can reshape and accentuate your facial features, achieving the illusion of more defined cheekbones, a slimmer nose, and a lifted appearance. These techniques are particularly valuable in photography and special events, as they enhance the three-dimensional aspect of the face and create stunning visual effects. Understanding Different Face Shapes Before diving into the contouring and highlighting process, it’s crucial to determine your face shape. Common face shapes include: Contouring and Highlighting for Different Face Shapes Understanding your face shape is the first step to creating a tailored contouring and highlighting routine. Here’s a comprehensive guide for each face shape: 1. Oval Face Shape Contouring: Apply contour shade along the sides of the forehead, under the cheekbones, and along the jawline to add subtle definition without overemphasizing angles. Highlighting: Focus on the center of the forehead, tops of cheekbones, and center of the chin to enhance your naturally balanced features. 2. Round Face Shape Contouring: Apply contour shade along the sides of the forehead, under the cheekbones, and along the jawline to create the illusion of more angular features. Highlighting: Focus on the center of the forehead, tops of cheekbones, and center of the chin to add vertical dimension and elongate the face. 3. Heart Face Shape Contouring: Apply contour shade along the sides of the forehead, under the cheekbones, and along the jawline, softening the forehead’s width. Highlighting: Emphasize the center of the forehead, tops of cheekbones, and center of the chin to balance the narrower chin. 4. Square Face Shape Contouring: Apply contour shade along the sides of the forehead, under the cheekbones, and along the jawline, focusing on softening angular features. Highlighting: Highlight the center of the forehead, tops of cheekbones, and center of the chin to add softness and balance to the strong angles. 5. Diamond Face Shape Contouring: Apply contour shade along the sides of the forehead, under the cheekbones, and along the jawline, aiming to minimize the width of the cheekbones. Highlighting: Highlight the center of the forehead, tops of cheekbones, and center of the chin to create symmetry and balance between the forehead and chin. 6. Long (Oblong) Face Shape Contouring: Apply contour shade along the sides of the forehead and under the cheekbones, focusing on minimizing the appearance of height. Highlighting: Highlight the…

What Is Permanenteyeliner
What is Permanent Eyeliner?

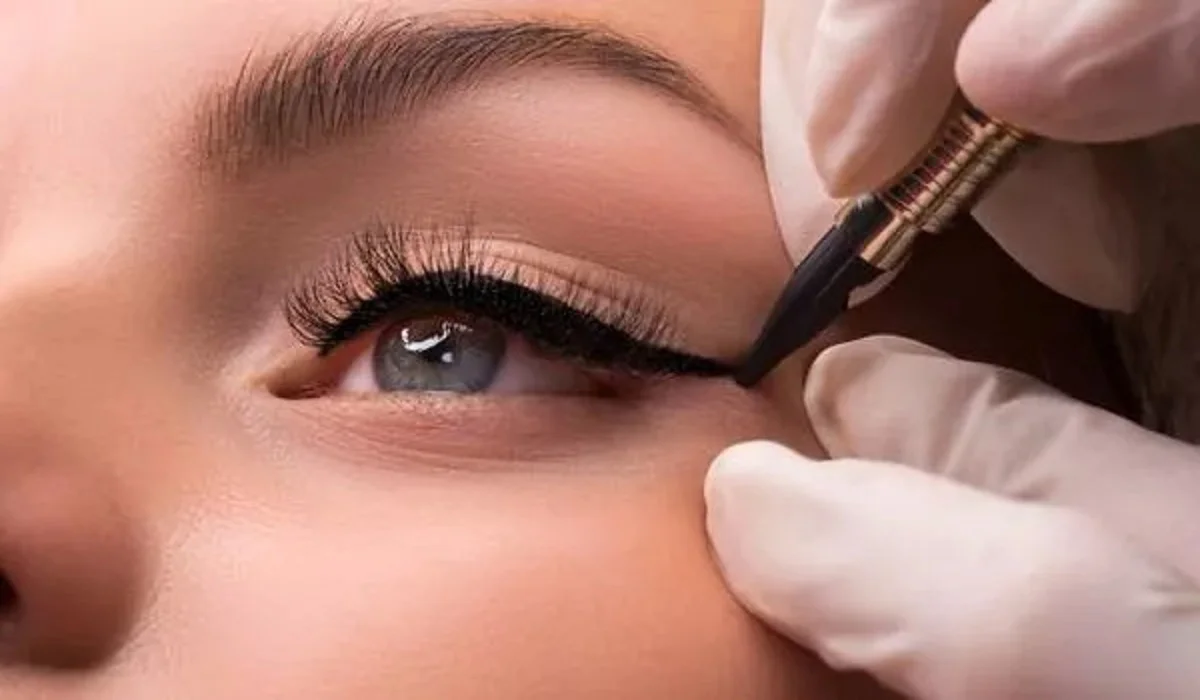
Permanent eyeliner, also known as eyeliner tattoo, stands as a beacon of innovation in the cosmetic industry, offering a semi-permanent solution for those seeking to enhance their eye definition without the daily fuss of makeup application. This detailed guide aims to unfold the layers of permanent eyeliner, exploring its procedure, types, benefits, and vital considerations to arm you with knowledge and confidence in your beauty decisions. At its core, permanent eyeliner involves the meticulous insertion of pigment into the skin’s dermal layer around the eyes, mimicking the appearance of traditional eyeliner. This method, rooted in the practice of cosmetic tattooing, transcends the temporary nature of conventional makeup, providing a durable solution that withstands time, sweat, and tears. Beyond mere aesthetic enhancement, permanent eyeliner serves as a testament to the fusion of art and technology in the pursuit of lasting beauty. The Procedure of Permanent Eyeliner The journey to permanent eyeliner is marked by precision, expertise, and customization, tailored to fit each individual’s unique features and desires. Pre-Procedure Preparation The road to permanent eyeliner begins with a thorough consultation with a certified and experienced technician. This initial meeting is crucial for discussing expectations, choosing the right pigment color, and determining the most flattering eyeliner style. Clients are advised to refrain from consuming alcohol, caffeine, and blood-thinning medications several days before the procedure to minimize bleeding and swelling. The Process Adorned with gloves and using sterile equipment, the technician delicately implants the chosen pigment along the lash line with the aid of a fine needle. Comfort is a priority, hence topical anesthetics are applied to mitigate discomfort. The session may last anywhere from one to several hours, contingent upon the complexity of the desired look and the intricacies involved in achieving it. Post-Procedure Care The aftermath of the procedure is pivotal for the longevity and appearance of the eyeliner. Adhering to aftercare instructions is paramount, including keeping the area clean and dry, avoiding makeup and direct sun exposure, and applying prescribed ointments to facilitate healing and prevent infection. Types of Permanent Eyeliner Permanent eyeliner offers a spectrum of styles, from subtle to bold, each capable of accentuating the eyes in unique ways. Lash Enhancement This technique, ideal for those seeking a natural enhancement, involves depositing pigment between the lashes. The result is a fuller lash base that subtly defines the eyes without the overt appearance of makeup. Traditional Eyeliner Traditional eyeliner offers a more pronounced look, customizable in thickness to either softly define the eyes or create a more dramatic effect. It’s perfect for individuals who desire a visible eyeliner look that remains impeccably in place from dawn till dusk. Winged and Designer Eyeliner For the bold and adventurous, winged or designer eyeliner allows for creative expression, extending beyond the eyelids to include intricate designs or extended flicks. This option caters to those looking to make a statement with their eyes, offering endless possibilities for customization. Benefits of Permanent Eyeliner The allure of permanent eyeliner lies not only in its aesthetic appeal but also in the myriad of benefits it offers. Time-saving and Convenience…

The Importance Of Washing Your Hair Brush: Maintaining Hair Health And Hygiene
The Importance of Washing Your Hair Brush: Maintaining Hair Health and Hygiene

A hair brush is an essential tool for maintaining the health and appearance of your hair. However, many people overlook the importance of cleaning their hair brushes regularly. In this article, we will explore the reasons why you should make washing your hair brush a regular part of your hair care routine. From preventing product buildup and dandruff to promoting scalp health and overall hygiene, keeping your hair brush clean offers numerous benefits. Read on to discover how a simple task like washing your hair brush can make a significant difference in the health and vitality of your hair. Prevents Product BuildupOver time, hair products such as styling gels, serums, and hairsprays accumulate on your hair brush bristles. When you use a dirty brush, these residues transfer back onto your hair, leading to product buildup. This buildup can weigh down your hair, making it appear dull and lifeless. By regularly washing your hair brush, you remove these residues, ensuring that your hair receives the full benefits of the styling products you use. To clean your hair brush, start by removing any loose hair from the bristles. Then, create a solution of warm water and mild shampoo or liquid soap. Gently scrub the brush with the solution, paying special attention to the bristle area. Rinse thoroughly and allow it to air dry before using it again. Promotes Scalp HealthA clean hair brush contributes to a healthy scalp. When you brush your hair, the bristles stimulate blood circulation in the scalp, promoting the delivery of essential nutrients to the hair follicles. However, if your brush is dirty, it can transfer bacteria, oil, and dead skin cells back onto your scalp, leading to irritation, itchiness, and even infections.Regularly cleaning your hair brush helps maintain a hygienic environment for your scalp. It removes bacteria, oil, and debris that may have accumulated on the brush, reducing the risk of scalp issues. Additionally, a clean brush ensures that your hair remains free from external pollutants, keeping it healthier and more vibrant. Prevents DandruffDandruff is a common scalp condition characterized by flaky, itchy skin. While various factors contribute to dandruff, a dirty hair brush can worsen the problem. Dead skin cells, oils, and bacteria trapped in the bristles can transfer back onto your scalp, exacerbating dandruff symptoms.By regularly washing your hair brush, you eliminate these potential triggers. A clean brush minimizes the chances of dandruff-causing substances making contact with your scalp, helping to reduce the occurrence and severity of dandruff. Extends the Lifespan of Your Hair BrushTaking care of your hair brush by cleaning it regularly can extend its lifespan. Product buildup, hair residue, and oils not only affect your hair but also accumulate on the bristles, making them less effective over time. Regular cleaning ensures that the bristles remain clean, strong, and properly aligned, allowing the brush to work optimally. Maintains Overall HygieneMaintaining good hygiene is essential for overall health and well-being. Your hair brush is exposed to a variety of external elements such as dust, dirt, and environmental pollutants, which can settle on the bristles. Additionally, if…

Foilyage: The Perfect Fusion Of Foil Highlights And Balayage
Foilyage: The Perfect Fusion of Foil Highlights and Balayage

When it comes to hair color trends, there’s always something new and exciting on the horizon. One such trend that has taken the hair industry by storm is “foilyage.” Foilyage is a hair coloring technique that combines the best of both worlds: the precise placement of foil highlights and the seamless, natural look of balayage. This technique has gained immense popularity among hairstylists and clients alike, offering a stunning and low-maintenance hair color option. In this article, we will delve into the details of foilyage, exploring what it is, how it differs from other coloring techniques, its benefits, and why it has become a go-to choice for many individuals seeking a sun-kissed, dimensional look. What is Foilyage? Foilyage is a term coined by hairstylists to describe a hair coloring technique that combines the foil highlighting method with balayage. Foil highlights involve separating sections of hair and applying color or lightener to the selected strands, which are then covered with foil to process the color more efficiently. On the other hand, balayage is a freehand technique where the colorist paints the color or lightener directly onto the hair, creating a soft, graduated effect. Foilyage bridges the gap between these two techniques by incorporating the precise placement of foil highlights with the natural blending and softness of balayage. How is Foilyage Different from Traditional Highlights and Balayage? Traditional highlights involve placing foils throughout the hair to create contrast and dimension. While this technique can produce beautiful results, the final look can sometimes appear too structured and uniform. Balayage, on the other hand, offers a more natural and effortless look by painting color directly onto the hair. However, without the aid of foils, it can be challenging to achieve maximum lift and create a more dramatic contrast. Foilyage strikes the perfect balance between these two techniques. By using foils strategically, colorists can achieve more lift and control while still maintaining a soft and blended appearance. The foils help to incubate the color, resulting in a more vibrant and dimensional effect compared to traditional balayage. Additionally, foilyage allows for precise placement of color, making it an excellent choice for those looking for specific highlights or lightening in certain areas of the hair. Benefits of Foilyage: Natural and Gradual: Foilyage creates a seamless, sun-kissed effect that mimics the natural way hair lightens under the sun. The color transition is soft and gradual, giving the hair a dimensional and lived-in appearance. Low Maintenance: One of the key advantages of foilyage is its low maintenance nature. Since the color is applied in a way that blends seamlessly with the hair, regrowth is less noticeable, reducing the frequency of touch-up appointments. This makes foilyage an ideal choice for those who prefer a more effortless hair color that grows out gracefully. Customizable: Foilyage offers endless possibilities for customization. Colorists can tailor the placement and intensity of the highlights to complement a client’s skin tone, hair type, and personal style. Whether you desire a subtle change or a bold transformation, foilyage can be adapted to suit your preferences. Versatile for All Hair…

Airbrush Makeup: Unveiling The Flawless Finish And How To Achieve It
Airbrush Makeup: Unveiling the Flawless Finish and How to Achieve It

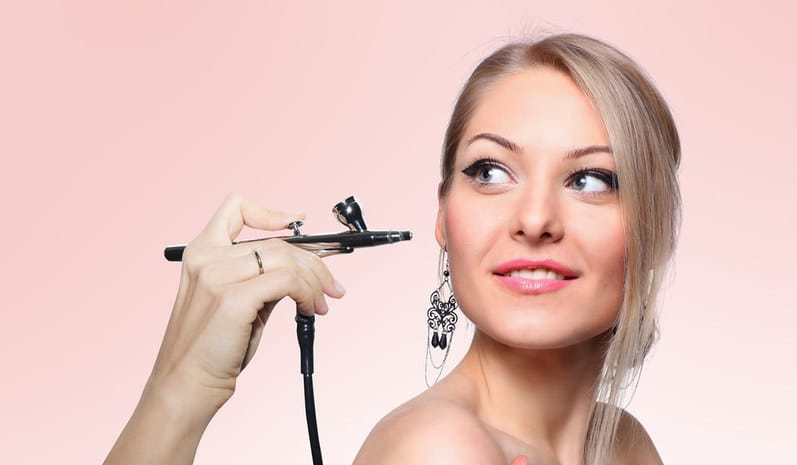
Airbrush makeup has gained popularity in the beauty industry for its ability to create a flawless, long-lasting, and natural-looking complexion. Utilizing an airbrush gun and specialized makeup formulas, this technique offers a seamless application that leaves the skin looking smooth and radiant. In this article, we will explore the world of airbrush makeup, discussing its benefits, application process, and tips for achieving the coveted airbrushed look. Whether you’re a makeup enthusiast or a professional artist, understanding airbrush makeup can elevate your makeup game to new heights. What is Airbrush Makeup?Airbrush makeup is a technique that involves applying makeup through an airbrush gun, which delivers a fine mist of foundation, blush, highlighter, and other makeup products onto the skin. The makeup formula is typically water-based, silicone-based, or a combination of both. This method allows for precise control and even distribution of makeup, resulting in a flawless, lightweight, and natural finish. Benefits of Airbrush Makeup:Airbrush makeup offers several advantages over traditional makeup application techniques: Flawless Finish: The microfine mist of makeup particles creates a seamless, second-skin effect, minimizing the appearance of imperfections and providing a smooth, airbrushed finish. Longevity: Airbrush makeup is known for its exceptional staying power. The formula adheres to the skin, resisting sweat, humidity, and transfer, making it ideal for special occasions, weddings, or events that require long-lasting makeup. Buildable Coverage: The airbrush technique allows for customizable coverage. By layering the makeup in thin, even passes, you can achieve sheer to full coverage, depending on your preferences and the desired look. Lightweight and Natural: Airbrush makeup feels lightweight on the skin, as the ultra-fine particles create a breathable layer. The result is a natural-looking finish that doesn’t look heavy or cakey. The Airbrush Makeup Process:To achieve the airbrushed look, follow these steps:Step 1: Prep the Skin: Start with a clean and moisturized face. Ensure your skin is well-hydrated to create a smooth canvas for makeup application. Step 2: Choose the Right Formula: Select an airbrush makeup formula that suits your skin type and desired finish. Water-based formulas are suitable for most skin types, while silicone-based formulas provide a longer-lasting and more waterproof finish. Step 3: Set Up the Airbrush System: Assemble your airbrush system according to the manufacturer’s instructions. This typically involves connecting the airbrush gun to an air compressor and adjusting the airflow and pressure settings. Step 4: Test the Spray: Before applying the makeup to your face, it’s crucial to test the spray on a tissue or your hand to ensure the desired coverage and adjust the air pressure if necessary. Step 5: Apply Foundation: Begin by applying the foundation. Hold the airbrush gun approximately six to eight inches away from your face and move it in small, circular motions. Start from the center of your face and work outward for an even application. Step 6: Build Coverage: For areas that require more coverage, such as blemishes or redness, apply additional layers of foundation using light, overlapping passes. Gradually build the coverage to achieve your desired look. Step 7: Add Blush, Contour, and Highlight: Once the foundation is applied,…

From Sparse To Spectacular A Journey To Rejuvenating Youreyelashes
From Sparse to Spectacular: A Journey to Rejuvenating Your Eyelashes

The diminution of eyelashes not only detracts from the visual appeal and the lively expressiveness of the eyes but also causes considerable distress. Eyelashes, serving as both a protective barrier against environmental irritants and a key feature enhancing facial symmetry, necessitate proper attention and care to maintain their health and aesthetics. This detailed guide aims to unveil a holistic approach towards curbing eyelash loss and fostering the regeneration of fuller, more robust eyelashes through a combination of effective care strategies, nutritional insights, and professional advice. Optimal Makeup Conduct and Removal Techniques The manner in which makeup is applied and subsequently removed plays a critical role in preserving eyelash integrity. The application of heavy, waterproof eye cosmetics often leads to undue stress on the lashes, contributing to their fragility and loss during the removal process. Favoring cosmetics formulated to be gentle on the lashes and employing a careful, thorough makeup removal process with appropriate products can significantly mitigate these risks. It’s imperative to abstain from harshly rubbing or tugging at the lashes to avoid exacerbating the loss. Nutritional Foundations for Eyelash Vitality The correlation between diet and hair health extends to eyelashes, with a nutrient-dense diet being foundational to their growth and resilience. A balanced intake of proteins, vitamins (notably B vitamins), minerals (including iron and zinc), and essential fatty acids promotes the vitality of eyelashes. Consuming foods rich in these nutrients, such as fish, eggs, legumes, and nuts, supports not only the health of your eyelashes but also their potential for more rapid growth. Enhancement through Eyelash Growth Serums and Natural Oils The targeted application of growth serums and natural oils can significantly enhance the thickness and length of eyelashes. Ingredients such as peptides, biotin, and botanical extracts in serums are known to aid hair growth, while natural oils like castor oil, coconut oil, and vitamin E oil offer nourishment and strength to the lashes when applied consistently with a clean applicator. Sidestepping Detrimental Habits Many everyday habits unwittingly contribute to the loss of eyelashes, such as vigorous eye rubbing, excessive use of lash curlers, or neglecting to remove makeup before sleep. Adopting a more mindful and gentle approach to eye care can help avert unnecessary damage and loss. Advancements through Professional Eyelash Treatments For individuals desiring more noticeable enhancements, professional options such as advanced growth serums and eyelash extensions present viable alternatives. These treatments, however, warrant careful consideration and should always be undertaken with professional guidance to circumvent adverse effects and ensure the health of your eyelashes. Instituting a Regular Eyelash Maintenance Regimen The establishment of a consistent eyelash care regimen is instrumental in maintaining their health and aesthetic appeal. Routine actions such as gentle cleansing, conditioning, and occasional light brushing can greatly influence the condition of your lashes, promoting their health and natural growth. Stress Reduction for Optimal Eyelash Health The pervasive effects of stress on the body include detrimental impacts on hair and eyelash growth. Engaging in activities that lower stress levels, such as physical exercise, meditation, or pursuing enjoyable hobbies, can help in reducing these adverse effects and…

7 Makeup Mistakes That Might Be Making You Look Older
7 Makeup Mistakes That Might Be Making You Look Older: How to Avoid Them

Makeup is a powerful tool that can enhance your natural beauty and boost your confidence. However, certain makeup habits might be doing more harm than good, especially as they can inadvertently age your appearance. Identifying and correcting these mistakes can make a significant difference in looking effortlessly youthful. This guide will explore seven common makeup mistakes and provide practical advice for avoiding them. Mistake #1: Overdoing Foundation Choosing the Wrong Formula A heavy foundation or the wrong formula can settle into fine lines and wrinkles, accentuating them. Opt for lightweight, hydrating foundations that offer buildable coverage. Application Techniques to Avoid Avoid applying foundation too heavily. Use a damp beauty sponge or a stippling brush for a more natural, skin-like finish. Remember, less is more. Mistake #2: Neglecting Skincare Before Makeup The Importance of a Hydrated Base Skincare plays a crucial role in how makeup sits on your skin. Dehydrated skin can cause makeup to cling to dry patches, making you look older. Recommended Pre-Makeup Skincare Routine Always start with a clean face, followed by a hydrating serum or moisturizer, and don’t forget to apply a primer to smooth out the skin’s texture. Mistake #3: Using Too Much Powder The Effect of Powder on Mature Skin Setting powder, especially when overused, can highlight fine lines and dry out your skin. Use translucent powders sparingly and only in areas that need it. Alternative Setting Methods Consider setting sprays or lightly dusting powder only in the T-zone to maintain a dewy finish on the rest of the face. Mistake #4: Ignoring Eyebrow Care Filling Eyebrows Too Harshly Over-filled eyebrows can harden your features, making you appear older. Aim for a more natural look by using feathery strokes and choosing a shade that matches your hair color closely. The Role of Eyebrows in Facial Structure Well-groomed eyebrows can lift the face and frame the eyes, contributing to a more youthful appearance. Consider consulting a professional for the best shape. Mistake #5: Over-Contouring and Highlighting Finding the Balance Too much contouring or highlighting can look unnatural and aging. Use these products sparingly and blend thoroughly to enhance your natural bone structure subtly. Techniques for a Natural Contour Opt for cream products that can be blended out easily for a more natural-looking shadow and glow, rather than harsh lines. Mistake #6: Choosing the Wrong Lip Products The Impact of Matte and Dark Shades Matte and darker lip colors can make lips appear thinner and more aged. They can also emphasize lip lines. Hydrating Lip Color Options Choose lip colors that are closer to your natural lip color and opt for formulas that offer hydration and a slight sheen to give the appearance of fuller, younger lips. Mistake #7: Skipping Eyelid Primer Preventing Creased Eyeshadow Eyelid primer prevents eyeshadow from settling into creases, which can age the eyes. It creates a smooth canvas for eyeshadow, enhancing its color and longevity. Enhancing Eyeshadow Longevity A good primer can also intensify the pigment of your eyeshadow, making your eye makeup look more vibrant and youthful throughout the day. In conclusion, avoiding…

The Struggle Is Real A Comprehensive Guide To Dealing With Dry Skin
The Struggle is Real: A Comprehensive Guide to Dealing with Dry Skin

The affliction of dry skin is a widespread dilemma, impacting countless individuals with discomfort and undermining self-assurance. This guide is meticulously crafted to furnish you with an intricate comprehension of dry skin—encompassing its origins, prevention strategies, and remedial actions. Our objective is to equip you with the insights and actionable recommendations necessary for the proficient management of dry skin, thereby restoring your skin’s hydration, vitality, and health. Insights into Dry Skin Known in the medical sphere as xerosis, dry skin is characterized by a deficiency of moisture in its superficial layer, manifesting in symptoms such as itchiness, flakiness, and in certain cases, cracking. This condition can arise from genetic factors, adverse environmental conditions including harsh weather, frequent bathing, or the utilization of astringent cleansers and detergents. Comprehending these underlying factors is paramount to devising an effective treatment plan. Identifying Causes and Risk Elements Dry skin’s emergence can be attributed to a multitude of factors, notably: Environmental and Climatic Conditions: Low humidity, chilly climates, and windy conditions substantially diminish the skin’s hydration. Excessive Bathing and Potent Soaps: Regular exposure to hot water and the employment of detergents that deplete the skin’s inherent oils. Aging Process: The reduction of natural oils with advancing age, rendering the elderly more susceptible to dry skin. Underlying Health Conditions: Ailments such as eczema, psoriasis, and diabetes may predispose individuals to dry skin. Strategies for Prevention Foregoing the onset of dry skin is frequently more straightforward than its remedy. Minor modifications to one’s lifestyle and skincare regimen can yield notable benefits: Consistent Moisturization: Applying an appropriate moisturizer post-bathing aids in sealing moisture. Shower Duration and Temperature: Favoring brief showers in lukewarm water. Selection of Skin Care Essentials: Opting for hypoallergenic, unscented cleansing and skincare products. Air Humidification: Employing a humidifier in arid settings or throughout the winter months can assist in preserving skin moisture. Approaches to Treating Dry Skin Addressing dry skin entails an amalgamation of skincare practices and alterations in lifestyle: Internal Hydration: Enhancing water consumption to moisturize the skin internally. Nutritional Adjustments: A diet abundant in omega-3 fatty acids and antioxidants can bolster skin health. Mild Exfoliation: The eradication of dead skin cells facilitates the deeper absorption of moisturizers. Nocturnal Therapies: The nighttime application of intensive moisturizers or oils offers profound hydration. Optimal Skincare Product Selection The selection of apt skincare products is critical for the management of dry skin. It is advisable to seek ingredients such as hyaluronic acid, glycerin, and ceramides, renowned for their moisture-retention properties. Conversely, products containing alcohol, fragrances, or retinoids should be avoided as they may exacerbate dryness. Consultation with a Dermatologist For severe instances of dry skin, professional consultation with a dermatologist may be necessary. Should you encounter excessive redness, peeling, or symptoms of infection, professional guidance is imperative. The Impact of Diet on Dry Skin: Indeed, a diet deficient in essential fatty acids and hydration can precipitate dry skin. Incorporating foods rich in omega-3 and ensuring sufficient water intake can ameliorate skin condition. Moisturization Frequency: Ideal practice suggests moisturizing twice daily, particularly following showers or baths. Nonetheless, individual skin requirements…