5 Essential Tips for Washing Hair Extensions: Extend Their Life and Beauty

Hair extensions offer a fantastic way to add length, volume, and versatility to your hairstyle. However, maintaining them properly, especially when it comes to washing, is crucial to preserving their beauty and prolonging their life. This comprehensive guide delves into the nuances of hair extensions and washing, ensuring your extensions stay as gorgeous as the day you got them.
Hair Extensions And Washing 3


Understanding Hair Extensions

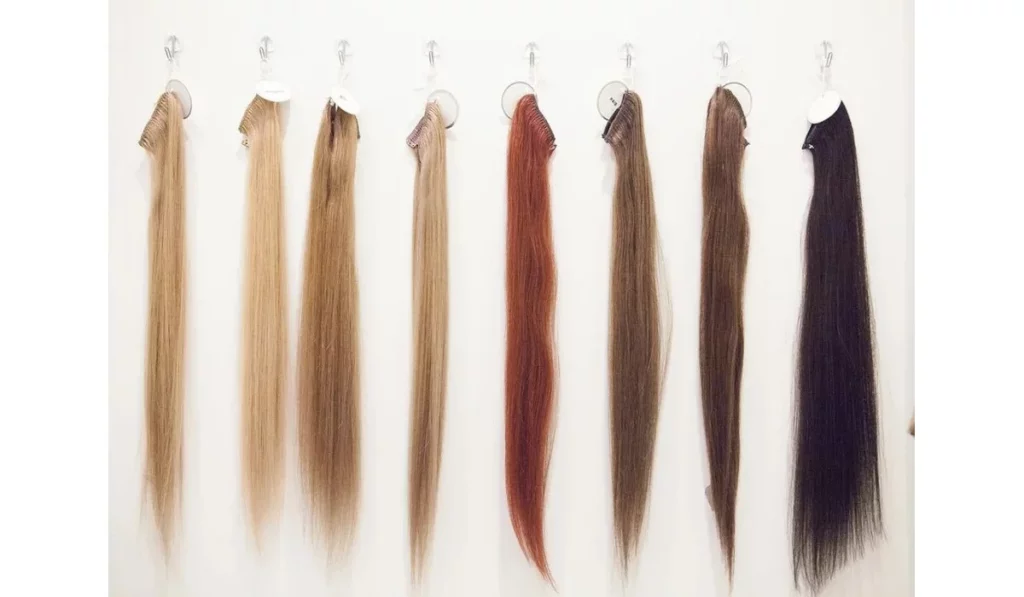
Hair extensions come in various forms, including clip-ins, tape-ins, weaves, and fusion extensions, each requiring specific care techniques. The benefits of using hair extensions are manifold; they can instantly transform your look, add volume to thinning hair, and allow you to experiment with colors and styles without committing to permanent changes. When choosing hair extensions, consider factors like your lifestyle, hair type, and maintenance commitment to find the perfect match.

Pre-Wash Care for Hair Extensions

Before diving into washing your extensions, pre-wash care is vital. Detangling your extensions with a soft brush or a wide-tooth comb can prevent matting and reduce breakage during the washing process. Applying a light, nourishing oil or a pre-wash treatment can also protect the hair fibers and ensure they remain smooth and manageable.

Washing Hair Extensions: Step-by-Step Guide

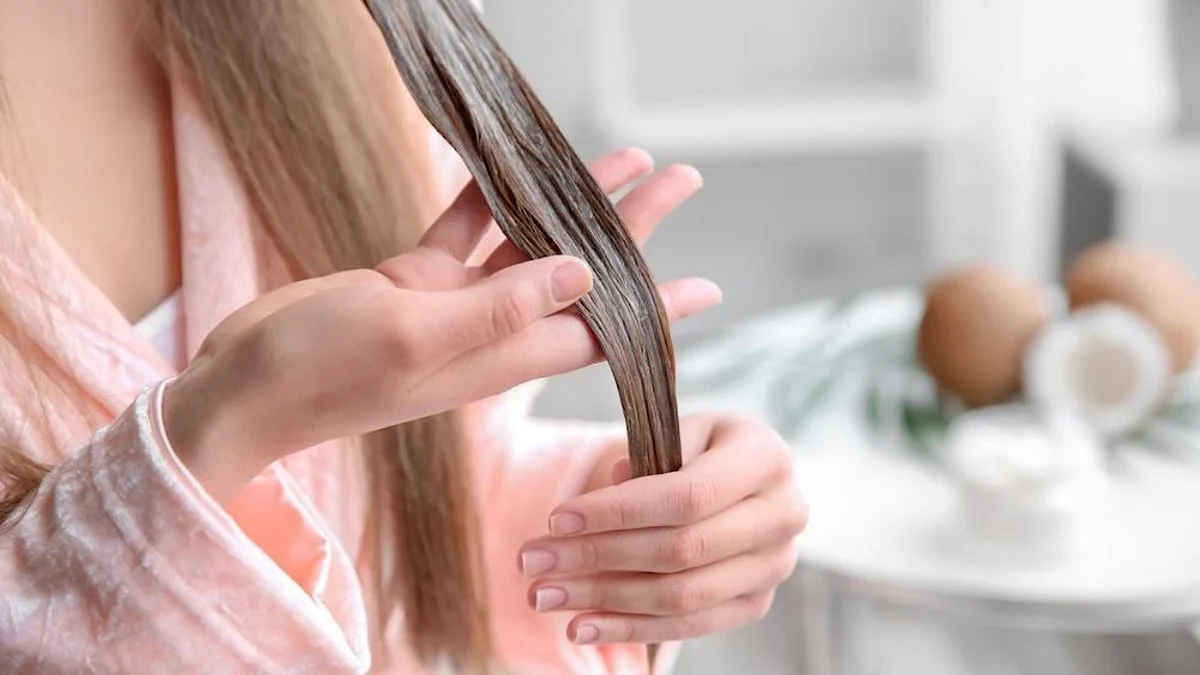
Washing your hair extensions doesn’t have to be daunting. Begin by gently brushing them to remove tangles, then wet the hair gradually to prevent tangling under water. Use a sulfate-free shampoo to cleanse the extensions, focusing on the roots where buildup is most common. Rinse thoroughly and apply a moisturizing conditioner, avoiding the bonds or clips. Finally, rinse with cold water to seal the hair cuticles, enhancing shine and smoothness.

Maintaining Hair Extensions Post-Wash

After washing, gently pat your extensions dry with a soft towel and apply a leave-in conditioner or hair oil to keep them hydrated. Avoid using high heat when drying or styling your extensions, and consider air-drying them when possible to minimize damage. Regularly scheduled maintenance appointments with a professional can also ensure your extensions remain in top condition.

Common Mistakes to Avoid with Hair Extensions

Many extension wearers unknowingly shorten the lifespan of their hair additions by washing them too frequently, using harsh chemicals, or neglecting daily care. To avoid these pitfalls, wash your extensions only when necessary, opt for gentle hair care products, and implement a nightly routine to prevent tangling and matting.

Professional Tips for Hair Extension Care

Salon professionals often recommend specific washing techniques and products tailored to your type of extensions. They can also provide invaluable advice on maintaining your extensions, from the best brushes to the ideal frequency of washes.

DIY Hair Extension Washing Solutions

For those who prefer natural hair care, there are plenty of homemade solutions and natural products that can safely clean and condition your hair extensions. Ingredients like apple cider vinegar, coconut oil, and aloe vera gel can offer gentle, effective alternatives to store-bought products.

Hair Extensions And Washing 3


Understanding the Impact of Water Quality on Hair Extensions

The quality of the water you use to wash your extensions can significantly affect their condition. Hard water, rich in minerals, can leave deposits on your extensions, leading to dullness and tangling. Conversely, soft water can help keep them silky and manageable. Investing in a water softener or filtering shower head can make a big difference in the health of your hair extensions.

Hair Extension Longevity: Washing and Care Tips

With proper care, hair extensions can last several months to a year. Maximizing their lifespan involves not only proper washing techniques but also regular maintenance, gentle styling, and protection from environmental damage. Knowing when to replace your extensions is also key to maintaining a fresh, vibrant look.

Troubleshooting Common Hair Extension Issues

Tangling, matting, dryness, and frizz are common issues that can arise with hair extensions. Implementing a regular care routine, using the right products, and seeking professional help when necessary can address these problems, keeping your extensions in pristine condition.

The Role of Conditioners and Treatments in Hair Extension Care

Conditioners and treatments play a crucial role in maintaining the health and beauty of hair extensions. Deep conditioning treatments can restore moisture and elasticity to dry extensions, while leave-in conditioners and oils can provide daily hydration and shine.

Hair Extensions and Scalp Health

It’s essential to consider your scalp’s health when wearing hair extensions. Ensuring proper scalp hygiene, avoiding tight hairstyles that can strain your scalp, and using extensions made from natural materials can help prevent irritation and promote overall scalp health.

Eco-Friendly Practices in Hair Extension Maintenance

In today’s environmentally conscious world, adopting eco-friendly practices in hair extension

maintenance is more important than ever. Opting for sustainable washing methods, using biodegradable hair care products, and choosing extensions made from ethically sourced materials can reduce your environmental footprint while keeping your hair looking beautiful.

Hair Extensions Washing Frequency: Finding the Right Balance

Finding the right balance in washing frequency is crucial for maintaining healthy, vibrant extensions. Overwashing can strip the hair of its natural oils, while underwashing can lead to buildup and odors. Adjusting your washing routine based on your lifestyle, hair type, and extension material can ensure your extensions remain in optimal condition.

Technological Advances in Hair Extension Care

The hair care industry is constantly evolving, with new products and tools designed to make maintaining extensions easier and more effective. From gentle detangling brushes to advanced hair care formulations, these innovations can help simplify your hair care routine and ensure your extensions look their best.


Best Practices for Hair Extensions and Washing

Maintaining hair extensions requires a delicate balance of proper washing, daily care, and professional maintenance. By understanding the specific needs of your extensions, choosing the right products, and adopting a gentle handling approach, you can enjoy beautiful, long-lasting hair extensions that enhance your natural beauty and confidence.

  • How often should I wash my hair extensions?
  • Can I use regular shampoo on my hair extensions?
  • How do I dry my hair extensions after washing?
  • What products should I avoid using on my hair extensions?
  • How can I prevent tangling and matting in my hair extensions?


Unveiling The Magic Of Mascara Primers: Elevating Your Lash Game
Unveiling the Magic of Mascara Primers: Elevating Your Lash Game

In the realm of beauty and cosmetics, mascara is often regarded as the Holy Grail for achieving voluminous and defined lashes. However, in recent years, a new player has emerged to elevate lash perfection to unprecedented heights: mascara primer. This revolutionary product has garnered attention for its ability to enhance the effects of mascara, creating longer, fuller, and more dramatic lashes. In this article, we will explore the fascinating world of mascara primers, unravel their benefits, and provide insights into how they work their magic. So, get ready to discover the secret weapon for achieving luscious lashes! Understanding Mascara Primer: Mascara primer is a product designed to be applied to the lashes before mascara. It acts as a base coat, prepping the lashes for mascara application and maximizing its effects. Typically, mascara primers come in a creamy, often white or light-colored formula, enriched with nourishing ingredients and specialized polymers. These ingredients work in harmony to deliver a range of benefits that enhance the appearance of lashes. Benefits of Mascara Primer: Lash Lengthening and Thickening:Mascara primers contain fibers or microfibers that adhere to the lashes, adding length and thickness. These tiny fibers act as extensions, effectively magnifying the impact of mascara by providing a fuller and more voluminous look. The combination of primer and mascara creates the illusion of longer, fluttery lashes that beautifully frame the eyes. Improved Mascara Performance:By applying a mascara primer, you create a smoother surface for mascara application. The primer coats and separates each lash, creating a solid foundation for the mascara to adhere to. As a result, mascara glides on effortlessly, ensuring clump-free and even distribution of the product. The primer also helps to prevent smudging and flaking throughout the day, enhancing the longevity of your mascara wear. Enhanced Curl Retention:If you’re looking to achieve a captivating curl that lasts, mascara primer is your secret weapon. The formula of many primers includes curl-enhancing properties that help lift and hold the lashes in place. By using a primer, you can preserve the curl created by an eyelash curler for a more extended period, giving your eyes an open and awakened appearance. Nourishment and Conditioning:Many mascara primers are enriched with nourishing ingredients, such as vitamins, peptides, and botanical extracts. These ingredients provide essential nutrients to the lashes, helping to strengthen and condition them over time. Regular use of a mascara primer can contribute to healthier lashes that are less prone to breakage and damage. Versatility:One of the remarkable aspects of mascara primers is their versatility. They can be used in combination with any mascara, allowing you to tailor your lash look according to your preferences. Whether you desire a natural, everyday look or a dramatic, high-impact effect, a mascara primer can help you achieve it by amplifying the results of your chosen mascara. How to Apply Mascara Primer: Applying mascara primer is a simple process that can make a significant difference in your lash game. Follow these steps to make the most of your mascara primer: Step 1: Start with clean, dry lashes. Ensure that your lashes are free from…

How To Create A Flawless Makeup Look Without Foundation
How to Create a Flawless Makeup Look Without Foundation

Creating a flawless makeup look without relying on foundation is an art that celebrates natural beauty while skillfully concealing imperfections. This approach not only allows your skin to breathe but also highlights your features in the most natural and effortless way. Whether you’re aiming to simplify your makeup routine or seeking a lighter option for daily wear, mastering the art of no-foundation makeup can transform your beauty regimen. The Basics of No-Foundation Makeup The journey to a flawless look without foundation starts with understanding the essentials. Prepping your skin and choosing the right products are foundational steps that determine the success of your makeup application. This section will guide you through essential skin preparation, selecting products that enhance rather than cover, and techniques that offer coverage and radiance without the weight of foundation. Skin Preparation A flawless makeup application begins with well-prepared skin. Cleansing, exfoliating, and hydrating are key steps to create a smooth canvas. Additionally, priming your skin helps to refine pores and ensure a longer-lasting makeup application. This segment will delve into the best practices for skin preparation, focusing on products and methods that boost your skin’s natural glow. Concealing Without Foundation Concealing blemishes and under-eye circles without the blanket coverage of foundation requires targeted techniques and the right concealer. This part will explore how to choose a concealer that matches your skin tone and texture and detailed application methods to cover imperfections effectively. Enhancing the Skin with Tinted Moisturizers Tinted moisturizers offer a light, breathable alternative to foundation, providing hydration and a hint of color. This section will cover how to select the perfect tinted moisturizer for your skin type and the best application tips for a natural, dewy finish. The Role of Powder Setting your makeup and reducing shine without foundation can be achieved with the right powder. We’ll discuss the different types of powders available, from translucent to mineral, and how to apply them for a natural, matte finish. Achieving a Natural Glow with Highlighters Highlighters can bring dimension and a healthy glow to the skin without the need for foundation. This part will guide you through selecting the right highlighter for your skin tone and mastering subtle highlighting techniques. Adding Color Without Heaviness Blush and bronzer can add warmth and color to your face without the heaviness of foundation. Learn about the selection of blush and bronzer that complements your skin tone and how to apply them for a natural-looking flush and contour. Eye Makeup Techniques Eye makeup plays a crucial role in enhancing your no-foundation look. From choosing the right eyeshadow colors to applying mascara and eyeliner for maximum impact, this section provides tips for making your eyes stand out. Defining Brows Well-defined brows frame your face and enhance your features, especially when foregoing foundation. Discover how to find the right shape and color for your brows and techniques for filling and shaping them for a polished look. Lip Makeup Lip color can tie your makeup look together. This part will discuss how to choose lip colors that complement your natural look and application tips…

Factors That Can Make Or Break Your Mascara's Quality: Understanding Key Influences
Factors That Can Make or Break Your Mascara’s Quality: Understanding Key Influences

Mascara is a staple in many makeup routines, providing length, volume, and definition to lashes. However, not all mascaras are created equal, and several factors can significantly impact their quality and performance. In this article, we will explore the key factors that can make or break your mascara’s quality. By understanding these influences, you can make informed choices when selecting and using mascara to achieve the desired lash effect. Formula Composition:The quality of a mascara largely depends on its formula composition. Factors such as the type of waxes, pigments, and additives used can greatly affect the mascara’s performance. Look for mascaras that contain high-quality ingredients, as they tend to provide better coverage, enhance lash volume, and minimize clumping or flaking. Mascara is a staple in many makeup routines, providing length, volume, and definition to lashes. However, not all mascaras are created equal, and several factors can significantly impact their quality and performance. In this article, we will explore the key factors that can make or break your mascara’s quality. By understanding these influences, you can make informed choices when selecting and using mascara to achieve the desired lash effect. Formula Composition:The quality of a mascara largely depends on its formula composition. Factors such as the type of waxes, pigments, and additives used can greatly affect the mascara’s performance. Look for mascaras that contain high-quality ingredients, as they tend to provide better coverage, enhance lash volume, and minimize clumping or flaking. Brush Design:The design and quality of the mascara wand or brush play a crucial role in the application and overall outcome. Different brush shapes and bristle configurations can achieve varying effects, from lengthening to volumizing. Look for brushes that are well-designed, with bristles that are evenly spaced and of appropriate length. This ensures that the mascara coats each lash evenly and separates them for a natural and defined look. Lash Type:The natural characteristics of your lashes can significantly impact how a mascara performs on them. Factors such as length, thickness, and curl pattern vary from person to person. Consider your lash type when selecting a mascara. For example, if you have naturally long lashes, a lengthening mascara may be more suitable. If your lashes are sparse, a volumizing formula can help create the illusion of fuller lashes. Desired Effect:The desired effect you want to achieve with your mascara will determine the type of formula and brush you should choose. Different mascaras cater to specific needs, such as lengthening, volumizing, curling, or waterproof properties. Define your desired lash look and select a mascara that aligns with those goals to ensure optimal results. Application Technique:How you apply mascara can greatly impact its quality and performance. Applying too many coats or layering mascara on dry lashes can lead to clumping, flaking, and an unnatural appearance. It’s important to apply mascara in thin, even coats, starting from the base of the lashes and wiggling the wand upward. Use a lash comb or a clean spoolie brush to separate any clumps and achieve a more polished look. Product Freshness:Mascara has a limited shelf life, and using expired…

Flawless Beauty Masteringmakeup Without Foundation
Flawless Beauty: Mastering Makeup Without Foundation

The trend towards a more natural, effortless beauty look has many embracing the idea of wearing makeup without foundation. This approach highlights your natural complexion, focusing on enhancing features rather than covering them up. Perfect for those seeking a lighter makeup routine or with skin sensitive to heavy products, this guide will walk you through achieving a polished look without the traditional foundation base. The Importance of Skincare A flawless makeup application without foundation starts with a solid skincare routine. This section emphasizes the significance of preparing your skin with proper cleansing, moisturizing, and sunscreen application. Tailoring your skincare to your specific skin type can improve texture and tone, creating a smooth canvas for makeup. Tips on incorporating exfoliation and hydration for a radiant base will also be covered. Concealer: The Key to Spot Coverage Without foundation, concealer becomes your go-to for minimizing imperfections. Learn how to choose the right concealer for your skin tone and type, and master techniques for applying and blending concealer to cover blemishes, dark circles, and redness without a cakey finish. This part will guide you on using lightweight, buildable concealers for targeted coverage that looks natural and seamless. Enhancing Your Glow with Highlighter and Bronzer Achieving a radiant complexion without foundation is all about strategic use of highlighters and bronzers. This section provides tips on selecting the right shades and formulas for your skin tone, and the best application methods to enhance your natural bone structure. Discover how to create a sun-kissed glow and subtle contouring for added dimension without the need for heavy makeup. Eyes, Lips, and Brows: Defining Features Focus on defining your eyes, lips, and brows to draw attention away from the lack of foundation. Explore techniques for creating eye looks that brighten and open up your eyes, choosing lip colors that complement your natural skin tone, and grooming your brows for a polished appearance. This part includes recommendations for long-wearing eyeliners, volumizing mascaras, natural lip tints, and brow products that offer definition without overpowering your look. Setting Your Makeup for Longevity Ensuring your makeup lasts all day without foundation requires effective setting techniques. Discover the benefits of setting sprays and translucent powders that can lock in your makeup without adding weight or texture. Learn how to apply these products lightly to maintain the freshness and radiance of your skin throughout the day. Embracing Your Natural Beauty This final section celebrates the confidence that comes with embracing your natural beauty. Tips on adjusting your makeup routine to enhance rather than conceal, and advice on building self-confidence while wearing minimal makeup, will encourage you to feel comfortable and beautiful in your skin. Wearing makeup without foundation is not only possible but can also be incredibly liberating. By focusing on skincare, utilizing concealer for spot coverage, and enhancing your natural features with light touches of color and definition, you can achieve a beautiful, natural look that feels comfortable and is kind to your skin. Embrace this minimalist approach to makeup and enjoy the simplicity and beauty of your natural, radiant self. By embracing your natural…

The Ultimate Guide To Selecting The Perfect Bronzer Brush
The Ultimate Guide to Selecting the Perfect Bronzer Brush

Bronzer application is an art form, reminiscent of painting, where the choice of brush plays a crucial role in the final effect. Selecting an appropriate bronzer brush not only elevates the application process but guarantees that the bronzer melds impeccably with your skin, yielding a natural, luminous finish. Bronzer: Purpose and Essence Bronzer, a beauty staple, aims to bestow your skin with a warm, sun-kissed radiance, enriching your complexion. Beyond its primary purpose, it’s instrumental in contouring, allowing for the meticulous sculpting and highlighting of facial contours. The secret to mastering bronzer application lies in the symbiosis between the product and the applicator. Diverse Spectrum of Bronzer Brushes The realm of bronzer brushes is diverse, with each variant designed to fulfill a distinct aspect of bronzer application. From angled, fluffy, dense, to stippling brushes, each type is tailored to meet specific application desires, guiding you towards achieving your envisioned makeup look. Natural vs. Synthetic Bristle Debate The selection between natural and synthetic bristle brushes remains a topic of debate. Natural bristles excel in their ability to pick up and distribute powder products seamlessly, while synthetic bristles stand out for their versatility, ease of maintenance, and ethical stance. Your choice should align with your personal ethics and the specific effects you wish to achieve. Impact of Shape and Size on Application The geometry and dimensions of a brush significantly dictate its application efficacy. Broad, fluffy brushes are ideal for an overall radiant effect, whereas compact, dense brushes allow for meticulous contouring. Angled brushes are adept at chiseling cheekbones, and stippling brushes offer a refined, airbrushed finish. Angled Brushes: Masters of Contouring Angled brushes, characterized by their tapered bristles, facilitate focused application, rendering them perfect for contouring endeavors with bronzer. They are the tools of choice for sculpting cheekbones, jawlines, and temple areas with precision. Fluffy Brushes: Architects of a Natural Glow For a subtle, natural glow, fluffy brushes are unparalleled. Their plush, expansive bristles ensure even distribution of bronzer, achieving a delicate, radiant sheen. Dense Brushes: Precision in Sculpting Dense brushes, known for their compact bristles, provide unparalleled control, making them indispensable for detailed face sculpting. Employing a gentle approach allows for the gradual intensification of the bronzer, ensuring a sculpted yet natural appearance. Stippling Brushes: Pioneers of a Flawless Finish Stippling brushes, with their unique dual-fiber bristles, are celebrated for achieving an impeccable, airbrushed complexion. They excel in seamlessly blending bronzer into the skin, eliminating any potential for unevenness or streaks. Influence of Brush Handle on Application The design and balance of a brush handle can significantly enhance application control, offering a comfortable and precise makeup experience. Bronzer Brush Maintenance Maintaining your bronzer brush through regular cleaning is crucial for its performance and longevity, ensuring a clean and hygienic application process. Bronzer Application Mastery To sidestep common pitfalls, such as excessive application or misplaced product, heed expert advice. Employing a gentle hand, thorough blending, and selecting a bronzer shade that complements your skin tone are essential techniques. Evaluating Budget vs. Premium Brushes The decision between investing in a premium brush or opting…

Embrace Your Natural Curls: Why Curly Girls Should Ditch Heat Styling Tools In Warmer Weather
Embrace Your Natural Curls: Why Curly Girls Should Ditch Heat Styling Tools in Warmer Weather

Warmer weather brings with it a desire for carefree hairstyles that embrace the natural beauty of our hair. For curly girls, this means letting those gorgeous curls shine without the need for excessive heat styling. Heat styling tools like flat irons and curling wands can cause damage to curly hair, especially during the hotter months when the hair is already more prone to dryness and frizz. Embracing your natural curls in warmer weather not only helps protect your hair from damage but also allows you to rock effortlessly beautiful and unique hairstyles. In this comprehensive guide, we will explore the reasons why curly girls should ditch the heat styling tools during warmer weather and offer practical tips to help you rock your natural curls with confidence. Preserve Hair Health:Heat styling tools can cause significant damage to curly hair, as the high temperatures strip the hair of its natural moisture. When the weather is already warm and potentially more drying, it’s essential to preserve your hair’s health and hydration. By avoiding heat styling, you allow your curls to retain their natural moisture and elasticity, resulting in softer, more manageable hair. Prevent Heat Damage:Curly hair is already prone to dryness and frizz due to its unique structure, which makes it more susceptible to damage from heat styling. When the weather is hot and humid, the risk of heat damage increases, leading to split ends, breakage, and a loss of curl pattern. Embracing your natural curls during warmer weather helps prevent heat damage and keeps your locks looking healthy and vibrant. Embrace Natural Volume:Warm weather can often mean more humidity, which can work in your favor as a curly girl. Embracing your natural curls allows you to take advantage of the increased humidity, which can enhance your hair’s natural volume and bounce. Instead of fighting against the elements, work with them to create stunning and voluminous hairstyles. Low-Maintenance Styling:One of the greatest benefits of ditching heat styling tools is the ease and simplicity it brings to your hair care routine. Embracing your natural curls in warmer weather means less time spent in front of the mirror with heat tools and more time enjoying the outdoors. Low-maintenance styling not only saves time but also reduces the risk of heat-related damage to your hair. Rock Effortless Beach Waves:Warm weather often calls for beachy and carefree hairstyles, and curly hair is perfect for achieving those coveted beach waves. Letting your natural curls shine allows you to effortlessly rock beachy waves without the need for heat styling. Simply scrunch your damp hair with a curl-enhancing product and let it air dry for a laid-back and sun-kissed look. Experiment with Protective Styles:Ditching heat styling tools gives you the opportunity to experiment with various protective styles that not only shield your hair from the sun’s rays but also allow your curls to flourish. Protective styles like braids, twists, and buns can be fashionable and practical during warmer weather, helping to keep your hair off your neck and reducing exposure to damaging UV rays. Reduce Styling Stress:Curly hair can have a mind…

Flawless Foundation Tips And Tricks For Applying Liquid Foundation
Flawless Foundation: Tips and Tricks for Applying Liquid Foundation

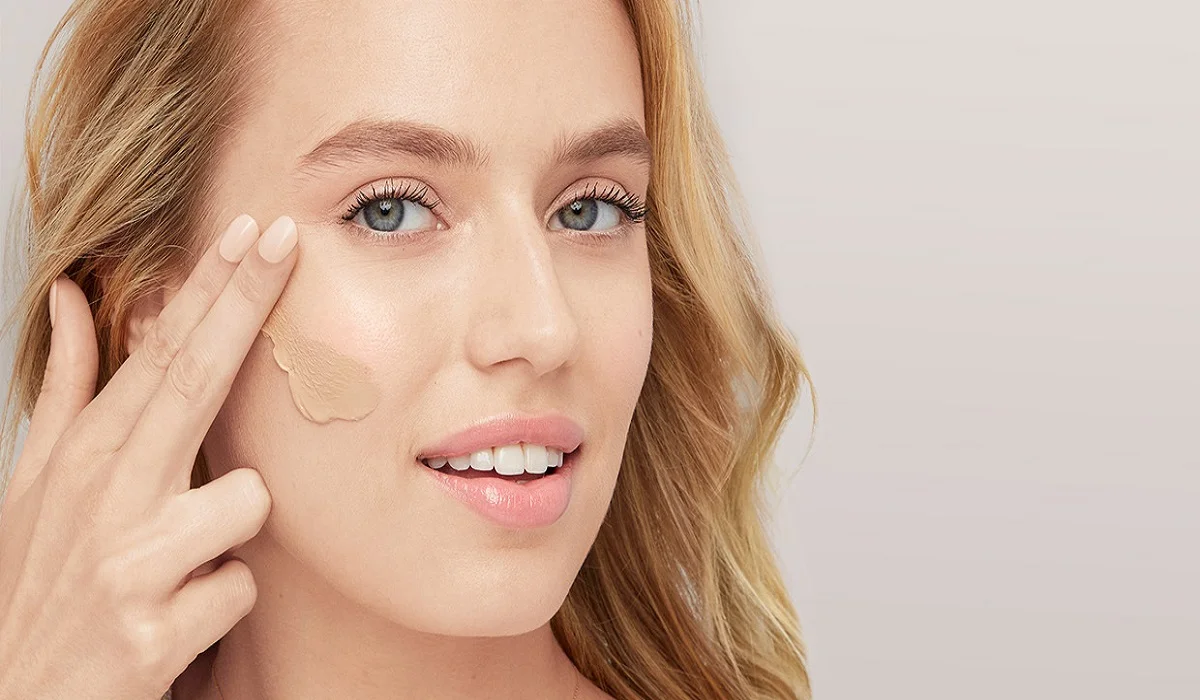
Liquid foundation is a versatile and widely used makeup product that helps create a smooth and even complexion. However, achieving a flawless finish with liquid foundation requires proper application techniques and some helpful tricks. In this comprehensive guide, we will explore valuable tips and tricks to ensure that your liquid foundation application is seamless, long-lasting, and enhances your natural beauty. Prepping Your SkinBefore applying liquid foundation, it’s essential to prepare your skin to ensure a smooth and even canvas. Follow these steps to optimize your foundation application: a. Cleansing: Start with a clean face by washing away any dirt, oil, or makeup residue. Use a gentle cleanser suitable for your skin type. b. Exfoliation: Regular exfoliation helps remove dead skin cells, promoting smoother skin and preventing foundation from clinging to dry patches. Exfoliate 1-2 times per week. c. Moisturizing: Apply a lightweight, hydrating moisturizer to keep your skin supple and prevent the foundation from settling into fine lines or dry areas. d. Primer: Consider using a makeup primer to create a smooth base and extend the longevity of your foundation. Choose a primer that suits your skin type, whether you have oily, dry, or combination skin. Selecting the Right FoundationChoosing the appropriate liquid foundation for your skin type and desired coverage is crucial. Here are some pointers for selecting the right foundation: a. Skin Type: Identify your skin type (oily, dry, combination, or normal) to find a foundation that addresses your specific needs. Oil-free, matte foundations work well for oily skin, while hydrating formulas suit dry skin. b. Undertone: Determine your skin’s undertone, which can be warm, cool, or neutral. Select a foundation with a matching undertone for a natural look. c. Shade Matching: Test foundation shades on your jawline or wrist in natural light to find the most suitable match. The right shade should blend seamlessly with your neck and face. d. Coverage: Choose the level of coverage you desire—light, medium, or full—based on your skin concerns and the occasion. Applying Liquid FoundationNow that your skin is prepped and you have the right foundation, let’s explore different application techniques to achieve a flawless finish: a. Brush Application: Use a foundation brush to apply the product in downward strokes. Brushes provide even coverage and help buff the foundation into the skin for a polished look. b. Beauty Blender or Makeup Sponge: Dampen a makeup sponge or Beauty Blender and gently bounce it across your face to apply the foundation. This technique provides a natural, airbrushed finish and ensures seamless blending. c. Fingertip Application: For a more lightweight and natural finish, use clean fingers to apply the foundation. Warm the product between your fingers before patting it onto your skin. d. Layering: Start with a small amount of foundation and build up coverage gradually where needed. This approach prevents a cakey appearance and allows you to tailor the coverage to your preference. e. Sheer Application: For a light, sheer coverage, mix a drop of foundation with your moisturizer or primer before applying. Concealing and Color CorrectingTo achieve a flawless complexion, consider incorporating concealer…

Mastering The Inner Corner Eyeliner Trend: A Step By Step Guide
Mastering the Inner Corner Eyeliner Trend: A Step-by-Step Guide

The inner corner eyeliner trend has taken the beauty world by storm, adding a touch of brightness and glamour to any eye look. This trendy technique involves applying eyeliner to the inner corners of the eyes to create a wide-eyed and radiant appearance. Whether you’re a makeup enthusiast or a beginner, mastering the inner corner eyeliner is simple and can elevate your eye makeup game instantly. In this comprehensive guide, we will walk you through the three easy steps to pull off the inner corner eyeliner trend flawlessly. Step 1: Gather the Right Tools and Products Before you start applying the inner corner eyeliner, ensure you have the right tools and products on hand: A fine-tipped eyeliner brush or a precision eyeliner pencil: Choose a brush or pencil with a fine tip to create precise lines in the inner corners of your eyes. Gel eyeliner or liquid eyeliner: These formulas work best for achieving clean and defined lines in the inner corners. Eyeshadow primer or concealer: Prepping your eyelids with a primer or concealer will ensure the eyeliner stays in place and enhances its color intensity. Setting powder or eyeshadow: A setting powder or eyeshadow close to your skin tone will set the primer or concealer and prevent creasing. Optional: Shimmery or metallic eyeshadow: If you want to add a pop of sparkle to your inner corner, opt for a shimmery or metallic eyeshadow in a complementary shade. Step 2: Prep and Prime the Inner Corners Prepping your inner corners is essential to ensure a smooth application and enhance the longevity of the eyeliner. Cleanse your face and eyes: Start with a clean canvas by thoroughly cleansing your face and removing any makeup residue from your eyes. Apply eyeshadow primer or concealer: Gently dab a small amount of eyeshadow primer or concealer on the inner corners of your eyes using your fingertips or a small brush. Blend it evenly to create a smooth base for the eyeliner. Set the primer or concealer: Dust a setting powder or a neutral eyeshadow close to your skin tone over the primed area. This step will set the base and prevent creasing. Step 3: Apply the Inner Corner Eyeliner Now that your inner corners are prepped and ready, follow these steps to achieve the perfect inner corner eyeliner look: Choose your eyeliner color: You can opt for classic black for a bold and defined look, or you can experiment with colored eyeliners to add a fun and unique twist. Dip your brush or eyeliner pencil into the gel or liquid eyeliner: Ensure the brush or pencil is coated evenly with the product. Create the inner corner line: For a subtle and natural look, start by drawing a thin line along the inner corners of your eyes. Begin from the tear ducts and extend the line slightly outwards. For a more dramatic and elongated look, extend the line further towards the middle of your eyelids. Blend or smudge (optional): If you prefer a softer effect, you can gently blend or smudge the eyeliner with a cotton swab…