Revitalizing Your Look for the New Academic Year: Trendy and Easy Hairstyles

The transition from a leisurely vacation back to the structured schedules of school or work marks a perfect opportunity for a personal makeover. As we embrace the new academic year or return to our routine jobs, updating our appearance can provide a fresh burst of energy and confidence. This season, why not consider revamping your hairstyle? Easy, trendy, and quick to style, the right hairstyle can significantly uplift your look and mood. In this comprehensive guide, we’ll explore a variety of simple yet stylish hairstyles suitable for short, medium, and long hair, ensuring you can easily craft a chic look from the comfort of your home.
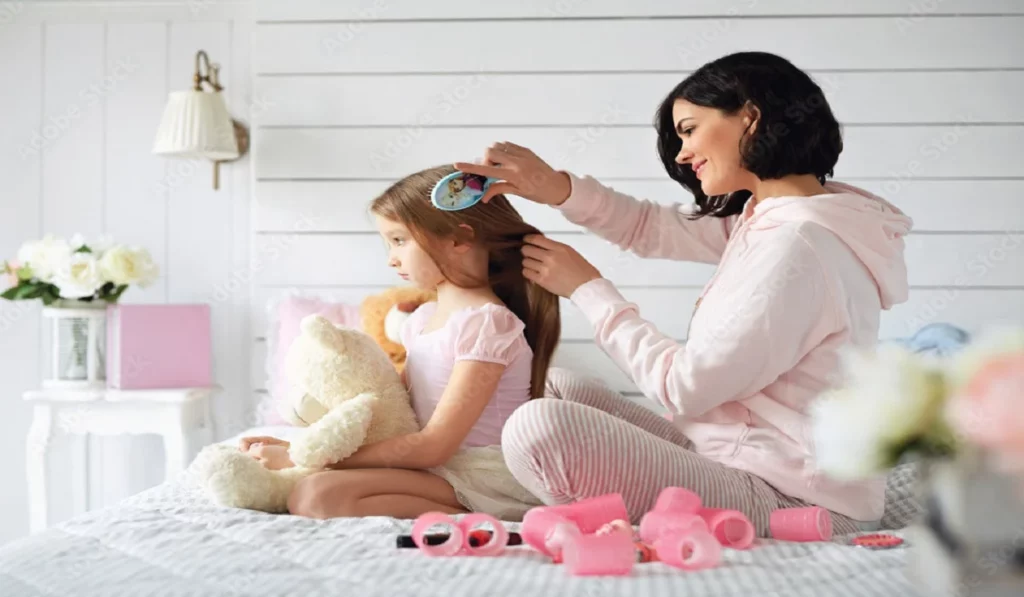
Effortless Yet Chic School Hairstyles


Trendy Hairstyles to Kickstart the Season

Transforming your look with a new hairstyle is a fantastic way to mark the beginning of a new season or academic year. Let’s delve into some effortless and fashionable hairstyles that can be achieved in minutes, making them perfect for busy mornings before school or work.

Simple Hairstyles for Short Hair Short hair offers a plethora of styling options that are both easy and quick to execute.

  • Half-Up Hairstyles: Ideal for a cute and simple look. Gather the top section of your hair and secure it with a hairband, or create two buns for a playful twist.
  • Halo Braid: A sophisticated style for those with slightly longer short hair. Mastering the French braid can give you a chic, ready-for-work look in no time.
  • Enhanced Curls: Add definition to straight, short hair by creating curls overnight with curling rods, or opt for beach waves for a summer-inspired vibe.
  • Accessorize: Elevate your hairstyle with hairbands or clips featuring bold patterns, colors, and sparkles to make your hair stand out.

Cute Hairstyles for Effortless Charm Cute hairstyles can be achieved quickly, ensuring you look stylish without spending too much time.

  • Slicked-Back High Ponytail: Channel your inner Ariana Grande with this sleek and simple look, using a bit of serum for smoothness.
  • French Plait: A classic hairstyle that’s both cute and easy. Oil your hair, split it into two sections, braid, and you’re ready to step out the door.
  • Top Bun: A formal yet adorable option. Create a bun at the crown of your head and secure it with hairpins for a chic look.

Easy Hairstyles For Braids Braids are versatile and can be styled in minutes, offering a quick solution for a polished look.

  • Side Braid: Simply brush your hair to one side, create a braid, and secure it to effortlessly enhance your appearance.

Simple Hairstyles for Long Hair Long hair provides a canvas for various hairstyles that are easy and quick to manage, perfect for school settings.

  • Half Bun, Half-Down: This hairstyle adds definition and volume. Secure the top section into a bun and let the rest flow freely, optionally adding curls for more bounce.
  • Ribbons and Bows: Tying your hair with ribbons and bows can add a playful and stylish element to your look.
  • Flip and Style: For a simple and cool look, flip your hair over, apply some hair oil or serum, and style as desired.

Simple Hairstyles for Medium-Length Hair Medium-length hair is incredibly versatile, allowing for a range of styles from beach waves to sleek bobs, all of which are easy to style and maintain for school.

Simple and Stylish Twists

Twists are exactly as they sound—simple yet capable of adding either a fun or sophisticated flair to your look with minimal effort.

  • The Casual Side Twist: Ideal for partially keeping hair away from the face.
  • The Chic Rope Twist: A minimalist two-strand twist that’s effortlessly stylish.

Embrace Your Natural Beauty

Leveraging your natural hair texture not only simplifies your routine but also highlights your innate beauty.

  • Enhanced Natural Curls: A touch of product can define your curls and minimize frizz.
  • Effortless Waves: Achievable by braiding damp hair and allowing it to air dry.
Effortless Yetchic School Hairstyles


Elevate Your Look with Accessories

Even the simplest hairstyles can be elevated with the right accessories, adding a personal touch to your school look.

  • Vibrant Headbands: Inject color and personality.
  • Retro Scrunchies: Add a nostalgic charm while being hair-friendly.
  • Sparkling Hair Clips: Keep stray hairs in place while adding a sparkle.

Streamlining Your Morning Hair Routine

For those mornings when every second counts, these tips can be lifesavers:

  • Innovative Dry Shampoo Uses: Maintain the appearance of clean hair, no wash required.
  • Pre-prepared Overnight Styles: Save precious morning time with hairstyles set the night before.

Styles for Every Hair Length

Regardless of whether your hair is short, medium, or long, this guide offers stylish and manageable options for every student.

Maintaining Luscious Locks

The secret to any great hairstyle is healthy hair. A consistent care routine and regular trims are essential to maintaining your hair’s vitality.

Visual Learning Aids

For those who prefer visual guidance, numerous online tutorials and resources are available to walk you through these hairstyles step-by-step.


Refreshing your look with a new hairstyle is an excellent way to start the new academic year or to return to your routine with renewed vigor. Whether you have short, medium, or long hair, there are countless simple and trendy hairstyles that can elevate your appearance with minimal effort. By incorporating these styles into your daily routine, you can ensure you look and feel your best, ready to tackle the challenges and opportunities of the new season.

Navigating the morning rush before school often involves the daunting task of choosing a hairstyle that is both quick to achieve and stylishly enduring for a day filled with activities. This comprehensive guide is dedicated to presenting an array of straightforward yet chic hairstyles, ranging from the evergreen classics to contemporary adaptations, suitable for the school environment.

How can I quickly style my short hair for school? Try half-up hairstyles, halo braids, or simply add curls or waves for a quick refresh.

What are some cute, easy hairstyles for school? Opt for a slicked-back high ponytail, French plait, or a top bun for a cute and manageable look.

Can I create easy braided hairstyles in minutes? Yes, side braids are a simple and quick option for an elegant look.

What simple hairstyles are recommended for long hair? Consider half bun, half-down styles, or accessorize with ribbons and bows for a playful touch.

Are there simple styling options for medium-length hair? Yes, from beach waves to a long bob, medium-length hair offers various easy-to-maintain styles suitable for school.


Mastering The Eyelash Curler
Mastering the Eyelash Curler

Transforming your lashes from straight to stunningly curled can be effortlessly achieved with the proper use of an eyelash curler, turning it into an indispensable tool in your beauty arsenal. However, mishandling it could result in discomfort, lash damage, or uneven curls. This detailed manual will guide you through mastering the eyelash curler, incorporating upkeep advice and solutions to frequent problems, enabling you to safely and effectively obtain those desirable, fluttering lashes. Selecting the Ideal Eyelash Curler Eyelash Curler Varieties The market offers eyelash curlers in metal, plastic, and heated models. Metal curlers stand out for their sturdiness and precision in curling, while plastic variants are perfect for on-the-go use due to their lightness. For those with hard-to-curl lashes, heated eyelash curlers can achieve a more defined and enduring curl. Choosing a Curler for Your Eye Shape Eyelash curlers are not one-size-fits-all; their efficiency varies with different eye shapes. It’s crucial to choose a curler that complements the curvature of your eye to ensure a uniform curl and avoid discomfort. Some manufacturers provide curlers tailored to specific eye shapes such as almond, round, or deep-set. Lash Preparation Ensure Lashes are Clean and Dry Commence with lashes that are devoid of any makeup or residue, as leftover products can lead to lashes sticking to the curler, risking damage. Post face-washing, ensure your lashes are thoroughly dried before proceeding with the curling process. Warming the Curler (Optional) To enhance the curl, consider gently warming your metal eyelash curler with a hairdryer for a brief period. Always test the curler’s temperature on your hand to confirm it’s warm, not hot, preventing any harm to your eye’s delicate surrounding skin or the lashes themselves. Curling Your Lashes Proper Curler Placement With the curler open, position your lashes between the pads, getting as close as possible to the lash base without touching the eyelid. Confirm that all lashes are captured by the curler’s opening. Executing the Curl Press the curler’s handles together gently for approximately 5 to 10 seconds. For a more natural curl, you may lightly pump the curler. Refrain from pulling or yanking the curler to avoid lash damage. Sectional Curling For a more pronounced curl, adopt a sectional approach: begin at the base, then mid-lash, and finally near the tips. This technique fosters a seamless, natural curl rather than an abrupt crimp. Post-Curling Mascara Application Follow up the curling with your preferred mascara to set the curl. Opt for a waterproof or curl-enhancing mascara for optimal results. Applying mascara post-curling prevents the lashes from sticking to the curler and potential damage. Curler Maintenance and Cleanliness Eyelash Curler Cleansing To ensure optimal performance, regularly clean your curler to eliminate any mascara residue or debris. Utilize a gentle makeup remover or isopropyl alcohol for cleaning, allowing the curler to dry thoroughly before its next use. Pad Replacement Change the curler’s rubber pads every few months or at signs of wear to maintain curl efficiency and lash safety. Neglecting to replace worn pads can compromise lash health and curl quality. Addressing Common Concerns Avoiding Eyelid Pinching Pinching…

What Is Eyelashserum
What is Eyelash Serum?

Eyelash serum has emerged as a cornerstone in the beauty routines of those aiming to achieve fuller, healthier, and more vibrant lashes. This detailed guide explores eyelash serums, their composition, how they work, and their benefits, providing you with essential knowledge to transform your lashes and enhance your natural beauty. The allure of luscious, thick eyelashes has long been a symbol of beauty and femininity. Eyelash serums are specifically formulated products designed to promote the health, length, and thickness of the lashes, offering a non-invasive solution to the common desire for more pronounced eyelashes. Defining Eyelash Serum Eyelash serums are potent formulations that contain active ingredients aimed at stimulating the growth and improving the overall condition of eyelashes. These serums are applied directly to the lash line and work over time to enhance lash appearance. Composition and Types Eyelash serums vary widely in their composition, with key ingredients often including peptides, vitamins, and natural extracts designed to nourish and strengthen lashes. There are both over-the-counter options and prescription-strength formulations available, each catering to different needs and sensitivities. How Does Eyelash Serum Work? Eyelash serums penetrate the hair follicles to stimulate growth from within. By nourishing and supporting the lash follicles, these serums can extend the growth phase of the lash cycle, leading to longer, fuller lashes. The Science Behind the Serum Active ingredients like biotin, peptides, and hyaluronic acid support keratin production, enhance follicle health, and provide moisture to the lashes, respectively. Expected Results and Timeline Results vary, but many users report noticeable improvement in lash length and density after 4 to 6 weeks of consistent use. Maximum effects are often observed after 3 to 4 months. Benefits of Using Eyelash Serum The regular application of eyelash serum can lead to enhanced growth, increased thickness, strength, and improved health and hydration of the eyelashes. This can reduce lash loss and breakage, contributing to a fuller lash line. How to Choose the Right Eyelash Serum Key Ingredients to Look For Look for serums containing peptides for growth, biotin for strengthening, and hyaluronic acid for hydration. These ingredients are crucial for promoting healthy, robust lashes. Understanding Different Formulas Choose a serum based on your specific needs—whether it’s for growth, strengthening, or moisture. Always perform a patch test to ensure you don’t have an allergic reaction to the product. Application Tips for Maximum Effectiveness Best Practices Apply the serum to clean, dry lashes once a day, ideally at night, to allow the serum to work overnight. Use a single stroke at the base of the upper eyelashes. Common Mistakes to Avoid Avoid applying too much product, which can lead to irritation. Ensure the serum doesn’t get into your eyes, and refrain from using multiple lash products simultaneously to avoid adverse reactions. Safety and Side Effects While eyelash serums are generally safe, potential risks include eye irritation, darkening of the eyelid skin, and, in rare cases, changes in iris color, particularly with prescription-strength formulas. Minimize complications by following the product’s instructions carefully and consulting with a healthcare provider if you have sensitive eyes or skin. What…

Master The Art Of Bronzing Pro Tips For A Flawless Glow
Master the Art of Bronzing: Pro Tips for a Flawless Glow

Mastering the art of bronzing can elevate your beauty regimen by infusing your complexion with warmth, depth, and a vibrant, healthy radiance. Unlike the sculpting effects of contouring or the luminosity added by highlighting, bronzing recreates the natural warmth of sunlight on the skin, ensuring a look that’s both natural and glowing. This comprehensive guide will equip you with the knowledge to use your bronzer brush with the finesse of an expert artist. Choosing Your Ideal Bronzer Embarking on the journey to find the quintessential bronzer involves navigating through the varieties of powder, cream, and liquid forms. Each type offers distinct advantages, suited to different skin types and personal preferences. Powder bronzers excel for those with oily skin and facilitate straightforward application, cream bronzers provide a moist finish ideal for dry skin, and liquid bronzers deliver an unparalleled natural effect suitable for every skin type. The cornerstone of a flawless selection is picking a hue one or two shades deeper than your skin, ensuring a blend that’s both seamless and devoid of an unnatural, muddy, or orange cast. Essential Application Tools The transformative power of bronzer is not solely in the product but also in the technique of application. Essential for achieving a perfect finish, the right tools are indispensable. A plush, angled brush is the best match for powder bronzers, offering a soft, widespread application, while a stippling brush is most effective for creams and liquids, providing the blendability and precision needed. Maintaining these tools through regular cleansing is vital to prevent buildup and guarantee a smooth application every time. Skin Preparation for Bronzer The foundation of a stellar bronzer application lies in the initial skin preparation. A regimen that includes a hydrating moisturizer and a smoothing primer sets up the perfect canvas, enhancing both the bronzer’s appearance and its durability. A foundation that mirrors your skin tone acts as a seamless base, facilitating the bronzer’s blendability and ensuring an absence of streaks or uneven areas. Fundamental Application Methods The essence of bronzing is to mimic a genuine sun-kissed effect, as though returning from a seaside getaway. To achieve this, apply the bronzer to areas typically kissed by the sun: your forehead, cheekbones, and jawline, employing a light touch and building intensity gradually to avoid stark lines or patchiness. The mantra “less is more” holds true in the realm of bronzing. Elevated Bronzing Strategies For those aspiring to refine their bronzing skills, utilizing bronzer for subtle contouring and enhancing the natural radiance is a strategy worth exploring. Applying the bronzer in a “3” shape on your face’s sides, blending from the forehead down under the cheekbones and across the jawline, not only adds warmth but also softly contours, imparting definition in a manner far more subdued than traditional contour products. Avoidable Bronzing Faux Pas Over-application ranks high among common bronzing errors, leading to an unnatural appearance. It’s crucial to shake off excess product before application and use a restrained hand. Equally, choosing an incorrect shade can create an undesired orange or muddy look. Opting for a bronzer with a neutral undertone…

The Power Of Rosemary Oil For Hair Growth
The Power of Rosemary Oil for Hair Growth

Esteemed for its aromatic and therapeutic qualities, rosemary oil emerges as a cornerstone in hair rejuvenation. This discourse ventures into the quintessence of rosemary oil, illuminating its pivotal role in hair vitality augmentation. Tracing its lineage from ancient remedies to contemporary scientific validations, we unveil the diverse mechanisms through which rosemary oil revolutionizes hair care. Unraveling the Essence of Rosemary Oil Rosemary, an aromatic herb characterized by its fragrant, evergreen foliage and variably colored blossoms, transcends its culinary applications to become a vital source of nourishment and antioxidative substances. The distillation process of rosemary culminates in an oil rich in 1,8-cineole, camphor, and alpha-pinene, molecules instrumental in its healing prowess. Deciphering Rosemary Oil’s Contribution to Hair Growth Empirical research highlights the remarkable capacity of rosemary oil to foster hair growth, rivaling even traditional treatments like minoxidil. Its proficiency in enhancing scalp blood flow, thereby enriching hair follicles with essential nutrients and oxygen, underscores the method through which rosemary oil fortifies hair health and proliferation. The Multifaceted Advantages of Rosemary Oil in Hair Care Beyond stimulating hair growth, rosemary oil is lauded for reinforcing hair follicles, delaying the onset of gray hair, and addressing scalp-related ailments such as dandruff and irritation, courtesy of its anti-inflammatory and antioxidative attributes. Optimal Application Techniques for Rosemary Oil in Hair Growth The application of rosemary oil for hair growth transcends mere topical use. This segment will navigate through the preparation of a homemade rosemary oil infusion and delineate the most efficacious application practices for optimal outcomes. It also examines precautionary measures and appropriate dilution guidelines to ensure a rewarding and safe experience. Insights from User Experiences with Rosemary Oil Gleaning insights from those who have integrated rosemary oil into their hair care regime offers invaluable perspectives. This section accentuates authentic narratives and feedback, evidencing the oil’s versatility across various hair types and conditions. Synergistic Effects of Rosemary Oil with Other Natural Ingredients Rosemary oil’s efficacy is magnified when combined with other natural constituents. This exploration reveals mixtures and partnerships that amplify hair growth, alongside the ancillary benefits of melding rosemary oil with additional essential oils. Tailoring Rosemary Oil Use for Diverse Hair Needs Grasping how rosemary oil interacts with different hair profiles is vital for maximizing its utility. Advice tailored to specific hair requirements is provided, empowering all to leverage rosemary oil’s advantages. Precautions and Considerations with Rosemary Oil Use Despite its general safety, it’s imperative to acknowledge potential adverse effects and contraindications of rosemary oil use. This section discusses safety protocols and considerations for incorporating rosemary oil into your hair care routine. Final Reflections on Rosemary Oil as a Hair Growth Enhancer Concluding with a synthesis of the benefits and insights presented, this final narrative reasserts the value of rosemary oil as a natural and efficacious hair growth stimulant. It offers concluding advice and strategies for a comprehensive hair care approach. Delving into the comprehensive role of rosemary oil in hair growth enhancement reveals its status as a holistic and potent hair care solution. Incorporating rosemary oil into your regimen not only fosters healthier hair growth…

Coffee Body Scrubs: Are They Suitable For Your Face?
Coffee Body Scrubs: Are They Suitable for Your Face?

Coffee body scrubs have gained popularity for their exfoliating and invigorating properties, but can they be safely used on the delicate skin of your face? While coffee scrubs offer numerous benefits for the body, including improved circulation and skin rejuvenation, the facial skin is thinner and more sensitive. In this comprehensive guide, we will explore the potential benefits and risks of using a coffee body scrub on your face, discuss the factors to consider, and provide alternatives for safe and effective facial exfoliation. Understanding Coffee Body Scrubs Coffee body scrubs are typically made by mixing ground coffee beans with other natural ingredients such as sugar, salt, oils, and sometimes additional herbs or essential oils. The coarse texture of coffee grounds helps to physically exfoliate the skin, removing dead cells, and promoting circulation. Additionally, coffee contains antioxidants and caffeine, which are believed to have anti-inflammatory and skin-toning properties. However, when it comes to using these scrubs on your face, caution is warranted due to the differences in skin sensitivity and thickness between facial and body skin. Here, we’ll explore the key factors to consider when deciding whether or not to use a coffee body scrub on your face. Factors to Consider Benefits of Coffee Scrubs for the Face While using a coffee body scrub on your face may have its risks, there are potential benefits if used cautiously and infrequently: Alternatives for Safe Facial Exfoliation If you’re hesitant about using a coffee body scrub on your face, there are several alternative methods for safe and effective facial exfoliation: Precautions and Best Practices If you decide to use a coffee body scrub on your face, follow these precautions and best practices: While coffee body scrubs offer benefits for the body, they may not be the best choice for facial exfoliation due to the sensitivity of facial skin. To avoid potential irritation, micro-tears, or breakouts, it’s safer to opt for facial scrubs or chemical exfoliants specifically formulated for delicate facial skin. These alternatives provide effective exfoliation without the risks associated with coffee body scrubs. While coffee body scrubs offer benefits for the body, they may not be the best choice for facial exfoliation due to the sensitivity of facial skin. To avoid potential irritation, micro-tears, or breakouts, it’s safer to opt for facial scrubs or chemical exfoliants specifically formulated for delicate facial skin. These alternatives provide effective exfoliation without the risks associated with coffee body scrubs. Prioritizing gentle skincare practices and choosing the right products tailored to your skin type can help you achieve a radiant and healthy complexion while avoiding potential pitfalls. Remember that maintaining the health of your facial skin should always be a top priority in your skincare routine.

The Ultimate Guide: How To Properly Apply Sunscreen Under Foundation
The Ultimate Guide: How to Properly Apply Sunscreen Under Foundation

Wearing sunscreen is crucial for maintaining healthy and youthful skin, protecting it from the harmful effects of the sun’s ultraviolet (UV) rays. However, many people struggle with incorporating sunscreen into their makeup routine, particularly when it comes to applying it under foundation. In this comprehensive guide, we will walk you through the steps to ensure that you can effectively wear sunscreen under foundation, allowing you to enjoy the benefits of both sun protection and flawless makeup. Step 1: Choose the Right Sunscreen:Before applying sunscreen, it is essential to select a product that suits your skin type and provides broad-spectrum protection against both UVA and UVB rays. Look for a lightweight formula that is specifically designed for the face and has a minimum SPF (Sun Protection Factor) of 30. Opt for non-comedogenic and oil-free options to prevent clogged pores and excessive shine. Step 2: Cleanse and Moisturize:Start with a clean canvas by washing your face with a gentle cleanser. Follow up with a lightweight moisturizer suitable for your skin type. Allow the moisturizer to absorb completely before proceeding to the next step. Hydrated skin ensures a smooth application of sunscreen and foundation. Step 3: Apply Sunscreen:Take a dime-sized amount of sunscreen and dot it onto your forehead, cheeks, chin, and nose. Gently spread the sunscreen across your face, ensuring even coverage. Pay extra attention to areas prone to sun exposure, such as the bridge of the nose, cheekbones, and temples. Avoid rubbing vigorously, as it may cause the sunscreen to pill or ball up. Step 4: Wait for Sunscreen to Set:Allow the sunscreen to absorb into your skin for at least 10 to 15 minutes before applying foundation. This waiting period allows the sunscreen to form a protective barrier on your skin and ensures better adherence of the foundation. Step 5: Choose a Foundation Formula:To ensure compatibility between sunscreen and foundation, opt for a foundation with a lightweight and liquid consistency. Oil-free and water-based formulas tend to work best with sunscreen, as they minimize the risk of clogged pores and allow for smoother application. Step 6: Mix Sunscreen with Foundation (Optional):If you prefer a more streamlined application process, you can mix a small amount of sunscreen with your foundation. This method helps to ensure even distribution of sun protection and foundation, providing a combined layer of coverage. However, it is important to maintain the recommended amount of sunscreen for adequate sun protection. Step 7: Apply Foundation:Using a clean makeup brush, sponge, or your fingertips, apply the foundation onto your face in gentle, downward strokes. Start from the center of your face and blend outward for a seamless finish. Avoid using excessive pressure, as it may disrupt the sunscreen layer beneath. Step 8: Set with Powder (Optional):If you prefer to set your foundation with powder, choose a translucent or mineral-based powder with sun-protective properties. Apply a light dusting to ensure your makeup stays in place while adding an extra layer of sun protection. Step 9: Reapply Sunscreen Throughout the Day:Remember that sunscreen needs to be reapplied every two hours, especially if you are exposed…

The Best Methods To Give Your Skin A Perfectly Even Tone
The Best Methods to Give Your Skin a Perfectly Even Tone

The quest for a flawless, even skin tone is a universal beauty goal, transcending cultures and ages. An even skin tone not only signifies a healthy and youthful appearance but also boosts confidence, allowing individuals to feel their best. However, achieving this coveted complexion can be challenging due to various skin tone irregularities such as hyperpigmentation, sun spots, and uneven textures. This comprehensive guide will explore the most effective strategies, from cutting-edge professional treatments to time-honored natural remedies, to help you give your skin the perfectly even tone it deserves. Understanding Skin Tone Irregularities Causes of Uneven Skin Tone: Skin tone irregularities can arise from a multitude of factors including genetic predisposition, sun damage, hormonal fluctuations, and the natural aging process. Understanding these underlying causes is the first step towards effective treatment. The Impact of Sun Exposure: Sunlight is a significant contributor to skin tone changes, causing dark spots and premature aging. Protective measures against UV radiation are crucial for maintaining an even skin tone. Hormonal Changes and Skin Tone: Hormonal imbalances can lead to conditions like melasma, characterized by dark patches on the face. Awareness of these changes can guide appropriate skin care and treatment options. Environmental Factors: Pollution and environmental stressors can exacerbate skin tone irregularities, making a comprehensive skincare regimen essential for urban dwellers. The Basics of Skin Care for Even Tone Daily Skin Care Routine: Establishing a daily skincare routine that includes cleansing, moisturizing, and exfoliating can significantly improve skin texture and tone. Regular exfoliation removes dead skin cells, revealing fresher, more even-toned skin beneath. Importance of Sun Protection: Sunscreen is non-negotiable in the pursuit of an even skin tone. A broad-spectrum SPF 30 or higher should be applied daily, regardless of weather conditions, to protect against UV damage. Hydration and Nutrition for Skin Health: Adequate hydration and a diet rich in antioxidants play a vital role in skin health. Foods high in vitamins C and E can help protect the skin from the visible effects of environmental damage. Professional Treatments for Even Skin Tone Chemical Peels: By removing the outermost layers of the skin, chemical peels can significantly reduce the appearance of pigmentation and uneven skin texture, revealing smoother, more radiant skin. Laser Therapy: Lasers target melanin deposits and damaged skin cells, effectively treating hyperpigmentation and redness, resulting in a more uniform skin tone. Microdermabrasion: This non-invasive treatment exfoliates the top layer of skin to diminish dark spots and texture irregularities, promoting new cell growth. The Role of Dermatological Consultation: Consulting with a dermatologist can provide personalized advice and access to advanced treatments tailored to your skin’s specific needs. Natural Remedies and Their Efficacy Home Remedies for Skin Tone: Natural ingredients like lemon juice, turmeric, and aloe vera have been used for centuries to lighten dark spots and improve skin tone. However, their efficacy varies, and they should be used with caution to avoid adverse reactions. The Power of Natural Ingredients: Certain natural compounds, such as vitamin C, licorice extract, and kojic acid, have been scientifically proven to help even out skin tone when used in skincare…

How To Make Fake Freckles A Guide To Achieving Sun Kissed Splendor
How to Make Fake Freckles: A Guide to Achieving Sun-Kissed Splendor

Fake freckles have become a coveted beauty trend, adored for their ability to mimic the sun-kissed speckles naturally bestowed by the sun. Unlike natural freckles that are the result of genetics and sun exposure, fake freckles offer a temporary way to sprinkle one’s face with these charming spots. This beauty trend celebrates the uniqueness and appeal of freckles, allowing anyone to adopt this endearing feature regardless of their natural skin type. Tools and Materials Needed Creating fake freckles that look authentic requires more than just a brown eyeliner. The choice of products is crucial; for a believable effect, opt for waterproof, smudge-proof pens or pencils in colors that complement your skin tone. Additionally, fine brushes or sponges can help in blending and achieving the perfect dot size. Step-by-Step Guide to Creating Fake Freckles Preparing Your Skin Begin with a clean, moisturized face. A smooth canvas is key to ensuring your fake freckles adhere well and look part of your skin. Technique for Natural-Looking Freckles Dot the product lightly across the nose and cheekbones, where the sun naturally hits. Vary the size and density of the dots for a more realistic look, and gently tap them with your fingertips or a sponge to blend them into the skin. Setting Your Freckles To ensure longevity, lightly dust a setting powder over your freckles. This step prevents them from smudging and helps integrate them seamlessly with the rest of your makeup. Different Methods for Creating Fake Freckles Using Eyeliner or Brow Pencil A fine-tipped eyeliner or brow pencil can provide the precision needed for creating small, defined dots. Choose a color that mimics natural freckles and lightly apply it to the desired areas. Freckle Stencils and Stamps For those seeking an easier application, freckle stencils and stamps offer a quick way to achieve a freckled look. Simply apply the product to the stencil or stamp and press onto the skin. Using Henna for Semi-Permanent Freckles Henna provides a semi-permanent option for those looking to enjoy their fake freckles for longer. However, practice caution with this method, as it requires a certain skill level and understanding of henna application. Tips for Achieving a Natural Look Color Matching Choosing the right color is essential. Opt for hues that naturally occur in freckles, considering your skin tone for the best match. Placement and Size Variation Randomness is key. Freckles naturally appear in an unpredictable pattern, so avoid creating uniform dots. Mix up the placement and size for authenticity. Maintaining and Removing Fake Freckles How to Make Them Last To extend the wear of your fake freckles, avoid touching your face and apply a setting spray after completing your makeup. Removing Freckles Safely When you’re ready to remove your freckles, gently cleanse your face with a makeup remover. Opt for products that are kind to your skin to avoid irritation. Common Mistakes to Avoid Overapplication Less is often more. Start with a few dots and gradually add more if needed. Overdoing it can quickly take your freckles from natural to noticeable makeup. Wrong Color Selection Using a color that’s…