How to Remove Stubborn Lipstick: A Comprehensive Guide

Lipstick, the crowning jewel of many makeup looks, can be both a blessing and a curse. While finding that perfect, long-lasting shade is a victory for beauty enthusiasts, removing it can pose a significant challenge. Stubborn, long-wearing lipsticks designed to last through meals and drinks often leave a lasting stain, necessitating effective removal techniques to protect and care for your lips. This guide offers detailed strategies for removing even the most tenacious lipstick, ensuring your lips remain healthy and stain-free.
How Do Iremove Lipstick


Before diving into removal methods, it’s essential to understand why some lipsticks are so hard to remove. Long-lasting and smudge-proof formulas contain ingredients designed to adhere firmly to the lips, resisting moisture and friction. While this makes them incredibly durable throughout the day, it also means they can stain the lips and require more than just a simple wipe to remove.

Effective Removal Techniques

1. Vaseline

Vaseline, a staple in skincare routines for generations, is not only a powerful moisturizer but also an effective lipstick remover. Its thick, emollient nature helps to break down the lipstick’s formula, making it easier to wipe away.

  • Application: Apply a generous amount of Vaseline to your lips, ensuring full coverage. Let it sit for about 5 minutes to soften the lipstick.
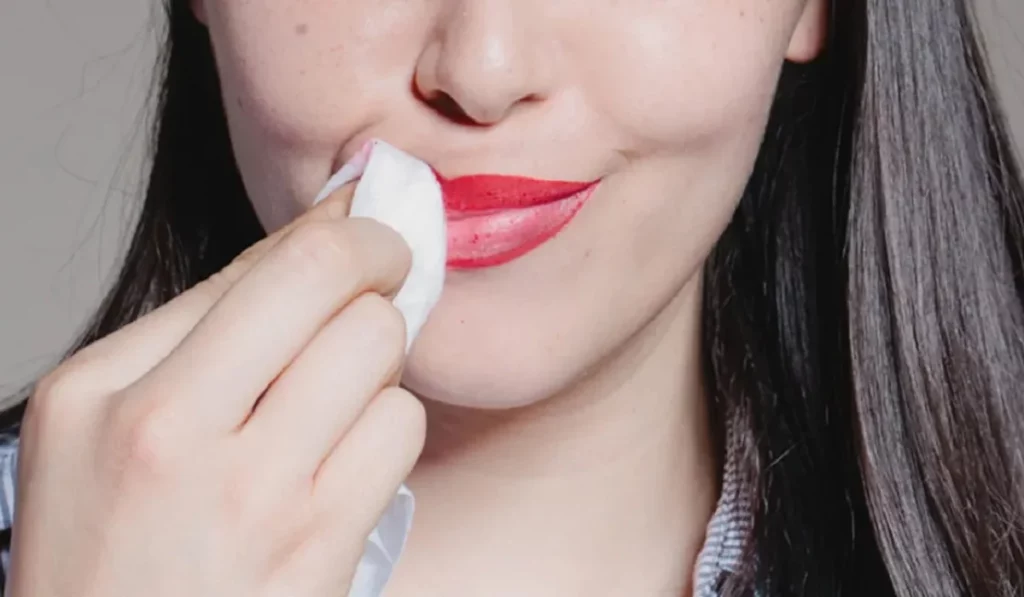
  • Removal: Use a damp cotton pad or cloth to gently wipe away the lipstick in a single stroke. Repeat if necessary, ensuring all traces of color are removed for a clean, soft finish.

2. Lip Balm

Lip balm can act as an on-the-go lipstick remover, offering a convenient solution when you need a quick color change.

  • Application: Swipe the lip balm over your stained lips, covering them completely to lift the pigment.
  • Removal: Instead of a cotton pad, use a tissue for this method. Gently press and wipe the tissue across your lips, removing the balm and the lifted lipstick pigment.

3. Organic Oil

Natural oils such as coconut and olive oil are not only excellent for skin care but also adept at removing stubborn makeup, including lipstick.

  • Application: Dab a dime-sized amount of oil onto a cotton pad and apply it to your lips, focusing on the stained areas.
  • Removal: The oil will loosen the lipstick’s grip on your lips. Use the cotton pad to gently rub the oil across your lips, lifting and removing the color. This method is effective yet gentle, preventing smearing and spreading of the pigment.

4. Micellar Cleansing Water

Micellar water is a gentle yet effective makeup remover that can tackle stubborn lipstick without irritating the skin or lips.

  • Application: Soak a cotton pad with micellar water and hold it against your lips for a few moments to allow the micelles to attract and dissolve the lipstick.
  • Removal: Gently wipe the cotton pad across your lips, refreshing the pad as needed until all lipstick is removed. This method is particularly suitable for those with sensitive skin.

5. Lip Scrub

Creating a homemade lip scrub with honey and brown sugar not only removes stubborn lipstick but also exfoliates the lips, leaving them soft and smooth.

  • Application: Mix a small amount of honey with brown sugar and apply the mixture to your lips.
  • Removal: Gently rub the scrub over your lips for a few minutes to exfoliate and lift the lipstick. Use a washcloth to wipe away the scrub and any remaining lipstick.
How Do I Remove Lipstick


Step-by-Step Removal Process

  1. Preparation: Start by blotting your lips with a clean cloth or pad to remove any excess lipstick.
  2. Application: Choose your preferred removal method and apply the product liberally over your lips. Allow it to sit and work its magic for around 5 minutes.
  3. Wiping: Soak a cotton pad in warm water to help break down the product and lipstick further. Wipe your lips gently, using a fresh part of the pad with each stroke until no color remains.
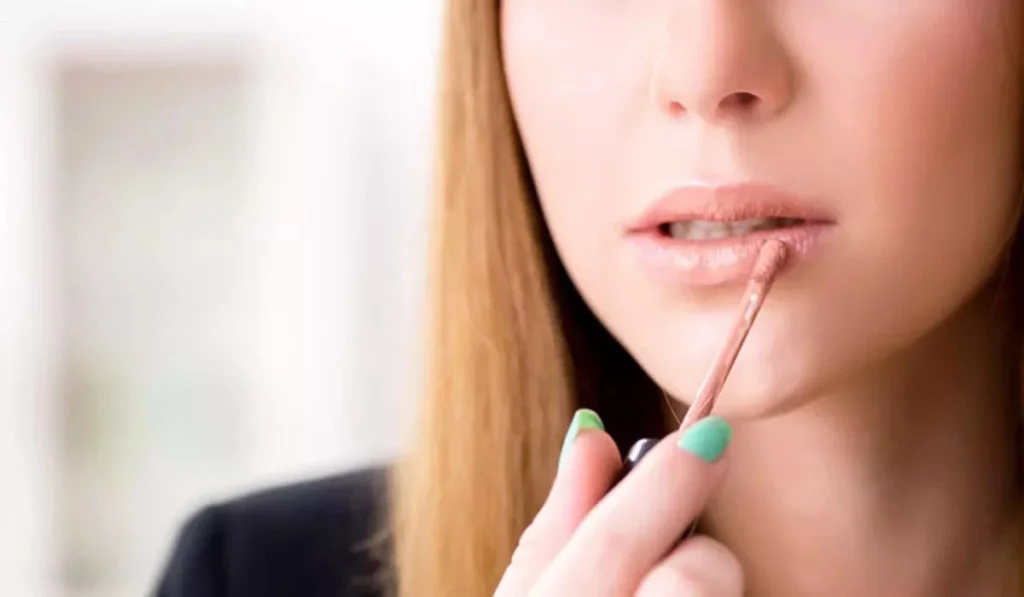
  4. Moisturizing: After successfully removing the lipstick, apply a hydrating lip balm to replenish moisture and protect your lips.

Removing stubborn lipstick needn’t be a harsh or damaging process to your lips. With the right products and gentle techniques, you can effectively remove any trace of lipstick, leaving your lips clean, soft, and ready for your next color application or simply to rest and rejuvenate overnight.

Refined Answers to Common Queries

Is It Safe to Eliminate Tenacious Lipstick Without Damaging My Lips?
Absolutely, provided that one adheres to gentle, moisture-rich techniques as detailed herein. Utilizing substances such as Vaseline, lip balm, organic oils, micellar water, and crafted lip scrubs can efficaciously dispel persistent lipstick while safeguarding your lips’ well-being. It is imperative to apply a quality lip balm post-removal to maintain optimal hydration.

Can Baby Oil Serve as a Substitute for Olive or Coconut Oil in Lipstick Removal?
Indeed, baby oil constitutes a viable and gentle alternative for eradicating stubborn lipstick, thanks to its formulation tailored for sensitive skin, thereby deeming it appropriate for the fragile area of the lips. Nonetheless, individuals with oily or acne-prone skin should exercise caution when applying near the lip perimeter to avert potential skin breakouts.

Is Micellar Water Compatible with All Skin Varieties?
Crafted for mildness, micellar water is generally compatible across all skin types, encompassing those with sensitive skin. Its micelles proficiently attract and encapsulate impurities, oils, and makeup without depriving the skin of its innate moisture, rendering it an excellent cleansing agent.

Recommended Frequency of Lip Scrub Utilization?
Limit lip scrub application to once or twice per week to prevent the risks of over-exfoliation, which may precipitate sensitivity and irritation. Regular exfoliation eradicates dead skin cells, enhancing your lips’ texture and increasing their receptiveness to moisturizing agents.

Remedial Measures for Dry or Irritated Lips Post Lipstick Removal?
Subsequent to stubborn lipstick removal, it’s typical for lips to exhibit a degree of dryness. To counteract this, liberally applying a hydrating lip balm or an overnight lip mask is advisable for moisture replenishment. Should irritation ensue, opt for a less abrasive removal technique in future instances and seek dermatological advice if discomfort persists.

Efficacy of These Techniques Against Waterproof Lipstick?
The outlined methods prove potent in dislodging waterproof and enduring lipstick variants. Oils are particularly effective, given their prowess in dissolving the oils and waxes constituting waterproof makeup.

Pre-Lipstick Application Lip Exfoliation: Necessary?
Exfoliating your lips can foster a smoother base for lipstick, notably for matte or long-lasting types prone to highlighting textural discrepancies. Nevertheless, exfoliation immediately before every application isn’t obligatory. Routine exfoliation coupled with hydration suffices.

Strategies to Avert Lipstick Stains?
Employing a lip primer or a minimal foundation coat prior to lipstick application can establish a protective barrier against stains. Favoring premium lipsticks with minimal staining propensity and ensuring regular lip moisturization can also diminish staining risk, as well-hydrated lips are less inclined to pigment absorption.

Feasibility of Utilizing Makeup Wipes for Stubborn Lipstick Removal?
Although makeup wipes can tackle lipstick removal, their efficiency wanes against stubborn or waterproof variants and might strip or irritate the lips. The aforementioned gentler, more effective methods are recommended for comprehensive lipstick removal without compromising lip moisture.

The Correct Order To Apply Your Makeup A Step By Step Guide
The Correct Order to Apply Your Makeup: A Step-by-Step Guide

Creating a perfect makeup look is akin to painting a masterpiece; it requires technique, the right tools, and an understanding of the proper sequence. Applying your makeup in the correct order is crucial for achieving a flawless, long-lasting finish. Whether you’re a makeup novice or looking to refine your routine, this guide will walk you through each step, ensuring your makeup application is both effective and efficient. Preparation: The Base of Flawless Makeup Cleansing: The First Step The canvas for your makeup masterpiece begins with clean skin. A gentle cleanser removes impurities and excess oil, providing a fresh base for your makeup. Moisturizing: Hydrating Your Canvas Hydration is key to preventing cakey foundation. A good moisturizer tailored to your skin type will keep your skin supple and ready for makeup application. Priming: Smoothing the Surface Primer fills in pores and fine lines, creating a smooth base that helps makeup last longer. Whether you’re aiming for a matte or dewy finish, there’s a primer for every skin type and desired effect. Foundation: The Canvas for Your Art Choosing the Right Foundation Selecting the right foundation shade and formula is paramount. Consider your skin type and the coverage you need when choosing between liquid, powder, or cream foundations. Application Techniques for a Seamless Finish Application tools can make a difference in your foundation’s finish. Whether you use a brush, sponge, or your fingers, the goal is to achieve an even, seamless coverage. Concealer: The Art of Camouflage Types of Concealers and Their Uses Concealers come in various forms and shades. Understanding the type that best suits your needs—be it for dark circles, blemishes, or redness—is crucial for effective camouflage. Application Tips for a Natural Look The key to concealer is blending. Learn to apply concealer in a way that brightens and evens out your complexion without looking heavy. Powder: Setting the Stage Loose vs. Pressed Powder Choosing between loose and pressed powder depends on your desired finish and convenience. We’ll explore the benefits of each and how they can set your makeup for longevity. Application for Long-Lasting Wear Setting your foundation and concealer with powder prevents them from shifting and reduces shine. Discover techniques for application that won’t disrupt your base. Eye Makeup: Framing Your Windows to the Soul Eyeshadow: Building the Base Eyeshadow application begins with a primer or base to ensure vibrant color and long wear. Learn how to build and blend eyeshadows for a seamless look. Eyeliner: Defining the Eyes Eyeliner can define and enhance the shape of your eyes. Whether you prefer pencil, gel, or liquid, mastering eyeliner application is key to defining your look. Mascara: The Finishing Touch Mascara adds the final touch to your eye makeup, creating the illusion of longer, fuller lashes. Discover tips for clump-free application and choosing the right mascara for your lashes. Eyebrows: The Frame for Your Masterpiece Shaping and Filling Techniques Well-defined eyebrows can transform your face. Learn about shaping and filling techniques that complement your face shape and enhance your features. Products for Eyebrow Perfection From pencils to pomades, there are myriad…

The Butterfly Haircut: A Nostalgic Hairstyle From The Past
The Butterfly Haircut: A Nostalgic Hairstyle from the Past

The butterfly haircut was a popular hairstyle in the 1970s and 1980s. This hairstyle was characterized by short hair on the top and longer hair on the sides and back. The hair on the sides and back was often layered, giving the hair a flowing, butterfly-like appearance. This hairstyle was especially popular among women, but it was also worn by men. The butterfly haircut was often paired with a perm, which added volume and texture to the hair. The perm created curls or waves in the longer hair on the sides and back, while the shorter hair on the top was often styled with a slight wave or curl as well. This created a contrast in textures that added to the overall appearance of the hairstyle. The butterfly haircut was not just a hairstyle, but a cultural phenomenon. It was popularized by celebrities like Farrah Fawcett, who wore the hairstyle on the hit television show “Charlie’s Angels.” Fawcett’s hairstyle became so popular that it was named after her, and it became known as the “Farrah Fawcett hairstyle.” The butterfly haircut was also popular among African American women, who often wore the hairstyle with cornrows or braids on the sides and back. This created a unique look that combined traditional African American hairstyles with the popular butterfly haircut. Despite its popularity, the butterfly haircut eventually fell out of fashion. In the 1990s, shorter haircuts became more popular, and the perm fell out of fashion as well. However, the butterfly haircut remains a nostalgic hairstyle from the past, and it is still worn by some today. If you’re considering getting a butterfly haircut, there are a few things you should know. First, the haircut requires regular maintenance to keep it looking its best. The longer hair on the sides and back will need to be trimmed regularly to prevent split ends, and the shorter hair on the top will need to be styled to maintain its shape. Second, the butterfly haircut works best on those with straight or slightly wavy hair. If you have curly hair, you may need to straighten it to achieve the desired look. If you have very thick or coarse hair, you may need to have it thinned out to achieve the flowing, butterfly-like appearance. Finally, the butterfly haircut can be a great choice if you’re looking for a nostalgic hairstyle that harkens back to the 1970s and 1980s. It’s a fun and playful hairstyle that can add a touch of whimsy to your look. Whether you’re wearing it with a perm or without, the butterfly haircut is sure to turn heads and make you stand out in a crowd. In conclusion, the butterfly haircut is a hairstyle that has stood the test of time. Although it may no longer be as popular as it once was, it remains a nostalgic hairstyle from the past that is still worn by some today. If you’re considering getting a butterfly haircut, be sure to do your research and talk to your hairstylist to make sure it’s the right choice for you. With…

Flawless Foundation Tips And Tricks For Applying Liquid Foundation
Flawless Foundation: Tips and Tricks for Applying Liquid Foundation

Liquid foundation is a versatile and widely used makeup product that helps create a smooth and even complexion. However, achieving a flawless finish with liquid foundation requires proper application techniques and some helpful tricks. In this comprehensive guide, we will explore valuable tips and tricks to ensure that your liquid foundation application is seamless, long-lasting, and enhances your natural beauty. Prepping Your SkinBefore applying liquid foundation, it’s essential to prepare your skin to ensure a smooth and even canvas. Follow these steps to optimize your foundation application: a. Cleansing: Start with a clean face by washing away any dirt, oil, or makeup residue. Use a gentle cleanser suitable for your skin type. b. Exfoliation: Regular exfoliation helps remove dead skin cells, promoting smoother skin and preventing foundation from clinging to dry patches. Exfoliate 1-2 times per week. c. Moisturizing: Apply a lightweight, hydrating moisturizer to keep your skin supple and prevent the foundation from settling into fine lines or dry areas. d. Primer: Consider using a makeup primer to create a smooth base and extend the longevity of your foundation. Choose a primer that suits your skin type, whether you have oily, dry, or combination skin. Selecting the Right FoundationChoosing the appropriate liquid foundation for your skin type and desired coverage is crucial. Here are some pointers for selecting the right foundation: a. Skin Type: Identify your skin type (oily, dry, combination, or normal) to find a foundation that addresses your specific needs. Oil-free, matte foundations work well for oily skin, while hydrating formulas suit dry skin. b. Undertone: Determine your skin’s undertone, which can be warm, cool, or neutral. Select a foundation with a matching undertone for a natural look. c. Shade Matching: Test foundation shades on your jawline or wrist in natural light to find the most suitable match. The right shade should blend seamlessly with your neck and face. d. Coverage: Choose the level of coverage you desire—light, medium, or full—based on your skin concerns and the occasion. Applying Liquid FoundationNow that your skin is prepped and you have the right foundation, let’s explore different application techniques to achieve a flawless finish: a. Brush Application: Use a foundation brush to apply the product in downward strokes. Brushes provide even coverage and help buff the foundation into the skin for a polished look. b. Beauty Blender or Makeup Sponge: Dampen a makeup sponge or Beauty Blender and gently bounce it across your face to apply the foundation. This technique provides a natural, airbrushed finish and ensures seamless blending. c. Fingertip Application: For a more lightweight and natural finish, use clean fingers to apply the foundation. Warm the product between your fingers before patting it onto your skin. d. Layering: Start with a small amount of foundation and build up coverage gradually where needed. This approach prevents a cakey appearance and allows you to tailor the coverage to your preference. e. Sheer Application: For a light, sheer coverage, mix a drop of foundation with your moisturizer or primer before applying. Concealing and Color CorrectingTo achieve a flawless complexion, consider incorporating concealer…

Unveiling The Concealed Dangers Of Hair Dye Essential Insights
Unveiling the Concealed Dangers of Hair Dye: Essential Insights

The practice of hair coloring, adopted by countless individuals globally for aesthetic enhancement, gray coverage, or personal expression through dynamic hues, is not without its health-related debates. This comprehensive analysis seeks to shed light on the health ramifications of hair coloring, scrutinizing the chemical constituents, identifying possible hazards, and suggesting preventive measures. Deciphering Hair Dye Varieties of Hair Dye: From Permanent to Temporary SolutionsHair coloring products are differentiated by their formulation and chemical makeup, ranging from permanent solutions that alter hair color through deep chemical processes to semi-permanent and temporary variants that merely coat the hair, presenting fewer health risks and offering less permanence. Chemical Make-Up of Hair DyesKey ingredients in hair dye formulations, such as ammonia, peroxide, and p-Phenylenediamine (PPD), are instrumental in achieving color transformation. Nonetheless, these compounds are associated with various health concerns, including skin irritation and more severe adverse effects. Exploring the Health Implications of Hair Coloring Dermatological Concerns and Allergic ReactionsThe prevalence of contact dermatitis and allergies is notable, with symptoms ranging from slight itching to intense rashes. A preliminary patch test can be instrumental in identifying any allergic predispositions. Respiratory Health ConcernsExposure to hair dye fumes, especially in inadequately ventilated areas, can provoke respiratory irritation or exacerbate existing respiratory conditions, posing significant health risks. Long-term Health Concerns: Cancer and Endocrine DisruptionOngoing research into the correlation between hair dye use and an elevated risk of certain cancers presents inconclusive yet concerning findings. Issues relating to endocrine disruption also warrant a cautious approach to hair dye use. Impacts on Scalp Health Effects on Scalp Well-beingThe scalp can suffer from dryness and irritation due to the chemicals present in hair dyes, potentially leading to discomfort and damage. Opting for gentler dyes and prioritizing scalp care can alleviate these issues. Recommendations for Reducing Scalp HarmSelecting suitable products and adhering to best practices, including the use of conditioners and scalp treatments, can safeguard scalp health while still enjoying the cosmetic benefits of hair coloring. Adhering to Safe Hair Dyeing Practices Guidelines for Safe Hair ColoringImplementing safety precautions, such as wearing gloves, meticulously following product instructions, and choosing less harmful dye alternatives, can help in minimizing health risks. The Critical Role of Patch TestingConducting a patch test is essential to detect allergic reactions beforehand, ensuring a safer coloring experience. Exploring Safer Alternatives Natural and Herbal Dye OptionsInvestigating herbal and natural dyes offers a less hazardous alternative to traditional chemical dyes, reducing both health risks and environmental harm. Emergence of Temporary Coloring SolutionsThe popularity of temporary dyes and color-depositing conditioners is rising among those seeking minimal commitment and reduced health risks, marking a shift towards more health-conscious coloring choices. Professional vs. At-Home Coloring: A Comparative AnalysisEvaluating the advantages and potential risks of professional versus DIY hair coloring can help individuals make more informed decisions based on their health considerations and desired results. Guidance for NovicesBeginners are advised to seek expert consultation and consider starting with more temporary coloring methods, ensuring a safer and more enjoyable introduction to hair coloring. Dispelling Myths Surrounding Hair Coloring Addressing Common MisconceptionsBy debunking widespread myths and providing accurate…

Pump Up The Volume In Your Hair: Here's How To Achieve Bouncy And Voluminous Locks
Pump Up the Volume in Your Hair: Here’s How to Achieve Bouncy and Voluminous Locks

Having luscious, voluminous hair can transform your entire look, boosting your confidence and leaving you feeling fabulous. However, not everyone is naturally blessed with thick, voluminous hair. If you find yourself struggling to achieve the desired volume, don’t worry—there are various techniques and tricks you can employ to pump up the volume in your hair and create stunning, bouncy locks. In this guide, we’ll explore a range of methods, from styling techniques to product recommendations, that can help you achieve the voluminous hair of your dreams. Section 1: Preparing Your Hair for Volume Before diving into styling techniques, it’s essential to prepare your hair properly for volume-enhancing methods. Here are a few steps you can take to set the foundation for voluminous hair: Choosing the Right Haircut: Opt for layered cuts or styles that add texture and movement to your hair. Layers can create the illusion of fuller hair by removing weight and adding dimension. Proper Shampooing and Conditioning: Use volumizing shampoos and conditioners specifically designed to add fullness to your hair. Avoid heavy, oil-based products that can weigh down your strands. Blow-Drying Techniques: Blow-drying your hair in an upward motion using a round brush can provide a lift at the roots and create a voluminous base for styling. Section 2: Styling Techniques for Volume Now that your hair is prepped, it’s time to explore different styling techniques that can help you achieve volume: Teasing or Backcombing: Using a fine-toothed comb, gently tease the roots of your hair to create instant lift and volume. Remember to be gentle to avoid damaging your hair. Velcro Rollers: Before blow-drying, set sections of your hair in velcro rollers. This technique allows your hair to cool and set in a voluminous shape, creating long-lasting volume. Root-Lifting Products: Applying root-lifting sprays or mousses directly to your roots can add height and volume. Massage the product into your roots for extra lift. Heat Styling Tools: Curling irons or straighteners can be used strategically to add volume. By curling sections of your hair away from your face or creating loose waves, you can achieve a fuller appearance. Dry Shampoo: Not only does dry shampoo refresh your hair between washes, but it can also add texture and volume. Spritz dry shampoo onto your roots and massage it in to absorb excess oil and create lift. Section 3: Product Recommendations for Volume In addition to styling techniques, certain hair products can work wonders in creating volume. Here are a few recommendations: Volumizing Shampoos and Conditioners: Look for products that are specifically formulated to add volume and thickness to your hair. These products usually contain ingredients that plump up the hair shaft and create fullness. Texturizing Sprays: These sprays are designed to give your hair grip and create a tousled, voluminous look. Spray onto your roots and mid-lengths to add texture and body. Hairsprays: Opt for lightweight hairsprays that provide a flexible hold. They will help maintain your volume throughout the day without weighing down your hair. Mousse: Apply a golf ball-sized amount of mousse to your roots before blow-drying. It adds…

Creating An Editorial Makeup Look Tips And Tricks For A High Fashion Look
Creating an Editorial Makeup Look: Tips and Tricks for a High-Fashion Look

Editorial makeup transcends the boundaries of everyday beauty, venturing into the realms of art and high fashion. It’s where creativity knows no bounds, and makeup artists unleash their imagination to create looks that are not just beautiful but tell a story. Whether for magazine spreads, fashion shows, or brand campaigns, editorial makeup is about making a statement and leaving a lasting impression. This guide will walk you through the essentials of creating captivating editorial makeup looks, from the tools you need to the techniques that will set your work apart. Understanding Editorial Makeup Editorial makeup is distinguished by its innovation and artistic flair. It’s about pushing boundaries, experimenting with textures, colors, and shapes to create looks that are often bold, sometimes surreal, and always impactful. The evolution of editorial makeup reflects the changing trends in fashion and art, constantly challenging and redefining beauty standards. Essential Tools for Editorial Makeup The right tools are your best allies in crafting editorial looks. High-quality brushes and applicators ensure precision and ease of application, while specialty products like pigmented shadows, vibrant liners, and unique textures allow for endless creativity. Investing in a diverse makeup kit will enable you to bring any vision to life. Mastering the Base A flawless base is the canvas for any makeup look, especially in editorial where perfection is key. Choosing the right foundation formula and applying it with skill can make all the difference. Techniques like layering, blending, and setting are crucial for a base that complements rather than competes with your creative elements. The Art of Eye Makeup Eye makeup in editorial looks can be daring and dramatic. Bold shadows, graphic liners, and false lashes are often used to create eye-catching designs. Mastering innovative techniques, such as cut-creases, bold color blocking, and intricate liner work, can elevate your makeup artistry. Sculpting with Contours and Highlights Contouring and highlighting are powerful techniques to shape and define the face. In editorial makeup, they can be used more artistically to exaggerate or alter facial features, playing with light and shadow to achieve the desired effect. Choosing the right shades and blending meticulously are key to a sculpted, high-fashion look. Lip Makeup for Editorial Looks Lips are a focal point in many editorial looks, whether the goal is a bold statement or a subtle enhancement. Selecting the right color and texture to complement the overall theme is essential. Tips for precise application and ensuring longevity will help your lip makeup stand out and last through long photoshoots. Adding Drama with Textures and Glitters Textures and glitters can add a unique dimension to editorial makeup. From glossy finishes to metallic foils, incorporating different textures can create depth and interest. Safe application techniques are important, especially when working with glitters, to achieve a dramatic effect without compromising safety. The Role of Color Theory in Editorial Makeup A deep understanding of color theory can elevate your editorial makeup by ensuring harmony or deliberate contrast within your look. Using color to evoke emotions or convey a theme is a powerful tool in your artistic arsenal. Blending Techniques for…

Niacinamide Benefits 2
Unveiling the Power of Niacinamide: A Comprehensive Guide on Usage and Benefits

Unlocking the Power of Niacinamide: A Comprehensive Overview on Use and BenefitsNiacinamide (Vitamin B3) has taken the beauty world by storm with its abundance of skin benefits and widespread adoption by various skincare formulations. Understanding what niacinamide is and incorporating it into your routine will open a host of transformative skincare possibilities that could make a real difference to both its effectiveness and efficacy. Niacinamide plays a pivotal role in keeping skin health at optimal levels and treating common issues, from soothing irritations to stimulating collagen production for firmness and elasticity. Niacinamide also regulates oil production – making it an invaluable ally in treating acne-prone or oily complexions. Benefits of Niacinamide for Your Skin Reducing Fine Lines and Wrinkles: Niacinamide’s collagen-boosting effects result in smoother, younger-looking skin over time by diminishing fine lines and wrinkles over time.Hyperpigmentation/Dark Spots: Niacinamide’s anti-hyperpigmentation benefits can also help mitigate hyperpigmentation/darken spots to create smoother-looking complexion. Niacinamide, known for its brightening effects, helps fade hyperpigmentation and dark spots for an even skin tone. Niacinamide also regulates oil production to control acne flare-ups. Niacinamide’s sebum-balancing effects make it effective at managing oiliness and avoiding breakouts – an asset for those living with acne-prone skin. Reducing Redness and Inflammation: Niacinamide helps decrease redness and inflammation within skin pores as well as improving overall appearance, providing valuable therapeutic relief to acne sufferers. Niacinamide’s anti-inflammatory properties make it an effective yet gentle solution to reduce redness and soothe irritated skin, perfect for sensitive skin types. Add Niacinamide into Your Routine: Cleanser with Niacinamide: Start off your routine right with a cleanser containing niacinamide to reap its many advantages at the outset of your skincare regime.Niacinamide Serums: Niacinamide serums provide powerful solutions that target specific problems like hyperpigmentation or fine lines. Choose one to address them effectively. Niacinamide-rich moisturizers deliver both hydration and the vitamin’s skin-nourishing benefits, making these suitable for various skin types. Sunscreen with Niacinamide: Sunscreen should be part of any skincare regime, and one with Niacinamide offers multiple advantages for protecting skin against damage caused by UV radiation while offering additional skincare benefits. Incorporate it into treatments: Integrate Niacinamide into targeted treatments like face masks and overnight creams for intensive skin care. Niacinamide is an amazing skincare ingredient, offering benefits suitable for many different skin types and concerns. From targeting signs of aging and hyperpigmentation, to acne control and management – niacinamide offers something everyone could use more of in their skincare regime! When applied correctly into one’s routine it can transform to give one radiant, healthy-looking complexions. Are You Wondering If Niacinamide Causes Any Harm? Refuting Common Misconceptions Niacinamide (Vitamin B3) has become widely popular and celebrated due to its many therapeutic qualities. Niacinamide can be safely integrated into any skincare regime when administered correctly and it poses minimal risk. As with any product, however, it’s crucial that users follow recommended usage instructions and conduct patch tests, especially those with sensitive skin or concerns related to their treatment or condition. Consulting a dermatologist for customized advice about adding Niacinamide into their regime safely can offer invaluable assistance.