The Comprehensive Spectrum of Concealers: Navigating Through Choices for Impeccable Skin

At the heart of any transformative makeup regimen lies the concealer, a pivotal element that meticulously camouflages imperfections such as under-eye shadows, blemishes, and skin tone disparities. The perfect concealer not only magnifies your inherent allure but also elevates your self-assurance by presenting a pristine base. This exposition ventures into the myriad forms of concealers, equipping you with the knowledge to discern the most compatible variant for your skin’s unique needs and preferences.
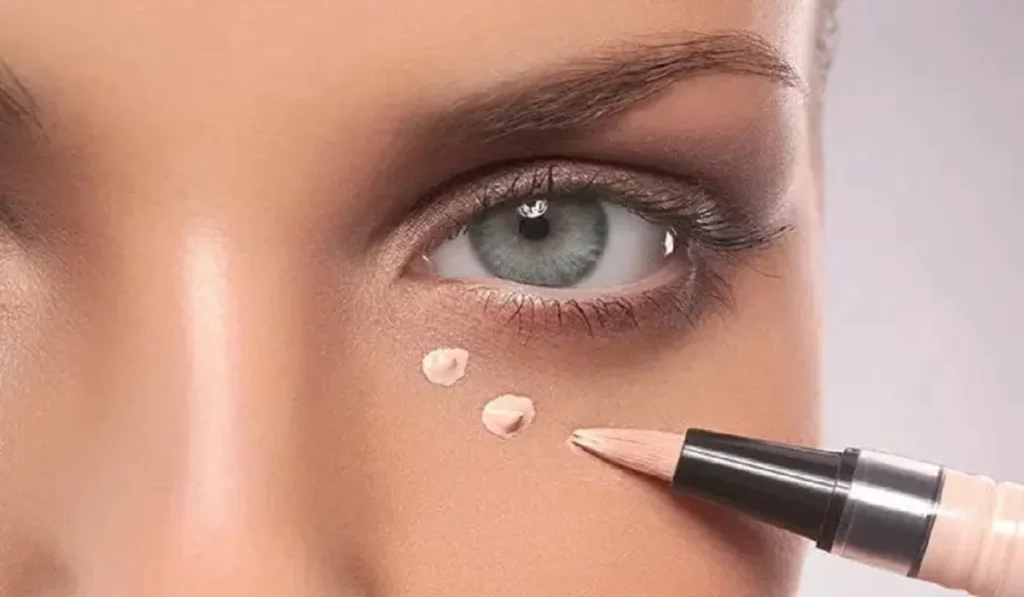
The Comprehensive Spectrum Of Concealers


Liquid Concealers

Boasting unparalleled adaptability, liquid concealers cater to a broad spectrum of skin types, including those that are dry, mixed, and prone to acne. They provide a customizable coverage range from sheer to opaque, ideally complementing foundation. For a flawless integration, adopt a gentle patting technique using a beauty sponge or brush, ensuring an evenly distributed, authentic appearance.

Cream Concealers

For those seeking superior concealment, cream concealers emerge as the prime choice, particularly favoring dry and aging skin due to their hydrating formulation. They are adept at masking dark under-eye areas and harmonizing skin tone variations. Optimal application involves pre-warming the concealer on your skin and setting it with a fine powder to avert creasing.

Stick Concealers

Designed for precision and portability, stick concealers are the go-to for oily and combination skin, offering a dense formula conducive to targeted application. They excel in concealing specific spots and hyperpigmentation. For a smooth blend, use either a brush or fingertips.

Color-Correcting Concealers

Exploiting color theory, color-correcting concealers effectively neutralize distinct discolorations; green attenuates redness, while peach and orange are antidotes for blue or grey under-eye circles, and yellow revitalizes dull complexions. Apply judiciously prior to your standard concealer to prevent a heavy makeup look.

Hydrating Concealers

Infused with moisturizing agents like hyaluronic acid and vitamins, hydrating concealers are the salvation for dry skin or areas with fine lines, offering a radiant, moist finish that doesn’t crease. Seek out serum-esque formulas for optimal results.

Matte Concealers

Matte concealers are the sanctuary for oily complexions, delivering enduring coverage devoid of gloss. To circumvent a parched appearance, prime your skin with a moisturizing base and blend swiftly.

Mineral Concealers

For those with sensitive skin, mineral concealers present a minimalistic approach, devoid of oils, fragrances, and artificial colorants, minimizing irritation risks. Employ a fluffy brush for a light, authentic coverage.
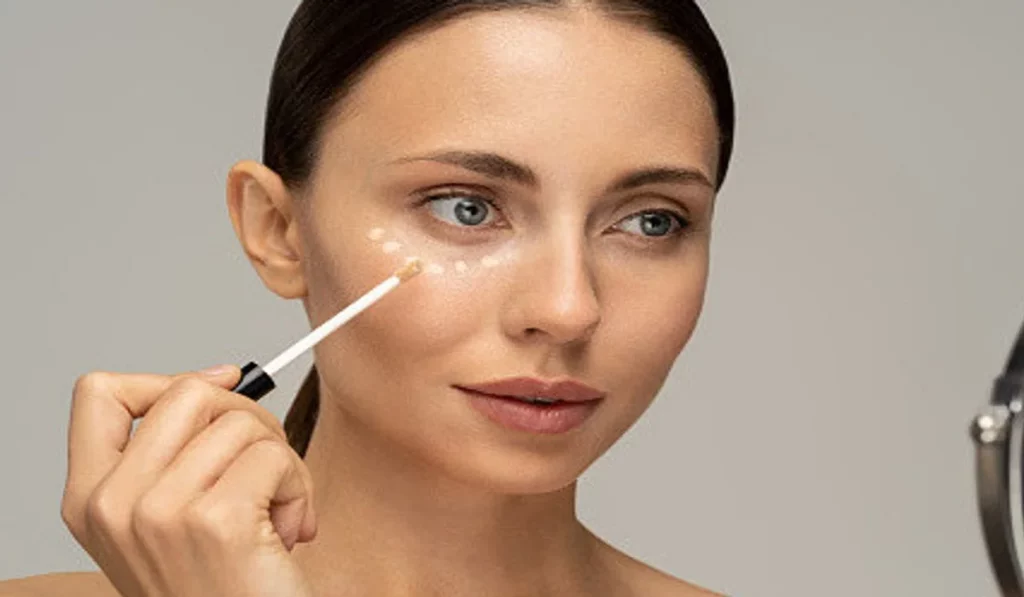
The Comprehensive Spectrum Of Concealers Navigating Through Choices For Impeccable Skin


Serum Concealers

Merging skincare with cosmetic elegance, serum concealers offer a featherlight, nurturing blend that progressively enhances skin quality. They are ideal for achieving a subtle, “barely-there” makeup look while pampering your skin with beneficial ingredients.


Balm Concealers

For relentless imperfections, balm concealers promise full coverage. They necessitate warming between the fingers for a fluid application and are best blended with a dense brush.

Pot Concealers

Pot concealers deliver concentrated pigment in a compact format, perfect for precise applications and under-eye concealment. Utilize a small brush for targeted application, blending the periphery for a natural effect.

Brightening Concealers

Formulated to illuminate and elevate the under-eye region and facial shadows, brightening concealers contain reflective particles that impart a luminous sheen. Layer over your regular concealer for an enhanced glow.

Waterproof Concealers

Indispensable for humid conditions or active routines, waterproof concealers ensure smudge-resistant, enduring coverage. Choose formulations that can be gently removed to preserve skin health.

Non-Comedogenic Concealers

Non-comedogenic concealers, designed to prevent pore blockages, are essential for acne-prone individuals, offering coverage without exacerbating skin concerns. Verify this characteristic if your skin is sensitive or prone to breakouts.


Vegan and Cruelty-Free Concealers

Embracing ethical beauty, vegan and cruelty-free concealers abstain from animal derivatives and testing, presenting high-quality, botanical-based alternatives that do not compromise on coverage.

Concealer Palettes

Concealer palettes provide a spectrum of shades for tailored coverage, ideal for makeup aficionados or fluctuating skin tones. Blending hues enables the creation of an exact match for any facial region.

Selecting the Quintessential Concealer

The quest for the ideal concealer is governed by your skin’s texture, concerns, and desired coverage intensity. Evaluate shades under natural illumination and opt for formulations that resonate with your skin’s requirements.

Application Mastery

For impeccable application, prime your skin with moisturizer and primer. Select tools congruent with your concealer type and blend thoroughly to eliminate discernible lines. A finishing powder prolongs your concealer’s endurance.

In essence, mastering the diverse concealer spectrum can profoundly transform your beauty regimen. Whether in pursuit of comprehensive coverage, specific color correction, or a hydrating formula, an apt concealer awaits. Acknowledge your skin type and concerns in your selection process, and embrace experimentation to uncover your ideal match.

  • Ideal Concealer for Dark Circles?
    Cream-based and peach or orange color-correcting concealers proficiently mask dark circles, offering ample coverage and brightness.
  • Concealer Sans Foundation?
    Certainly. Employ concealer solo for targeted imperfection concealment or a natural aesthetic.
  • Preventing Concealer Creasing?
    Minimize creasing by setting with a light powder and eschewing excessive application in areas prone to fine lines.
  • Brush or Fingers for Concealer Application?
    The choice between fingers and brushes hinges on the concealer’s formulation and the desired coverage level; fingers facilitate blending through warmth, whereas brushes provide precision.
  • Concealer as Eyeshadow Primer?
    Yes, concealers can double as eyeshadow primers, creating a smooth canvas and intensifying eyeshadow pigmentation.
  • Selecting the Right Concealer Shade?
    For blemishes, opt for a concealer that matches your skin tone; for under-eyes, choose one shade lighter to brighten the area.

Concealers, with their multifaceted utility, are indispensable in any makeup arsenal, capable of metamorphosing your complexion’s look. With an extensive array of options, finding your perfect match ensures a flawless, radiant visage. The essence of successful concealer application lies in selecting the appropriate type for your skin’s demands and honing your blending skills. Explore, experiment, and relish the confidence emanating from immaculate, imperfection-free skin.


How To Make Fake Freckles A Guide To Achieving Sun Kissed Splendor
How to Make Fake Freckles: A Guide to Achieving Sun-Kissed Splendor

Fake freckles have become a coveted beauty trend, adored for their ability to mimic the sun-kissed speckles naturally bestowed by the sun. Unlike natural freckles that are the result of genetics and sun exposure, fake freckles offer a temporary way to sprinkle one’s face with these charming spots. This beauty trend celebrates the uniqueness and appeal of freckles, allowing anyone to adopt this endearing feature regardless of their natural skin type. Tools and Materials Needed Creating fake freckles that look authentic requires more than just a brown eyeliner. The choice of products is crucial; for a believable effect, opt for waterproof, smudge-proof pens or pencils in colors that complement your skin tone. Additionally, fine brushes or sponges can help in blending and achieving the perfect dot size. Step-by-Step Guide to Creating Fake Freckles Preparing Your Skin Begin with a clean, moisturized face. A smooth canvas is key to ensuring your fake freckles adhere well and look part of your skin. Technique for Natural-Looking Freckles Dot the product lightly across the nose and cheekbones, where the sun naturally hits. Vary the size and density of the dots for a more realistic look, and gently tap them with your fingertips or a sponge to blend them into the skin. Setting Your Freckles To ensure longevity, lightly dust a setting powder over your freckles. This step prevents them from smudging and helps integrate them seamlessly with the rest of your makeup. Different Methods for Creating Fake Freckles Using Eyeliner or Brow Pencil A fine-tipped eyeliner or brow pencil can provide the precision needed for creating small, defined dots. Choose a color that mimics natural freckles and lightly apply it to the desired areas. Freckle Stencils and Stamps For those seeking an easier application, freckle stencils and stamps offer a quick way to achieve a freckled look. Simply apply the product to the stencil or stamp and press onto the skin. Using Henna for Semi-Permanent Freckles Henna provides a semi-permanent option for those looking to enjoy their fake freckles for longer. However, practice caution with this method, as it requires a certain skill level and understanding of henna application. Tips for Achieving a Natural Look Color Matching Choosing the right color is essential. Opt for hues that naturally occur in freckles, considering your skin tone for the best match. Placement and Size Variation Randomness is key. Freckles naturally appear in an unpredictable pattern, so avoid creating uniform dots. Mix up the placement and size for authenticity. Maintaining and Removing Fake Freckles How to Make Them Last To extend the wear of your fake freckles, avoid touching your face and apply a setting spray after completing your makeup. Removing Freckles Safely When you’re ready to remove your freckles, gently cleanse your face with a makeup remover. Opt for products that are kind to your skin to avoid irritation. Common Mistakes to Avoid Overapplication Less is often more. Start with a few dots and gradually add more if needed. Overdoing it can quickly take your freckles from natural to noticeable makeup. Wrong Color Selection Using a color that’s…

Oily Skin Makeup Tips And Tricks Bid Farewell To Unwanted Shine 11
Oily Skin Makeup Tips and Tricks: Bid Farewell to Unwanted Shine

Oily skin can be a makeup lover’s nemesis. The constant battle against shine, makeup sliding off, and clogged pores can be frustrating. However, with the right knowledge and techniques, you can achieve a matte and flawless look that lasts all day. In this comprehensive guide, we will delve into the world of makeup for oily skin, providing you with a wealth of tips, tricks, and product recommendations to help you say goodbye to unwanted shine and embrace a fresh, matte complexion. Understanding Oily Skin Before we jump into makeup tips, it’s essential to understand what causes oily skin. Oily skin is the result of an overproduction of sebum, the skin’s natural oil. This overproduction can be influenced by factors such as genetics, hormonal fluctuations, and environmental conditions. Oily skin tends to have larger pores and can be prone to acne and blackheads. When applying makeup to oily skin, the goal is to control excess oil production while maintaining a natural, matte finish. Prepping Your Canvas: Skincare for Oily Skin Effective makeup for oily skin begins with proper skincare. A well-balanced skincare routine can help control excess oil, minimize pores, and create a smoother canvas for makeup application. Here are some skincare steps tailored to oily skin: Choosing the Right Makeup Products Selecting makeup products that are specifically formulated for oily skin is crucial. Look for the following characteristics when choosing makeup products: Prepping Your Skin for Makeup Properly prepping your skin before makeup application is crucial for long-lasting results. Follow these steps to ensure your makeup adheres well to your oily skin: Foundation for Oily Skin Choosing the right foundation is crucial for achieving a matte and long-lasting makeup look for oily skin. Here’s how to do it: Concealer and Contouring When it comes to concealer and contouring for oily skin, choose products that are matte, long-wear, and non-comedogenic. Here are some tips: Eye Makeup for Oily Skin Eye makeup can be particularly challenging for those with oily skin, as creasing and smudging are common issues. Here’s how to make your eye makeup last: Lip Makeup for Oily Skin When it comes to lip makeup, oily skin individuals can enjoy a wide range of options. Here are some tips for long-lasting lip color: Setting Your Makeup To lock in your makeup and keep it shine-free, setting your makeup is essential. Here’s how: Makeup Removal and Skincare at Night Proper makeup removal and nighttime skincare are crucial for maintaining healthy skin, especially if you have oily skin. Here’s a nighttime routine tailored to your needs: With the right makeup products and techniques, individuals with oily skin can achieve a matte, long-lasting makeup look that stays fresh throughout the day. The key is to focus on oil-free, matte formulas, proper skincare, and setting your makeup effectively. Embrace these tips and tricks, and say goodbye to unwanted shine. Remember that makeup is a form of self-expression, and with a little practice, you can confidently showcase your unique style while keeping oiliness at bay. Enjoy your journey to a shine-free and flawless complexion!

Understanding Makeup Primer: Functions And Application Techniques
Understanding Makeup Primer: Functions and Application Techniques

Makeup primer is an essential product in the cosmetics industry, designed to create a smooth base for foundation and enhance the longevity and appearance of makeup. In this guide, we will explore the basics of makeup primer, its functions, and provide an overview of how to effectively use it in your beauty routine. What is Makeup Primer?Makeup primer is a cosmetic product applied before foundation or other makeup to prep the skin for smoother application and improved longevity. It is typically with ingredients that help fill in fine lines, minimize the appearance of pores, and create a barrier between the skin and makeup, resulting in a flawless finish. Functions of Makeup Primer Smoothing Texture: Primers are designed to create a smooth canvas for foundation application by filling in fine lines, wrinkles, and pores, resulting in a more even complexion.Extending Makeup Wear: A good primer helps makeup adhere to the skin and prevents it from fading, creasing, or melting throughout the day, ensuring a longer-lasting and fresher look. Oil Control: Some primers are specifically keeping to control excess oil production, the skin matte and reducing shine.Color Correction: Certain primers are tinted to help correct specific skin concerns, such as redness, dullness, or discoloration, providing a more even and balanced complexion. Hydration and Nourishment: Some primers contain moisturizing ingredients that hydrate the skin and improve its texture, resulting in a smoother makeup application. How to Use Makeup PrimerCleanse and Moisturize: Start with clean, moisturized skin. Gently cleanse your face and follow up with your regular moisturizer. Allow the moisturizer to absorb fully before applying the primer.Choose the Right Primer: Select a primer that suits your specific needs, whether it’s oil control, color correction, or hydration. Consider your skin type and any specific concerns you may have, such as large pores or uneven texture. Apply a Small Amount: Dispense a small amount of primer onto your fingertips or the back of your hand. Remember that a little goes a long way, so start with a pea-sized amount and add more if needed.Dot and Blend: Apply the primer onto the center of your face and then dot it on your forehead, cheeks, nose, and chin. Gently blend the primer using your fingertips, a brush, or a makeup sponge, working it into the skin in upward and outward motions. Focus on Problem Areas: Pay extra attention to areas that require additional smoothing or coverage, such as enlarged pores or fine lines. Pat the primer into these areas for more targeted results.Allow Absorption: Give the primer a few moments to settle into the skin and fully absorb before applying foundation or other makeup products. This allows the primer to create a smooth base for seamless makeup application. Proceed with Makeup Application: Once the primer has absorbed, apply your foundation, concealer, and other makeup products as usual. Notice how the primer helps the makeup adhere better and enhances its overall appearance.Touch-Up Throughout the Day: If necessary, carry a small tube of primer with you for touch-ups during the day. Gently pat a small amount onto areas that may need…

Tips And Tricks On How To Put In Clip In Hair Extensions
Tips and Tricks on How to Put in Clip-In Hair Extensions

Transforming your hairstyle with clip-in hair extensions offers a realm of possibilities, from adding length and volume to experimenting with colors without commitment. This comprehensive guide delves deep into the world of clip-in extensions, providing you with the know-how to choose, install, and maintain your extensions for an effortlessly glamorous look. Understanding Clip-In Hair Extensions Clip-in hair extensions are a versatile and reversible way to change your hair’s appearance. Made from either synthetic fibers or real human hair, they come in various lengths, shades, and textures, allowing for a customizable look. The appeal of clip-ins lies in their ease of use; they can be clipped into your own hair in minutes, offering a temporary solution that’s perfect for special occasions or everyday wear. Choosing the Right Clip-In Hair Extensions The key to natural-looking clip-in hair extensions is selecting the right match for your hair. This section covers how to choose extensions based on color, texture, and length that blend seamlessly with your natural hair. It also touches on understanding the weight of extensions and how it impacts your comfort and the health of your natural hair. Preparation for Installation Proper preparation is crucial for a successful application of clip-in hair extensions. This involves selecting the right tools and preparing both your natural hair and the extensions for installation. Tips on how to create a sturdy base for the clips and ways to protect your hair from potential damage during the process are also covered. Step-by-Step Guide to Installing Clip-In Hair Extensions Here, you’ll find a detailed, step-by-step guide on how to correctly install clip-in hair extensions. The guide includes how to section your hair for an even distribution of volume and length, the correct method to secure the clips, and expert advice on achieving a blend indistinguishable from your natural hair. Styling Tips with Clip-In Extensions Styling your hair with clip-in extensions opens up a myriad of hairstyle options. This section offers inspiration and instructions for creating looks that range from simple and elegant to complex and glamorous, ensuring your extensions look natural and stay secure. Maintenance and Care for Clip-In Hair Extensions To ensure your clip-in hair extensions remain looking their best, proper care is essential. This comprehensive guide covers everything from the correct way to brush, wash, and dry your extensions, to storing them properly to avoid tangling and damage. Also included are tips for prolonging the life of your extensions and keeping them looking as good as new. Troubleshooting Common Issues Even with careful installation and maintenance, you might encounter issues with your clip-in hair extensions. This section addresses common problems such as slippage, blending difficulties, and discomfort, offering practical solutions to ensure your extension experience is a positive one. The Do’s and Don’ts of Clip-In Hair Extensions Maximize the potential of your clip-in hair extensions by following these essential do’s and don’ts. Learn about the best practices for a natural look, how to avoid common mistakes, and tips for ensuring your extensions contribute positively to your hair’s health and appearance. Advanced Tips and Tricks For those looking to…

Healing
A Father’s Stand: Love, Desperation and the Power of Healing

Doctors at a hospital in Texas informed George Pickering that his son was in a state of brain death. They explained that his son showed “no brain activity” and the decision had been made to remove life support. George Pickering became distraught when he learned of his son’s apparent brain death. Pickering was unconvinced of their assessment and… GO TO THE NEXT PAGE TO CONTINUE…

Microshading: The Art Of Effortlessly Defined Brows
Microshading: The Art of Effortlessly Defined Brows

Eyebrows play a crucial role in framing the face and enhancing our overall appearance. Over the years, various techniques have emerged to help individuals achieve their desired brow look, including microshading. Microshading is a semi-permanent cosmetic procedure that aims to create natural-looking, defined eyebrows. In this article, we will explore the art of microshading, understanding what it is, how it works, and the benefits it offers for those seeking flawlessly shaped and filled brows. Understanding Microshading:Microshading, also known as powder brows or ombre brows, is a cosmetic tattooing technique that involves depositing pigment into the superficial layers of the skin to create a soft, powdered effect on the eyebrows. Unlike microblading, which uses fine incisions to mimic individual eyebrow hairs, microshading utilizes a stippling technique to achieve a more filled-in appearance. This technique is particularly beneficial for individuals with sparse or thin eyebrows, as it creates a denser and more defined brow look. The Process of Microshading:Microshading typically begins with a consultation to discuss the desired eyebrow shape, color, and overall outcome. Before the procedure, a numbing cream is applied to the brow area to minimize any discomfort. The technician then uses a handheld device or a manual tool with a cluster of small needles to gently tap and deposit pigment into the skin. The technician carefully layers the pigment, creating a gradient effect that mimics the natural growth and shading of eyebrow hair. The procedure may take around 1-2 hours, depending on the individual’s desired result. Achieving Natural-Looking Results:One of the significant advantages of microshading is its ability to create natural-looking results. By utilizing a stippling technique, the technician can mimic the appearance of soft, powdered eyebrows, closely resembling the natural texture and shading of brow hair. This technique allows for more flexibility in creating varying levels of density and achieving a result that complements the client’s facial features and desired aesthetic. Customization for Every Client:Microshading offers a high level of customization to meet each client’s unique preferences. The technician takes into account factors such as the client’s face shape, existing brow shape, and color to create a personalized treatment plan. The color of the pigment can be tailored to match the client’s natural hair color or desired shade, ensuring that the brows look natural and well-blended with the client’s overall appearance. The shape and density of the brows can also be adjusted to enhance the client’s facial features and achieve their desired brow style. Long-Lasting Results:Microshading is a semi-permanent procedure, meaning that the results can last for an extended period before requiring touch-ups. On average, microshaded eyebrows can retain their color and shape for 1-3 years, depending on factors such as individual skin type, lifestyle, and aftercare. Touch-up sessions can be scheduled as needed to maintain the desired brow appearance and ensure longevity. Minimally Invasive and Safe:Microshading is a minimally invasive procedure that carries a relatively low risk when performed by a skilled and experienced technician in a sterile environment. Proper sanitation practices and the use of high-quality pigments minimize the risk of complications. However, as with any cosmetic procedure,…

Creating An Editorial Makeup Look Tips And Tricks For A High Fashion Look
Creating an Editorial Makeup Look: Tips and Tricks for a High-Fashion Look

Editorial makeup transcends the boundaries of everyday beauty, venturing into the realms of art and high fashion. It’s where creativity knows no bounds, and makeup artists unleash their imagination to create looks that are not just beautiful but tell a story. Whether for magazine spreads, fashion shows, or brand campaigns, editorial makeup is about making a statement and leaving a lasting impression. This guide will walk you through the essentials of creating captivating editorial makeup looks, from the tools you need to the techniques that will set your work apart. Understanding Editorial Makeup Editorial makeup is distinguished by its innovation and artistic flair. It’s about pushing boundaries, experimenting with textures, colors, and shapes to create looks that are often bold, sometimes surreal, and always impactful. The evolution of editorial makeup reflects the changing trends in fashion and art, constantly challenging and redefining beauty standards. Essential Tools for Editorial Makeup The right tools are your best allies in crafting editorial looks. High-quality brushes and applicators ensure precision and ease of application, while specialty products like pigmented shadows, vibrant liners, and unique textures allow for endless creativity. Investing in a diverse makeup kit will enable you to bring any vision to life. Mastering the Base A flawless base is the canvas for any makeup look, especially in editorial where perfection is key. Choosing the right foundation formula and applying it with skill can make all the difference. Techniques like layering, blending, and setting are crucial for a base that complements rather than competes with your creative elements. The Art of Eye Makeup Eye makeup in editorial looks can be daring and dramatic. Bold shadows, graphic liners, and false lashes are often used to create eye-catching designs. Mastering innovative techniques, such as cut-creases, bold color blocking, and intricate liner work, can elevate your makeup artistry. Sculpting with Contours and Highlights Contouring and highlighting are powerful techniques to shape and define the face. In editorial makeup, they can be used more artistically to exaggerate or alter facial features, playing with light and shadow to achieve the desired effect. Choosing the right shades and blending meticulously are key to a sculpted, high-fashion look. Lip Makeup for Editorial Looks Lips are a focal point in many editorial looks, whether the goal is a bold statement or a subtle enhancement. Selecting the right color and texture to complement the overall theme is essential. Tips for precise application and ensuring longevity will help your lip makeup stand out and last through long photoshoots. Adding Drama with Textures and Glitters Textures and glitters can add a unique dimension to editorial makeup. From glossy finishes to metallic foils, incorporating different textures can create depth and interest. Safe application techniques are important, especially when working with glitters, to achieve a dramatic effect without compromising safety. The Role of Color Theory in Editorial Makeup A deep understanding of color theory can elevate your editorial makeup by ensuring harmony or deliberate contrast within your look. Using color to evoke emotions or convey a theme is a powerful tool in your artistic arsenal. Blending Techniques for…

Simple Ways To Get Rid Of Facial Bloating
Deflate and Refresh: Simple Ways to Reduce Facial Bloating

Facial bloating can be a frustrating and uncomfortable experience that affects our appearance and self-confidence. It is often caused by factors such as water retention, poor digestion, inflammation, or certain lifestyle habits. Fortunately, there are simple and effective ways to alleviate facial bloating and restore a more contoured and refreshed appearance. In this article, we will explore various techniques and lifestyle adjustments that can help reduce facial bloating and promote a healthier, more balanced complexion. Stay Hydrated:Contrary to popular belief, drinking an adequate amount of water can actually help reduce facial bloating. Proper hydration helps to flush out toxins, maintain optimal fluid balance, and prevent water retention. Aim to drink at least 8 glasses of water per day and include hydrating foods like cucumbers, watermelon, and citrus fruits in your diet. Limit Sodium Intake:Excessive sodium consumption can contribute to water retention and facial bloating. Avoid highly processed and salty foods, and opt for fresh, whole foods instead. Cooking at home allows you to control the amount of salt in your meals. Incorporate herbs and spices to enhance flavor without relying on excessive salt. Follow a Balanced Diet:A healthy, balanced diet plays a vital role in reducing facial bloating. Incorporate plenty of fresh fruits, vegetables, whole grains, and lean proteins into your meals. These nutrient-dense foods provide essential vitamins and minerals while supporting healthy digestion and reducing inflammation. Minimize Alcohol and Caffeine:Alcohol and caffeine can dehydrate the body and lead to facial bloating. Limit your consumption of alcohol and opt for non-alcoholic beverages whenever possible. Reduce your intake of caffeinated drinks like coffee and tea, or consider switching to herbal teas that have anti-inflammatory properties. Practice Facial Massage:Gentle facial massage can stimulate lymphatic drainage and reduce fluid retention, helping to relieve facial bloating. Use your fingertips to apply light pressure in circular motions, starting from the center of your face and moving outward. Focus on areas prone to bloating, such as the cheeks, jawline, and under-eye area. Apply a Cool Compress:A cool compress can help constrict blood vessels and reduce facial puffiness. Place a clean washcloth soaked in cold water or chilled cucumber slices on your face for a few minutes. The cool temperature will help reduce inflammation and promote a more refreshed appearance. Reduce Stress:Stress can contribute to facial bloating by triggering hormonal imbalances and affecting digestion. Practice stress-management techniques like deep breathing exercises, meditation, or engaging in activities that help you relax. Prioritize self-care and get enough sleep to support overall well-being and reduce facial puffiness. Avoid Chewing Gum:Chewing gum can lead to swallowing air, which can contribute to facial bloating. Opt for mints or natural breath fresheners instead. If you need to chew gum, choose sugar-free options and limit your intake. Improve Digestion:Promoting healthy digestion is essential for reducing facial bloating. Eat slowly, chew your food thoroughly, and avoid overeating. Consider incorporating probiotic-rich foods like yogurt, kefir, and sauerkraut into your diet to support a healthy gut and improve digestion. Consider Facial Exercises:Facial exercises can help strengthen and tone the muscles in your face, reducing the appearance of bloating. Try…