Nail Strengtheners: The Secret to Healthy and Strong Nails

In the quest for flawless beauty routines, the health and strength of our nails often take a backseat. However, nails are not just a canvas for trendy polish colors; they’re a reflection of our overall health. That’s where nail strengtheners come in – the unsung heroes of nail care. This article delves into the world of nail strengtheners, revealing how they can be the secret to unlocking healthy, resilient nails.

Nail health is a mirror to our general well-being, indicating the state of our nutrition and care routines. Strong nails are not only aesthetically pleasing but also essential for performing daily tasks without discomfort. Nail strengtheners, therefore, play a crucial role in maintaining the integrity and beauty of our nails.
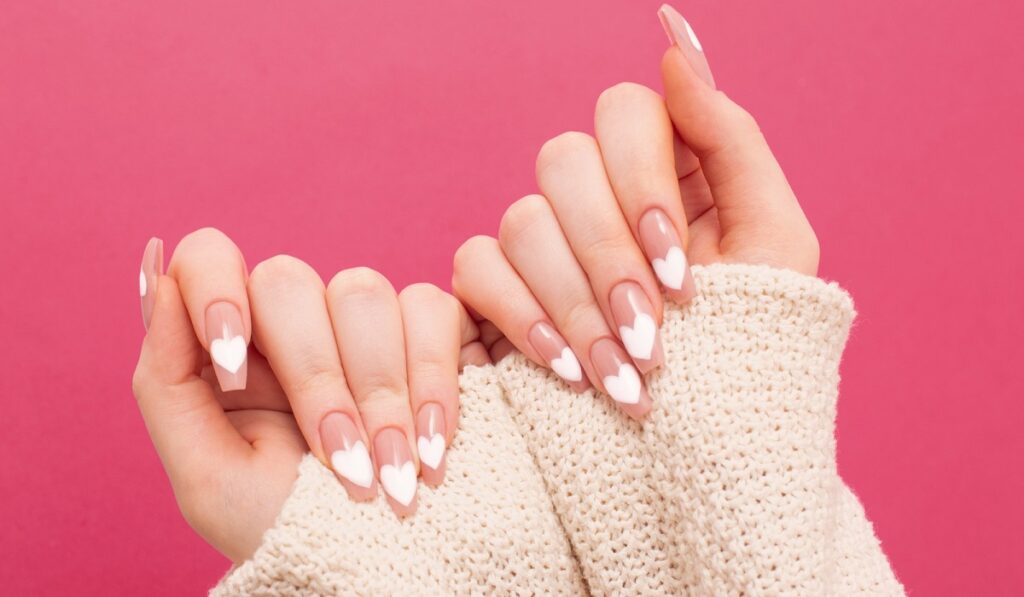
Female,hands,with,beautiful,long,nails,with,manicure,with,heart


What Are Nail Strengtheners?

Nail strengtheners are specialized treatments designed to improve the health and resilience of nails. They come in two main types: hardeners, which work by reinforcing the nail plate, and hydrators, which moisturize and prevent brittleness. By incorporating essential vitamins, proteins, and other nourishing ingredients, these products aim to fortify nails from within.

The Science Behind Nail Strengtheners

The effectiveness of nail strengtheners lies in their ability to penetrate the nail plate, delivering nutrients and moisture to the underlying nail bed. Ingredients like keratin, biotin, and collagen are pivotal in reinforcing nail structure, promoting flexibility and preventing breakage.

Benefits of Using Nail Strengtheners

Regular use of nail strengtheners can transform weak, brittle nails into strong, flexible ones. They help in preventing common issues like splitting and peeling, thereby promoting healthier nail growth. Moreover, well-nourished nails have a natural sheen and improved texture, enhancing their overall appearance.

Choosing the Right Nail Strengthener

Selecting a nail strengthener should be based on individual nail needs. For dry, brittle nails, hydrators are ideal, whereas hardeners are better suited for soft, weak nails. Ingredients like formaldehyde (in moderation) and calcium provide structural support, while natural oils and plant extracts offer hydration and nourishment.

Application Tips for Maximum Benefits

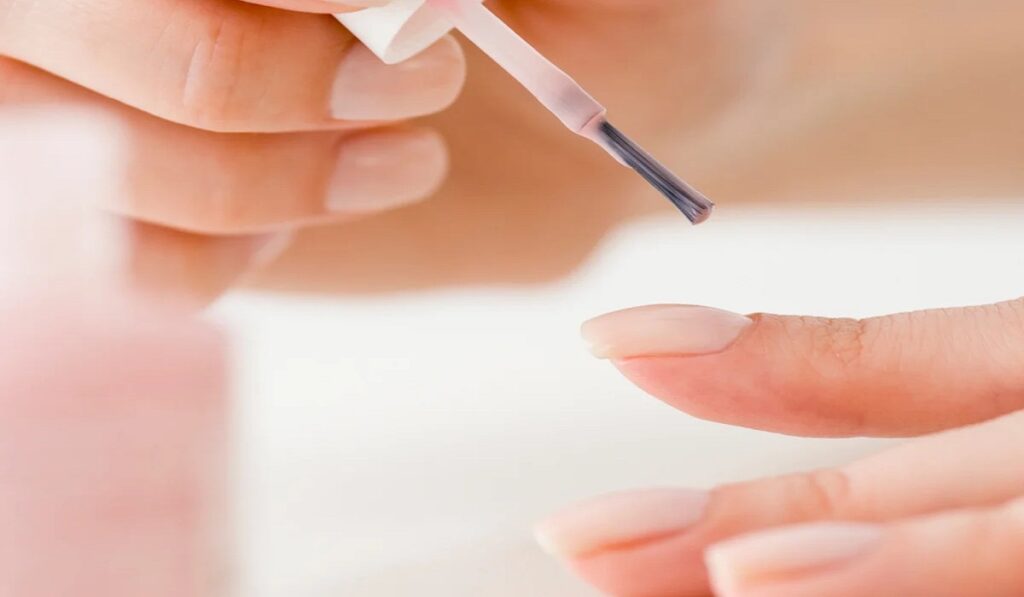
For optimal results, nail strengtheners should be applied to clean, dry nails. Following the product’s instructions is key, as overuse can sometimes lead to brittleness. A common recommendation is to apply a thin layer daily for a week, then remove and start the process over.

Natural Alternatives to Commercial Nail Strengtheners

For those preferring a more natural approach, DIY recipes featuring ingredients like olive oil, lemon juice, and garlic offer a homemade solution to nail strengthening. These natural options can provide similar benefits without the chemicals found in commercial products.

Integrating Nail Strengtheners into Your Nail Care Routine

Incorporating nail strengtheners into your nail care regimen can enhance the efficacy of your overall routine. They can be used as a base coat under nail polish or alone as a treatment, ideally complemented by regular hydration and protection measures.
Nail Strengtheners The Secret To Healthy And Strong Nails


The Role of Diet in Nail Health

A balanced diet rich in vitamins and minerals is foundational to strong nails. Nutrients like biotin, vitamin E, and omega-3 fatty acids are particularly beneficial, supporting nail growth and preventing brittleness.

Professional Treatments vs. At-Home Nail Strengtheners

While at-home nail strengtheners are convenient and cost-effective, professional treatments can offer more intensive care. Deciding between the two depends on individual nail conditions and goals.

Safety Considerations and Potential Side Effects

It’s important to be aware of potential allergic reactions or adverse effects from nail strengthener ingredients. Formaldehyde, for instance, can cause brittleness with excessive use. Monitoring your nails for any negative changes is crucial.

Reviews: Top Nail Strengtheners on the Market

Exploring user reviews and expert recommendations can help identify the best nail strengtheners available, ensuring you choose a product that meets your specific needs.

Nail Strengtheners for Specific Conditions

Certain nail strengtheners are formulated to address specific issues, such as peeling or frequent polish use. Tailoring your choice to your nails’ needs can enhance treatment effectiveness.

The Future of Nail Care: Innovations in Nail Strengthening

Emerging technologies and ingredients are continually shaping the nail care industry, promising more effective and efficient solutions for nail strengthening in the future.

How to Know if You Need a Nail Strengthener

Identifying signs of weak, brittle, or peeling nails can indicate the need for a strengthener. Incorporating one into your routine can preemptively combat these issues, maintaining nail health.

Embracing Strong and Healthy Nails

Nail strengtheners are a key component in achieving and maintaining strong, healthy nails. By understanding and applying the right products for your nail type, you can enjoy the benefits of resilient, beautiful nails. Embrace the power of nail strengtheners and unlock the secret to the ultimate nail health and beauty.


  • How often should I use a nail strengthener?
  • Can I use nail strengthener with gel or acrylic nails?
  • Are there any side effects to using nail strengtheners?
  • How long does it take to see results from using a nail strengthener?
  • Can men use nail strengtheners?


Brain Power Challenge

Welcome to the Ultimate IQ Challenge! Are you ready to test your limits? This IQ test is designed to push your analytical skills to their peak. You have 20 minutes to answer 20 carefully crafted questions. Did you know? The average IQ in the U.S. is 98. Can you prove you’re smarter than the average American? Push your boundaries and see where you stand. Challenge yourself and aim for the top! Start the Test

Understanding Makeup Primer: Functions And Application Techniques
Understanding Makeup Primer: Functions and Application Techniques

Makeup primer is an essential product in the cosmetics industry, designed to create a smooth base for foundation and enhance the longevity and appearance of makeup. In this guide, we will explore the basics of makeup primer, its functions, and provide an overview of how to effectively use it in your beauty routine. What is Makeup Primer?Makeup primer is a cosmetic product applied before foundation or other makeup to prep the skin for smoother application and improved longevity. It is typically with ingredients that help fill in fine lines, minimize the appearance of pores, and create a barrier between the skin and makeup, resulting in a flawless finish. Functions of Makeup Primer Smoothing Texture: Primers are designed to create a smooth canvas for foundation application by filling in fine lines, wrinkles, and pores, resulting in a more even complexion.Extending Makeup Wear: A good primer helps makeup adhere to the skin and prevents it from fading, creasing, or melting throughout the day, ensuring a longer-lasting and fresher look. Oil Control: Some primers are specifically keeping to control excess oil production, the skin matte and reducing shine.Color Correction: Certain primers are tinted to help correct specific skin concerns, such as redness, dullness, or discoloration, providing a more even and balanced complexion. Hydration and Nourishment: Some primers contain moisturizing ingredients that hydrate the skin and improve its texture, resulting in a smoother makeup application. How to Use Makeup PrimerCleanse and Moisturize: Start with clean, moisturized skin. Gently cleanse your face and follow up with your regular moisturizer. Allow the moisturizer to absorb fully before applying the primer.Choose the Right Primer: Select a primer that suits your specific needs, whether it’s oil control, color correction, or hydration. Consider your skin type and any specific concerns you may have, such as large pores or uneven texture. Apply a Small Amount: Dispense a small amount of primer onto your fingertips or the back of your hand. Remember that a little goes a long way, so start with a pea-sized amount and add more if needed.Dot and Blend: Apply the primer onto the center of your face and then dot it on your forehead, cheeks, nose, and chin. Gently blend the primer using your fingertips, a brush, or a makeup sponge, working it into the skin in upward and outward motions. Focus on Problem Areas: Pay extra attention to areas that require additional smoothing or coverage, such as enlarged pores or fine lines. Pat the primer into these areas for more targeted results.Allow Absorption: Give the primer a few moments to settle into the skin and fully absorb before applying foundation or other makeup products. This allows the primer to create a smooth base for seamless makeup application. Proceed with Makeup Application: Once the primer has absorbed, apply your foundation, concealer, and other makeup products as usual. Notice how the primer helps the makeup adhere better and enhances its overall appearance.Touch-Up Throughout the Day: If necessary, carry a small tube of primer with you for touch-ups during the day. Gently pat a small amount onto areas that may need…

Effortless Elegance: A Step By Step Guide On How To Remove Gel Nail Polish At Home
Effortless Elegance: A Step-by-Step Guide on How to Remove Gel Nail Polish at Home

Gel nail polish has revolutionized the world of manicures, offering long-lasting color and a glossy finish. However, the time eventually comes when you need to remove your gel nail polish to refresh your nails or switch up your look. While salon visits are a common option, learning how to remove gel nail polish at home can save you time and money. In this comprehensive guide, we will walk you through the step-by-step process of safely and effectively removing gel nail polish at home, ensuring that your nails stay healthy and pristine. Understanding Gel Nail Polish Gel nail polish differs from traditional nail polish due to its unique formula and the curing process involved. Gel polish is applied in layers and cured under a UV or LED lamp, resulting in a durable and chip-resistant finish that can last for several weeks. Tools and Supplies You’ll Need Before you start the gel nail polish removal process, gather the following tools and supplies: Step-by-Step Guide to Removing Gel Nail Polish at Home Step 1: Prep Your Workspace Choose a well-lit and comfortable space to work in. Lay down a towel or a disposable surface to catch any spills or drips. Step 2: Buff the Shine Using a nail buffer or a gentle nail file, lightly buff the surface of your gel nails. This step helps break the seal of the topcoat, allowing the acetone to penetrate and dissolve the gel polish more effectively. Step 3: Soak Cotton Pads Cut your cotton pads or cotton balls into pieces that are large enough to cover your nails. Soak them in acetone until they are fully saturated. Step 4: Apply Cotton and Foil/Clips Place the soaked cotton on your nails, ensuring that the entire nail surface is covered. Then, wrap each fingertip with a small piece of aluminum foil or use nail clips to secure the cotton in place. This creates a sealed environment that helps the acetone work more efficiently. Step 5: Wait and Relax Wait for about 10-15 minutes, allowing the acetone to soften the gel polish. Use this time to relax, catch up on a book, or simply enjoy a quiet moment. Step 6: Gently Remove the Gel Polish After the soaking time, carefully remove the foil or clips and the cotton from your nails. You’ll notice that the gel polish has started to lift and peel. Use a cuticle pusher or an orange stick to gently push away the softened gel from your nails. Be patient and avoid scraping or prying too aggressively, as this could damage your natural nails. Step 7: Hydration and Nourishment After removing the gel polish, wash your hands with soap and water to remove any residue. Apply a nourishing cuticle oil or cream to replenish moisture to your nails and cuticles. This step helps counteract the drying effects of acetone. Step 8: Moisturize Finish the process by applying a rich hand cream or moisturizer to your hands and nails. This helps keep your skin hydrated and supple. Learning how to remove gel nail polish at home can be a…

How To Cover A Tattoo With Makeup 2
A Comprehensive Guide on How to Cover a Tattoo with Makeup

Expressive Expression Canvas Tattoos are powerful signs of art and identity etched onto our skins, yet sometimes we need them covered temporarily for job interviews, special events, or simply trying out something different. Makeup offers the ideal combination of artistry and practicality as a skillful solution that conceals tattoos without altering their essence. Chapter 1: Selecting Appropriate Tools for Any Task Correctors and Concealers Finding an appropriate concealer to cover your tattoo can be the key to its effective concealment. A highly pigmented, long-wearing concealer which complements your skin tone should do. Color correctors may help neutralize any hues present in the tattoo design that have bright hues. Primer for Smooth Canvases (Creating A Smooth Background ) Primer helps create an even surface, helping makeup adhere well and remain in place throughout the day. Choose one suitable for your skin type – perhaps one which hydrates, mattifies or fills pores. Chapter 2 : Mastering Technique Layering: the Key to Seamless Coverage Acchieve flawless coverage requires applying several thin coats of concealer over time – rather than applying all at once, build up gradually for natural-looking coverage that also prevents caking or creasing of makeup. Blending: the Art of Seamless Transitions Blending is key for creating a natural-looking finish, so use makeup sponges, brushes or your fingertips to blend concealer seamlessly into surrounding skin and especially at tattoo edges to ensure a seamless transition. Chapter 3 : Color Matching and Customization Perfecting Your Match Acknowledging the importance of selecting a concealer shade suitable to your skin tone, you may require experimentation in order to find your ideal hue. While some individuals might like their concealer exactly matching their foundation shade, others might choose for something lighter or darker depending on their desired look. Customization with Special Effects Makeup Special effects makeup offers endless creative potential. Experiment with different color palettes, stencils and techniques to craft unique designs that either seamlessly merge into the skin’s surface or transform a tattoo into works of art. Chapter 4 : Establishing Longevity Strategies Setting Powders and Sprays Setting is crucial when creating your masterpiece. Apply translucent setting powder generously across any concealed areas to avoid smudging and create a matte finish, and consider adding an additional protective measure such as setting spray if sweaty conditions or humid climates exist. Enhance Your Longevity Through Touch-Up Tips Maintaining excellent coverage may require touch-ups throughout the day to protect areas vulnerable to friction. Keep a small makeup kit handy to quickly apply touch-ups as necessary and guarantee your hidden tattoo remains looking its best! Chapter 5 : Removing Makeup Canvases Gentle Cleansing to Give you a Fresh Start At the end of every day, it’s essential to remove makeup carefully to maintain healthy skin. A gentle oil-based cleanser will break down makeup without harsh scrubbing while your regular skincare regime should then nourish and soothe it further. Conclusion: Revealing or Concealing Are Your Choices Makeup artistry provides endless possibilities when it comes to covering tattoos – be it forever embracing it proudly, temporarily hiding it for special events or temporarily…

Nourishing Your Skin: How To Choose The Right Face Moisturizer For Your Skin Type
Nourishing Your Skin: How to Choose the Right Face Moisturizer for Your Skin Type

Moisturizing is a fundamental step in any skincare routine. Whether you have dry, oily, combination, or sensitive skin, finding the right face moisturizer tailored to your skin type is crucial. A well-chosen moisturizer not only keeps your skin hydrated but also addresses specific concerns, such as oiliness, dryness, or sensitivity. In this comprehensive guide, we will explore the importance of moisturizing, how to identify your skin type, and the key factors to consider when choosing the perfect face moisturizer to keep your skin healthy, radiant, and balanced. The Importance of Moisturizing Before delving into the specifics of selecting a face moisturizer, it’s essential to understand why moisturizing is a vital part of skincare: Identifying Your Skin Type Before you can choose the right face moisturizer, you need to determine your skin type. Your skin type dictates the specific needs and concerns your moisturizer should address. Here are the most common skin types: Now that you’ve identified your skin type, let’s explore how to choose the right face moisturizer accordingly. Choosing the Right Face Moisturizer for Your Skin Type Selecting the perfect face moisturizer involves considering your skin type and specific concerns. Here are the key factors to keep in mind: 1. Ingredients Matter: 2. Texture and Consistency: 3. SPF Protection: 4. Specific Concerns: 5. Allergies and Sensitivities: 6. Test Before Committing: 7. Consistency is Key: 8. Adjust with the Seasons: 9. Professional Guidance: In conclusion, finding the right face moisturizer is a journey that involves understanding your skin type, recognizing its unique needs, and selecting a product tailored to those needs. The world of skincare offers a wide range of moisturizers designed to address various concerns, so take the time to explore and experiment. By following these key factors and guidelines, you can embark on a skincare routine that not only keeps your skin well-hydrated but also addresses specific issues, leaving you with a healthy and radiant complexion. Remember that skincare is a highly personalized experience, and what works best for you is the moisturizer that makes your skin look and feel its best.

Embrace Your Natural Curls: Why Curly Girls Should Ditch Heat Styling Tools In Warmer Weather
Embrace Your Natural Curls: Why Curly Girls Should Ditch Heat Styling Tools in Warmer Weather

Warmer weather brings with it a desire for carefree hairstyles that embrace the natural beauty of our hair. For curly girls, this means letting those gorgeous curls shine without the need for excessive heat styling. Heat styling tools like flat irons and curling wands can cause damage to curly hair, especially during the hotter months when the hair is already more prone to dryness and frizz. Embracing your natural curls in warmer weather not only helps protect your hair from damage but also allows you to rock effortlessly beautiful and unique hairstyles. In this comprehensive guide, we will explore the reasons why curly girls should ditch the heat styling tools during warmer weather and offer practical tips to help you rock your natural curls with confidence. Preserve Hair Health:Heat styling tools can cause significant damage to curly hair, as the high temperatures strip the hair of its natural moisture. When the weather is already warm and potentially more drying, it’s essential to preserve your hair’s health and hydration. By avoiding heat styling, you allow your curls to retain their natural moisture and elasticity, resulting in softer, more manageable hair. Prevent Heat Damage:Curly hair is already prone to dryness and frizz due to its unique structure, which makes it more susceptible to damage from heat styling. When the weather is hot and humid, the risk of heat damage increases, leading to split ends, breakage, and a loss of curl pattern. Embracing your natural curls during warmer weather helps prevent heat damage and keeps your locks looking healthy and vibrant. Embrace Natural Volume:Warm weather can often mean more humidity, which can work in your favor as a curly girl. Embracing your natural curls allows you to take advantage of the increased humidity, which can enhance your hair’s natural volume and bounce. Instead of fighting against the elements, work with them to create stunning and voluminous hairstyles. Low-Maintenance Styling:One of the greatest benefits of ditching heat styling tools is the ease and simplicity it brings to your hair care routine. Embracing your natural curls in warmer weather means less time spent in front of the mirror with heat tools and more time enjoying the outdoors. Low-maintenance styling not only saves time but also reduces the risk of heat-related damage to your hair. Rock Effortless Beach Waves:Warm weather often calls for beachy and carefree hairstyles, and curly hair is perfect for achieving those coveted beach waves. Letting your natural curls shine allows you to effortlessly rock beachy waves without the need for heat styling. Simply scrunch your damp hair with a curl-enhancing product and let it air dry for a laid-back and sun-kissed look. Experiment with Protective Styles:Ditching heat styling tools gives you the opportunity to experiment with various protective styles that not only shield your hair from the sun’s rays but also allow your curls to flourish. Protective styles like braids, twists, and buns can be fashionable and practical during warmer weather, helping to keep your hair off your neck and reducing exposure to damaging UV rays. Reduce Styling Stress:Curly hair can have a mind…

About Women's Beauty
About Women’s Beauty

In the vast and vibrant spectrum of human beauty, women stand out for their incredible diversity and unique charm. The concept of beauty transcends mere physical appearance, embedding itself deeply in actions, attitudes, and the profound impact one leaves on others. Women’s beauty embodies strength, grace, and inspiration, making it a source of endless admiration and celebration.Our discussion navigates through the myriad ways women can enhance and embrace their natural beauty. By delving into practical beauty tips, sharing inspirational stories, and offering insights into health and wellness, we aim to empower women to feel confident and radiant, both inside and out. The Essence of Women’s Beauty: A Haven for Celebration and Inspiration The beauty of a woman is an amalgamation of her physical attributes, her inner strength, and the way she carries herself through life’s challenges. Our platform serves as a beacon for women seeking to celebrate their individuality and the beauty of others. Here, we journey through personal stories of empowerment, practical beauty tips, and the celebration of female diversity. Women’s Beauty isn’t just about aesthetics; it’s about creating a supportive community where every woman can find her voice and space. Whether it’s discovering new hairstyles or drawing inspiration from the stories of remarkable women, our blog is your go-to resource for celebrating womanhood in all its glory. Empowering Tips for a Radiant You: From Skincare to Soul Care Beauty is a holistic concept that intertwines physical well-being with emotional and mental health. To embody beauty is to nurture oneself on all fronts. Here, we outline essential tips for maintaining and enhancing your natural beauty: Unlocking the Secrets to Inner and Outer Beauty To be truly beautiful is to glow from within. Here, we delve deeper into the practices that accentuate your inner beauty while reflecting on the outside: Embracing Your Unique Beauty Remember, beauty cannot be confined to a single definition or standard. It’s a mosaic of qualities, experiences, and expressions that make you uniquely you. By nurturing both your physical and emotional well-being, you can unlock a radiance that is inherently yours. Embrace your distinct beauty with confidence and pride, knowing that true beauty is a reflection of your essence and spirit. In a world where external appearances are often given undue importance, it’s vital to recognize that true beauty encompasses so much more. It’s about feeling confident in your skin, celebrating your uniqueness, and living a life that feels authentic to you. So, let’s redefine beauty on our own terms, supporting and uplifting each other along the way. By integrating these strategies into your daily routine, you can celebrate and enhance your natural beauty, leading to a more confident and radiant you.

Tips To Pick The Right Foundation For Oily Skin
Tips to Pick the Right Foundation for Oily Skin

For individuals grappling with oily skin, pinpointing the ideal foundation is transformative, elevating the entire makeup regimen. Characterized by an overproduction of sebum, oily skin necessitates a foundation that delivers an impeccable, shine-free finish while ensuring pores remain unblocked. This detailed exploration delves into essential considerations for selecting the optimal foundation for oily skin, aiming for a matte, enduring aesthetic. A Deep Dive into Foundation Selection for Oily Skin Grasping the nuances of your skin type stands as the cornerstone in the journey toward the ultimate foundation. Oily skin, marked by dilated pores, a glossy sheen, and a propensity for acne, benefits immensely from a foundation that not only mitigates shine but also enhances skin quality over time. The endeavor extends beyond mere concealment of flaws; it’s about discovering a formulation that synergizes with your skin’s specific requirements. Exploring Foundation Varieties for Oily Complexions Crucial Ingredients to Seek Components to Avoid Foundation Testing: Shade and Type Evaluation Application Insights for Oily Skin Oily Skin Maintenance via Foundation Reviewing Popular Foundations for Oily Skin A comprehensive review of both accessible and premium foundations, accentuating their advantages for oily skin, equips readers with varied options that align with their financial plan and preferences. Enhancing Foundation Endurance Navigating the selection of a suitable foundation for oily skin need not be overwhelming. Armed with the correct information and tools, you can uncover a foundation that not only enhances your appearance but also promotes skin health. The aim is to secure a balanced, matte finish that offers comfort and a natural look.