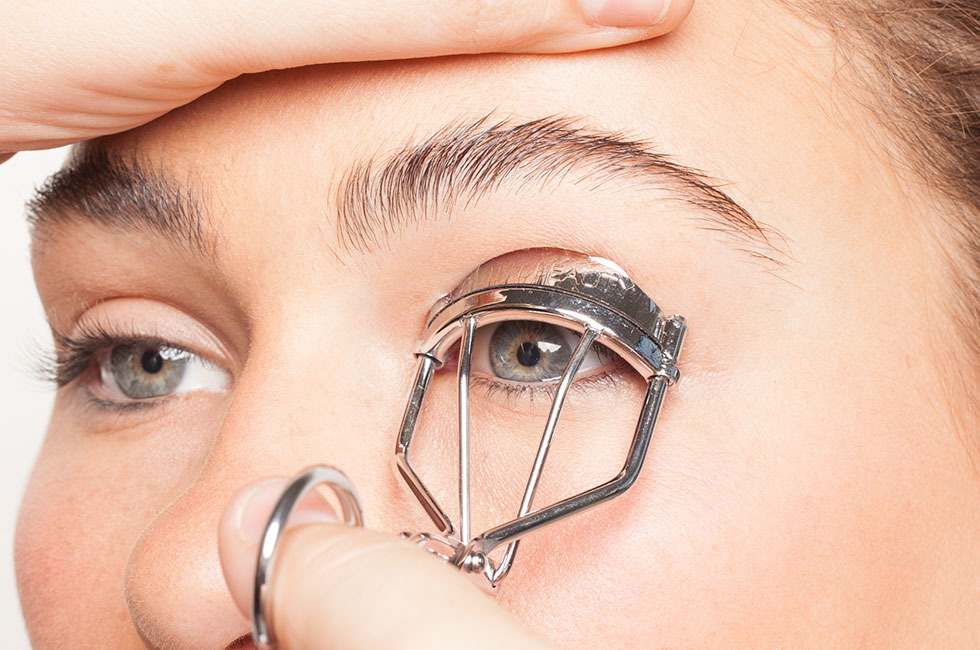
7 Makeup Mistakes That Might Be Making You Look Older: How to Avoid Them

Makeup is a powerful tool that can enhance your natural beauty and boost your confidence. However, certain makeup habits might be doing more harm than good, especially as they can inadvertently age your appearance. Identifying and correcting these mistakes can make a significant difference in looking effortlessly youthful. This guide will explore seven common makeup mistakes and provide practical advice for avoiding them.

7 Makeup Mistakes That Might Be Making Youlook Older


Mistake #1: Overdoing Foundation

Choosing the Wrong Formula

A heavy foundation or the wrong formula can settle into fine lines and wrinkles, accentuating them. Opt for lightweight, hydrating foundations that offer buildable coverage.

Application Techniques to Avoid

Avoid applying foundation too heavily. Use a damp beauty sponge or a stippling brush for a more natural, skin-like finish. Remember, less is more.

Mistake #2: Neglecting Skincare Before Makeup

The Importance of a Hydrated Base

Skincare plays a crucial role in how makeup sits on your skin. Dehydrated skin can cause makeup to cling to dry patches, making you look older.

Recommended Pre-Makeup Skincare Routine

Always start with a clean face, followed by a hydrating serum or moisturizer, and don’t forget to apply a primer to smooth out the skin’s texture.

Mistake #3: Using Too Much Powder

The Effect of Powder on Mature Skin

Setting powder, especially when overused, can highlight fine lines and dry out your skin. Use translucent powders sparingly and only in areas that need it.

Alternative Setting Methods

Consider setting sprays or lightly dusting powder only in the T-zone to maintain a dewy finish on the rest of the face.

Mistake #4: Ignoring Eyebrow Care

Filling Eyebrows Too Harshly

Over-filled eyebrows can harden your features, making you appear older. Aim for a more natural look by using feathery strokes and choosing a shade that matches your hair color closely.

7 Makeup Mistakes That Might Be Making You Look Older


The Role of Eyebrows in Facial Structure

Well-groomed eyebrows can lift the face and frame the eyes, contributing to a more youthful appearance. Consider consulting a professional for the best shape.

Mistake #5: Over-Contouring and Highlighting

Finding the Balance

Too much contouring or highlighting can look unnatural and aging. Use these products sparingly and blend thoroughly to enhance your natural bone structure subtly.

Techniques for a Natural Contour

Opt for cream products that can be blended out easily for a more natural-looking shadow and glow, rather than harsh lines.

Mistake #6: Choosing the Wrong Lip Products

The Impact of Matte and Dark Shades

Matte and darker lip colors can make lips appear thinner and more aged. They can also emphasize lip lines.

Hydrating Lip Color Options

Choose lip colors that are closer to your natural lip color and opt for formulas that offer hydration and a slight sheen to give the appearance of fuller, younger lips.

Mistake #7: Skipping Eyelid Primer

Preventing Creased Eyeshadow

Eyelid primer prevents eyeshadow from settling into creases, which can age the eyes. It creates a smooth canvas for eyeshadow, enhancing its color and longevity.

Enhancing Eyeshadow Longevity

A good primer can also intensify the pigment of your eyeshadow, making your eye makeup look more vibrant and youthful throughout the day.

In conclusion, avoiding these common makeup mistakes can significantly rejuvenate your appearance and enhance your natural beauty. By making small adjustments to your makeup routine, you can achieve a more youthful, radiant look that feels as good as it looks. Remember, the goal of makeup should always be to highlight your best features and embrace your unique beauty at every age.

How can I make my makeup look more natural and youthful? Focus on hydration, both in your skincare routine and the makeup products you choose. Use light layers and blend well to avoid heavy application.


Can makeup primer be used around the eyes? Yes, specific eye primers are designed for the delicate skin around the eyes, helping to smooth out fine lines and improve the application of eyeshadow and eyeliner.

What’s the best way to apply foundation to avoid looking older? Use a damp beauty sponge to press the foundation into the skin, allowing for a more even and natural coverage without settling into lines.

How do I choose the right shade of concealer to avoid aging my appearance? Select a concealer one shade lighter than your foundation for the under-eye area to brighten and lift. Match the concealer to your foundation shade for blemishes and spots.

Is it possible to correct makeup mistakes without starting over? Absolutely. Use a damp sponge to blend away excess product gently, or apply a light layer of moisturizer to areas that look overdone to dilute and smooth out the makeup.



What Is Scrub And What Does It Do
What is Scrub and What Does It Do?

Navigating the path to luminous, vibrant skin, the inclusion of scrubs has become indispensable within the realm of meticulous skincare practices. Acting as a crucial intermediary that seamlessly connects the acts of cleansing and hydrating, scrubs are instrumental in not just refining the texture of the skin but significantly elevating its overall vitality. Delve into the core of what scrubs represent, unravel their extensive benefits, and discover actionable insights for seamlessly weaving them into your daily skincare ritual. The Essence of Scrubs: Pioneers of Skin Transformation Fundamentally, a scrub is crafted as a skin care concoction aimed at the gentle eradication of dead skin cells, grime, and additional contaminants blanketing the skin’s exterior. This exfoliation process is key to reviving the skin, ushering in an era of smoother and more effervescent skin layers below. Moreover, the very action of scrubbing invigorates circulation, infusing the skin with a renewed sense of vitality and radiance. But what elevates scrubs to an essential status within skincare? Unveiling the Mechanisms Behind Scrubs Scrubs come to life through their meticulously designed formulations, encompassing minute particles or granules that, upon being massaged onto the skin, perform the act of mechanical exfoliation. This transcends the capabilities of standard cleansing, promoting deeper purification while simultaneously fostering blood circulation and lymphatic detoxification, thus revitalizing skin wellness from within. Exploring the Diversity of Scrubs and Their Distinctive Merits Gel-Based Scrubs: Perfect for delivering hydration and a cooling sensation, these scrubs stand as a solace, especially after exposure to the sun or vigorous physical activities.Natural Exfoliators – Sugar and Salt Scrubs: Offering a spectrum of abrasiveness, these scrubs afford a personalized exfoliation experience.Coffee Scrubs: Laden with antioxidants, these variants not only slough off dead skin cells but also contribute to skin tightening and enhanced circulation. Incorporating Scrubs into Your Skincare Regimen Adopting a scrub into your routine is uncomplicated yet demands conscientiousness to sidestep the pitfalls of over-exfoliation. Here is a methodical approach: Begin with Cleansed Skin: Initiating with a pristine base ensures the scrub’s efficacy.Gentle Application: Employ soft, circular strokes to massage the scrub onto your skin, ensuring the process remains gentle.Rinse Off Completely: Utilize lukewarm water to remove the scrub, unveiling rejuvenated and lively skin.Hydrate: Conclude with a moisturizing agent to deeply nourish the newly exfoliated skin. Selecting an Ideal Scrub for Your Skin Type Oily Skin: Seek scrubs designed to regulate oil secretion whilst preserving natural moisture.Dry Skin: Opt for scrubs embedded with hydrating elements that promise gentle exfoliation, thereby preventing additional dryness.Sensitive Skin: Favor scrubs with fine particles and calming ingredients to reduce potential irritation. Custom Scrubs: Tailored to Your Skin’s Specifications Crafting scrubs within the comfort of your home allows for an unparalleled level of customization to cater to your skin’s unique requirements. Utilizing ingredients like sugar, olive oil, and lemon not only facilitates natural exfoliation but also ensures skin revival. Nonetheless, recognizing your skin type and sensitivities is paramount to guarantee the safety and efficacy of your DIY endeavors. Scrubs stand as formidable allies in the quest for thriving, resplendent skin. By gaining a comprehensive understanding of…

A Mother And Her 600 Grams Baby
A Mother and Her 600 grams Baby

Can somebody tell me what’s going on? I shouted. It was unimaginable for me that a routine check up during my pregnancy could send me to emergency and a couple of hours later I was being wheeled towards the Operation Theatre. What was wrong with everybody! I felt absolutely normal. “Mam, calm down. Doctor is on the way to speak with you”, said the nurse. I was anything but calm. Just then my doctor comes. “Shweta, I am sorry to say but your blood pressure has shot up and not come down despite the medicines we gave you. This is a very risky situation and we need to operate and remove the foetus immediately.” My world crashed the moment I heard those words. After struggling to get pregnant for five years I was finally pregnant. Why… GO TO THE NEXT PAGE TO CONTINUE… Why was God doing this to me! My mind was numb and I didn’t know how to react. Just then I felt something in my womb. Something moving. Something kicking. It was the first time I felt those tiny kicks. Forgetting the conversation I was having with my doctor I squealed with delight. “Doctor I just felt my baby moving. See. Touch here. Do you feel it?” I asked excitedly. But the moment I looked at her the gravity of the situation dawned upon me. No way. Absolutely no way could I let anybody do anything to my baby. I was the one to create my little bundle of joy and I couldn’t let anybody take away that life from me. Not now. Not when my baby felt safe & secure tucked within me. I got up and told the doctor that there was not a percentage of chance that I would get operated and after a lot of convincing I was referred to a bigger hospital and was admitted in the I.C.U. I was four and a half months pregnant then. But as fate would have it I could only continue the pregnancy for one and a half months more and had to give in when the doctor said that the chances of my baby surviving outside my womb was better than in the womb. And then came the most beautiful day of my life. I gave birth to my angel, my Navya. But a big shock came to us when we heard that the baby weighed only 600 grams. All sorts of reaction came from our friends & family. Nobody could imagine a baby weighing a mere 600 grams. But I ignored them all and was desperate to see my baby. And the moment I laid my eyes on her I was in love with her. All I saw was a perfect baby with tiny hands and legs, a beautiful face with pink lips. But my angel was suffering. She just looked like a little fairy who had come from heaven and lost her wings. I know she wanted me to hold her. I know she wanted me to cuddle her. But I wasn’t allowed to. And…

All You Need To Know About Eyebrow Threading: The Ultimate Guide
All You Need to Know About Eyebrow Threading: The Ultimate Guide

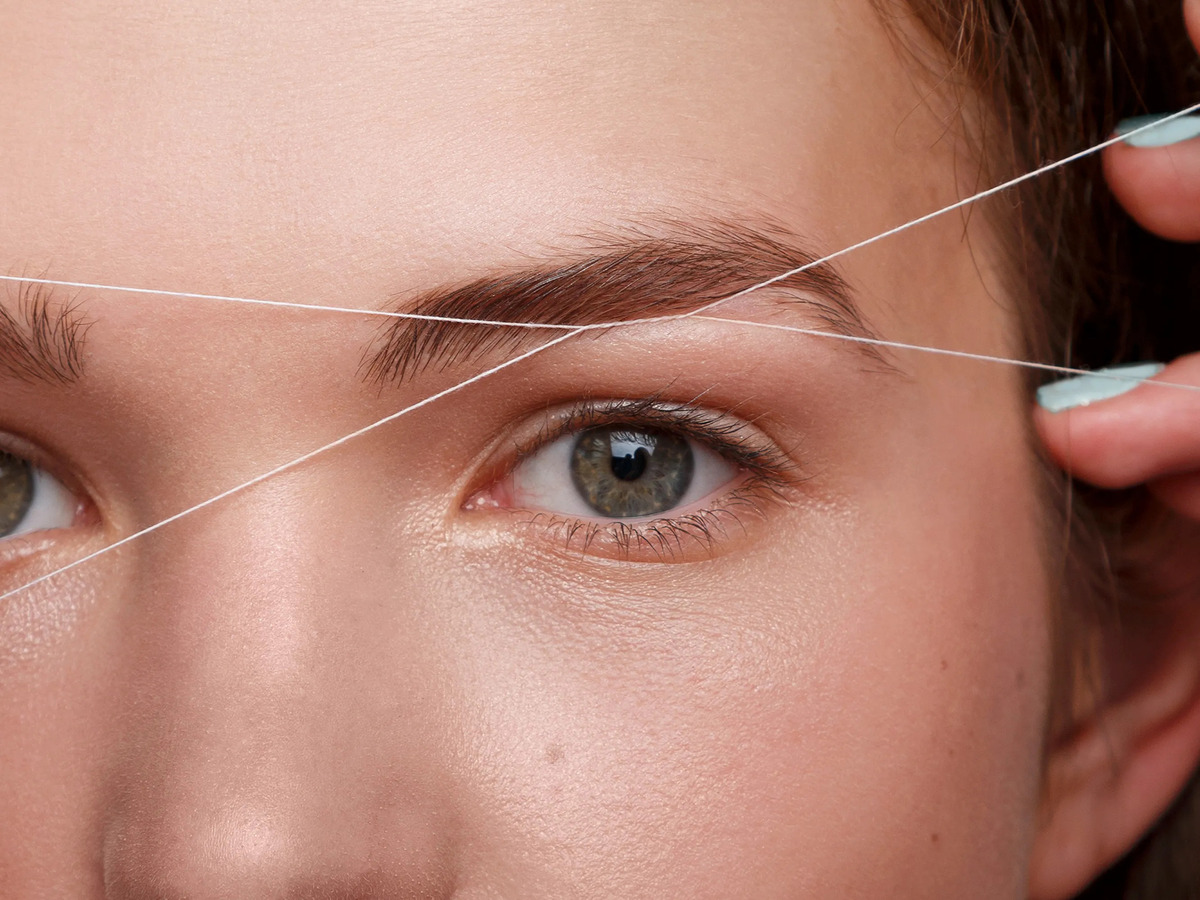
Eyebrow threading is a popular method of hair removal that originated in South Asia and has become increasingly popular in the Western world. It is a precise and relatively painless way to shape and groom eyebrows. In this guide, we will cover everything you need to know about eyebrow threading, including what it is, how it works, the benefits, and what to expect during and after the procedure. What is Eyebrow Threading?Eyebrow threading is a hair removal technique that involves twisting and pulling a thread along the skin, which removes the hair from the follicle. The thread is typically made of cotton or polyester and is doubled over, creating a loop at one end and two loose ends at the other. The practitioner holds one end of the thread in their mouth and uses the other hand to manipulate the loop, allowing them to precisely remove individual hairs from the eyebrow area. How does Eyebrow Threading Work?Eyebrow threading works by pulling out hair from the root. The practitioner will use the looped end of the thread to trap and twist individual hairs, pulling them out from the follicle. Because threading only removes hair from the root, the results can last up to 4-6 weeks before the hair grows back. Additionally, threading is a relatively gentle technique, as it does not require any chemicals or heat, making it suitable for those with sensitive skin. Benefits of Eyebrow Threading:There are several benefits to eyebrow threading. First, it is a precise technique, allowing for a more defined and tailored eyebrow shape. Second, it is less painful than other hair removal methods, such as waxing, as it does not pull on the skin. Third, threading is a quick and easy procedure that can be done in a matter of minutes. Finally, because threading only removes hair from the root, the results can last up to 4-6 weeks, making it a low-maintenance option. What to Expect During an Eyebrow Threading Procedure:If you have never had your eyebrows threaded before, you may be wondering what to expect during the procedure. First, the practitioner will ask you about the shape and style you are looking for. They will then use a white eyeliner pencil to draw on the shape of your new eyebrows. Once you have approved the shape, the practitioner will begin the threading process, using the looped end of the thread to remove hairs from the eyebrow area. You may experience some mild discomfort during the procedure, but it should not be painful. Once the threading is complete, the practitioner will apply a soothing cream or gel to the area to reduce any redness or irritation. Aftercare for Eyebrow Threading:Aftercare for eyebrow threading is relatively simple. You should avoid touching or rubbing the eyebrow area for at least 24 hours after the procedure to allow the skin to heal. You may also experience some redness or mild swelling, which should subside within a few hours. You can apply a cool compress to the area to reduce any discomfort. Finally, it is important to keep the eyebrow area…

Mastering Nail Stamps Your Ultimate Guide To Exquisite Nail Art
Mastering Nail Stamps: Your Ultimate Guide to Exquisite Nail Art

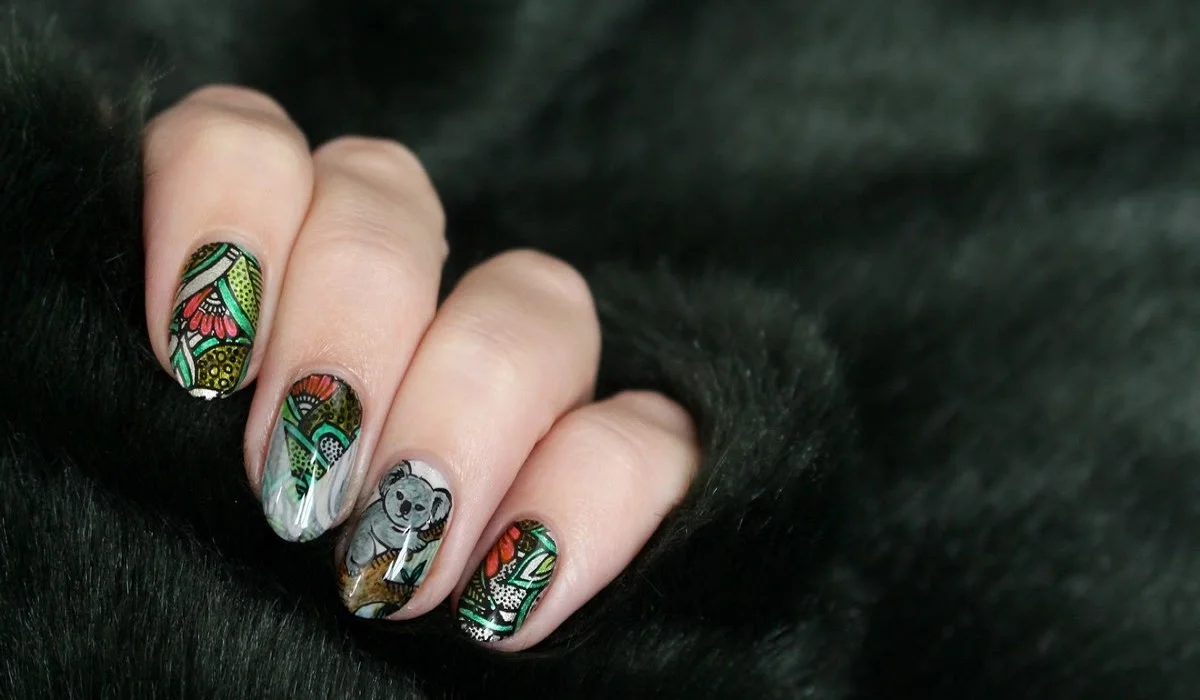
Nail stamping is not just a beauty trend; it’s an art form that allows for personalized, intricate nail designs that were once only achievable by seasoned nail artists. Whether you’re a seasoned nail artist or a beginner, this guide will walk you through the essentials of nail stamping, ensuring your next manicure stands out. Understanding Nail Stamps Nail stamps are innovative tools designed to transfer designs from etched plates to your nails, creating detailed and precise nail art. The key components include the stamping plate, stamper, scraper, and stamping polish. Stamping plates are made from metal or plastic and feature engraved designs. Stampers, typically made from silicone, pick up the polish from these designs. The scraper removes excess polish from the plate, ensuring a clean transfer. Types of Nail Stamps Preparation for Nail Stamping Preparing your nails is crucial for a flawless finish. Start with clean, shaped nails, and apply a base coat to protect your natural nails and enhance polish adherence. Choose a smooth, flat surface for your work area, and lay out all your tools within easy reach. Selecting Your Design When selecting a design, consider the size of your nails and the complexity of the design. Beginners may find simpler designs easier to work with, while more experienced users can explore intricate patterns and layered looks. Choosing the Right Nail Polish for Stamping The success of nail stamping heavily relies on the polish used. Stamping polishes are specifically formulated to be thick and highly pigmented, ensuring a crisp, opaque design. While not all regular polishes work for stamping, metallic and cream polishes often yield good results due to their pigmentation and consistency. Tips for Color Selection Step-by-Step Guide to Nail Stamping Advanced Techniques As you become more comfortable with the basics of nail stamping, explore advanced techniques to elevate your nail art. Troubleshooting Common Issues Aftercare and Maintenance Extend the longevity of your stamped nails by applying a clear top coat to seal in the design. For maintenance, clean your stamping plate and tools with nail polish remover after each use. Avoid using acetone on silicone stampers, as it can cause them to deteriorate. How long do nail stamped designs last? With proper application and aftercare, including a quality top coat, nail stamped designs can last as long as a traditional manicure, typically around one to two weeks. Can nail stamps be used on artificial nails? Absolutely! Nail stamps can be used on both natural and artificial nails. Just ensure the artificial nails are properly prepped and the surface is smooth for stamping. How can I remove nail stamping polish? Nail stamping polish can be removed with regular nail polish remover. However, for long-lasting designs sealed with a gel top coat, you might need a gel polish remover or acetone. Nail stamping opens up a world of creativity and personal expression right at your fingertips. With practice, you can achieve salon-quality designs from the comfort of your home. Embrace the learning curve, and don’t be afraid to experiment with different techniques and styles. Happy stamping!

Diy Haircut Guide: How To Cut Your Own Hair At Home
DIY Haircut Guide: How to Cut Your Own Hair at Home

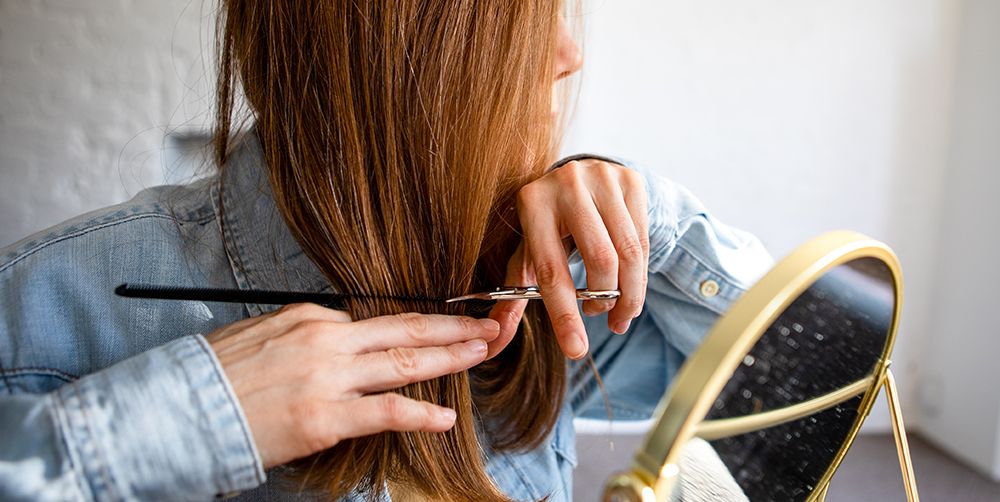
Whether you’re looking to save time and money or simply prefer the convenience of a DIY approach, cutting your own hair at home is a practical skill to have. While leaving major hair transformations to professional stylists is advisable, trimming your hair or giving yourself a simple haircut can be achieved with the right tools and techniques. In this comprehensive guide, we will walk you through step-by-step instructions on how to cut your own hair, along with helpful tips to ensure a successful and satisfying outcome. Gather the Right Tools:Before you start cutting your hair, gather the necessary tools to ensure a smooth process. You will need:Sharp haircutting scissors: Invest in a good pair of professional scissors designed for hair cutting. Using regular scissors can lead to uneven cuts and split ends. Hair clips or elastics: These will help you section your hair for easier cutting. Comb: A fine-toothed comb will assist in detangling and parting your hair. Mirror: A large, handheld mirror and a stationary mirror will allow you to see your hair from different angles during the cutting process. Spray bottle with water: Mist your hair with water to dampen it slightly before cutting. This makes the hair more manageable and prevents excessive flyaways. Decide on the Haircut:Decide on the type of haircut you want before you begin. For simple trims or maintaining your current hairstyle, follow your previous cut as a reference. If you plan to make significant changes to your hair, it’s best to seek guidance from a professional stylist to avoid potential mishaps. Start with Clean, Dry Hair:Cutting your hair when it’s clean and dry ensures more accurate results. Wash and dry your hair thoroughly before starting the haircutting process. Section Your Hair:Divide your hair into manageable sections using hair clips or elastics. Start by parting your hair down the center and then create additional sections horizontally. Pin each section securely to keep the hair you’re not cutting out of the way. Trim the Ends:For a simple trim, work with one section at a time. Take a small subsection of hair and comb it straight down. Hold the hair between your fingers and trim the ends evenly, following your desired length. Make small, cautious cuts to avoid removing too much hair at once. Create Layers (Optional):If you desire layers, you can achieve them at home with careful technique. To create face-framing layers, take a section of hair from the front and hold it at a 45-degree angle away from your face. Trim the hair diagonally, working from the shortest point to the longest point. Repeat this process on both sides of your face for balanced layers. Check for Evenness:After cutting each section, release the hair and check for evenness and balance. Use your mirror to view your hair from different angles, making any necessary adjustments to ensure a uniform cut. Tackle Bangs (Optional):If you have bangs, trim them carefully by combing them straight down over your forehead. Hold the scissors vertically and make small, gentle cuts to the desired length. Remember that it’s better to start with…

The Importance Of Different Moisturizers For Day And Night: Here's Why
The Importance of Different Moisturizers for Day and Night: Here’s Why

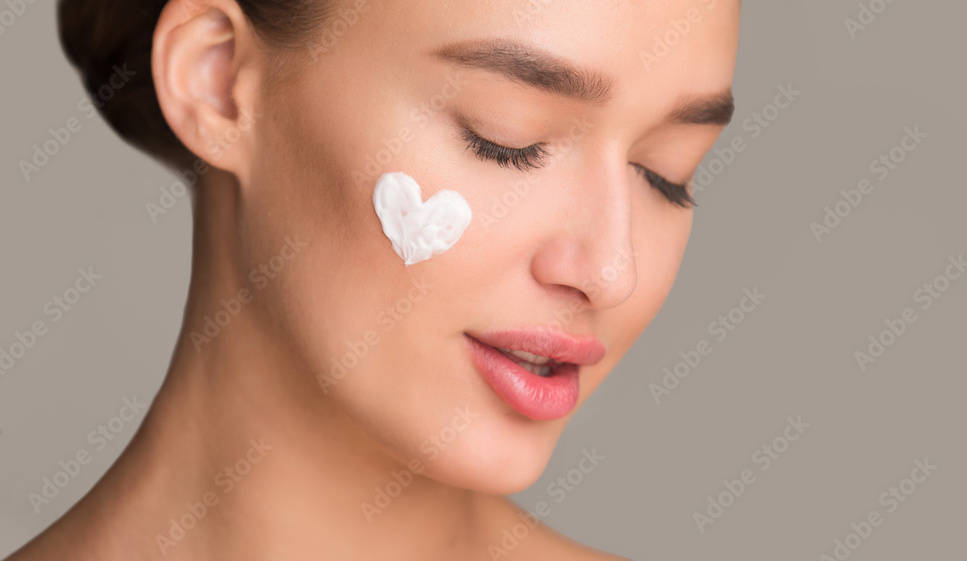
Moisturizers are an essential part of any skincare routine, providing hydration and nourishment to the skin. However, have you ever wondered why there are separate moisturizers designed specifically for daytime and nighttime use? The answer lies in the different needs of our skin throughout the day and night. In this article, we will explore the importance of using different moisturizers for day and night, and how these specialized products can optimize your skincare routine for healthy and glowing skin. Daytime Moisturizer: Protection and HydrationDuring the day, our skin is exposed to various external aggressors, such as pollution, UV rays, and environmental stressors. A daytime moisturizer serves as a protective barrier, shielding the skin from these harmful elements. It often contains ingredients like antioxidants, SPF, and lightweight hydrating agents to combat free radicals and lock in moisture without feeling heavy or greasy. a. SPF Protection: Many daytime moisturizers include sun protection factor (SPF) to shield the skin from UV radiation. SPF protects against premature aging, sunburn, and reduces the risk of skin cancer. Applying a moisturizer with SPF every morning helps maintain a youthful complexion and prevents sun-induced damage. b. Lightweight Texture: Daytime moisturizers are designed to be absorbed quickly, providing a smooth canvas for makeup application and preventing excessive shine throughout the day. They are often oil-free or have a light, non-greasy texture suitable for wearing under makeup. c. Antioxidants: To combat free radicals produced by pollution and UV exposure, daytime moisturizers frequently contain antioxidants like vitamin C and E. These powerful ingredients neutralize harmful molecules, helping to maintain the skin’s elasticity and reducing the signs of aging. Nighttime Moisturizer: Repair and RenewalNighttime is when the skin’s natural repair and renewal processes are most active. During sleep, the body focuses on cellular regeneration and healing. A nighttime moisturizer is specially formulated to support these processes, providing nourishment and moisture to aid in skin recovery and revitalization.a. Richer Formulas: Nighttime moisturizers typically have richer and more emollient formulas to deeply nourish and replenish the skin. They may contain ingredients like hyaluronic acid, peptides, and retinoids to promote collagen production, reduce fine lines, and improve skin texture. b. No SPF: Unlike daytime moisturizers, nighttime products do not include SPF, as they are not exposed to direct sunlight. This allows the skin to fully absorb and utilize the beneficial ingredients without interference from UV filters. c. Repairing Ingredients: Nighttime moisturizers often include ingredients like ceramides, niacinamide, and plant extracts, which work to strengthen the skin’s barrier, fade hyperpigmentation, and soothe inflammation. Addressing Different Skin Concerns:Using different moisturizers for day and night allows you to target specific skin concerns effectively. During the day, your focus is on protecting the skin from external damage, whereas, at night, you can concentrate on repairing and improving its overall health.a. Daytime: If you have oily or combination skin, a lightweight, oil-free moisturizer with SPF will prevent excess sebum production and provide sun protection without clogging pores. For dry skin, opt for a hydrating moisturizer with added antioxidants to combat environmental stressors. b. Nighttime: A night cream that is more substantial…

Exploring The Revolution Of Magnetic Lashes A Guide To Elevating Your Aesthetic Appeal
Exploring the Revolution of Magnetic Lashes: A Guide to Elevating Your Aesthetic Appeal

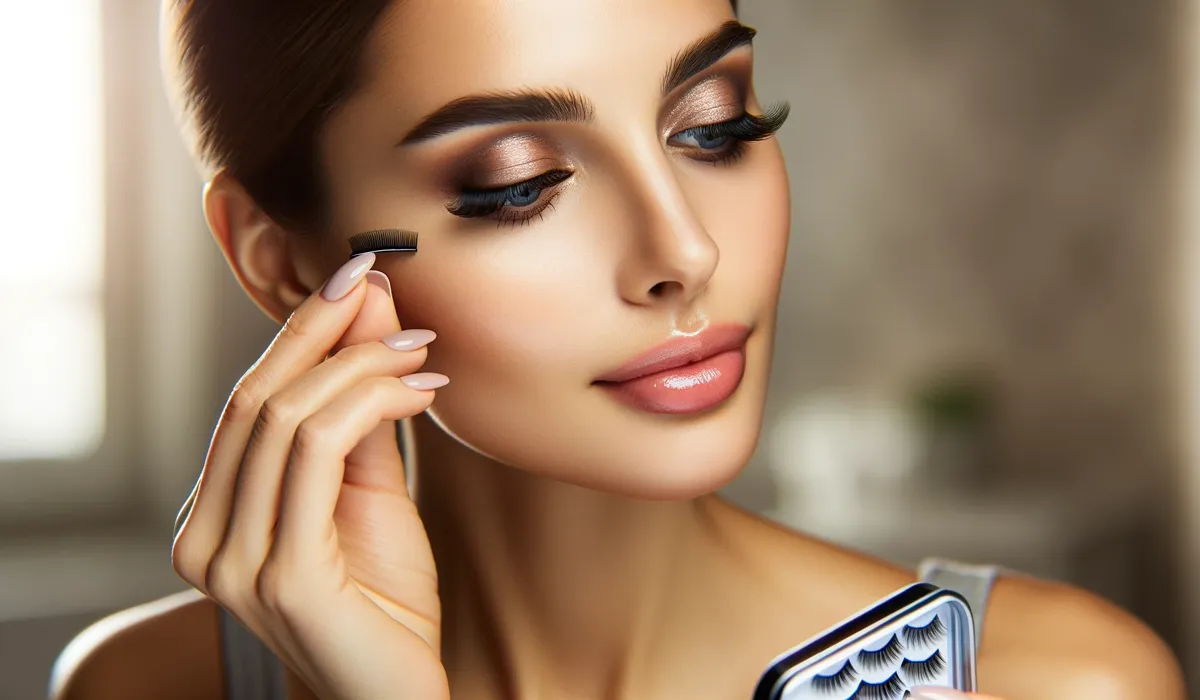
Magnetic lashes have emerged as a groundbreaking solution in the realm of cosmetics, providing a novel method for attaining voluminous, striking eyelashes minus the complications and clutter associated with traditional glue-on extensions. Utilizing minuscule magnets for attachment directly above the natural lash line, these lashes offer a sturdy, comfortable, and reusable option, diverging from the conventional false eyelash approach. This piece explores the essence of magnetic lashes, elucidates their advantages, and demonstrates how they can be seamlessly integrated into your cosmetic regimen to achieve captivating outcomes. Deciphering Magnetic Lashes Standing at the forefront of eye makeup innovation, magnetic lashes dispense with the need for adhesive, instead employing diminutive magnets that cling to a magnetic eyeliner or to each other, enveloping the natural lashes. This mechanism guarantees a firm fit for the entire day, obviating the mess associated with traditional adhesives. Magnetic lashes come in a plethora of forms, including full strips and individual clusters, accommodating a wide array of tastes and aesthetics. Advantages of Magnetic Lashes Magnetic lashes boast several merits. Their simplicity of application renders them suitable for novices. The aspect of reusability stands out, permitting multiple uses from a single pair, thus ensuring economic efficiency. By eliminating the need for lash glue, these lashes reduce the likelihood of allergic reactions, offering a safer and more pleasant usage experience. Furthermore, their diversity in styles provides ample room for creative makeup expressions. Application Technique for Magnetic Lashes The application of magnetic lashes is uncomplicated and becomes intuitive with practice. It generally involves the application of magnetic eyeliner along the lash line, followed by attaching the magnetic lashes to the dried liner. For the sandwich-type lashes, precise placement directly on the natural lashes is crucial. Achieving a flawless look requires allowing the magnetic eyeliner to fully dry and employing a lash applicator for enhanced accuracy. Magnetic Versus Traditional Lashes: A Comparative Overview In comparing magnetic to traditional glue-on false lashes, notable distinctions include ease of application and removal for magnetic lashes, mitigating the risk of harming natural lashes. They also tend to provide a more reliable and enduring hold, eliminating concerns over detachment or displacement. Nonetheless, traditional lashes may present a broader selection in terms of materials and designs. Selecting Suitable Magnetic Lashes Choosing appropriate magnetic lashes involves assessing aspects such as length, volume, and design to complement your eye shape and desired appearance optimally. Prioritizing lashes made with superior magnets and materials is crucial for ensuring comfort and longevity. Maintenance and Upkeep of Magnetic Lashes Extending the life of magnetic lashes requires proper maintenance, including gentle cleansing post-use, safe storage in a dedicated case, and avoiding contact with water or makeup removers that could damage the magnets. Addressing Common Challenges with Magnetic Lashes Frequent issues encountered with magnetic lashes, such as application difficulties and discomfort, can typically be resolved through practice, correct placement, and selecting lashes that suit your eye shape. The Underlying Science of Magnetic Lashes The magnetic elements in these lashes are engineered to balance strength for retention and gentleness to avoid discomfort. Safety evaluations confirm that, when utilized correctly,…

Mastering The Art Of Crimping: A Comprehensive Guide To Correct Usage
Mastering the Art of Crimping: A Comprehensive Guide to Correct Usage

Crimping is a fundamental technique used across various industries and DIY projects to create secure and reliable connections between wires, cables, or components. Whether you’re working with electronics, automotive repairs, or crafting jewelry, understanding how to use a crimper correctly is essential to ensure the integrity and longevity of your connections. This comprehensive guide will walk you through the step-by-step process of using a crimper effectively, along with essential tips and best practices. Understanding Crimping Crimping is the process of mechanically compressing a connector or terminal onto a wire to establish a secure electrical connection or physical attachment. This technique ensures a strong bond that resists vibrations, corrosion, and other environmental factors. Crimping is commonly used in applications such as electrical wiring, network cables, automotive wiring harnesses, and more. Using the right tools and techniques is crucial to achieving consistent and reliable results. Selecting the Right Crimper Before you begin, it’s vital to choose the right crimper for your specific application. There are various types of crimpers available, each designed for different connectors and wire sizes. Common types of crimpers include: Wire Crimpers: Used for electrical connections and available in various sizes to accommodate different wire gauges. Coaxial Cable Crimpers: Designed for attaching connectors to coaxial cables, commonly used in telecommunications and audio/video installations. Terminal Crimpers: Used to secure terminals onto wires, often found in automotive and industrial applications. Modular Crimpers: Specifically designed for Ethernet cables and connectors, ensuring accurate terminations in networking projects. Step-by-Step Guide to Proper Crimping Follow these steps to ensure you’re using a crimper correctly: Prepare the Wire: Strip the insulation off the wire end to expose the bare conductor. The length of exposed wire should match the length of the connector’s barrel or terminal. Prepare the Connector: Insert the stripped wire end into the appropriate terminal or connector. Make sure the wire fits snugly, without any excess sticking out. Position the Crimper: Place the connector and wire into the appropriate slot or cavity of the crimper. Ensure that the connector is properly aligned with the crimping jaws. Apply Pressure: Squeeze the crimper’s handles firmly and evenly. The tool’s jaws will compress the connector, creating a strong and secure connection. Avoid using excessive force, as it could deform or damage the connector. Inspect the Crimp: After crimping, inspect the connection visually. The crimped terminal should tightly grip the wire without any gaps. Ensure that the wire is properly crimped and that the insulation is not damaged. Tips for Successful Crimping Use High-Quality Connectors: Invest in reliable connectors and terminals from reputable manufacturers. Quality components are essential for achieving long-lasting and reliable connections. Choose the Right Wire Size: Match the wire gauge with the appropriate terminal size. Using undersized or oversized connectors can result in poor connections and potential safety hazards. Practice Proper Technique: Maintain steady pressure while crimping, and avoid jerky or uneven movements. Consistent pressure ensures a uniform and secure connection. Perform a Pull Test: After crimping, perform a gentle tug on the wire to ensure it’s securely attached to the connector. If the wire easily detaches,…