Unlock the Shine: The Benefits of Using Natural Oils in Your Hair Care Routine

The quest for lustrous, healthy hair is universal, yet the paths to achieve it are diverse. Among the most effective routes is the inclusion of natural oils in your hair care regimen. These oils, extracted from fruits, nuts, and seeds, are packed with nutrients that deeply nourish the scalp and hair, promoting overall health and vitality.
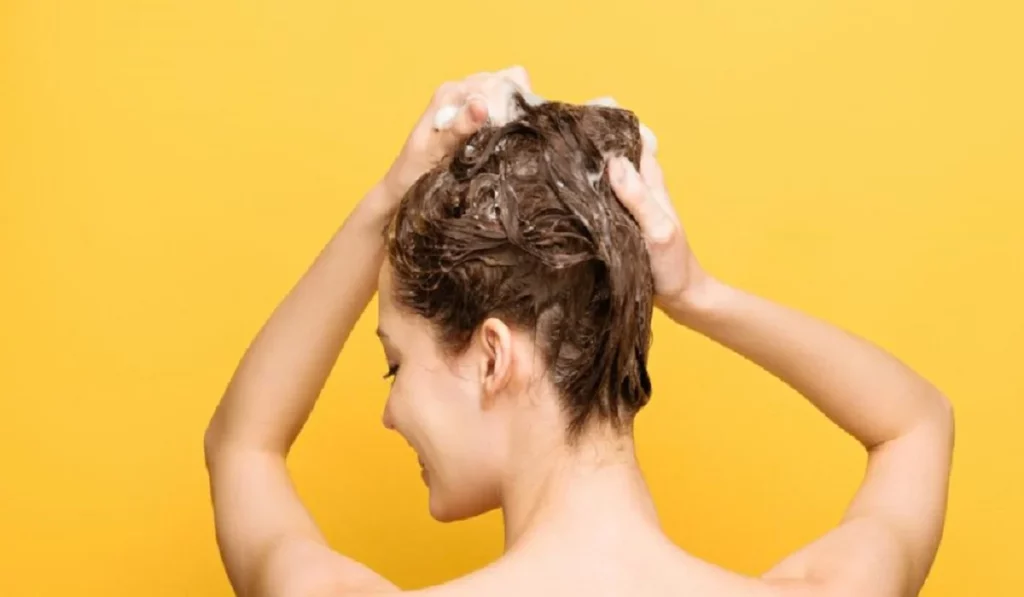
Unlock The Shine The Benefits Of Using Natural Oils In Yourhair Care Routine


Types of Natural Oils and Their Benefits

Coconut Oil: A Deep Conditioner

Rich in fatty acids, coconut oil penetrates the hair shaft to moisturize and protect against environmental damage, making it ideal for deep conditioning treatments.

Argan Oil: For Frizz and Shine

Dubbed ‘liquid gold,’ argan oil is renowned for its ability to tame frizz, add shine, and soften hair, thanks to its high content of antioxidants and vitamin E.

Jojoba Oil: Mimics Natural Hair Sebum

Jojoba oil’s molecular structure closely resembles that of human sebum, making it exceptionally effective in regulating oil production and maintaining scalp health.

How to Incorporate Natural Oils into Your Routine

Pre-Shampoo Treatments

Applying oils before shampooing can prevent the shampoo from stripping hair of its natural oils, resulting in less dryness and breakage.

Leave-in Conditioners

A few drops of oil can be used as a leave-in conditioner to smooth hair cuticles and add shine without the heaviness of traditional conditioners.

Scalp Massages

Regular scalp massages with natural oils can stimulate blood circulation, promoting hair growth and scalp health.

Natural Oils for Different Hair Types

Oils for Curly Hair

Curly hair benefits from heavier oils like castor or avocado oil, which provide the moisture and definition curls crave.

Unlock The Shine The Benefits Of Using Natural Oils In Your Hair Care Routine


Oils for Straight Hair

Lighter oils such as argan or sweet almond oil are perfect for straight hair, offering shine and frizz control without weighing it down.

Oils for Color-Treated Hair

Sunflower and grapeseed oils are excellent for color-treated hair, protecting against color fade and adding vibrancy.

Combating Common Hair Problems with Natural Oils

Dandruff Solutions

Tea tree oil, with its antifungal properties, can be mixed with a carrier oil to alleviate dandruff and soothe the scalp.

Preventing Split Ends

Regular application of oils can seal hair cuticles, preventing split ends and minimizing breakage.

Tackling Hair Loss

Rosemary and peppermint oils are known to stimulate hair growth when massaged into the scalp, offering a natural remedy for hair thinning.

DIY Natural Oil Hair Care Recipes

Homemade Deep Conditioning Treatment

Mix coconut oil with honey and a few drops of essential oil for a nourishing deep conditioning treatment.

Natural Oil Serum for Shine and Frizz Control

Combine argan, jojoba, and a few drops of lavender oil for a homemade serum that combats frizz and adds shine.

The Science Behind Natural Oils and Hair Health

Nutrient Absorption and Hair Follicle Nourishment

Natural oils are rich in essential fatty acids and vitamins that are crucial for hair health, penetrating the hair shaft to nourish and strengthen from within.

The Role of Fatty Acids and Antioxidants

The fatty acids in natural oils help to rebuild the lipid layer of the hair, while antioxidants protect against environmental damage.


Pros and Cons of Using Natural Oils

Advantages of Natural Oils

Natural oils offer a chemical-free alternative to conventional hair products, providing deep nourishment and addressing specific hair concerns.

Potential Drawbacks and How to Avoid Them

Overuse of oils can lead to buildup. To avoid this, apply oils sparingly and wash thoroughly with a clarifying shampoo when needed.

Testimonials and Success Stories

Real-life stories from individuals who have transformed their hair health through the use of natural oils can inspire and guide newcomers to natural oil hair care.

Embracing natural oils in your hair care routine can lead to transformative results. With their diverse benefits and versatility, these oils not only enhance the appearance of your hair but also fortify it against daily challenges. By choosing the right oil for your hair type and concerns, you can unlock the secret to healthy, vibrant hair.

  1. What natural oils are best for hair growth?
    • Certain oils like castor oil, peppermint oil, and rosemary oil are known for their ability to stimulate hair growth. They improve blood circulation to the scalp, which in turn promotes healthier hair follicles.
  2. Can I use natural oils on oily hair?
    • Yes, even if you have oily hair, you can benefit from natural oils. Jojoba oil is particularly beneficial as it mimics the natural sebum production of the scalp, helping to regulate oil production.
  3. How often should I apply natural oils to my hair?
    • The frequency can vary depending on your hair type and condition. A general recommendation is once or twice a week, but those with very dry or damaged hair might benefit from more frequent applications.
  4. Can natural oils replace my conditioner?
    • Natural oils can be used as a supplement to your conditioner for added moisture and nutrients. However, they may not completely replace the detangling and smoothing effects of conventional conditioners for everyone.
  5. Do natural oils help with dandruff?
    • Yes, oils like tea tree oil and coconut oil have antimicrobial properties that can help combat dandruff-causing yeast on the scalp, providing relief from flakiness and itchiness.
  6. How long should I leave natural oils in my hair?
    • For deep conditioning, you can leave oils in your hair for a few hours or even overnight. If you’re using oil as a pre-shampoo treatment or scalp massage, 15-30 minutes should be sufficient.
  7. Can using natural oils make my hair greasy?
    • If used in excess, natural oils can make your hair feel greasy. It’s important to use only a small amount and apply it mainly to the ends of your hair and the scalp, avoiding the roots if you have naturally oily hair.
  8. Are there any side effects of using natural oils in my hair?
    • While natural oils are generally safe for most people, some individuals may experience allergic reactions. It’s always a good idea to perform a patch test before using a new oil extensively.
  9. Can I use cooking oils for hair care?
    • While some cooking oils like coconut oil and olive oil can be used for hair care, it’s best to opt for cold-pressed, unrefined versions of these oils for the most benefits.
  10. How can I remove natural oils from my hair effectively?
    • To remove excess oil, you may need to shampoo your hair twice. Consider using a clarifying shampoo if regular shampoo doesn’t fully remove the oil.

These FAQs aim to address common questions and concerns people have when incorporating natural oils into their hair care routine, offering practical advice for achieving healthier, more beautiful hair.


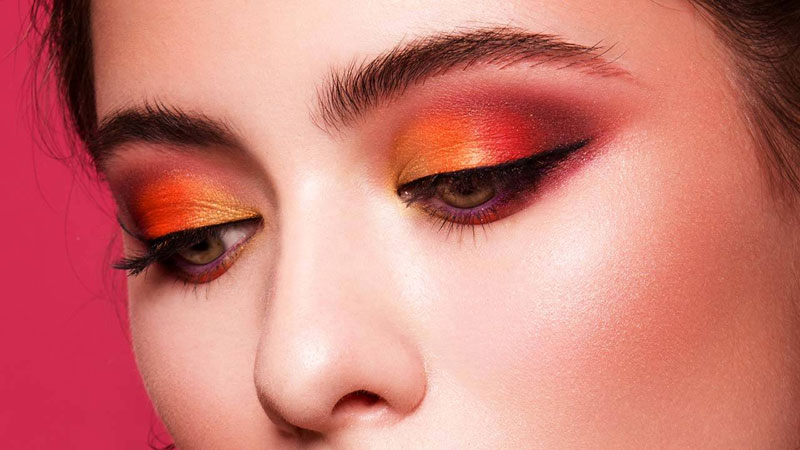

How To Achieve The Tiktok Vanilla Girl Makeupaesthetic
How to Achieve the TikTok Vanilla Girl Makeup Aesthetic

In an era where TikTok dictates the pulse of beauty and fashion trends, the Vanilla Girl makeup aesthetic has emerged as a coveted look. It’s a celebration of simplicity and natural beauty, steering away from the bold and dramatic to embrace the understated elegance of minimal makeup. This aesthetic is all about enhancing your natural features in the most subtle way. Whether you’re a seasoned makeup enthusiast or new to the beauty scene, achieving the Vanilla Girl look can be simple with the right approach. This comprehensive guide will walk you through the essential steps to mastering this effortlessly chic look, turning you into a TikTok sensation in no time. Start with a Flawless Base Achieving the Vanilla Girl makeup look begins with perfecting your canvas. Cleanse and moisturize your face to ensure a smooth and hydrated base. Opt for a tinted moisturizer or a lightweight foundation that seamlessly matches your skin tone for that barely-there effect. Application is key; use a damp beauty sponge or a foundation brush for an even and natural finish. A good base not only enhances the makeup but also cares for your skin underneath. Embrace Neutral Shades The essence of the Vanilla Girl aesthetic lies in the palette of neutral tones that complement your natural skin tone. Earthy hues of brown, beige, and nude in matte finishes are your best friends for eyeshadows and blushes. For the lips, a hint of gloss over a nude lipstick or a swipe of tinted lip balm adds the perfect touch of understated glamour. Selecting the right shades is crucial for maintaining the authenticity of the aesthetic while playing up your best features. Illuminate Your Natural Features Highlighting is a game-changer in the Vanilla Girl makeup routine. Use a highlighter that’s just a shade lighter than your skin tone and possesses a subtle shimmer, not glitter. The key areas to focus on are the tops of your cheekbones, the bridge of the nose, and the cupid’s bow. A gentle application will lend you a soft, ethereal glow that defines the Vanilla Girl look. Subtly Defined Eyes For eyes that speak volumes without saying a word, stick to neutral eyeshadows to define the crease and the outer corners. A swipe of brown or black mascara adds definition to your lashes, making your eyes appear wider and more awake. Those seeking a bit more depth can lightly line the waterline with a brown or black pencil. Remember, the goal is to enhance, not overshadow, your natural beauty. Natural Brows Are Key Brows frame the face and play a pivotal role in the Vanilla Girl aesthetic. The focus here is on full, well-groomed brows that look as natural as possible. Fill in sparse areas with a brow pencil or gel, mimicking the natural hair direction. The shade chosen should closely match your hair color to avoid a harsh contrast, keeping the overall look soft and coherent. Seal with a Dewy Finish Lock in your makeup while adding a burst of hydration with a dewy setting spray. A fine mist enriched with glycerin or…

Mastering The Inner Corner Eyeliner Trend: A Step By Step Guide
Mastering the Inner Corner Eyeliner Trend: A Step-by-Step Guide

The inner corner eyeliner trend has taken the beauty world by storm, adding a touch of brightness and glamour to any eye look. This trendy technique involves applying eyeliner to the inner corners of the eyes to create a wide-eyed and radiant appearance. Whether you’re a makeup enthusiast or a beginner, mastering the inner corner eyeliner is simple and can elevate your eye makeup game instantly. In this comprehensive guide, we will walk you through the three easy steps to pull off the inner corner eyeliner trend flawlessly. Step 1: Gather the Right Tools and Products Before you start applying the inner corner eyeliner, ensure you have the right tools and products on hand: A fine-tipped eyeliner brush or a precision eyeliner pencil: Choose a brush or pencil with a fine tip to create precise lines in the inner corners of your eyes. Gel eyeliner or liquid eyeliner: These formulas work best for achieving clean and defined lines in the inner corners. Eyeshadow primer or concealer: Prepping your eyelids with a primer or concealer will ensure the eyeliner stays in place and enhances its color intensity. Setting powder or eyeshadow: A setting powder or eyeshadow close to your skin tone will set the primer or concealer and prevent creasing. Optional: Shimmery or metallic eyeshadow: If you want to add a pop of sparkle to your inner corner, opt for a shimmery or metallic eyeshadow in a complementary shade. Step 2: Prep and Prime the Inner Corners Prepping your inner corners is essential to ensure a smooth application and enhance the longevity of the eyeliner. Cleanse your face and eyes: Start with a clean canvas by thoroughly cleansing your face and removing any makeup residue from your eyes. Apply eyeshadow primer or concealer: Gently dab a small amount of eyeshadow primer or concealer on the inner corners of your eyes using your fingertips or a small brush. Blend it evenly to create a smooth base for the eyeliner. Set the primer or concealer: Dust a setting powder or a neutral eyeshadow close to your skin tone over the primed area. This step will set the base and prevent creasing. Step 3: Apply the Inner Corner Eyeliner Now that your inner corners are prepped and ready, follow these steps to achieve the perfect inner corner eyeliner look: Choose your eyeliner color: You can opt for classic black for a bold and defined look, or you can experiment with colored eyeliners to add a fun and unique twist. Dip your brush or eyeliner pencil into the gel or liquid eyeliner: Ensure the brush or pencil is coated evenly with the product. Create the inner corner line: For a subtle and natural look, start by drawing a thin line along the inner corners of your eyes. Begin from the tear ducts and extend the line slightly outwards. For a more dramatic and elongated look, extend the line further towards the middle of your eyelids. Blend or smudge (optional): If you prefer a softer effect, you can gently blend or smudge the eyeliner with a cotton swab…

10 Proven Ways To Achieve Shiny, Healthy Lookinghair
10 Proven Ways to Achieve Shiny, Healthy Looking Hair

Achieving shiny, healthy-looking hair is a goal for many, but it often seems elusive. The key to unlocking lustrous locks lies in a combination of good habits, proper care, and knowing what works best for your hair type. This guide explores ten proven strategies to enhance the health and appearance of your hair, ensuring it shines from the inside out. 1. Regular Trims Preventing Split Ends and Breakage Regular haircuts are crucial to maintaining healthy hair. Trimming every 6-8 weeks helps prevent split ends from working their way up the shaft, causing breakage and dullness. 2. Proper Washing Routine Finding the Right Shampoo and Conditioner Select products tailored to your hair type and concerns. Using the right shampoo and conditioner can make a significant difference in your hair’s health and shine. Washing Frequency Tips Over-washing can strip your hair of natural oils, leading to dryness. Find a washing routine that maintains your hair’s natural balance. 3. Deep Conditioning Treatments Types of Hair Masks and Their Benefits Incorporate deep conditioning treatments into your routine to repair and nourish your hair. Look for masks with ingredients like keratin, argan oil, or shea butter. DIY Natural Hair Masks Explore homemade options like avocado, honey, or coconut oil masks for a natural, chemical-free way to boost moisture and shine. 4. Cold Water Rinse Sealing Hair Cuticles for Extra Shine Finish your wash with a cold water rinse to seal the cuticles, making your hair smoother and more reflective. 5. Protect Hair from Heat Using Heat Protectant Sprays Always apply a heat protectant before using styling tools. This creates a barrier between your hair and high temperatures, preventing damage. Alternatives to Heat Styling Embrace air drying or use heat-free styling methods to give your hair a break from the damage caused by heat styling tools. 6. Healthy Diet for Healthy Hair Nutrients Essential for Hair Health A diet rich in vitamins, minerals, and proteins is vital for hair health. Include foods high in vitamins A, C, D, E, zinc, iron, and omega-3 fatty acids. Foods to Incorporate into Your Diet Salmon, nuts, eggs, and leafy greens are excellent choices for promoting hair strength and shine. 7. Stay Hydrated The Impact of Water Intake on Hair Hydration plays a key role in hair health. Drinking plenty of water ensures your hair stays moisturized from the inside out. 8. Use a Silk Pillowcase Reducing Friction and Breakage Sleeping on a silk pillowcase can reduce hair breakage caused by friction with cotton pillowcases. It also helps retain hair’s natural moisture. 9. Limit Chemical Treatments The Effects of Dyes and Perms Frequent chemical treatments can lead to damage and dullness. Limit these processes and opt for more natural styling methods when possible. Seeking Professional Advice Consult with a hair care professional before undergoing significant chemical treatments to ensure the health of your hair. 10. Natural Oils for Hair Nourishment The Benefits of Oils like Coconut and Argan Natural oils can deeply nourish and restore shine to your hair. They can be used as pre-shampoo treatments or to smooth frizz and add…

Brain Power Challenge

Welcome to the Ultimate IQ Challenge! Are you ready to test your limits? This IQ test is designed to push your analytical skills to their peak. You have 20 minutes to answer 20 carefully crafted questions. Did you know? The average IQ in the U.S. is 98. Can you prove you’re smarter than the average American? Push your boundaries and see where you stand. Challenge yourself and aim for the top! Start the Test

7 Powerful Reasons Why Cancer Treatment Demandsglobalunity
7 Powerful Reasons Why Cancer Treatment Demands Global Unity

In an era where cancer continues to challenge the boundaries of medical science, the call for international cooperation has never been louder. The disease, with its myriad forms and complexities, does not recognize borders, making the global fight against it a shared responsibility. This article delves into the heart of why cancer treatment not only benefits from but requires international collaboration, highlighting the multifaceted approach needed to tackle this global health crisis. The Global Impact of Cancer Cancer remains one of the leading causes of death worldwide, with millions of new cases diagnosed annually. The economic burden of cancer is staggering, affecting not just the healthcare systems but also the productivity and wellbeing of societies. International cooperation offers a beacon of hope in pooling resources, knowledge, and expertise to combat this pervasive disease. Importance of International Cooperation Sharing research and innovation across borders can accelerate the development of new treatments and understanding of cancer. Standardizing treatment protocols globally ensures that patients, regardless of where they live, have access to the best care possible. Such collaboration fosters an environment where breakthroughs are shared, and clinical practices are harmonized for the benefit of all. Challenges in International Collaboration Despite its benefits, international collaboration in cancer treatment faces numerous challenges. Political and economic barriers, along with differences in healthcare infrastructure, can hinder cooperative efforts. However, overcoming these obstacles is essential for the greater good of global health. Case Studies: Success Stories The world has witnessed several success stories where international cooperation has made significant strides in cancer treatment. From cross-border research initiatives to global cancer treatment programs, these examples serve as a testament to what can be achieved when countries work together. Technological Advances in Cancer Treatment Advancements in technology, such as AI and machine learning, are revolutionizing oncology, offering new insights and improving patient outcomes. Telemedicine and remote care have also emerged as crucial components in making cancer care more accessible, especially in remote and underserved regions. Role of International Organizations Organizations like the World Health Organization (WHO) and various NGOs play a pivotal role in facilitating international cooperation in cancer care. Their initiatives help standardize treatments, promote research, and support low-income countries in building their oncology care capacities. Funding International Cancer Research The collaboration between governments and the private sector is crucial in funding cancer research. Innovative funding models, such as crowdfunding, have also gained traction, enabling the public to directly support cancer research initiatives. Educating and Empowering Patients Globally Empowering patients with access to information and support networks is vital in the global fight against cancer. International cooperation can help disseminate knowledge and resources, ensuring patients everywhere can make informed decisions about their care. The Future of Cancer Treatment The future of cancer treatment lies in personalized medicine and preventative strategies. By collaborating internationally, the medical community can work towards these goals, ensuring advancements benefit everyone, regardless of geographic location. Barriers to Accessing Cancer Care Addressing the barriers to accessing cancer care, especially in low-income countries, is imperative. International cooperation can help bridge these gaps, ensuring equitable access to treatments and care…

Exploring The American Manicure: What It Is And How To Get It
Exploring the American Manicure: What It Is and How to Get It

The beauty industry is constantly evolving, and new trends are emerging every day. One of the latest trends to take the world of nails by storm is the American Manicure. While it may sound similar to the French Manicure, there are some key differences that set the two apart. In this article, we will delve into what an American Manicure is, the key differences between it and a French Manicure, and how you can achieve the perfect American Manicure look. What is an American Manicure? An American Manicure is a type of nail treatment that involves shaping and polishing the nails in a way that appears natural and understated. The aim of this type of manicure is to create a clean, well-groomed appearance that looks polished and professional. American Manicures have become increasingly popular in recent years, thanks to their simplicity and versatility. The Key Differences Between American and French Manicures: While the two styles may sound similar, there are some key differences between American and French Manicures that set them apart. One of the main differences is the shape of the nail tip. French Manicures typically have a more pronounced tip that is squared off, while American Manicures have a slightly rounded tip that is more natural-looking. Another difference is the color of the polish used for the tip of the nail. In a French Manicure, the tip is usually painted with a stark white polish, while an American Manicure uses a more subtle shade that closely matches the color of the nail bed. Finally, the thickness of the line used to separate the tip of the nail from the rest of the nail bed is typically thinner in an American Manicure than in a French Manicure. This gives the American Manicure a more natural, blended look. How to Achieve the Perfect American Manicure: If you’re interested in achieving the perfect American Manicure, the good news is that it’s relatively easy to do at home. Here are the steps you’ll need to follow: Step 1: Start by cleaning and shaping your nails. Use a nail file to shape them into a slightly rounded tip and gently buff them to create a smooth surface. Step 2: Apply a base coat to your nails to protect them and ensure the polish goes on smoothly. Step 3: Choose a polish color that closely matches the color of your nail bed. Apply two coats of polish, allowing each coat to dry fully before applying the next. Step 4: Once the polish is dry, use a slightly lighter shade of polish to paint the tips of your nails. You can use a special nail stencil or a steady hand to create a rounded tip. Step 5: Finally, apply a top coat to protect the polish and give your nails a glossy finish. The American Manicure is a popular nail trend that is perfect for those who want a natural and understated look. While it may share some similarities with the French Manicure, there are some key differences that set the two apart. With a little bit…

How To Grow Nails Naturally 11
How to Grow Nails Naturally?

As part of an overall quest for healthy, beautiful nails, faster nail growth is often sought. While genetics, diet, and overall health all play a significant role, natural strategies exist that you can integrate into your routine in order to accelerate this process and accelerate nail growth naturally. This comprehensive guide explores various tactics on how you can naturally accelerate this process so that your nails become an emblematic symbol of vitality and well-being. Before diving into natural methods to stimulate nail growth, it’s essential to gain an understanding of its fundamentals. Nails are composed of protein called keratin and their growth occurs at their nail matrix located beneath the cuticle. Fingernails typically grow about an eighth inch (3mm) every month while toenails grow at slower rates due to factors like age, nutrition and blood circulation affecting growth rate. Protein: essential in producing keratin, the main constituent of nails. Biotin: an excellent B-vitamin known for supporting healthy nails and avoiding brittleness.Iron: Provides oxygen directly to nail matrix, aiding healthy circulation. Vitamin E: an invaluable antioxidant which supports nail health.Omega-3 Fatty Acids: Omega-3s found in fish and flaxseed can aid overall nail health and help strengthen them as a protective factor. Wear Gloves When Engaging in Household Tasks/Activities that May Expose Nails To Harsh Chemicals/Excess Moisture Utilise Acetone-free Nail Polish Removers as This Will Prevent Dryness/Biting: When engaging in household or activities which expose nails to harsh chemicals/moisture exposure, always wear protective gloves. Consequently Castor Oil: Packed full of nutrients and essential fatty acids, castor oil provides nourishment to both nails and cuticles. Gently massage in some onto each of your nails before adding more for best results. Coconut Oil: With its moisturizing properties, coconut oil has long been used to prevent nail breakage and promote growth. A small amount should be massaged onto both cuticles and nails for best results.Horsetail Extract: Horsetail is packed with silica, an essential mineral that supports nail strength and growth. Consult a healthcare provider before considering taking horsetail supplements as recommended above.Lemon Juice: Lemon juice’s acidity provides a powerful boost for strengthening nails. Combine some with olive oil for maximum benefit and soak your fingers for several minutes in this solution to promote overall good health. 8. Improve Overall Wellness:Nail health is closely connected with overall well-being, so adopting an active, nutritious lifestyle will promote strong and vibrant nails. Be sure: Accumulate Sleep: Sufficient restful sleep is crucial to cell renewal and nail cell health, including nail cells. Simplify Stress Management: Prolonged periods of high stress levels can worsen nail issues; consider practicing mindfulness techniques like meditation or yoga to manage them effectively.Regular Exercise increases blood circulation and can assist nail growth. Conclusion: Nurturing Your Nails Naturally Promoting natural nail growth involves adopting an all-encompassing approach that encompasses diet, protection measures and nurturing rituals into daily practice. By including such practices into your regiment, you can create the ideal environment for nail health to flourish – after all, healthy nails reflect overall well-being! So embrace these natural methods of nurturing nails into an expression of vitality and…

Expert Insights And Solutions For Eliminating Ingrown Hairs
Expert Insights and Solutions for Eliminating Ingrown Hairs

Ingrown hairs, a common yet often painful issue, occur when hairs grow sideways or curl back into the skin, leading to redness, inflammation, and possible infection. This detailed guide aims to shed light on the nature of ingrown hairs, explore their causes, and introduce a variety of effective strategies for both prevention and treatment. Deciphering the Phenomenon of Ingrown Hairs Characterized by the sideways growth or curling back of hair into the skin due to clogged follicles with dead skin, ingrown hairs are a widespread concern. Although anyone can suffer from ingrown hairs, those with curly or coarse textures are more prone, especially in areas subjected to regular hair removal like the face, neck, underarms, legs, and bikini line. Root Causes of Ingrown Hairs The act of hair removal, whether through shaving, waxing, or plucking, stands as the chief culprit for ingrown hairs. The type of skin, particularly oily or thick, may further predispose individuals to this condition by facilitating follicle clogging. Additionally, tight garments and friction can aggravate the situation, trapping hairs under the skin. Strategies to Forestall Ingrown Hairs Adopting correct hair removal practices is pivotal in averting ingrown hairs. Employing a sharp razor, shaving in the hair growth direction, and using a gentle shaving cream are key. Exfoliation plays a vital role in eliminating dead skin and ensuring proper hair growth. Selecting hair removal products that align with your skin type can also significantly reduce irritation. Eradicating Ingrown Hairs For those grappling with ingrown hairs, an array of home-based and clinical solutions are available. Home-Based Remedies for Ingrown Hairs Applying warm compresses can soften the skin, facilitating the emergence of the hair. Sugar scrubs can mildly exfoliate the skin, whereas essential oils like tea tree offer antiseptic benefits to diminish inflammation and avert infections. Clinical Interventions for Ingrown Hairs Techniques such as laser hair removal and electrolysis present more permanent answers by curbing hair growth and lessening ingrown hair occurrences. Chemical peels are effective in exfoliating dead skin and preventing follicle blockages. Pharmacy Solutions Applying creams with salicylic acid or benzoyl peroxide can mitigate inflammation and address infections in ingrown hairs. Products designed for exfoliation and serums to prevent ingrown hairs are specifically formulated to stop hairs from growing inward. Importance of Exfoliation Consistent exfoliation is crucial in warding off ingrown hairs by clearing dead skin that can ensnare hairs. Both manual and chemical exfoliants prove beneficial, yet selecting a suitable type for your skin to avoid irritation is essential. Post-Removal Care and Skin Recovery Post-extraction, maintaining cleanliness and hydration in the affected area is vital. Steer clear of tight-fitting clothes to reduce friction and irritation. Using a soothing balm or lotion can aid in healing and forestall future ingrown hairs. Consulting a Healthcare Provider Should signs of infection like pus, severe discomfort, or fever arise, seeking medical counsel is crucial. Persistent ingrown hairs that defy home-based treatments may necessitate professional care. Although ingrown hairs are bothersome, adopting appropriate preventative measures and treatments can lead to smooth, trouble-free skin. Whether through at-home remedies, clinical treatments, or over-the-counter products, grasping…