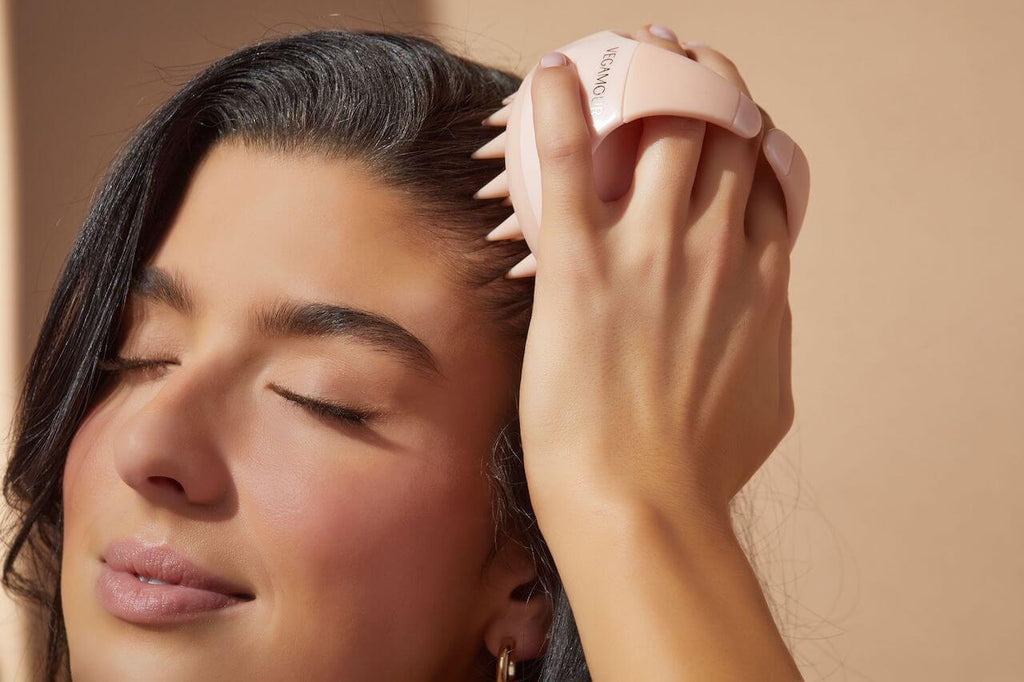
The Hidden Dangers of Sleeping with Wet Hair

Sleeping with wet hair is a common practice for many, often seen as a harmless shortcut in our nightly routines. However, this habit can lead to a variety of health risks and physical consequences for both your scalp and hair. This article delves into the science behind why sleeping with wet hair is detrimental, debunks common myths, and offers actionable advice for healthier hair care practices.

The Risks And Consequences Of Sleeping With Wethair


Understanding the Science

Hair undergoes significant changes when it’s wet. Water causes hair strands to swell, making them weaker and more susceptible to damage. As you move in your sleep, the friction between your hair and the pillow can lead to breakage and split ends. This section explains the biology of hair and how its interaction with water at night can be harmful.

Health Risks Associated with Wet Hair and Sleep

A wet scalp can create an ideal environment for fungal infections and dandruff. The moisture trapped close to the skin can disrupt the natural balance of your scalp, leading to conditions such as tinea capitis or seborrheic dermatitis. Additionally, the physical stress placed on weakened hair can accelerate hair loss and thinning. Here, we’ll explore these risks in detail, providing insights into how they can affect your overall scalp health and what you can do to mitigate them.

Physical Consequences

Beyond the health implications, sleeping with wet hair has several physical repercussions. We’ll discuss the phenomenon of hygral fatigue, where hair becomes fatigued from the constant swelling and drying cycle. This condition weakens the hair shaft, leading to increased fragility and reduced elasticity. Additionally, tangled and matted hair becomes more common, making morning grooming a challenge and further contributing to hair damage.

Myth vs. Reality: Debunking Common Misconceptions

Common lore suggests that going to bed with wet hair can cause colds or induce severe headaches. This section separates fact from fiction, examining the scientific evidence (or lack thereof) behind these claims. Understanding the truth can help alleviate unnecessary concerns and focus on the real risks involved.

Preventative Measures and Best Practices

Preventing damage begins with proper hair care before bed. We’ll cover effective drying techniques that minimize damage, recommend protective hairstyles to reduce friction and breakage, and suggest products designed to protect and nourish your hair overnight. Implementing these practices can significantly reduce the adverse effects of sleeping with wet hair.

Alternatives to Sleeping with Wet Hair

Sometimes, washing your hair at night is unavoidable. This section offers advice on quick-drying methods and products that can expedite the drying process, reducing the time your hair remains wet before you go to sleep. Additionally, we’ll provide tips for overnight hair care that can help mitigate the risks associated with going to bed with damp hair.

The Risks and Consequences of Sleeping with Wet Hair

Summarizing the key points discussed, this section reinforces the importance of keeping your hair dry before bedtime. By understanding the potential risks and implementing preventative measures, you can protect your hair and scalp from the adverse effects of sleeping with wet hair.

These commonly asked questions will be answered with clear, concise information, providing readers with practical advice for managing their nighttime hair care routine.

The Risks And Consequences Of Sleeping With Wet Hair

While the habit of going to bed with wet hair might seem harmless, it poses several risks to both your scalp and hair health. By understanding these risks and adopting healthier hair care practices, you can avoid the hidden dangers of sleeping with wet hair. Protecting your locks starts with awareness and ends with action, ensuring your hair remains strong, healthy, and beautiful.

It’s broadly advised against going to bed with wet hair due to various potential hazards, including the possibility of scalp infections, increased hair fragility, and hygral fatigue. If you find yourself needing to sleep with damp hair, taking precautions like utilizing a silk or satin pillowcase to lessen friction and applying leave-in conditioners to diminish harm can be beneficial. It’s also wise to ensure your hair is just mildly damp and not thoroughly wet to reduce risks.

Sleeping with wet hair doesn’t directly lead to hair loss, but it can indirectly contribute to conditions fostering increased hair thinning and breakage over time. Damp hair is more prone to damage, and rubbing against the pillow can cause strands to break. Moreover, a moist scalp can be an inviting environment for fungal growth, which can aggravate scalp conditions and potentially accelerate hair loss.

To avoid the pitfalls of sleeping with wet hair, aim to dry your hair thoroughly before hitting the pillow. Employing a microfiber towel to softly dab away moisture can greatly decrease drying time while avoiding harm. Utilizing a heat protectant followed by a blow dryer on a gentle setting can further hasten drying. Alternatively, for those avoiding heat, letting your hair air-dry well before bedtime or using products that speed up drying can be effective tactics.

Certain hair types, especially those that are fine or fragile, face greater risks from sleeping with wet hair due to their inherent susceptibility to breakage. Individuals with chemically altered or colored hair should also exercise extra caution, as their hair is already more prone to moisture and friction damage.

Indeed, using protective hair products like leave-in conditioners, serums, and oils can offer a safeguard for your hair during sleep. These products work by sealing the cuticle, retaining moisture, and reducing friction, thereby lowering the likelihood of damage. Selecting products that align with your hair type and applying them as recommended is crucial to avoid overburdening your hair or causing scalp problems.

Implementing appropriate nighttime hair care routines can profoundly impact preserving your hair’s health and strength. By recognizing the dangers of sleeping with wet hair and taking steps to counteract these risks, you can ensure your hair remains healthy and robust.


Tips For Growing Long, Healthy And Beautiful Hair
Tips for Growing Long, Healthy and Beautiful Hair

Across cultures and ages, long, lush locks symbolize beauty and vitality. While genetics play a crucial role in determining the texture and length of your hair, adopting specific strategies and practices can significantly influence its health and growth. This guide unveils the secrets to nurturing long, beautiful hair, offering insights applicable to every hair type, from straight to curly. Embark on a transformative journey towards achieving the hair of your dreams. Understanding the Science of Hair Growth Hair growth unfolds in three distinct phases, each critical to the cycle of shedding and regeneration: Recognizing that factors like genetics, nutrition, lifestyle, and environment influence hair growth is pivotal. While some elements remain beyond your control, others can be optimized to foster healthier, more vibrant hair. Strategies for Promoting Luxuriant Hair Growth Weaving the Dream of Radiant Hair into Reality Achieving long, healthy, and beautiful hair is a holistic journey that intertwines nutrition, dedicated care, and consistent maintenance. By integrating these strategies into your routine, you not only enhance your hair’s health and appearance but also contribute to your overall well-being. Let your hair reflect your inner health and beauty—start your journey towards luxurious locks today and embrace the transformation that follows. Remember, the path to beautiful hair is not just about external treatments; it’s a reflection of your lifestyle, diet, and the care you invest in yourself. Prioritize your hair health as an integral part of your self-care regimen and watch as your hair flourishes, becoming a testament to your dedication and love.

How To Wear Crystal Makeup: Tips And Tricks For A Glamorous Look
How to Wear Crystal Makeup: Tips and Tricks for a Glamorous Look

Crystal makeup has become a popular trend in recent years, and it’s not hard to see why. The shimmering, sparkling effect of crystals on the face can add a touch of glamour and elegance to any makeup look. If you’re interested in trying out this trend, there are a few things you need to know. In this article, we’ll go over some tips and tricks for how to wear crystal makeup like a pro. What is Crystal Makeup? First, let’s define what we mean by crystal makeup. This refers to any makeup look that incorporates crystals or other glittery, sparkly materials onto the face. This can range from subtle touches of shimmer to full-on, glittery glam. Some common types of crystal makeup include: Crystal eyeliner: This involves using a liquid liner with tiny crystals embedded in it to create a sparkling line along the eyelid.Crystal highlighter: This involves using a powder or cream highlighter with glittery particles to add a shimmering effect to the high points of the face, such as the cheekbones, brow bone, and cupid’s bow.Crystal lips: This involves using a glittery lip gloss or lipstick with tiny crystals or glitter particles to add a shimmering effect to the lips.Crystal face jewels: This involves using adhesive jewels or rhinestones on the face to create a glamorous, sparkling effect.Now that you know what we mean by crystal makeup, let’s get into some tips and tricks for how to wear it. Choose the Right ProductsThe key to a successful crystal makeup look is choosing the right products. You’ll want to look for makeup products that have glitter or crystals already built in, such as crystal eyeliner or glittery lip gloss. You can also create your own crystal makeup by using loose glitter or crystals and mixing them with a clear adhesive, such as eyelash glue. Prep Your SkinBefore applying any makeup, it’s important to prep your skin properly. This means cleansing your face thoroughly and applying a moisturizer to ensure your skin is hydrated and smooth. You may also want to use a primer to help your makeup stay in place and prevent it from creasing or smudging. Start SmallIf you’re new to crystal makeup, it’s best to start small and work your way up. Begin by adding a subtle touch of shimmer to your makeup, such as a crystal eyeliner or a glittery lip gloss. As you become more comfortable with the look, you can experiment with more elaborate crystal makeup looks. Use AdhesiveWhen applying crystals or glitter to your face, it’s important to use a strong adhesive that will hold them in place. You can use a clear adhesive, such as eyelash glue, or a specialized adhesive designed for use on the face. Be sure to apply the adhesive sparingly and allow it to dry fully before applying the crystals or glitter. Apply in LayersTo create a more dramatic effect, you can apply crystals or glitter in layers. Begin with a thin layer of adhesive and a small amount of crystals or glitter, and then gradually build up the layers…

What To Know About Putting Lotion On Your Face
What to Know About Putting Lotion on Your Face

Nurturing the skin of your face transcends mere indulgence; it embodies an essential regimen. An apt facial lotion not only shields your skin from detrimental pollutants but also preserves its innate equilibrium and wards off the signs of aging prematurely. The plethora of options on the market, however, can render the task of choosing and utilizing face lotion a formidable endeavor. This guide aims to illuminate the intricacies of face lotions, equipping you with the knowledge requisite for navigating your skincare regimen with confidence. Demystifying Skin Types Embarking on your quest for the ideal face lotion necessitates a deep comprehension of your skin’s unique constitution. Skin is predominantly classified into four types: oily, dry, combination, and sensitive, each with distinctive needs and care protocols. Oily Skin: Defined by an overproduction of sebum, resulting in a glossy appearance and potential for acne.Dry Skin: Characterized by a sensation of tightness and possible flaking, due to insufficient moisture.Combination Skin: Exhibits both oily and dry regions, with the T-zone often presenting increased oiliness.Sensitive Skin: Prone to adverse reactions from certain substances, manifesting as irritation, redness, or discomfort.Identifying your skin type is imperative for selecting a lotion that complements rather than contradicts your skin’s inherent behavior. The Significance of Lotion in Skincare Lotions play a pivotal role in moisturizing and safeguarding the skin. Generally lighter and less oily than creams, they are ideally suited for daytime application or for individuals with oily skin. Lotions are instrumental in sustaining the skin’s moisture barrier, averting dehydration, and rendering the skin supple and smooth. Lotion versus Cream: Delineating the Distinction Contrasting lotions, which are aqueous and lightweight, creams are denser and imbue greater hydration, typically catering to dry or maturing skin. The choice between them hinges on your skin type, environmental conditions, and personal preference. Selecting the Appropriate Lotion for Your Face Choosing the correct lotion entails consideration of your skin’s requirements and meticulous examination of ingredient labels. Ingredients to Embrace Hyaluronic Acid: A hydration titan capable of retaining up to 1000 times its weight in water.Glycerin: Draws moisture to the skin, ensuring hydration and a protective layer.Niacinamide (Vitamin B3): Mitigates inflammation, fortifies the skin’s barrier, and balances skin tone.Ceramides: Lipids essential for the skin’s barrier, aiding in moisture retention.Ingredients to EschewAlcohol: May deplete the skin’s natural oils, leading to dryness and irritation.Fragrances: Potential allergens or irritants, particularly for sensitive skin.Parabens: Preservatives with possible hormone-disruptive effects and associated health risks. Guidance for Various Skin Types Oily Skin: Opt for non-comedogenic, oil-free lotions.Dry Skin: Seek lotions rich in hyaluronic acid and ceramides for hydration.Combination Skin: Prefer lotions that maintain balance without aggravating oily or dry zones.Sensitive Skin: Choose lotions free from fragrances and allergens, specifically formulated for sensitive skin. Optimal Application Techniques for Lotion Maximizing the benefits of lotion involves: Seasonal Variations and Skin Care The changing seasons necessitate adjustments in your skincare approach; the chill of winter may induce dryness, whereas summer warmth can heighten oiliness. Adapt your lotion and skincare routine to suit these seasonal demands. Incorporating Sun ProtectionSun defense is paramount. Numerous facial lotions now incorporate SPF, marrying…

Unlock Luxury, The Most Effective Hairmasks To Try
Unlock luxury, The Most Effective Hair Masks to Try

Hair masks are a cornerstone in the quest for healthy, vibrant hair, offering targeted treatments to address a plethora of hair woes. This article sheds light on the importance of hair masks, elucidates the various types available for different hair issues, highlights key ingredients to seek out, shares DIY recipes for those who love a homemade touch, and recommends commercial options that promise to bring about a transformation in your hair health. Hair Masks Why Your Hair Desperately Needs Them Hair masks go beyond the surface, offering deep nourishment and repair unlike everyday conditioners. They’re specially formulated to penetrate deeply into the hair shaft, delivering essential nutrients and moisture to repair, strengthen, and rejuvenate hair from within. The Mechanism Behind Hair Masks These potent treatments work by filling in the gaps in the hair’s cuticle, caused by damage through styling, environmental factors, or chemical treatments. By doing so, they not only restore the hair’s health but also protect it from future damage, making hair more manageable, softer, and shinier. Diverse Types of Hair Masks Finding Your Perfect Match Ingredients to Look For The Building Blocks of Effective Hair Masks DIY Hair Mask Recipes Your Kitchen Could Hold the Key Commercial Hair Masks Worth Trying Expert Picks for Every Hair Concern Applying Hair Masks Correctly Techniques That Maximize Efficacy A step-by-step guide to application ensures that hair masks work as intended, highlighting the importance of sectioning hair, applying evenly from mid-length to ends, and using heat or a shower cap to enhance penetration. Timing Is Everything The frequency and duration of mask application can vary depending on hair type and condition, but generally, once a week for 20-30 minutes is a good rule of thumb for most hair types. The Lifelong Benefits of Regular Use A Commitment to Your Hair’s Health Consistent use of hair masks can lead to sustained improvements in hair texture, strength, and overall health, making them an indispensable part of any hair care routine. The Most Effective Hair Masks to Try Curated Recommendations for Stellar Results This section will detail top selections for hair masks, considering various hair types and concerns, ensuring you find a product or recipe perfectly matched to your needs. Navigating Common Pitfalls Ensuring You Get the Most Out of Your Hair Mask Avoiding common mistakes, such as using too much product or choosing a mask ill-suited for your hair type, can greatly enhance the effectiveness of hair masks. Addressing common questions and misconceptions about hair masks plays a crucial role in educating individuals on their benefits and proper usage. This not only demystifies their application but also highlights their importance in a comprehensive hair care regimen. Let’s dive into some of these questions to provide a clearer understanding: A Journey Towards Healthier Hair Embracing hair masks as part of your hair care routine is an investment in the long-term health and beauty of your hair. Whether you prefer the personalized touch of DIY masks or the convenience of commercial products, the key to unlocking luxurious locks lies in regular, mindful use tailored to your hair’s…

Mastering The Art Of Diy Haircuts An In Depth Tutoriall
Mastering the Art of DIY Haircuts: An In-Depth Tutorial

Embarking on the journey of self-haircutting can seem challenging, yet with adequate preparation, the right set of tools, and mastering various techniques, it transforms into a deeply satisfying endeavor. This tutorial is designed to guide you through every step of the process, whether you aim to maintain your existing hairstyle, experiment with a new look, or simply snip away those split ends. Haircut Preparation Essentials Choosing the Correct Tools A successful self-haircut begins with selecting the appropriate tools. Essential items include razor-sharp hairdressing shears, a fine-toothed comb, hair clips for sectioning, and a mirror. For those considering clipper cuts, selecting a set with a comprehensive range of guard lengths is crucial. Hair Washing and Conditioning To facilitate a smoother cutting process, start with freshly washed and conditioned hair. After washing, towel-dry your hair to eliminate excess moisture, leaving it more pliable and ready for a precise cut. Fundamental Haircutting Techniques Precision Scissor Work Master the correct grip of the scissors and practice executing fine, accurate snips. The cutting angle is pivotal in determining the final look, hence begin with straightforward cuts before advancing to intricate angles. Clipper Usage for Shorter Styles For those desiring shorter or buzzed styles, clippers become an indispensable tool. Initiate the cut with a higher guard setting to preclude removing too much hair abruptly, progressively adjusting to achieve the desired length. Detailed Haircutting Guide Designing Your Hairstyle Prior to cutting, formulate a clear vision of the desired hairstyle, considering factors such as hair texture, facial structure, and maintenance commitment. Hair Sectioning Segmenting your hair into manageable sections simplifies the cutting process. Utilize clips to divide the hair in alignment with your planned hairstyle. Executing the Cut Start with the lower layers, gradually ascending. Exercise restraint in the initial cuts—it’s preferable to trim further if necessary than to remedy overly short lengths. DIY Haircutting Pro Tips Circumventing Common Errors A prevalent error in self-haircutting is removing too much hair simultaneously. Proceed slowly, bearing in mind that it’s more feasible to cut additional length later than to correct an overly short cut. Layering Techniques Incorporating layers can introduce movement and dimension. Begin with the frontal layers, advancing rearward, using your digits as a guide to ensure uniformity. Men’s Haircutting Tutorial Men’s Cutting Tools and Methods Typically, men’s haircuts involve clippers for the sides and back and shears for the top. Acquiring skills in blending these methods is essential for a polished look. Post-Cut Styling The foundation of a stellar hairstyle is a proficient cut. Select styling products that enhance your hair type and intended style. Women’s Haircutting Guide Women’s haircuts range from straightforward trims to elaborate layered cuts, with texture and volume playing pivotal roles. Crafting Layers and Bangs Layers and bangs can significantly alter your appearance. Tailor each cut to complement your facial shape and hair texture for optimal outcomes. Timing Your Trims To maintain hair health and style, aim for trims every 6-8 weeks, varying with hair growth rates. Promoting Hair Health Maintaining hair health simplifies cutting and styling. Develop a care routine that includes balanced nutrition, regular…

Airbrush Makeup: Unveiling The Flawless Finish And How To Achieve It
Airbrush Makeup: Unveiling the Flawless Finish and How to Achieve It

Airbrush makeup has gained popularity in the beauty industry for its ability to create a flawless, long-lasting, and natural-looking complexion. Utilizing an airbrush gun and specialized makeup formulas, this technique offers a seamless application that leaves the skin looking smooth and radiant. In this article, we will explore the world of airbrush makeup, discussing its benefits, application process, and tips for achieving the coveted airbrushed look. Whether you’re a makeup enthusiast or a professional artist, understanding airbrush makeup can elevate your makeup game to new heights. What is Airbrush Makeup?Airbrush makeup is a technique that involves applying makeup through an airbrush gun, which delivers a fine mist of foundation, blush, highlighter, and other makeup products onto the skin. The makeup formula is typically water-based, silicone-based, or a combination of both. This method allows for precise control and even distribution of makeup, resulting in a flawless, lightweight, and natural finish. Benefits of Airbrush Makeup:Airbrush makeup offers several advantages over traditional makeup application techniques: Flawless Finish: The microfine mist of makeup particles creates a seamless, second-skin effect, minimizing the appearance of imperfections and providing a smooth, airbrushed finish. Longevity: Airbrush makeup is known for its exceptional staying power. The formula adheres to the skin, resisting sweat, humidity, and transfer, making it ideal for special occasions, weddings, or events that require long-lasting makeup. Buildable Coverage: The airbrush technique allows for customizable coverage. By layering the makeup in thin, even passes, you can achieve sheer to full coverage, depending on your preferences and the desired look. Lightweight and Natural: Airbrush makeup feels lightweight on the skin, as the ultra-fine particles create a breathable layer. The result is a natural-looking finish that doesn’t look heavy or cakey. The Airbrush Makeup Process:To achieve the airbrushed look, follow these steps:Step 1: Prep the Skin: Start with a clean and moisturized face. Ensure your skin is well-hydrated to create a smooth canvas for makeup application. Step 2: Choose the Right Formula: Select an airbrush makeup formula that suits your skin type and desired finish. Water-based formulas are suitable for most skin types, while silicone-based formulas provide a longer-lasting and more waterproof finish. Step 3: Set Up the Airbrush System: Assemble your airbrush system according to the manufacturer’s instructions. This typically involves connecting the airbrush gun to an air compressor and adjusting the airflow and pressure settings. Step 4: Test the Spray: Before applying the makeup to your face, it’s crucial to test the spray on a tissue or your hand to ensure the desired coverage and adjust the air pressure if necessary. Step 5: Apply Foundation: Begin by applying the foundation. Hold the airbrush gun approximately six to eight inches away from your face and move it in small, circular motions. Start from the center of your face and work outward for an even application. Step 6: Build Coverage: For areas that require more coverage, such as blemishes or redness, apply additional layers of foundation using light, overlapping passes. Gradually build the coverage to achieve your desired look. Step 7: Add Blush, Contour, and Highlight: Once the foundation is applied,…

Unmasking The Types Of Concealers: A Comprehensive Guide To Flawless Coverage
Unmasking the Types of Concealers: A Comprehensive Guide to Flawless Coverage

Concealers are a makeup essential that helps cover imperfections, dark circles, and blemishes, creating a flawless canvas for the rest of your makeup. With a wide range of concealers available, each designed to cater to specific needs and skin types, finding the perfect one can be overwhelming. In this comprehensive guide, we will explore the various types of concealers, their unique formulations, and the best ways to use them to achieve a flawless and radiant complexion. Liquid ConcealerLiquid concealers are the most popular and versatile type of concealer. They come in a liquid form, which makes them easy to blend and build coverage as needed. Liquid concealers are suitable for all skin types and offer a natural finish. They are available in various formulations, including hydrating, matte, and illuminating, catering to different skin concerns. a. Hydrating Liquid Concealer: Best for dry and mature skin, hydrating liquid concealers contain moisturizing ingredients that help prevent the product from settling into fine lines and wrinkles. They provide a dewy finish, adding a healthy glow to the skin. b. Matte Liquid Concealer: Ideal for oily and combination skin, matte liquid concealers offer long-lasting coverage and help control excess oil throughout the day. They provide a natural matte finish, blurring imperfections and creating a smooth complexion. c. Illuminating Liquid Concealer: Also known as radiant or luminous concealers, these are perfect for adding brightness and radiance to the under-eye area. They often contain light-reflecting particles that help reduce the appearance of dark circles and give the skin a youthful glow. Cream ConcealerCream concealers are thicker in texture than liquid concealers, making them suitable for medium to full coverage. They are especially effective in covering stubborn blemishes, scars, and discolorations. Cream concealers work well for normal to dry skin types and may require setting with powder to ensure long-lasting wear. Stick ConcealerStick concealers come in solid form and are easy to apply directly to the skin. They offer medium to full coverage and are perfect for concealing dark spots, acne, and redness. Stick concealers often have a thicker consistency, making them an excellent choice for those with normal to oily skin types. Cream-to-Powder ConcealerCream-to-powder concealers are formulated as creams but transform into a powder-like finish upon application. They work well for those who prefer the ease of cream concealers but desire a matte, powder-like finish. Cream-to-powder concealers are suitable for all skin types, depending on their specific formulations. Color Correcting ConcealerColor correcting concealers are specially formulated to neutralize and cancel out specific skin concerns, such as redness, dark circles, and sallowness. They come in various colors that correspond to the color wheel and work to balance out the targeted skin concern. a. Green Concealer: Green concealers are ideal for neutralizing redness, including acne, rosacea, and blemishes. The green color cancels out the red undertones on the skin, providing a more even complexion. b. Peach/Orange Concealer: Peach or orange concealers are excellent for neutralizing blue or purple undertones, making them effective in covering dark circles and bruises. c. Lavender/Purple Concealer: Lavender or purple concealers help counteract sallow or yellow tones,…

Mastering The Art Of Henna Hair Dye
Mastering the Art of Contouring: Tips and Tricks

The art of contouring has taken the beauty world by storm, offering a technique to enhance and define facial features like never before. This guide breaks down the steps, tips, and tricks to master contouring, transforming your makeup routine and elevating your look to new heights. The Basics of Contouring What is Contouring? Contouring is a makeup technique used to define, enhance, and sculpt the natural features of the face through strategic application of makeup. Tools You Will Need Discover the essential tools for contouring, including brushes, sponges, and the types of makeup best suited for the task. Understanding Face Shapes Identifying Your Face Shape Learn how to identify your face shape to tailor your contouring technique for the most flattering results. Contouring for Each Face Shape Detailed tips on contouring for round, oval, square, heart, and diamond-shaped faces, ensuring every reader can achieve their best look. Step-by-Step Guide to Contouring Preparing Your Skin The importance of a clean, moisturized base for seamless makeup application. Mapping Your Face Guidance on how to map the areas of your face for contouring, highlighting the regions that will help achieve a balanced and defined look. Blending Techniques Techniques and tips for blending contour makeup flawlessly, avoiding harsh lines for a natural finish. Highlighting: The Perfect Pair to Contouring Areas to Highlight Identify the areas of your face that should be highlighted to complement your contouring, enhancing your facial structure effectively. Choosing Highlighter Advice on selecting the right highlighter shade and formula for your skin tone and type. Contouring with Different Products Cream vs. Powder Contour Pros and cons of cream and powder contour products, helping you decide which is best for your skin type and desired finish. How to Choose Tips on choosing the right shades and formulas for your specific contouring needs. Advanced Contouring Techniques Nose Contouring Step-by-step guide to contouring your nose, making it appear slimmer or more defined. Jawline and Neck Contouring How to contour the jawline and neck for a more sculpted and defined appearance. Common Contouring Mistakes and How to Avoid Them Too Dark or Too Light How to select contour shades that match your skin tone to avoid a muddy or overly dramatic look. Mismatched Undertones Understanding the importance of matching the undertone of your contour product to your skin to ensure a natural look. Tips and Tricks for a Natural Contour Blending is Key Emphasize the importance of blending for a seamless, natural contour that enhances rather than overshadows your natural beauty. Less is More Advice on starting with a light hand and building up product gradually to avoid over-contouring. Maintaining Your Contour Throughout the Day Setting Your Contour Recommendations for setting sprays and powders to keep your contour in place all day. Touch-up Tips Quick fixes and touch-up tips for maintaining your contour, even on the go. Mastering the art of contouring can dramatically enhance your makeup routine, offering a sculpted, polished look that highlights your best features. With practice, the right tools, and a bit of creativity, anyone can become proficient in this transformative makeup technique….