Using Eyeshadow as Eyeliner

Transforming eyeshadow into eyeliner isn’t just a clever beauty hack; it’s an art form that unlocks a treasure trove of creative possibilities. With the vast spectrum of eyeshadow colors and textures at your disposal, you can craft eyeliner looks that range from subtly sophisticated to boldly avant-garde. This detailed guide takes you through the process step by step, ensuring that even beginners can master the technique and add a personalized touch to their makeup repertoire.
Using Eyeshadow As Eyeliner


The Foundation: Understanding the Essentials

To embark on this creative journey, you’ll need to gather a few essential tools and products. The right tools not only facilitate ease of application but also influence the precision and longevity of your eyeliner.

  • Flat, Angled Eyeliner Brush: A high-quality, flat, angled brush offers control and precision, allowing you to draw sharp lines and perfect wings.
  • Highly Pigmented Eyeshadow: Choose eyeshadows known for their rich pigmentation and smooth application. Both matte and shimmer finishes can be used, depending on the desired effect.
  • Mixing Medium: A mixing medium enhances the durability and intensity of eyeshadow when used as an eyeliner. For a waterproof finish, opt for a medium specifically designed for eye makeup.
  • A Clean Palette or Mixing Surface: This will be used to blend your eyeshadow with the mixing medium or water, creating a creamy, eyeliner-like consistency.
  • A Drop of Water (Alternative to Mixing Medium): In the absence of a mixing medium, plain water can suffice, though it may not offer the same longevity or intensity.

Choosing Your Eyeshadow: The Color Palette

Your choice of eyeshadow color can dramatically affect your overall look. Consider the occasion, your outfit, and the statement you wish to make. From the deep, sultry tones of midnight blue and rich burgundy to the soft, subtle hues of dusty rose and taupe, each color offers a unique vibe. Additionally, experimenting with finishes can add dimension to your look—metallics for a pop of shine, mattes for depth, and satins for a soft glow.
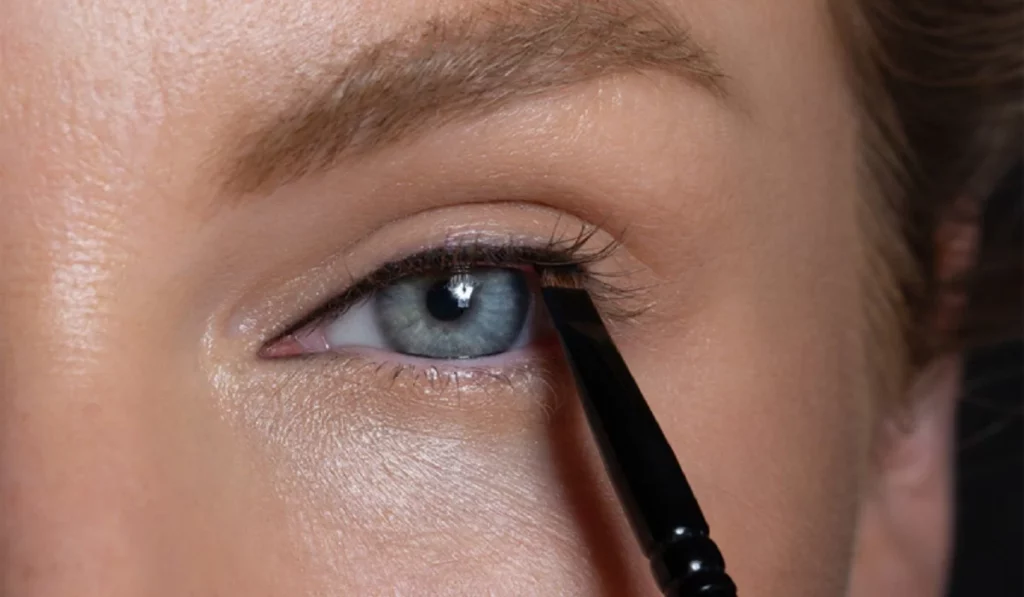
Using Eyeshadow Aseyeliner


Preparing the Eyeliner Mixture: A Step-by-Step Guide

  1. Preparation: Start with a clean, dry mixing palette. If you’re using a mixing medium, place a small drop onto the palette. For those opting for water, have a container nearby to moisten the brush as needed.
  2. Mixing: Dip your angled brush into the chosen eyeshadow, picking up a generous amount of product. Then, mix it with the medium or water on your palette until you achieve a smooth, creamy consistency akin to traditional liquid eyeliner. The goal is to create a blend that’s neither too wet nor too dry, offering smooth application and vibrant color payoff.
  3. Application Techniques for Diverse Looks:
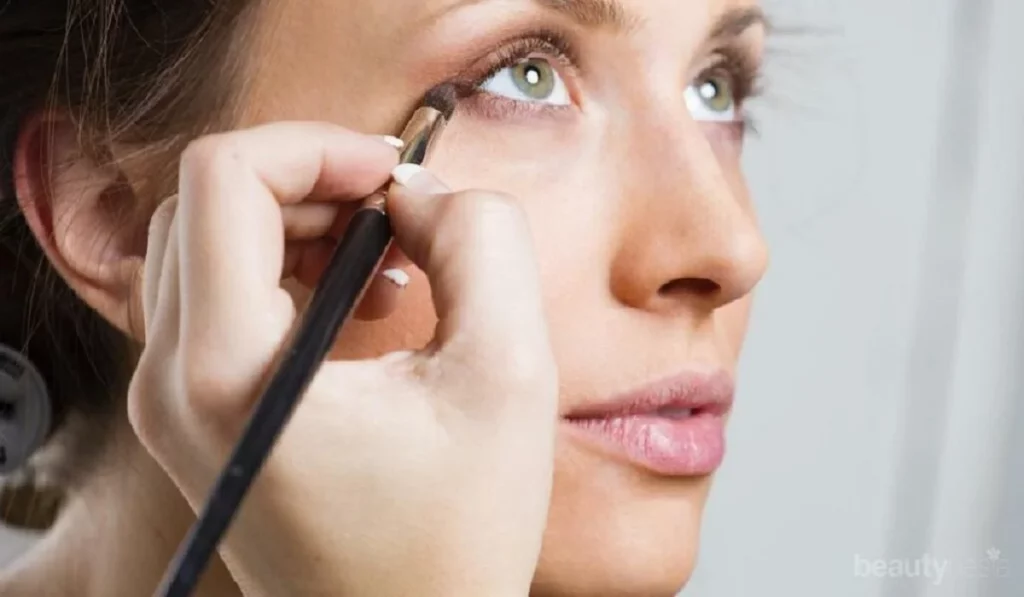
    • For a Defined Cat Eye: Start at the inner corner of the eye, tracing along the lash line with the angled brush. Extend beyond the outer corner in a swift, upward flick to create the iconic wing. The key is to keep the line as close to the lashes as possible for a seamless look.
    • For a Soft, Smudged Effect: After drawing your line, quickly use a small smudging brush to gently blur the edges before the mixture sets. This technique is perfect for creating a smoky eye look that’s effortlessly chic.
    • For a Graphic Eyeliner Look: Use the creamy mixture to draw bold, geometric shapes or intricate designs around the eye area. This approach requires a steady hand and a bit of creativity.

Setting and Perfecting Your Work

To ensure your newly applied eyeshadow eyeliner remains pristine throughout the day, consider setting it with a matching powder eyeshadow. Using a small, flat brush, gently press the powder onto the wet line, which will help lock the color in place and prevent smudging. Additionally, cleaning up any mistakes or sharpening your lines with a pointed cotton swab dipped in makeup remover can perfect your look.

Advanced Tips for Eye-Catching Results

  • Layering for Intensity: For deeper color saturation or to achieve a multi-dimensional effect, consider applying a second layer of the eyeshadow mixture once the first has dried.
  • Custom Color Blending: Don’t be afraid to mix different eyeshadow shades on your palette to create a custom color that perfectly matches your vision or ensemble.
  • Hygiene and Care: Always ensure your brushes are clean before use to prevent eye infections. Regular washing with gentle soap and water will keep them in top condition.

Unleashing Your Creativity

Using eyeshadow as eyeliner not only diversifies your makeup options but also encourages creative expression. Whether you’re aiming for a subtle enhancement or a dramatic statement, the versatility of eyeshadows offers endless possibilities to explore. Remember, makeup is an art, and you are the artist. With practice, patience, and experimentation, you can master this technique and elevate your makeup game to new heights.

  • Can any eyeshadow texture be used as eyeliner? Yes, you can use various eyeshadow textures as eyeliner, including matte, shimmer, and metallic finishes. However, the texture can affect the application and final look. Matte eyeshadows provide a more traditional eyeliner appearance, while shimmer and metallic shadows offer a luminous finish that can brighten the eyes.
  • How do I prevent eyeshadow eyeliner from smudging throughout the day? To prevent smudging, ensure the eyeshadow mixture has the right consistency and isn’t too wet. Setting your eyeliner with a matching powder eyeshadow or a clear setting spray can also improve its longevity. Additionally, using a primer before application can create a more adhesive base for the eyeshadow.
  • Is it safe to use eyeshadow as eyeliner on the waterline? Generally, it’s safer to avoid using eyeshadow on the waterline, especially if you have sensitive eyes or are using a product not specifically formulated for this area. The fine particles from eyeshadows can irritate the eyes. If you desire to line your waterline, opt for products explicitly safe for waterline use.
  • How do I choose the best eyeshadow color to use as eyeliner? The best eyeshadow color for eyeliner depends on your desired look and eye color. For a natural look, choose eyeshadows close to your eyeliner shade. For a pop of color, opt for contrasting shades that enhance your eye color, such as copper for blue eyes, purple for green eyes, and blue for brown eyes.
  • Can I use this technique for creating winged eyeliner? Absolutely! Using eyeshadow as eyeliner is excellent for creating a winged look. The key is to use a flat, angled brush for precise application. Start thin at the inner corner and thicken the line as you extend outward, flicking the brush up and out at the corner of your eye to create the wing.
  • What can I do if the eyeshadow eyeliner looks too faint? If the eyeliner appears too faint, you can build up the intensity by applying a second layer once the first has dried. Ensure your eyeshadow mixture is pigmented enough, and consider using a base or primer to enhance the color payoff.
  • How can I remove eyeshadow eyeliner effectively? Eyeshadow eyeliner can be removed with your regular makeup remover or micellar water. If you’ve used a waterproof mixing medium, you may need an oil-based remover. Gently sweep a cotton pad soaked in remover over the eyelids until the makeup dissolves.
  • Can mixing mediums cause irritation? While mixing mediums are formulated to be safe for use around the eyes, sensitivity varies from person to person. It’s always best to conduct a patch test before using a new product near your eyes, especially if you have sensitive skin. Opt for hypoallergenic or ophthalmologist-tested mediums to minimize the risk of irritation.
  • How do I fix mistakes or sharpen the edges of my eyeshadow eyeliner? To fix mistakes or sharpen your eyeliner edges, dip a pointed cotton swab in makeup remover and gently erase or refine the areas as needed. This method allows for precise adjustments without disturbing the rest of your makeup.
  • Are there any alternatives to water or mixing mediums for creating the eyeliner mixture? Aside from water and commercial mixing mediums, some people use setting sprays to moisten the brush before dipping it into the eyeshadow. This can offer improved longevity and set the eyeliner once applied, but it’s essential to ensure the setting spray is safe for use around the eyes.

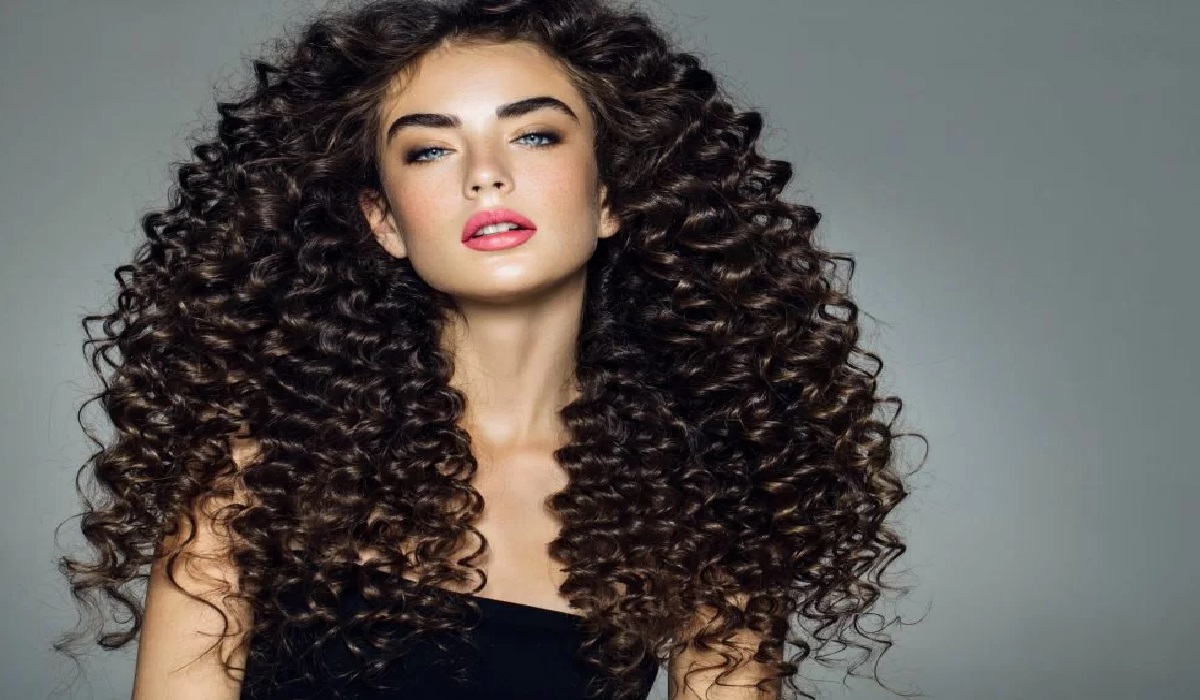
Eat Your Mane, Love Your Tresses Healthyhair Habits Nourishing Your Locks
Eat Your Mane, Love Your Tresses: Healthy Hair Habits: Nourishing Your Locks

Welcome to the definitive guide to obtaining healthy and gorgeous hair which stands out with strength and vitality. This particular article discusses essential nutrients, strategies for enhancing hair health, natural cures, and styling tricks to boost your mane. Understanding Hair Structure and Growth CycleThe structure of hair and how hair grows are crucial before beginning hair care habits. Hair Anatomy: Investigate the follicle, shaft, and cuticle to learn just how the various areas of hair wellness function.Phases of Hair Growth: Find out about the 3 phases of the hair regrowth cycle – telogen, catagen, and anagen – and how each stage affects hair length, thickness, and shedding.Things That Influence Hair Growth: Find out what factors effect growth of hair, from hormones and genes to nutrition, environment and stress.Common Hair Issues: Determine common hair problems such as thinningness, brittleness, split ends & hair loss and discover the main cause & treatment. Nutrients Your Hair NeedsFood is crucial for good hair. Let us explore the key nutrients required for promoting hair health from inside. Protein: Understand the significance of protein for hair growth & growth and the foods you consume which have it – lean meats, dairy, eggs, fish, poultry, nuts and legumes.Vitamins: Go over the role of vitamins A, C, E and also the B complex vitamins (Biotin, B5, B6, B12) on growth of hair, follicle power and protection against harm.Minerals: Minerals like iron, magnesium, selenium, and zinc are crucial for the scalp, growth of hair and baldness. Omega 3 Fatty Acids: Get the facts on omega 3 essential fatty acids from fatty fish, walnuts and flaxseeds for healthy scalp, decreased inflammation, along with glossy hair.Water: Hydrate your hair for all around hair wellness; drying away makes for dry, brittle hair and thinning scalps. Drink a minimum of eight glasses of water daily for optimum drinking water. Healthy Hair Care PracticesGood hair demands gentle, gentle hair treatment regimes which promote scalp wellness, hydration & resiliency. Gentle Cleansing: Make use of a gentle, sulfate-free shampoo to wash your scalp and hair; rub the scalp to eliminate product buildup, oil, and dirt while staying away from overwashing (which may strip skin oils and cause dryness). Moisturizing & Conditioning: Observe with a moisturizing conditioner to rehydrate, clean out tangles and also give your hair back its silky shine & manageability – apply straight to your lengths and ends while staying away from the scalp for greasiness.Scalp Care: Observe scalp wellness: exfoliate regularly to eliminate dead skin cells and product buildup, stimulate blood circulation with scalp massages, and also add scalp therapies with ingredients including tea tree oil or salicylic acid to treat dandruff, inflammation or itching.Protection for Heat Styling: Cut back on heat damage with heat protectant aerosols or serums prior to applying heat styling tools like hair dryers, flat irons or even curling wands and always use lower heat settings for split ends and breakage.Staying away from Overprocessing: Reduce chemical treatments which bleach, color, perm or even straighten the hair to prevent cuticle irritation and also to avoid breakage, brittleness and loss of hair.Trimming: Regular:…

Boost Your Smile Top 7 Strategies For Smooth, Hydrated Lips In 2024
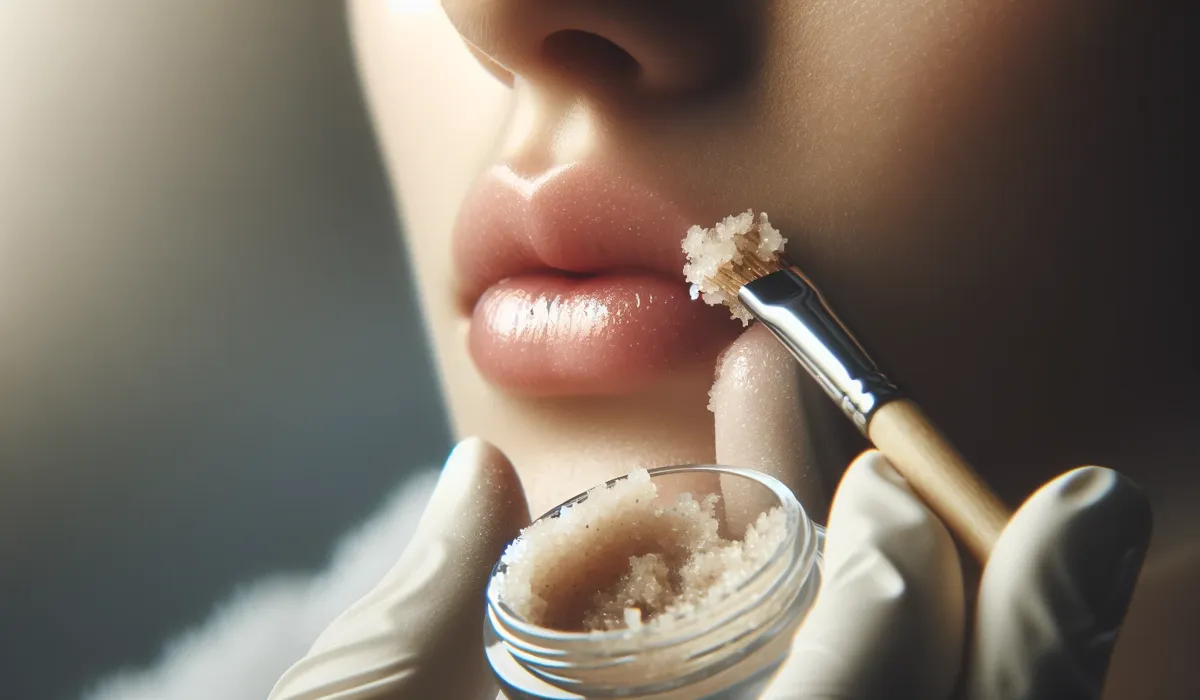
Boost Your Smile: Top 7 Strategies for Smooth, Hydrated Lips in 2024

Achieving a soft, plump, and healthy look for your lips is paramount, necessitating the removal of dead skin cells to unveil the underlying smooth texture. This practice not only refines the feel and look of your lips but also maximizes the absorption and effectiveness of lip care products. Our discussion will cover the essentials for attaining perfectly exfoliated lips, including its significance, correct methods, and the finest products and techniques for superior outcomes. The Essence of Lip Exfoliation Far from being merely cosmetic, lip exfoliation is a critical health regimen. Given their constant exposure to environmental factors like the sun, wind, and cold, lips are susceptible to dryness and peeling. The absence of oil glands in the lips means they lack natural moisturization, a gap filled by the benefits of exfoliation, which facilitates dead skin removal and encourages cellular renewal. The Underlying Science of Lip Exfoliation The principle of lip exfoliation lies in the gentle removal of dead surface cells, averting dryness and promoting a richer blood supply for a fuller and more radiant appearance. Consistent exfoliation also wards off early signs of aging around the lips. Selecting an Appropriate Lip Exfoliator The choice of lip exfoliator should be informed by your skin type and sensitivities, ranging from homemade concoctions to commercial exfoliating balms. Ingredients such as sugar, honey, and coconut oil are mild yet effective, matching the performance of many off-the-shelf products. Homemade Lip Exfoliation Solutions Crafting your lip scrub is straightforward, allowing for personalization. A basic mix of sugar, coconut oil, and honey offers a hydrating and exfoliating solution, nourishing the lips alongside the removal of dead cells. A Comprehensive Guide to Lip Exfoliation The exfoliation process is quick and efficient. Apply a chosen exfoliant to the lips, massage gently in circles, then rinse off with warm water. Seal in moisture immediately afterward with a hydrating balm. Moisture Retention Post-Exfoliation Post-exfoliation hydration is vital. Opt for lip balms enriched with shea butter, vitamin E, and hyaluronic acid to maintain moisture and elasticity. Seasonal Lip Care Adjustments Adapt your lip care to seasonal changes, increasing exfoliation and hydration during winter and ensuring UV protection during summer. Mitigating Common Lip Issues Through Exfoliation Regular exfoliation addresses various lip concerns like discoloration, uneven texture, and aging signs, enhancing both the look and health of your lips through dead skin removal and improved circulation. Evaluating Lip Exfoliation Merchandise The vast market selection makes choosing the right product daunting. Base your decision on specific needs and preferences, evaluating ingredients, textures, and consumer reviews. Achieving Luscious, Healthy Lips Incorporating lip exfoliation into your skincare routine is crucial for soft, well-maintained lips. By selecting appropriate exfoliators, maintaining hydration, and adjusting care with the seasons, you pave the way for a radiant, healthy smile, transcending mere aesthetics to embody genuine lip care.

The Ultimate Guide To Cleaning Your Makeup Brushes: Tips, Tricks, And Techniques
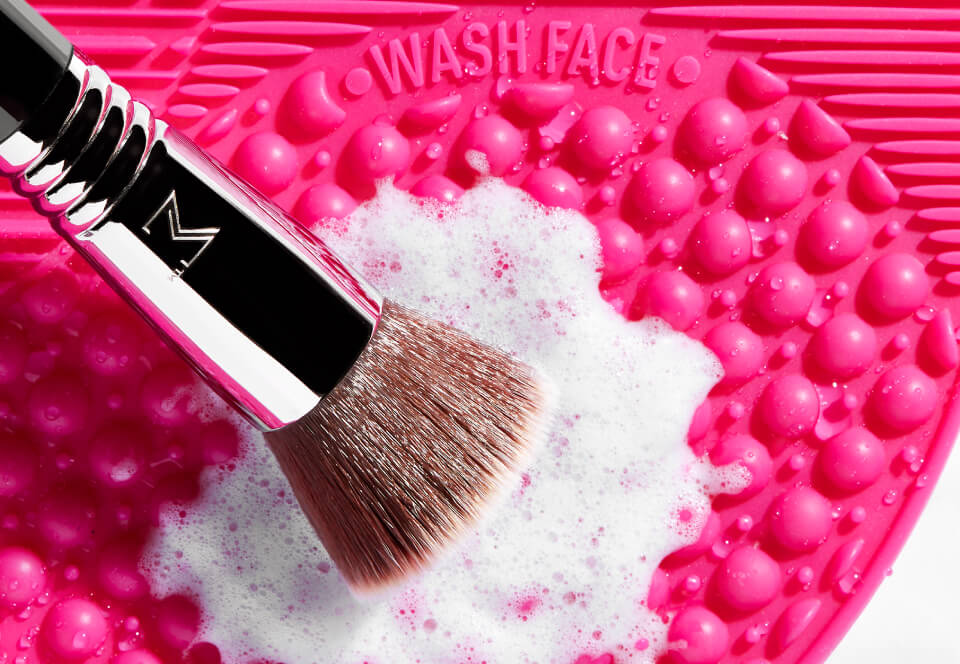
The Ultimate Guide to Cleaning Your Makeup Brushes: Tips, Tricks, and Techniques

Makeup brushes are an essential tool in any beauty routine. They help us achieve flawless and effortless makeup looks, whether we’re going for a natural or dramatic look. However, it’s important to note that these brushes need to be cleaned regularly to maintain their performance and longevity. Dirty brushes can harbor bacteria, oil, dirt, and dead skin cells that can cause breakouts and other skin problems. Cleaning your makeup brushes may seem like a daunting task, but it’s actually quite simple and easy to do. With the right tools and techniques, you can keep your brushes clean and in good condition for years to come. In this article, we’ll walk you through the step-by-step process of cleaning your makeup brushes, as well as some tips and tricks to make the process even easier. Step 1: Gather Your Supplies Before you start cleaning your makeup brushes, you’ll need to gather some supplies. Here are the things you’ll need: Gentle liquid soap or brush cleaner: You can use any gentle liquid soap or brush cleaner to clean your brushes. Avoid using harsh soaps or detergents as they can damage the bristles. Bowl or sink: You’ll need a bowl or sink to clean your brushes in. Make sure it’s clean and free from any dirt or debris. Towel: You’ll need a clean towel to dry your brushes on. Brush cleaning mat or glove (optional): A brush cleaning mat or glove can help you get a deeper clean on your brushes by helping to remove dirt and makeup residue. Step 2: Wet Your Brushes To start cleaning your makeup brushes, wet the bristles under running water. Make sure the water is lukewarm and not too hot or too cold. Hold the brush under the water with the bristles facing down, and avoid getting water on the metal part of the brush as it can loosen the glue that holds the bristles in place. Step 3: Clean Your Brushes Once your brushes are wet, it’s time to clean them. You can use a gentle liquid soap or brush cleaner for this step. Put a small amount of soap or cleaner into your palm or onto a brush cleaning mat or glove. Swirl the brush into the soap or cleaner, making sure to cover all the bristles. Gently massage the bristles with your fingers, working the soap or cleaner into the brush. If you’re using a brush cleaning mat or glove, use the textured surface to help remove any dirt or makeup residue. Step 4: Rinse Your Brushes After you’ve cleaned your brushes, rinse them thoroughly under running water. Make sure all the soap or cleaner is rinsed out of the bristles. Keep rinsing the brushes until the water runs clear. Step 5: Dry Your Brushes Once you’ve rinsed your brushes, it’s time to dry them. Gently squeeze the excess water out of the bristles, then reshape the bristles with your fingers. Lay the brushes flat on a clean towel and let them air dry. Avoid drying your brushes upright as the water can seep down into the…

How Does Coffee Affect Yourskin
How Does Coffee Affect Your Skin?

Coffee, the well-loved drink by many around the world, is known to give energy to the drinker; not only that, but it has another great reputation for the various effects it has on the body, including the skin. This review article goes into the various ways in which coffee can impact your skin health, a widely used beverage of benefit at times and harm at other times to the largest organ of your body. Introduction to Coffee and Its Popularity That lowly bean, through that long journey, would become the morning fuel for millions, and coffee became the drink that crossed borders rich with history and cultural importance. Coffee is not merely a drink, but an international sensation that has found its way, almost magically, through taste, into the affections of millions. The Composition of Coffee: What’s in Your Cup? To understand the influence coffee has on the skin, one should, first of all, look at the constituents which make the product up. If from the best known is caffeine, then coffee is not only the existence of this one ingredient. Coffee has many antioxidants, such as phenols, which are very vital for the purpose of fighting radicals and skin damage. Caffeine and Skin: The Direct Connection It is one of the reasons why coffee can be such a great partner to keeping healthy skin. Some studies even show that it reduces puffiness, improves blood circulation, and protects against UV damage when applied topically to the skin. The Positive Effects of Coffee on Skin Antioxidants cannot only be good for your health, but they can be good for the skin, too. Antioxidants help fight free radicals, reducing the signs of aging and possibly protecting the skin from harmful rays produced by the sun. Other than all this, its natural exfoliating properties further assist in making it an excellent ingredient for skin renewal and rejuvenation. Potential Negative Effects of Coffee on Skin Besides its boons, there are also a few banes of coffee to skin health. Overconsumption will lead to dehydration, and this will cause problems of skin elasticity, accentuating the appearance of signs of aging. In some people, coffee could again worsen issues related to acne, whether for hormonal reasons or for drinks made out of coffee which contain milk in them. How Does Coffee Affect Your Skin? Effects of coffee on the skin are not generic for all. They can have some helpful effects for certain skin conditions, and they may be harmful in some aspects, depending on health, skin type, and taking in patterns individually. Regulated and mindful intake would be a key to taking the best of coffee without its disadvantages. Integrating Coffee into Your Skin Care Routine Adding coffee into your skincare regimen will mean having natural and really effective means toward better skin health. It will see coffee find its place in your beauty regimen from DIY exfoliating scrubs to antioxidant-rich facemasks. Alternatives to Coffee for Skin Health For those wanting to really take the coffee-drinking down a notch, there is plenty that can be done for…

Flawless Fitness: Gym Makeup For A Workout
Flawless Fitness: Gym Makeup for a Workout

Going to the gym may be daunting for some people, particularly for those looking their best during workouts. Although makeup might not immediately spring to mind when considering gym work outs, many women find a bit of makeup can boost confidence and feel ready to tackle any exercise routines they face. In this article we’ll talk about The Stronghold look – ideal makeup style to achieve in this setting – plus tips and tricks that’ll help achieve and maintain it during each gym workout session. The Stronghold LookThis look embodies minimalism and longevity – designed to remain put no matter how much sweating takes place! The goal is for it to look natural yet have just enough glamor. Here are its core components. Begin with an oil-free and matte-finish primer designed specifically to keep makeup in place during physical activity, applying thin layers all over your face in areas where sweat tends to collect most often. Pay particular attention when applying these foundations if sweat becomes an issue for you. Foundation: When selecting foundation or tinted moisturizer that complements the tone of your skin, ensure it is lightweight enough. Any product too thick or cakey could clog pores during exercise and make you uncomfortable during physical activities such as sports. When applying foundation with brush or sponge application, blend well. Concealers: Concealer can help cover up blemishes or dark circles under your eyes; for optimal results use something lightweight and blendable. Furthermore, color correctors may help neutralize any redness or discolorations on your face and neutralize redness or discolorations on its own. Brows: Use either clear gel or tinted tinted gel to shape and add definition to your eyebrows, giving them shape that frames your face for an impeccable appearance. Doing this will add dimension and help give a polished feel. Mascara: When selecting waterproof mascara, choose one or two coats that won’t smudge or flake off during exercise. Concentrate application efforts at outer corners so your eyes appear wider open. Lip Balm or Gloss: For an added splash of color during workout sessions, complete your look by applying tinted lip balm or gloss to add some moisture back into your lips while giving them some needed nourishment. This can keep them hydrated throughout your fitness regime! Now that you understand how to achieve the Stronghold look, here are a few tricks and tips to maintain it throughout your workout: Apply a sweat-proof setting spray: For added peace of mind and to secure the integrity of your makeup application, invest in a spray designed specifically to resist sweat and humidity. Carry oil-blotting sheets: If your workout routine leaves you oily, take oil blotting sheets along. They can help absorb excess oils while simultaneously maintaining fresh-looking makeup. Avoid Touching Your Facial Structure: As much as possible during your workout, avoid touching your facial structure too often as this could cause your makeup to smudge and spread, while potentially spreading bacteria onto the surface of the skin. Bring along a towel: Always have a small towel handy so you can wipe sweat from your…

Latte Makeup Warm And Inviting Earthy Tones For A Naturally Radiant Look
Latte Makeup: Warm and Inviting Earthy Tones for a Naturally Radiant Look

In the world of makeup, trends come and go, and one that has been gaining popularity is the latte makeup trend. Inspired by the warm and inviting colors of a freshly brewed latte, this makeup style embraces earthy and neutral tones, creating a cozy and effortlessly chic look. From soft browns and warm caramels to creamy beiges and rich mochas, the latte makeup trend offers endless possibilities for creating natural yet stunning looks. In this comprehensive guide, we will delve into the essence of latte makeup, explore its key features, and provide tips on how to achieve this versatile and flattering style. At the heart of the latte makeup trend is a focus on earthy and neutral shades that mimic the colors found in a delicious cup of latte. These hues are warm, inviting, and universally flattering, making them suitable for various skin tones and occasions. a. Soft Browns: Emphasizing soft brown eyeshadows on the lids and along the lower lash line creates a warm and approachable look. The versatility of brown shades allows you to create subtle day looks or build up for more dramatic effects. b. Warm Caramels: Caramel tones on the eyes and lips add depth and dimension to the overall look. These shades offer a touch of sweetness and sophistication. c. Creamy Beiges: Creamy beige shades on the lids and as a base color create a bright and fresh canvas. Beige is an ideal shade for highlighting and creating a soft, seamless transition between colors. d. Rich Mochas: Deep mocha shades add intensity and sultriness to the eyes, making them ideal for a smoky eye or a more alluring evening look. Achieving a Natural Glow:The latte makeup trend is all about enhancing your natural beauty while exuding warmth and radiance. Achieving a natural glow is key to this look, and it can be accomplished through various makeup techniques: a. Dewy Foundation: Opt for a dewy or luminous foundation to achieve a radiant and hydrated complexion. Dewy foundations add a healthy sheen to the skin, giving it a natural and fresh appearance. b. Soft Highlighting: Highlight the high points of your face, such as the cheekbones, brow bone, and inner corners of the eyes, with a soft, champagne-toned highlighter. This enhances your features and imparts a subtle glow. c. Cream Blush: Use cream blush in soft peach or rosy shades for a natural flush of color on the cheeks. Cream blush blends seamlessly into the skin, creating a soft and effortless finish. d. Glossy Lips: Opt for glossy lip products in warm nude or soft brown shades to add dimension and plumpness to your lips. Glossy lips reflect light, giving the illusion of fuller and more luscious lips. Soft and Smudged Eyeliner:The latte makeup trend veers away from sharp and defined eyeliner, favoring a softer and smudged approach. This creates a more lived-in and effortless look that complements the earthy and natural vibe of the trend. a. Smudged Pencil Liner: Use a soft brown or chocolate-colored pencil eyeliner to line your upper and lower lash lines. Then, gently smudge…

Scientists Bust Myth That Eggs Are Bad For Your Heart A Heart Healthy Revelation
Scientists Bust Myth That Eggs Are Bad for Your Heart: A Heart-Healthy Revelation

Eggs have been a nutritional controversy, particularly on the heart health issue. Debate has centered on cholesterol in eggs and its suspected link with heart problems. However new researches have smashed the perception, proving that eggs are great for the heart. We take you from misconception to clarity about eggs and cholesterol and heart health. The Egg Debate: A Historical Overview The tale of eggs being branded villains in the diet saga began in the 2nd half of the twentieth century. Health recommendations initially stated you need to limit your egg consumption since eggs are loaded with cholesterol and could worsen heart problems. Myth its Origin This particular belief arose from early studies which related high-cholesterol in the bloodstream with higher heart disease risk. Eggs have dietary cholesterol so that they were likely to raise this risk. Dietary Guidelines The Shift Nevertheless, as nutrition science advanced, the role of dietary cholesterol in heart health also developed. The role of saturated fats and the difference between’good’ (HDL) and ‘bad’ (LDL) cholesterol have become more relevant in assessing dietary risks. Cholesterol: Basics – Understanding the Basics Good vs Bad Cholesterol Cholesterol is not always bad. It plays crucial roles in the body by forming cell membranes and hormones. The key is balancing HDL (which protects against heart disease LDL and) (which increases it risk). What the Body Processes Dietary Cholesterol The response to dietary cholesterol is individualized. Cholesterol-rich foods have little impact on blood cholesterol. Latest Scientific Findings Meta-Analyses and Their Conclusions The latest meta-analyses discovered that for the majority of individuals, consuming eggs doesn’t increase cardiovascular disease risk considerably. These studies address general eating habits and lifestyle variables that influence cardiovascular health. Heart Health Effects of Eggs Eggs have finally acquired reputation as being loaded with protein, vitamins and minerals which could help in a balanced diet. Eggs in Balanced Diet Nutritious Benefits Beyond Cholesterol Besides cholesterol, eggs have vitamin D, B vitamins and proteins. They are often part of a heart healthy diet when eaten in moderation. How to Include Eggs In Your Diet? How to balance egg consumption within a nutritious diet is crucial. What this means is pairing eggs with veggies in addition to whole grains, not processed and high-fat meals. Experts Discuss Egg Consumption Official Dietary Recommendations Some current dietary guidelines emphasize whole foods and healthy diets instead of concentrating on individual nutrients like cholesterol. Views from Cardiology Nutrition Experts Numerous nutritionists and cardiologists today suggest having eggs in your heart healthy diet plan, citing their nutrition and also the absence of evidence that they raise heart disease risk in the overall public. Researchers Bust Myth That Eggs Are Bad for Your Heart The consensus among scientists is apparent : When eaten in moderate amounts, eggs don’t cause most heart problems. This section confirms the article title and also shows the change in scientific understanding. Role of Lifestyle Factors Exercise Diet Heart health is associated with numerous factors, including physical activity and diet quality. As a food, eggs can fit this particular lifestyle. Stress Management Heart Health Stress and…

What Is A Charcoalmask
What Is a Charcoal Mask?

The beauty and skincare realm has witnessed a remarkable surge in the adoption of charcoal masks, celebrated for their profound cleaning and detoxifying capabilities. But the question arises, what are charcoal masks, and how do they perform their skin-transforming feats? In this discussion, we demystify the concept of charcoal masks, delving into their merits, varieties, and the optimal way to integrate them into your skincare regimen. The Scientific Foundation of Charcoal MasksAt the heart of charcoal masks lies activated charcoal, renowned for its ability to function as a magnet, drawing in and ensnaring dirt, oil, and toxins from the epidermis and its underlying pores. The porous characteristic of activated charcoal facilitates the entrapment of these contaminants, which are subsequently eliminated upon the removal of the mask. Key Components in Charcoal MasksIn addition to activated charcoal, these formulations typically incorporate other elements such as clays, tea tree oil, or salicylic acid, each chosen for its capacity to augment the mask’s purifying and calming effects. These ingredients collectively work to diminish oiliness, ward off acne, and pacify the skin. Detoxification Mechanism of Charcoal MasksThe detoxifying procedure employed by charcoal masks is straightforward yet potent. As the mask dries, activated charcoal attracts and captures impurities lodged within the pores, not only cleansing the skin but also minimizing pore visibility and thwarting future acne outbreaks. Varieties of Charcoal MasksCharcoal masks come in various formats, catering to individual preferences and skin needs, each with its distinct application and removal methodology. Peel-off VariantsDesigned to harden upon application, these variants form a peelable layer that, upon removal, strips away dead skin cells and surface debris. Wash-off VariantsThese are rinsed off with water, offering a milder detoxification alternative, ideal for sensitive skin types or those seeking a less intense cleansing experience. Sheet Mask VariantsThese blend the convenience of a no-mess application with the hydrating benefits of a fabric sheet mask, enriched with activated charcoal. Advantages of Charcoal MasksIncorporating charcoal masks into your skincare routine promises a myriad of benefits: Optimal Application of Charcoal MasksFor maximum efficacy, it’s vital to adhere to correct application practices. Preparation and Application:Initiate with a cleansed face, ensuring even application while steering clear of the eyes and lips. Duration and Frequency:Maintain the mask for the suggested duration—typically 10 to 20 minutes—and limit use to once or twice weekly for optimal skin health. Post-Application Care:Conclude with a moisturizer to hydrate and seal in the mask’s benefits. Potential Adverse Effects and SafeguardsGenerally, charcoal masks are safe for most skin types, though some individuals may encounter dryness or irritation. Awareness of Side Effects:Being cognizant of potential adverse effects equips users to manage them effectively. Risk Mitigation:Conduct a patch test prior to using a new charcoal mask, especially for sensitive skin, and meticulously follow usage instructions. DIY Charcoal Mask FormulationsFor enthusiasts of homemade skincare solutions, here are straightforward recipes for crafting your charcoal masks. Simple DIY Charcoal Mask:Combine activated charcoal powder with aloe vera gel for a calming, purifying mask. Charcoal Mask for Acne-Prone Skin:Blend activated charcoal with tea tree oil and water to target acne while soothing the skin….