What is Permanent Eyeliner?

Permanent eyeliner, also known as eyeliner tattoo, stands as a beacon of innovation in the cosmetic industry, offering a semi-permanent solution for those seeking to enhance their eye definition without the daily fuss of makeup application. This detailed guide aims to unfold the layers of permanent eyeliner, exploring its procedure, types, benefits, and vital considerations to arm you with knowledge and confidence in your beauty decisions.
What Is Permanent Eyeliner


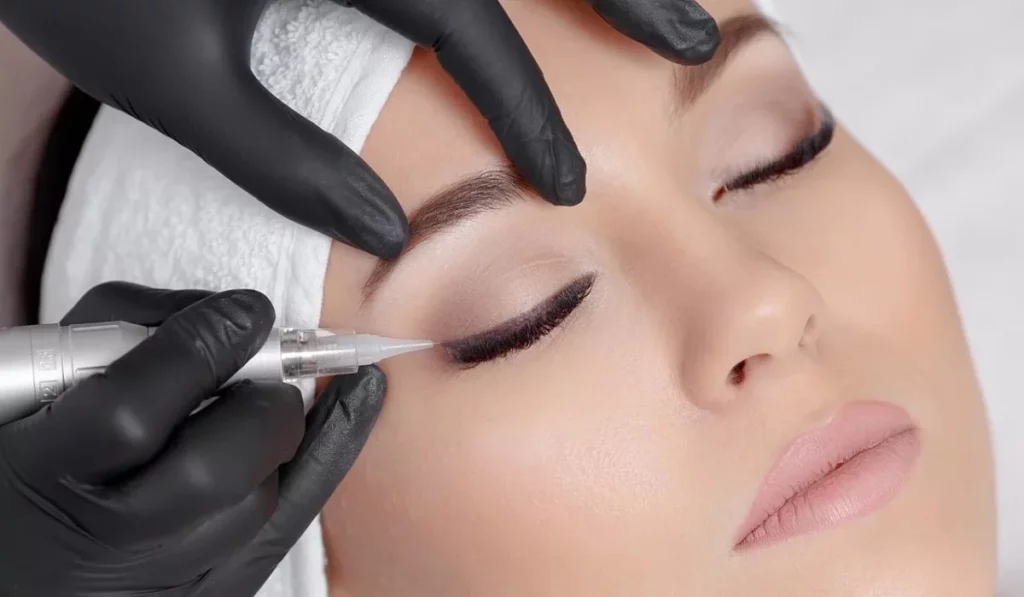
At its core, permanent eyeliner involves the meticulous insertion of pigment into the skin’s dermal layer around the eyes, mimicking the appearance of traditional eyeliner. This method, rooted in the practice of cosmetic tattooing, transcends the temporary nature of conventional makeup, providing a durable solution that withstands time, sweat, and tears. Beyond mere aesthetic enhancement, permanent eyeliner serves as a testament to the fusion of art and technology in the pursuit of lasting beauty.

The Procedure of Permanent Eyeliner

The journey to permanent eyeliner is marked by precision, expertise, and customization, tailored to fit each individual’s unique features and desires.

Pre-Procedure Preparation

The road to permanent eyeliner begins with a thorough consultation with a certified and experienced technician. This initial meeting is crucial for discussing expectations, choosing the right pigment color, and determining the most flattering eyeliner style. Clients are advised to refrain from consuming alcohol, caffeine, and blood-thinning medications several days before the procedure to minimize bleeding and swelling.

The Process

Adorned with gloves and using sterile equipment, the technician delicately implants the chosen pigment along the lash line with the aid of a fine needle. Comfort is a priority, hence topical anesthetics are applied to mitigate discomfort. The session may last anywhere from one to several hours, contingent upon the complexity of the desired look and the intricacies involved in achieving it.

Post-Procedure Care

The aftermath of the procedure is pivotal for the longevity and appearance of the eyeliner. Adhering to aftercare instructions is paramount, including keeping the area clean and dry, avoiding makeup and direct sun exposure, and applying prescribed ointments to facilitate healing and prevent infection.

Types of Permanent Eyeliner

Permanent eyeliner offers a spectrum of styles, from subtle to bold, each capable of accentuating the eyes in unique ways.

Lash Enhancement

This technique, ideal for those seeking a natural enhancement, involves depositing pigment between the lashes. The result is a fuller lash base that subtly defines the eyes without the overt appearance of makeup.

Traditional Eyeliner

Traditional eyeliner offers a more pronounced look, customizable in thickness to either softly define the eyes or create a more dramatic effect. It’s perfect for individuals who desire a visible eyeliner look that remains impeccably in place from dawn till dusk.

Winged and Designer Eyeliner

For the bold and adventurous, winged or designer eyeliner allows for creative expression, extending beyond the eyelids to include intricate designs or extended flicks. This option caters to those looking to make a statement with their eyes, offering endless possibilities for customization.

Benefits of Permanent Eyeliner
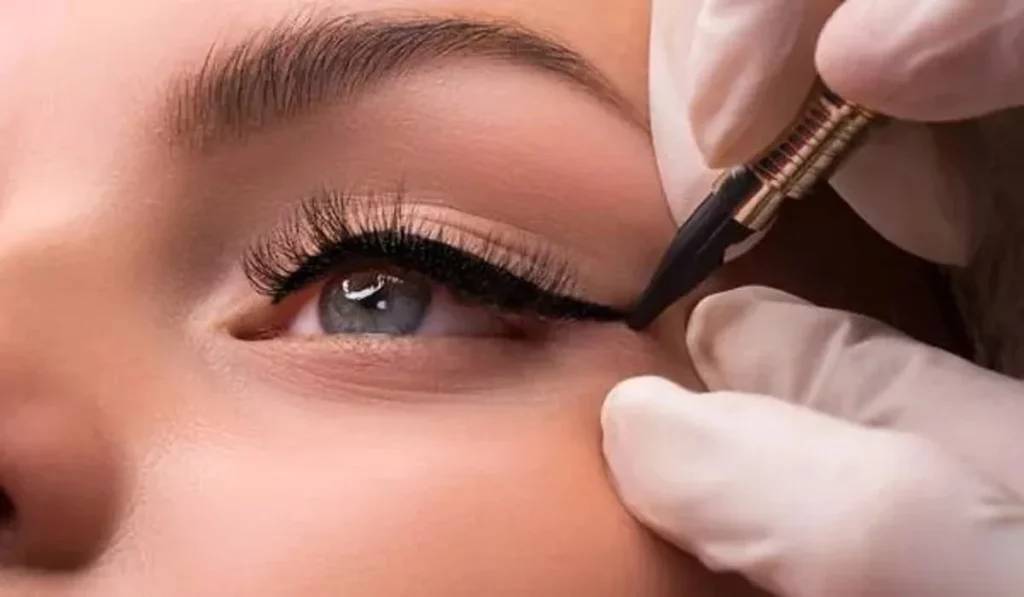
What Is Permanenteyeliner

The allure of permanent eyeliner lies not only in its aesthetic appeal but also in the myriad of benefits it offers.


Time-saving and Convenience

It eradicates the daily need for eyeliner application, offering a liberating solution for those with hectic schedules or those who wish to wake up with perfectly defined eyes.

Smudge-proof and Long-lasting

Ideal for individuals with active lifestyles, oily skin, or sensitivities to traditional makeup, permanent eyeliner stays intact through sweat, swimming, and tears.

Enhances Eye Shape and Color

Tailored to each person, permanent eyeliner can accentuate the natural beauty of the eyes, enhancing their shape and making the eye color pop.

Risks and Considerations

While the benefits are compelling, it’s essential to acknowledge and understand the potential risks associated with permanent eyeliner.

Potential Side Effects

The procedure can result in temporary swelling, bruising, or redness. In rare cases, infection or allergic reactions to the pigment may occur, underscoring the importance of choosing a reputable technician who conducts patch tests.

Choosing the Right Technician

Research is paramount in selecting a technician. Look for someone with extensive experience, proper certification, and a portfolio of their work to ensure they align with your aesthetic preferences and safety standards.


Aftercare and Healing Process

The healing process is a critical phase where proper care can significantly impact the outcome and longevity of the eyeliner.

Immediate Aftercare

Following the technician’s aftercare instructions is crucial. This typically includes applying specific ointments, avoiding water and makeup around the eyes, and refraining from rubbing or touching the area to prevent infection and ensure optimal healing.

Long-term Care and Touch-ups

While permanent eyeliner is durable, it may gradually fade over time. Touch-up sessions every few years can maintain the vibrancy and definition of the eyeliner, keeping your eyes perpetually captivating.

What is Permanent Eyeliner?

Permanent eyeliner transcends the temporary nature of makeup, offering a lasting solution that embodies efficiency, beauty, and confidence. By opting for permanent eyeliner, you embrace a carefree beauty routine, ensuring you always present the best version of yourself to the world.

Permanent eyeliner represents a transformative beauty solution, blending artistry with innovation to bestow enduring elegance upon its recipients. As you contemplate embarking on this journey, remember that the key to a successful outcome lies in informed decision-making, meticulous research, and selecting a technician who aligns with your vision of beauty. Embrace the transformative power of permanent eyeliner and revel in the ease and confidence it brings to your daily life.

How long does permanent eyeliner last? Permanent eyeliner typically lasts between 1 to 3 years, depending on several factors including the quality of pigment used, the individual’s skin type, exposure to sunlight, and skincare routines. Over time, the pigment may fade, requiring touch-up sessions to maintain the desired intensity and sharpness of the eyeliner.

Is the procedure painful? The level of discomfort experienced during the permanent eyeliner procedure varies from person to person. Most technicians apply a topical anesthetic to numb the area before starting, significantly reducing pain. However, some individuals may still feel a slight stinging or scratching sensation. Discuss pain management options with your technician prior to the procedure to ensure comfort.

Can permanent eyeliner be removed? Yes, permanent eyeliner can be removed, but it is a complex process that should be undertaken by professionals. Laser treatment is the most common method for removing cosmetic tattoos, including permanent eyeliner. The process may require several sessions, depending on the depth and color of the pigment. It’s important to consult with a specialist to understand the risks and expected outcomes of removal.

What’s the difference between permanent eyeliner and a lash line enhancement? Permanent eyeliner and lash line enhancement are similar techniques that differ primarily in their visual effects. Lash line enhancement involves tattooing pigment directly into the lash line to create the appearance of thicker, fuller lashes without the visible line above the lashes that is characteristic of traditional eyeliner. Permanent eyeliner, on the other hand, creates a more defined line on the eyelid, which can vary in thickness and may extend beyond the lash line for various stylistic effects, such as a winged look.

How do I choose the right color and style for my permanent eyeliner? Choosing the right color and style for your permanent eyeliner depends on your natural eye color, skin tone, personal style, and the look you wish to achieve. Neutral, darker shades like black or brown are popular choices that complement most eye colors and skin tones, offering a natural and versatile look. Discussing your lifestyle, makeup routine, and preferences with your technician during the consultation will help in selecting the best style, whether you prefer a subtle lash line enhancement or a more dramatic eyeliner look.


What is the recovery time for permanent eyeliner? The recovery time for permanent eyeliner typically ranges from 7 to 10 days. Immediately after the procedure, you may experience swelling, redness, and a sensation similar to a sunburn around the treated area. These symptoms usually subside within a few days. It’s crucial to follow the aftercare instructions provided by your technician to ensure proper healing and to achieve the best results. This includes avoiding water and makeup near the eye area, not rubbing or touching the eyes, and applying any recommended ointments or treatments to help with healing.

Can I wear makeup after getting permanent eyeliner? It’s recommended to avoid applying makeup directly on or around the newly tattooed area for at least a week or until the healing process is complete. This precaution helps prevent infection and ensures that the pigment sets properly. After the area has fully healed, you can wear makeup as usual, but some individuals find that they rely less on traditional makeup thanks to the defining effects of permanent eyeliner.

How do I ensure my permanent eyeliner lasts as long as possible? To maximize the longevity of your permanent eyeliner, follow these tips:

  • Avoid prolonged exposure to sunlight, as UV rays can fade the pigment. Wear sunglasses and consider using a gentle, non-irritating SPF around the eyes.
  • Follow a gentle skincare routine that avoids harsh chemicals and exfoliants around the eyes.
  • Keep the area moisturized with a safe, recommended product to support skin health.
  • Attend touch-up appointments as recommended by your technician to refresh the color and definition of your eyeliner.

By understanding these aspects of permanent eyeliner, you can make an informed decision and ensure that your experience is positive, leading to beautiful and lasting results.

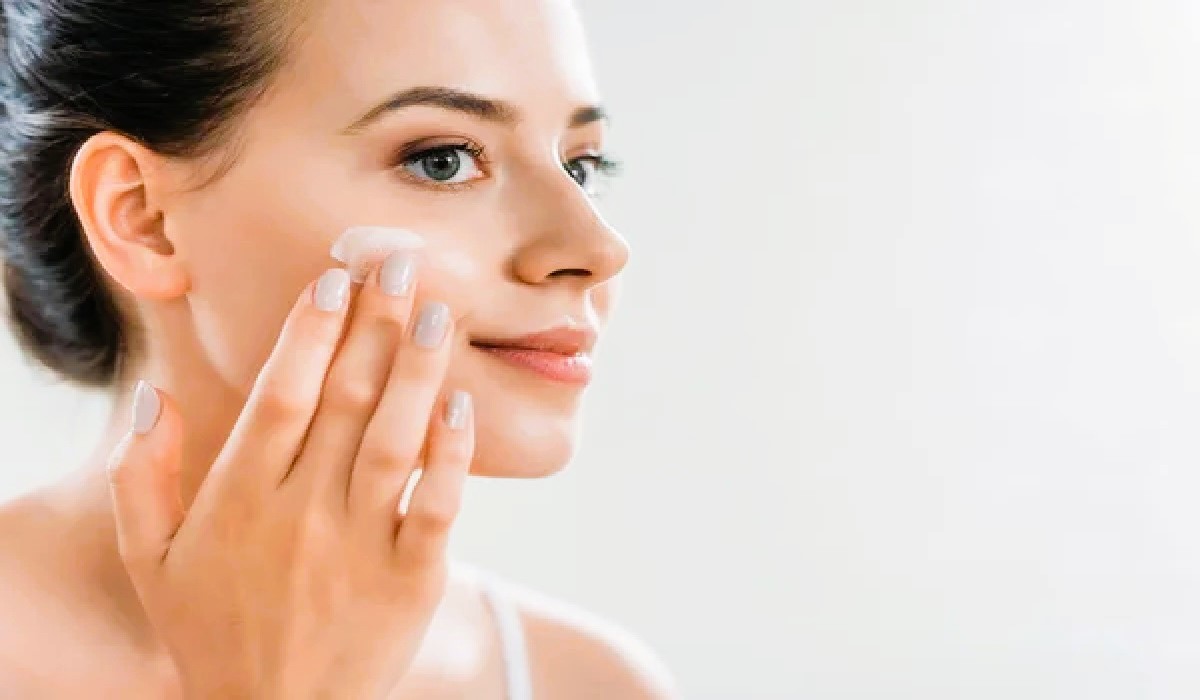
Glowing From Within Alternative Methods Forhealthy Skin
Glowing from Within: Alternative Methods for Healthy Skin

Whatever the skincare fads, radiant, glowing skin is a frequent aim. But rather than appearing with topical creams and quick fixes, many are switching to holistic approaches which produce long-term results. Nutrition & Skin Health What we put on our skin has a major effect on keeping good skin. A diet full of vitamins, antioxidants and minerals could repair the skin from inside. Particularly great for skin will be vitamins C, E & omega three essential essential fatty acids. Hydration and Its Effects on Skin Hydration is vital for keeping skin flexible and from becoming dry. The daily consumption of sufficient water gets rid of toxic wastes from the body and gives the skin a new appearance. Other moisture – boosting skincare products may also keep the skin moist. Mind Body Connection & Skin Health Entire body and mind are intertwined and emotional stress could cause havoc on the skin. Relaxing methods like meditation, deep breathing or yoga might help keep a healthy skin by lessening inflammation and relaxation. All Natural Skincare Products Nature offers numerous pure ingredients to hydrate and protect skin without strong chemical additives or fillers. Natural products which have ingredients like aloe vera can provide a bright complexion without triggering irritation or allergies. Activity 1and1 Skin Health Additional excellent health advantages of exercise include a glowing complexion. Excellent circulation and blood circulation during exercise return oxygen and nutrients into the skin where it regrows tissues and also makes it glow. Strive for thirty minutes of moderate exercise the majority of days of the week for best skin overall health. Sleep and Its Effects on Skin Sleeping correct is important for skin repair and renewal. While asleep the entire body repairs injured tissues and cells. Insufficient sleep may leave skin looking drab – so try to get seven to eight hours of restful sleep each night for luminous skin. Detoxification 1and1 Skin Purification The skin is dulled by impurities and toxins sometimes removed by detoxifying it. Little gestures like exfoliation and detoxifying masks are able to help minimize pores and promote cellular turnover for softer, more radiant skin. Sun Protection & Skin Care You need to keep your skin shielded from damaging UV rays for a younger appearance. Wear broad spectrum sunscreen all day and reapply every 2 hours out in the sunshine. Together with sunscreening, seek shade at peak sun times and also put on sun protection — including hats and sunglasses. Alternative Skincare Routines But developing a good skincare regime goes beyond putting items on the skin: it calls for an integrated skincare strategy. It is about lifestyle choices which boost overall health – nourishment, clean water, exercise 1and1 stress minimization. You are able to get amazing, glowing skin from the inside with the entire body skin care regimen. Treatments for Pro Holistic Skincare Professional treatments might include increasing your skin health and look beyond DIY skin care. Facials, massages and body scrubs utilizing only organic items and methods to soothe and refresh the skin are considered holistic spa treatments. Traditional vs Holistic Skincare Though widespread skincare…

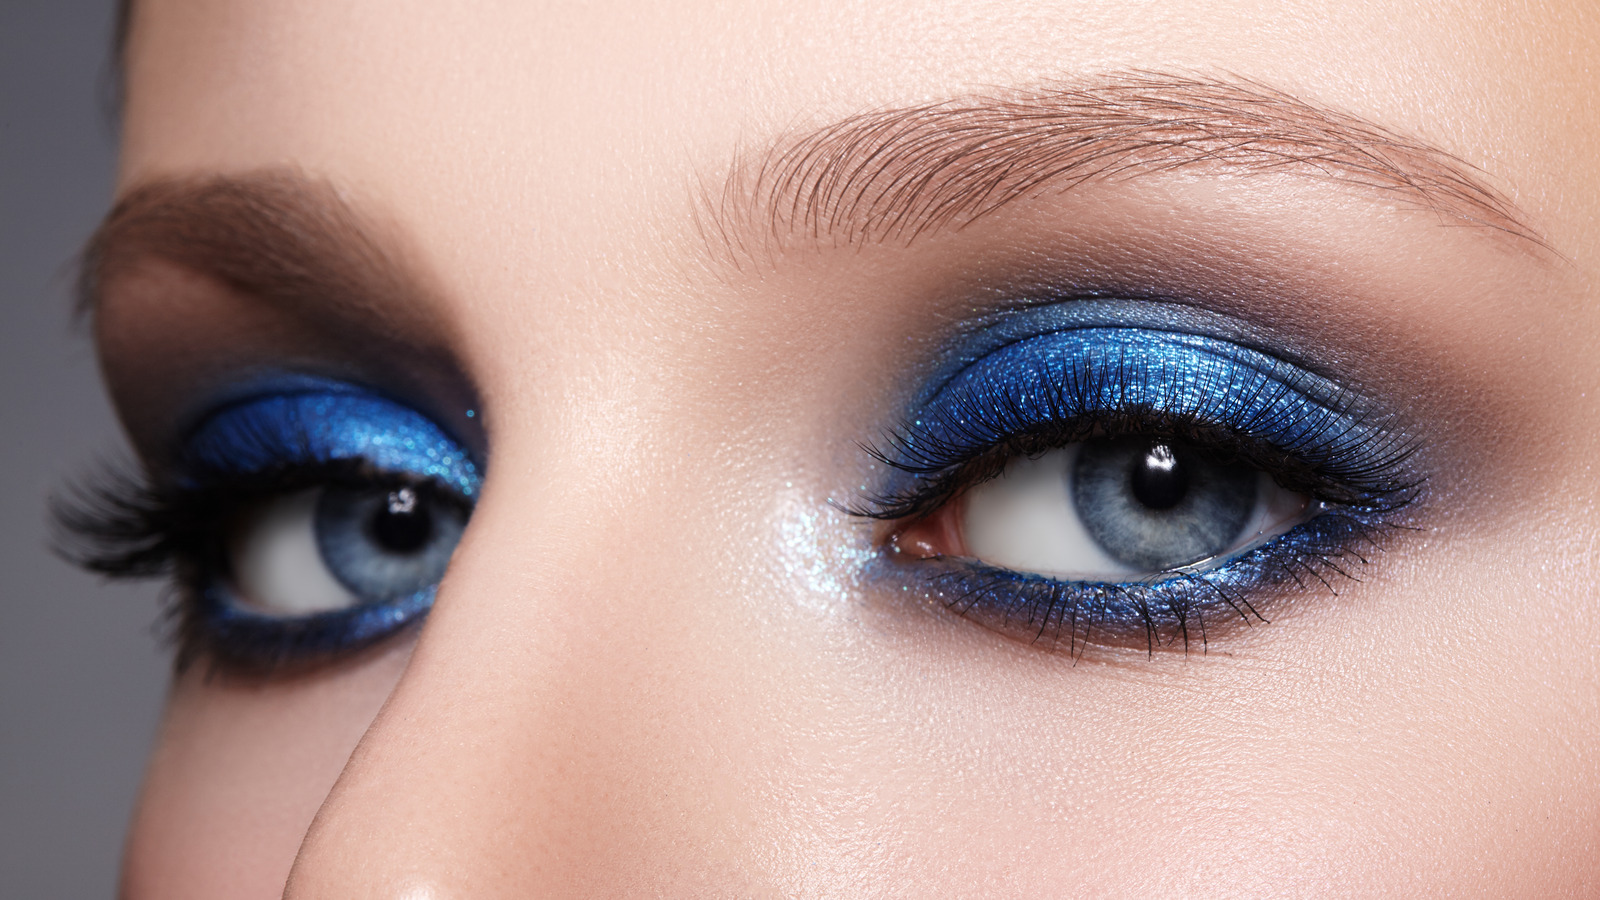
Closeup,macro,of,woman,face,with,blue,eyes,make Up.,fashion
Revealing the Beauty of Blue Eyes

Eyes have always held an alluring allure; for those blessed with striking blue eyes, eyeshadow can serve as the canvas to highlight and emphasize them further. From daily looks to bold statements, choosing an appropriate eyeshadow shade can elevate your gaze and take it to new heights – in this exploration we unveil an assortment of captivating looks tailored specifically for blue-eyed individuals. Understanding Complementary Colors: Understanding complementary colors is key when it comes to creating eyeshadow looks designed to emphasize blue eyes. Warm tones such as orange, copper and earthy browns make excellent choices to amplify and bring out their richness – providing the ideal contrast against their cool tone of blue. This timeless eyeshadow look is ideal for everyday wear, offering subtle enhancement that brings out the natural beauty of blue eyes. Warm brown hues add depth without overshadowing; creating an adaptable and timeless appearance suitable for any special occasion or event. Welcome the warmth of a sunset with this eyeshadow look that brings out blue eyes’ captivating glow. A combination of peach hues and burnt orange tones bring life and vibrancy to this look; conjuring vivid imagery associated with dusk. Ideal for evening events and occasions where your eyes need to command attention! Explore purples and lavenders for an air of dreaminess and ethereality, or explore light lavender to deep plum transitioning between them for added dimension and allure, creating a whimsical aesthetic. Blue eyes contrast beautifully against these calming tones for a captivating contrast effect, mesmerizing audiences wherever they may roam. Their soft transition between light lavender to deep plum adds dimension and allure that sets this eyeshadow look apart as an option to those wanting something different from standard everyday eyeshadow looks. Amp up the drama with an eyeshadow look that elevates drama through sophistication: an alluring smoky eye that adds intensity and depth to blue eyes. Cool tones like gray and charcoal create an arresting contrast, drawing the focus towards your blue eye color as the center point. Perfect for evening events or making an impressionful statement, this sophisticated yet alluring eyeshadow look exudes sophistication and allure. Plunge into oceanic hues with an amazing teal eyeshadow look! Teals and aquas work well when combined with blue eyes for an engaging and eye-catching effect – ideal for summer events when adding sea-inspired elegance into your gaze! This eyeshadow look makes an impactful statement! Gold shimmer adds luxuriousness and glamour, exacerbating blue eye’s natural luminosity for an eye-catching effect that exudes luxuriousness. Perfect for special events or simply when exuding sophisticated charm, this eyeshadow look elevates glamor! Use olive tones’ earthy charm for an eyeshadow look that stands out. Green hues – olive and forest green in particular – bring depth and intensity to blue eyes, providing depth without losing elegance or sophistication. This look makes an excellent statement! Expert Tips for Enhancing Blue Eyes Utilize an Eyeshadow Primer To enhance long-term and vibrant wear of eye shadow looks, an eyeshadow primer can ensure their longevity and vibrancy by helping avoid creasing while making colors pop more vividly….

Niacinamide Benefits 2
Unveiling the Power of Niacinamide: A Comprehensive Guide on Usage and Benefits

Unlocking the Power of Niacinamide: A Comprehensive Overview on Use and BenefitsNiacinamide (Vitamin B3) has taken the beauty world by storm with its abundance of skin benefits and widespread adoption by various skincare formulations. Understanding what niacinamide is and incorporating it into your routine will open a host of transformative skincare possibilities that could make a real difference to both its effectiveness and efficacy. Niacinamide plays a pivotal role in keeping skin health at optimal levels and treating common issues, from soothing irritations to stimulating collagen production for firmness and elasticity. Niacinamide also regulates oil production – making it an invaluable ally in treating acne-prone or oily complexions. Benefits of Niacinamide for Your Skin Reducing Fine Lines and Wrinkles: Niacinamide’s collagen-boosting effects result in smoother, younger-looking skin over time by diminishing fine lines and wrinkles over time.Hyperpigmentation/Dark Spots: Niacinamide’s anti-hyperpigmentation benefits can also help mitigate hyperpigmentation/darken spots to create smoother-looking complexion. Niacinamide, known for its brightening effects, helps fade hyperpigmentation and dark spots for an even skin tone. Niacinamide also regulates oil production to control acne flare-ups. Niacinamide’s sebum-balancing effects make it effective at managing oiliness and avoiding breakouts – an asset for those living with acne-prone skin. Reducing Redness and Inflammation: Niacinamide helps decrease redness and inflammation within skin pores as well as improving overall appearance, providing valuable therapeutic relief to acne sufferers. Niacinamide’s anti-inflammatory properties make it an effective yet gentle solution to reduce redness and soothe irritated skin, perfect for sensitive skin types. Add Niacinamide into Your Routine: Cleanser with Niacinamide: Start off your routine right with a cleanser containing niacinamide to reap its many advantages at the outset of your skincare regime.Niacinamide Serums: Niacinamide serums provide powerful solutions that target specific problems like hyperpigmentation or fine lines. Choose one to address them effectively. Niacinamide-rich moisturizers deliver both hydration and the vitamin’s skin-nourishing benefits, making these suitable for various skin types. Sunscreen with Niacinamide: Sunscreen should be part of any skincare regime, and one with Niacinamide offers multiple advantages for protecting skin against damage caused by UV radiation while offering additional skincare benefits. Incorporate it into treatments: Integrate Niacinamide into targeted treatments like face masks and overnight creams for intensive skin care. Niacinamide is an amazing skincare ingredient, offering benefits suitable for many different skin types and concerns. From targeting signs of aging and hyperpigmentation, to acne control and management – niacinamide offers something everyone could use more of in their skincare regime! When applied correctly into one’s routine it can transform to give one radiant, healthy-looking complexions. Are You Wondering If Niacinamide Causes Any Harm? Refuting Common Misconceptions Niacinamide (Vitamin B3) has become widely popular and celebrated due to its many therapeutic qualities. Niacinamide can be safely integrated into any skincare regime when administered correctly and it poses minimal risk. As with any product, however, it’s crucial that users follow recommended usage instructions and conduct patch tests, especially those with sensitive skin or concerns related to their treatment or condition. Consulting a dermatologist for customized advice about adding Niacinamide into their regime safely can offer invaluable assistance.

Shielding Your Strands: Exploring The Purpose And Benefits Of Heat Protectant For Your Hair
Shielding Your Strands: Exploring the Purpose and Benefits of Heat Protectant for Your Hair

Heat styling tools like flat irons, curling wands, and blow dryers have become essential tools in our hair care routine. While these tools help us achieve various hairstyles, they can also subject our hair to high temperatures, leading to damage and breakage. This is where heat protectant products come into play. Heat protectants are designed to shield our strands from the harmful effects of heat styling, providing an extra layer of defense. In this article, we will explore the purpose and benefits of heat protectant for your hair, understanding how it works and why it is a crucial addition to your styling routine. Understanding Heat Protectant:Heat protectant is a hair care product formulated to create a barrier between your hair and the heat from styling tools. It typically comes in the form of sprays, serums, or creams and is applied to the hair before using heat styling tools. Heat protectants are usually infused with ingredients that can withstand high temperatures and help prevent damage caused by heat exposure. Protection from Heat Damage:The primary purpose of heat protectant is to safeguard your strands from heat damage. When subjected to high temperatures, the cuticle layer of the hair can become damaged, resulting in dryness, frizz, split ends, and breakage. Heat protectants form a protective coating over the hair, acting as a barrier that minimizes the direct impact of heat on the hair shaft. This helps to maintain the integrity of the hair, preventing damage and preserving its overall health. Reducing Moisture Loss:Heat styling can strip moisture from the hair, leaving it dry, brittle, and prone to breakage. Heat protectants are often formulated with hydrating ingredients that help seal in moisture and prevent water loss from the hair strands. By creating a barrier, heat protectants help to retain the hair’s natural moisture, leaving it hydrated, soft, and more resilient to heat-induced damage. Minimizing Frizz and Flyaways:Excessive heat can cause the cuticles of the hair to lift, resulting in frizz and flyaways. Heat protectants work to smooth down the cuticle layer, minimizing frizz and creating a sleeker, more polished look. They help to keep the hair strands aligned and reduce static, ensuring a smoother, more manageable hairstyle. Enhancing Shine and Smoothness:Heat protectants not only protect the hair but also enhance its appearance. They can add shine and smoothness to the hair, giving it a healthier and more lustrous look. By creating a protective barrier, heat protectants help to seal the hair cuticles, allowing light to reflect off the strands and creating a glossy, radiant finish. Improving Styling Results:Using a heat protectant can improve the overall outcome of your heat-styled hairstyle. By providing a smooth and protected surface, heat protectants make it easier to glide through the hair with styling tools, allowing for more precise and efficient styling. Additionally, the added moisture and protection help the hair hold the style for longer, ensuring your hard work doesn’t go to waste. Suitable for Various Hair Types:Heat protectants are suitable for all hair types, whether you have straight, wavy, curly, or coily hair. They can benefit those with fine…

10 Tips For Concealing Under Eye Bags Like A Pro
10 Tips for Concealing Under-Eye Bags Like a Pro

Under-eye bags are a common problem for many people, whether it’s due to genetics, lack of sleep, or aging. These bags can make you look tired and older than you actually are. Luckily, there are many ways to conceal under-eye bags and make your eyes look brighter and more youthful. In this article, we will share 10 tips for concealing under-eye bags like a pro. Use a Color CorrectorIf you have dark circles under your eyes, a color corrector can help neutralize the discoloration. Look for a peach or orange color corrector, depending on your skin tone. Apply it gently to the under-eye area using your ring finger. Be careful not to tug or pull on the delicate skin around your eyes. Use a Concealer with a Yellow or Peach UndertoneAfter applying a color corrector, use a concealer that has a yellow or peach undertone. This will help brighten your under-eye area and make you look more awake. Use a small, fluffy brush to apply the concealer in a triangle shape under your eyes, then blend it in with a damp beauty sponge. Use a Hydrating Eye CreamDry skin can make under-eye bags look worse. Make sure to use a hydrating eye cream before applying any makeup. Look for an eye cream that contains hyaluronic acid, which helps to plump and hydrate the skin. Apply a Cooling Eye GelIf you’re dealing with puffiness under your eyes, try applying a cooling eye gel. Keep the eye gel in the fridge for a few minutes before applying it to your under-eye area. The coolness will help reduce inflammation and puffiness. Use a Light-Reflecting PowderAfter applying your concealer, use a light-reflecting powder to set it. This will help brighten your under-eye area even more and prevent creasing. Use a fluffy brush to apply the powder lightly under your eyes. Use a Matte BronzerIf you have under-eye bags that are more prominent, you can use a matte bronzer to create a shadow effect. Apply the bronzer lightly in the hollows under your cheekbones and around your temples. This will help to create the illusion of depth and make your under-eye bags less noticeable. Apply Mascara and EyelinerApplying mascara and eyeliner can help draw attention away from your under-eye bags. Curl your lashes and apply mascara to open up your eyes. Use a thin line of eyeliner along your lash line to define your eyes further. Use a Bright LipstickIf you’re still feeling self-conscious about your under-eye bags, try wearing a bright lipstick. A bold lip color will draw attention away from your under-eye area and make you feel more confident. Use a Makeup Setting SprayTo make sure your makeup stays in place all day, use a makeup setting spray. This will also help prevent your under-eye area from getting oily and causing your makeup to smudge. Get Plenty of Sleep and Drink WaterWhile these tips can help conceal under-eye bags, the best way to get rid of them is to get plenty of sleep and drink water. Aim for at least 7-8 hours of sleep each…

Achieving Radiant Skin: A Comprehensive Guide On How To Make Your Skin Glow
Achieving Radiant Skin: A Comprehensive Guide on How to Make Your Skin Glow

Attaining a flawless, luminous complexion is an aspiration shared by many, emblematic of vitality, youthfulness, and overall health. The path to achieving such enviable skin transcends mere topical applications; it necessitates a comprehensive regimen that marries skincare with nutrition, lifestyle choices, and emotional equilibrium. This manual ventures into the critical steps and methodologies necessary for unveiling the inherent glow of your skin, providing guidance for a personalized skincare regimen that caters to your distinctive requirements. The quest for luminous skin stands as a testament to ultimate skincare success. Its allure goes beyond mere surface-level beauty, signaling robust health, adequate hydration, and a harmonious lifestyle. Through a holistic lens, this manual examines the cultivation of a radiant complexion, underscoring the necessity of recognizing and catering to the specific demands of your skin, thereby fostering its internal and external nourishment. Understanding Your Skin Type Embarking on the journey toward radiant skin begins with a thorough understanding of your skin type. The nature of your skin, be it dry, oily, mixed, or sensitive, will dictate the specifics of your skincare regimen. This segment aims to aid in the identification of your skin type and propose customized routines that guarantee your skin’s optimal health and luminosity. The Importance of a Balanced Diet The foundation of a radiant complexion is built from within. Essential nutrients such as vitamins C and E, omega-3 fatty acids, and antioxidants are pivotal in maintaining skin health, enhancing its glow, and shielding it from damage. This section will guide you through the dietary choices that contribute to a natural radiance and identify foods that should be avoided to preserve your skin’s peak condition. Hydration: The Key to Supple Skin Maintaining hydration is crucial for achieving a soft, elastic skin texture. This chapter delves into the significance of adequate water intake and highlights hydrating skincare products designed to preserve your skin’s moisture equilibrium, with recommendations tailored for various skin types. Cleansing and Exfoliation The foundations of radiant skin lie in proper cleansing and consistent exfoliation. Learn about selecting suitable products that cleanse effectively without stripping away natural oils, and how exfoliation uncovers fresh, glowing skin by eliminating dead cells and facilitating cellular renewal. Moisturizing Strategies Moisturizing is indispensable for attaining a glowing complexion. This section offers insights into choosing the right moisturizers and oils that not only lock in moisture but also strengthen the skin’s barrier, yielding a luminous, dewy appearance. Sun Protection Safeguarding your skin against the sun is paramount to avoiding damage and preserving its glow. This part explains the critical role of SPF, how to select appropriate sunscreen, and additional protective measures to defend your skin from the detrimental effects of UV exposure. The Power of Antioxidants Antioxidants are vital for protecting the skin from environmental stressors and combating signs of aging. Discover the most effective antioxidants for skincare and how to incorporate antioxidant-rich foods into your diet to bolster skin health from within. Incorporating Serums and Essences Serums and essences provide targeted solutions to specific skin issues with concentrated formulas. This section explores how these potent products can amplify…

Diy Haircut Guide: How To Cut Your Own Hair At Home
DIY Haircut Guide: How to Cut Your Own Hair at Home

Whether you’re looking to save time and money or simply prefer the convenience of a DIY approach, cutting your own hair at home is a practical skill to have. While leaving major hair transformations to professional stylists is advisable, trimming your hair or giving yourself a simple haircut can be achieved with the right tools and techniques. In this comprehensive guide, we will walk you through step-by-step instructions on how to cut your own hair, along with helpful tips to ensure a successful and satisfying outcome. Gather the Right Tools:Before you start cutting your hair, gather the necessary tools to ensure a smooth process. You will need:Sharp haircutting scissors: Invest in a good pair of professional scissors designed for hair cutting. Using regular scissors can lead to uneven cuts and split ends. Hair clips or elastics: These will help you section your hair for easier cutting. Comb: A fine-toothed comb will assist in detangling and parting your hair. Mirror: A large, handheld mirror and a stationary mirror will allow you to see your hair from different angles during the cutting process. Spray bottle with water: Mist your hair with water to dampen it slightly before cutting. This makes the hair more manageable and prevents excessive flyaways. Decide on the Haircut:Decide on the type of haircut you want before you begin. For simple trims or maintaining your current hairstyle, follow your previous cut as a reference. If you plan to make significant changes to your hair, it’s best to seek guidance from a professional stylist to avoid potential mishaps. Start with Clean, Dry Hair:Cutting your hair when it’s clean and dry ensures more accurate results. Wash and dry your hair thoroughly before starting the haircutting process. Section Your Hair:Divide your hair into manageable sections using hair clips or elastics. Start by parting your hair down the center and then create additional sections horizontally. Pin each section securely to keep the hair you’re not cutting out of the way. Trim the Ends:For a simple trim, work with one section at a time. Take a small subsection of hair and comb it straight down. Hold the hair between your fingers and trim the ends evenly, following your desired length. Make small, cautious cuts to avoid removing too much hair at once. Create Layers (Optional):If you desire layers, you can achieve them at home with careful technique. To create face-framing layers, take a section of hair from the front and hold it at a 45-degree angle away from your face. Trim the hair diagonally, working from the shortest point to the longest point. Repeat this process on both sides of your face for balanced layers. Check for Evenness:After cutting each section, release the hair and check for evenness and balance. Use your mirror to view your hair from different angles, making any necessary adjustments to ensure a uniform cut. Tackle Bangs (Optional):If you have bangs, trim them carefully by combing them straight down over your forehead. Hold the scissors vertically and make small, gentle cuts to the desired length. Remember that it’s better to start with…

World's First All Girl Sextuplets
World’s First All-Girl Sextuplets

Meet the Walton sextuplets – Luci, Hannah, Sarah, Ruth, Kate and Jennie, the world’s first all-female surviving sextuplets. Born on 18th November 1983 in Liverpool, England, they changed the life of their parents Janet and Graham Walton forever. The couple had been trying to conceive for several years without any success. They went through 13 rounds of fertility treatment and were ready to adopt children after all the failed attempts. Imagine their excitement when they learnt that they were finally carrying a baby. But… GO TO THE NEXT PAGE TO CONTINUE…