Mastering Nail Stamps: Your Ultimate Guide to Exquisite Nail Art

Nail stamping is not just a beauty trend; it’s an art form that allows for personalized, intricate nail designs that were once only achievable by seasoned nail artists. Whether you’re a seasoned nail artist or a beginner, this guide will walk you through the essentials of nail stamping, ensuring your next manicure stands out.
Mastering Nail Stamps Your Ultimate Guide To Exquisitenail Art


Understanding Nail Stamps

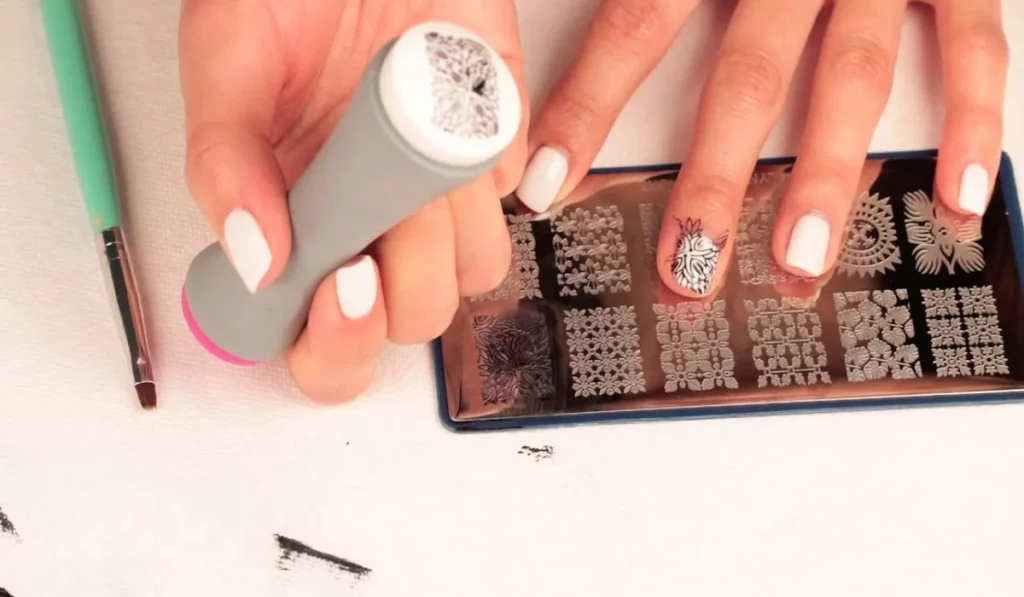
Nail stamps are innovative tools designed to transfer designs from etched plates to your nails, creating detailed and precise nail art. The key components include the stamping plate, stamper, scraper, and stamping polish. Stamping plates are made from metal or plastic and feature engraved designs. Stampers, typically made from silicone, pick up the polish from these designs. The scraper removes excess polish from the plate, ensuring a clean transfer.

Types of Nail Stamps

  • Clear Silicone Stampers: Allow for precise placement of the design on the nail, thanks to their see-through base.
  • Rubber Stampers: Offer a bit more resistance, suitable for thicker polishes or more intricate designs.

Preparation for Nail Stamping

Preparing your nails is crucial for a flawless finish. Start with clean, shaped nails, and apply a base coat to protect your natural nails and enhance polish adherence. Choose a smooth, flat surface for your work area, and lay out all your tools within easy reach.

Selecting Your Design

When selecting a design, consider the size of your nails and the complexity of the design. Beginners may find simpler designs easier to work with, while more experienced users can explore intricate patterns and layered looks.

Choosing the Right Nail Polish for Stamping

The success of nail stamping heavily relies on the polish used. Stamping polishes are specifically formulated to be thick and highly pigmented, ensuring a crisp, opaque design. While not all regular polishes work for stamping, metallic and cream polishes often yield good results due to their pigmentation and consistency.

Tips for Color Selection

  • Contrast is Key: Choose colors that stand out against your base polish for maximum impact.
  • Experiment: Mix and match different polish finishes, like matte or glitter, for unique effects.

Step-by-Step Guide to Nail Stamping

  1. Applying Polish to the Plate: Dab a small amount of polish onto the desired design on your stamping plate.
  2. Scraping: Hold the scraper at a 45-degree angle and firmly scrape across the design to remove excess polish.
  3. Transferring the Design: Press the stamper onto the plate with a quick, rolling motion to pick up the design.
  4. Stamping onto Your Nail: Align the stamper above your nail and roll it across the surface to transfer the design.

Advanced Techniques

As you become more comfortable with the basics of nail stamping, explore advanced techniques to elevate your nail art.

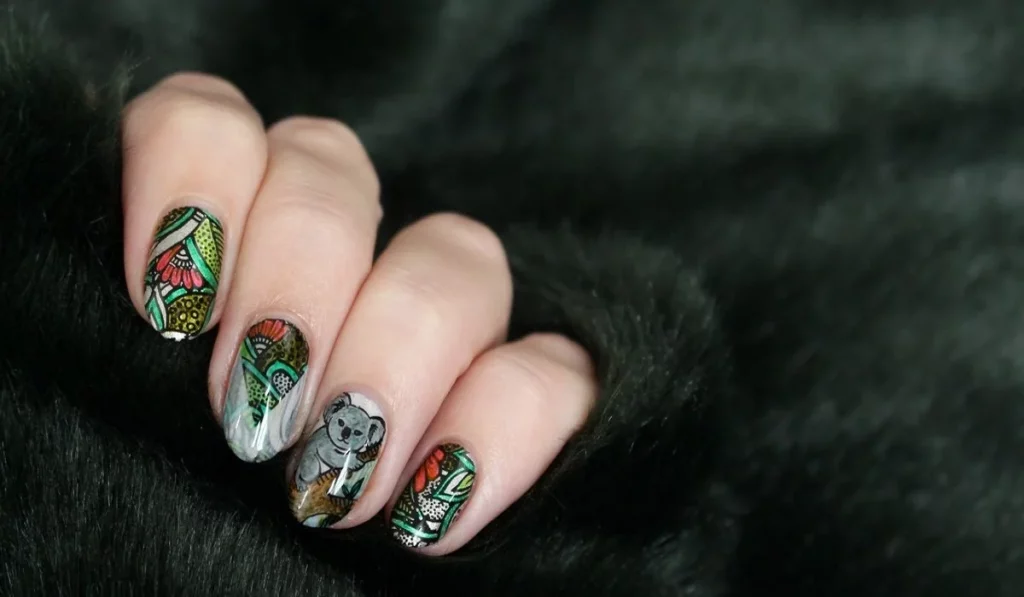
  • Layering Designs: Combine multiple stamps on a single nail to create depth and complexity.
  • Ombre Effects: Use two or more polishes on the stamping plate and blend them slightly with a scraper to achieve an ombre effect.

Troubleshooting Common Issues

  • Incomplete Transfers: Ensure your stamper is clean and not overly dry. A quick roll rather than a stamp may help pick up the entire design.
  • Smudging: Allow the stamped design to dry slightly before applying a top coat. Use a slow, careful application to avoid dragging the design.
Mastering Nail Stamps Your Ultimate Guide To Exquisite Nail Art


Aftercare and Maintenance

Extend the longevity of your stamped nails by applying a clear top coat to seal in the design. For maintenance, clean your stamping plate and tools with nail polish remover after each use. Avoid using acetone on silicone stampers, as it can cause them to deteriorate.

How long do nail stamped designs last?

With proper application and aftercare, including a quality top coat, nail stamped designs can last as long as a traditional manicure, typically around one to two weeks.

Can nail stamps be used on artificial nails?

Absolutely! Nail stamps can be used on both natural and artificial nails. Just ensure the artificial nails are properly prepped and the surface is smooth for stamping.

How can I remove nail stamping polish?

Nail stamping polish can be removed with regular nail polish remover. However, for long-lasting designs sealed with a gel top coat, you might need a gel polish remover or acetone.

Nail stamping opens up a world of creativity and personal expression right at your fingertips. With practice, you can achieve salon-quality designs from the comfort of your home. Embrace the learning curve, and don’t be afraid to experiment with different techniques and styles. Happy stamping!


Ultimate Guide To A Dazzling Bright White Smile
Ultimate Guide to a Dazzling Bright White Smile

A radiant smile can dramatically transform your appearance and boost your self-confidence. It’s not merely about looking good; it reflects good oral health and contributes positively to your social interactions. This guide will navigate you through various methods to achieve that coveted bright white smile, balancing effectiveness with safety. Understanding Tooth Discoloration Causes of Tooth Discoloration: Tooth discoloration can result from numerous factors, including dietary habits, smoking, and the natural aging process. Certain medications, trauma to the teeth, and genetics also play a significant role. Types of Tooth Stains: Stains on teeth can be categorized as extrinsic, occurring on the surface, or intrinsic, which are deeper and may require professional intervention to remove. Identifying the type of discoloration you’re dealing with is crucial for selecting the most effective treatment. Professional Teeth Whitening Options In-Office Whitening Treatments: Dental professionals offer in-office whitening treatments that provide dramatic results in a short period. These treatments use high concentrations of bleaching agents under controlled conditions, ensuring safety and minimizing tooth sensitivity. Custom Take-Home Whitening Kits: For those who prefer the convenience of home treatments with professional results, dentists provide custom-fitted trays and whitening gels. These kits are designed for use over a period of days or weeks, offering a more gradual whitening effect. Over-the-Counter Whitening Solutions Whitening Toothpastes and Rinses: These products contain mild abrasives and chemicals that can help remove surface stains. While convenient and affordable, their effectiveness is limited compared to professional treatments. Whitening Strips and Gels: Over-the-counter strips and gels are more potent than toothpastes and can provide noticeable results. However, they must be used according to the instructions to prevent gum irritation and sensitivity. Natural Teeth Whitening Methods DIY Whitening Remedies: Natural remedies, such as baking soda and hydrogen peroxide mixtures, can offer mild whitening effects. However, they should be used with caution to avoid damaging tooth enamel. Foods That Naturally Whiten Teeth: Incorporating crunchy fruits and vegetables into your diet can help clean your teeth naturally, while foods high in calcium, like dairy products, can strengthen your teeth and contribute to a whiter smile. Maintaining Your White Smile Daily Oral Hygiene Practices: Consistent oral hygiene, including brushing twice a day, flossing daily, and using an antibacterial mouthwash, is fundamental in maintaining a white smile. Foods and Drinks to Avoid: Coffee, tea, red wine, and dark-colored berries are known to stain teeth. Limiting your intake of these substances can help prevent new stains from forming. The Role of Dental Hygiene in Teeth Whitening Regular Dental Checkups: Regular visits to the dentist for checkups and cleanings play a critical role in maintaining oral health and keeping your teeth white. Professional cleanings can remove plaque and tartar that contribute to discoloration. Risks and Considerations for Teeth Whitening Sensitivity and Gum Irritation: Some whitening treatments can cause temporary sensitivity or gum irritation. Using products designed for sensitive teeth and following the recommended guidelines can minimize these effects. Understanding the Limits of Whitening: It’s important to have realistic expectations regarding teeth whitening. Not all types of discoloration can be completely removed, and the degree of whitening…

Gua Sha The Traditional Chinese Technique Revolutionizing Skincare
Gua Sha: The Traditional Chinese Technique Revolutionizing Skincare

Gua Sha has recently become a buzzword in the world of social media and the beauty industry, boasting compatibility with all skin types and the potential to achieve flawless skin contouring. If you’re looking to indulge in a skin treatment and update your skincare arsenal, continue reading to learn how to utilize Gua Sha. What Is Gua Sha? Gua Sha is a flat, uniquely shaped tool reminiscent of a heart or cloud, crafted from semi-precious stones for use on the face and neck. Though its popularity online is a recent phenomenon, its roots stretch back to ancient China. The term Gua Sha combines “Gua” (scraping) and “Sha” (redness), referring to the technique’s ability to promote the skin’s self-healing by encouraging blood circulation through scraping. How Did It Become Popular in the Beauty Industry? In the past two to three years, Gua Sha has exploded on social media. Beauty experts and estheticians alike have praised tools such as jade rollers, skin rollers, and Gua Sha, creating a significant buzz, particularly among fans of K-beauty (Korean beauty). The Skin Benefits of Gua Sha Gua Sha offers numerous benefits, including lymphatic drainage for reducing swelling and puffiness, improving blood circulation to fade acne scars, rejuvenating dull and dark skin tones, diminishing fine lines and wrinkles, and sculpting the jawline for more defined facial features. Step-by-Step Gua Sha Application Guide Before starting your Gua Sha session, ensure both your skincare tool and your skin are clean. For an added cooling effect, place your Gua Sha in the refrigerator for two hours before use. A Detailed Guide to Applying Gua Sha: Frequency of Use: Skincare experts recommend using the Gua Sha technique at least three times a week for optimal results. Most find performing this ritual at night before sleep to be the ideal timing. Always clean your tool after each use to avoid skin issues like pimples or acne. Wash it with hot soapy water and dry with a towel. Gua Sha promises clear cheekbones, a defined face, and an attractive jawline. This traditional Chinese technique has rightfully earned its place in modern beauty routines. Here’s an expanded FAQ section on Gua Sha, providing a deeper dive into the most common questions surrounding this popular skincare technique. What is Gua Sha?Gua Sha is a traditional Chinese healing technique that involves scraping your skin with a massage tool to improve circulation. This ancient practice is known for its unique approach to enhancing skin health and is believed to have healing properties. The tools are typically made from semi-precious stones like jade or quartz and are designed to be used on the face and neck to promote lymphatic drainage, reduce puffiness, and improve skin tone and texture. How does Gua Sha benefit the skin?Gua Sha offers multiple benefits for the skin, including promoting lymphatic drainage to reduce swelling and puffiness, improving blood circulation to enhance skin vitality, reducing the appearance of fine lines and wrinkles, aiding in the healing of acne and acne scars by encouraging the movement of new blood to the surface of the skin, and…

Ageless Beauty Unlocking The Secrets Of Timeless Skin
Ageless Beauty: Unlocking the Secrets of Timeless Skin

Ageless beauty has turned into a dominant aim in our society. From cosmetics to medical procedures, most people are always searching for ways to defy the signs of aging and still have gorgeous skin. What actually is the key to timeless skin? Ageless beauty: Let’s look into the mysteries of how to attain it. Understanding Aging Process The skin alters in many ways with age through extrinsic and intrinsic elements. Intrinsic aging, or perhaps chronological aging, is because of genes. On the other hand, extrinsic aging is primarily because of environmental factors like pollution and sun exposure and lifestyle choices like unhealthy diet and smoking. These factors degrade collagen and elastin and bring about wrinkles, fine lines and elasticity loss. Easy Skincare Regime A crucial element to younger looks is consistent skincare. This particular routine must include cleaning to eliminate impurities and dirt; exfoliating to eliminate dead skin cells; moisturizing to keep skin moist and then softened; and also applying sunscreen to block UVA rays. Hydration – Power Hydration is critical for keeping young skin. Hydration keeps the skin elastic and soft – skind, which helps prevent the formation of wrinkles and fine lines. Hydrating skincare products with ingredients including hyaluronic acid and consuming sufficient water during the entire day are crucial. Nutrition for Radiant Skin The old saying “you are what you’re eating” also pertains to skin health. A balanced diet loaded with minerals, vitamins and antioxidants is the secret to glowing, younger looking skin. Include vegetables and fruits, fattening fish and nuts, which have essential nutrients for skin renewal and repair. Adding Antioxidants The best defense against environmental damage and aging is your skin – wealthy supply of antioxidants. These potent antioxidants fight off free radicals which harm cells and age too early. Include antioxidants – like vitamin C, green tea and vitamin E extract to your skin care routine to keep the skin in good health & young. Effective Anti Aging Ingredients Specific products have been discovered to work against aging signs. A-form of vitamin a, retinol, stimulates collagen creation and cellular turnover for firmer, softer skin. Yet another powerful component is vitamin C, which is known to enhance and stop inflammation, whitening black areas & changing complexion. Sun Protection Techniques Among the primary causes of early aging is too much exposure to the sun. Put on sunscreen daily even on sunny days and also ask for shade during peak UV hours to avoid damaging UV rays. Additionally, put on sun safety clothing and accessories like sunglasses and hats. Importance of Sleep Sleeping enough quality rest is vital for skin rejuvenation & repair. Sleep creates collagen, which holds epidermis elastic and firm. Strive for 7-9 hours sleep each night and develop a bedtime ritual to obtain much better rest. Stress Management Strategies Constant stress could result in inflammation, pimples and early aging. Meditate, do deep breathing exercises, yoga or go outdoors to minimize stress and also assist the skin. Exercise for a Young Glow Exercise helps your well being and provides you with that more youthful look. Exercise sends…

Mastering The Art Of Henna Hairdye
Mastering the Art of Henna Hair Dye

Embarking on the journey of dyeing your hair with henna can be both exciting and daunting. Henna, a natural dye made from the leaves of the Lawsonia inermis plant, offers a chemical-free option for coloring your hair, providing rich, long-lasting hues and a host of hair health benefits. This guide will walk you through each step of the process, ensuring that you achieve beautiful results with henna. Understanding Henna What is Henna? Henna is not just a hair dye; it’s a centuries-old plant-based pigment that has been used for body art and hair coloring across various cultures. It’s celebrated for its natural coloring properties and conditioning benefits. Benefits for Hair Beyond imparting vibrant color, henna strengthens, conditions, and nourishes the hair, reducing dandruff and promoting hair growth. Types of Henna Pure Henna Pure henna yields a red-orange color and is free from any additives, making it the best choice for those looking for a natural option. Henna Mixes For a wider range of colors, henna is often mixed with other natural dyes. It’s important to choose mixes free from chemicals to maintain the natural benefits of henna. Preparing Your Hair for Henna Assessing Hair Type and Condition Your hair’s starting color, type, and condition will affect how henna appears and should guide your preparation process. Pre-Dye Preparations Preparing your hair involves clarifying to remove buildup and testing the henna on a small hair section to predict the outcome. Mixing Henna for Hair Dye Ingredients Needed You’ll need high-quality henna powder, acidic liquid (like lemon juice), and optional natural additives for enhanced effects. Step-by-Step Mixing Guide Mixing henna is an art; achieving the right consistency is crucial for easy application and optimal dye release. Application Process Sectioning Hair Dividing your hair into sections ensures thorough application and even color. Applying Henna Apply the paste from roots to tips, using gloves to protect your hands from staining. Tips for Even Coverage Ensuring even coverage is key to achieving uniform color and avoiding patches. How to Dye Hair with Henna? This comprehensive guide demystifies the process, making it accessible for first-timers and those looking to perfect their technique. Post-Application Care Washing Out Henna Washing out henna requires patience and gentle care to preserve the color and avoid stripping the hair’s natural oils. Hair Care After Dyeing Post-henna care involves hydrating treatments and avoiding harsh chemicals to maintain the color and health of your hair. Troubleshooting Common Henna Hair Dye Issues Uneven Color Adjusting your application technique or mix can help achieve more uniform results in future applications. Dryness after Dyeing Incorporating natural oils and deep conditioning treatments can combat dryness associated with henna. Environmental and Health Considerations Natural and Safe Dyeing Options Choosing henna for hair coloring supports environmentally friendly and health-conscious beauty practices. Dyeing your hair with henna is a rewarding process that not only beautifies but also benefits your hair health. By following these detailed steps, you can achieve stunning, natural-looking color and embrace a more sustainable approach to hair care. Can henna cover gray hair? Yes, henna can effectively cover grays, offering…

Understanding Whitespots On Nails
Understanding White Spots on Nails: Causes, Treatment, and Prevention

White spots on the nails, often noticed as small, painless dots or patches, have intrigued and concerned people for generations. While they’re usually harmless, understanding their underlying causes is key to addressing any potential health issues. This article dives deep into the reasons behind white spots, debunking common myths, exploring diagnosis methods, treatment options, and offering prevention tips to keep your nails looking their best. What Are White Spots on Nails? Defining Leukonychia Leukonychia refers to the white discolorations that can appear on the nails. These spots can vary greatly in appearance, from tiny, pinpoint dots known as punctate leukonychia to larger, more diffuse areas known as partial or total leukonychia, depending on the extent of the white area over the nail. Common Myths and Facts There’s a common misconception that white spots are always a sign of calcium or zinc deficiency. However, they are more frequently attributed to minor nail trauma or could be indicative of a fungal infection, especially when accompanied by other symptoms like thickening or changes in nail shape. The Root Causes Identifying the cause of white spots is crucial for effective treatment and prevention. Nutritional Deficiencies Although not as common as once thought, deficiencies in certain nutrients, such as zinc or calcium, can occasionally manifest as white spots on the nails. Physical Trauma The most frequent cause of white spots is minor trauma to the nail matrix, the part of the nail bed that produces cells that become the nail plate. This trauma can occur from something as simple as aggressive manicure techniques, nail biting, or even typing. Fungal Infections Fungal infections, particularly those caused by dermatophytes, can lead to white spots. These infections may also cause the nail to become thick, brittle, or discolored. Allergic Reactions Allergic reactions to nail polish, hardeners, or nail polish removers containing harsh chemicals can also lead to white spots. Switching to hypoallergenic or less harsh products can help prevent their recurrence. How to Diagnose White Spots on Nails Professional Diagnosis If white spots on your nails are persistent or accompanied by other symptoms, it’s important to seek a professional diagnosis. A dermatologist can provide a thorough examination, possibly including a fungal culture or biopsy, to determine the exact cause. Home Observation Tips For white spots that are clearly linked to a minor injury and are not spreading or changing in appearance, home observation may be sufficient. Monitoring for changes in the nail’s color, texture, or thickness can help decide when professional advice is necessary. Effective Treatments and Remedies Over-the-Counter Solutions For fungal-related white spots, antifungal creams or polishes can be effective. It’s important to apply these treatments as directed and for the full course, even if the spots appear to improve, to ensure the infection is fully eradicated. Prescription Medications In cases of severe fungal infections, prescription oral antifungals may be necessary. These medications can have side effects, so they’re typically used when other treatments haven’t been successful. Natural and Home Remedies Applying tea tree oil, known for its antifungal properties, can be an effective natural treatment for fungal-induced white…

The Sparkling World Of Diamond Facials: A Comprehensive Guide
The Sparkling World of Diamond Facials: A Comprehensive Guide

In recent years, the beauty industry has witnessed a growing demand for high-end treatments that promise glowing, youthful skin. One such treatment gaining popularity is the diamond facial. A diamond facial is a luxury skin treatment that involves the use of diamond-infused products to exfoliate. Part 1: What is Diamond Facial?Diamond facial is a type of facial in which diamond-infused products are used to rejuvenate and improve the appearance of the skin. Products used in diamond facials contain diamond powder, which is said to help exfoliate and remove dead skin cells, making skin look brighter and younger. Diamond powder is also believed to stimulate collagen production, which can help reduce the appearance of fine lines and wrinkles. Part 2: Benefits of Diamond FacialThere are several benefits of getting a diamond facial. First, the exfoliating properties of diamond powder can help remove dead skin cells that can clog pores and lead to acne breakouts. Secondly, diamond powder can stimulate blood circulation, which can improve skin tone and texture. Third, diamond skin care helps reduce the appearance of fine lines and wrinkles, making the skin look younger. Finally, diamond facials can moisturize the skin, leaving it feeling soft and supple. Part 3: Diamond Facial ProcedureA diamond face typically includes several steps. First, the skin is cleaned so that it is free of any dirt or make-up. Secondly, the diamond peeling cream is applied to the skin and massaged with circular movements. The cream is left on the skin for a few minutes before washing it off. Third, a diamond-infused serum is applied to the skin and left for a few minutes to absorb into the skin. Fourth, a diamond-infused mask is applied to the skin and left for 10-15 minutes before washing off. Finally, a moisturizer and sunscreen are applied to protect the skin from further damage. Chapter 4: Who Can Benefit From The Diamond Facial?Diamond facials are suitable for all skin types, but are especially beneficial for those with dull, dry or mature skin. If you have sensitive skin, it is important to consult a dermatologist before having a diamond facial as the exfoliating properties of diamond powder may be too harsh for some. Part 5: The Cost of a Diamond FacialDiamond skin care is considered a high-end treatment and therefore can be quite expensive. The cost of diamond facial care may vary depending on the area to be treated, the products used and the expertise of the esthetician. On average, a diamond facial can cost anywhere from $150 to $500. Chapter 6: Is Diamond Skin Care Worth It?Whether a diamond facial is worth it is subjective and depends on personal preferences and budget. If you’re looking for a luxurious, high-end treatment that promises to revitalize and hydrate your skin, the diamond facial may be worth the investment. However, if you’re on a tight budget, there are many other facials that can provide similar benefits at a lower cost. Diamond facials are a luxurious and effective way to rejuvenate and improve the appearance of the skin. While they are expensive, they offer a…

5secrets To Achieving Blackhead Free Skin
5 Secrets to Achieving Blackhead-Free Skin

Blackheads, those frustrating tiny black specks that frequently appear on our most noticeable areas like the nose, chin, and forehead, are a widespread concern for many individuals. Gaining an understanding of blackheads and the reasons behind their occurrence is the initial step towards effectively combating them. This guide is designed to provide you with the essential tools, knowledge, and advice needed to achieve and sustain a complexion free of blackheads, ensuring it remains radiant and healthy. The Underlying Science of Blackheads Known in medical terms as open comedones, blackheads develop when pores are blocked by a mix of sebum (skin oil) and dead skin cells. The exposure of this blockage to air leads to oxidation and turns it black, setting them apart from whiteheads. Grasping the origins of blackheads and the significance of sebum and dead skin cells in their development is key for their prevention and treatment. Fundamental Skincare Practices for Preventing Blackheads Preventing blackheads effectively hinges on a customized skincare routine. Essential steps include daily cleansing, consistent exfoliation, and appropriate moisturization. We will explore how these measures can avert the formation of blackheads and preserve skin vitality. Advanced Treatments for Blackheads For those in search of more profound solutions, advanced treatments like chemical peels, microdermabrasion, and laser therapy present promising outcomes. These procedures are instrumental in deeply purifying pores, eliminating dead skin cells, and diminishing blackheads’ visibility. Over-the-Counter Options A plethora of over-the-counter products are available for tackling blackheads, encompassing products with salicylic acid, retinoids, and masks containing charcoal or clay, each providing distinct advantages in the pursuit of clear skin. Prescription Solutions For cases that are more challenging, dermatologists might suggest prescription medications, including topical retinoids and oral alternatives. Recognizing when to resort to these options can significantly change the game for individuals battling persistent blackheads. Dietary Influence on Skin Health The connection between our diet and the condition and appearance of our skin is undeniable. This segment will delve into how dietary choices influence skin health, spotlighting foods to avoid and nutrients that foster a flawless complexion. Lifestyle Adjustments for Enhanced Skin In addition to skincare products and procedures, lifestyle aspects like hydration, managing stress, and the quality of sleep have substantial impacts on skin condition. Adopting positive lifestyle modifications can lead to remarkable enhancements in skin health. Home-based and Natural Solutions For enthusiasts of natural and home-based methods, alternatives such as tea tree oil and DIY exfoliating scrubs can provide gentle yet effective means to manage blackheads. The Crucial Role of Sun Protection Sun protection is an indispensable aspect of any skincare regime, especially for those prone to blackheads. Selecting the appropriate sunscreen and comprehending its importance in preventing blackheads are crucial measures towards maintaining skin health. Achieving a Complexion Without Blackheads This segment will outline an all-encompassing strategy, detailing the vital products, practices, and tips for securing and keeping a complexion devoid of blackheads, customized to various skin types and issues. Deciphering Your Skin Type Customizing your skincare routine to your specific skin type is essential. This part of the guide will assist in identifying your…

Treating Fungal Facial Acne: Causes, Symptoms, And Effective Remedies
Treating Fungal Facial Acne: Causes, Symptoms, and Effective Remedies

Fungal facial acne, frequently confused with its bacterial counterpart, originates from an excessive proliferation of yeast, notably the Malassezia species, on the skin’s surface. This yeast finds a conducive environment in oily areas, setting fungal acne apart from traditional acne. This guide aims to demystify the condition, exploring its roots, identification methods, and effective treatment options. Root Causes of Fungal Acne The imbalance in the skin’s microbiome, prompted by factors such as intense perspiration, high humidity, constrictive apparel, and the application of oil-based skincare products, paves the way for yeast overgrowth. Recognizing these triggers is fundamental to both the management and prevention of fungal acne flare-ups. Symptom Recognition Characterized by small, consistent bumps that often itch, fungal acne predominantly appears in oily or sweaty zones like the forehead, chin, and chest. Its resistance to conventional acne remedies serves as a significant distinguishing feature. Diagnosing Fungal Acne Seeking a dermatologist’s expertise is advisable for accurately distinguishing fungal acne from other dermatological issues, possibly involving skin inspections or more intricate procedures like cultures or biopsies. Home Treatment Strategies Natural Remedies Skincare Regimen Adopting a skincare routine that eschews heavy oils, favoring non-comedogenic alternatives, and includes washing with a gentle cleanser twice daily is crucial to averting yeast accumulation. Medical Intervention for Fungal Acne Prescribed Solutions Dermatologists may prescribe antifungal creams or oral medications, with ketoconazole or clotrimazole being common choices to address yeast overgrowth. Over-the-Counter Options Consultation with a healthcare provider is recommended when choosing over-the-counter antifungal treatments to ensure their efficacy. Dietary Role in Management A diet low in sugars and refined carbs can curb internal yeast proliferation. Including antifungal foods like garlic and coconut oil may further aid in combating the condition. Skincare Product Selection Recommended Products Seek out oil-free, non-comedogenic products that do not feed the yeast. Ingredients such as zinc pyrithione can be effective in reducing skin yeast levels. Ingredients to AvoidSteer clear of skincare items containing ingredients like fatty acids, esters, and oils that Malassezia yeast thrives on, as they can worsen the condition. Preventive MeasuresWearing breathable clothing, adhering to a balanced diet, and judiciously selecting skincare products are key preventive steps. Additionally, regularly changing bedding and minimizing sweating can thwart fungal acne development.Effectively tackling fungal facial acne necessitates a holistic approach that includes accurate diagnosis, lifestyle modifications, and careful product selection. With an informed understanding of its causes and dedicated application of suitable remedies, achieving and maintaining healthy skin is attainable.